|
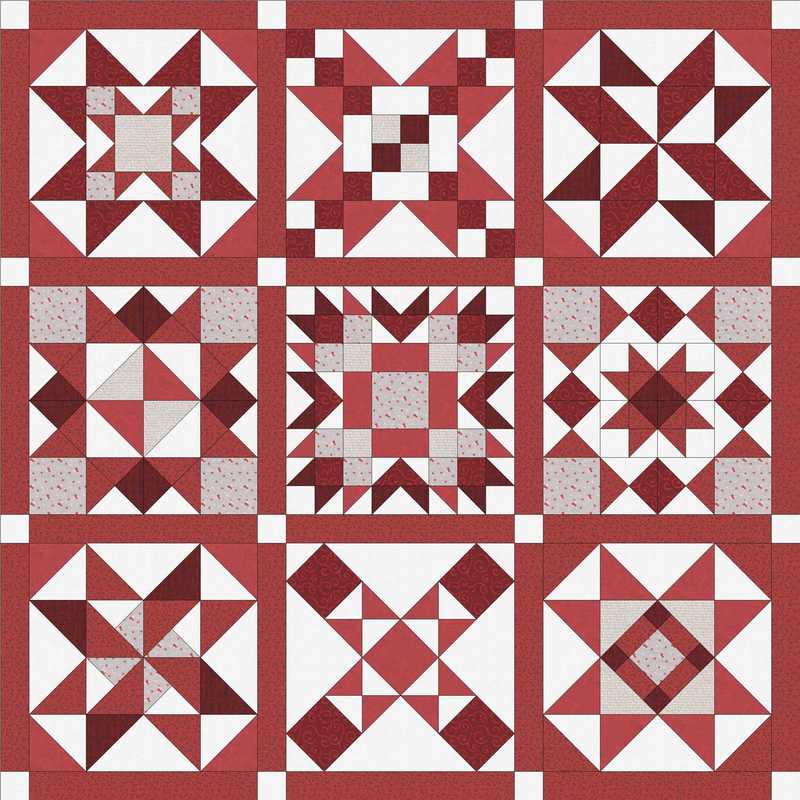
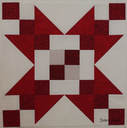
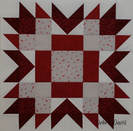
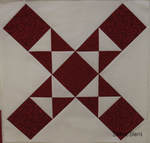
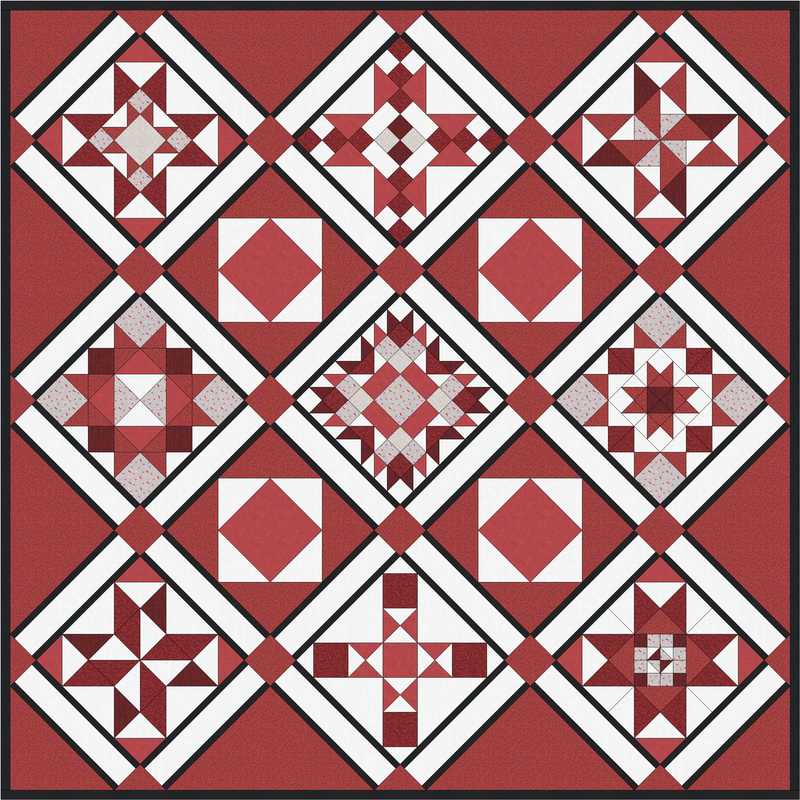
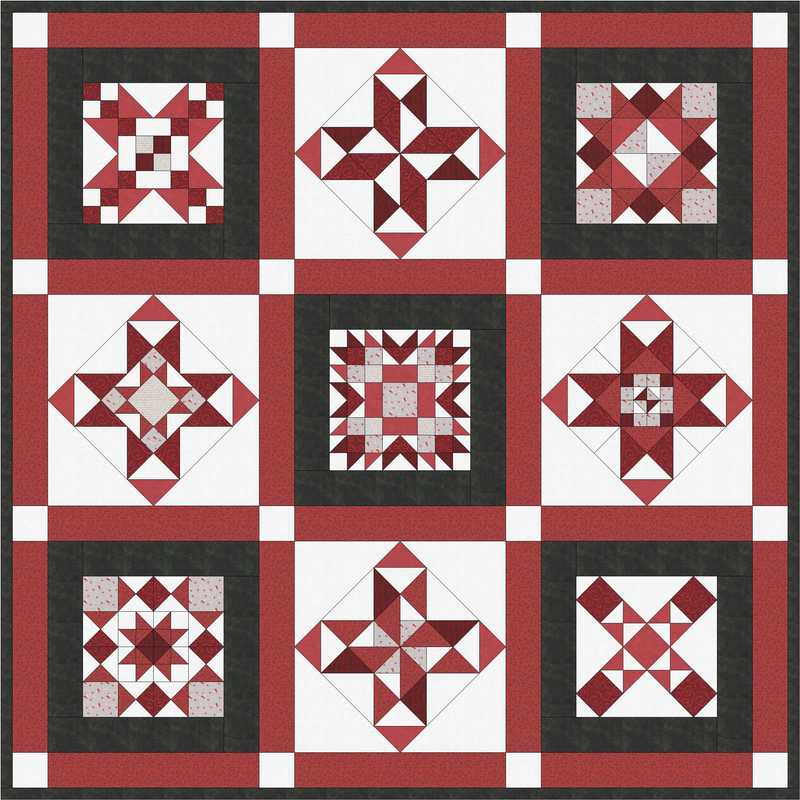
Click on the photos for links to each of the step-by-step photo tutorials that go with the patterns for Under the Stars. PDF Pattern Downloads
0 Comments
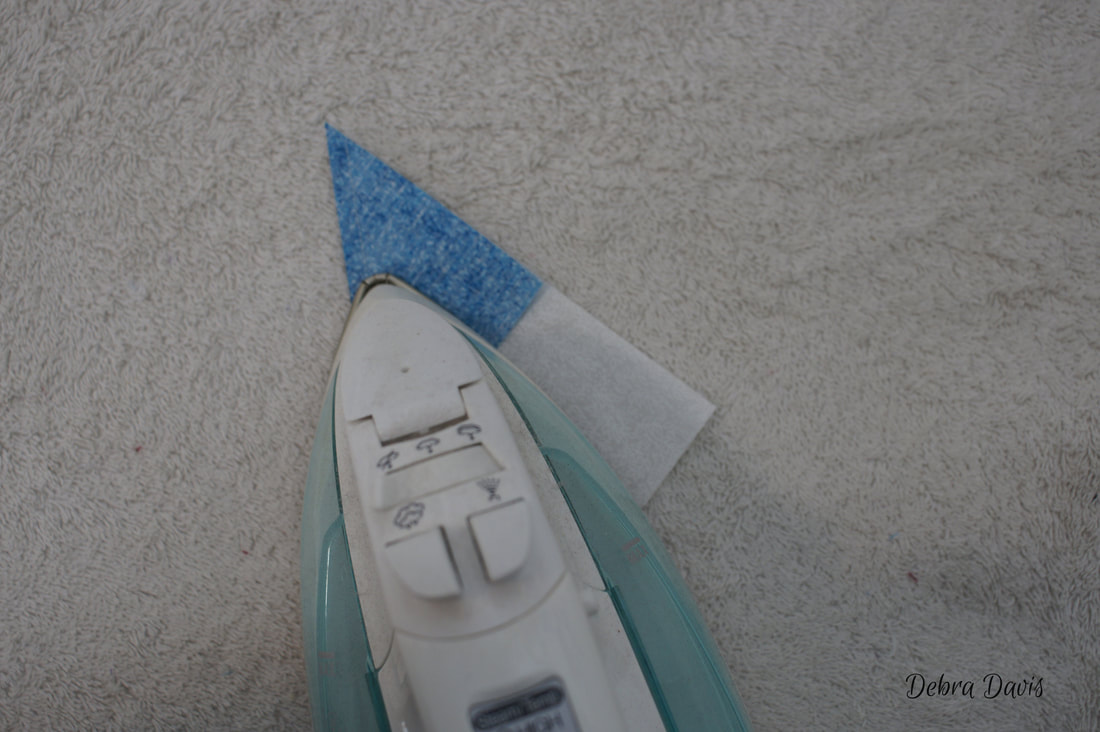
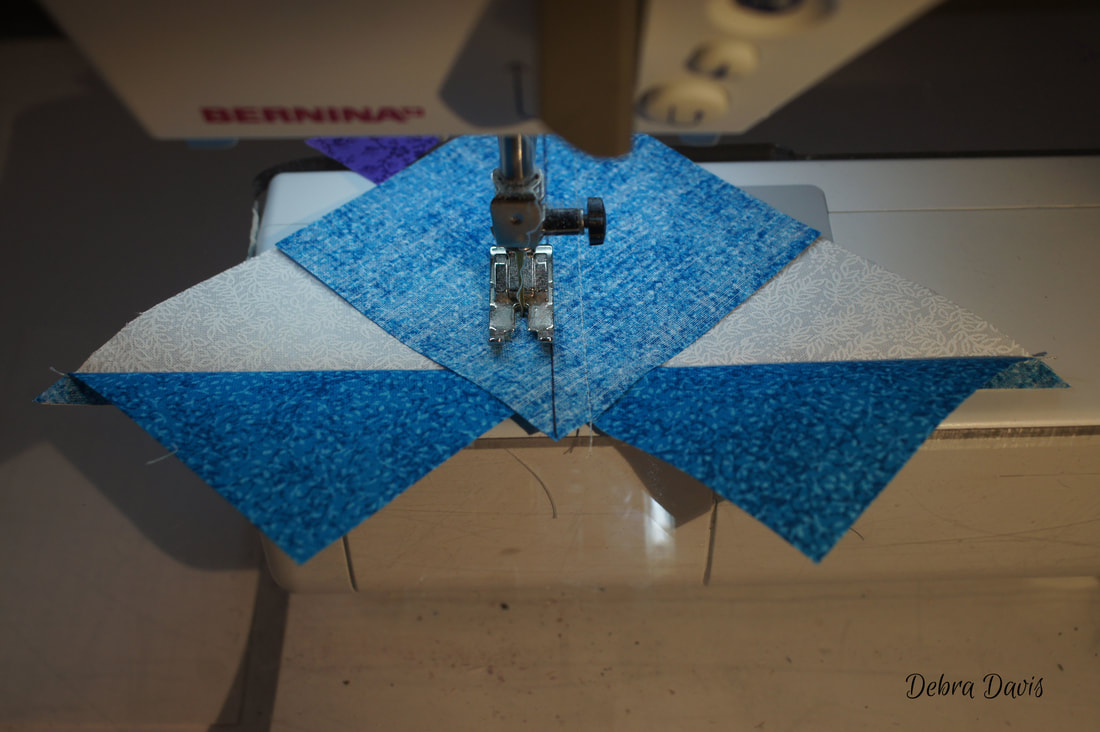
Flying Geese appear in a lot of different quilt blocks. Today I am going to share my favorite method for making them. The No-Waste method results in four identical Flying Geese. I start with slighthly oversized blocks and trim them down to size as this has resulted in sharper points for me. So there is a wee bit of waste. For this tutorial I will be making Flying Geese that finish at 2" x 4" but there is a chart at the end for using this method to achieve several more sizes. 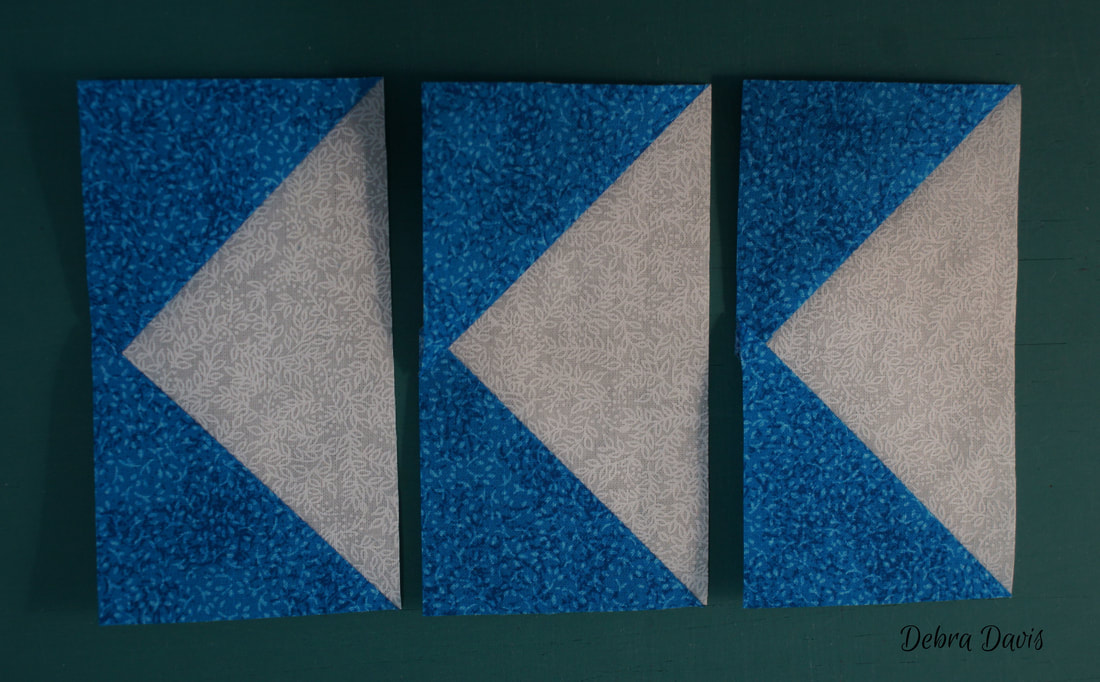 To begin I have cut 1 square of my "Goose" fabric (white) 5 1/2" x 5 1/2" and 4 squares of my "Sky" fabric (blue) 3 1/8" x 3 1/8" 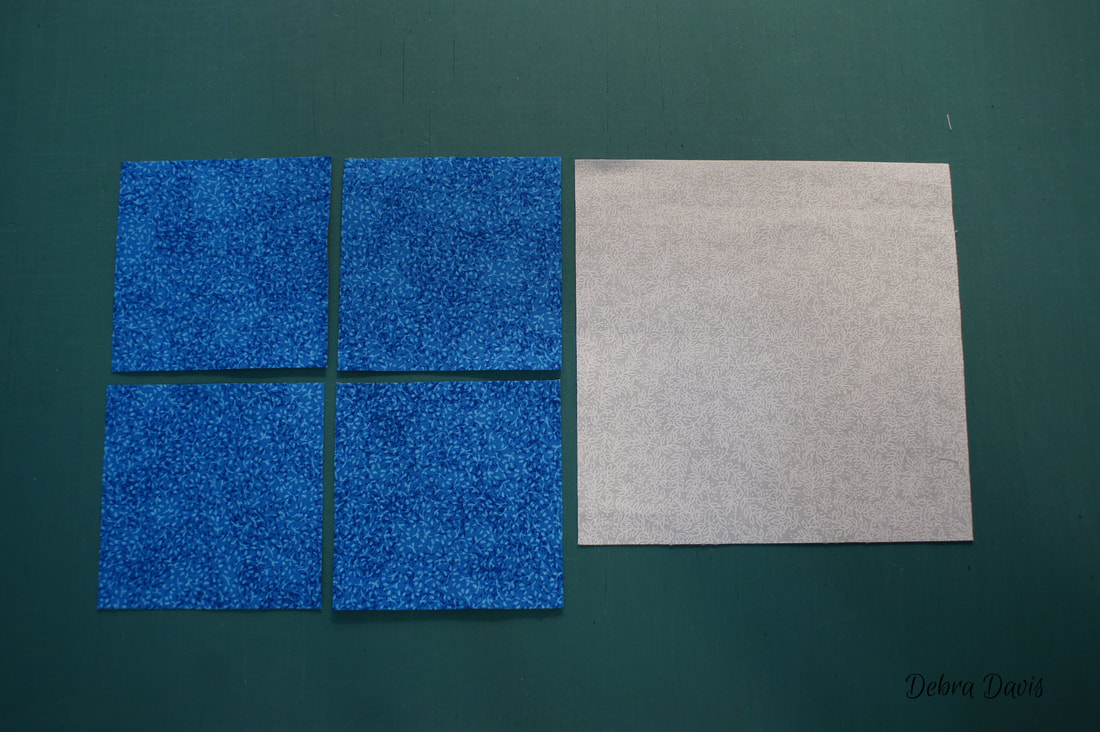 First I lay one of the small squares on the large square right sides together-lining up the edges. 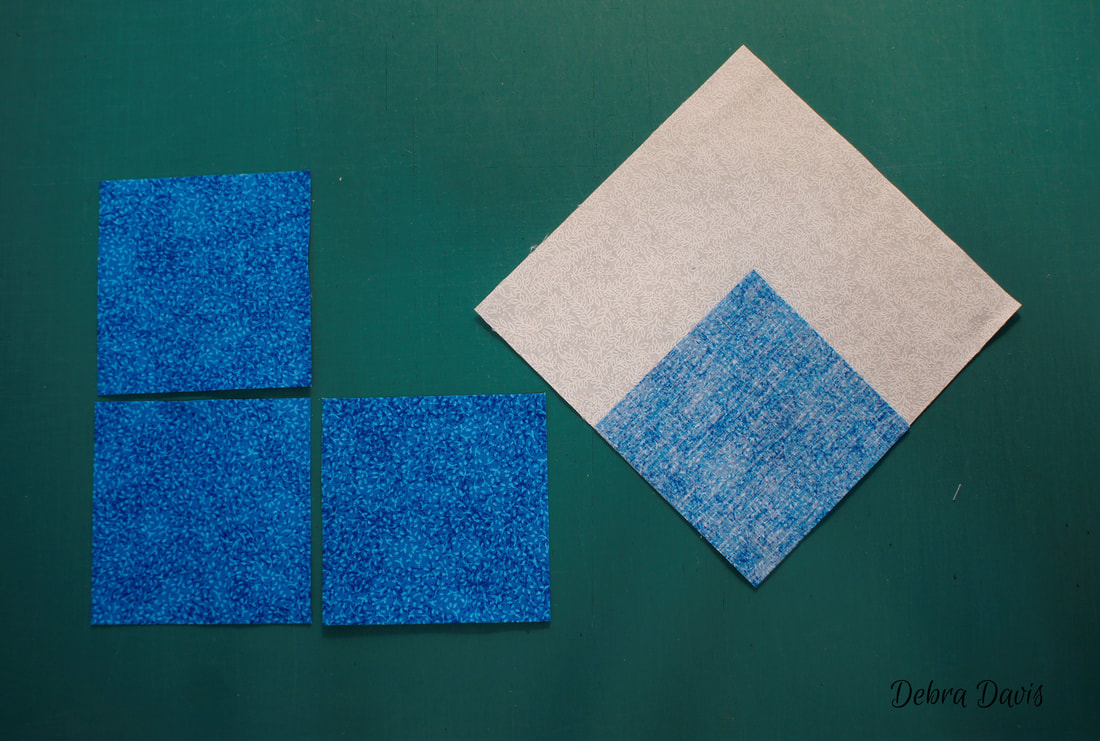 Another blue square gets placed on top, lining up the edges. There is a little overlap which is just what you need. 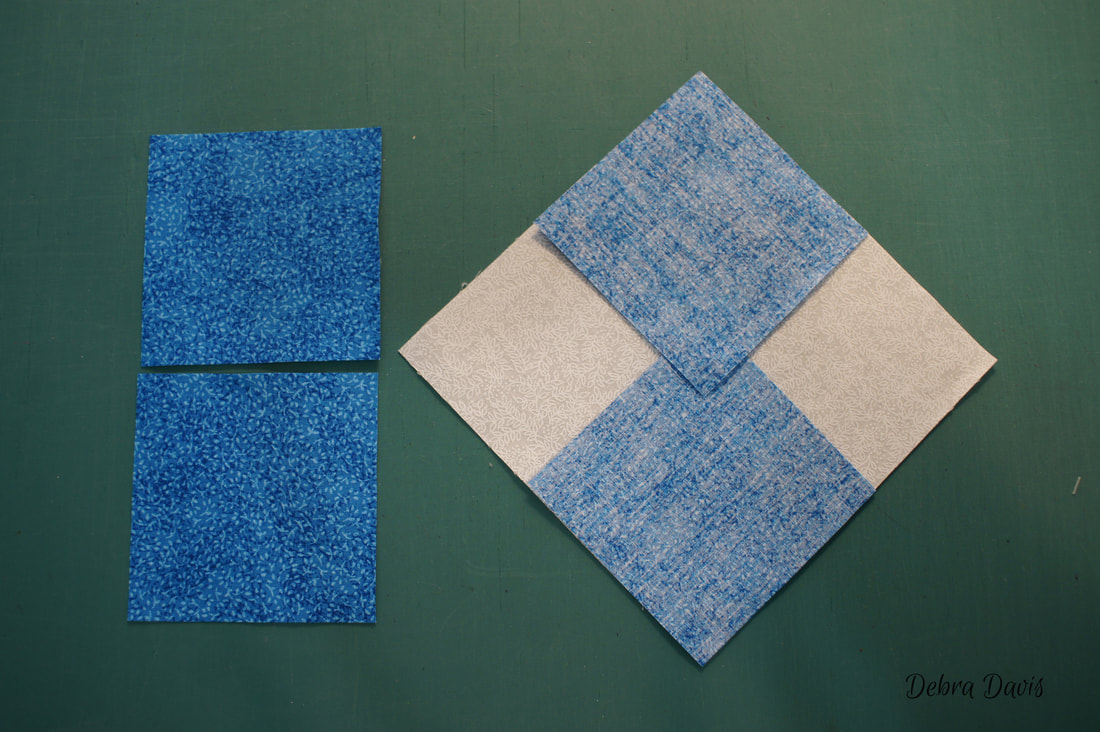 With a ruler mark a diagonal line down the middle of the small squares. It is important that your line is from point to point. By lining up the diagonal line on your ruler with the edge of the large square you will get the right angle. Whenever I need to mark fabric like this I place it on a piece of very fine sandpaper that I have attached to a clipboard. This keeps the fabric from moving while I mark it. 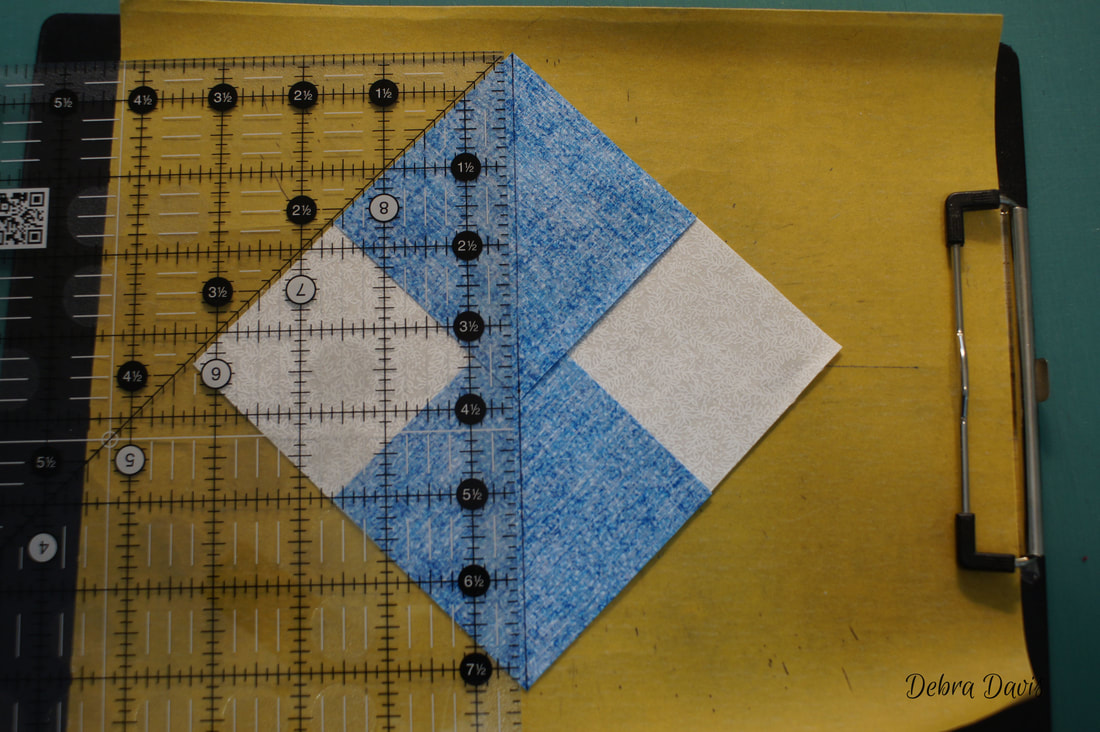 At my sewing machine I am going to sew 1/4 inch away from each side of the drawn line. I have the top blue square facing so that the overlapping point is pointing away from my needle. 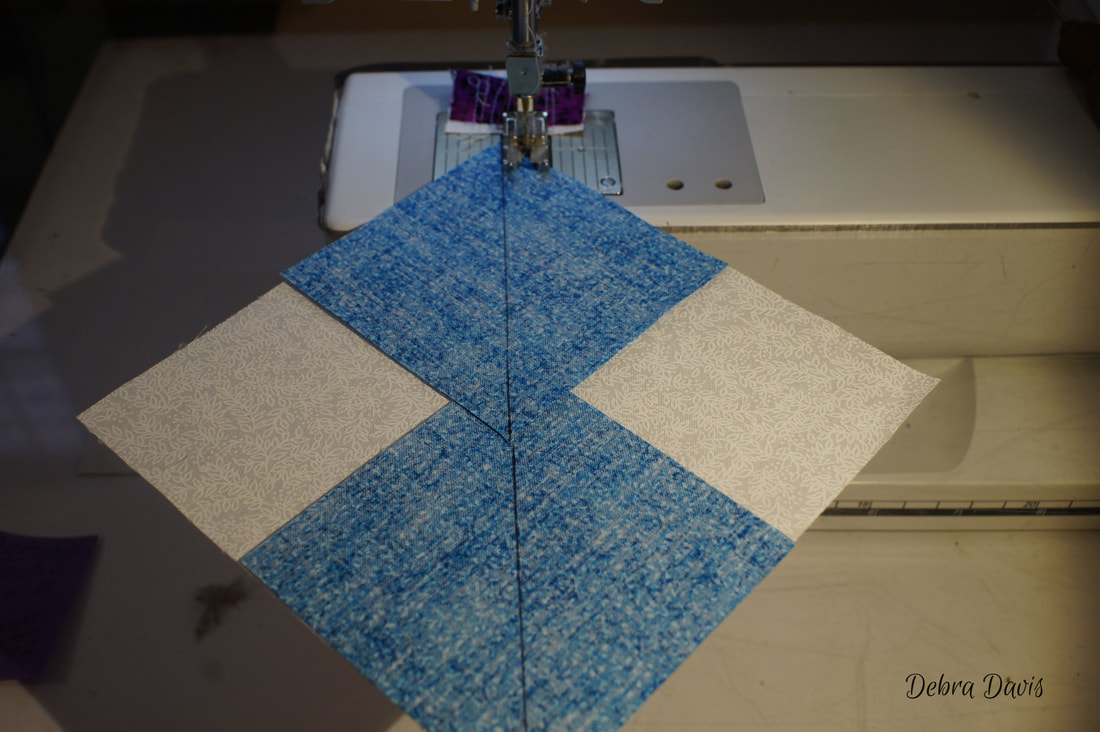 The previous stitches are hard to see here, but I am now sewing down the other side of the line. 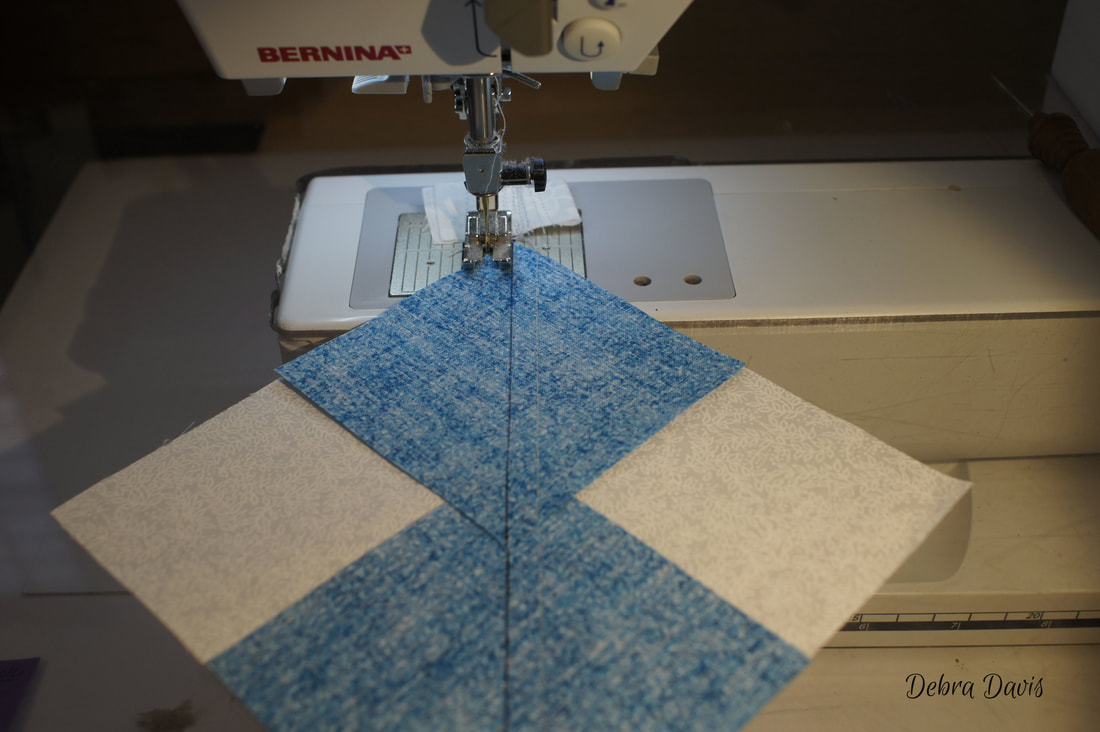 After sewing on both sides of the line I come back to my cutting table and cut on the drawn line. 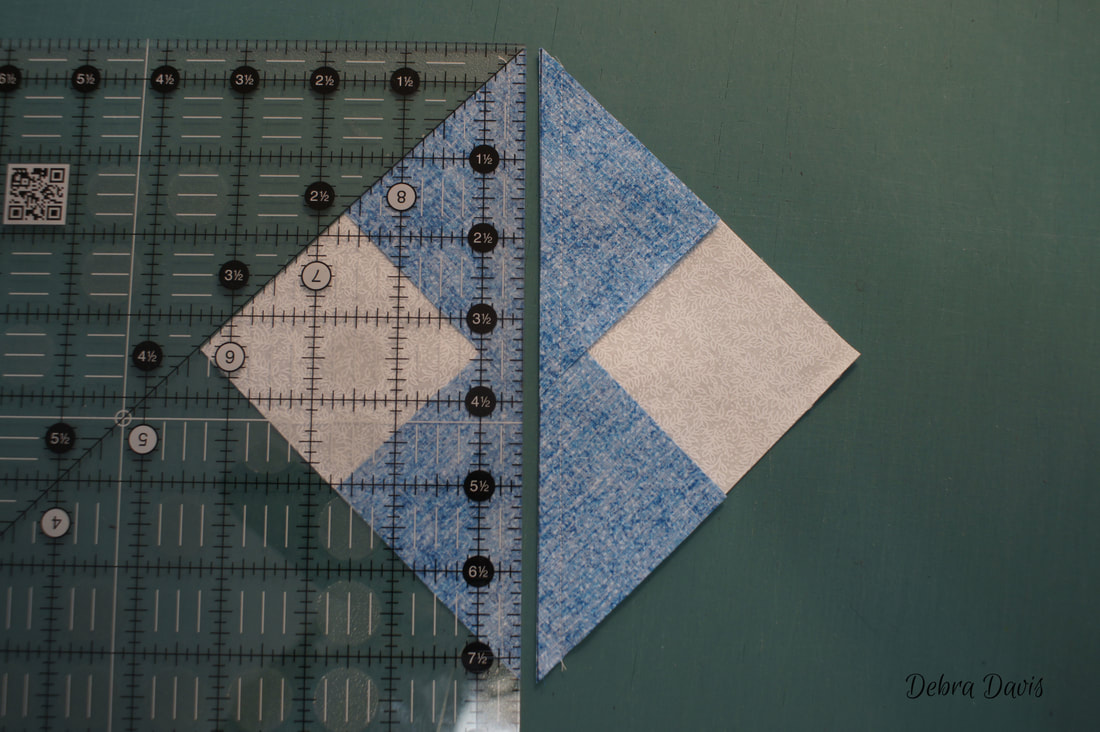 Then I press towards the small triangles-setting the seams first with my iron and then carefully pressing them open.
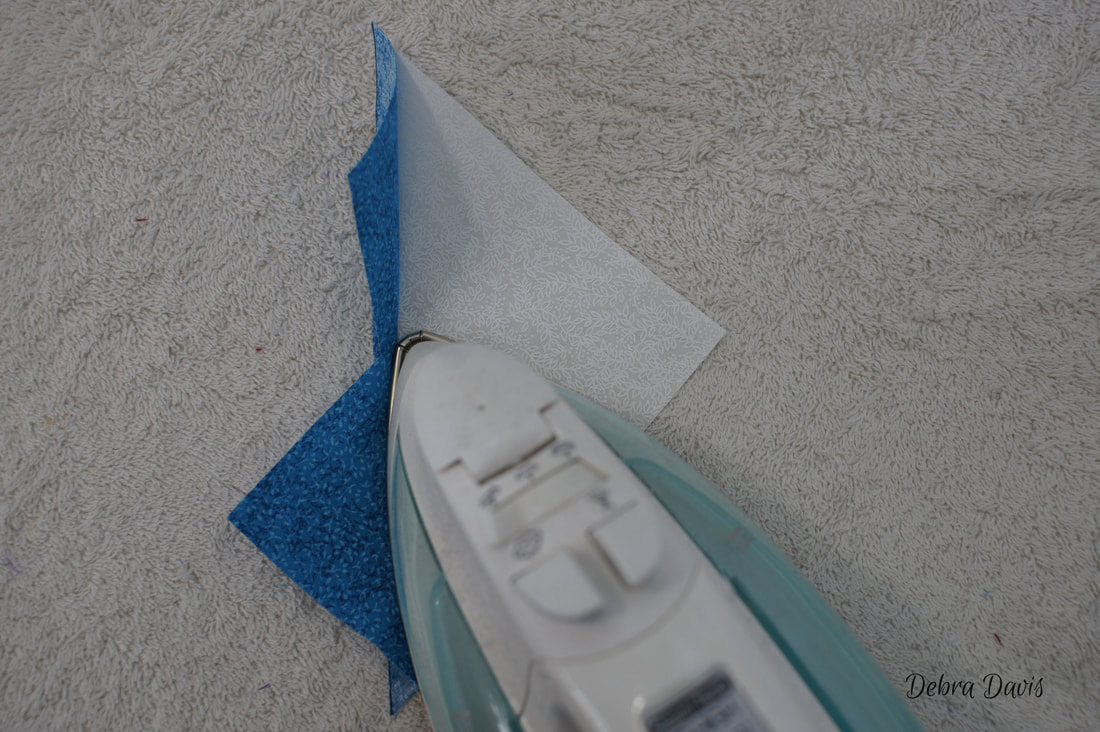
I know have two units that look like this.  Next I draw diagonal lines down the center of both of the remaining blue squares... 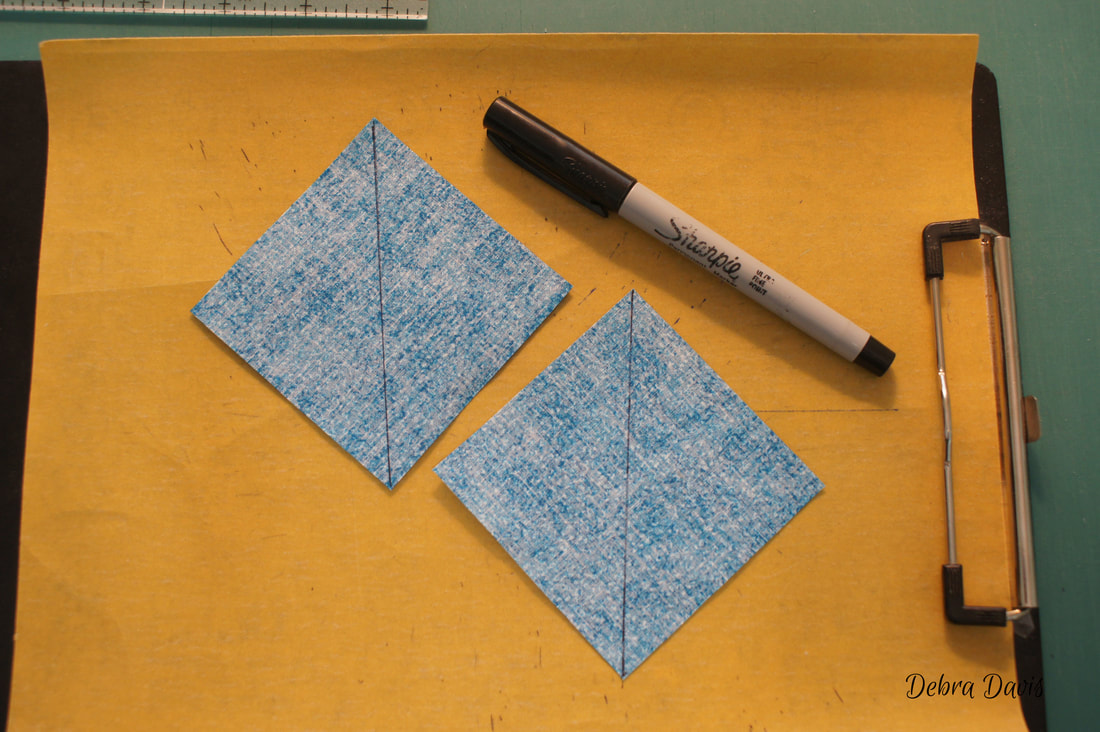 and place them on top of the pressed units. 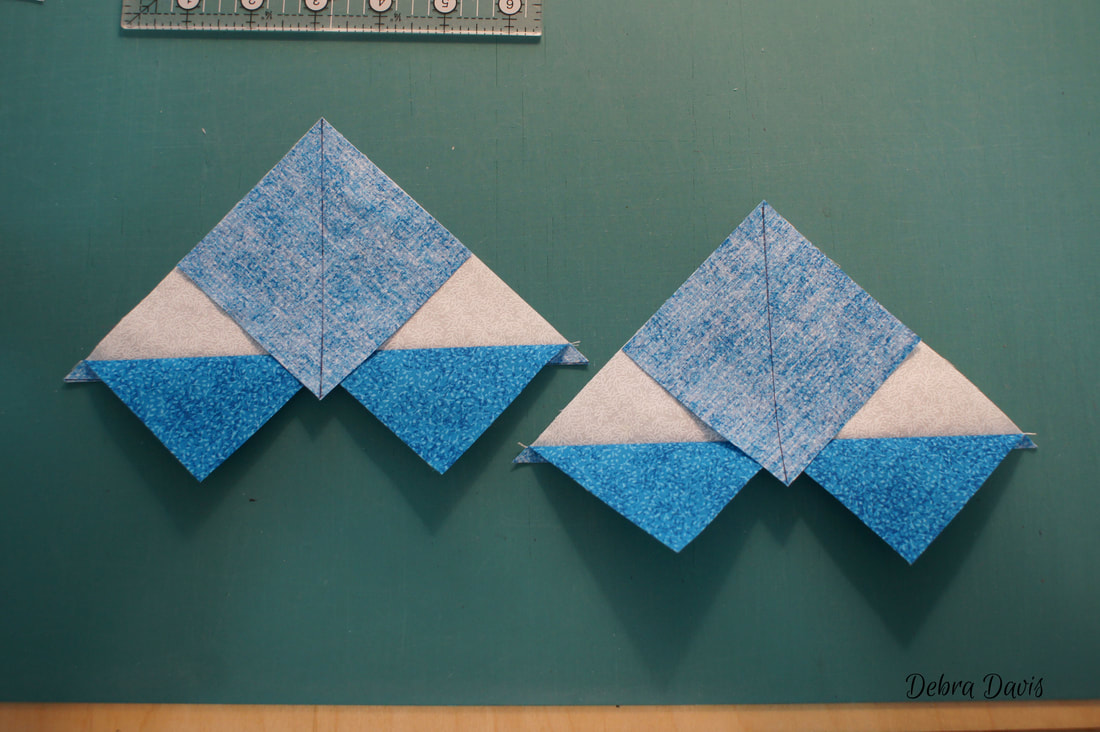 Once again I am sewing 1/4 inch away from each side of the drawn line.
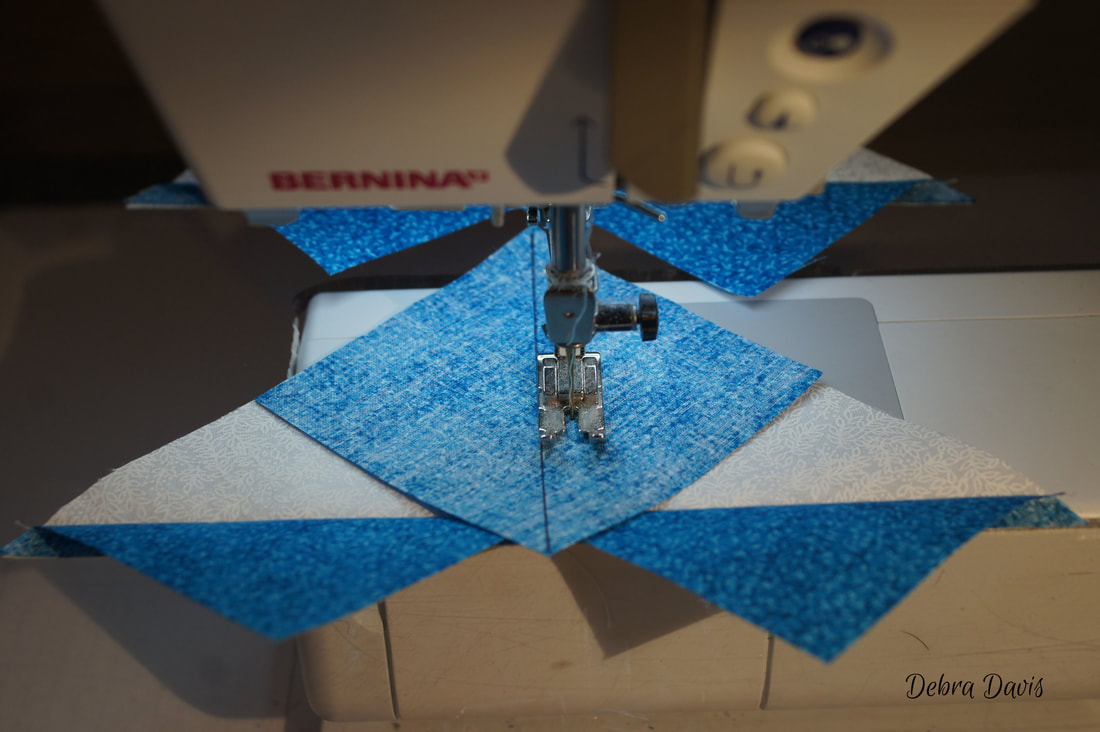
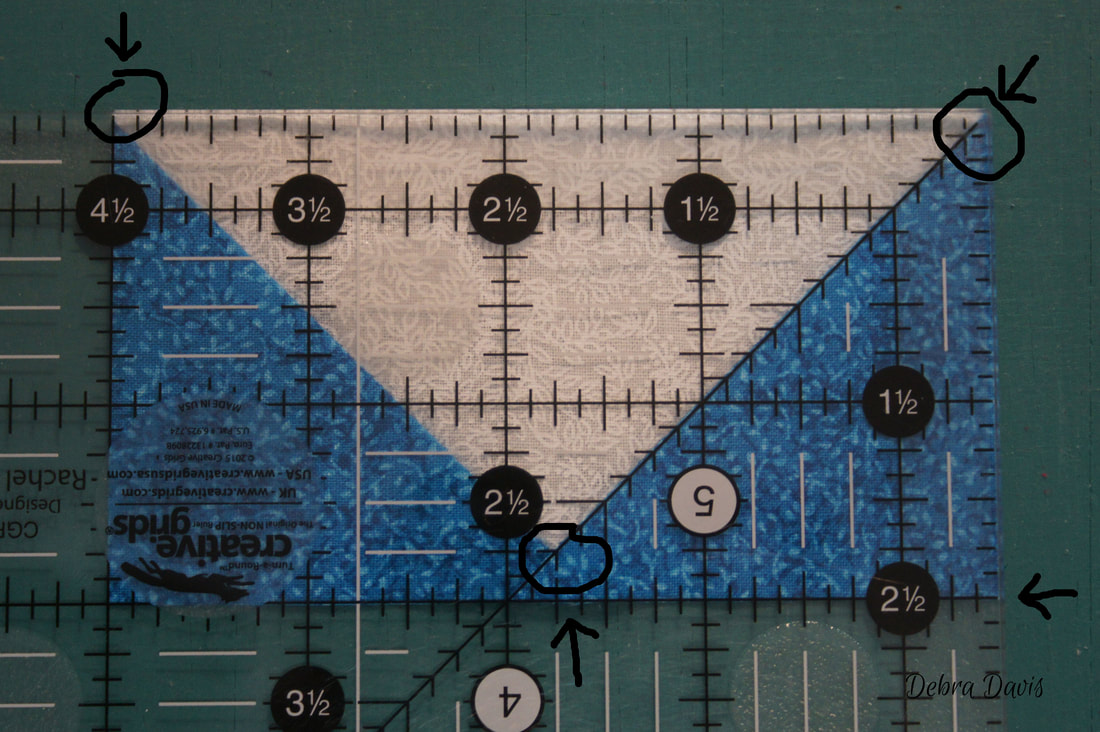
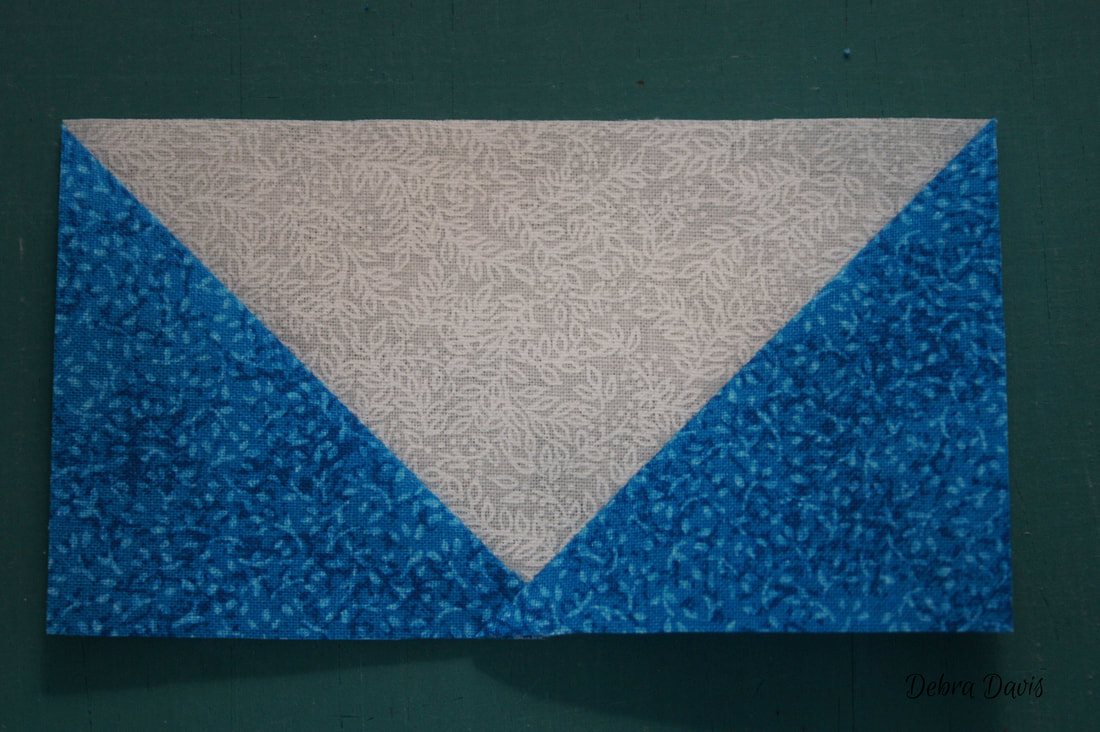
And like before, I cut apart on the drawn line. 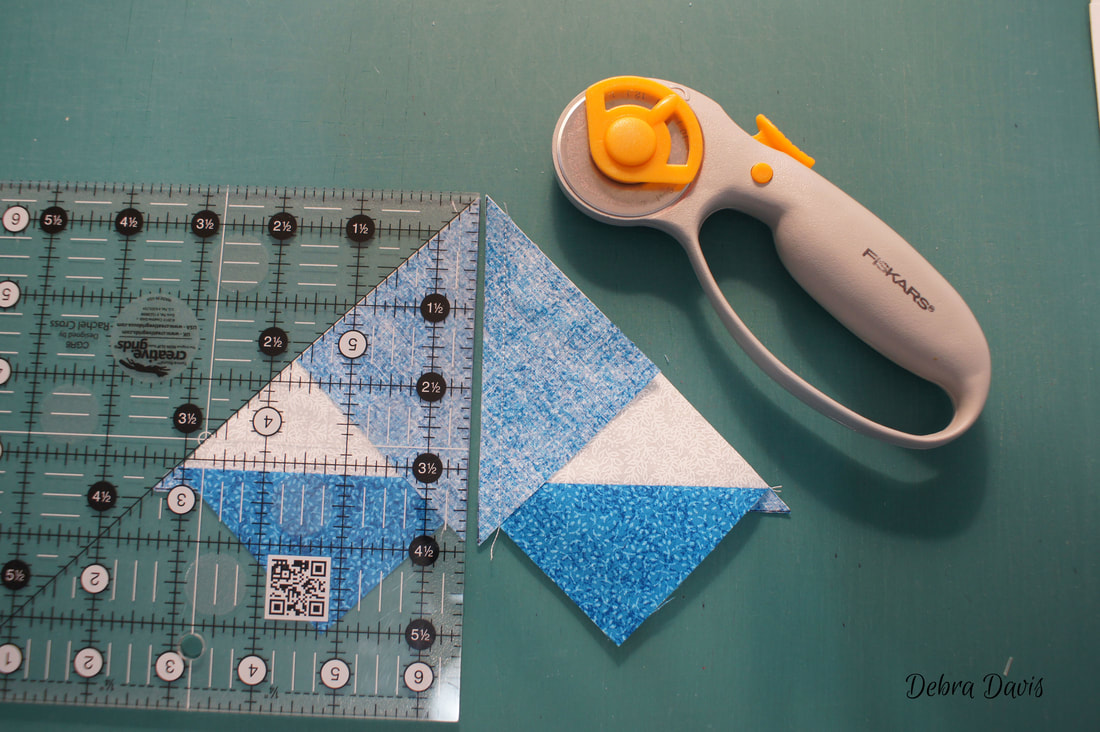 These get pressed towards the small triangles to form the Flying Geese units. 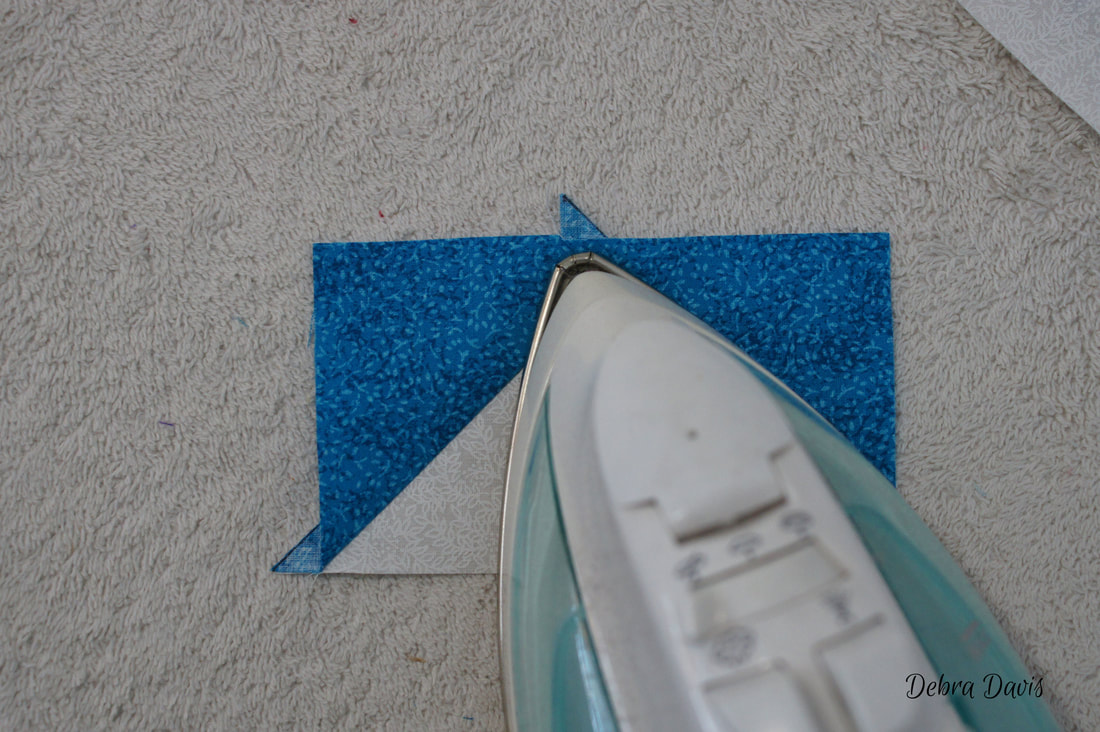 To trim these to the correct size I need to know my measurements. In this case I need Flying Geese that measure 2 1/2" x 4 1/2" (this is not the finished size, but the size needed to account for seam allowances.) The first thing I need to know is the Midpoint of my Flying Geese-the halfway mark of the length I need these to be. Since my length is 4 1/2" I divide that in half and get 2 1/4". I line up the 2 1/4" line on my ruler with the point of my "goose." I also lay the 1/4" line of my ruler across the top of that point-this will be my seam allowance and is very important in order to keep that point from disappearing when I sew. At the bottom corners of the unit I want the 2 1/2" and 4 1/2" interesecting lines on the left to meet right at the seam line. On the left I make sure that the edge of my ruler and the 2 1/2" line also meet at the seam on that side. This will keep my points sharp at those edges. 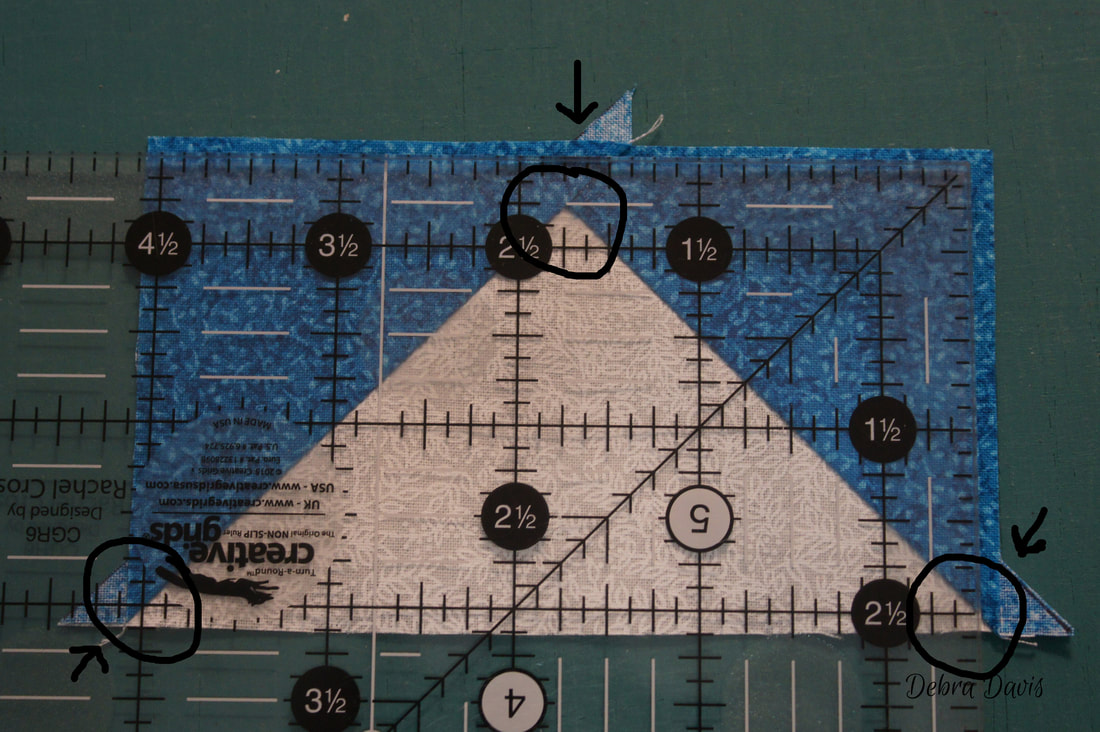 Once I am happy with how everything looks under my ruler I trim off the extra fabric on the right side and the top of the unit. (I have foudn that the Creative Grid rulers that have come out recently are very good for this as they do not slip as much as other rulers do.) 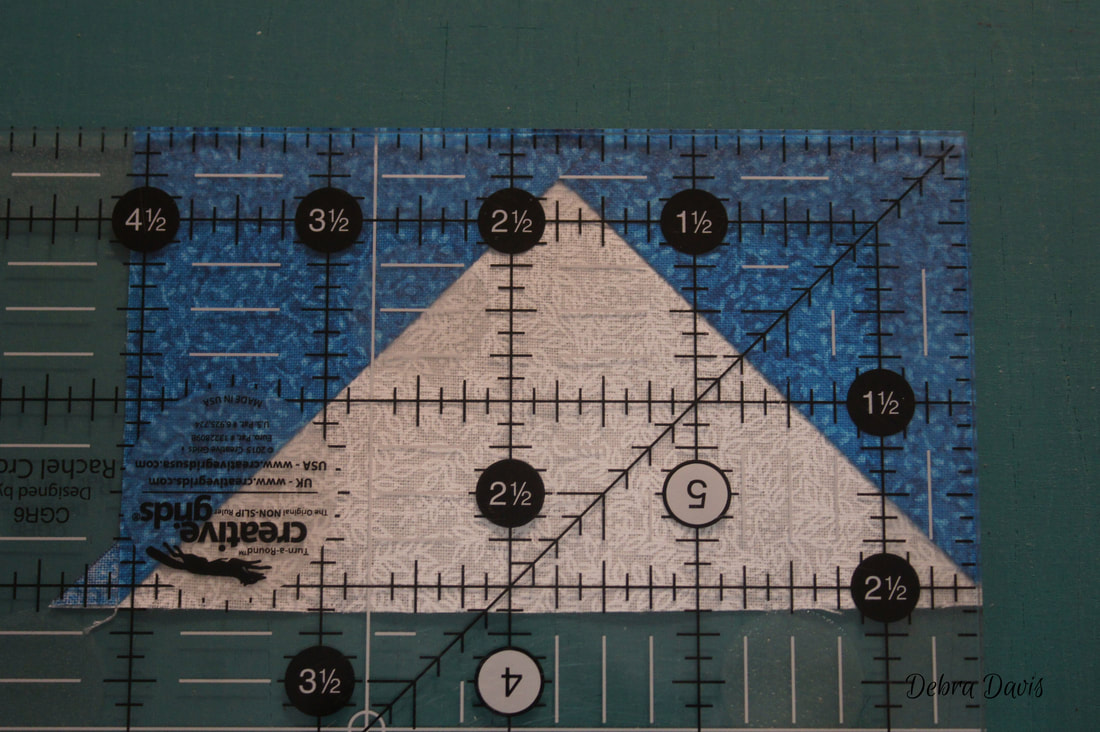 Next I have to turn everything around in order to trim the remaining two sides. I have lined up the 2 1/4" line back at the point of my "goose" and I now have that diagonal line on my ruler falling nicely along the seam line too. Another indicator that all is well. I have the 4 1/2" line along the side that I just trimmed and the same with the 2 1/2" line-then I trim off the extra and am left with a perfectly sized Flying Geese Unit.
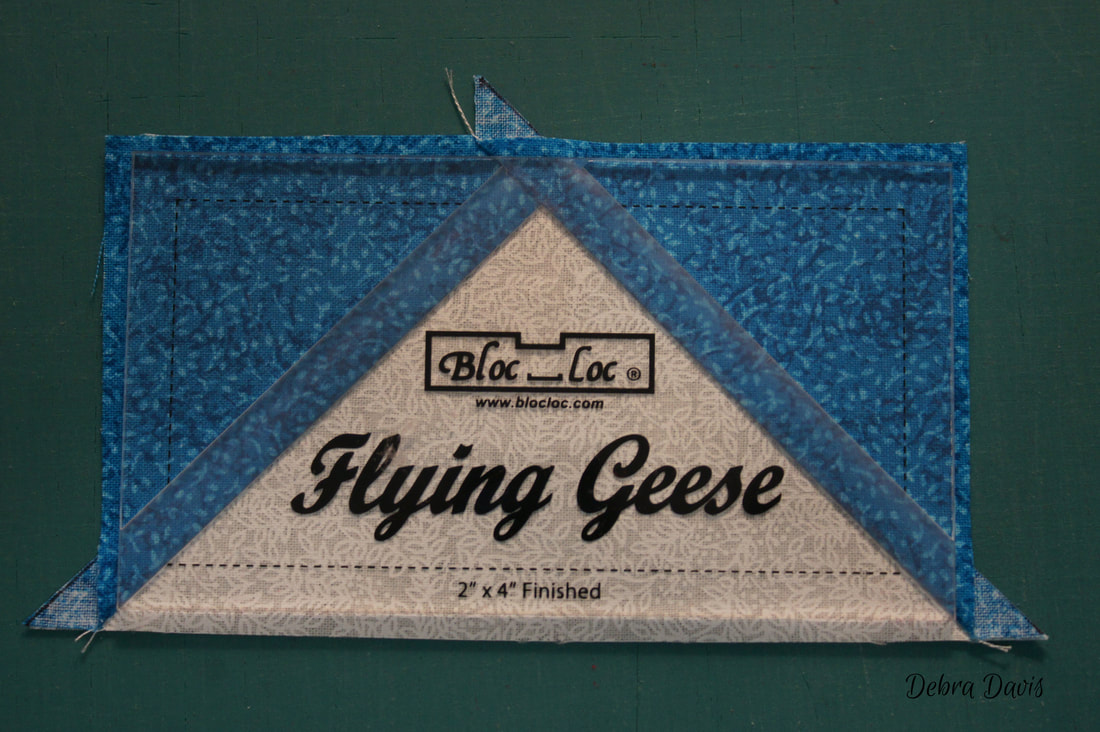
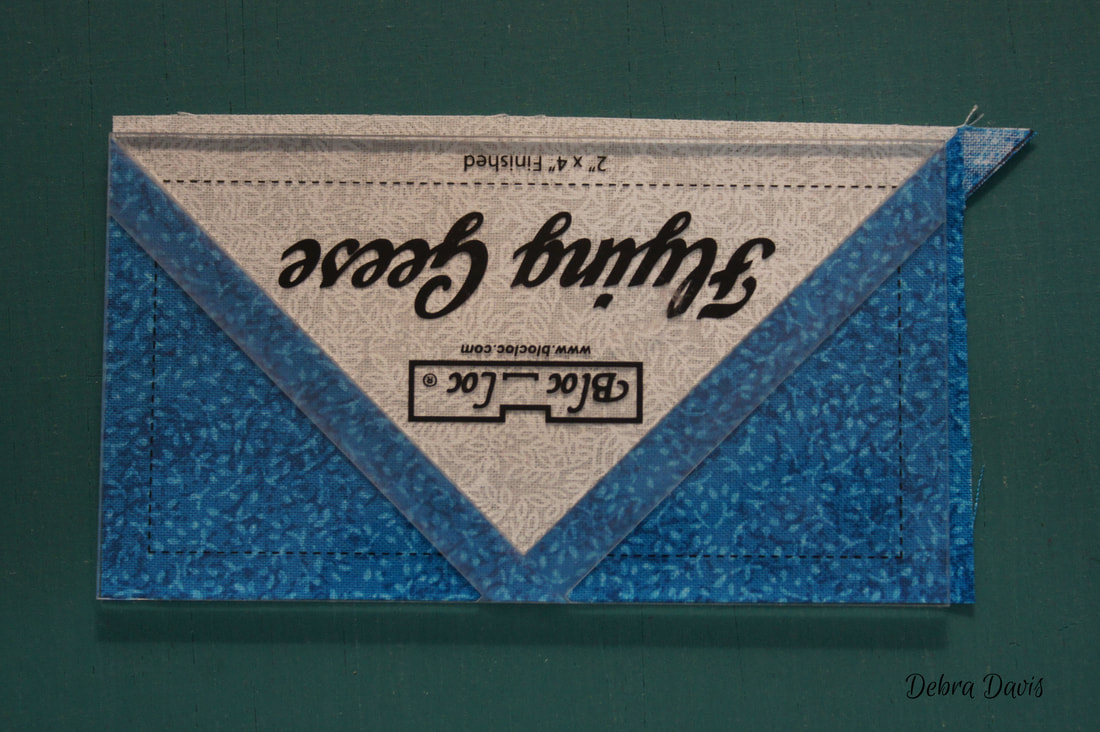
I have a couple of other tools for trimming that I really love. The first is a Bloc-Loc ruler. These come in several sizes and only work for trimming that one size. They have a groove in them that the seam of the Flying Geese fit into which locks the ruler in place and also acts to keep the unit you are cutting perfectly aligned with the daigonal seams. Like with the regular ruler I trim two sides, rotate everything and trim the other two sides.
Recently I added this little gem to my took kit-it is another Creative Grids ruler and designed for trimming multiple sizes of Flying Geese. You start with the side of the ruler marked Trim #1 and use the guide lines and letter that go with the size geese you are making-in this case I have lined up the 2" x 4" diagonal lines and the letter D goes at the point of my goose. This ruler has added my seam allowances so once I have those things lined up I am good to trim the first two sides.  After turning everthing around I am using the side of the ruler marked Trim #2. I line up the the letter D at the point of my goose again and the 2" x 4" lines at the trimmed edges of my unit, then just trim the last two sides. 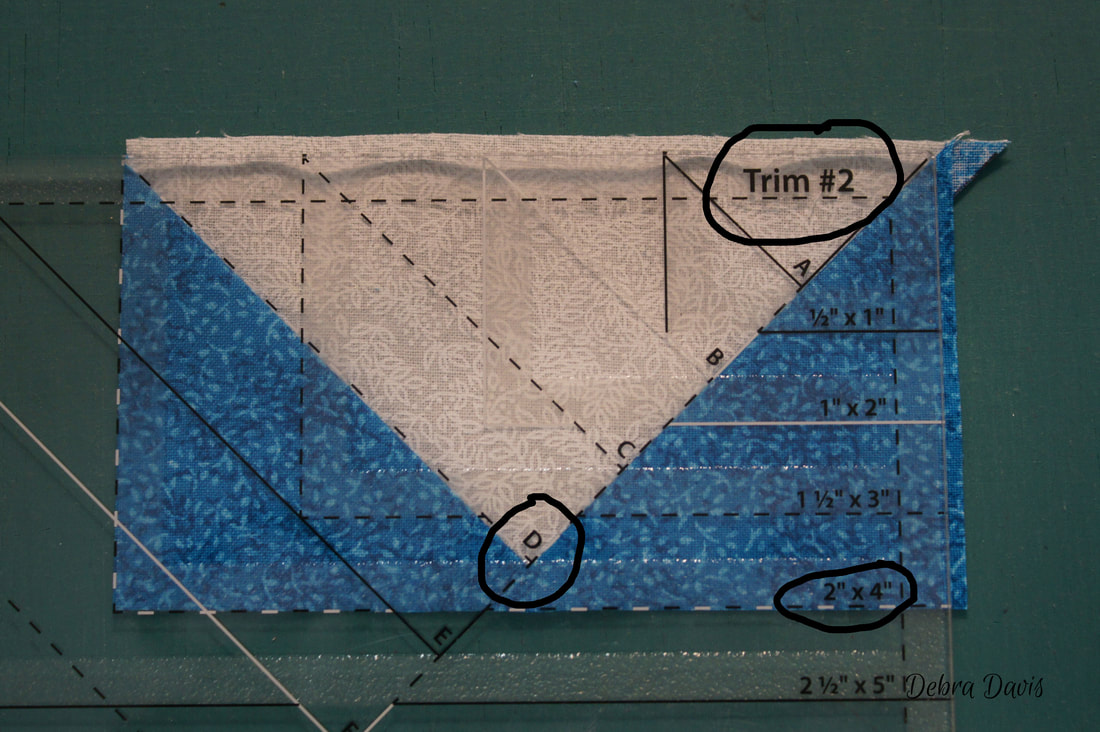 All three of these methods resulted in perfect Flying Geese. 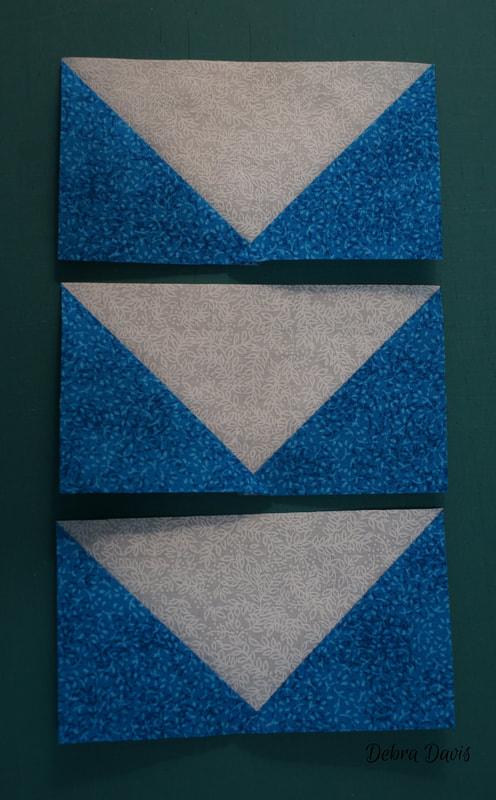 Now I want to take a moment and show you a comon problem. In the photo you will see that my red square is just a touch off of lining up with the larger square underneath. This will affect the end result. 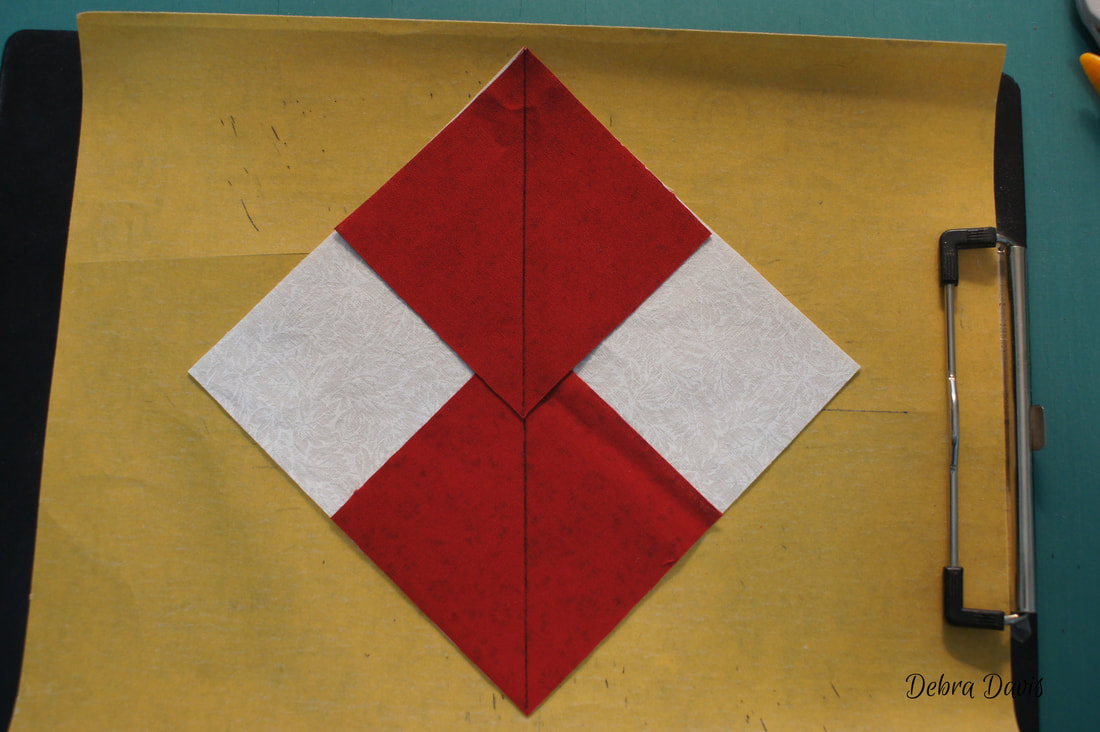 Another issue is not sewing in a straight line and/or keeping an accurate 1/4 inch away from the line. 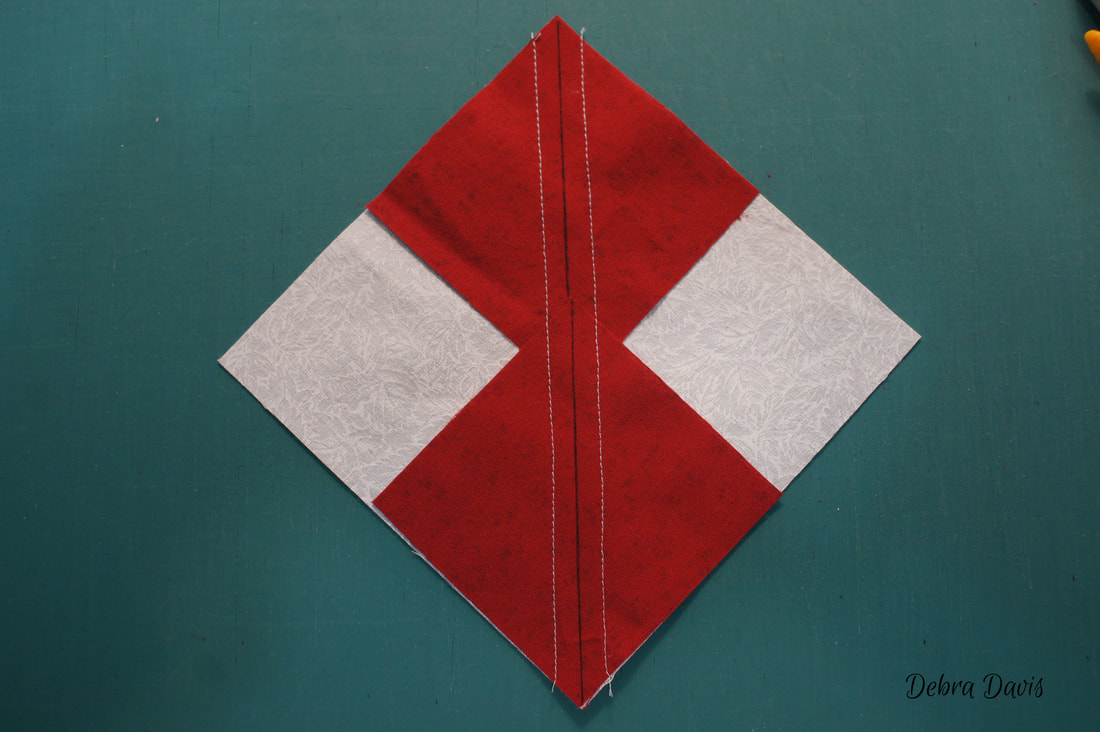 And a last issue is not making sure that the drawn line is centered on the block-this one veers off the the left of the bottom point of the square. 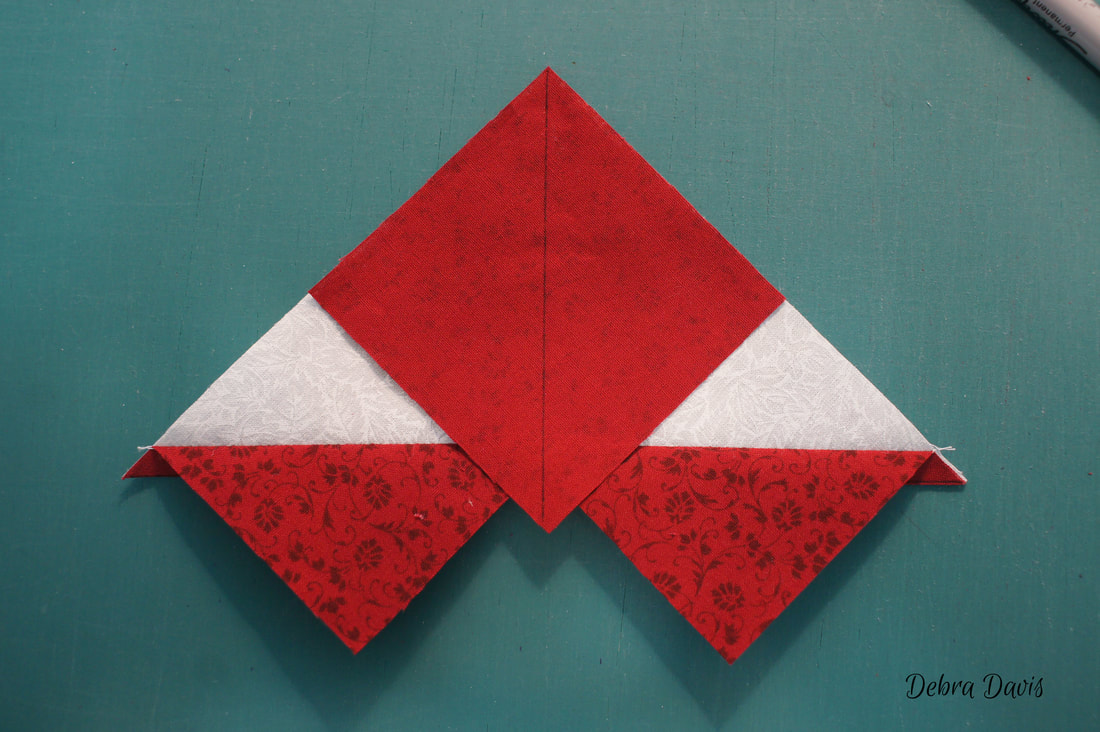 This will throw things off as well... 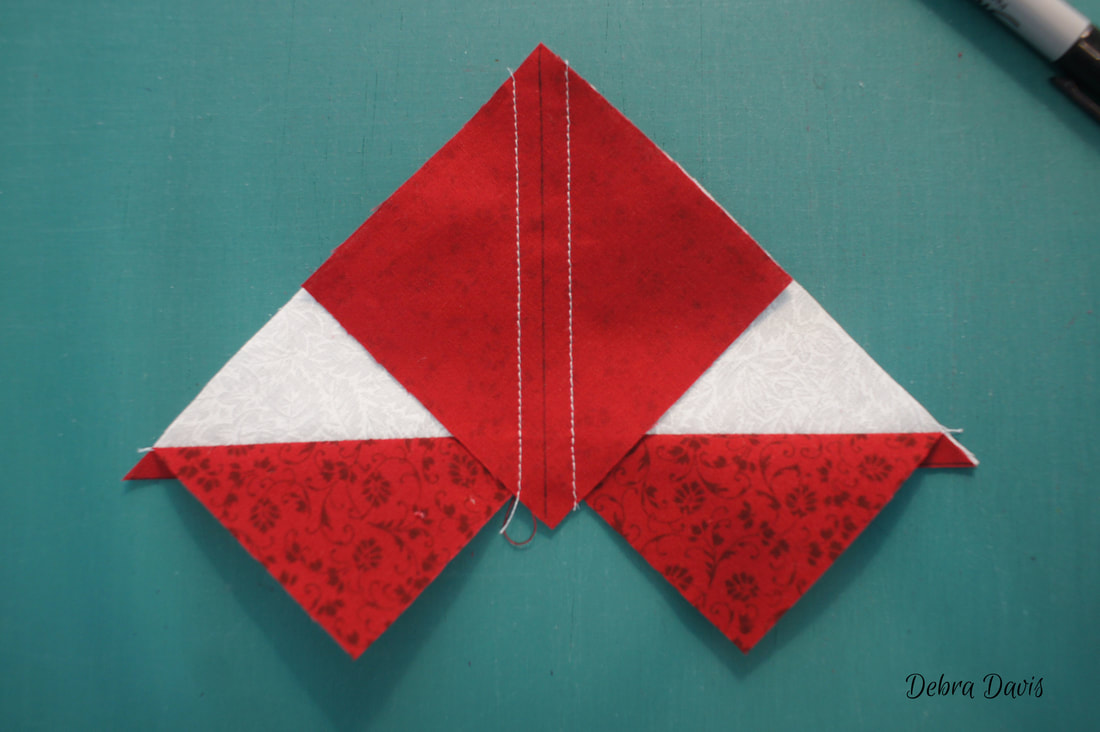 Then when I go to trim the unit you can see how even a small problem like one of the above can mean that the diagonal lines of my flying geese do not perfectly line up with the diaganal lines on my ruler. 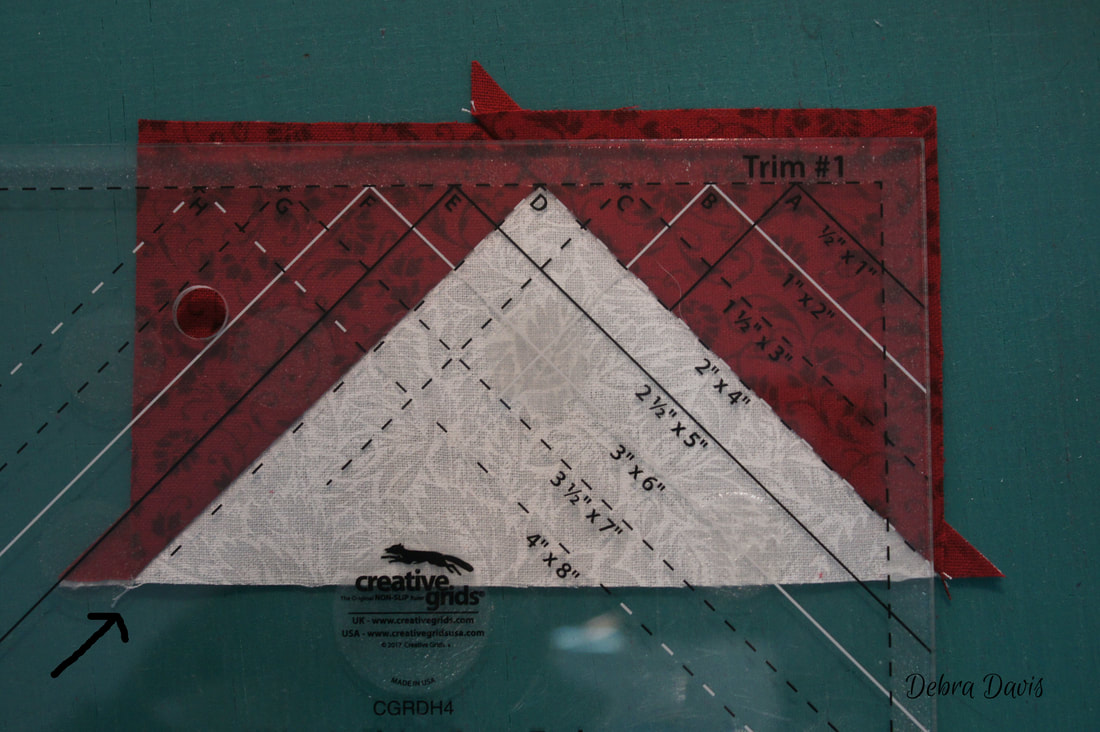 This means that I have a corner that will not result in a sharp point when sewn into a block. 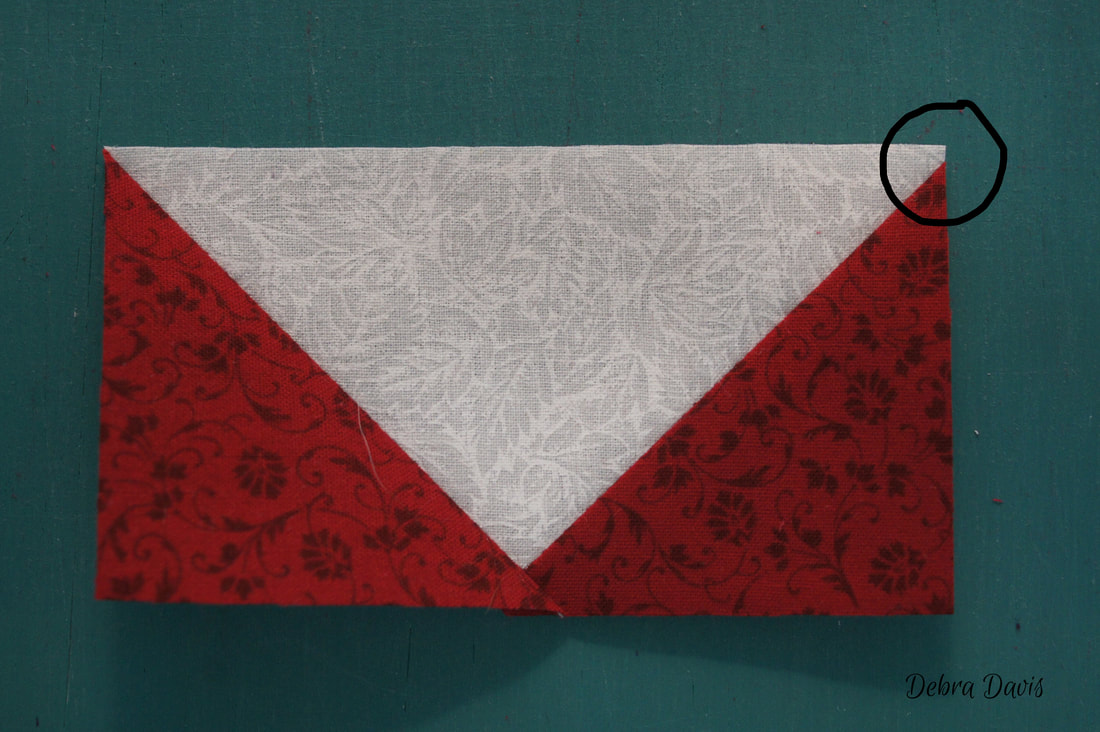 I hope these little tips will help you acheive perfect Flying Geese too. I have created a chart to give the cutting and trimming measurements for several different sizes of Flying Geese. Below the chart is a pdf version you can download to keep handy. 
Happy Quilting!  |
||||||||||||||

 RSS Feed