|
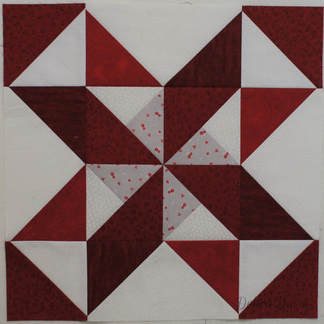
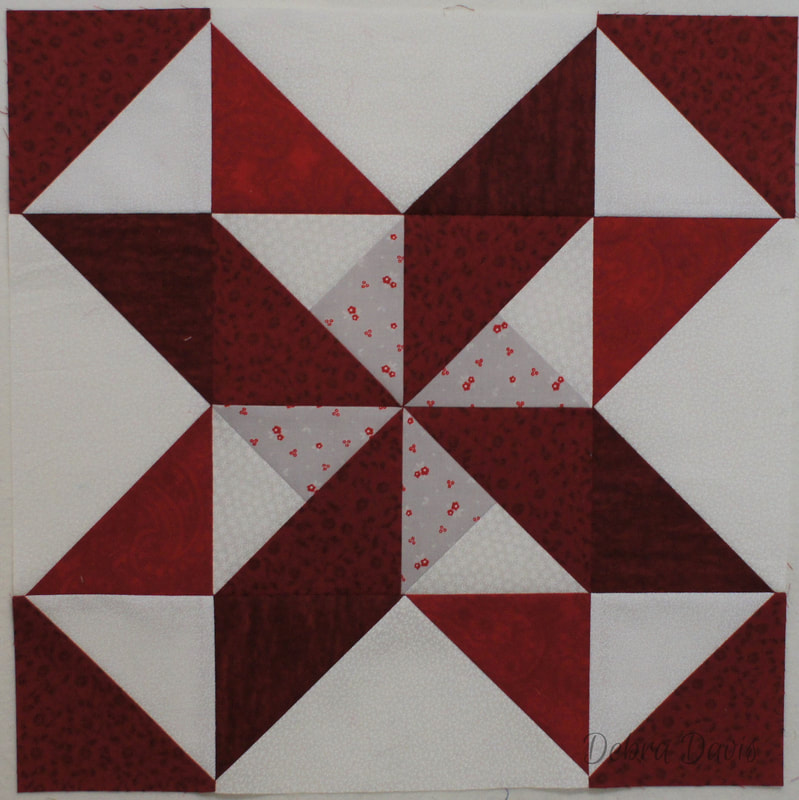
Here we are at the start of the final row of blocks for our quilt. Block 7 is the Stars and Pinwheels block. I realized when I started to cut my fabrics for this block that I have not been following my own directions as far as fabric placement goes on my red and white version-somewhere along the line I started using one of my medium reds for my light red and replaced some light red with medium red and...oh well, so I am just going with it. The pattern is correct, I just did not follow it, LOL. It will all look fine in the end even if I do not end up with the exact look I had planned on when I started. But that is part of the fun of working with a quilt pattern-making it your own with little changes here and there along the way
...even when it is your own pattern. PDF for Block 7 Download Previous Week's Blocks
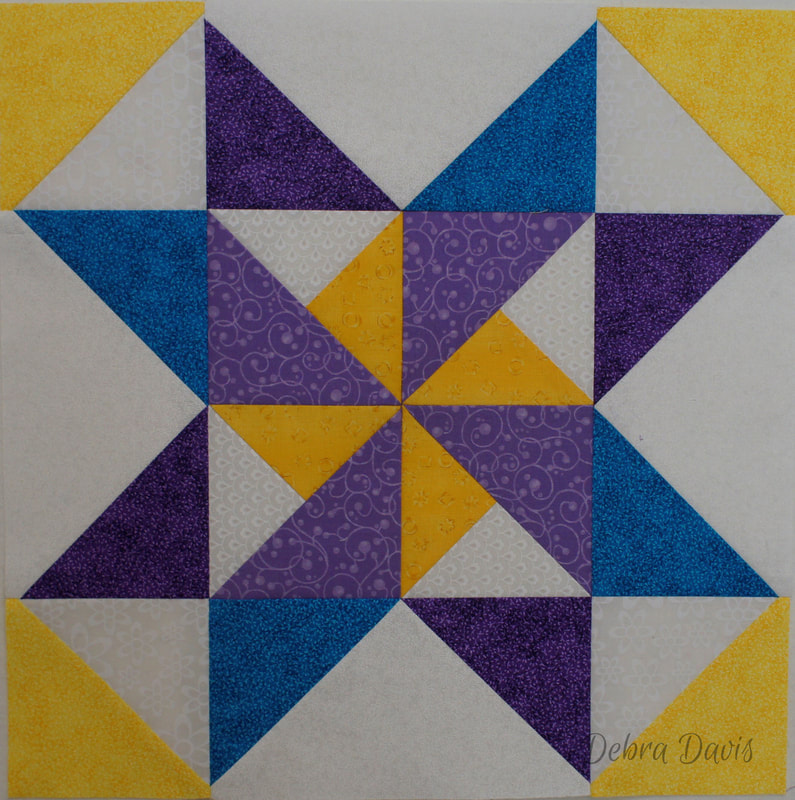
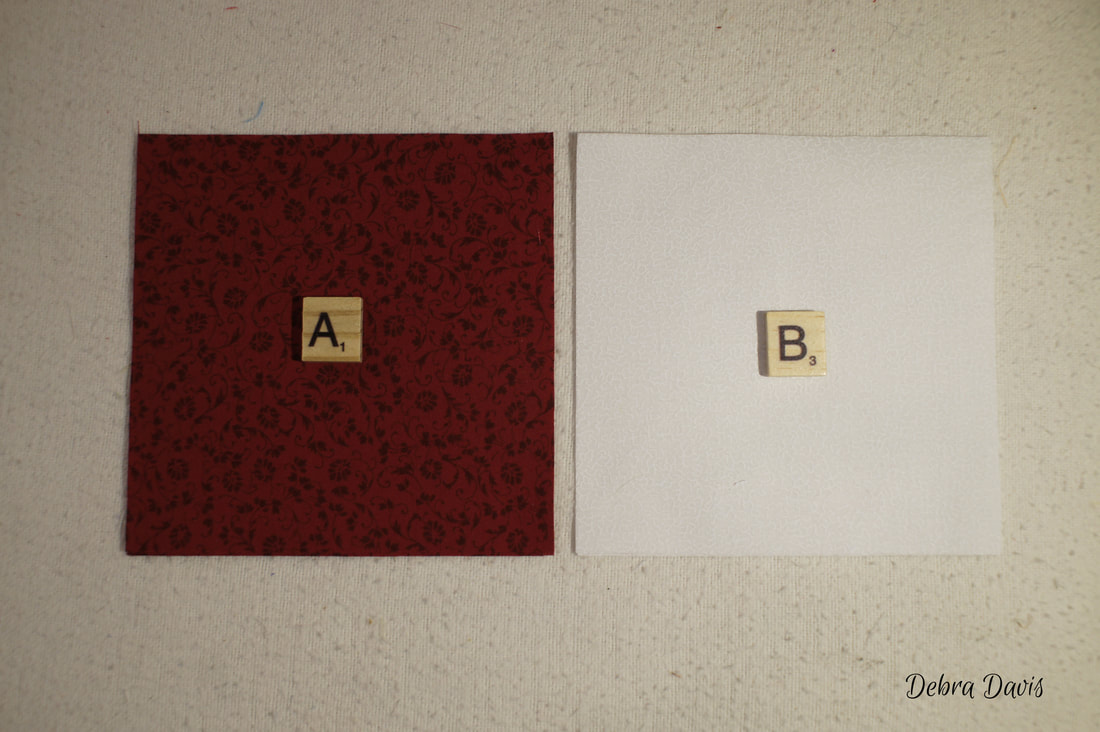
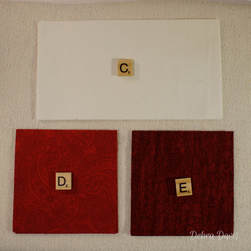
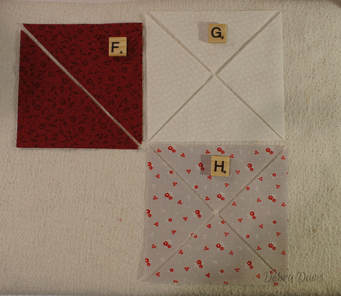
So here is what I ended up with for the fabrics in Block 7.
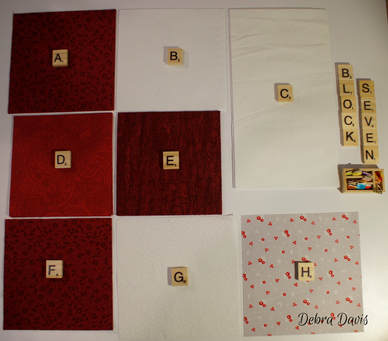
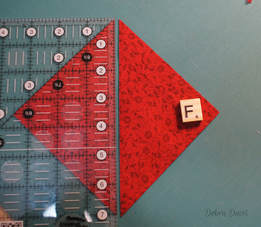
There are some extra cutting directions this week. The F squares need to be cut in half diagonally. The G and H squares will but cut on the diagonal in both directions. To make that easier I use a small cutting mat that I can rotate after making the first cut. This way I do not disturb the squares I am cutting and everything stays nicely lined up.
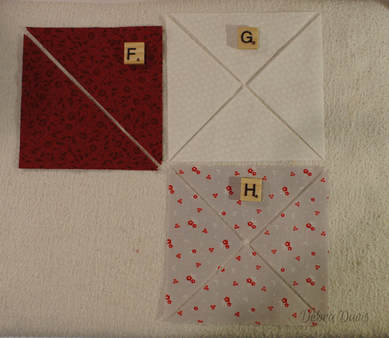
Your squares should now look like this.
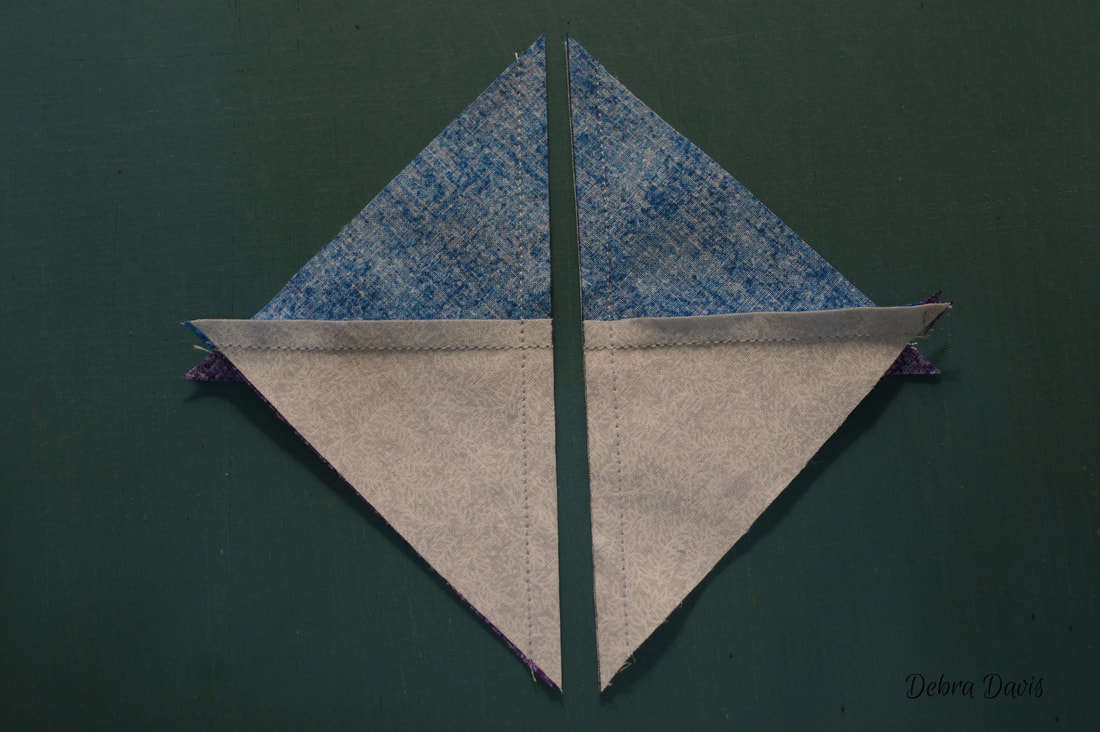
With all of that out of the way let's get started. I am going to start by using the A and B squares to make the Half-square Triangles (HST's) we have all become very familiar with by now. First draw a diagonal line on the back of the B squares.
Then sew 1/4 inch from each side of the drawn line. Cut apart on the line and press towards the A fabric.
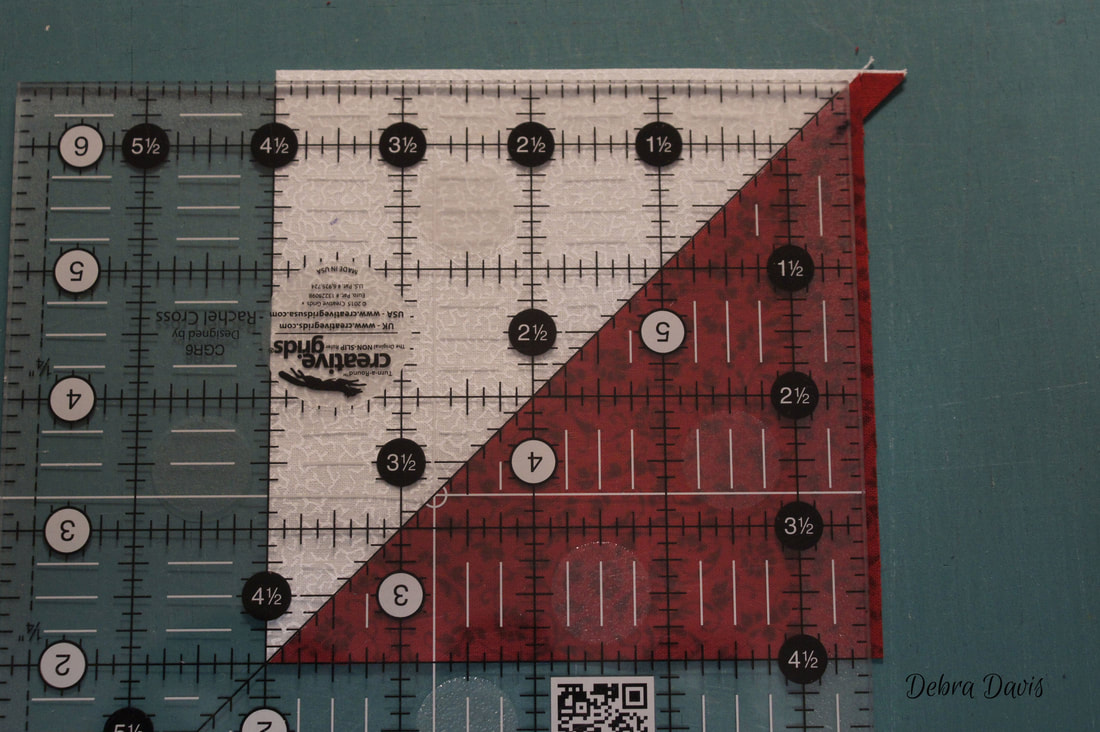
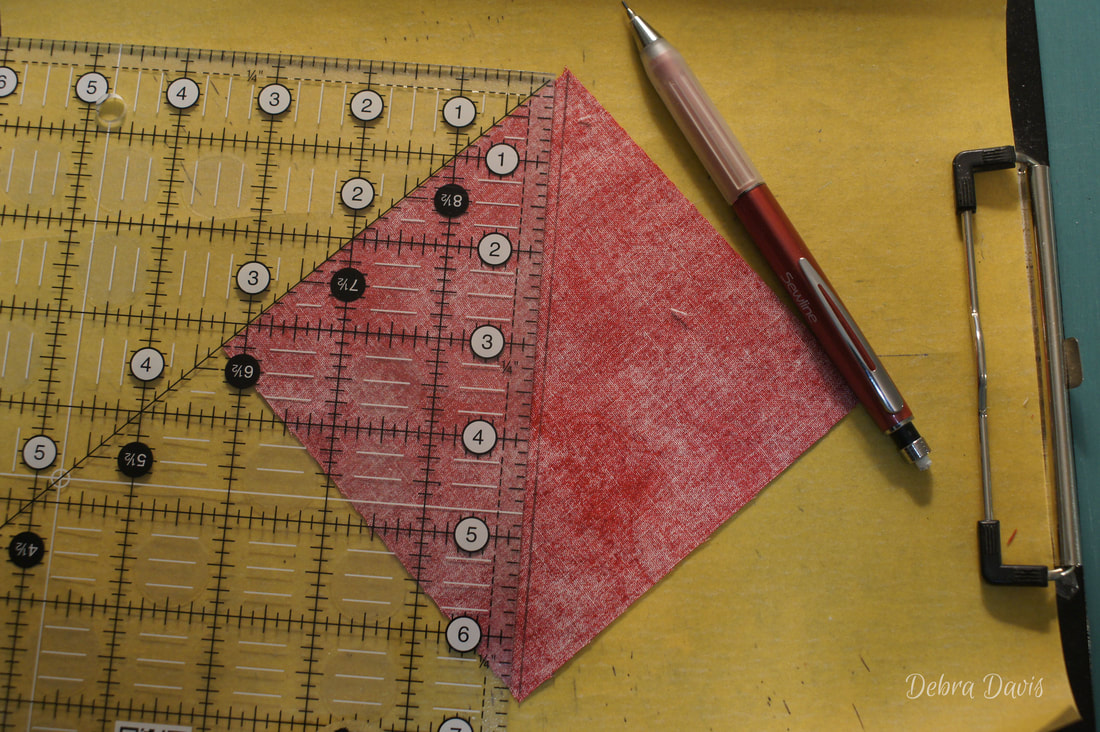
Next trim these to 4 1/2" squares. I love my Bloc-Loc ruler for this process but if you are using a regular ruler as shown in the photo be sure to line up the diagonal line on your ruler with the diagonal seam line.
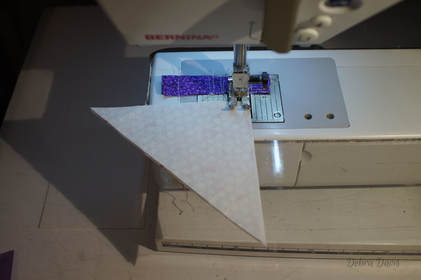
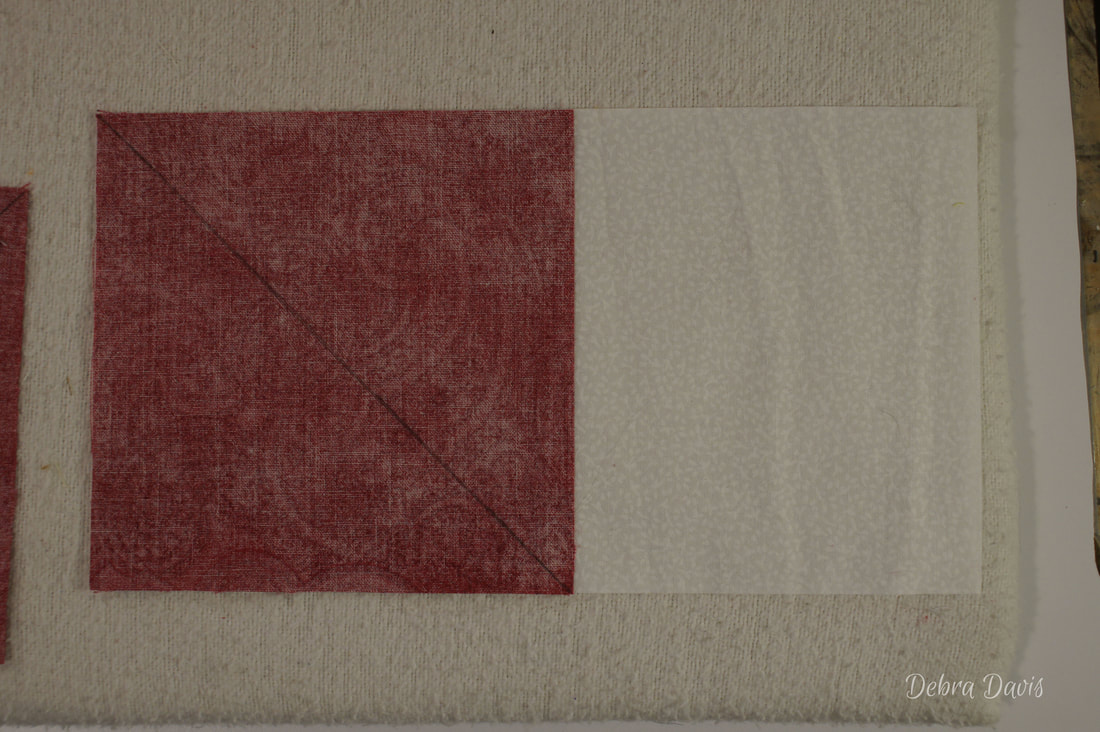
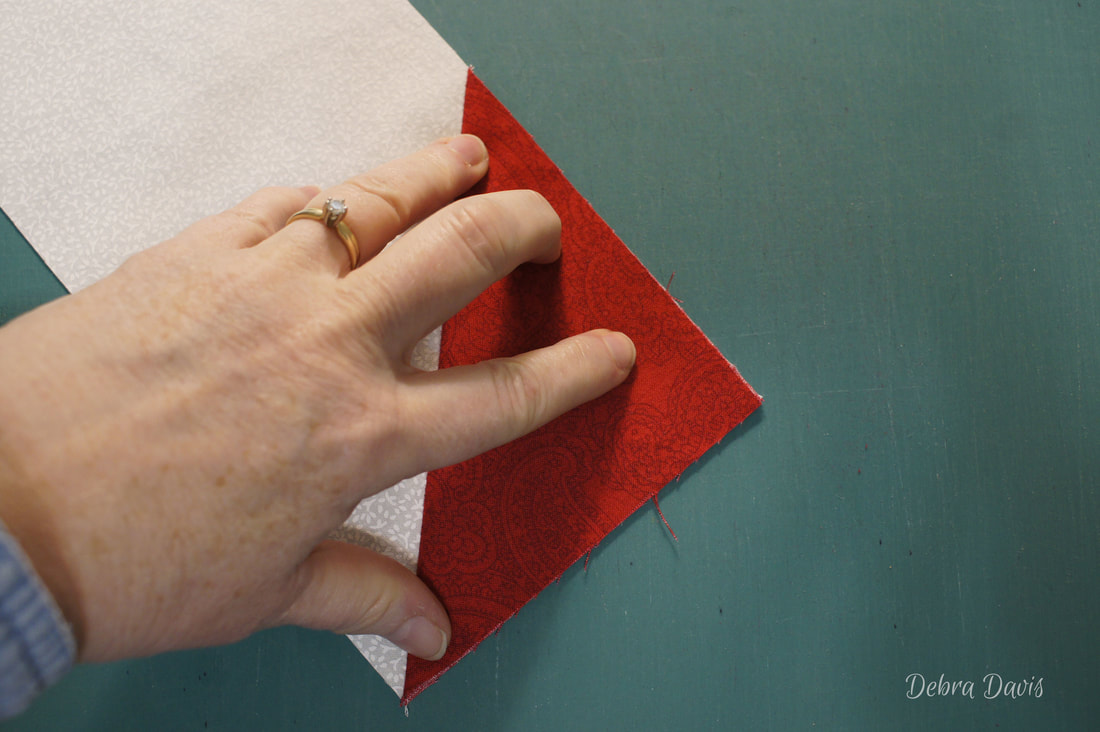
The next step is to make the Flying Geese units using the C rectangle, and the D and E squares. On the back of each D and E square draw a diagonal line down the middle.
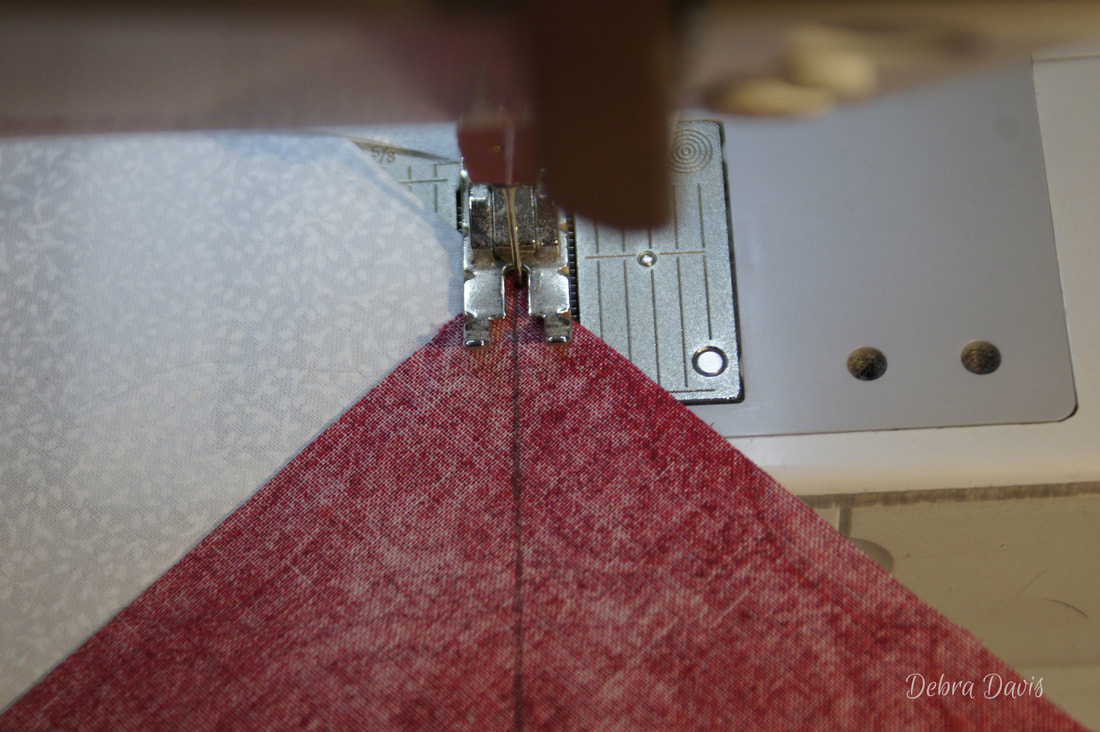
Begin by placing a D square with right sides together on the left side of the C rectangles. Stitch along the line- just a needle width to the outside of the line, rather than right on top of it.
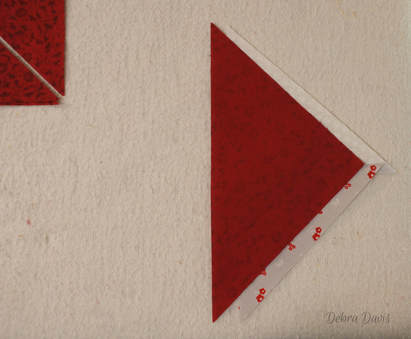
First check to make sure that when the triangle is folded over it will cover the C rectangle underneath. Then trim away the extra fabric 1/4 inch from the seam line. This method results in some waste, which I do not like at all-but since I am using two different colors here it is still the best method for making these units. They say when life hands you lemons make lemonade...well life has handed me some triangles so I am going to make something out of them and will tell you all about it later on.
Press towards the D triangle and then repeat the process adding the E squares to the other side and pressing towards the E triangles that result.
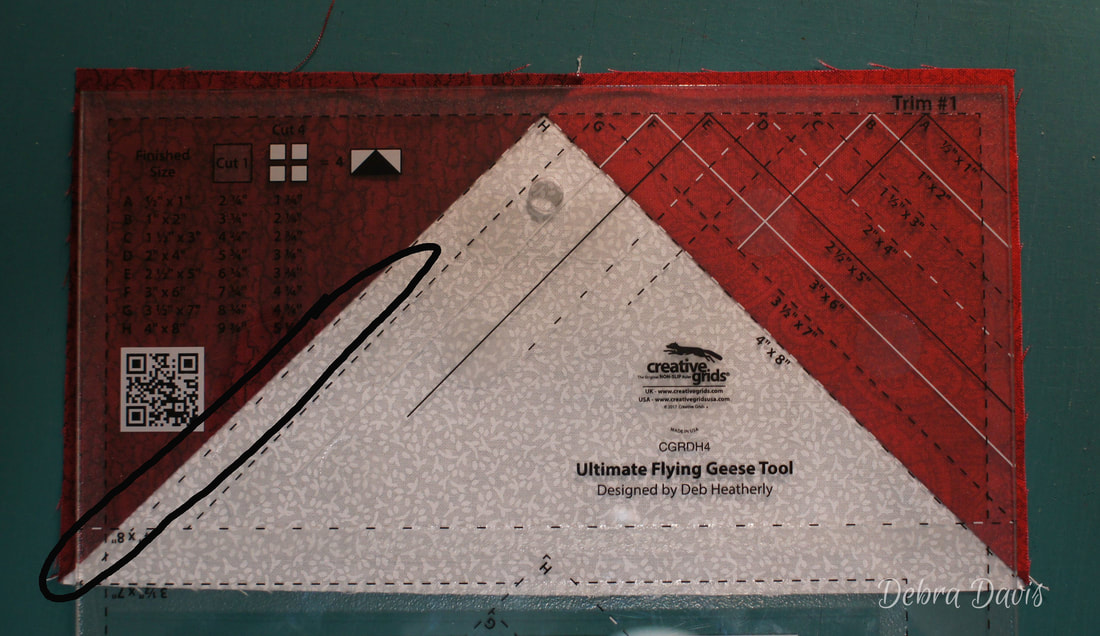
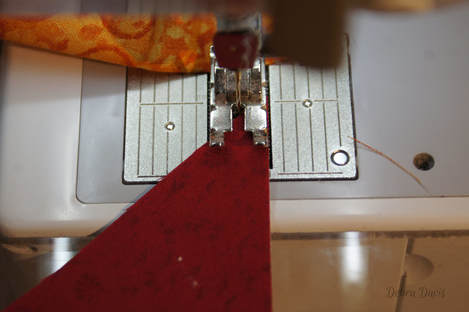
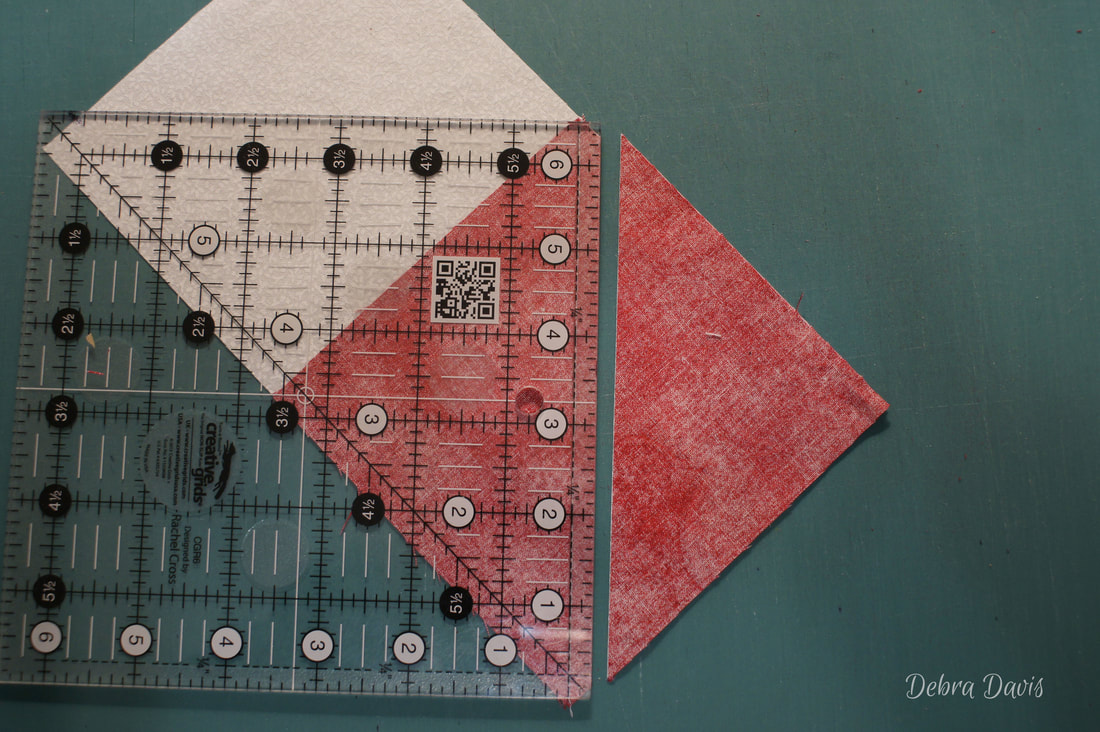
I am using my Creative Grids Flying Geese tool to trim these to size.
Trim to 4 1/2" x 8 1/2" 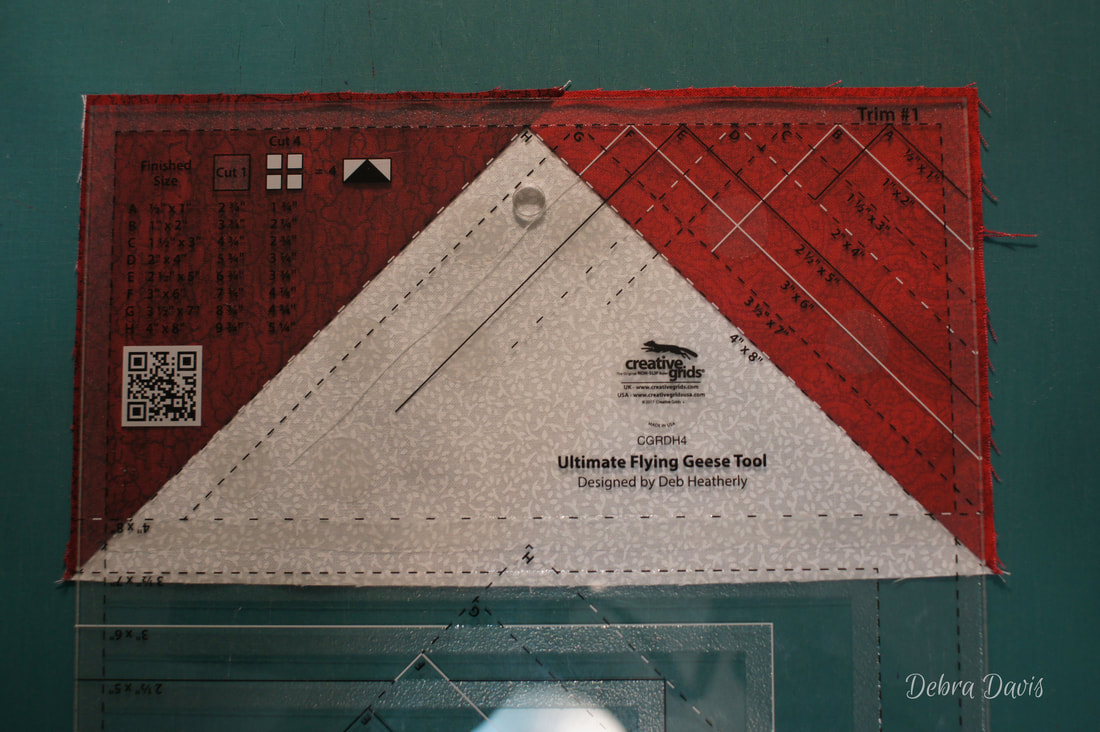
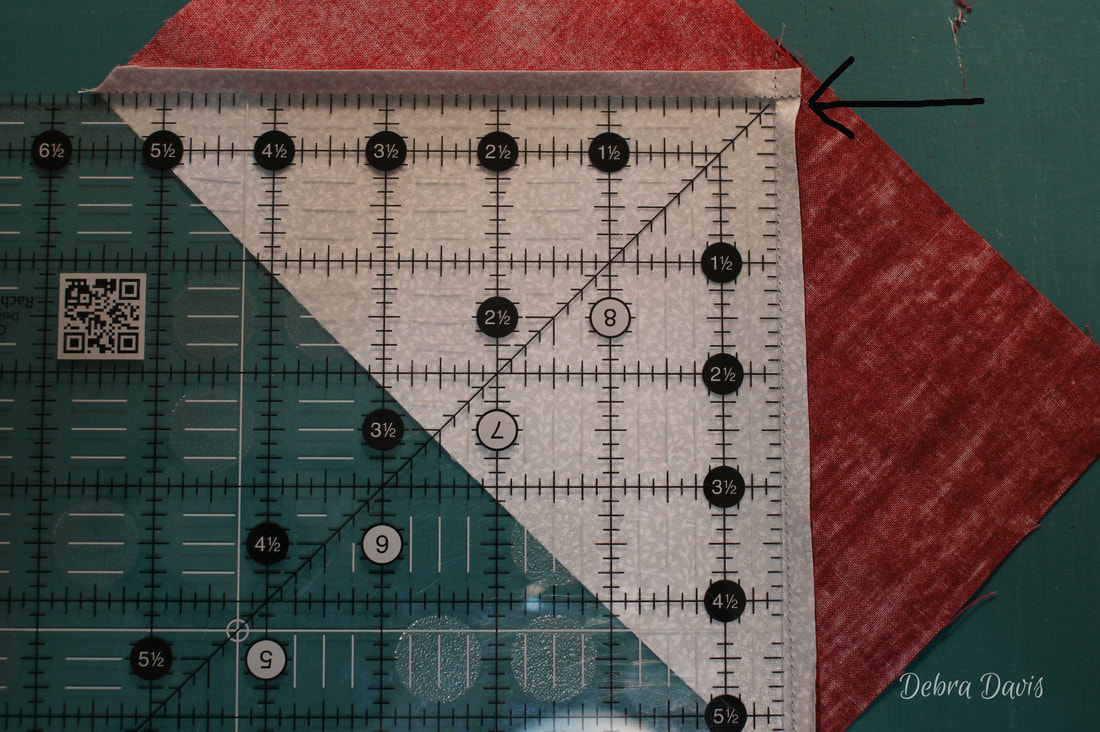
But what happens when one of your geese does not line up nicely with the lines on your ruler?
If I am not off by more than a 1/8 of an inch I can fix this problem. If I trim it as is, I will not have nice points in my block. By laying my ruler so that it snugs up against the seam that is in good shape (the one the arrow is pointing to in this case) I have a nice square measurment to straighten out my seam that wandered. I use a pencil to draw a new line along the edge that I am going to resew. Notice I am NOT ripping out the previous seam.
My new stitching line.
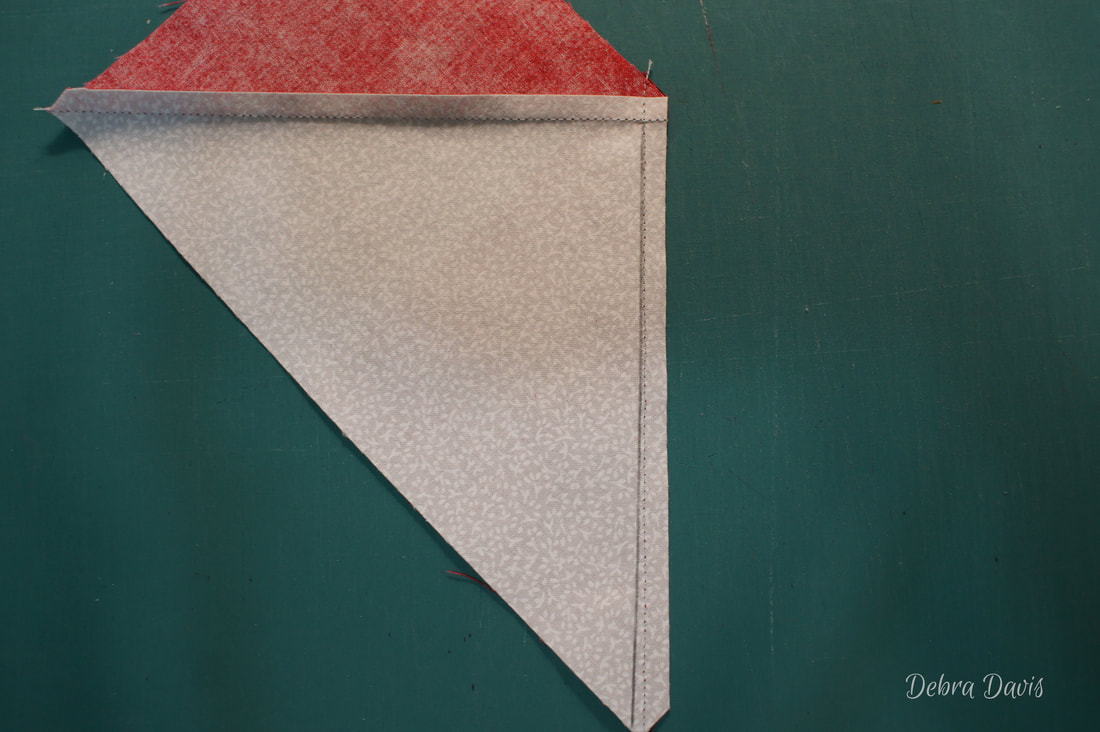
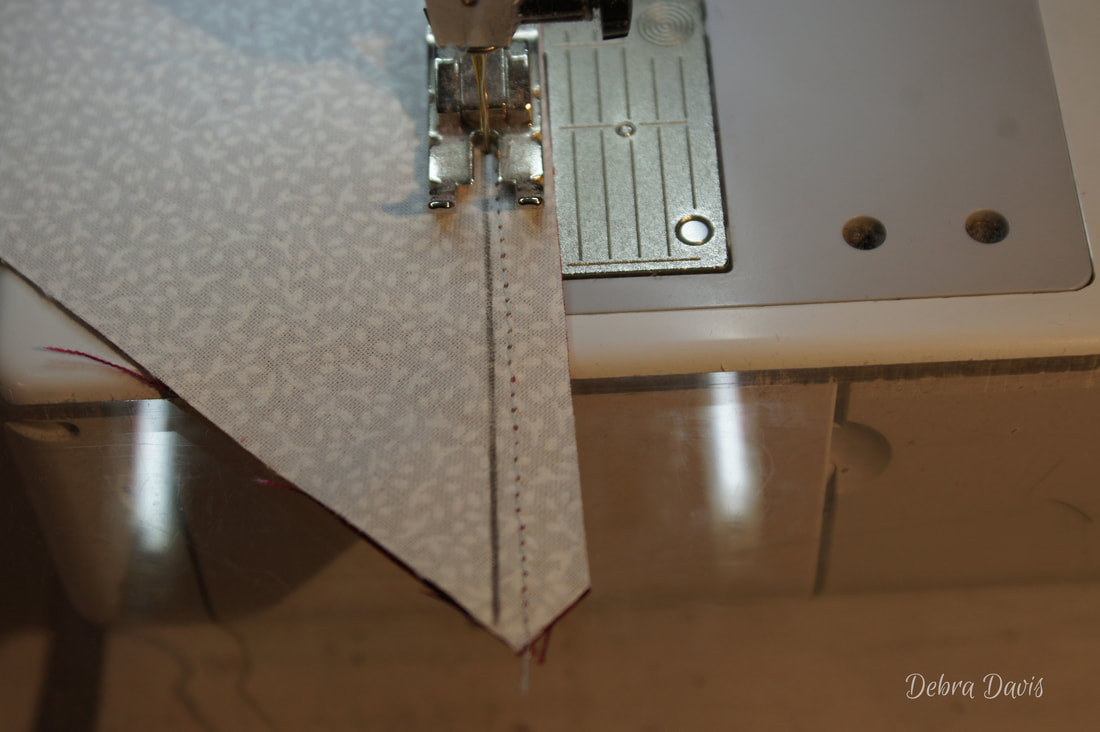
I sew the whole thing again following my revised line.
Voilà! Problem solved.
Note: I want to show you what happens if I try to use this method if I have more than an 1/8 inch error to begin with-it will cause the bottom corner to be too short. Being jsut a sliver off, this is still usable if I am careful in placing it, but in general this would be something to avoid. 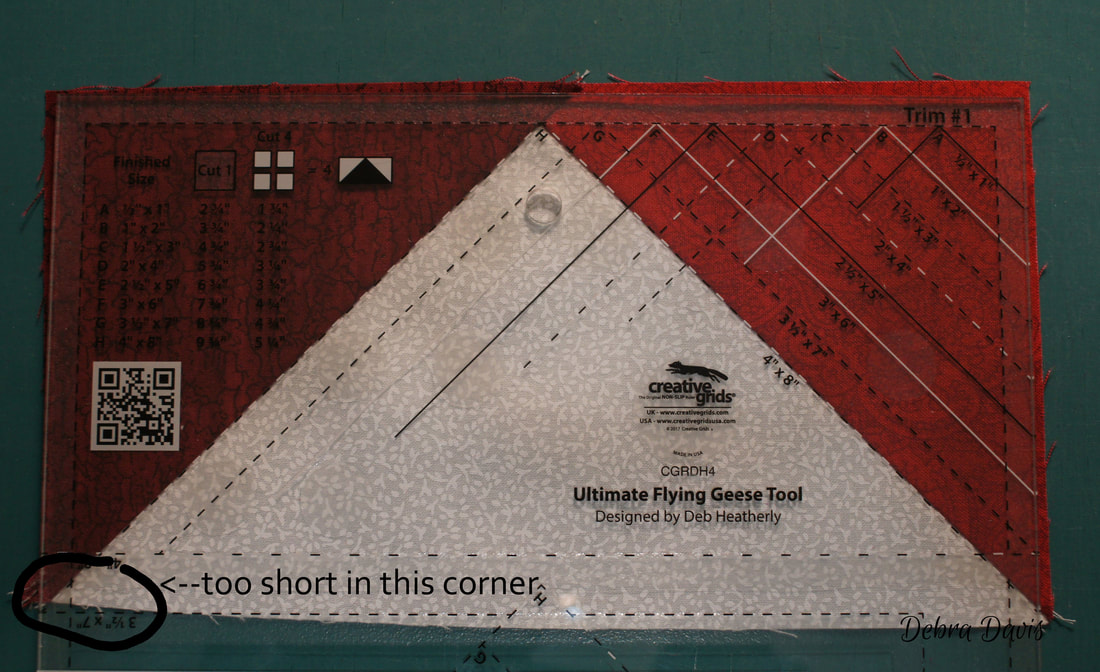
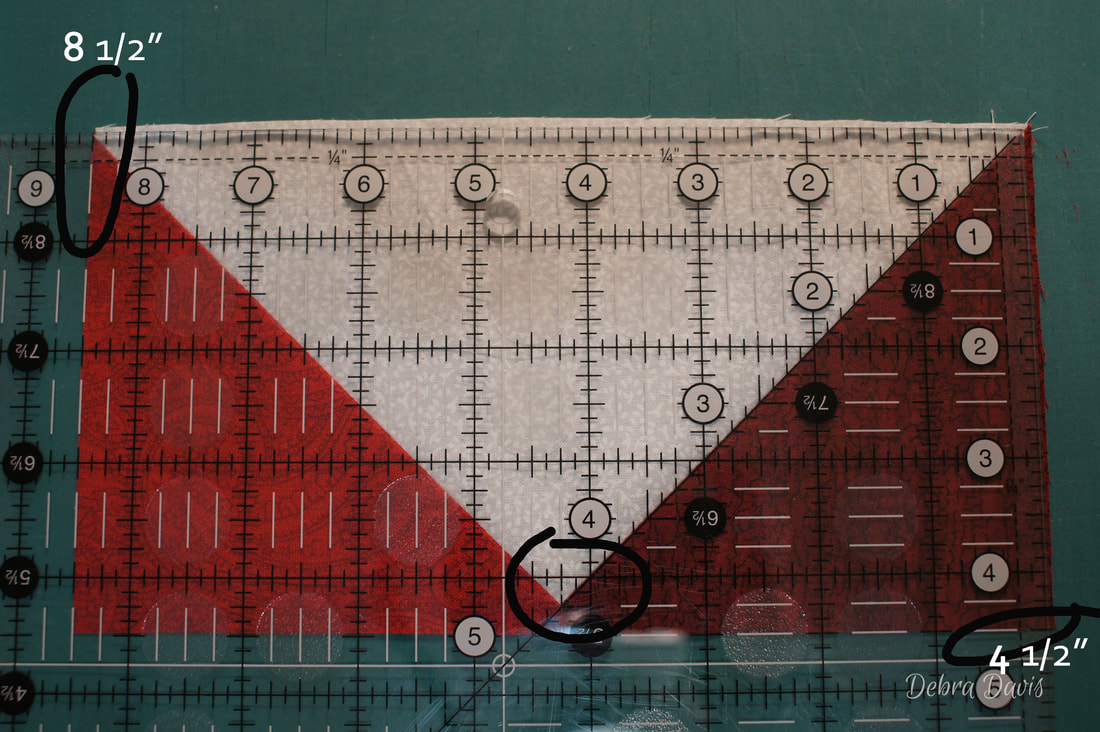
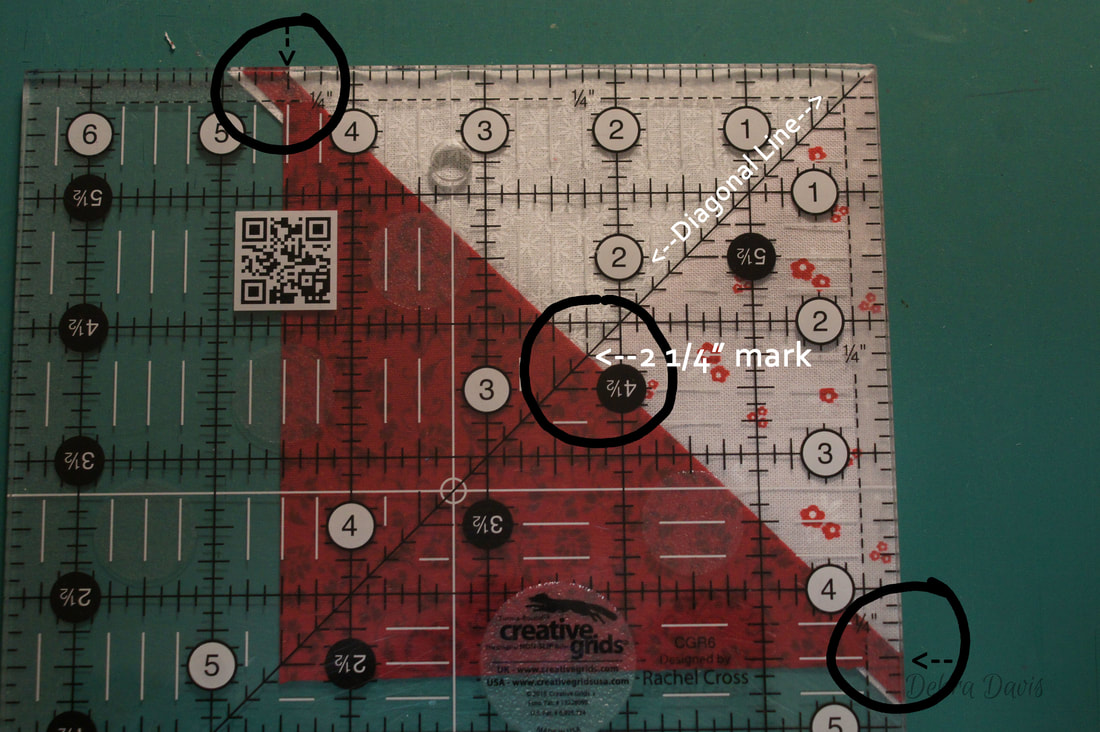
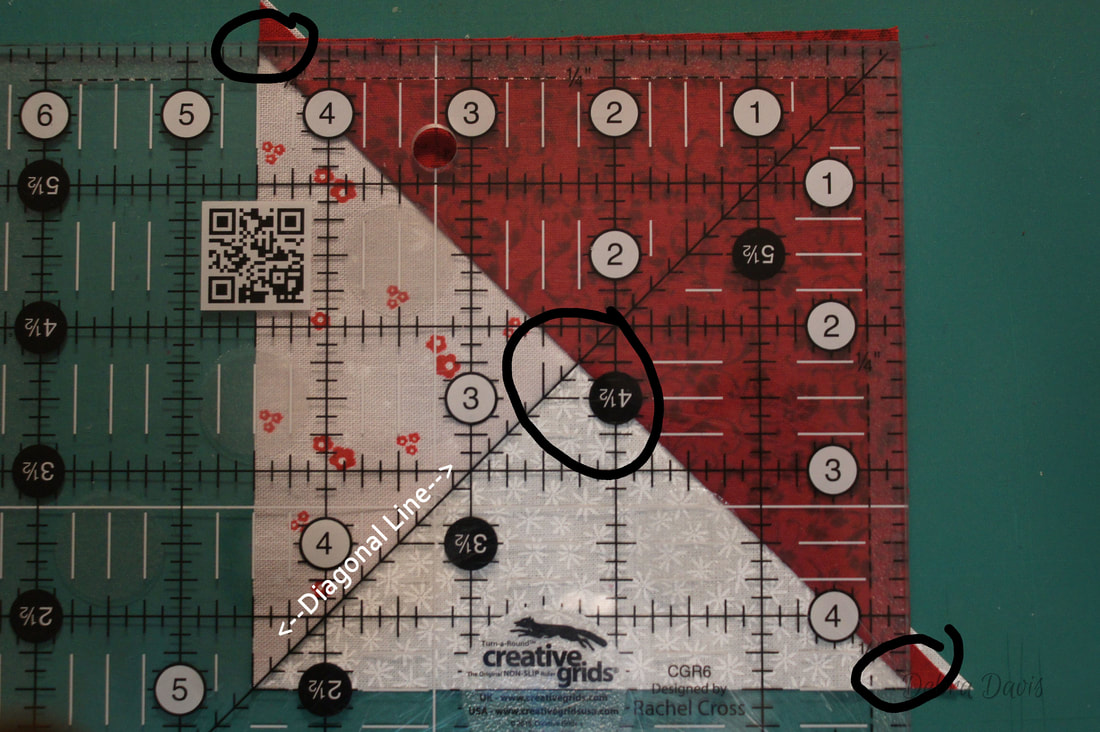
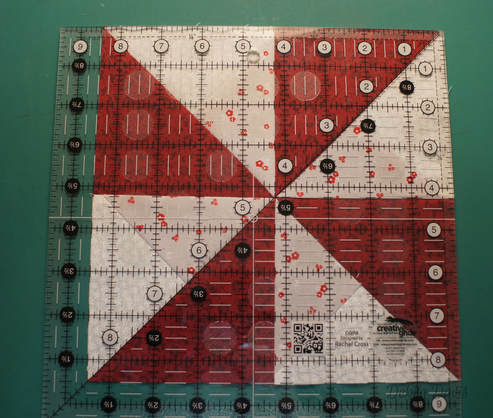
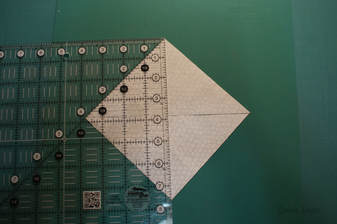
Back to the nicely finished Flying Geese. I wanted to take a moment for those using a regular ruler to give you the measurements you need to watch as you trim. The midpont (top circled area) is 4 1/4" and needs to have a 1/4" seam allowance above that point. The two bottom circles show how the corner seams need to meet at 4 1/2" and 8 1/2"
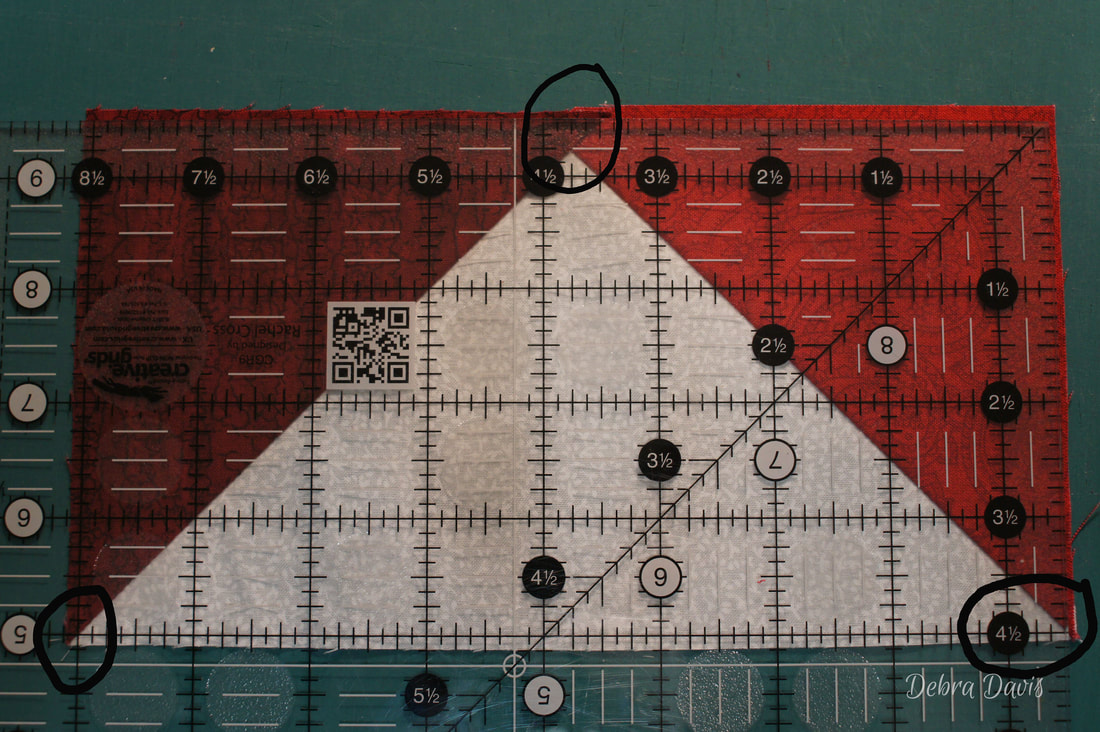
When rotated to trim the last two sides the trimmed edges get aligned with the 4 1/2" and 8 1/2" marks and the center point still needs to be 4 1/4" with a 1/4" seam allowance. The diagonal line on the ruler should also lay nicely now with the diagonal seam line.
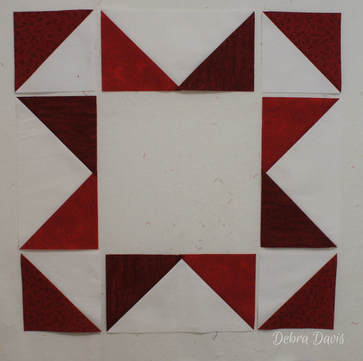
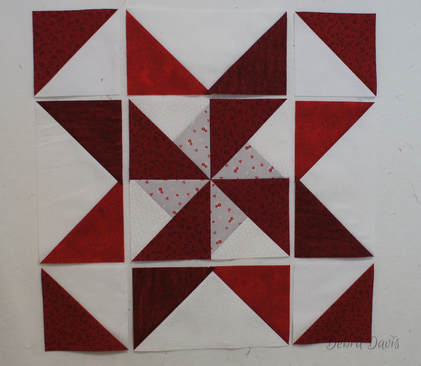
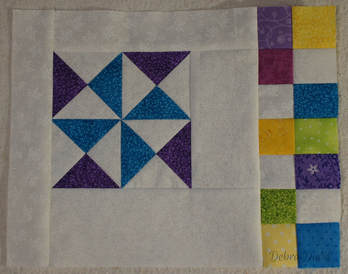
Our star is coming along nicely. Now we just have to make the center section.
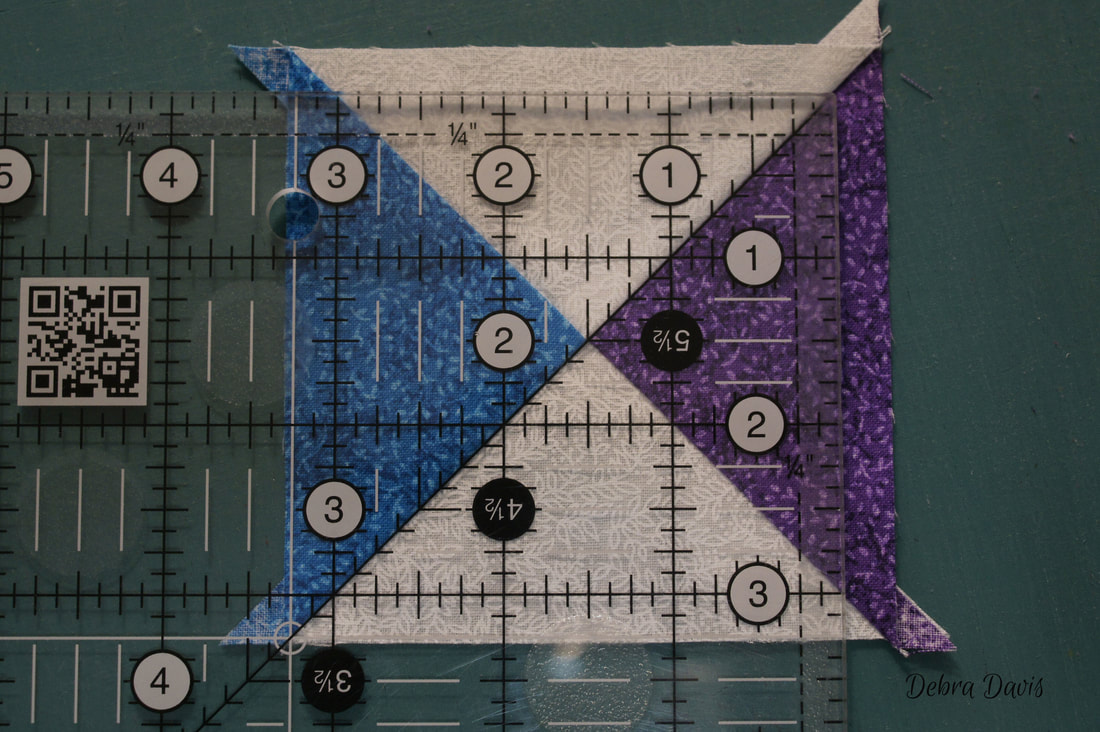
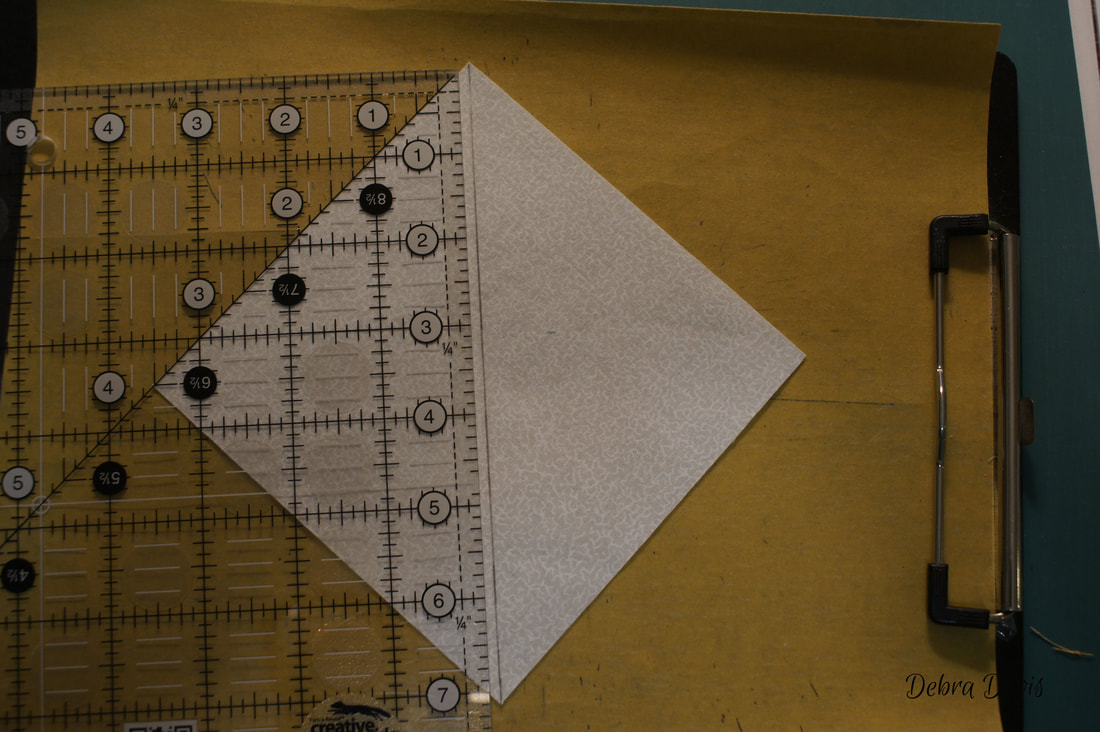
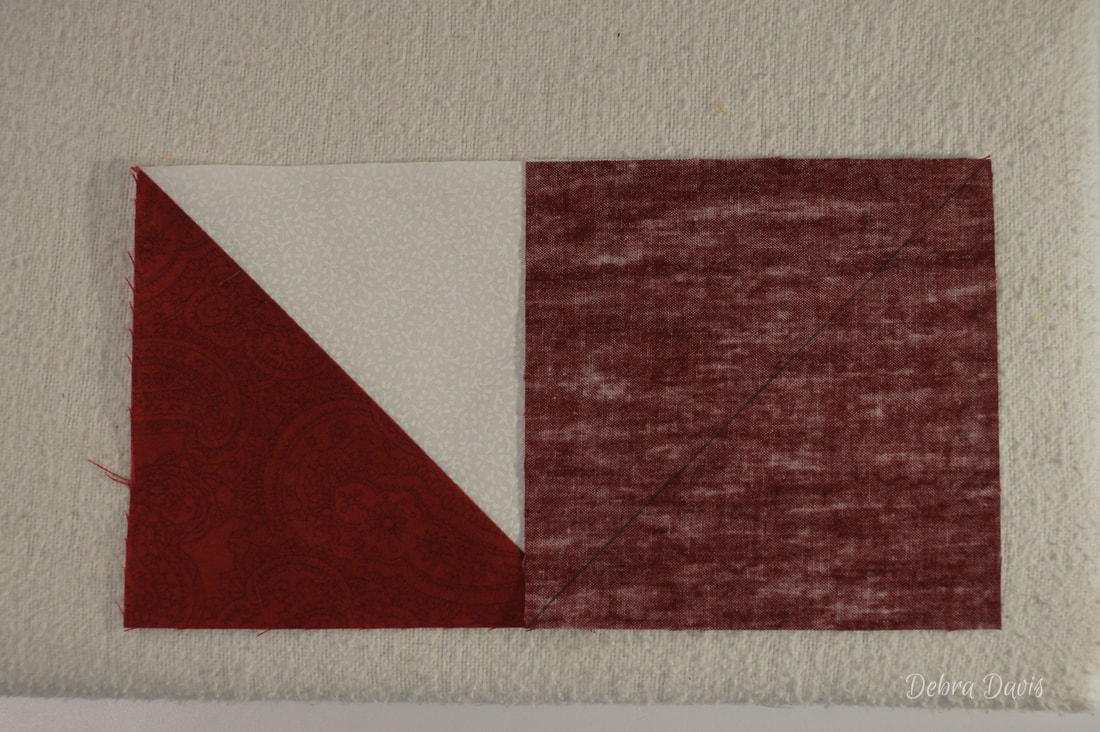
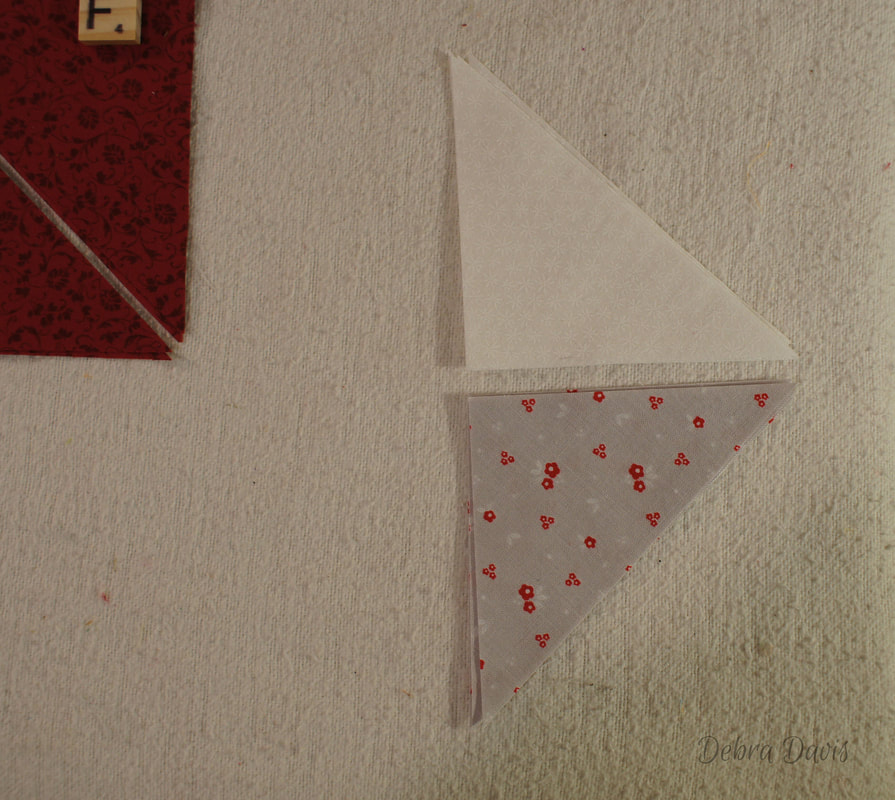
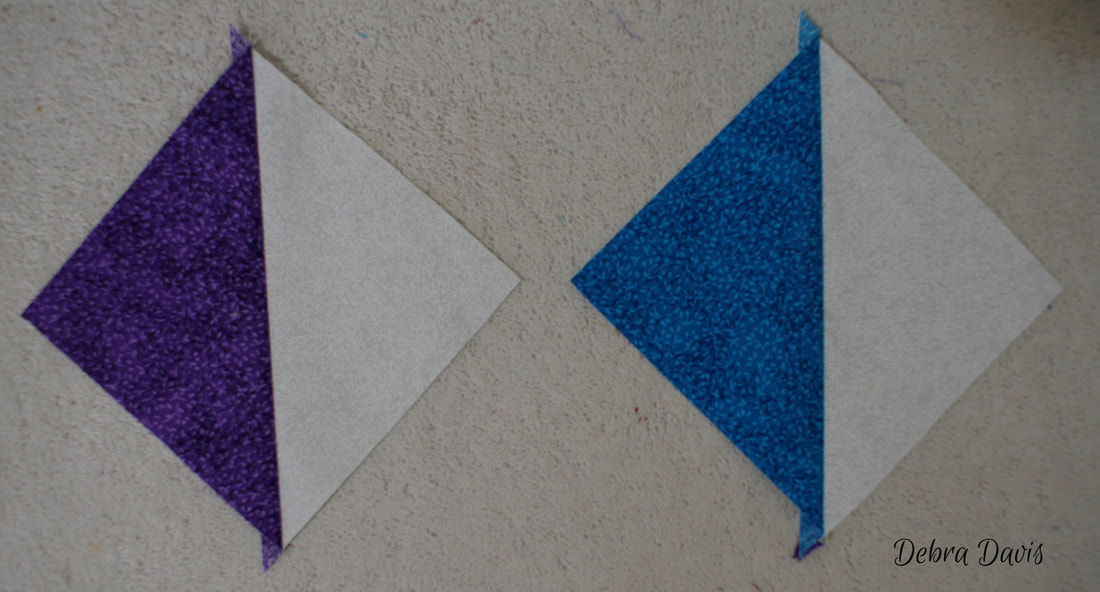
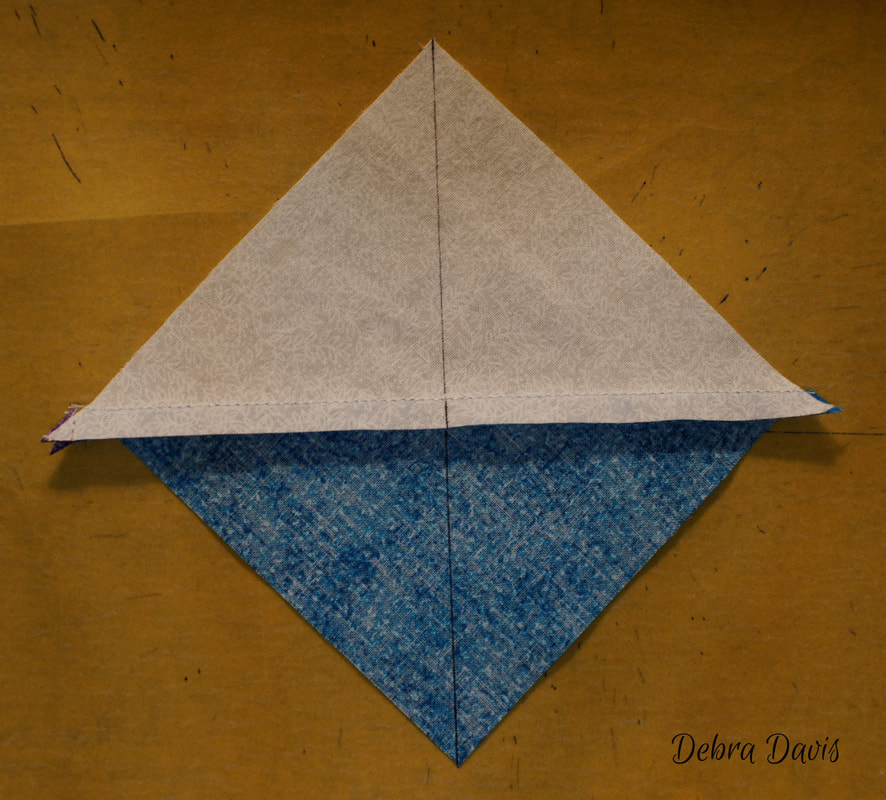
We will use the F, G, and H triangles to make 4 Quarter-square Triangles. Lay out the G and H triangles as shown. We will be joining these together.
With right sides together join them along this edge and press towards the H triangles
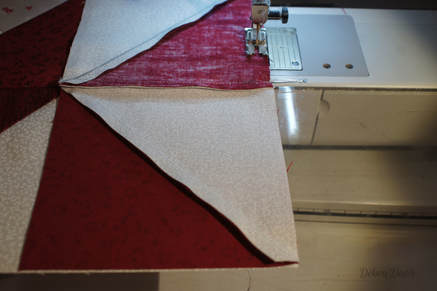
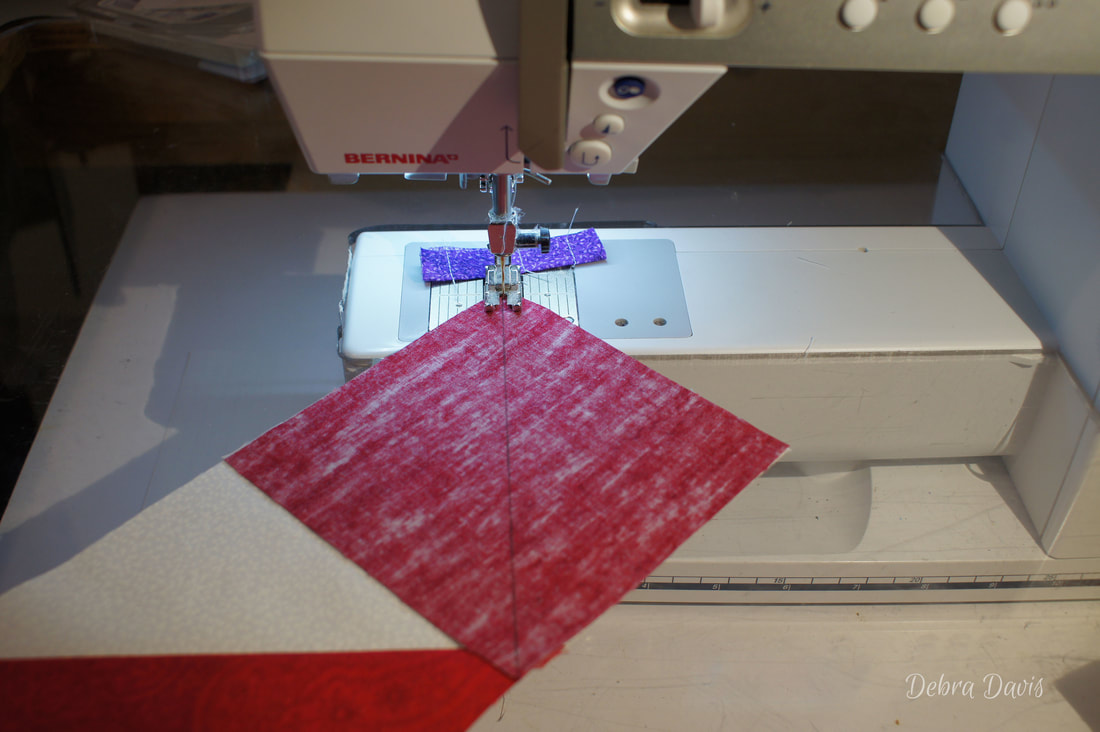
Now lay the F squares on top of the G/H triangle, lining up the points at the top of the triangles.
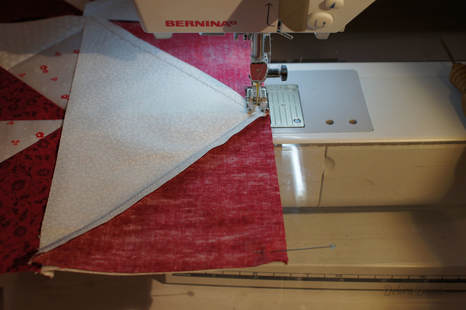
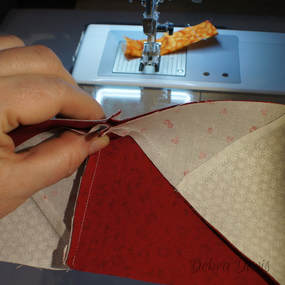
We are sewing on the bias edge here, which can stretch-so just take your time. The biggest improvement to my accuracy in piecing was when I finally learned to slow down.
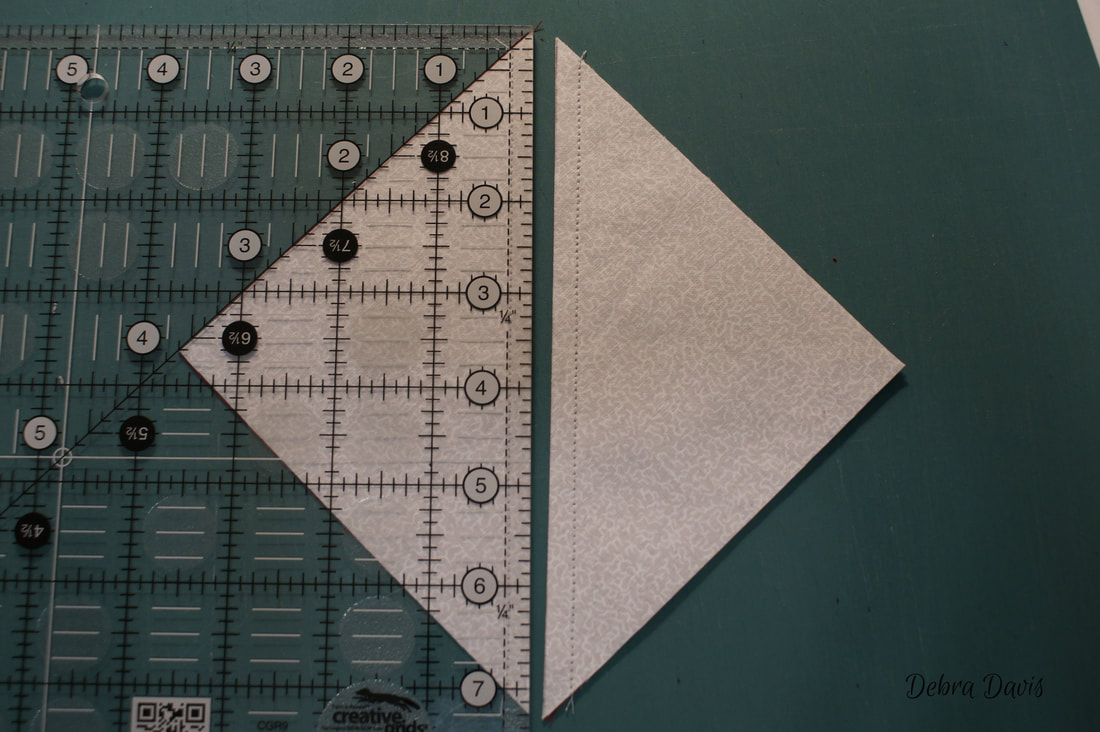
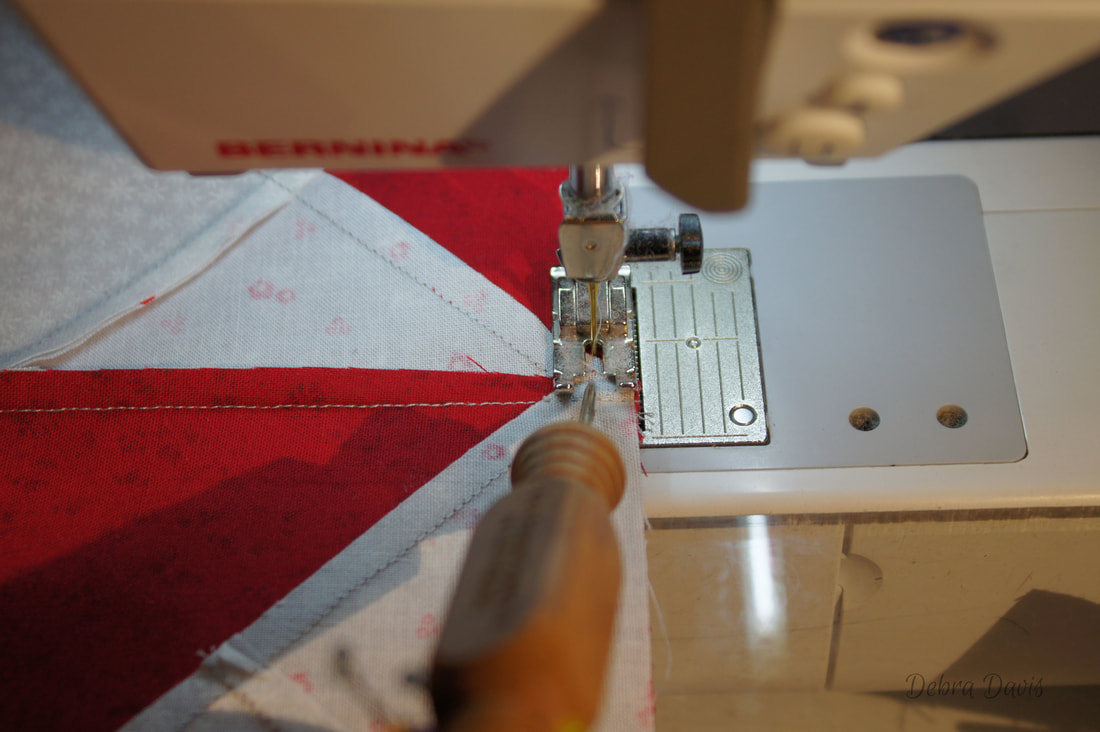
We need to trim these to 4 1/2" squares. I lay my ruler so that the diagonal line is on the G/H seam line. Then I move it so that the 2 1/4" mark is right where all of the seams come together-this is the very center of my block. I also want the top left corner and bottom right corner to come to sharp points along that seam.
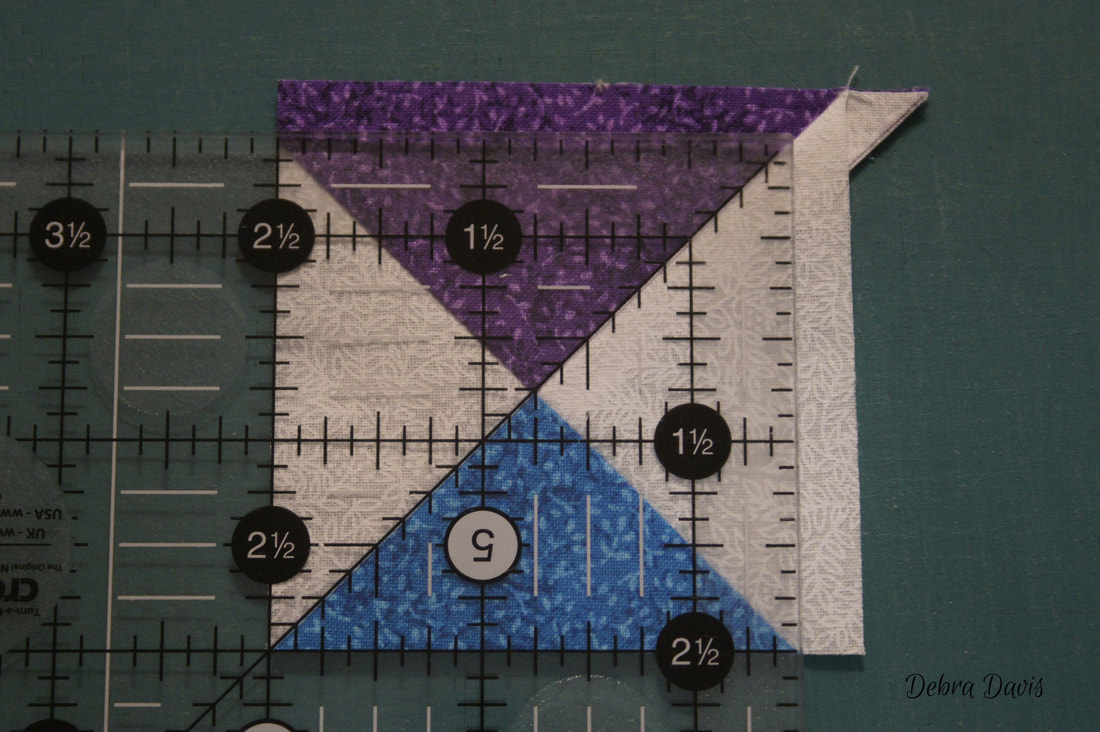
After trimming the first two sides I rotate the block and line everything up again-the most important thing is to make sure my diagonal lines still line up and that 2 1/4" mark is right in the center..
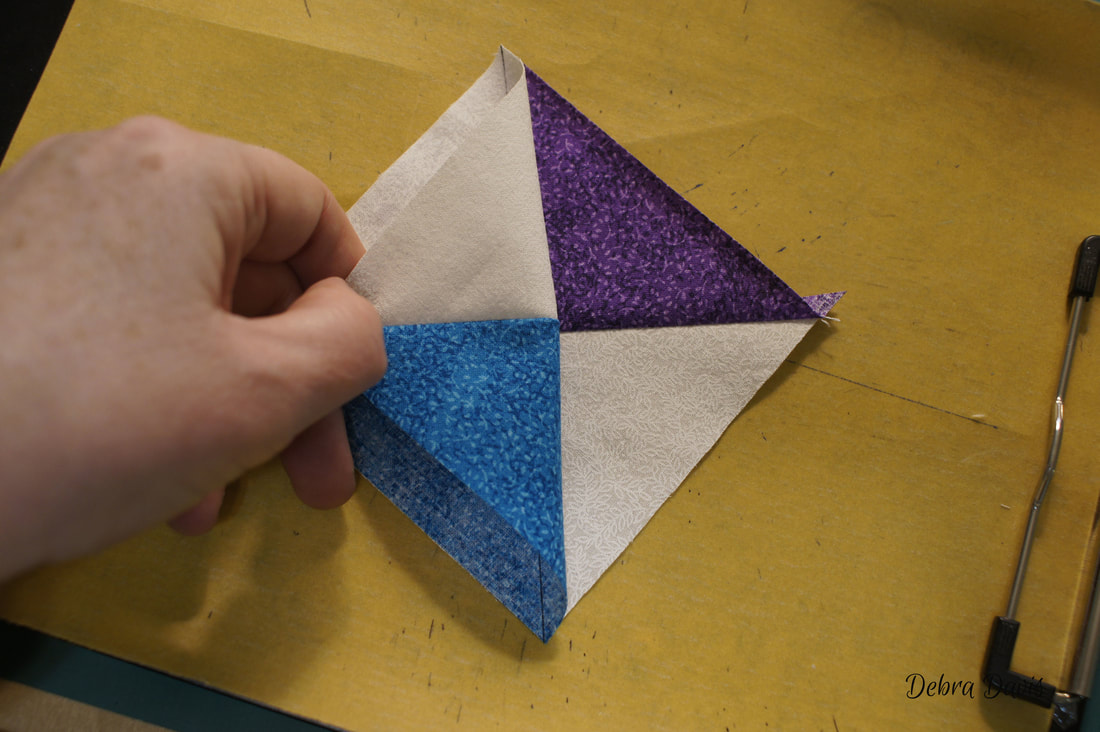
Once all of those units are trimmed they can be arranged to make
the pinwheel for the center of our block.. 
I like how the diagonal seams are locking together so I do not even need a pin
as I join these pairs. 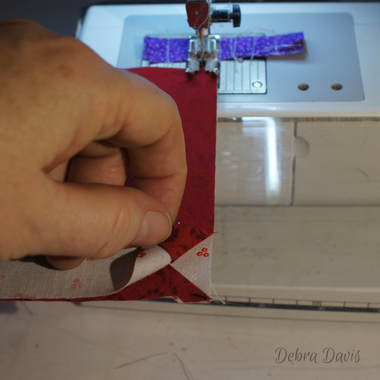
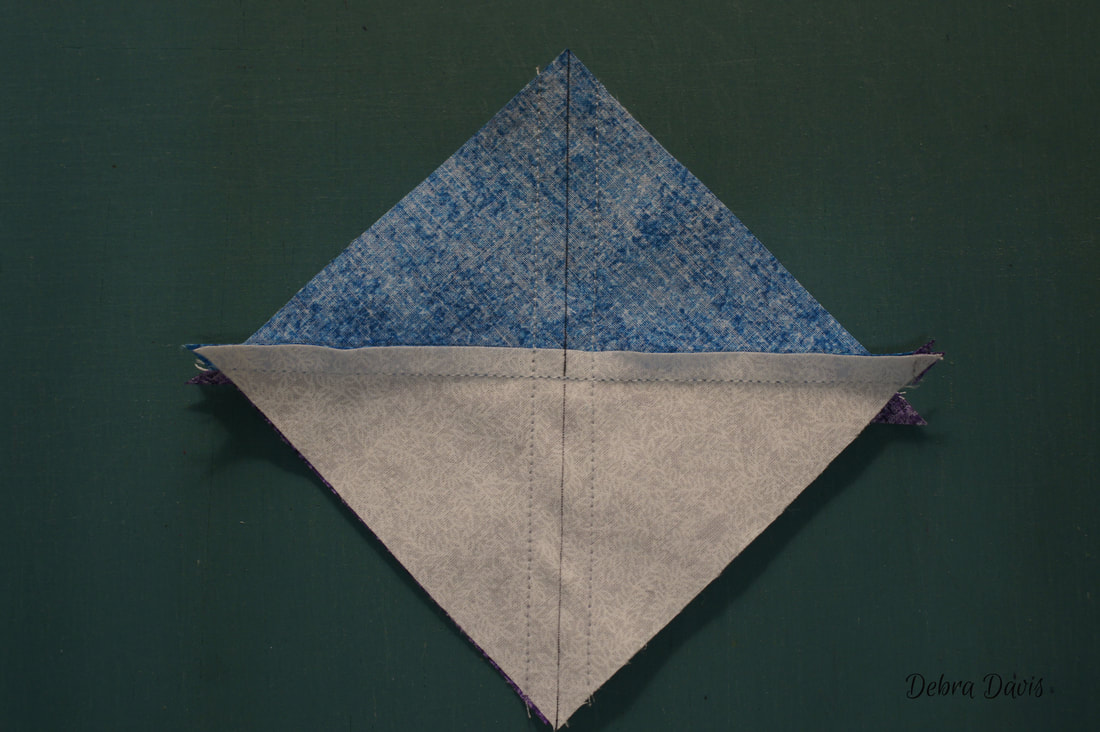
The top row is pressed to the left and the bottom row is pressed to the right.
Pressing this way will make the two rows go together so much better. 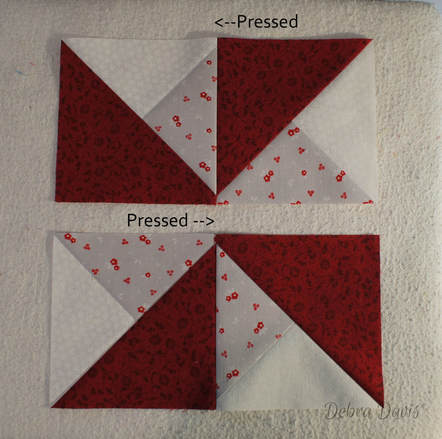
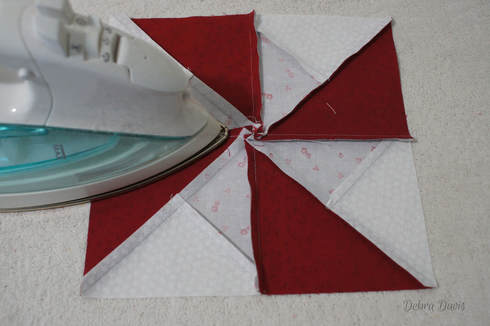
Now we just join the rows-and because of our careful pressing the locking seams are facing so that we do not even need to pin them in place. A stiletto does help to guide that bulky seam.
I fanned the seams here, using my iron to set the seam from the back first, and then flipping it over to press from the front.
This center pinwheel unit should measure 8 1/2" x 8 1/2"
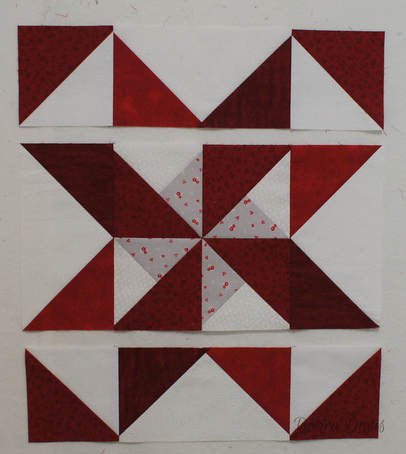
And look at that-everything is ready to be sewn together now.
As I joined together into rows, the only pin I placed was at the bottom of the center section just to keep things even as I sewed.
The rows are together and I pressed the top and bottom towards the corner units and the middle row towards the center pinwheel.
I used very few pins when joining the rows together-only pinning at the intersections where the top seam was facing away from my needle.
And another block is finished.
So what am I going to do with those triangles I had left over after trimming the Flying Geese?
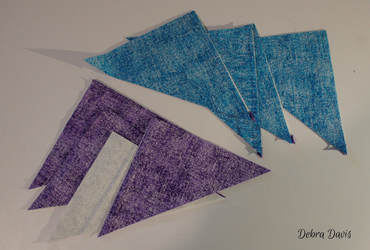
Make Mug Rugs and coasters of course!

I sew the triangles together along the bias edge which gave me these Half-square Triangles.
For the size needed to make the mug rug I trimmed the HST's to 3 1/2"
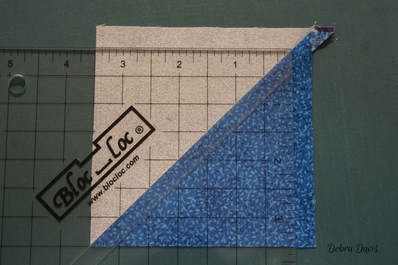
I then drew a line down the middle of one set of HST's and joined them with the other set to make hourglass units.
To do that just sew 1/4" from each side of the drawn line. Cut apart and press open.
For the coaster I trimmes these to 3 inches (Center point is 1 1/2" along that diagonal line.)
For the Mug Rug I trimmed to 2 1/2" using 1 1/4" as my center mark.
Then I joined the hourglass units to make a whirligig block:
For the Mug Rug it measures 4 1.2" square. The trimmed size of my coaster is 5 1/2" 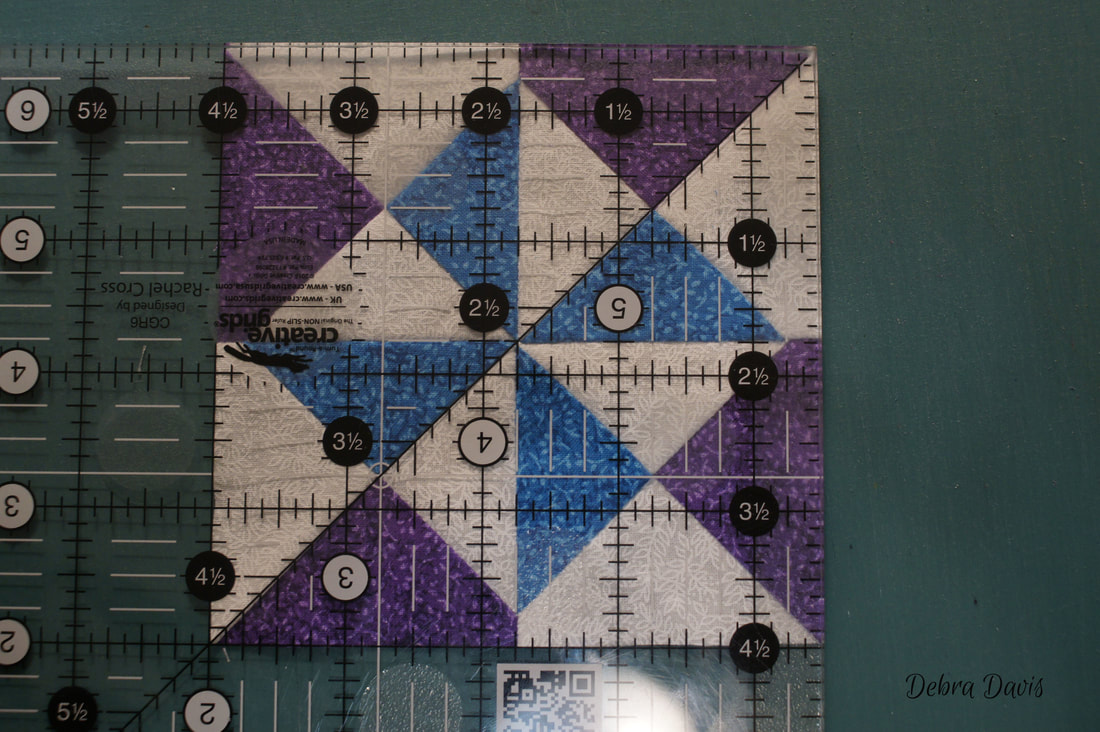
I need to add the finishing touches before quilting and binding. I think it will be pretty using the leftover triangles from my red and white block too.
If you are interested in purchasing the pattern for this Mug Rug
just click on the photo. 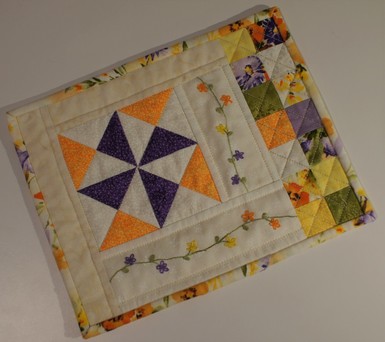
Summer Whirligig Mug Rug
Until next week...
Happy Quilting! 
Roxanne Mennenga
3/20/2018 03:31:12 am
Would do I see the blocks people summitted.?
Debra
3/20/2018 09:21:21 am
Hi Roxanne,
Debra
3/23/2018 02:57:37 pm
Thank you! Comments are closed.
|

Welcome to the site of Debra Davis-a woman who loves the Lord and loves to quilt.
My other blog where I share about my walk of faith:
Sitting at His Feet 
|


 RSS Feed