|
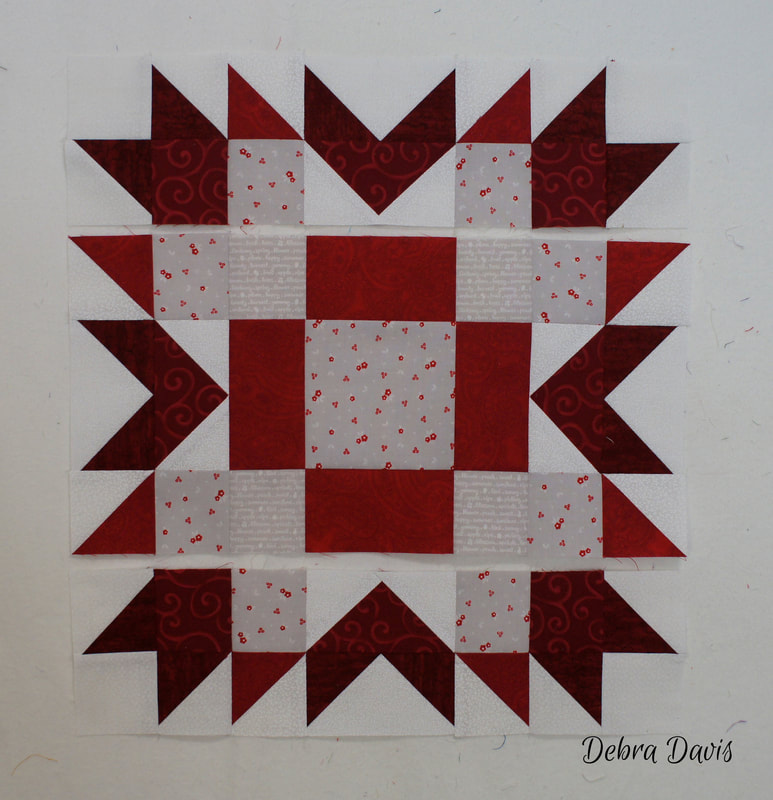
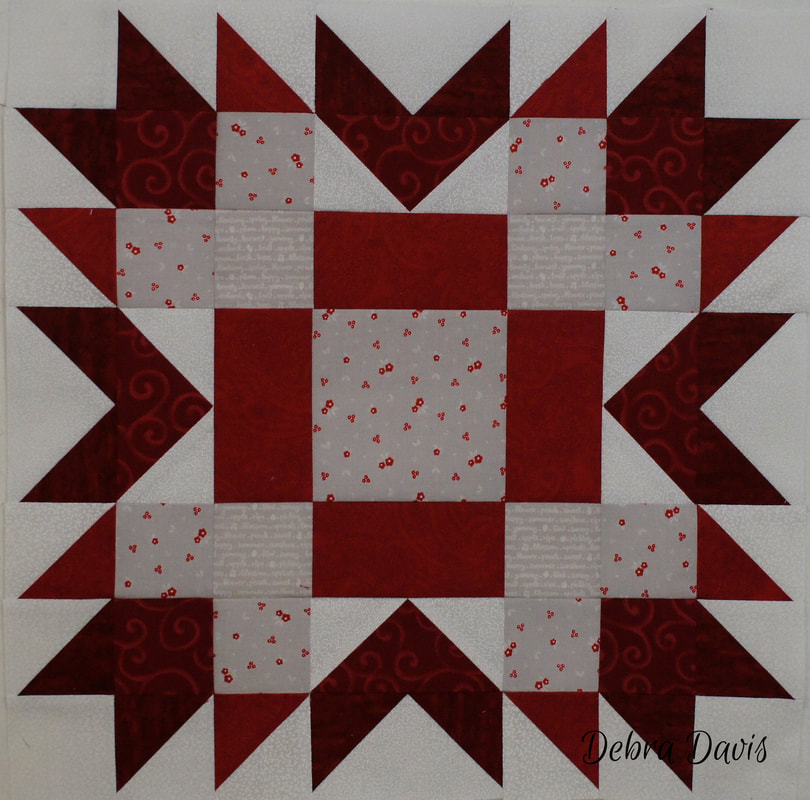
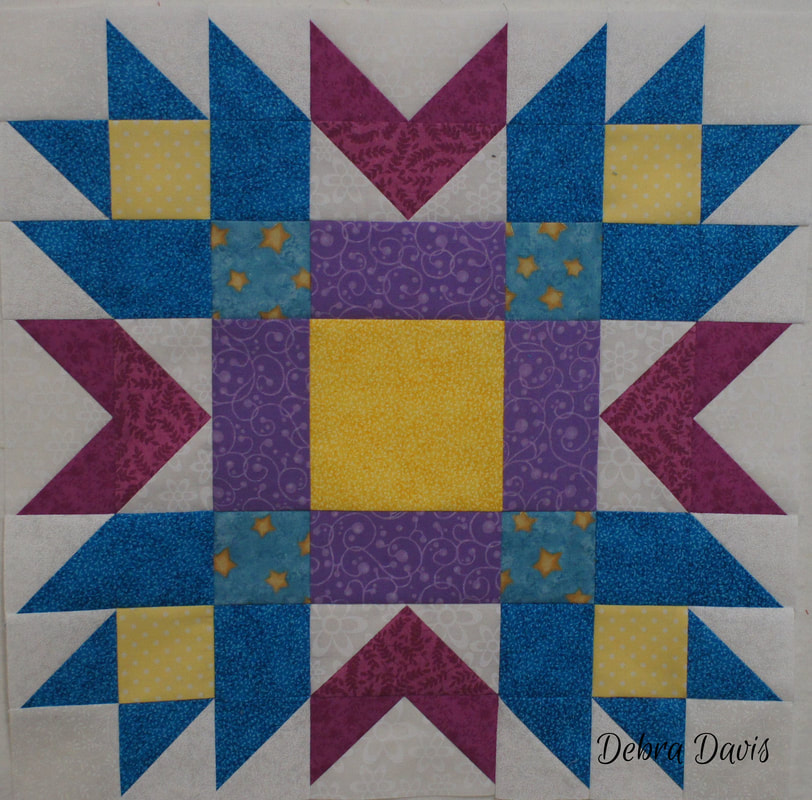
It's Monday and you know what that means--time for the next block in my Sew Along. This week's block is one I came up with while playing with my quilt design software-I decided to call it Puzzled Star. We have had a cold and snowy week here in Oregon and when I started putting this block together for my color version I was reminded of a colorful summer garden full of flowers so I did not stop at one, but made two color versions. And look how different they are when you change things up a bit. The one on the left is the one I designed for my quilt-but then I wanted to see what would happen if I popped in some more yellow and added a bit of my fuschia's. I may have a tough call as to which one makes the final cut!
Click on the link for a pdf of Block 5
There are a lot of pieces to keep track of on this Block so I do recomend that you find a way to label your pieces. Do not be intimidated by all of those pieces-it will go together quite easily with the skills you have gained on the previous blocks.
Starch is going to be your friend on this one. 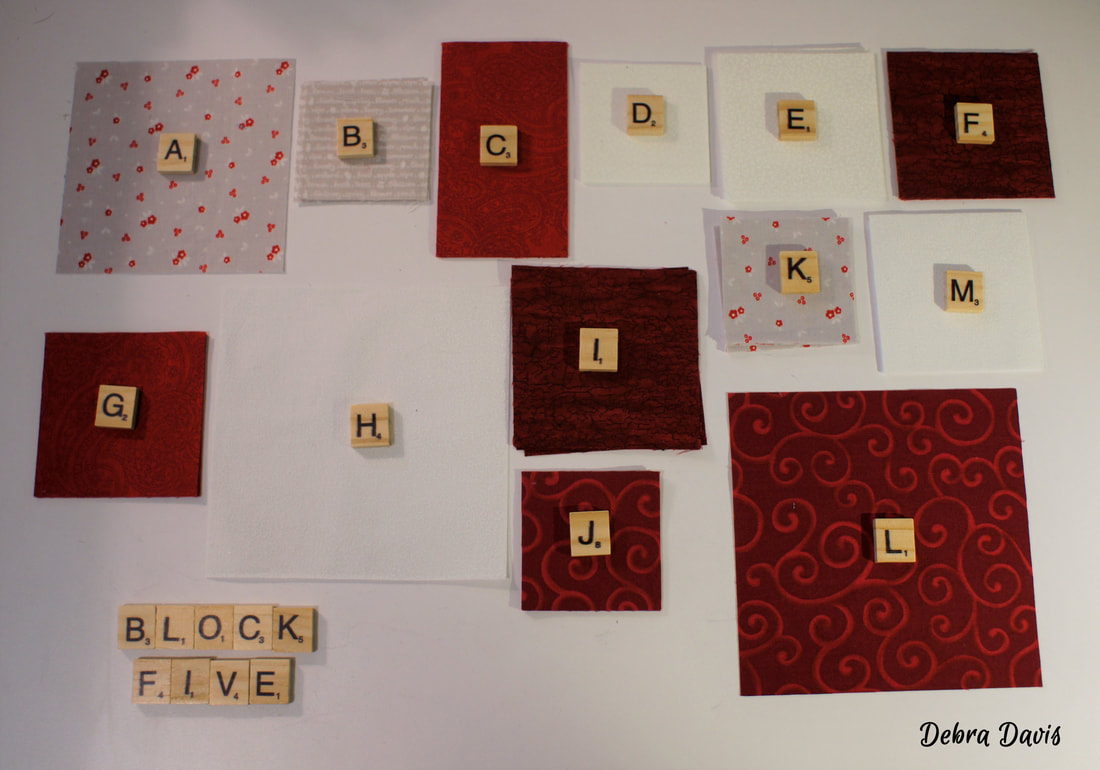
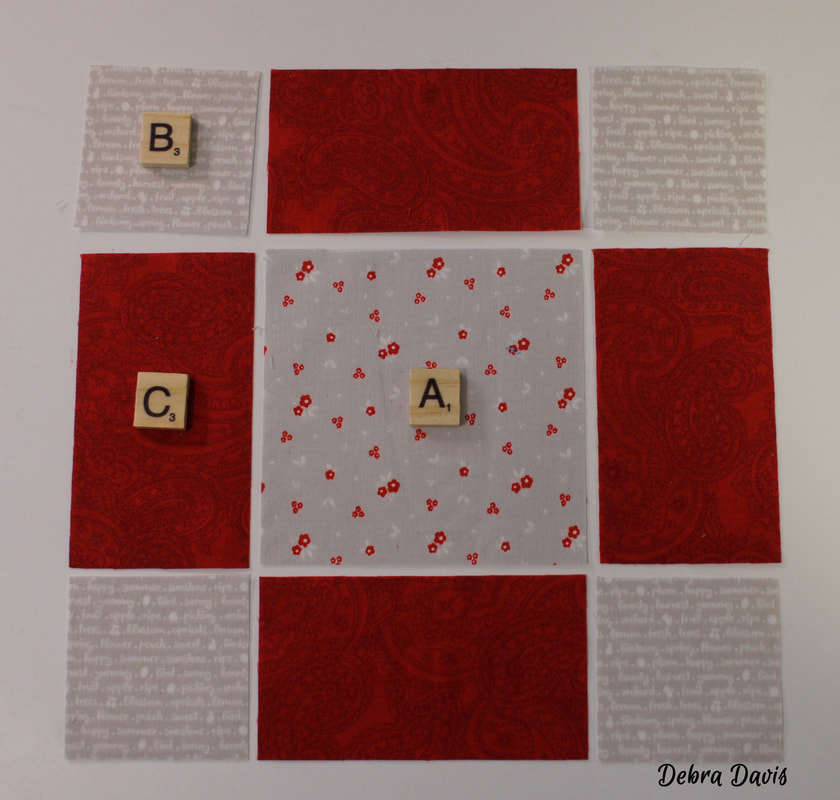
I am going to start by making the Center Section using the A, B and C fabrics. I need to sew two C rectangles to each side of the A square. I also need to sew the B squares to each end of the remaining two C rectangles. I laid out all of my pieces at once and chained-pieced them.
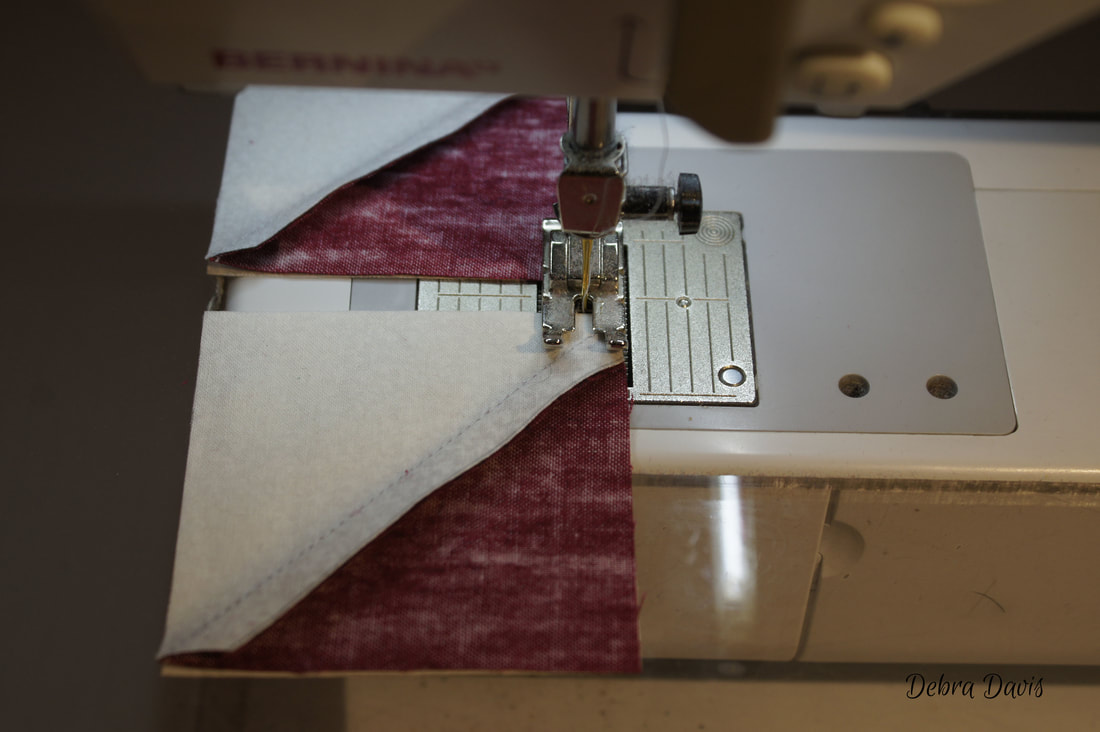
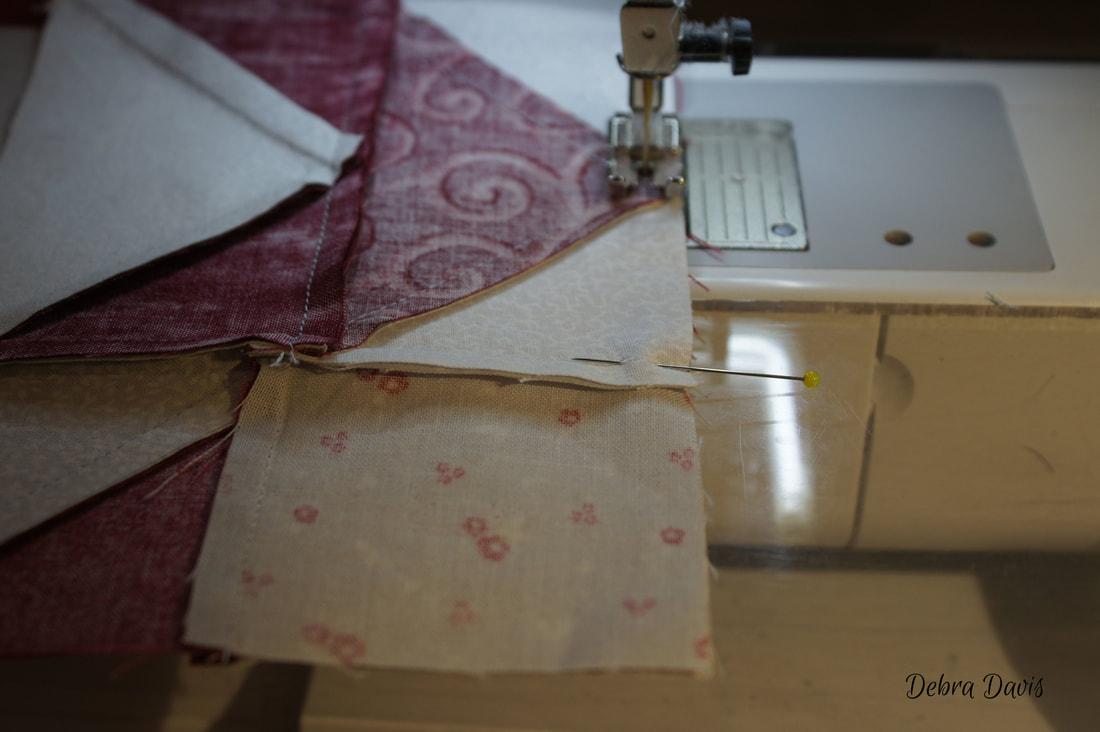
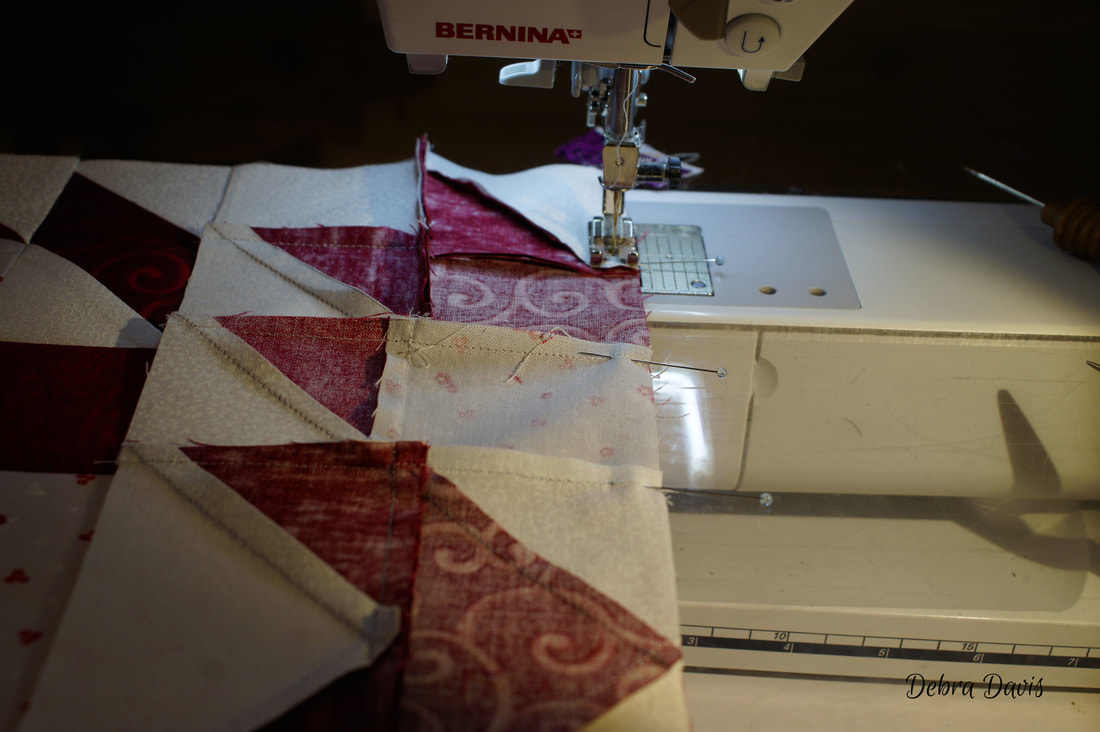
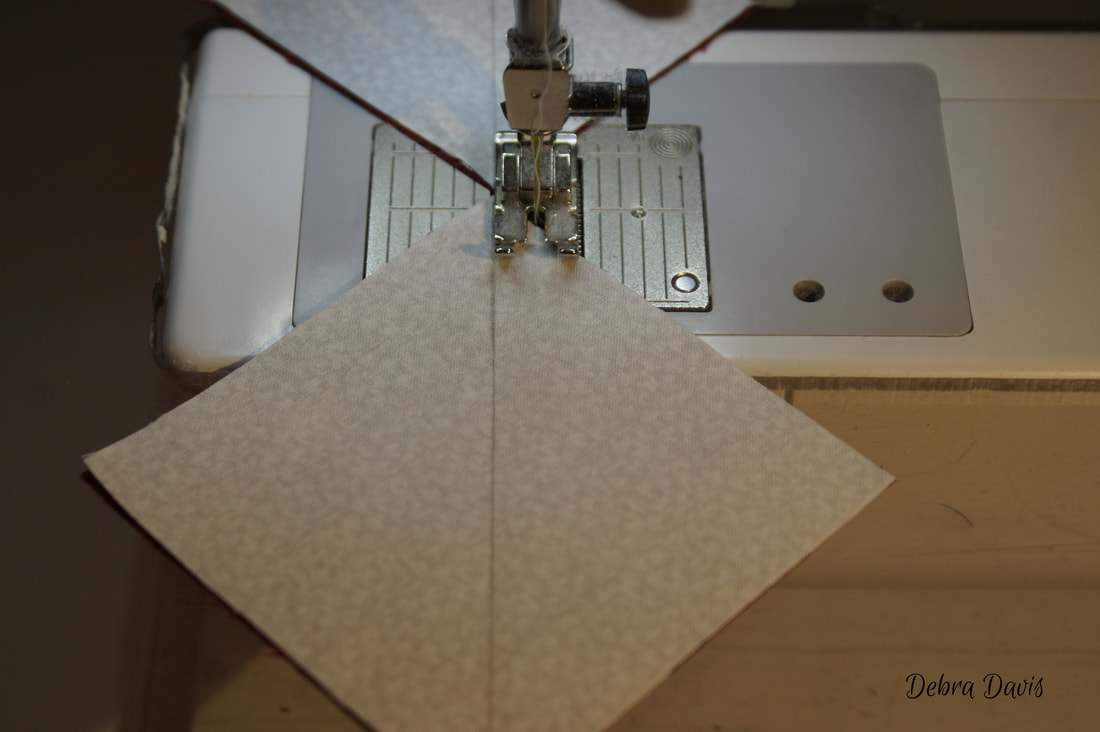
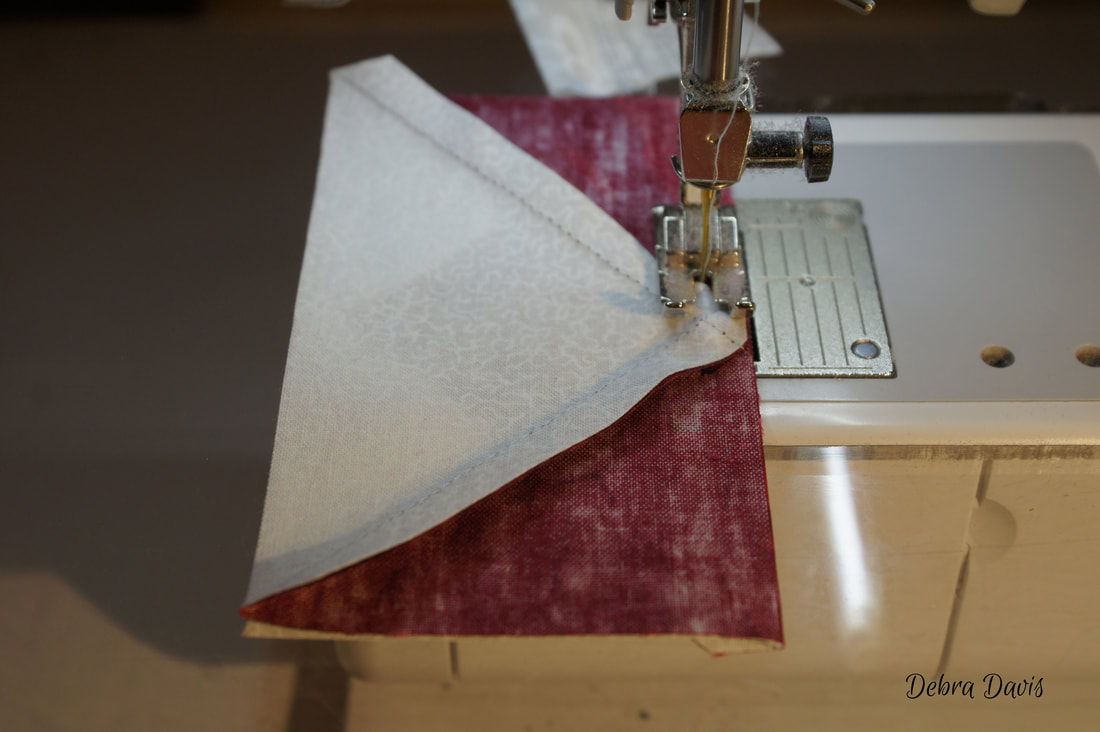
Pretty simple straight stitching but I wanted to take the time to share how important sewing a straight 1/4 inch seam is. On my Bernina the throat plate has markings for the 1/4 inch seam which I have found to be quite accurate. I also have the tendency to not have my pieces squared up to the horizontal lines on the foot plate. Have you ever noticed that the stitches at the beginning and end of your sewing can sometimes veer off of straight? Lining things up to begin with can help, as well as making sure you are sitting straight on at your machine...sitting so the needle is centered in your line of vision, not off to the left or right. Another key here is to start with the fabric under yout presser foot and right up next to your needle.
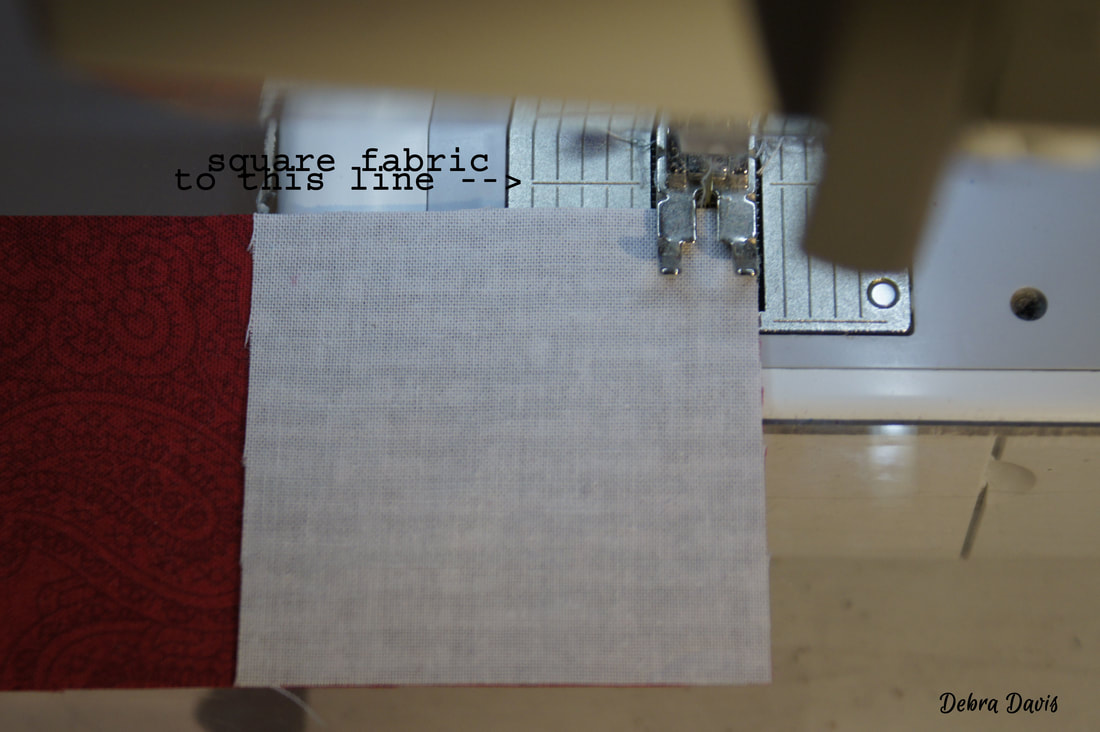
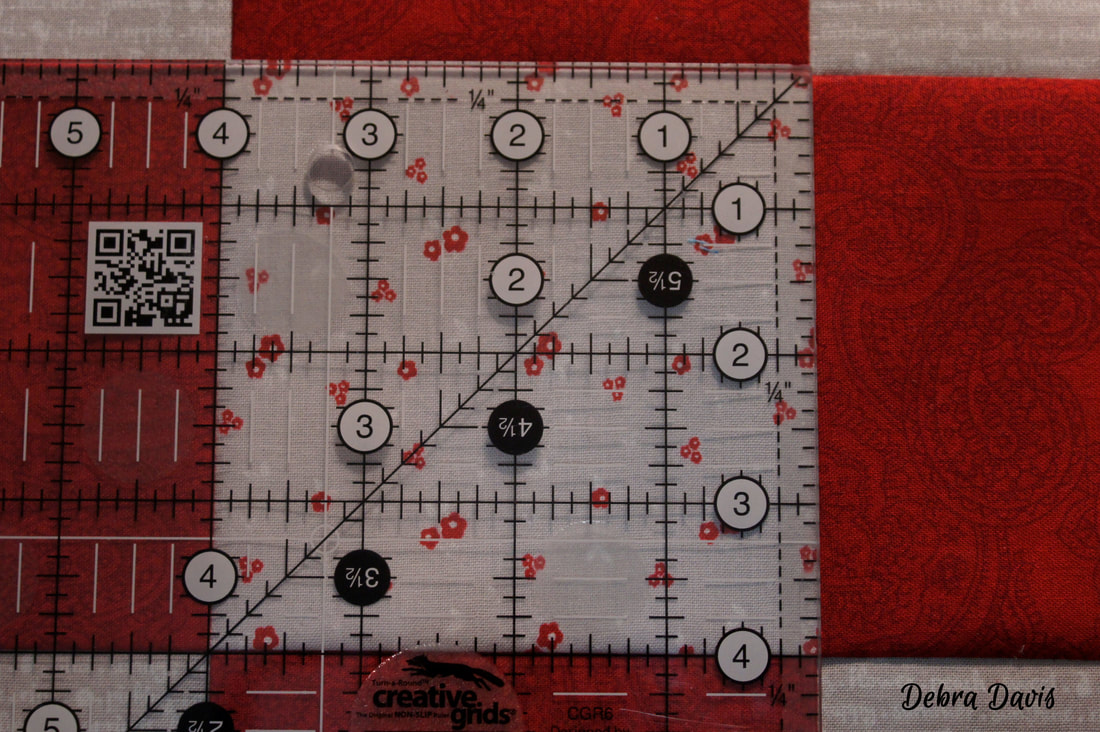
This is an exageration of starting crooked but shows that 1/4 inch mark (in the black circle) that I make sure I line up the edge of my fabric with. I tend to watch my fabric along this mark rather than looking at the needle when I sew. I can still see what is happening under my needle
when I need to pay attention to a pin or am coming to a seam that I want to watch closely, but it is not where I focus my attention. 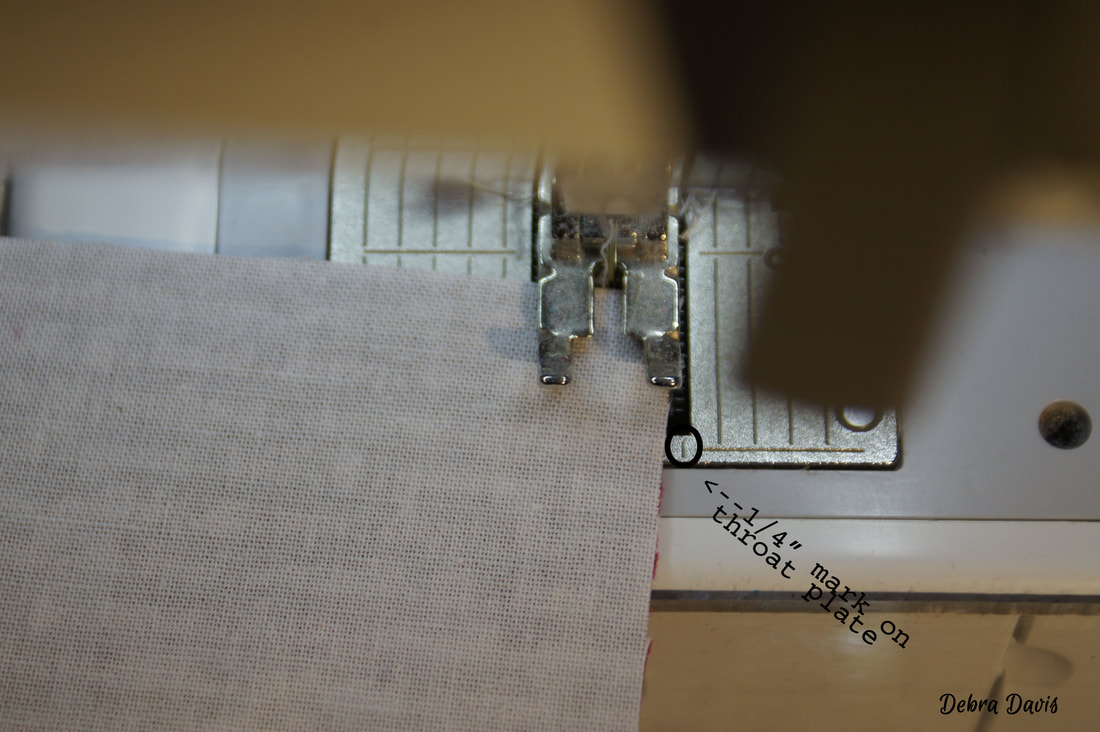
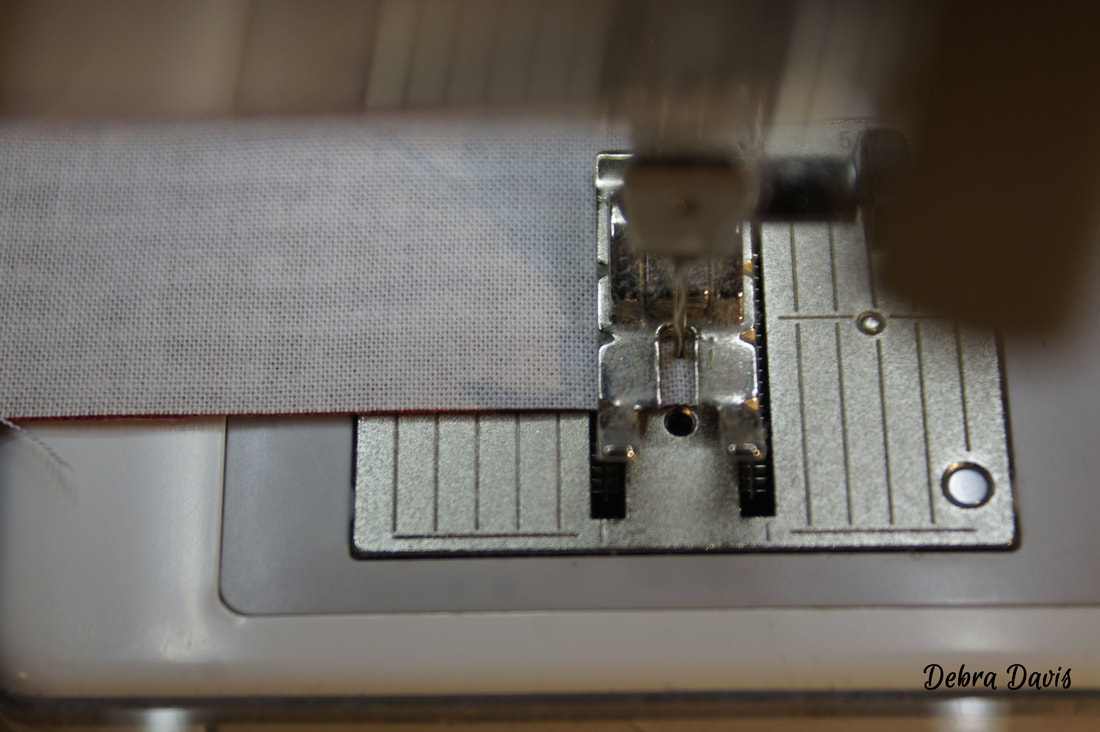
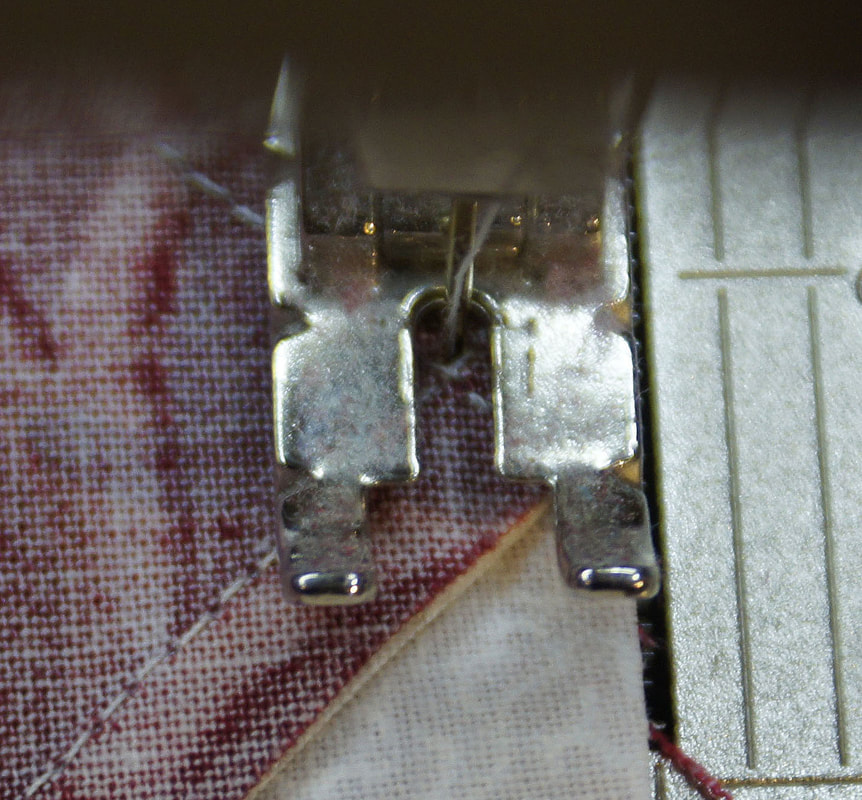
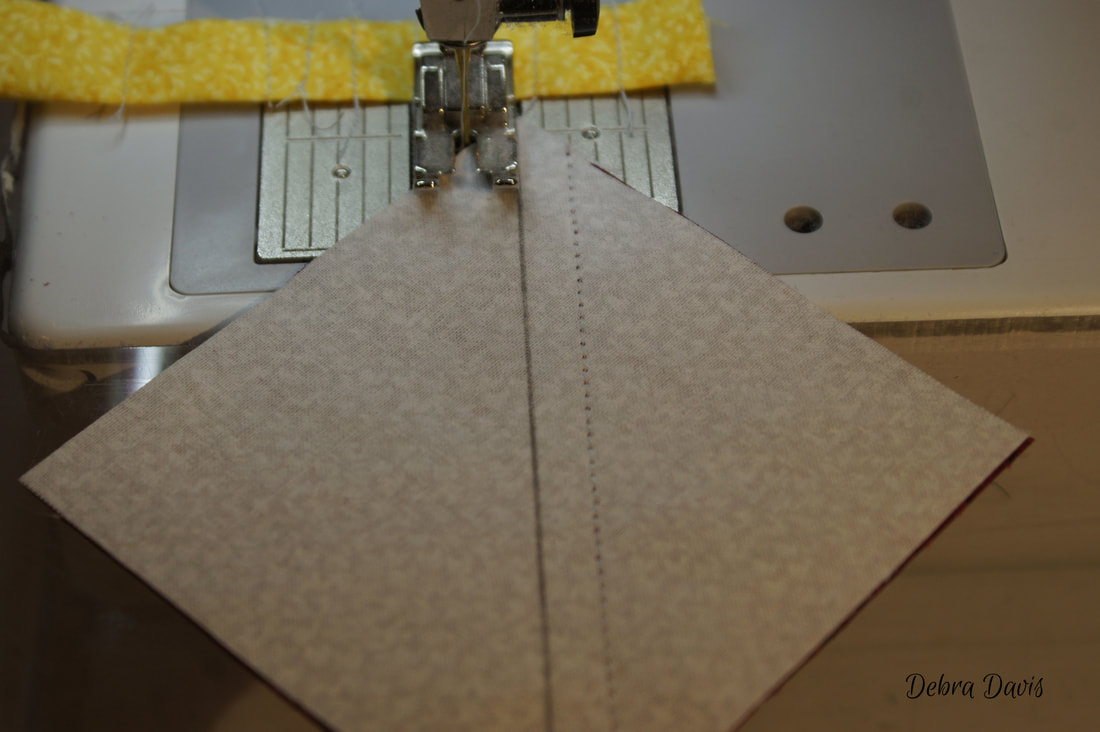
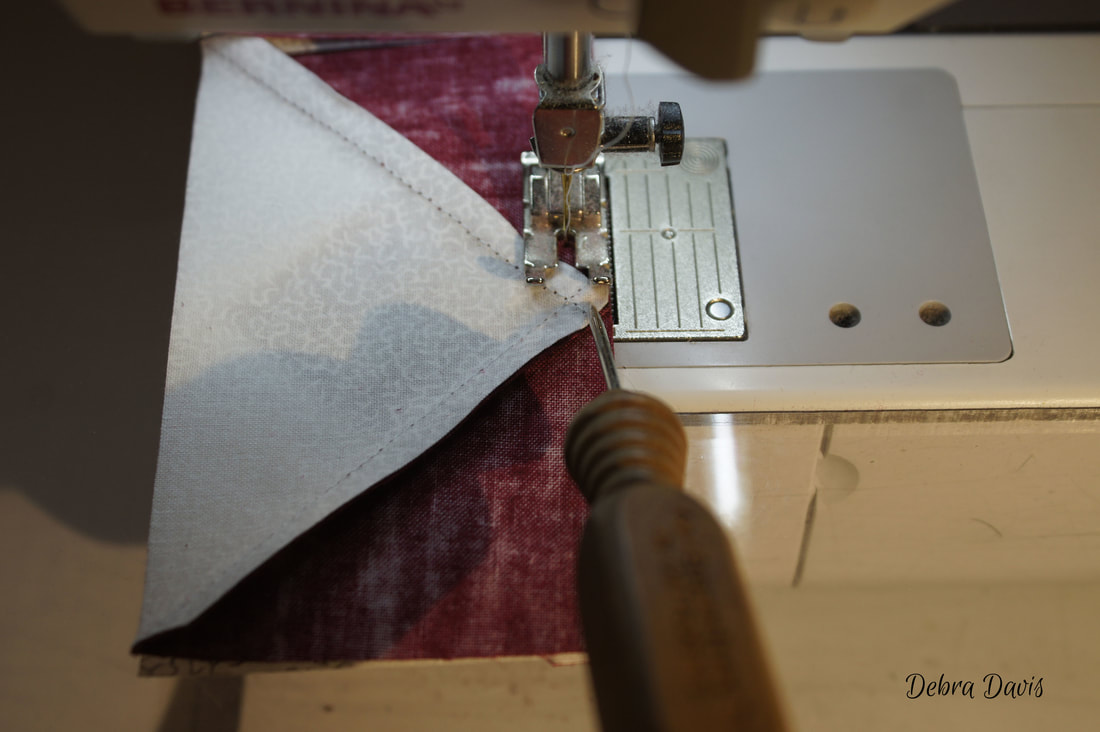
As I finish sewing I want to make sure I am just as straight as at the start-this is where the indentations on my presser foor come in handy-as well as an eye for how I am lined up with the horizontal marks on the throat plate again. Keeping everything square is important. I also need to make sure that I do not rush my sewing and do not get lazy about paying attention to these details.
Now that those rows are sewn together it is time to press them.
In each case I pressed towards the C rectangles. 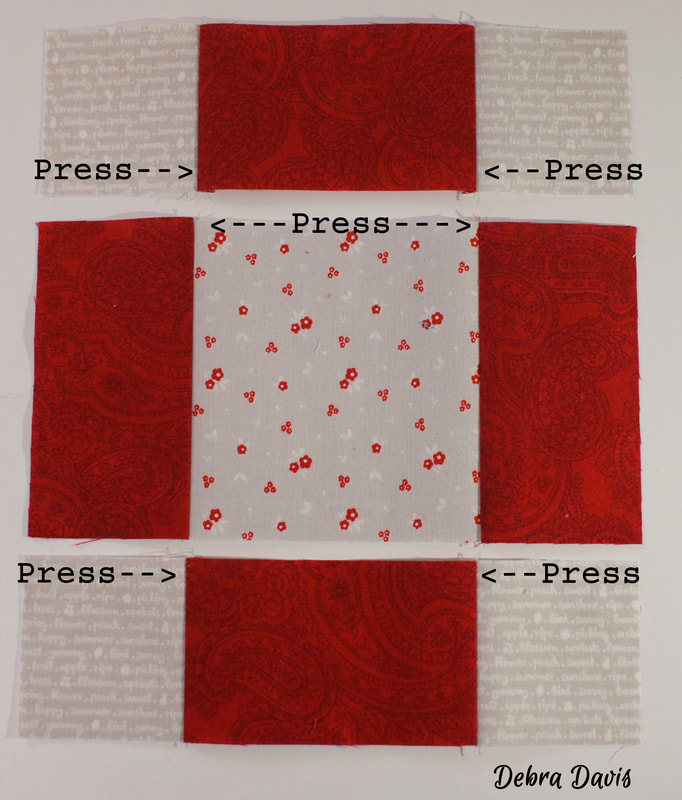
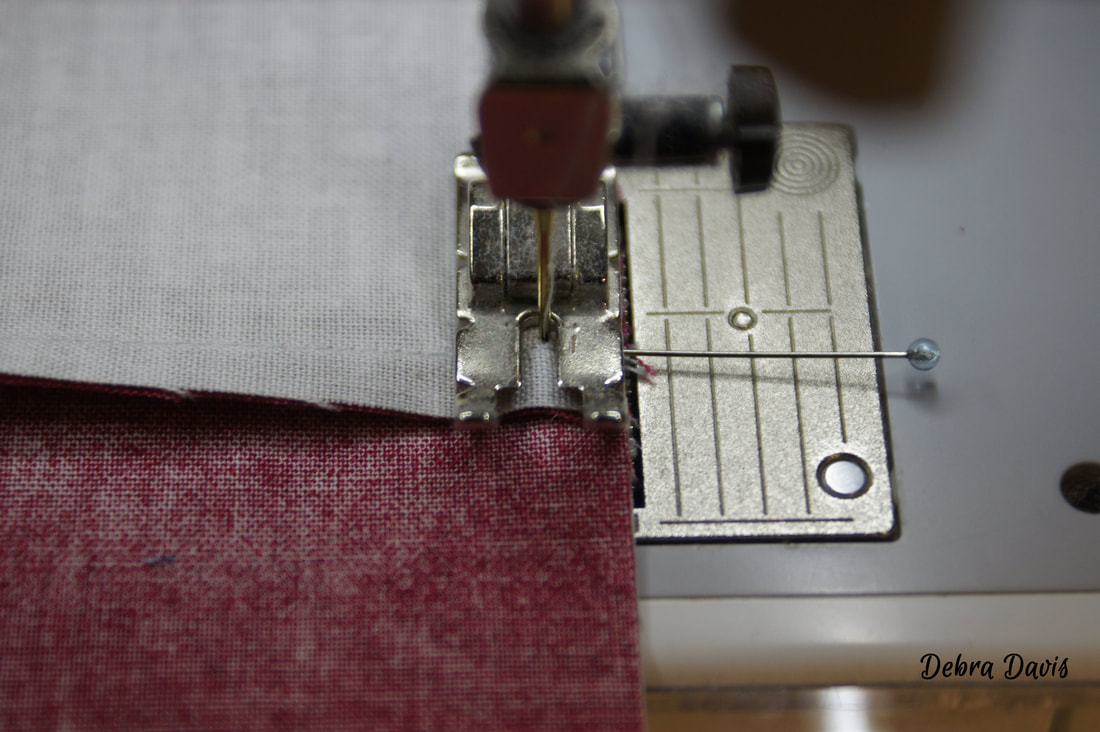
Even though the seams lock together since they are pressed in opposite directions I still placed a pin where the seam on top was facing away from my needle.
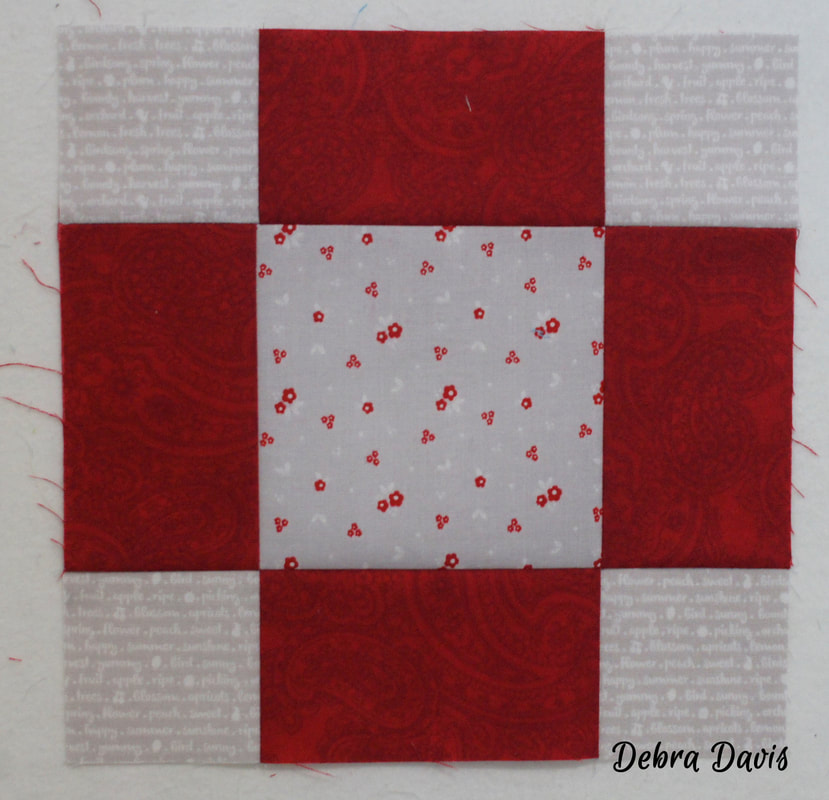
To check my accuracy I measure the A square which should now measures 4" x 4"...and it does...Perfect.
And the Center Section measures 8 1/2" x 8 1/2"
Next I move on to making the Corner Sections.
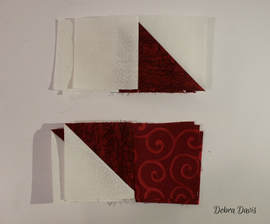
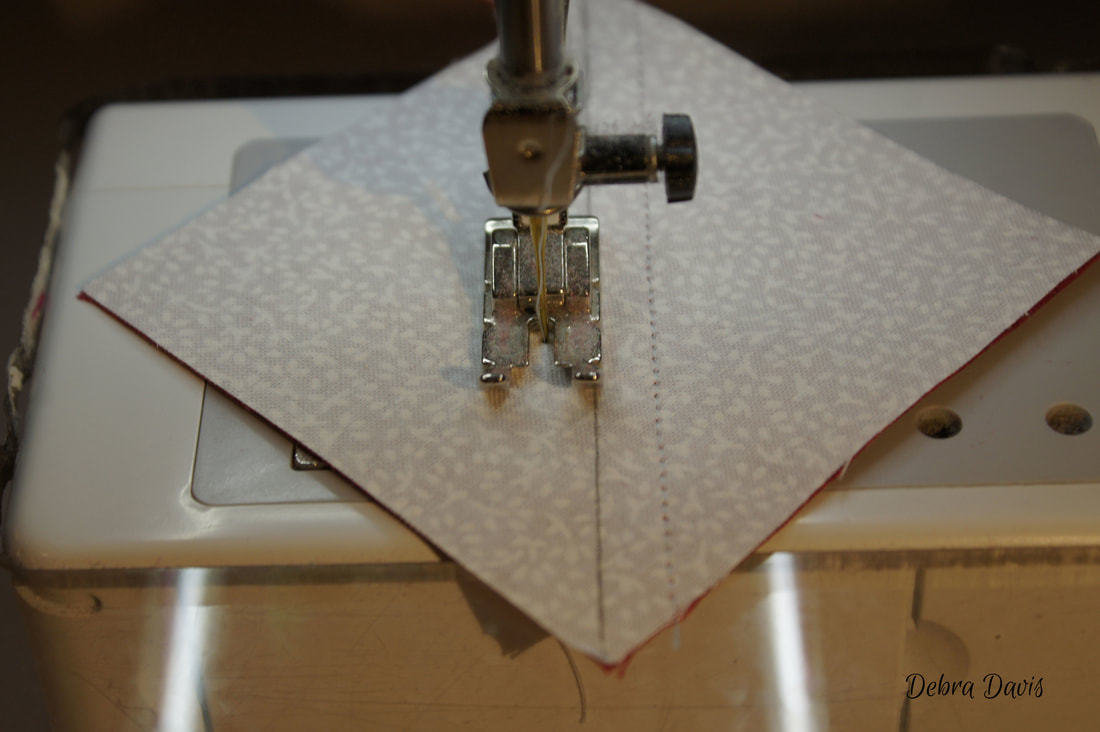
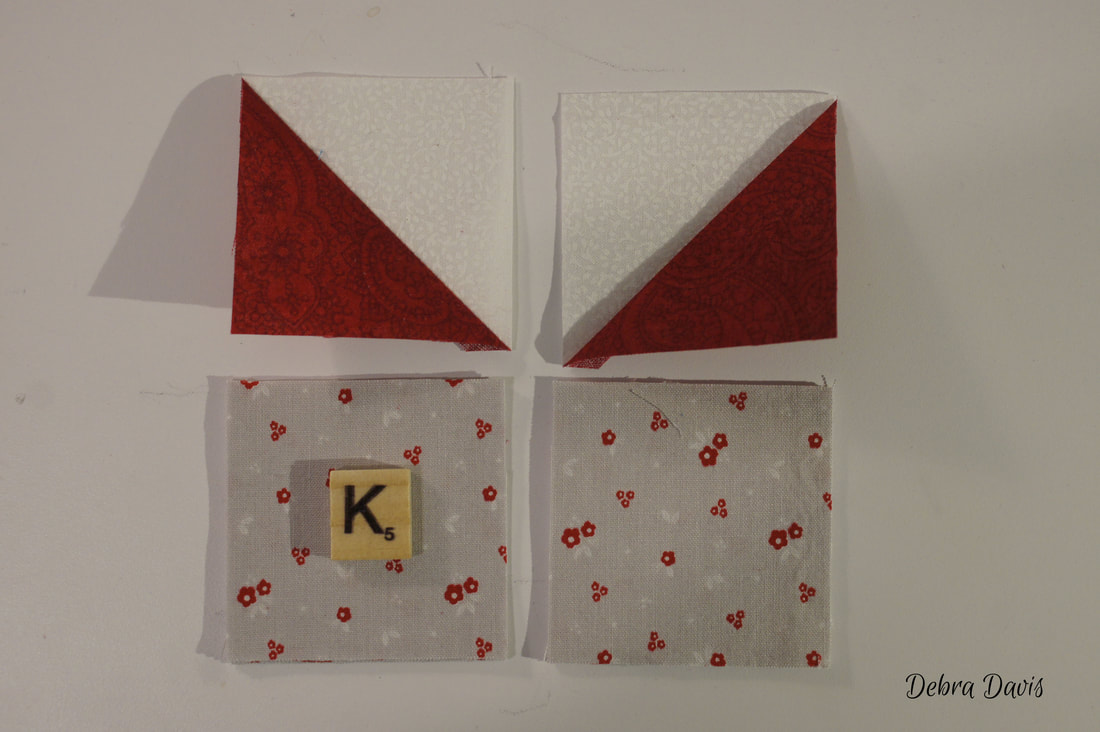
To begin I will be making four Half-square Triangles so I draw a diagonal line on the back of four of the E squares. (The other four E squares will be used later.) I place these right sides together with the F squares.
I sew 1/4 inch from each side of the drawn line.
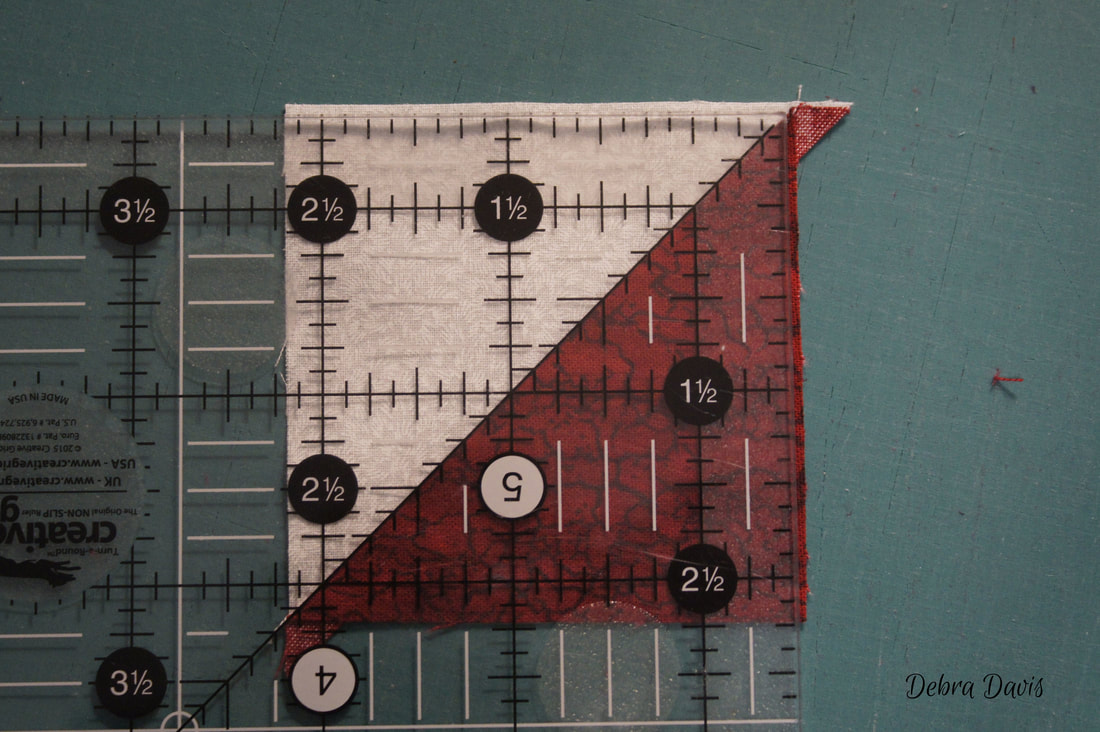
Cut apart on the drawn line and press towards the dark side.
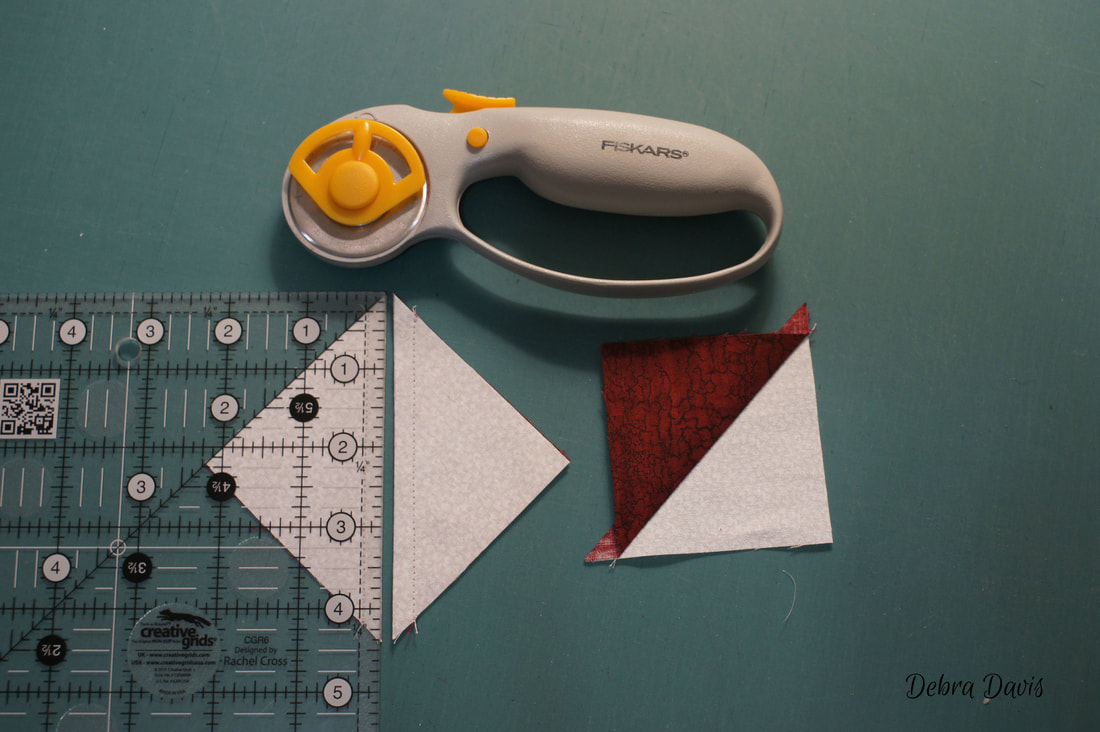
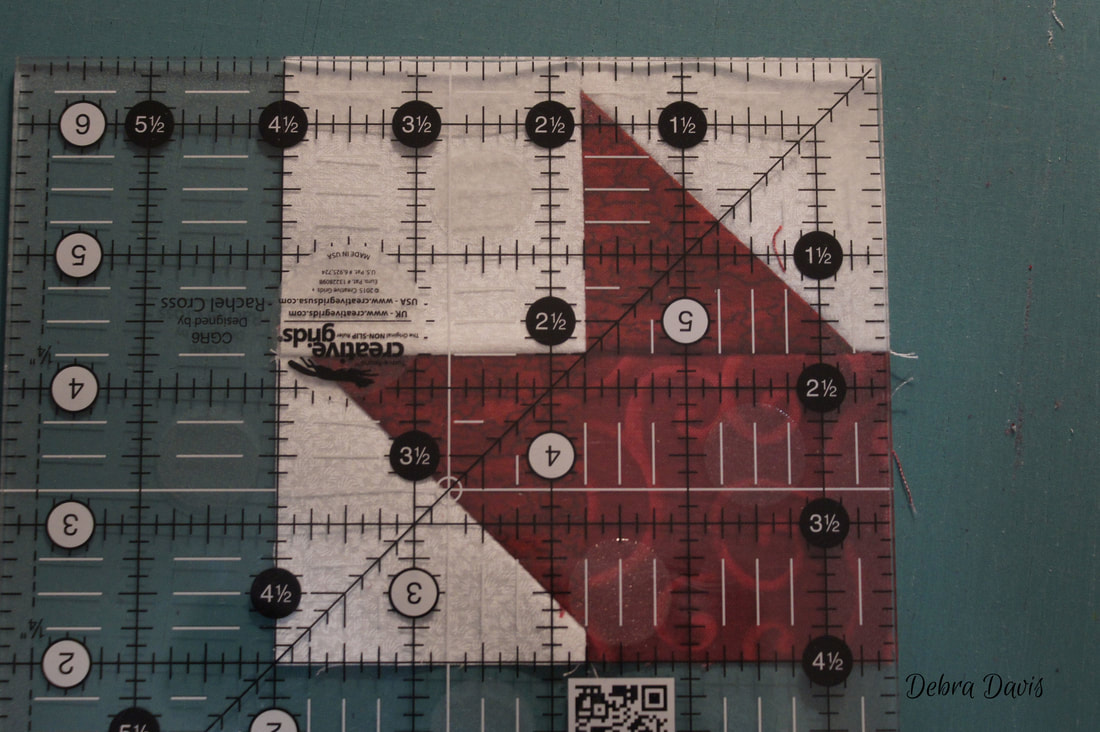
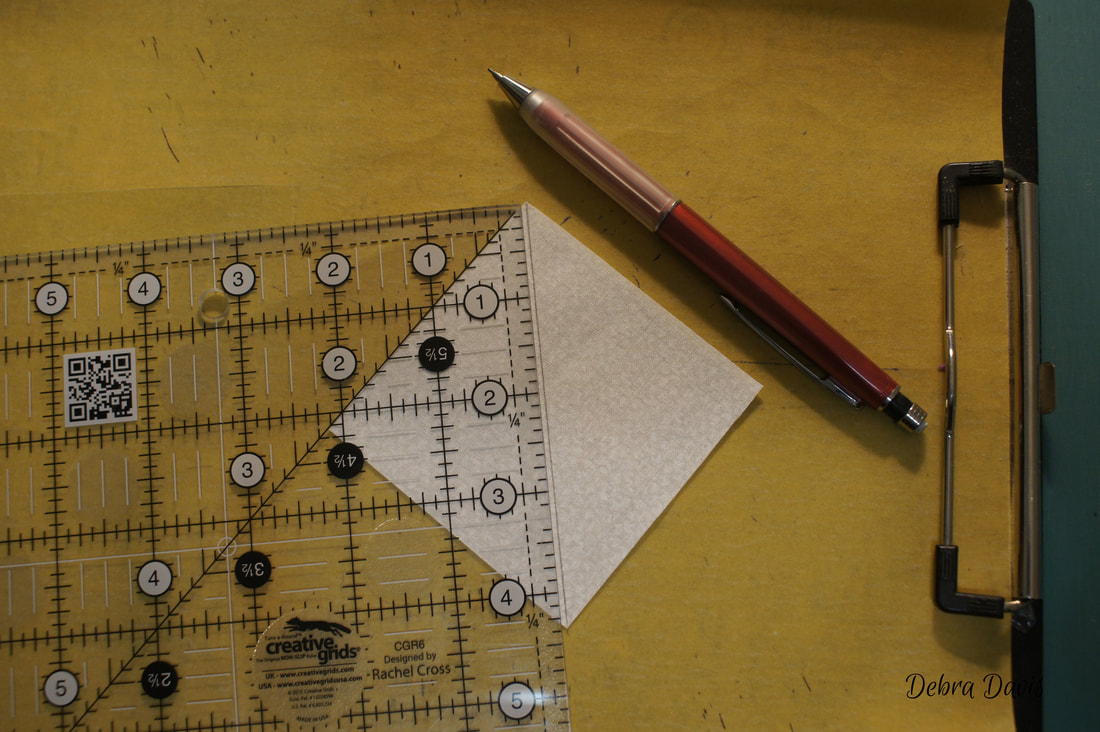
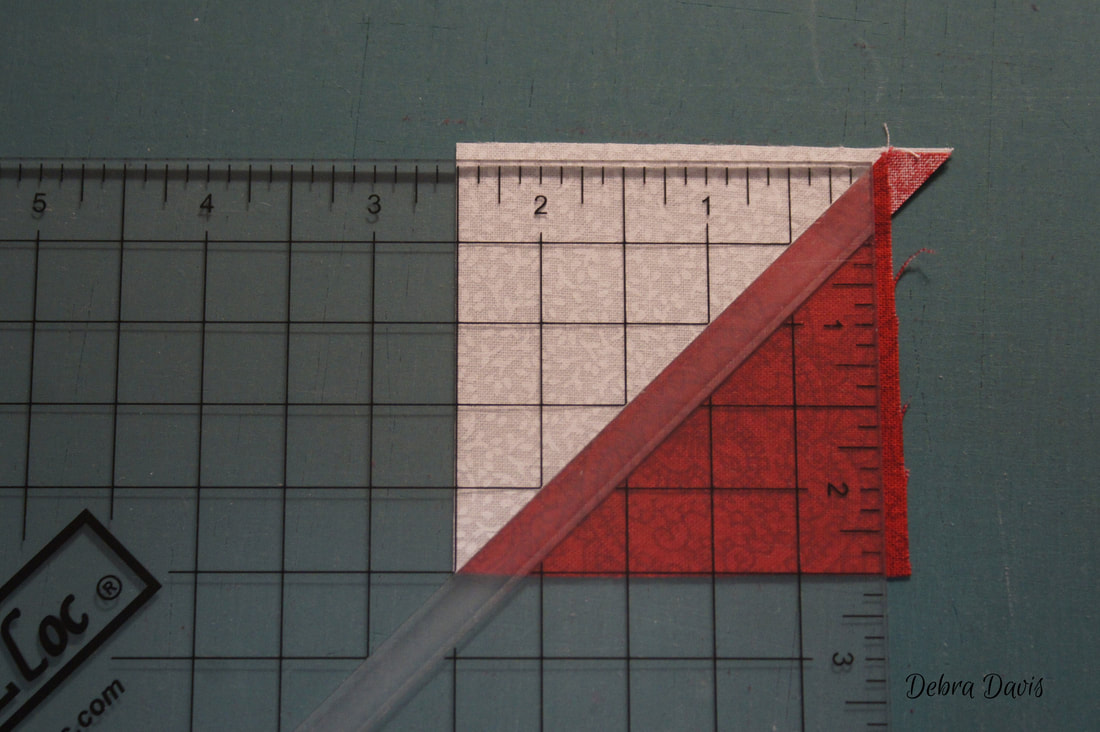
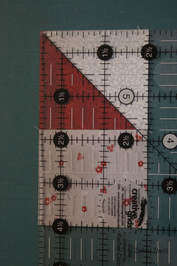
The Half-square Triangles need to be trimmed to 2 1/2" x 2 1/2" It is very important that the diagonal line on your ruler lays right on the diagonal seam line when trimming these.
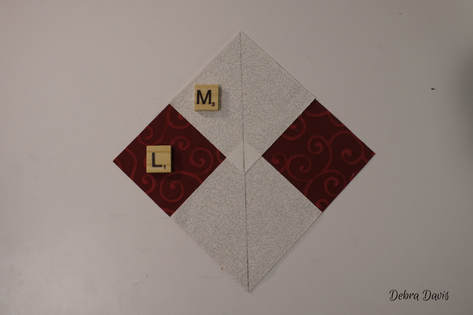
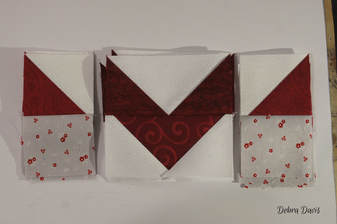
To complete the Corner Sections I add the D and J squares-laying out as shown below.
Make sure that the Half-square Triangles are facing the right direction. 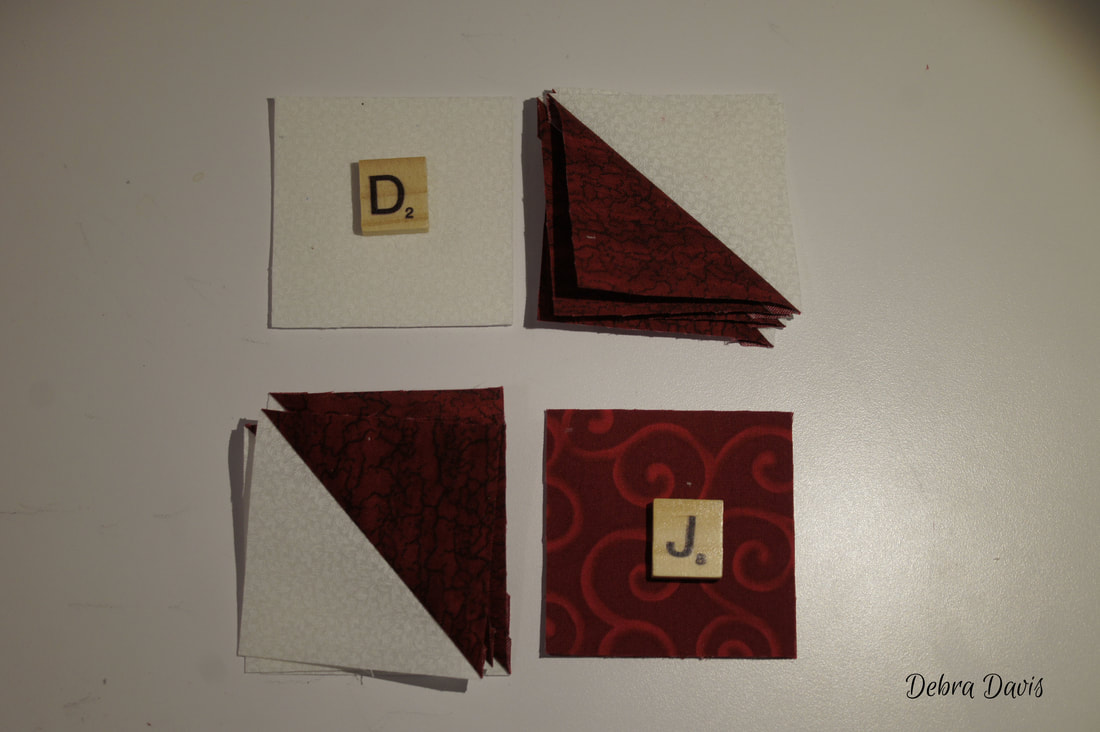
I like to stitch these with the HST's on the top.
Press towards the D and J squares. Then join these rows together to complete the Corner Sections. Pressing them towards the bottom row (the E/F and J row.)
When finished, the Corner Sections should measure 4 1/2" x 4 1/2"
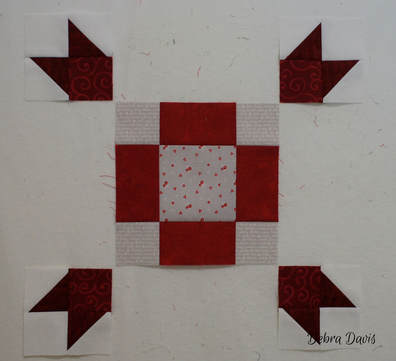
I have added the Corner Sections to my Center Section on my design wall. I wish I could get my reds more true to color-they are not as dark as the photos show.
Now I am going to move on to the Flying Geese.
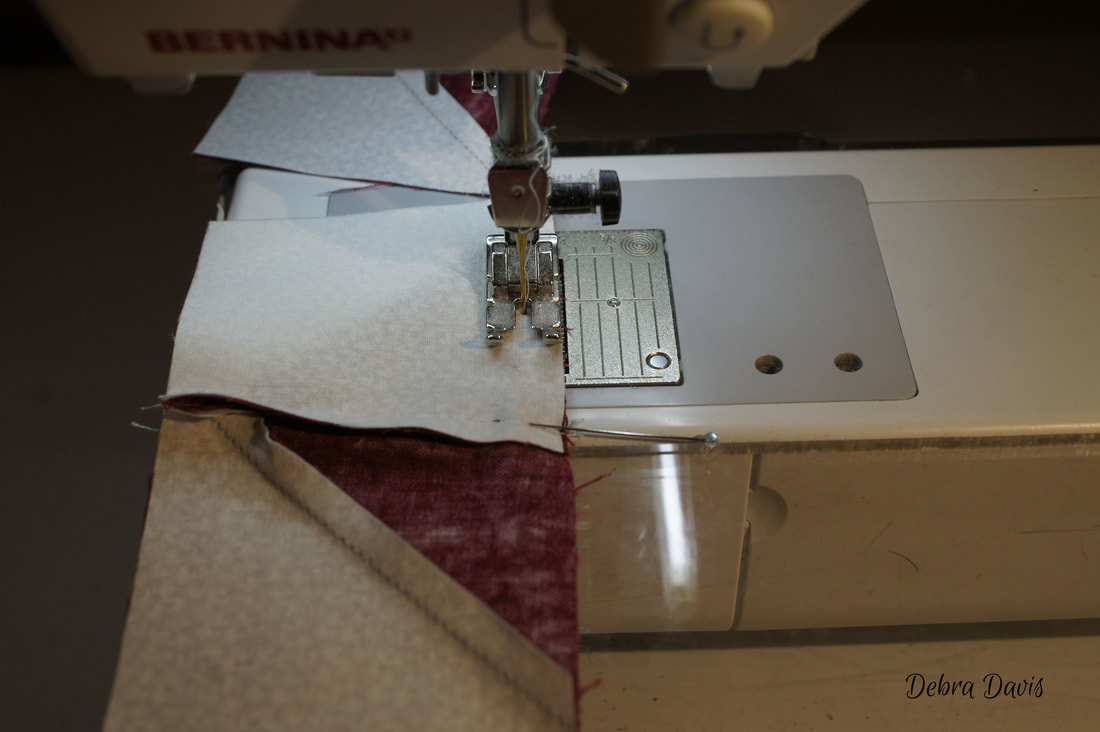
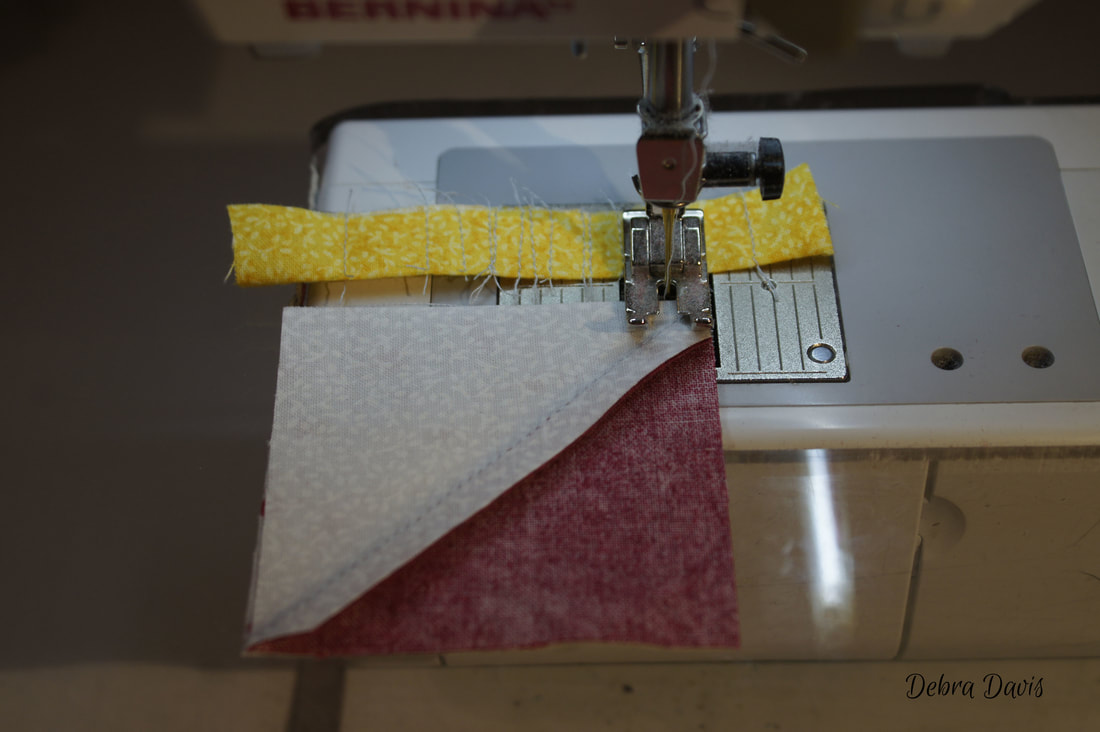
These will be part of the larger Flying Geese Section I am using the No-Waste Method for these, which is my favorite for how quickly they come together. These are a bit oversized which helps with getting a very accurate finish to the block. I place two "I" squares on top of the H square and draw a diagonal line down the middle of them. 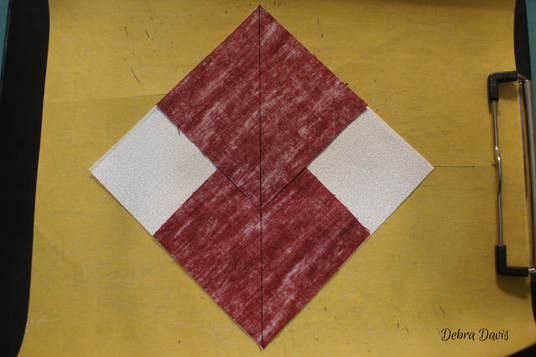
Then I proceed to sew 1/4 inch from each side of the line. I like to have the top "I" square pointing away from my needle as I sew.
Cut apart on the line and press towards the small triangles.
Draw diagonal lines down the center of the two remaining "I" blocks.
Place one on top of each of the pressed units as shown. 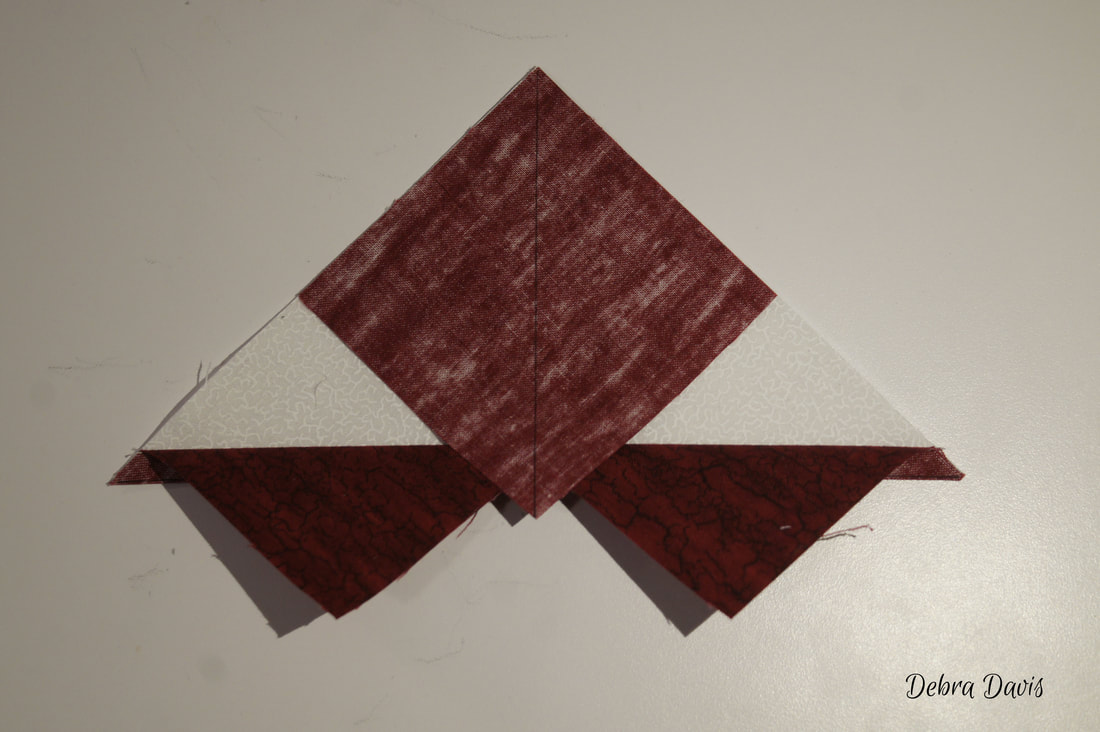
Once again sew 1/4 inch from each side of the drawn line.
Cut apart on the drawn line and press towards the small triangles.
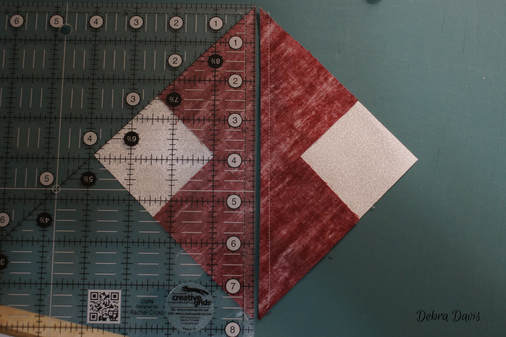
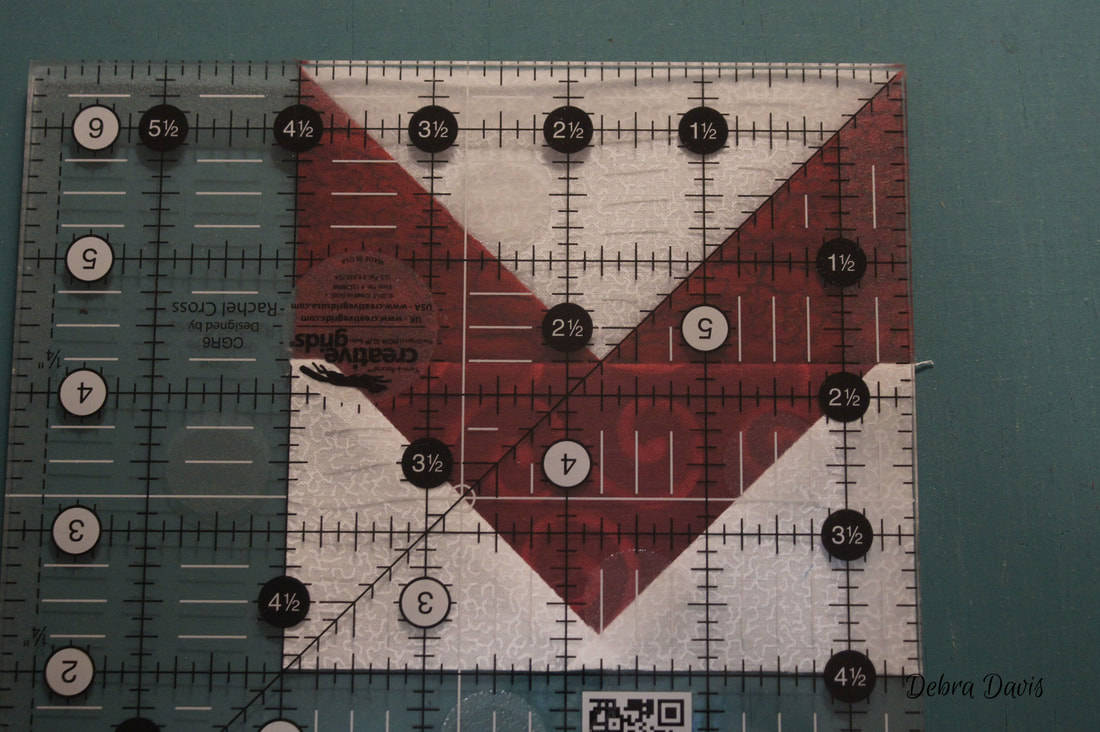
These are the perfect size to use one of my Bloc Loc Flying Geese rulers with. They too have the notch that the seam fits into to lock it into place as I trim with my rotary cutter.
With the correct size - I am using the 2" x 4" ruler which will trim my Flying Geese to 2 1/2" x 4 1/2" (this measurement includes the seam allowance I need to have) 
If you are using a regular ruler you will need to trim these to 2 1/2" x 4 1/2"
For details on on how to trim these with a regular ruler HERE. 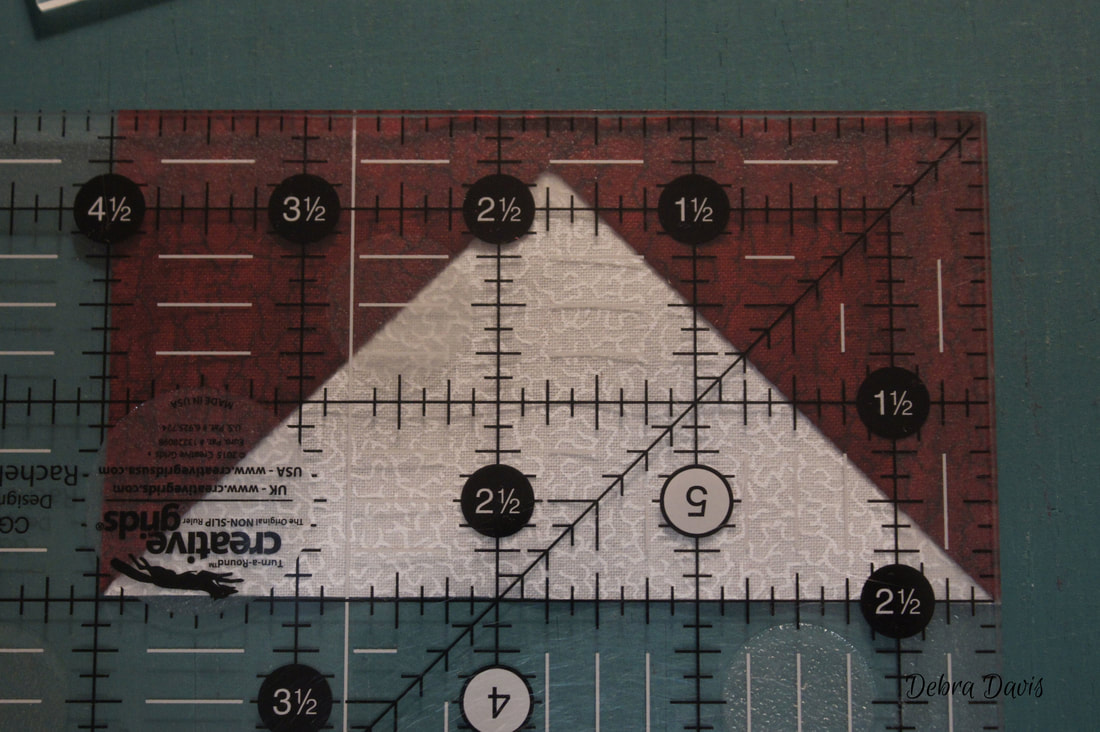
Repeat the process using the L and M squares.
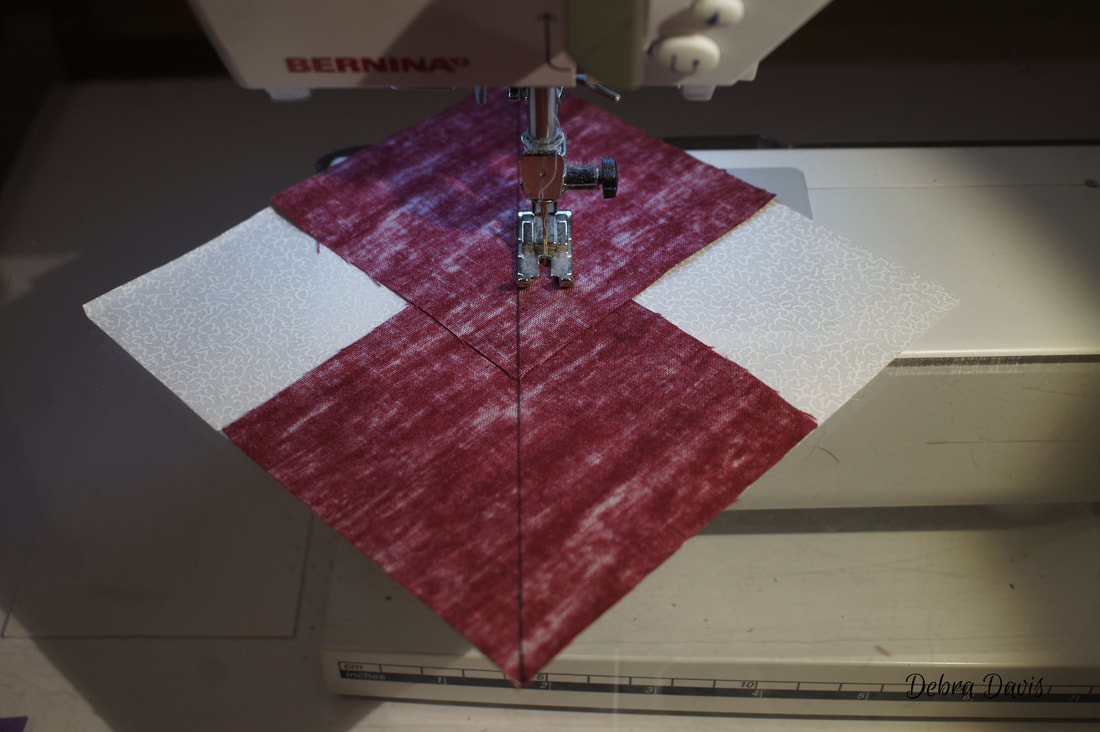
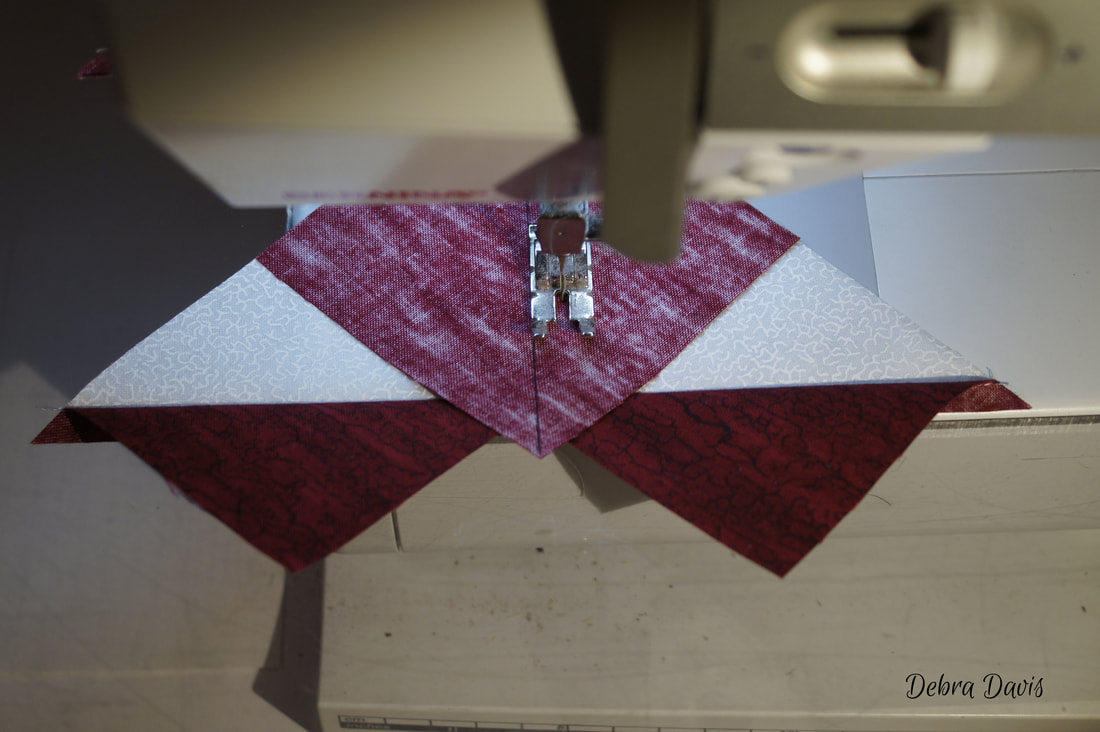
With all of the Flying Geese trimmed it is time to join them into pairs.
All of the large triangles should be facing down. 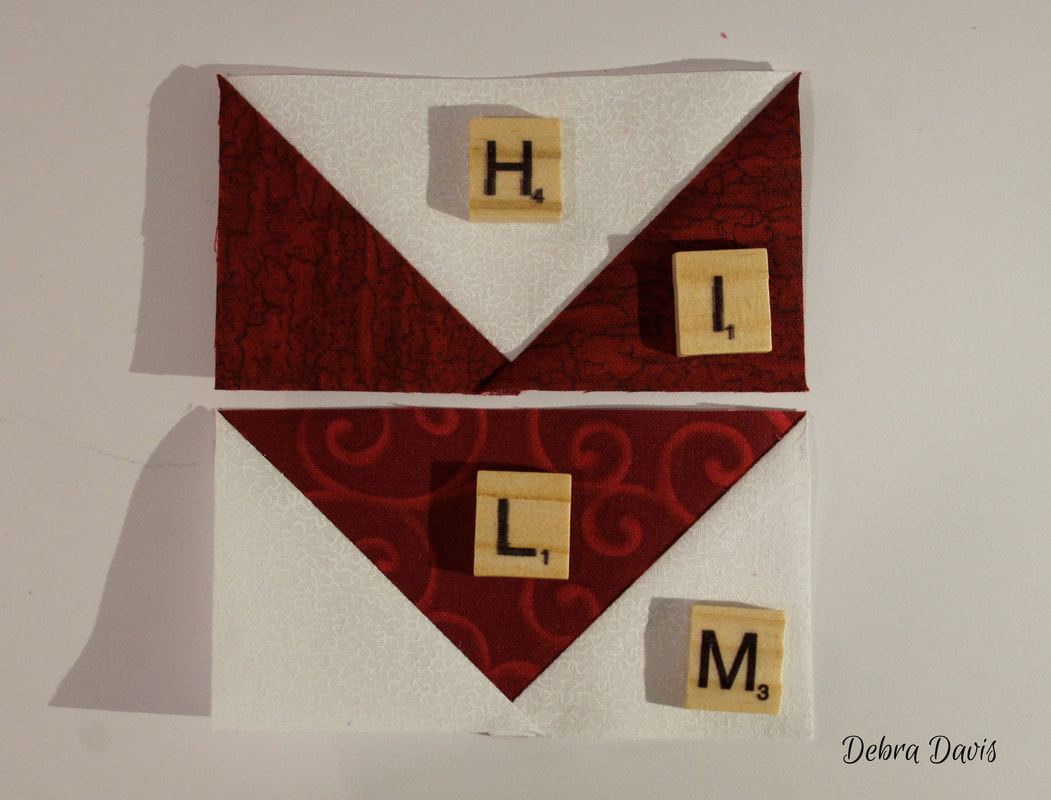
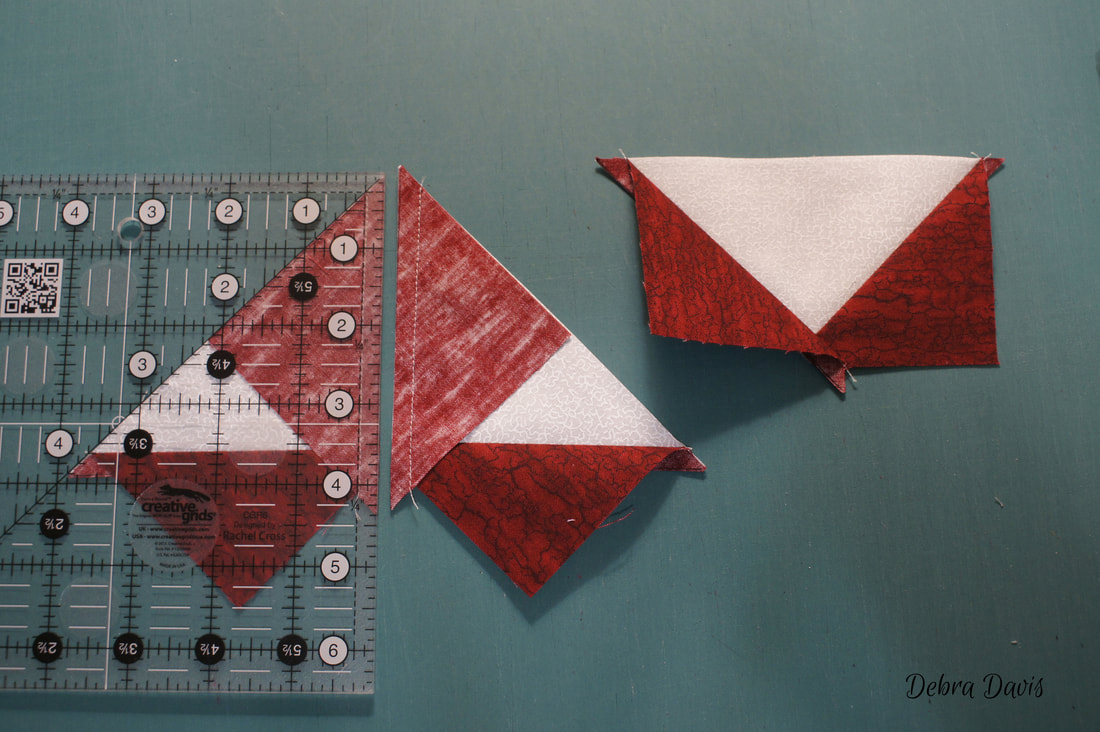
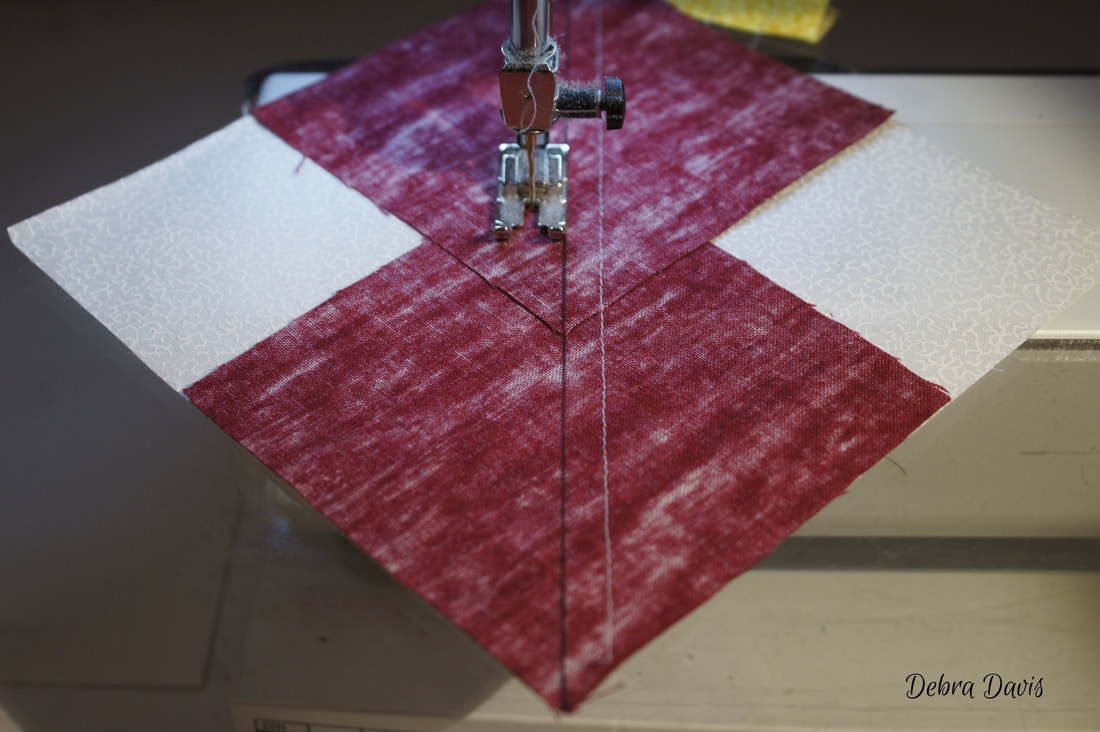
Carefully stitch over the seams-I always slow way down for this. Sometimes I find that the point of a stiletto helps to guide those bulky seams under the presser foot. You want to avoid having your needle fall to the left of the point where the seams intersect. It is much better if it lands to the right as this will keep your points nice and sharp. Ideally the needle should land right at the center of the "X" where those seams cross.
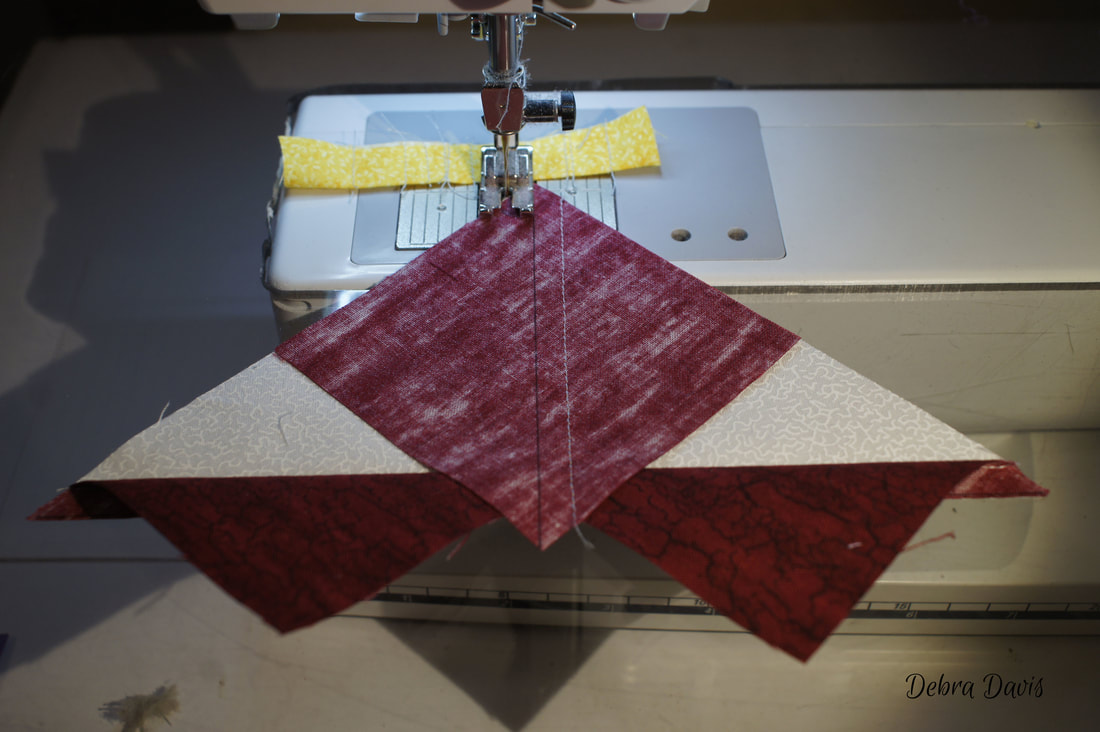
Press towards the L/M Flying Geese. These units should measure 4 1/2" x 4 1/2" now.
We will set those aside for the moment and work on the E/G Half-square Triangles (HST's)
These are done just like the previous E/F HST's from Step 2. Draw diagonal lines on the backs of the E squares. 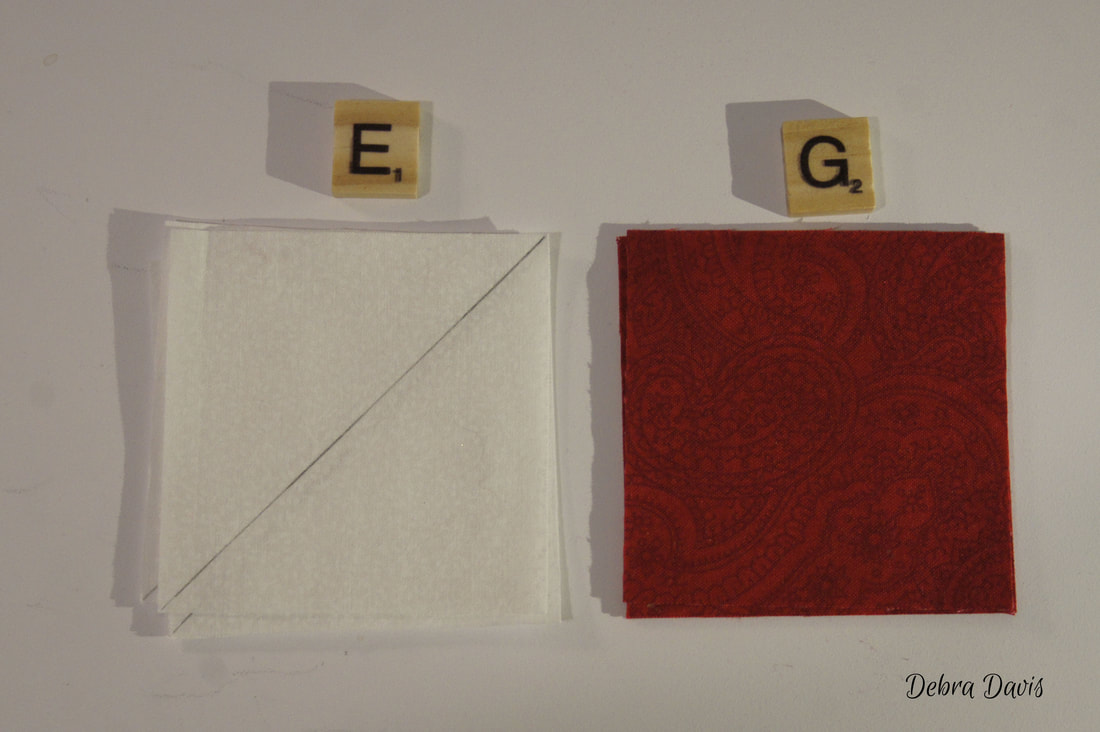
Sew 1/4 inch from each side of the drawn line. Cut apart on the line, press towards the dark side and trim to 2 1/2" squares.
For this next part I need to add one K square tothe bottom of each E/G HST making sure that the E/G hst's are facing the right way-four go one way and four go the other. These will make the side units for the Flying Geese Sections we are creating.
Press towards the E/G Half-square Triangles. One thing I would like to mention about pressing: I leave my hot iron on top of the fabric-both when setting the seam and pressing it open-for about 2-4 seconds, especially when I am trying to convince the seams to lay in a direction that they do not naturally want to go.
These side units should measure 2 1/2" x 4 1/2". and get added to each side of the Flying Geese units we made earlier. These combine to make the Flying Geese Section of our block.
I pinned the locking seams before sewing.
Press towards the side units. These Flying Geese Sections should now measure 4 1/2" x 8 1/2"
Almost done! All that is left is to sew the sections together.
First I join into rows, pressing the top and bottom rows towards the Corner Sections and the middle row towards the Center Section 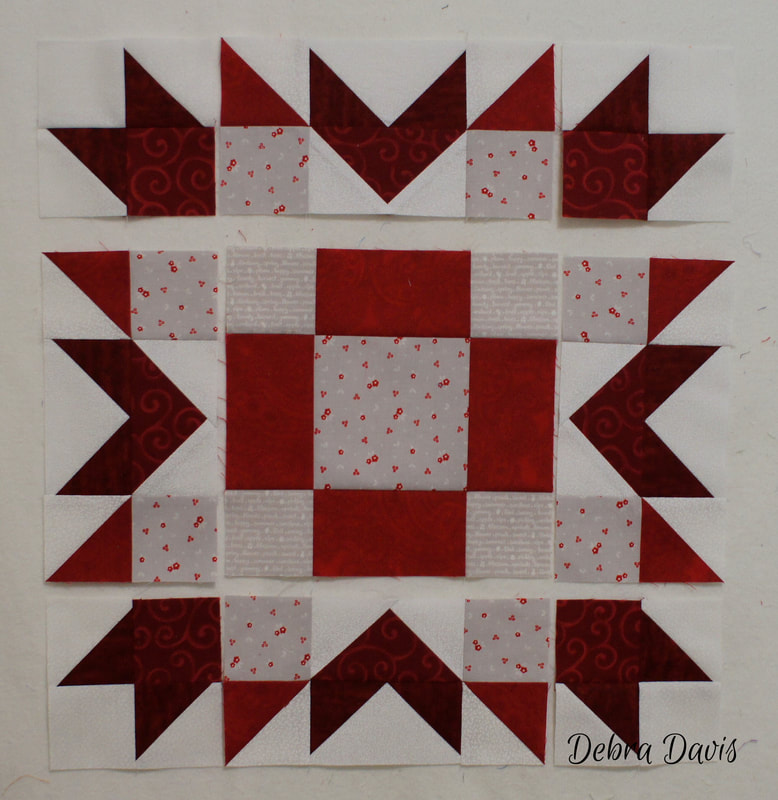
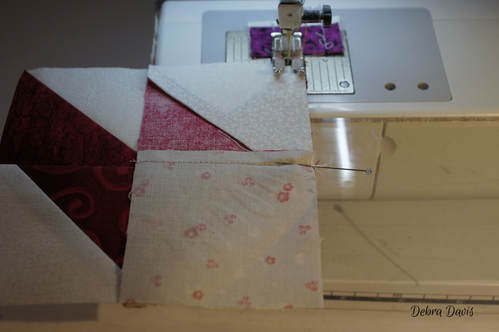
I like to sew with the Flying Geese on the top-that way I can watch those intersecting seams to make sure my needle falls right where I need it to in order to get a sharp point.
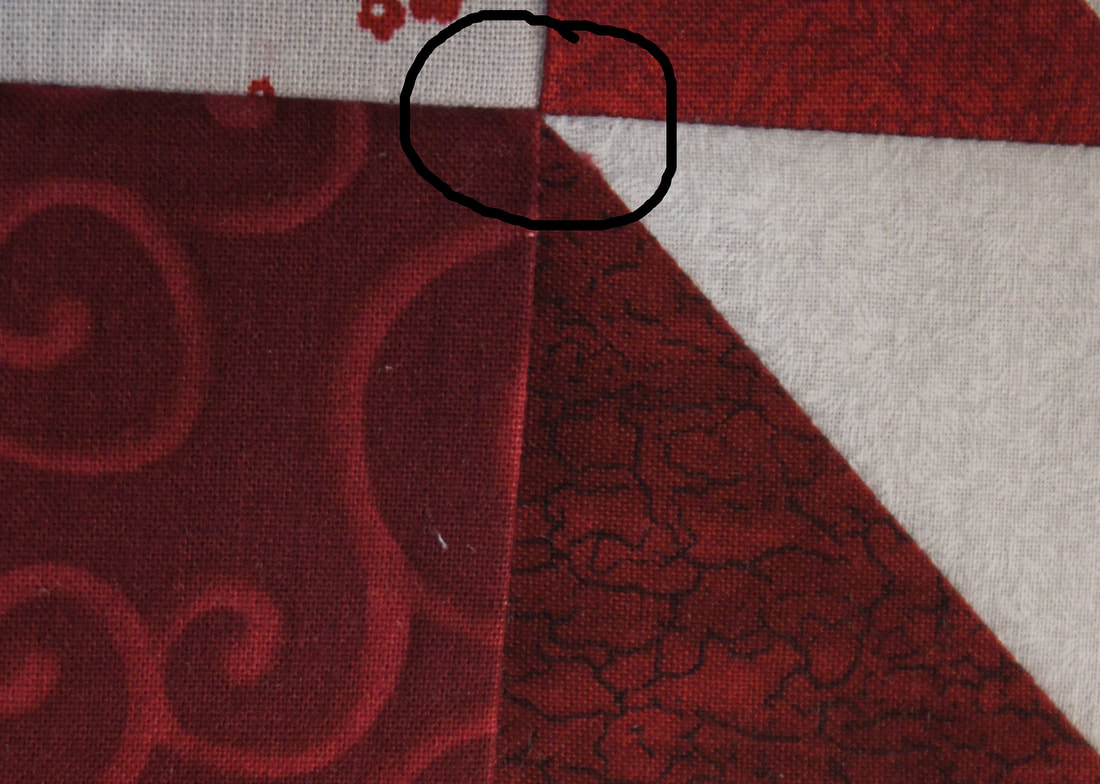
I have zoomed in here so you can see the intersection I want my needle to go over.
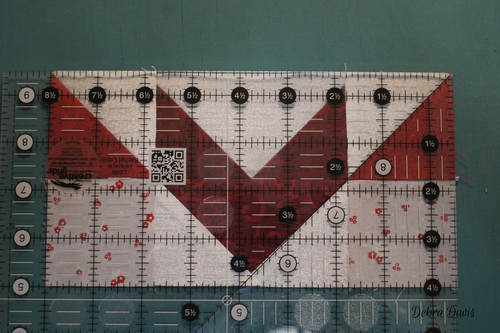
I look for the same thing to happen on these Half-square triangles as well. This one is perfect as my new seam crossed right at the point.
You can see here how well that worked out on the front of my block. I wish I could say that always happens-there are times when I just have to be happy with "close enough."
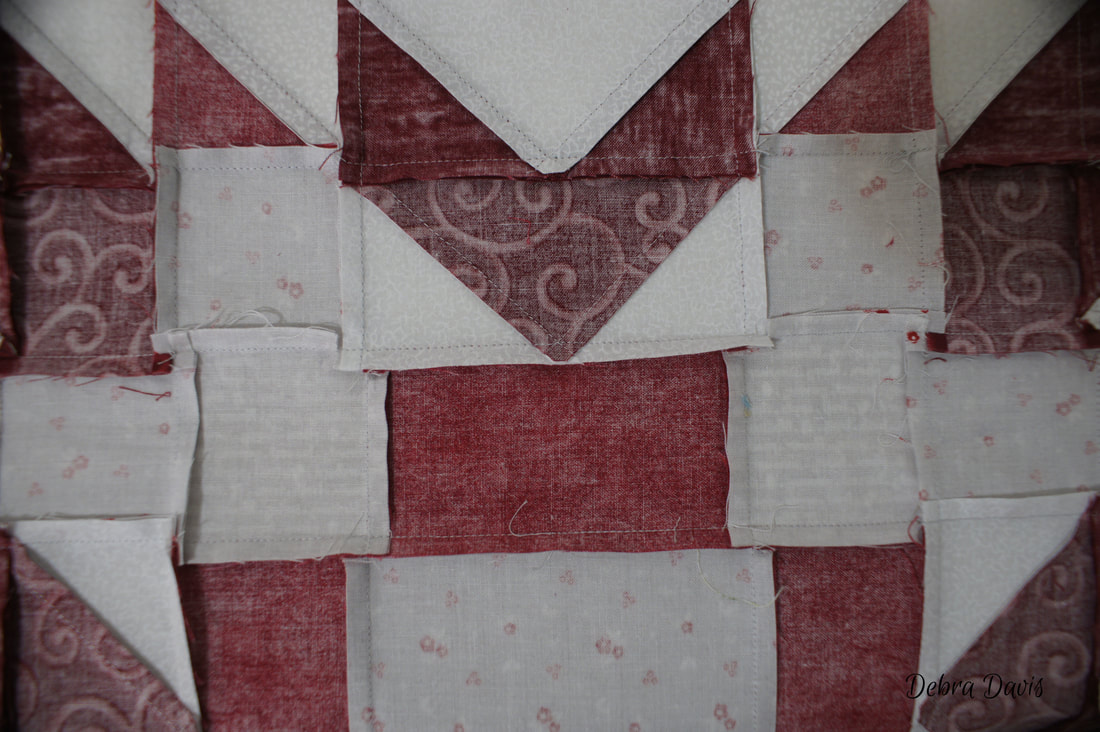
The rows of the block are ready to be sewn together
There are a lot of seams to join and I pinned every one after lining them up. Because of the careful pressing I did, the seams all nest together nicely which really helps.
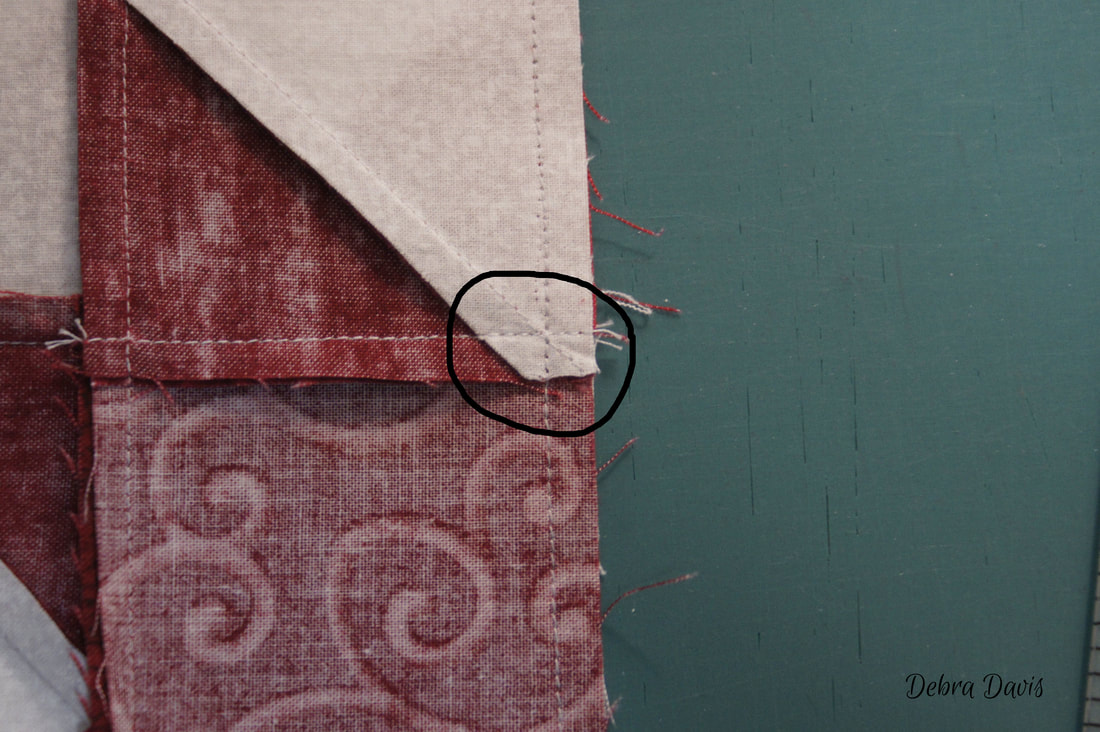
Because there are so many different seams coming together I decided it was best to fan them open. Once issue with that is the flying geese seams (I have circled in the photo) are not going the way that would be best to achieve a flat block. So I am going to clip those seams to get them to do what I want. Jo Morton calls this her "Clippy Trick" and I am included a link to her video so that you can see exactly what I am doing.
The other seams fanned without the clipping-I just clipped each side of the Flying Geese s you can see in the photo that is after this one. 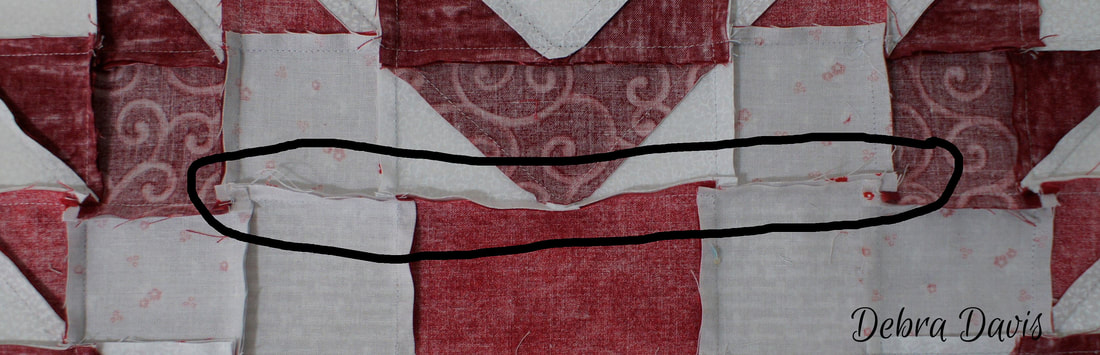
Jo Mortons' Clippy Trick Video
I made my cuts on each side of the Flying Geese
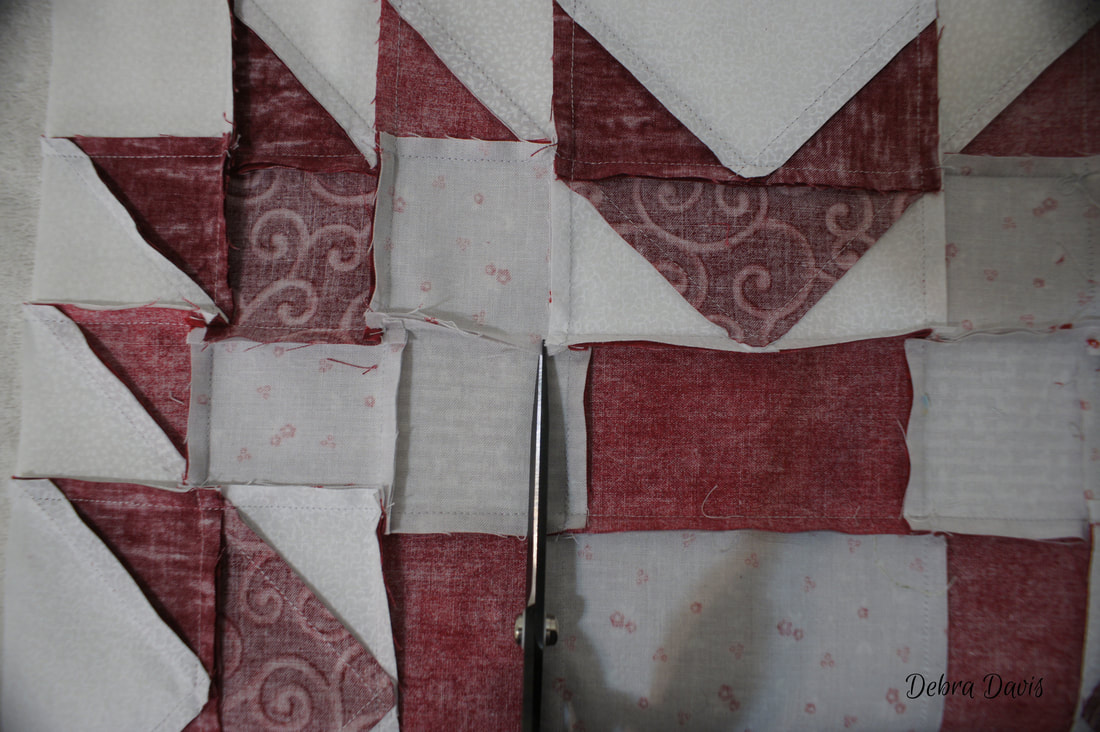
And now it lays just the way I want. You can also press the seams open if you prefer.
After a final pressing here is my Block 5-Puzzled Star.
I am so glad to hear from quilter's who are enjoying the quilt. It is such an encouragement so you can be sure there will be more in the future.
In the meantime... Happy Quilting!! 
|

Welcome to the site of Debra Davis-a woman who loves the Lord and loves to quilt.
My other blog where I share about my walk of faith:
Sitting at His Feet 
|


 RSS Feed