|
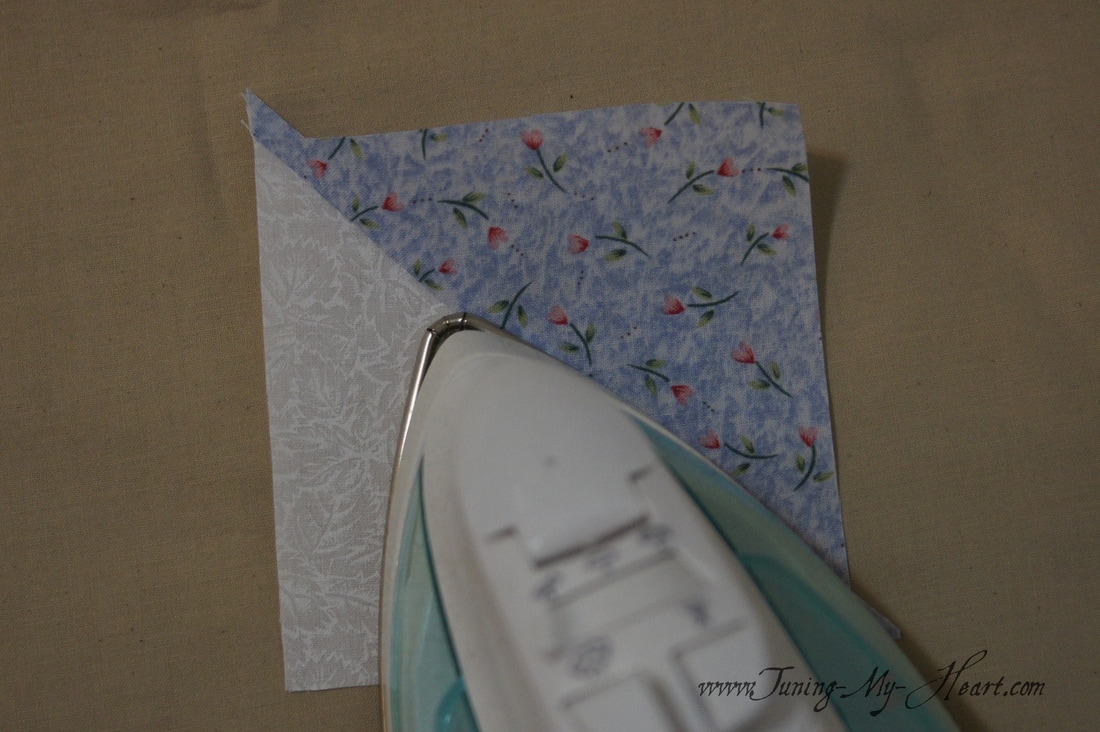
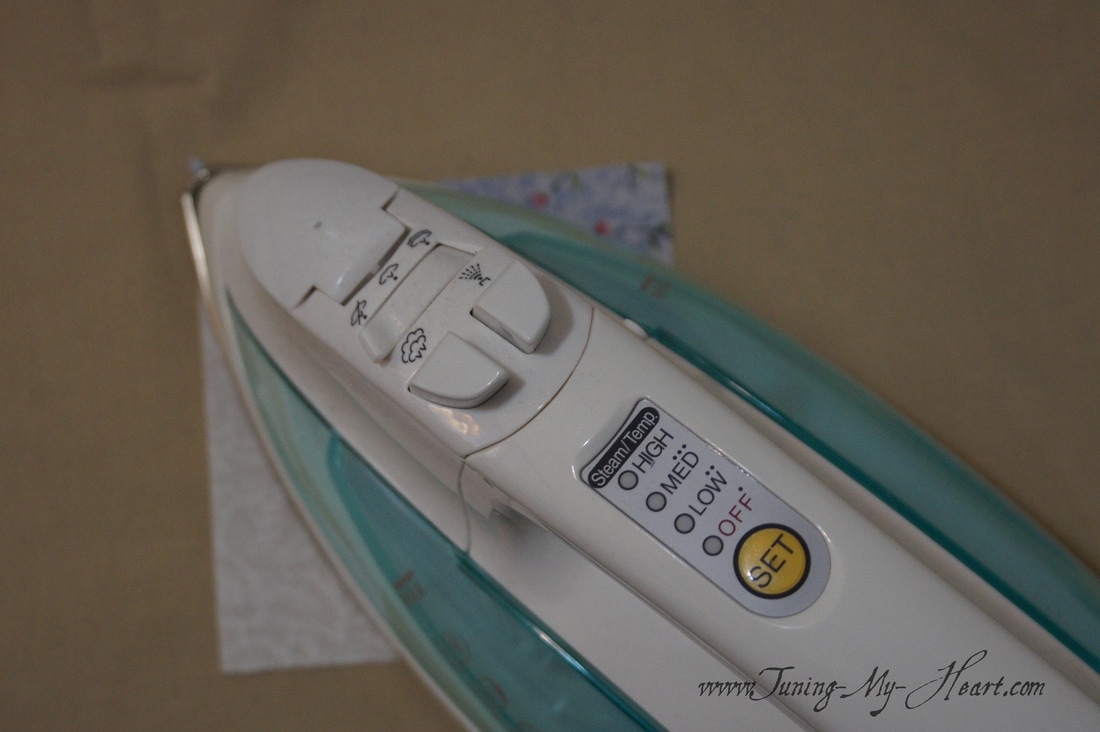
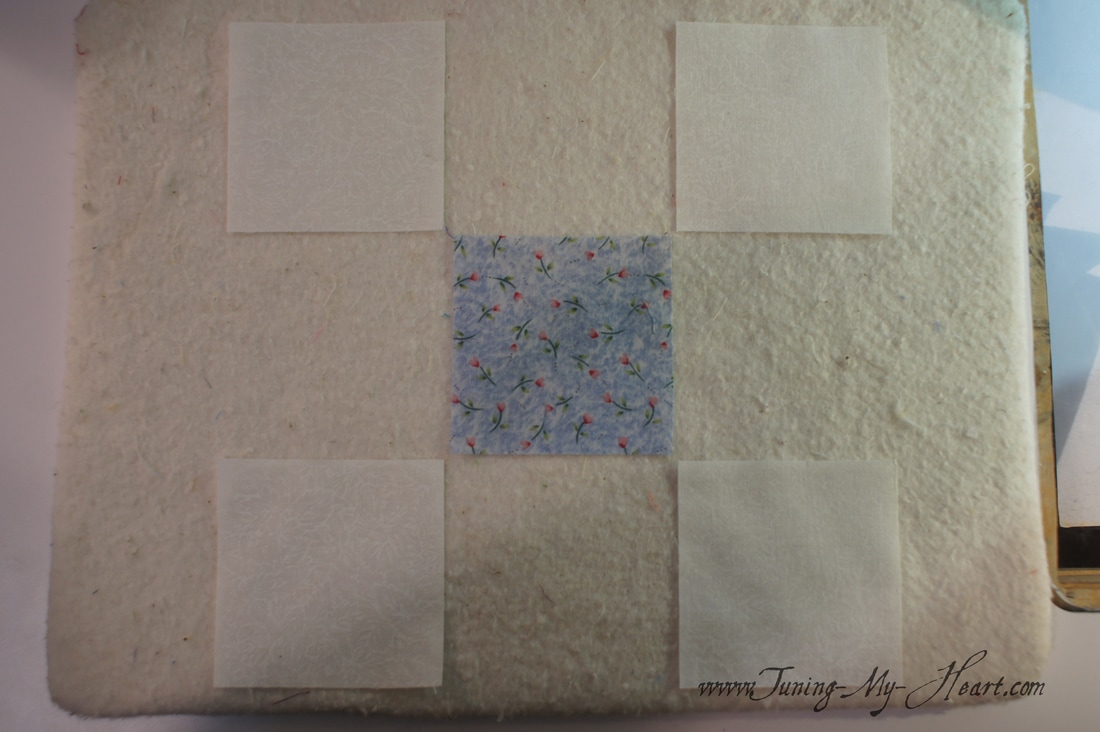
Anytime I can simplify my block construction and achieve better accuracy I am all for it. Making an Ohio Star block is the perfect chance to show you how to make Quarter Square Triangles (QST's.) 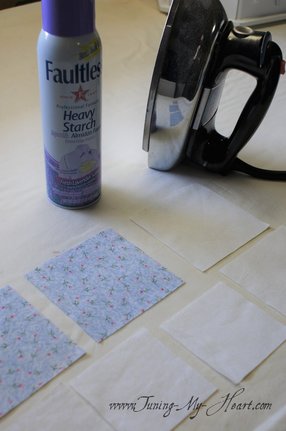 The finished size of my bock is going to be 9 inches. To make this block along with me you will need the following: 2 4-1/2 inch squares of light fabric 4 3-1/2 inch squares of light fabric 2 4-1/2 inch squares of dark fabric 1 3-1/2 inch square of dark fabric Once these are cut I like to starch them. I have found this helps with my accuracy, especially when working with seams on the bias. 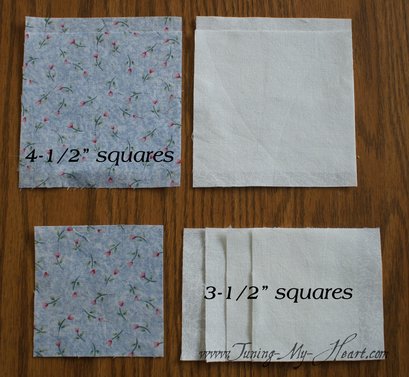 I am going to start by drawing a diagonal line on the 4-1/2 inch light fabric squares. I use an ultra fine Sharpie for this for a nice dark line that is easy to see. Underneath the fabric I use a very fine sandpaper that is attached to a clipboard. It is a little trick that keeps the fabric from shifting when I need to mark a line. 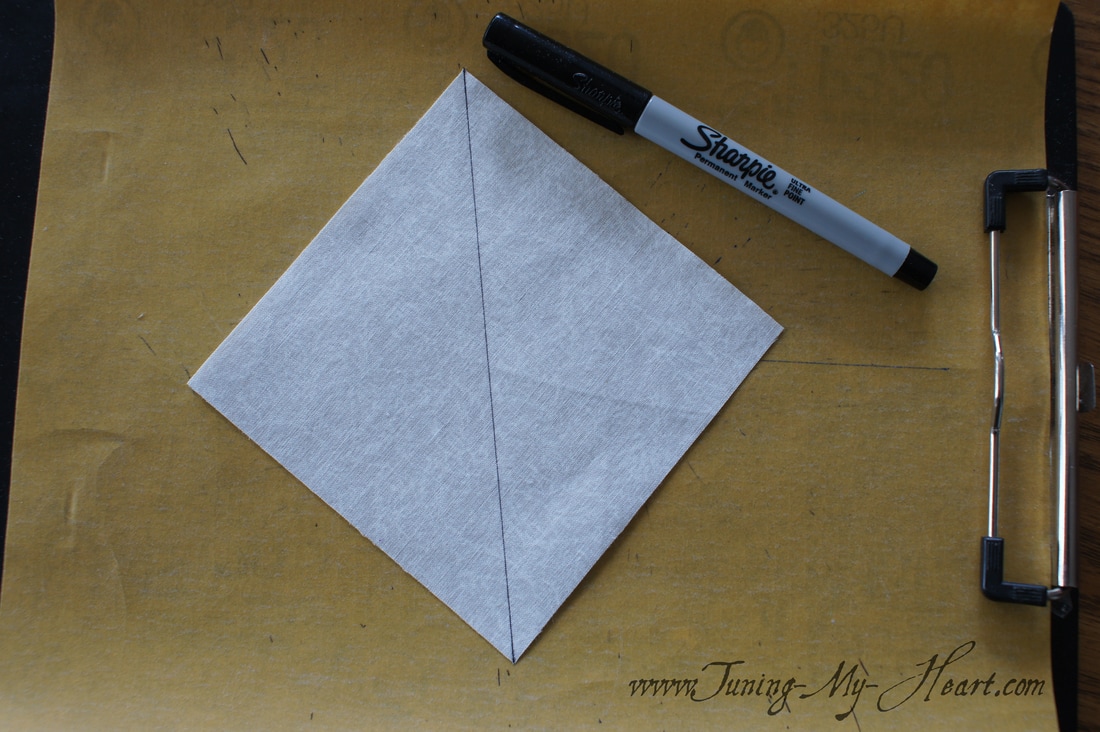 With right sides together I pair the light and dark 4-1/2 inch squares. I need to sew 1/4 inch from the drawn line. I prefer a small stitch when piecing (2.1 which equals 12 stitches/inch) and always sew with my needle in the down position. 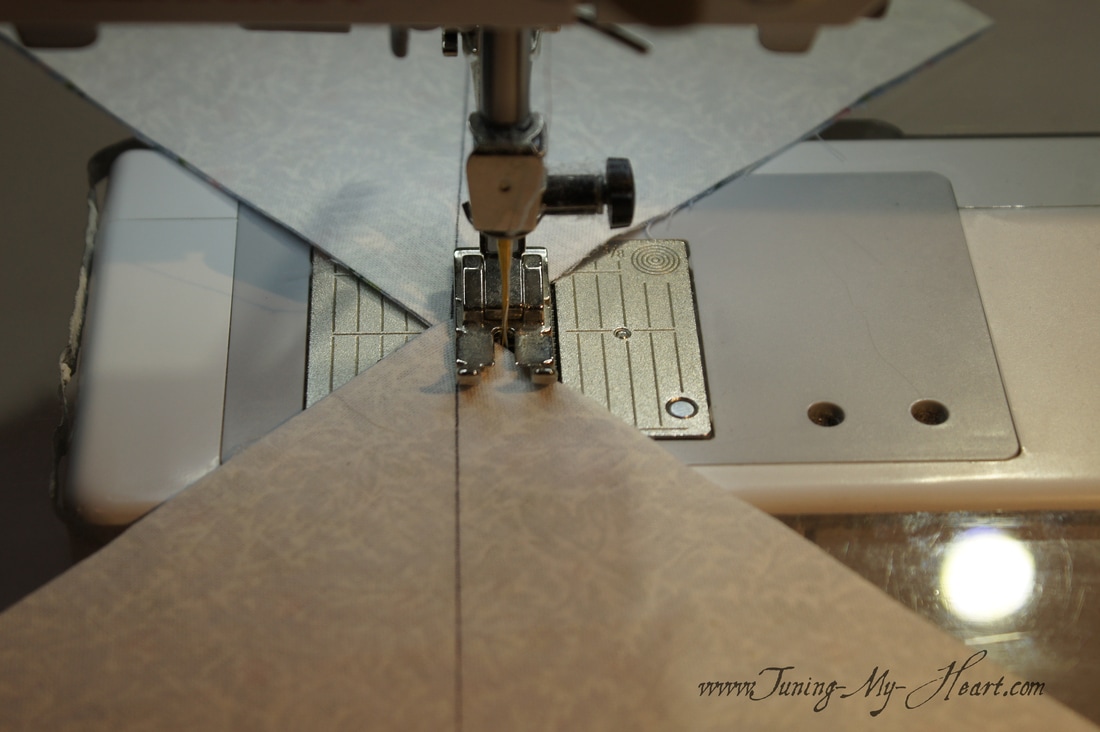 Next I need to sew 1/4 inch from the other side of the drawn line.  When that is done I cut on the diagonal line, giving me two Half Square Triangles. 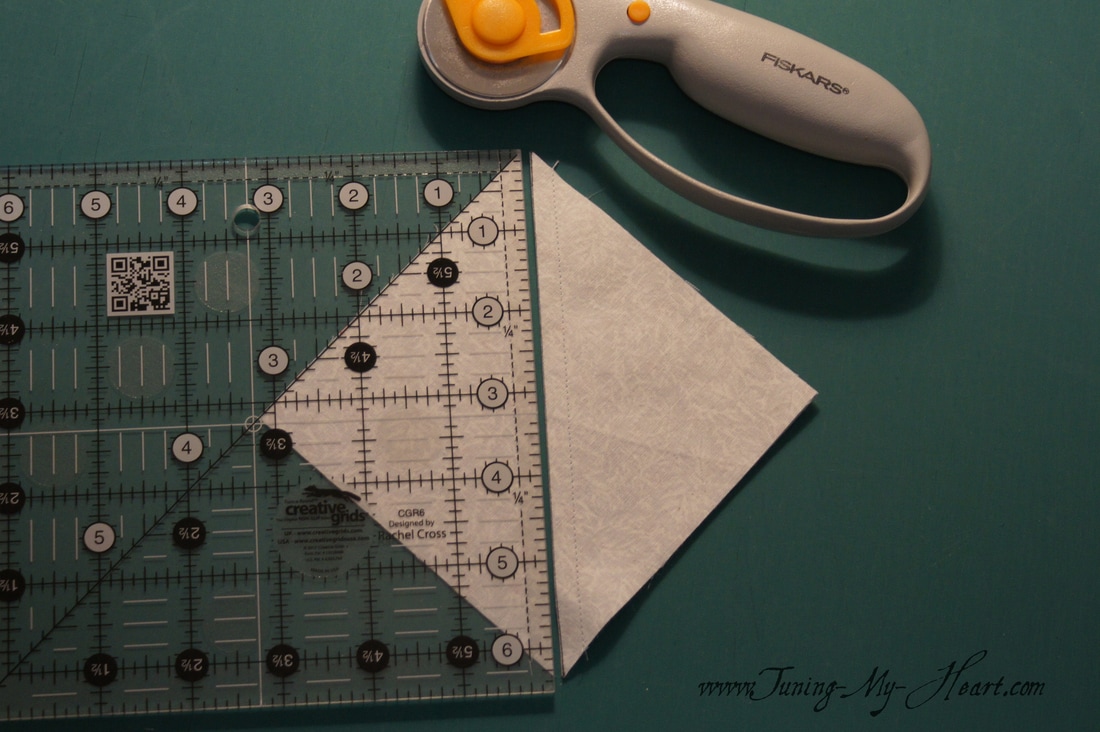 Time to press. First just lay the iron on the seam to "set the seam." I am pressing to the dark side.  After carefully opening up the unit I press from the top. It is particularly important when working with these bias seams to not move your iron around, but only lift it up and set it down on the fabric.
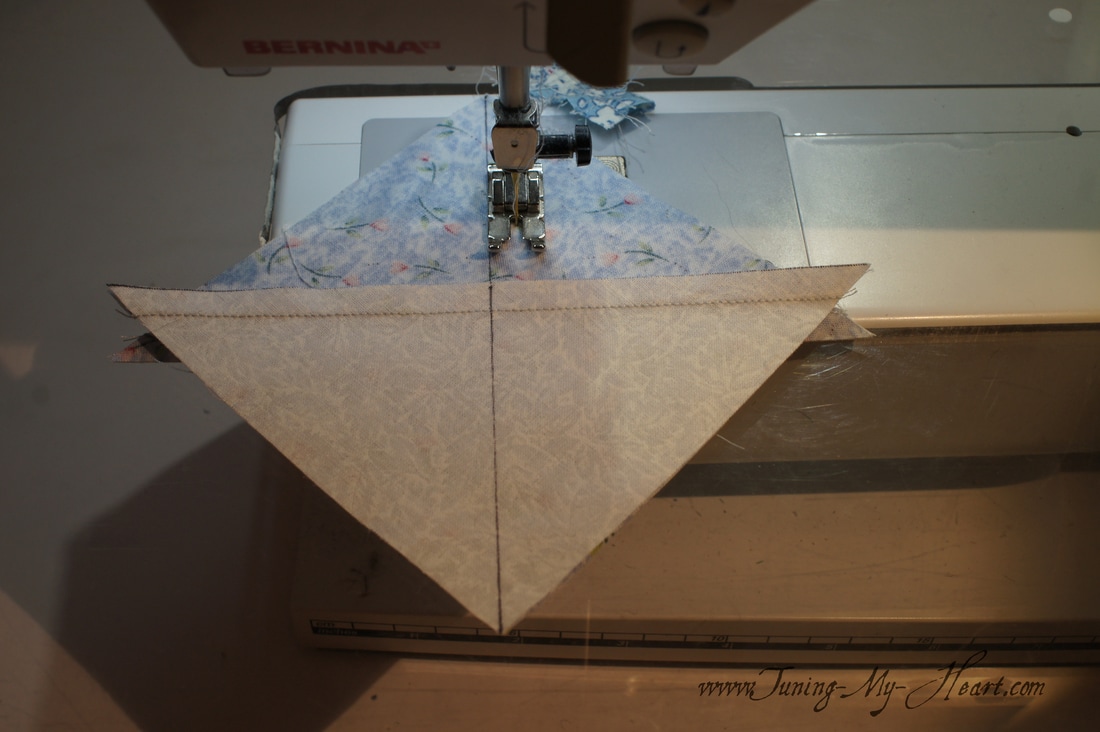
I lay two Half Square Triangles on top of each other-right, butting the seams together as in the bottom part of the photo. 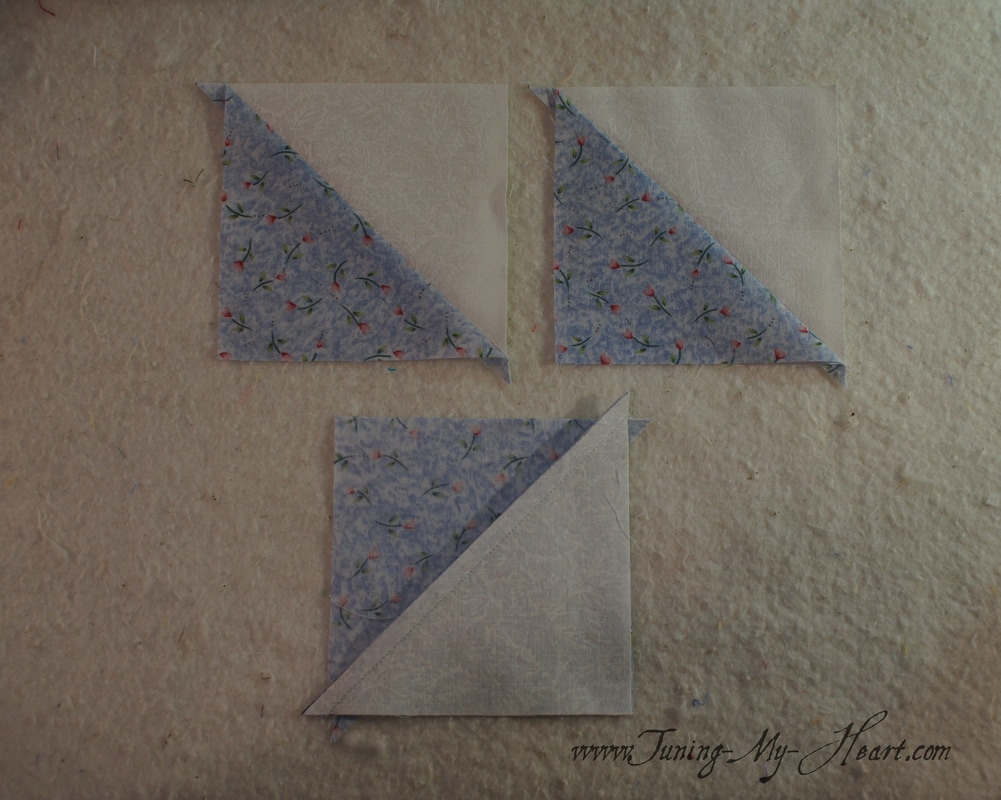 With my ruler I mark a diagonal line down the middle. 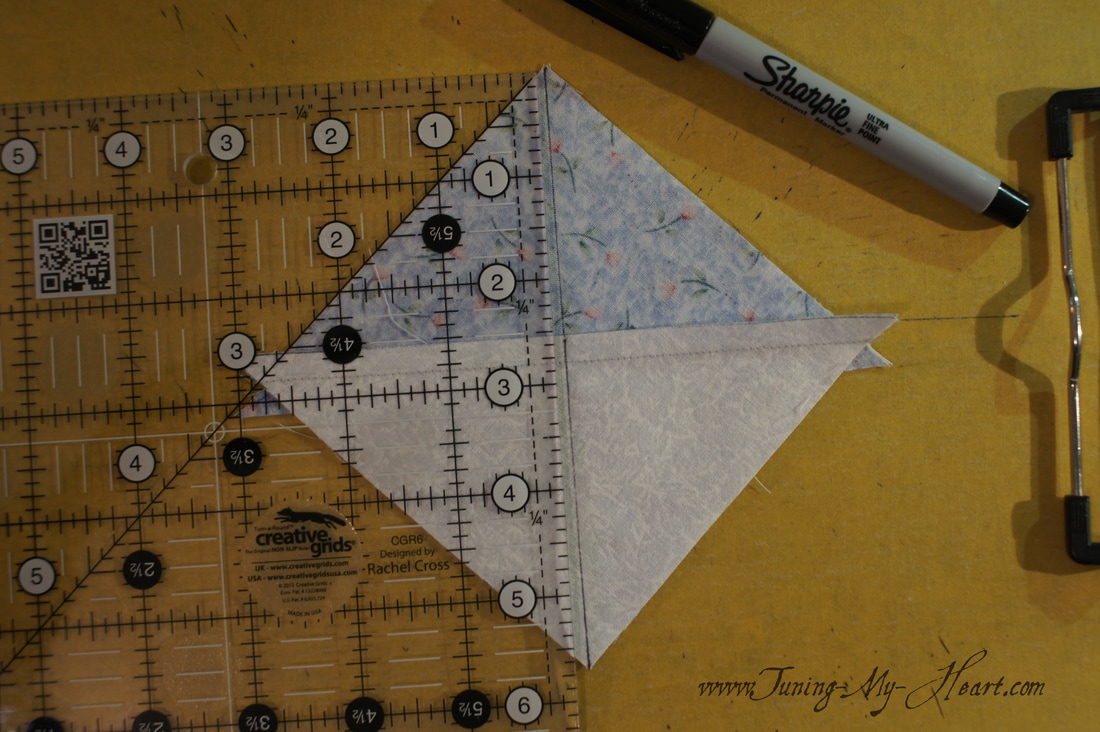 Just like before, I will sew 1/4 inch from each side of the drawn line. Feeding these units through my machine with the seam facing towards the needle like this helps to push those two seams together.
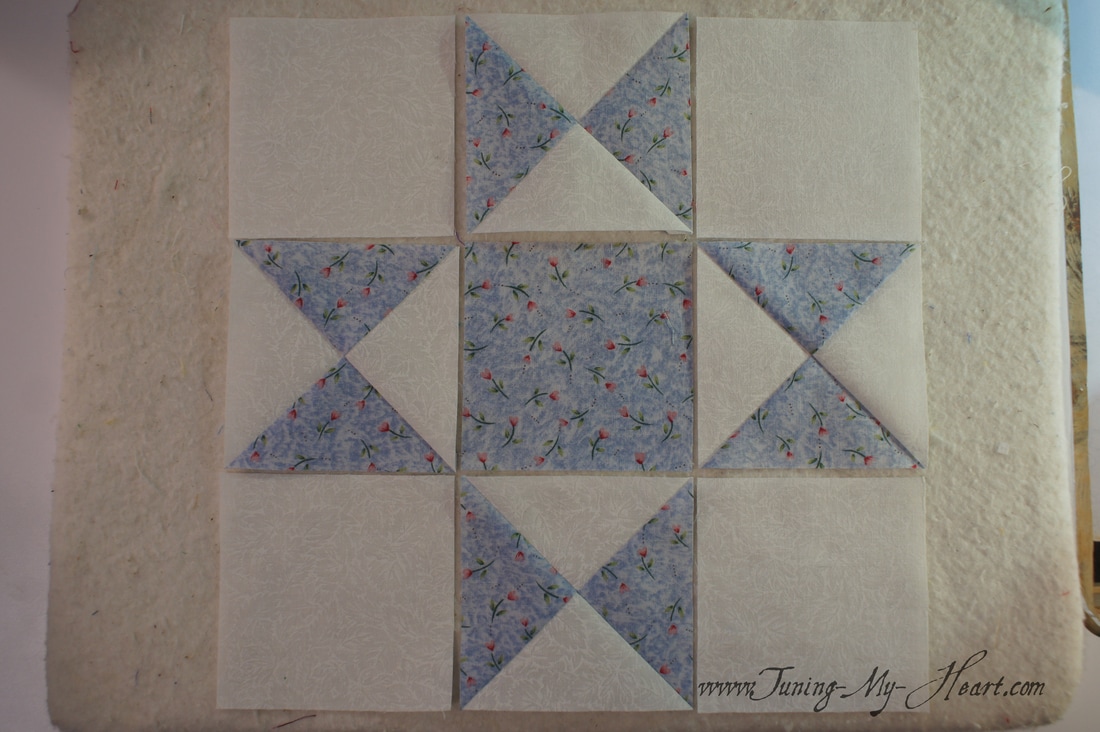
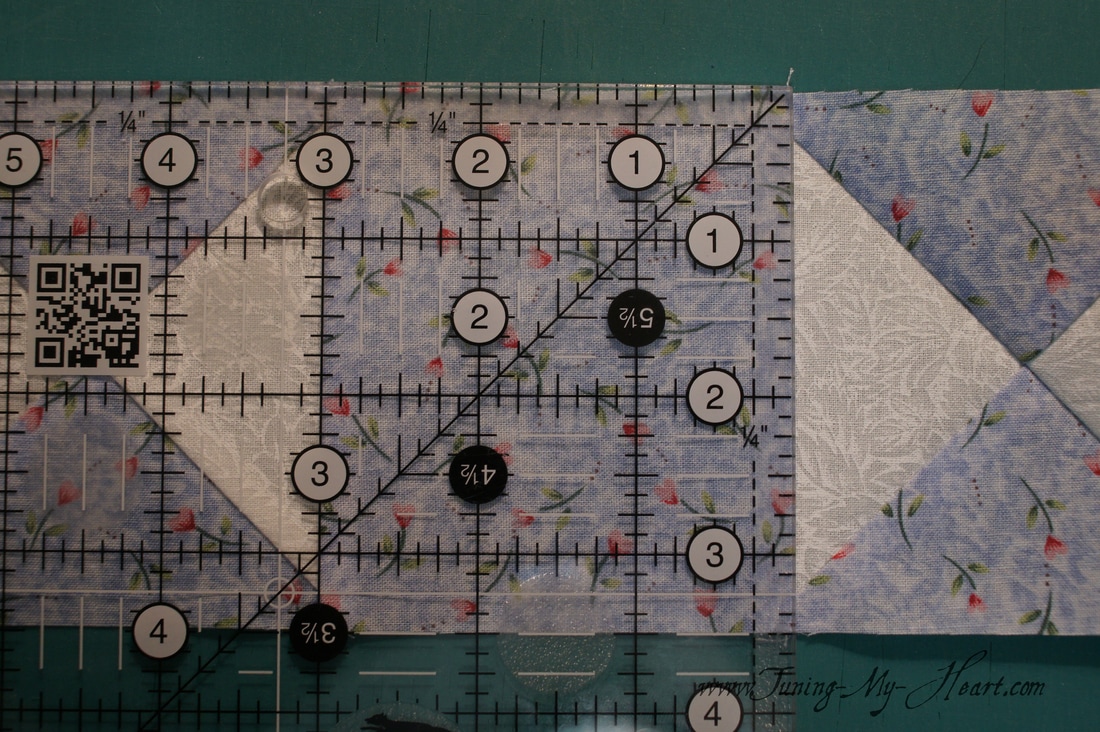
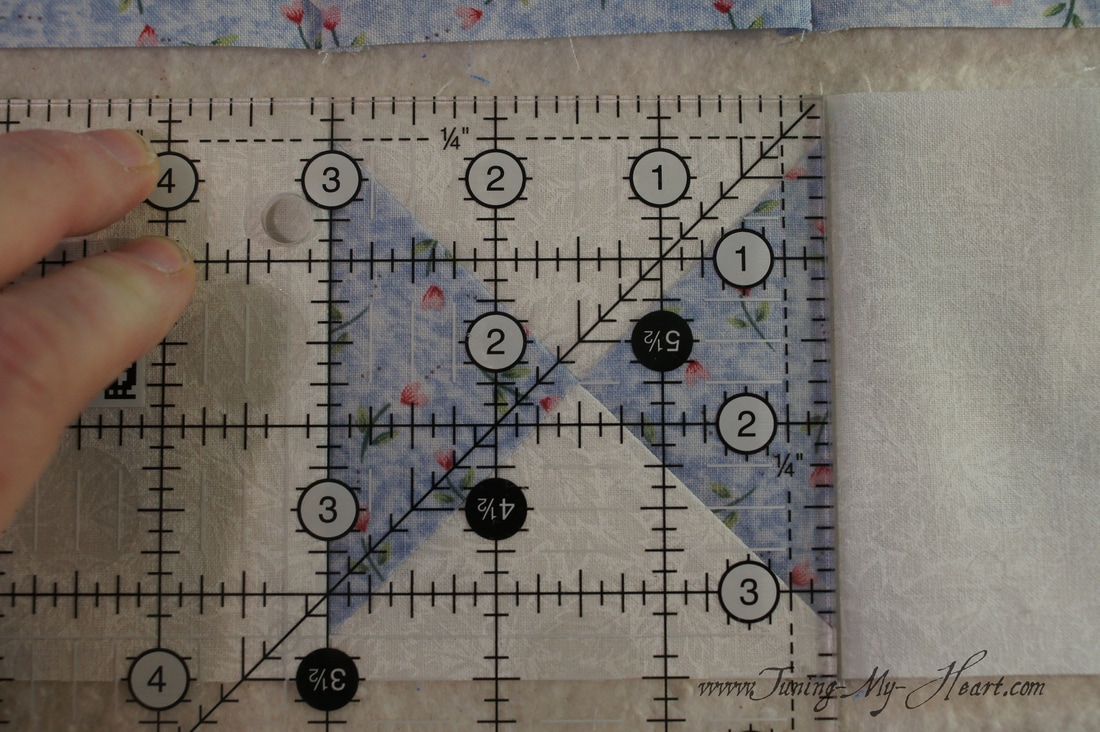
I take a quick look to make sure my seams have lined up well. 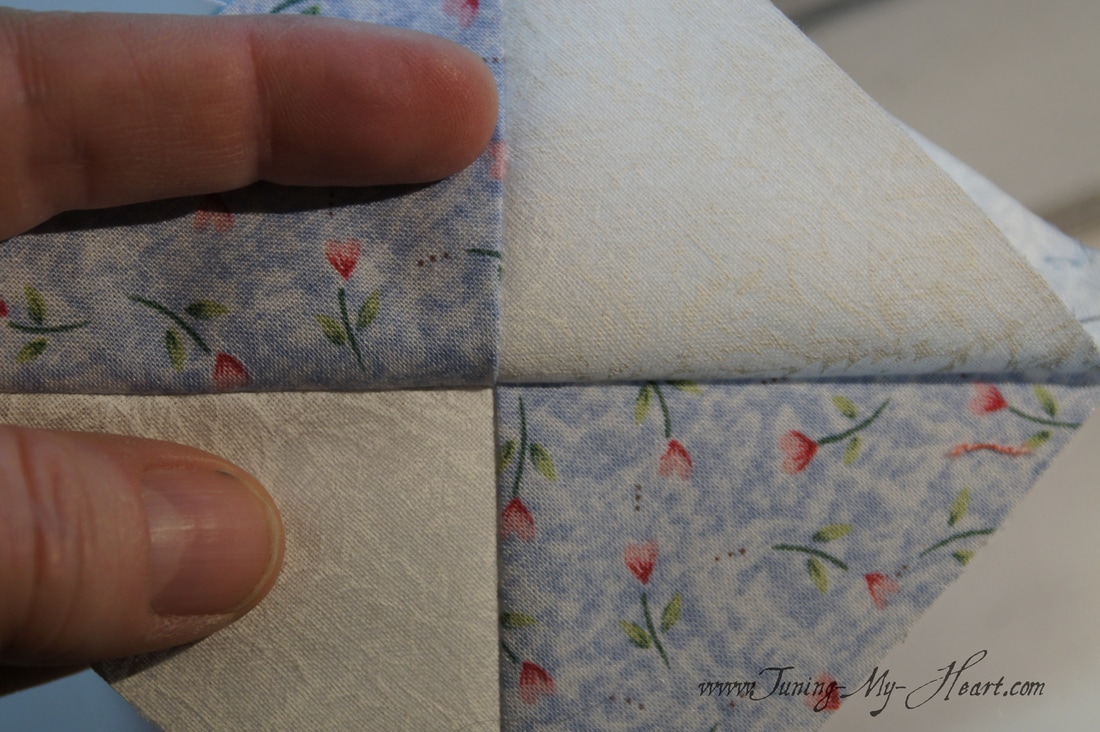 Now I cut right on the line I had drawn. 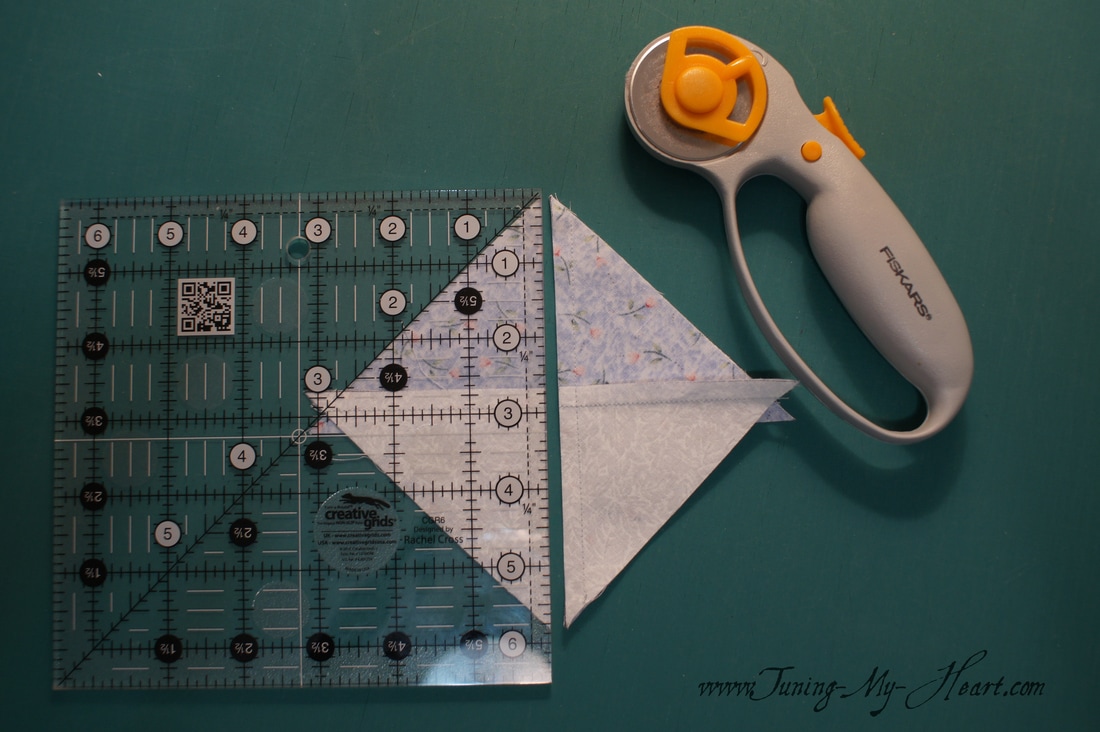 I now have enough Quarter Square Triangles to make my block. 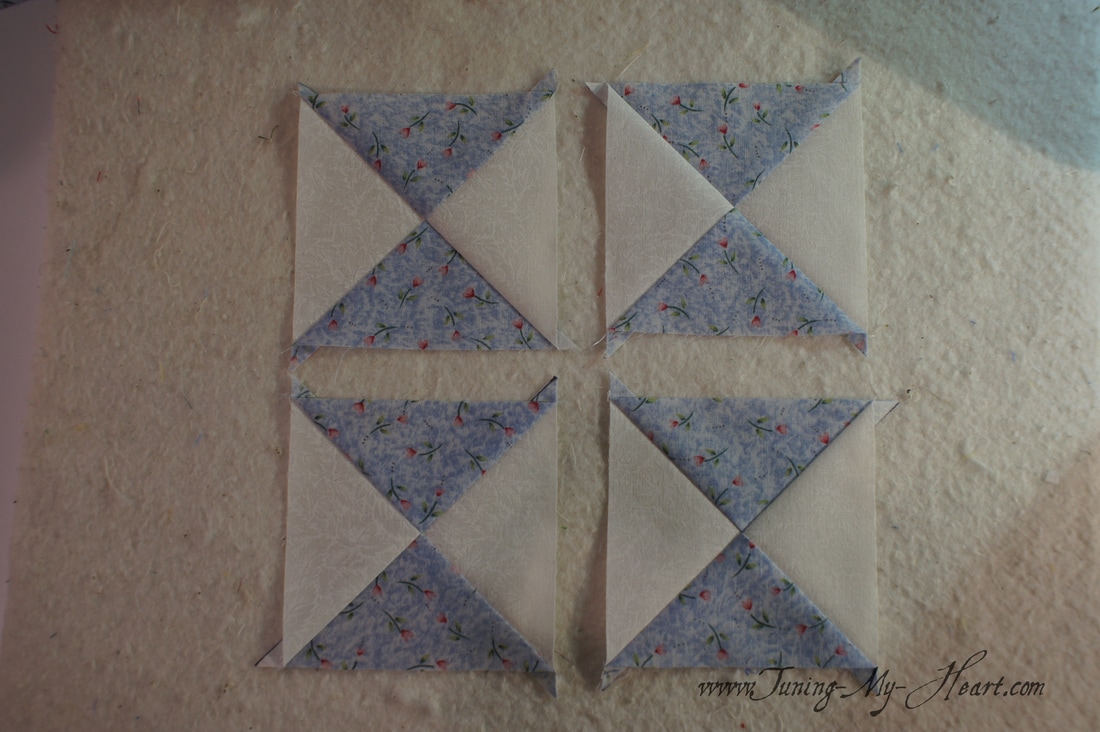 Since my finished units need to measure 3" I will trim these to 3-1/2 inches. It is important to lay my ruler's diagonal line right on that seam line. A little math here lets me know that half of 3-1/2 is 1-3/4. That means that I will find the 1-3/4inch mark on my ruler and place it right at the center of the intersecting triangles. Now I can trim the extra off on the first two sides. 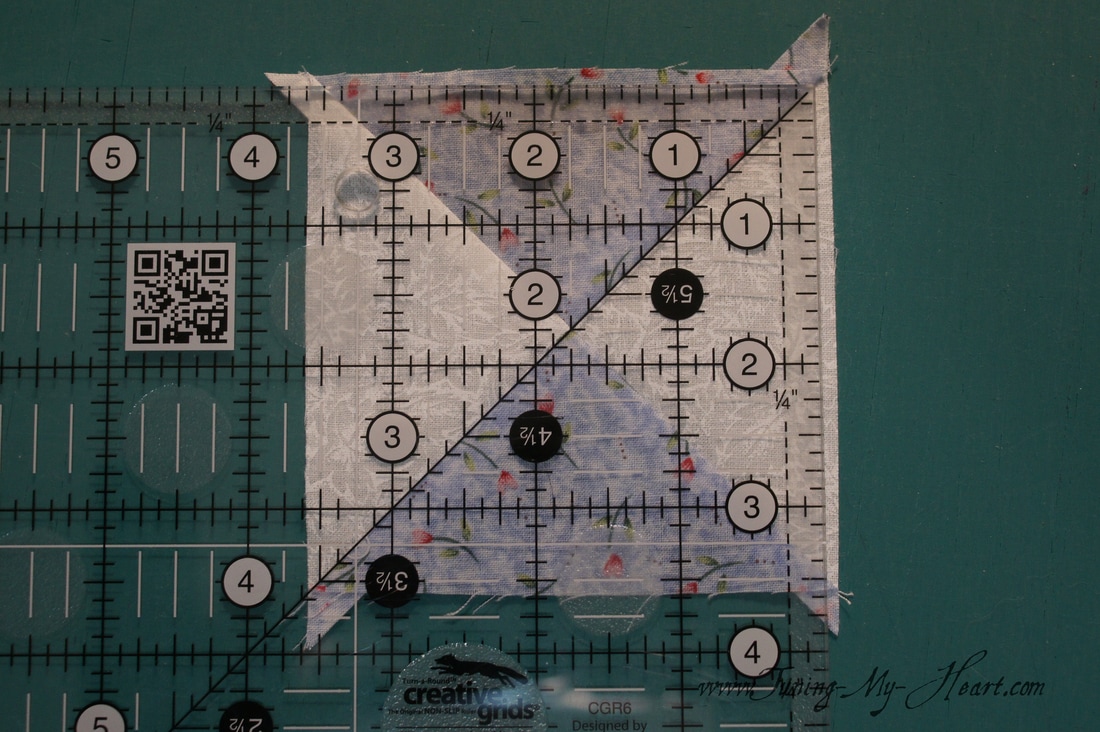 Rotatinf the block, I line up my ruler in exactly the same way and trim the remaining two sides. 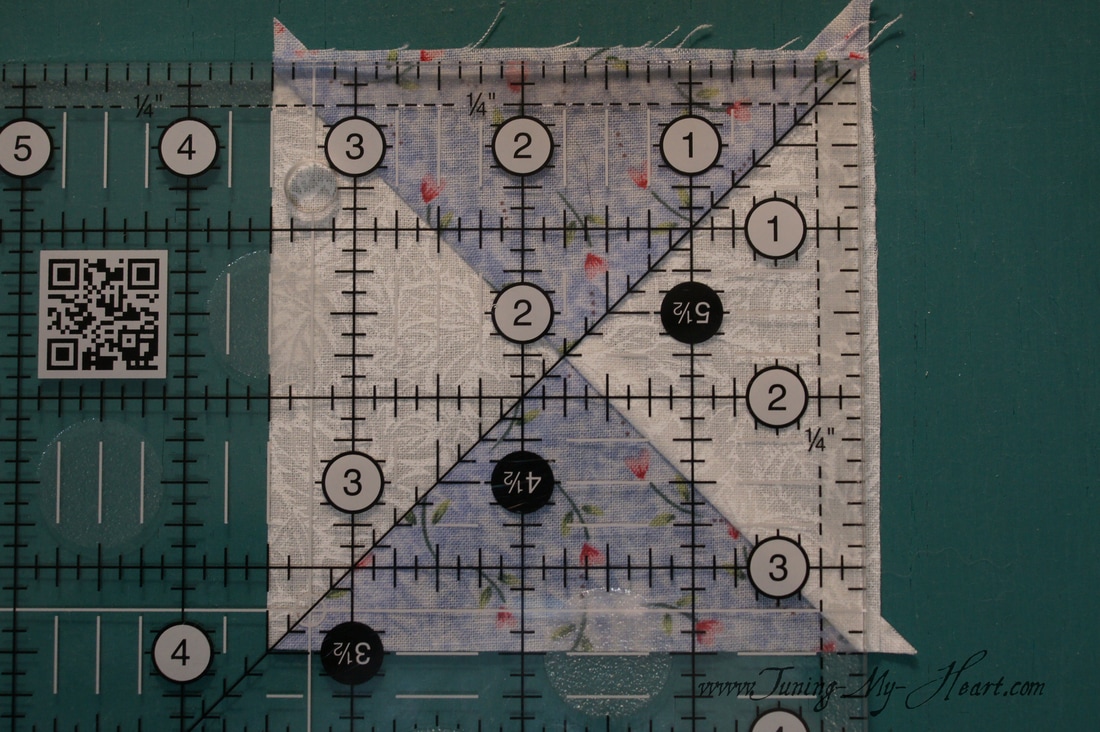 All of my Quarter Square Triangle units now measure 3-1/2 inches. Perfect. 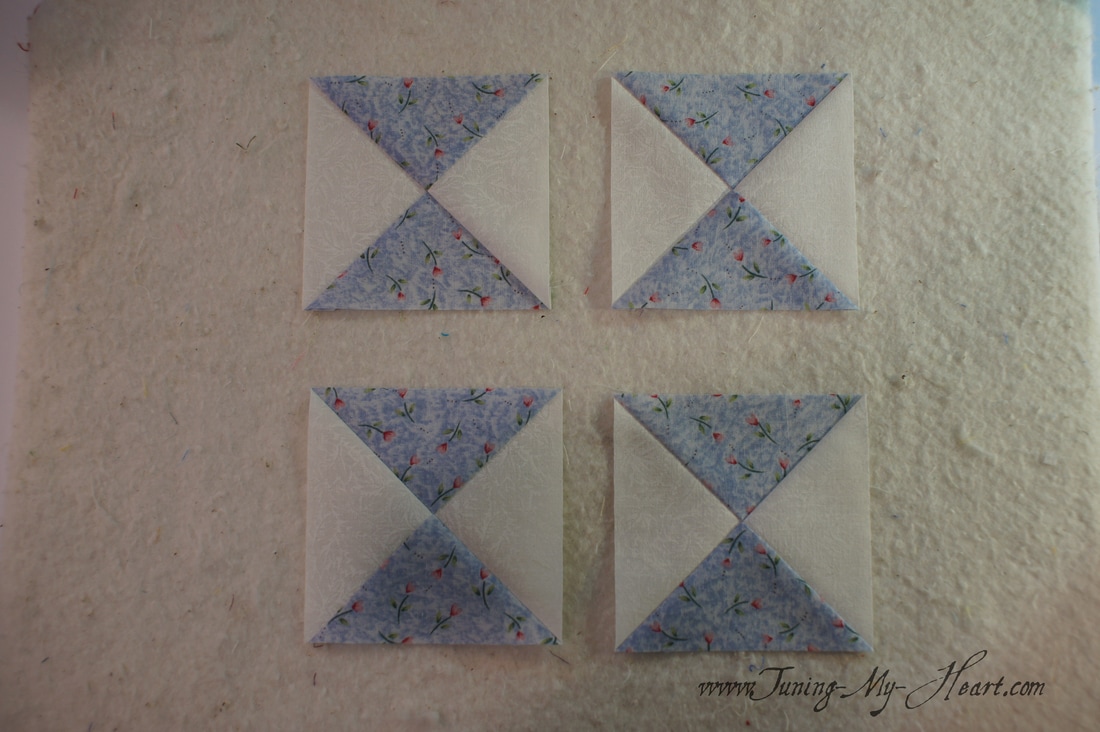 Time to lay all of my pieces together to make the Ohio Star Block.
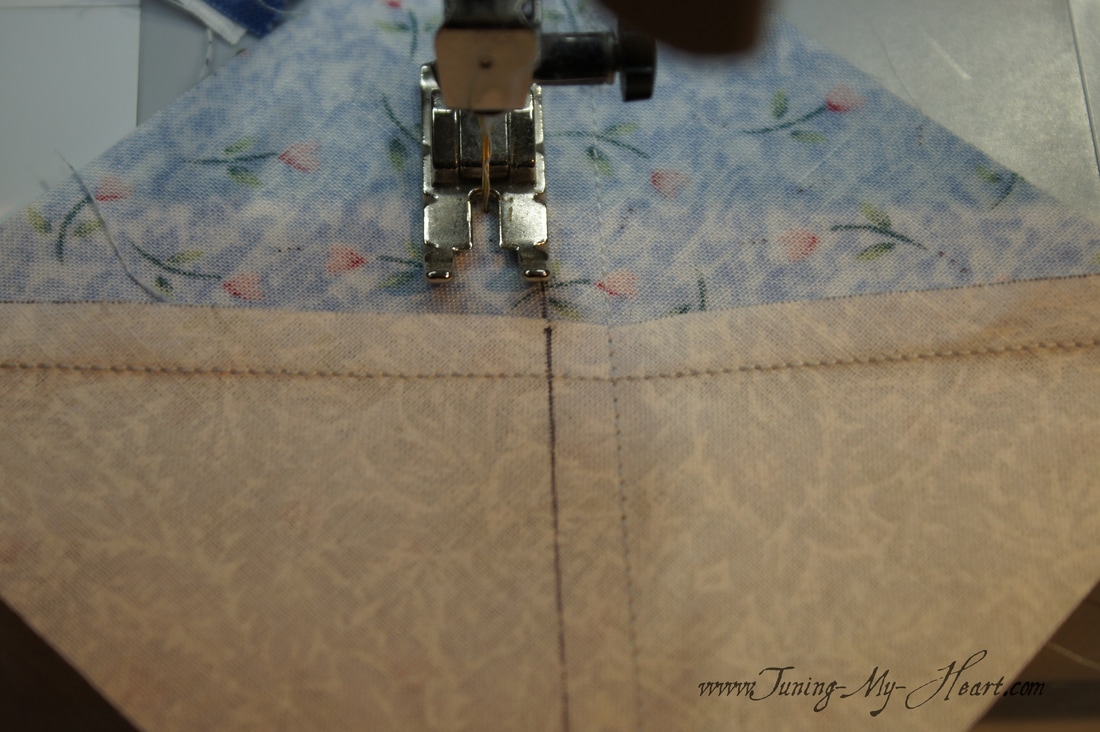
Chain piecing the rows together being careful to keep the Quarter Square Triangles in the correct position. I sometimes triple check before sewing as I all too often have to get out my seam ripper, Jack, when I put them together wrong. 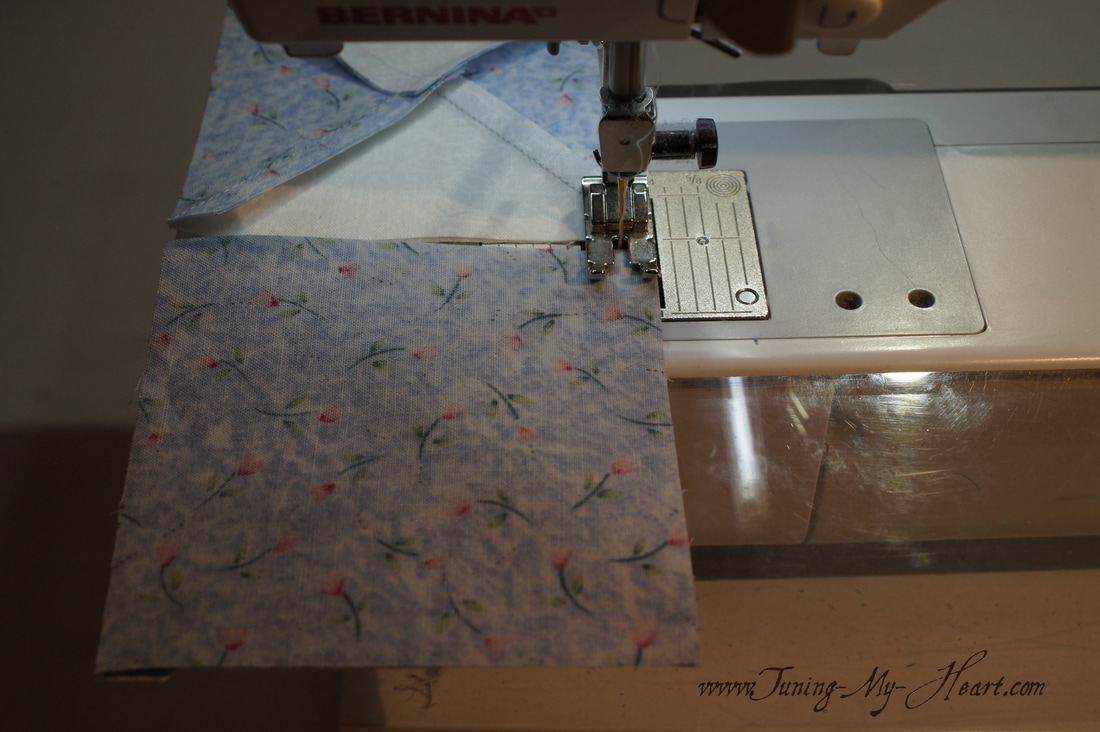 An important part of putting this block together is the direction I press the seams. I want to press them so that they go in opposite directions. If I can I liek to press towards the plain square to avoid bulky seams. 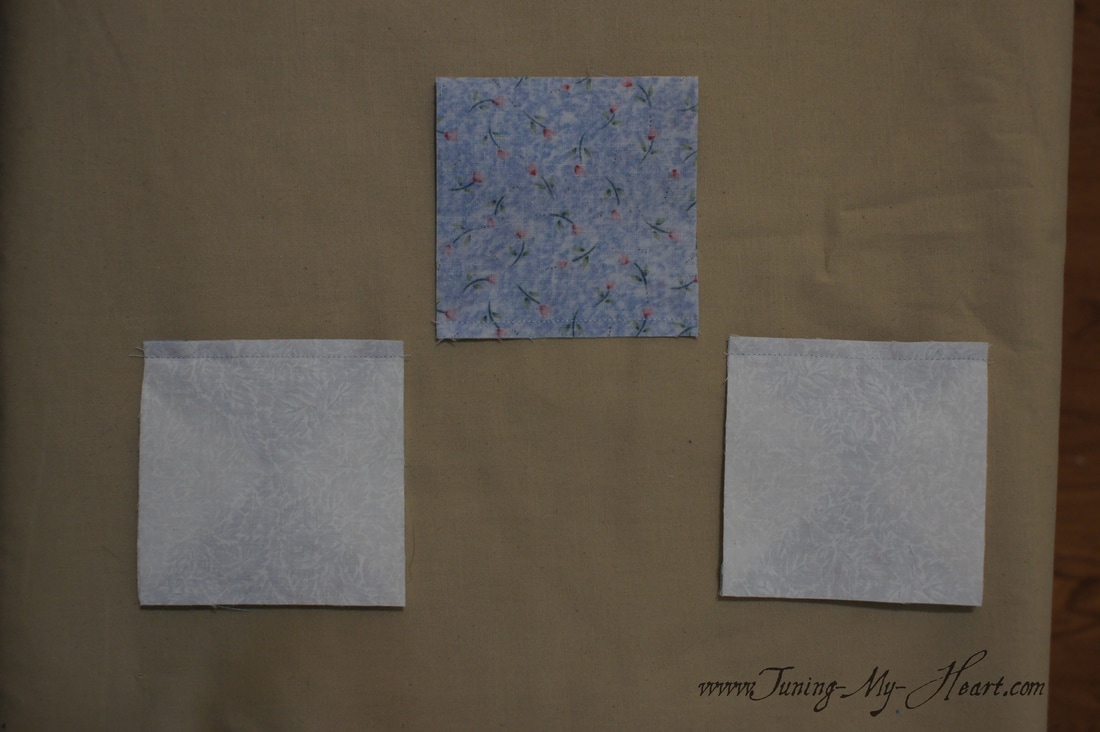 Making progress on sewing the rows together... 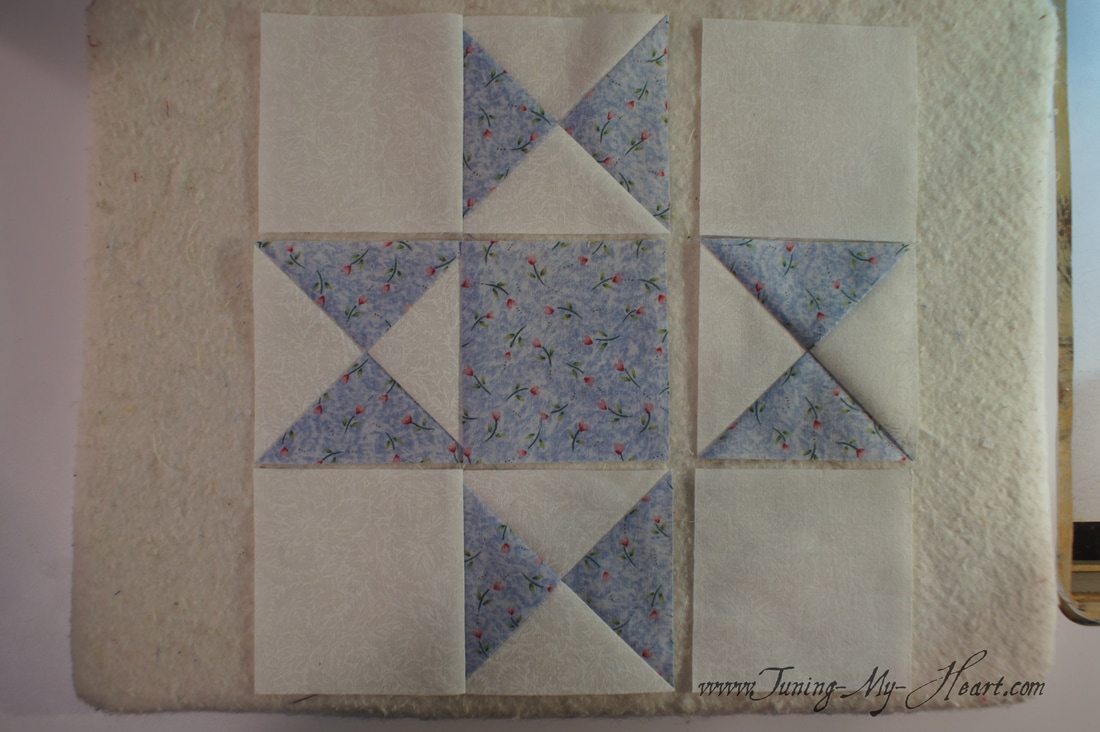 Before I proceed, I like to check to make sure my seam allowance is correct. The middle squares in each row should now measure 3 inches across. If they are off, it is a simple matter to remove the stitches and adjust the seam. Sometimes, just moving the needle position one way or the other is all it takes to solve the problem.
With my seams all pressed in opposite directions I can nest them together and put a pin in to hold them in place while I sew. 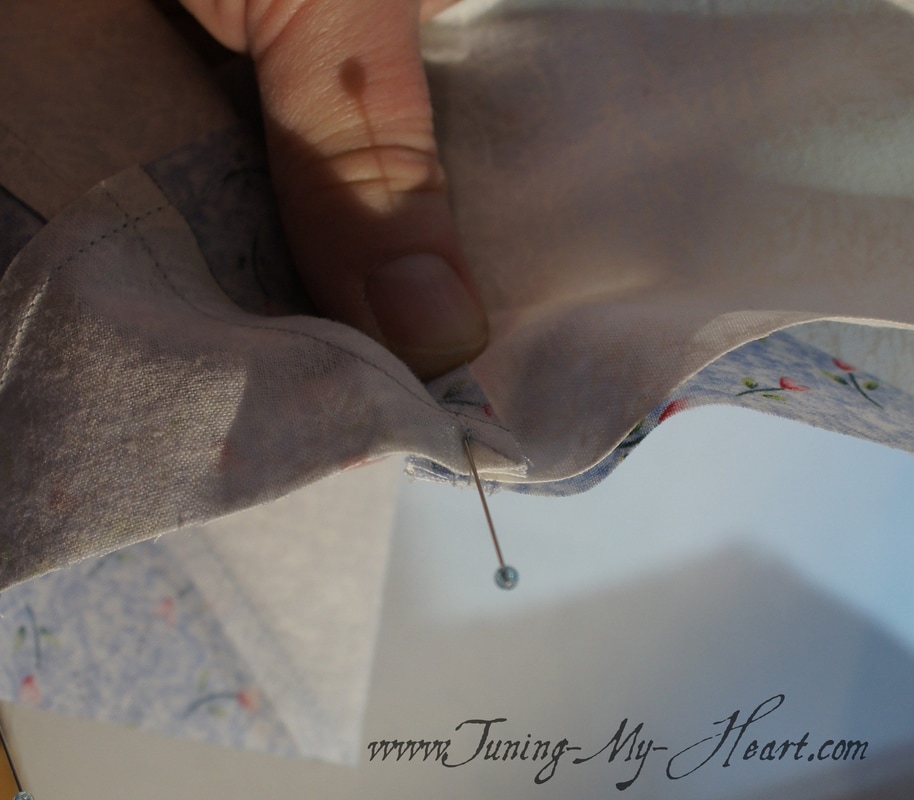 As I will sew right up to the pin, leave my needle in the down position and remove the pin before sewing the rest of the way. I also slow way down when I come to these seams as it is easy for the bulk to not behave nicely if I am sewing to fast. My goal here is to have my needle land right on those intersecting seams. 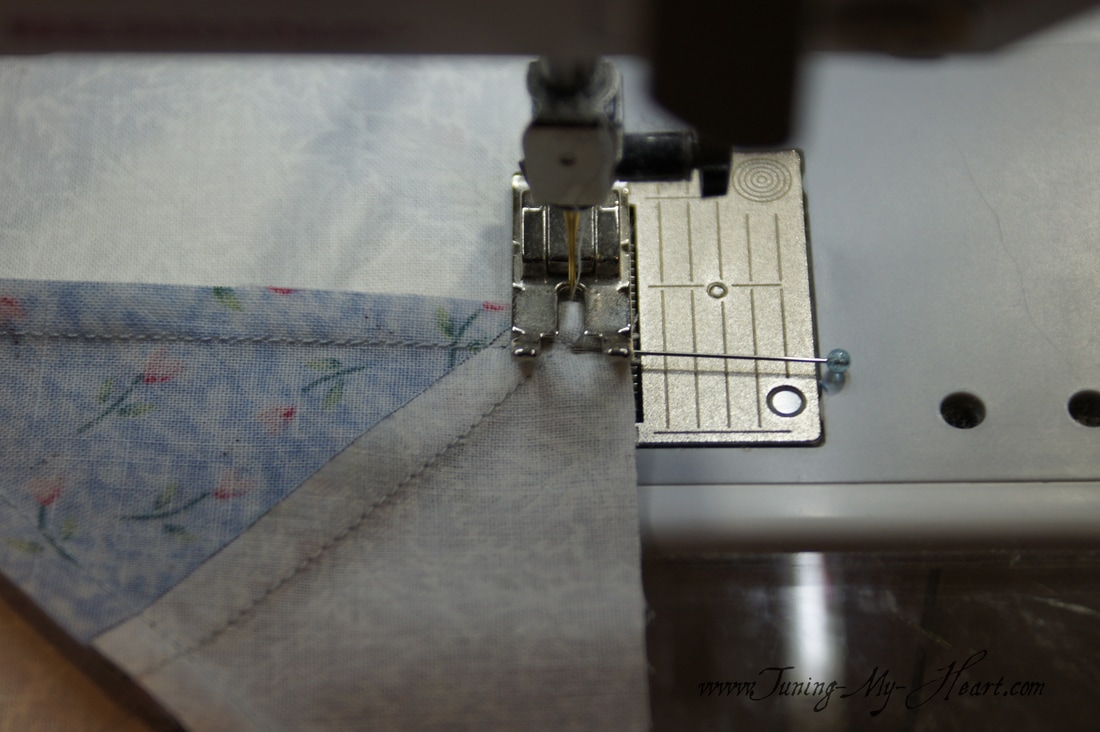 This is what the back of my block looks like. To reduce bulk at the intersections I flare them open. This allows the seams to lay in opposite directions. When you feel the intersections from the front they will be quite flat which I really like. 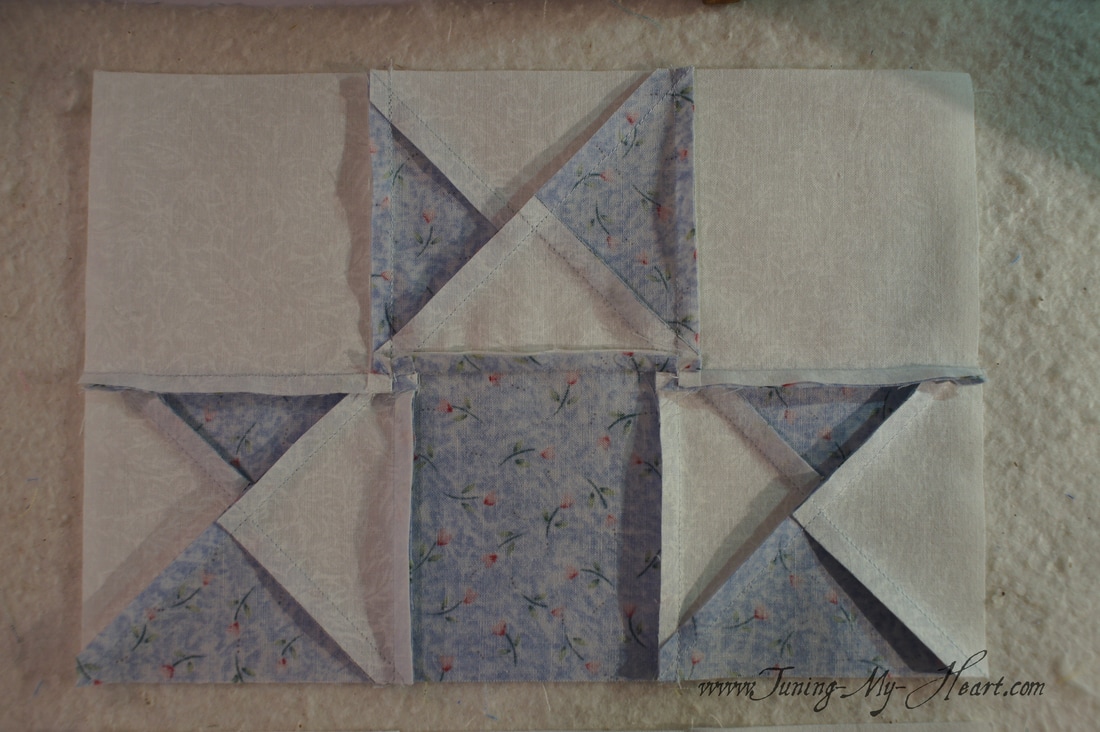 Here is the view from the front. Just need to add that last row... 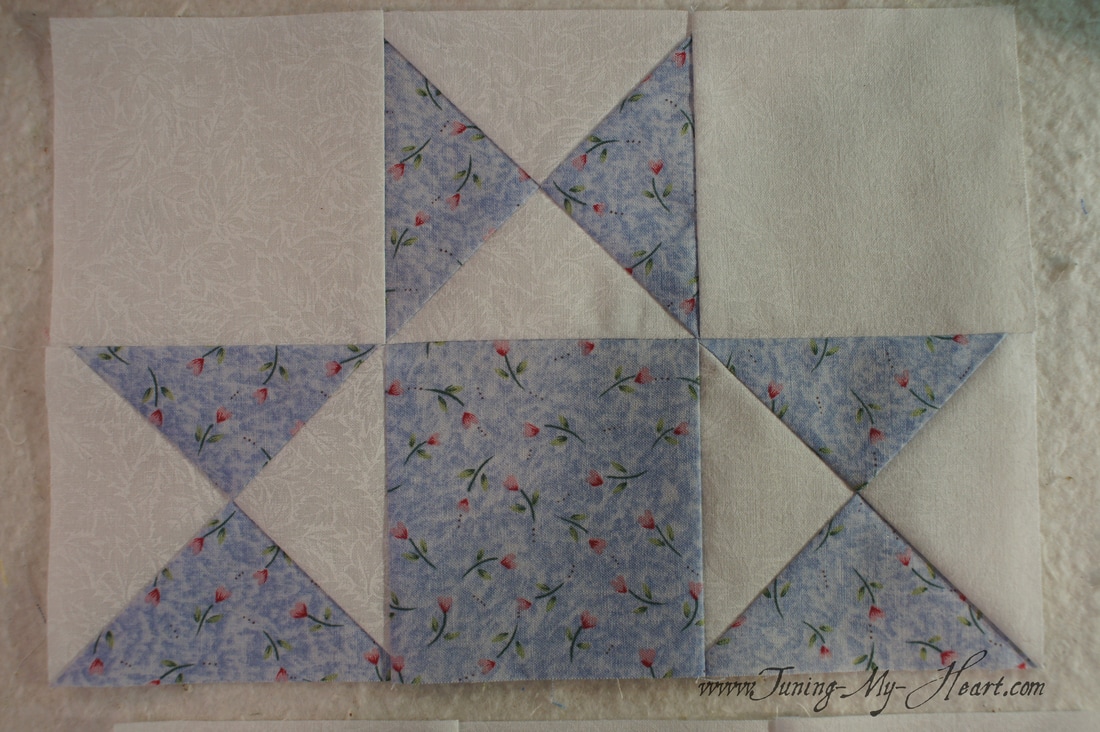 With all three rows sewn together it is time to square up this block to 9-1/2 inches. 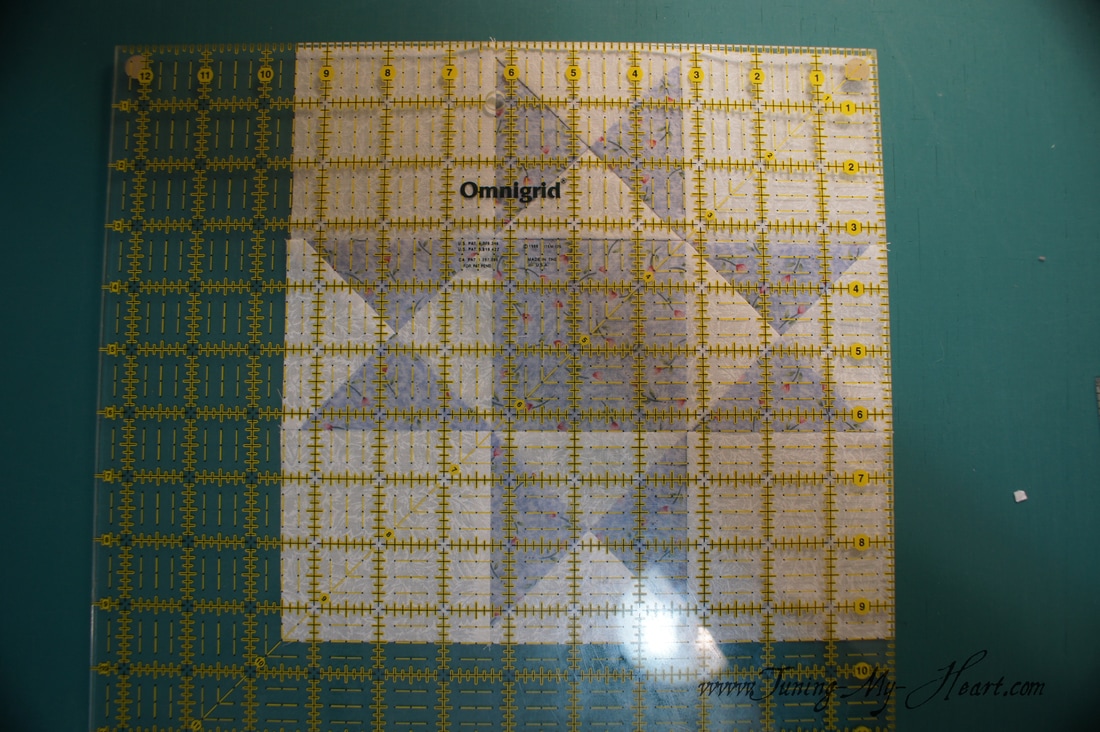 One thing to be aware of in that process is to make sure I have 1/4 inch of fabric extending beyond the points on my star. If not, then I will chop off the points when I sew it into the quilt. 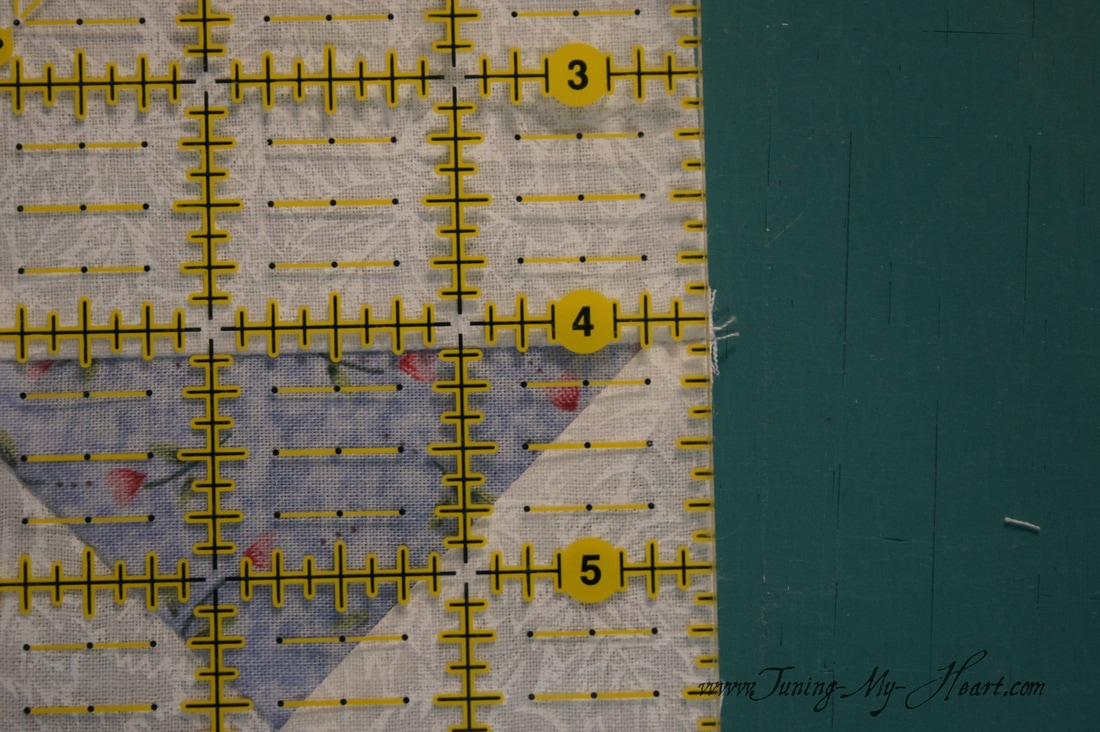 The Ohio Star is one of my favorite blocks. 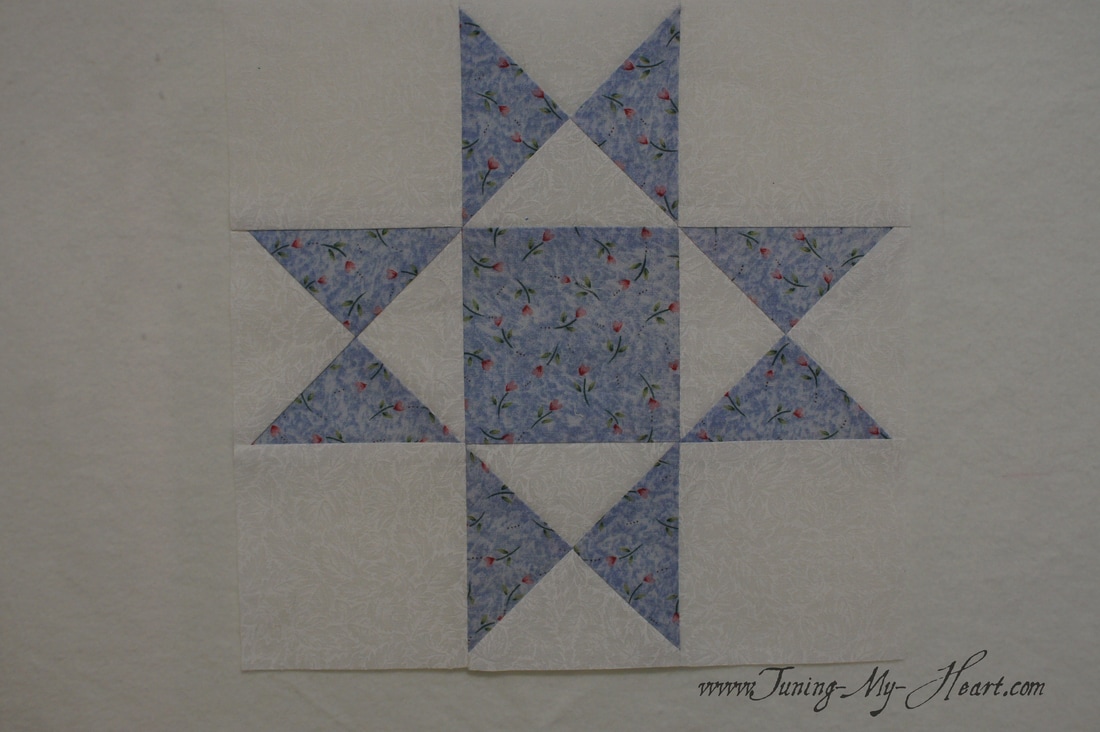 I hope you will give the Quarter Square Triangles a try. This method is easy to use no matter what size your finished block. Just add 1-1/2 inches to the finished size you need, In this case I needed a 3" finished Quarter Square Triangle unit. 3 + 1-1/2=4-1/2. Happy Quilting!! 
0 Comments
We have all heard how important a 1/4 seam is. It sounds so easy, but how elusive it can prove to be. Did you know that the accuracy of your 1/4 inch seam can be affected by the thread you use, among other things. It is important to check the accuracy of your seams before beginning a new project, especially if you are using a different thread and/or needle size. Here is my little tutorial on how to achieve that mysterious seam needed for quilting. There is nothing new here, but perhaps you, dear reader of my blog, will find it helpful. Step 1: I cut three strips of fabric that measure 1 1/2" x 4" wide using two different fabrics. 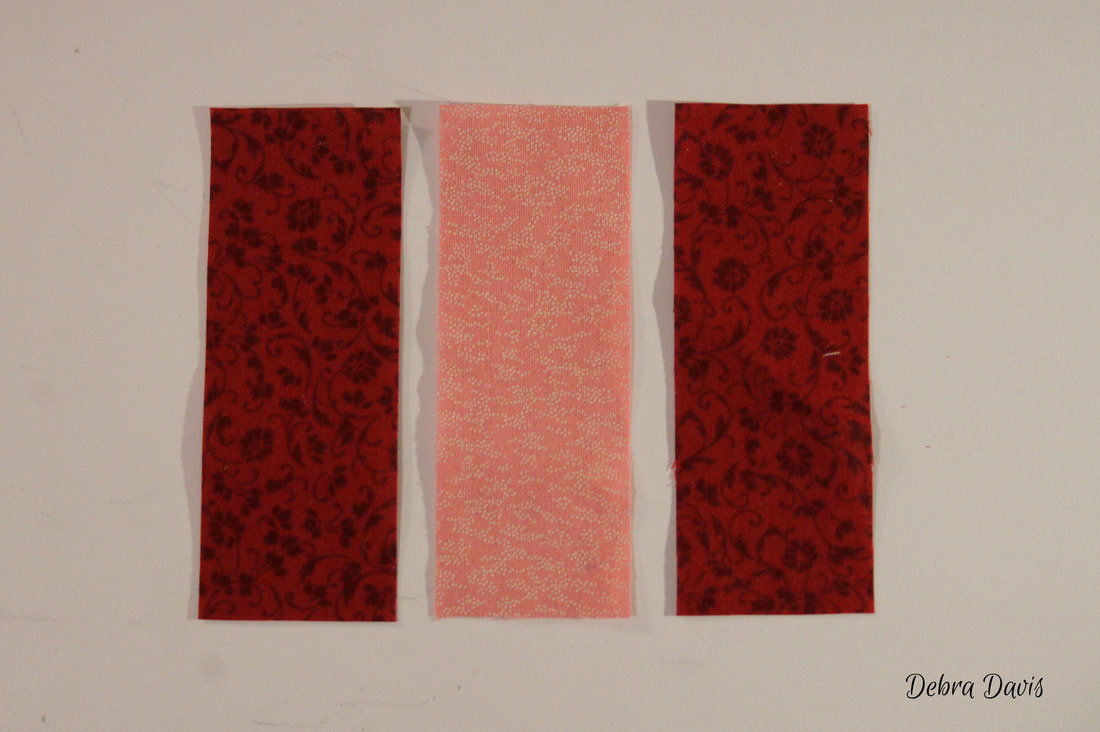 Step 2: One of the often overlooked keys is how you sit at your machine. It is important to sit facing your machine "square on." As you look at the needle you want your eyes to align with the presser foot in such a way that you are looking straight at it. My machine has a 1/4 inch foot that I use, I make sure the edge of my fabric is lined up with the edge of the foot. My throat plate also has a quarter inch mark that I make sure is lined up as well. One other thing I check is that the top edge of my fabric lines up with the horizontal mark on the throat plate-this tells me everything is squared up and I will be starting with a straight line as I sew. (Notice the two arrows in the photo,) When I sew I I focus my attention, not on the needle, but on that quarter inch mark on my throat plate. I was so used to looking at my needle from my garment sewing days that it took a bit to realize how much this little change in focus helped. 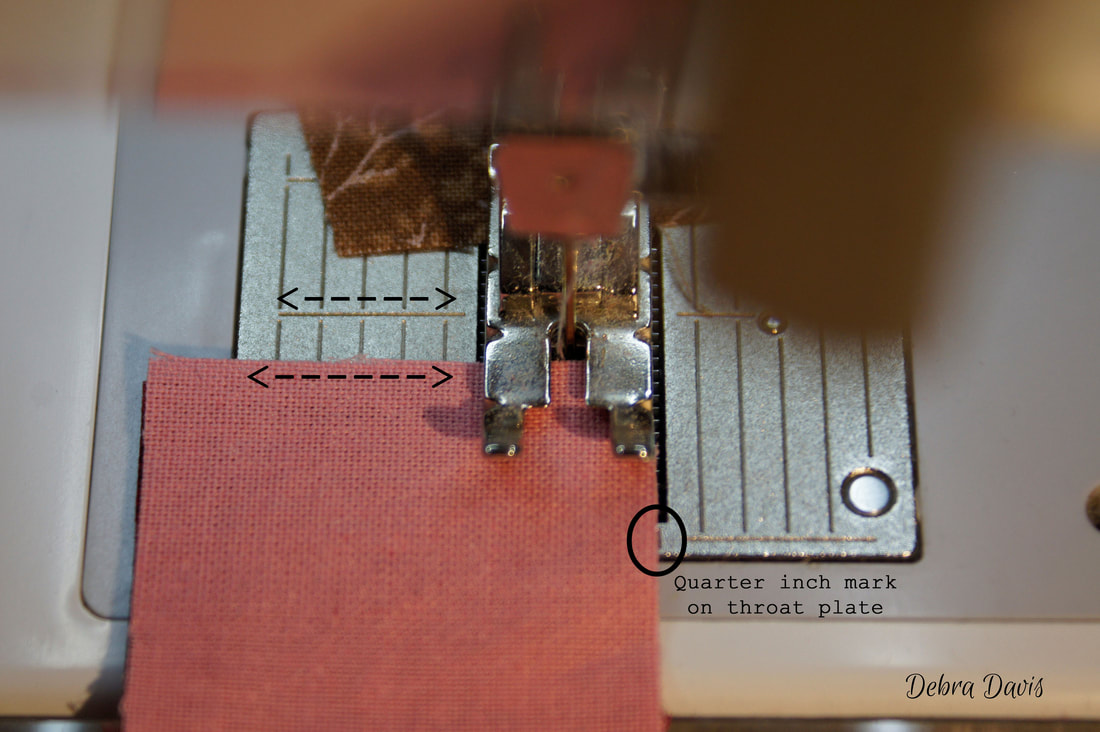 With right sides together sew the strips together and press towards the dark side. 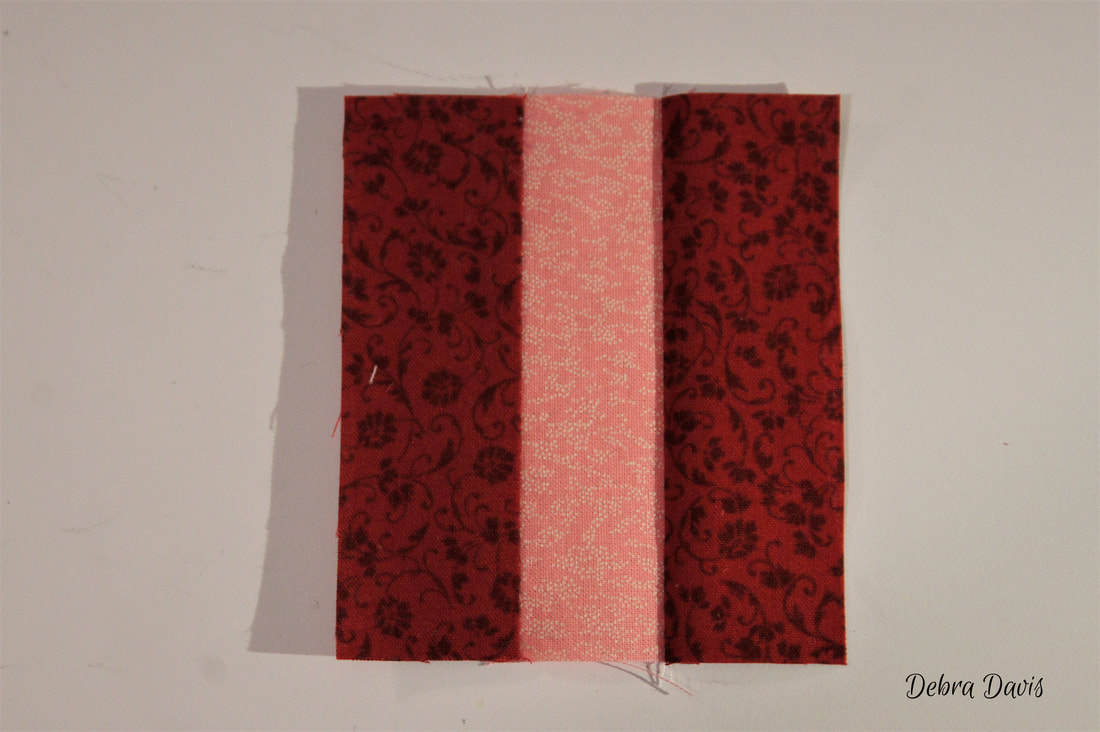 Step 3: Now I can check how accurate my seam is. The middle strip should measure 1" across. 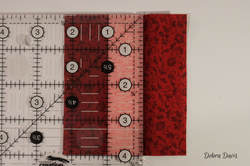 I want to show you in this next photo how much difference there is if I move my needle over one position on my machine. My machine has the ability to move the needle to the right and left several places. Here I have moved it one position to the right and you can see that the middle strip is now over 1" even though I only moved the needle over a very tiny fraction of an inch, basically a needle width. But just that little bit is enough to affect the accuracy of my blocks. 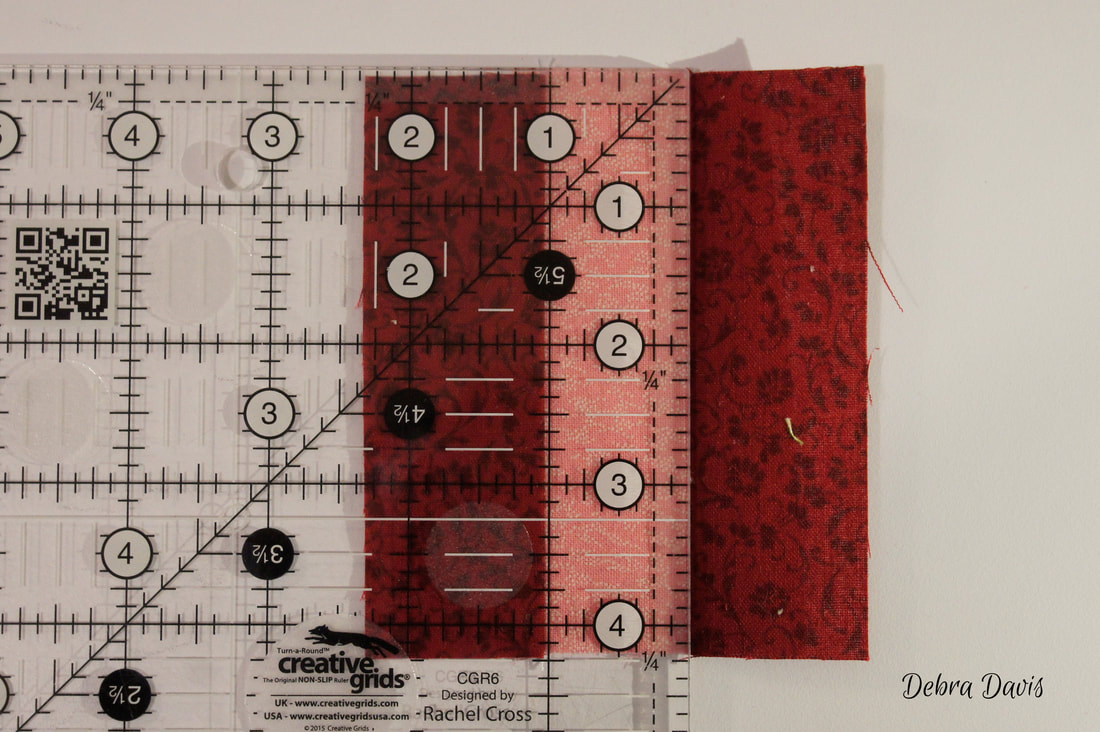 If your machine does not have this feature you may find it helpful to use a seam guide, of which there are many available options, that will help you line up your fabric on your machine as it enters the stitching area. You might even find placing a piece of tape on your throat plate is all that is needed once you figure out where your quarter inch mark should be. Pictured below are some of the things I have used in the past, before I purchased my current sewing machine, that helped me with acheiving accuracy. These are all adhesive guides that can be removed when not needed. I hope this helps. 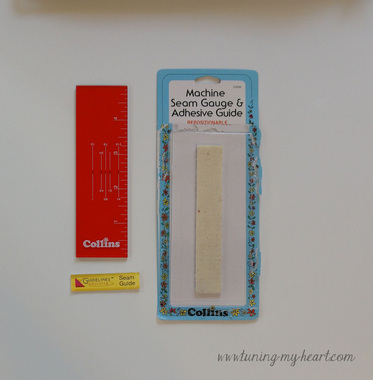 Happy Quilting! Debra |
 RSS Feed