|
We had a cold front move through Texas this weekend. It actually started to feel like fall. As my studio is usable again my thoughts soon turned to quilt patterns. I think I gather even more patterns than I do fabric! I came across these and thought you might enjoy them as well. 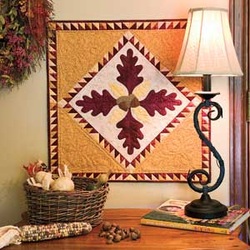 Acorn Autumn is a pattern available from McCAlls Quilting 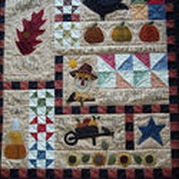 Autumn Blessings- a freebie from The Painted Quilt 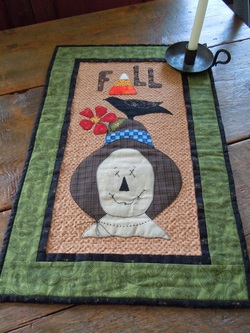 Fall Scarecrow-This is another one from the Painted Quilt.
I checked the links and they worked for me, but let me know if you run into problems. Happy Quilting! Deb
1 Comment
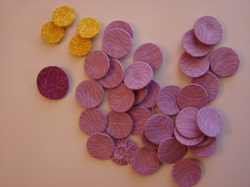 I fell in love with needle-turn applique a couple of years ago. There is something I find relaxing about sitting down with handwork. One of the great tricks I have learned is how to make perfect little circles. I had to do quite a few for the piece I am currently working on so decided I would put together a little tutorial. I hope you will see how easy it is to get great results after reading through this post. If you have any questions or need some clarification please feel free to comment and I will respond. How to Make Perfect Circles for Applique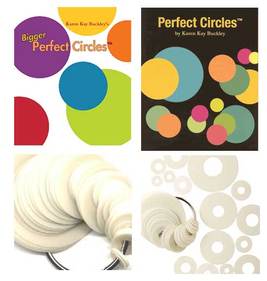 The key for me was Karen Buckley's Perfect Circles. I have the small set with the black background. I tried making my own templates once but it is extremely difficult to get them smooth and perfectly round. The other nice thing about Perfect Circles is that she provides you with several of each size. 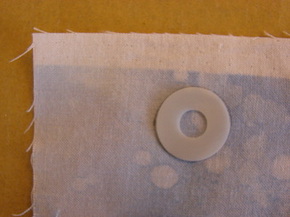 The first step is to place the template on your fabric, wrong side facing you. I like to place mine on a piece of very fine sand paper. Trace around the circle, I use a chalk pencil for this, SewLine makes one that is just like a mechanical pencil and they have a variety of colors of chalk leads to use with it. This is where the sandpaper comes in handy- the fabric does not move at all as you trace around the template.  Next I cut out the circle using between a 1/8 and 3/16 seam allowance-smaller circles benefit from narrower seams allowances. I never worry about being perfect, this is not going to show at all. 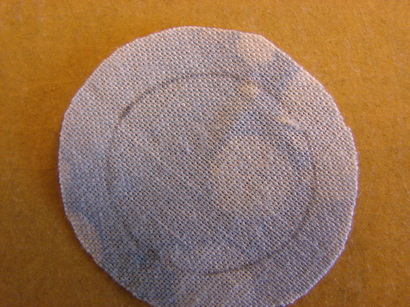 Using a running stitch I sew as near the edge as possible all the way around. (Be sure and leave a good bit of thread at the beginning careful not to pull it into your work as you sew.) If you get too close to the edge it may fray and your stitch will not stay in place. Again, I do this very quickly not worried a bit about perfection. 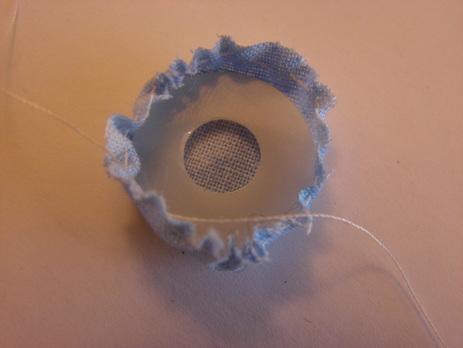 Once that is done clip the thread leaving a good tail. Place the template back in the middle of your circle and begin pulling the loose thread ends to gather up the fabric.  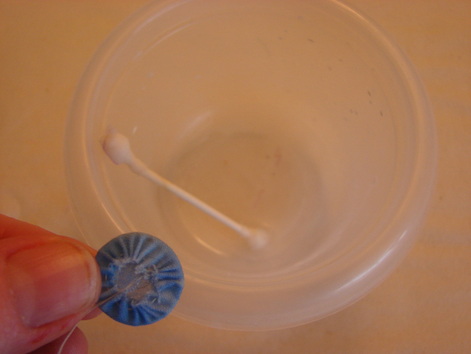 Holding the threads taught across the circle paint on the starch/sizing. Make sure to cover all of the gathers. 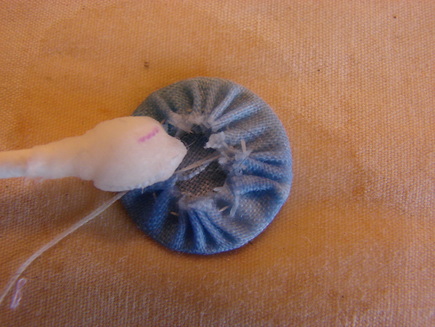 Using an iron that is set to medium heat, no steam, very carefully set it on top of the circle leaving the thread tails sticking out where you can see them. 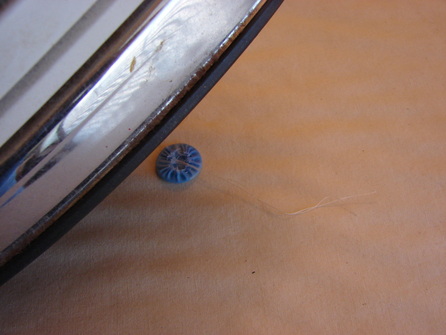 Just leave that iron to set on the circle, pick up another circle that has been cut out and do the running stitch on it while you wait. It is the perfect timing for the iron to do it's job. This is where those threads sticking out come in handy you can safely grab hold of them as you lift them iron and get grab your circle. Set this one to the side to cool. Prepare the second circle with the starch/sizing, place it under the iron and go to work on another circle. It is a great way to mass produce the circles. The set comes with four templates so I do all four, and then draw and cut out the next four while the first are cooling. Once the pressed circles have cooled gently pull out the plastic template 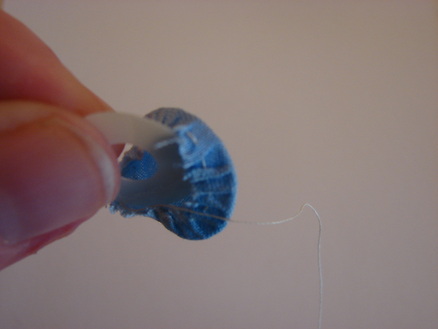 Pull on the stitches to return the circle to it's proper roundness and give a light press with the iron. TaDa! A perfect circle ready to be stitched in place. 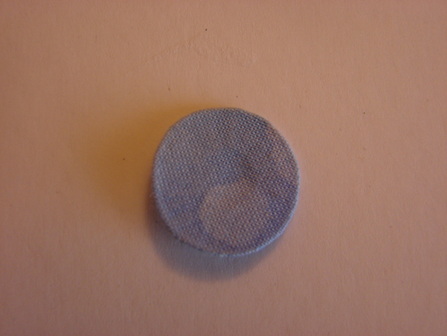 Now it is time for me to get back to sewing. 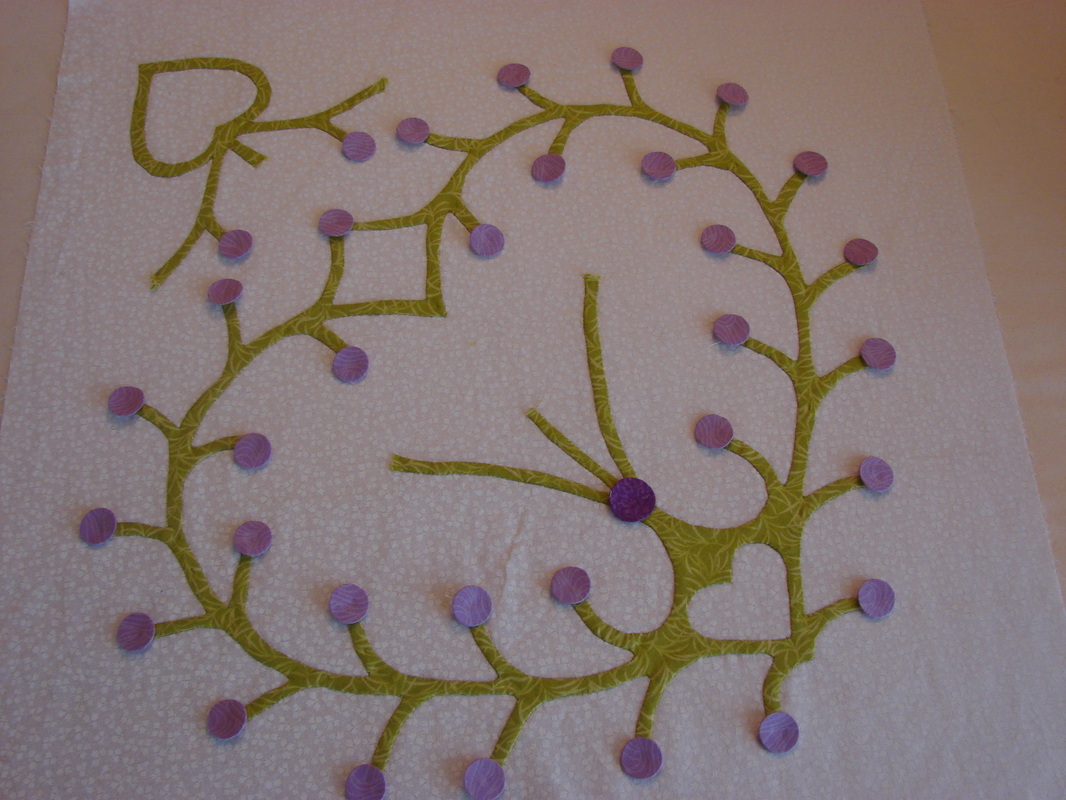 Happy Quilting!
Deb |
 RSS Feed