|
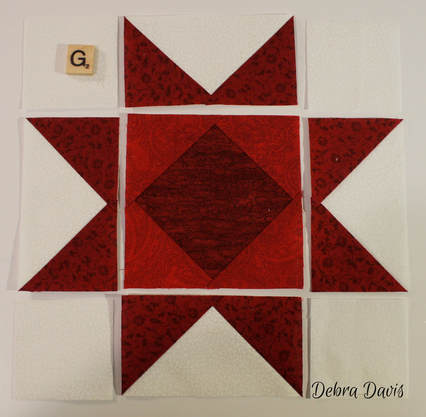
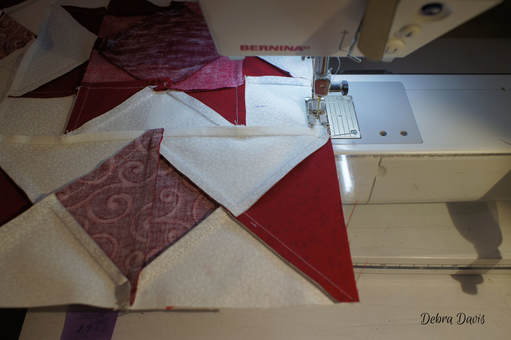
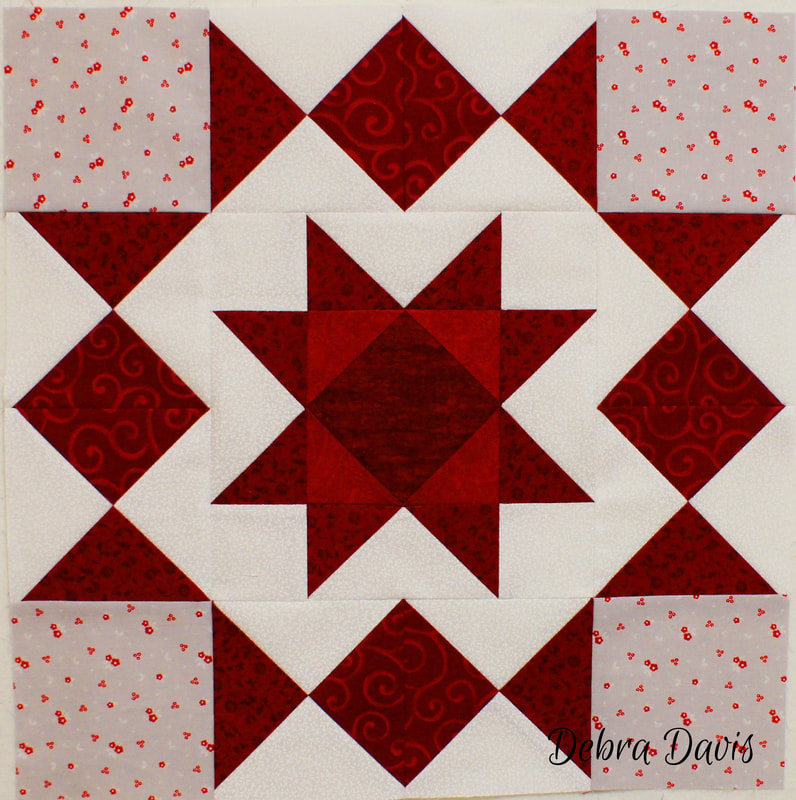
It's time for Block 6 of our weekly Sew Along. I have named this one Starburst. It has some similarity to Block 4 as I like playing with color placment to see how much it can change how a block can looks.
Click here for PDF Pattern Click here for all of the previous pattern in this series I am blessed with a wonderful son who is a tech guy. He has figured out how to make these blog posts printable so you will find that new feature at the end of this post. 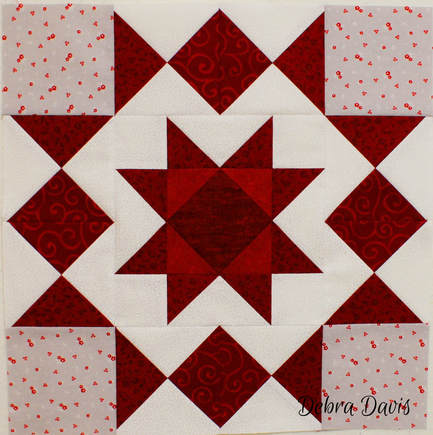
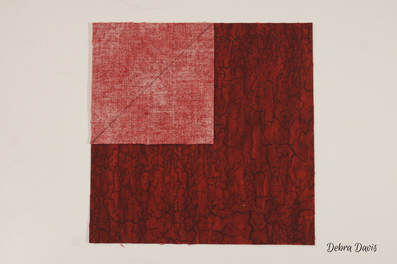
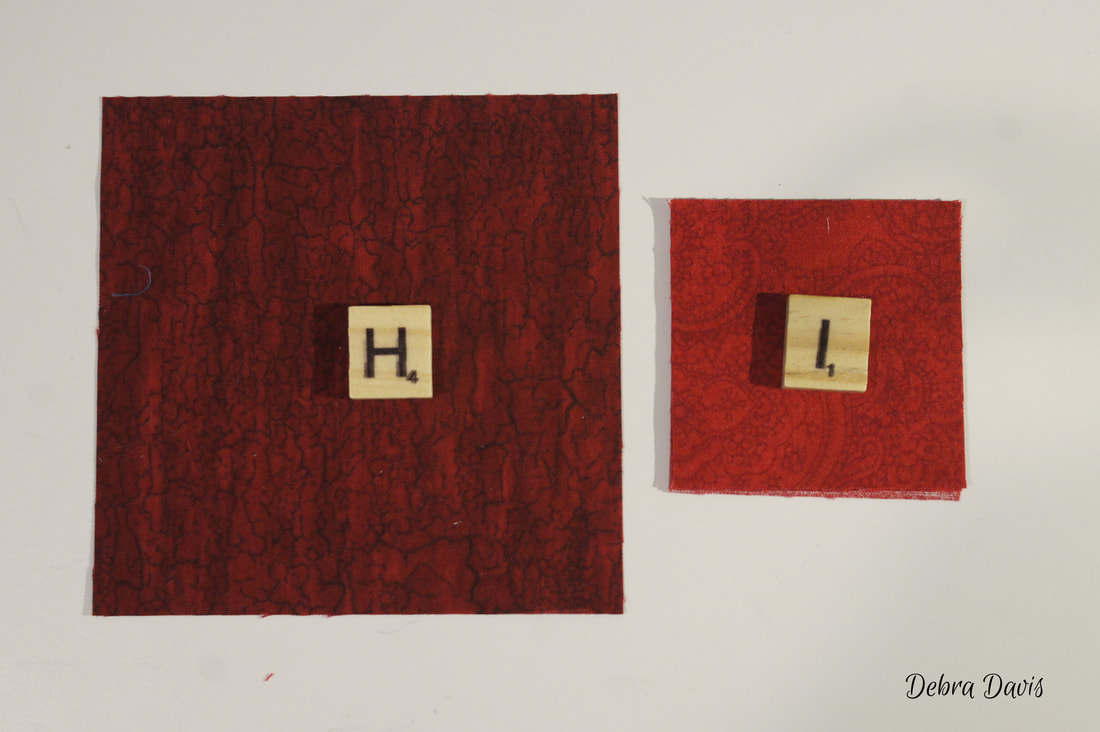
I have cut out all of my pieces from my fabric, which has been starched before cutting. I did decide to change one of my medium reds out for a lighter red-
I just felt I needed a little more pop of contrast in there. So my "I" squares are from the light red fabric I have been using in my other blocks. 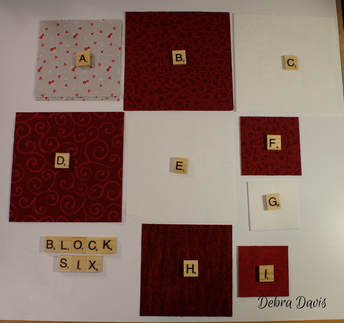
I will begin by making the hourglass units needed for section 1.
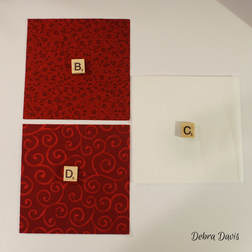
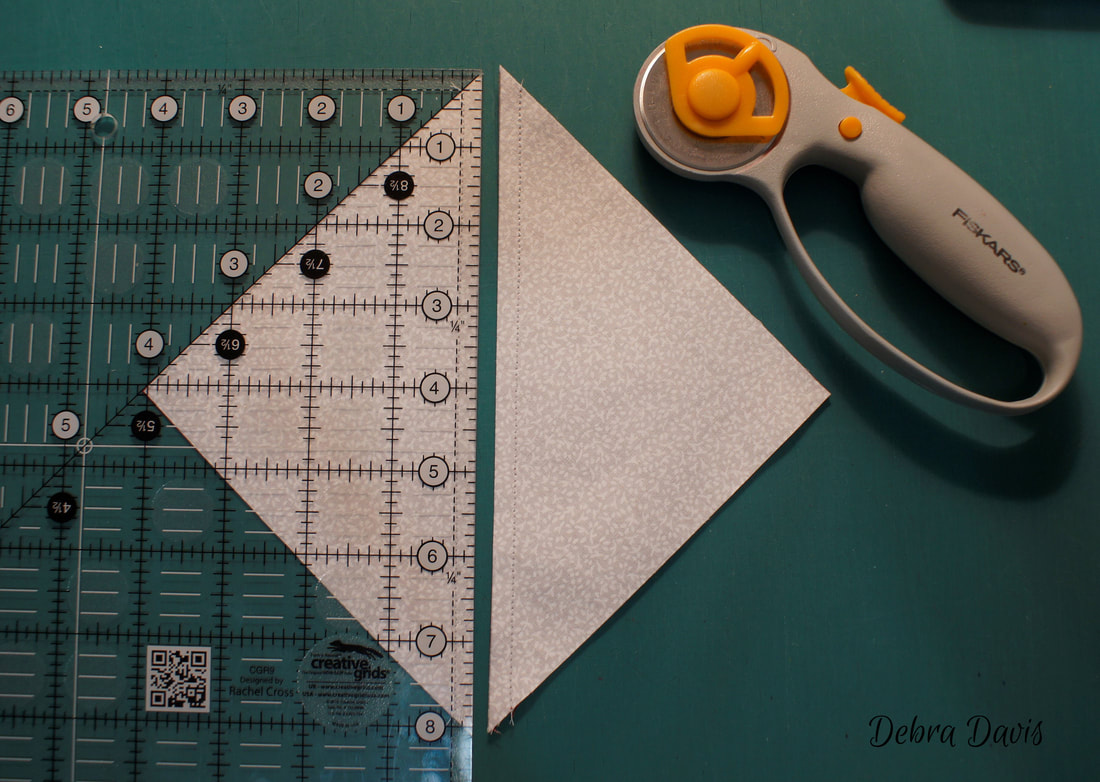
The hourglass units are made from Half-square Triangles (HST's) using the B,C, and D squares. The directions call for making these oversized so there is room for trimming the final Hourglass units to the correct size. First draw a diagonal line on the back of the C squares.
Next sew 1/4 inch from each side of the drawn line.
Cut these apart on the drawn line and press towards the dark side, keeping the B/C Half-square triangles in one pile and the D/C Half-square Triangles in another.
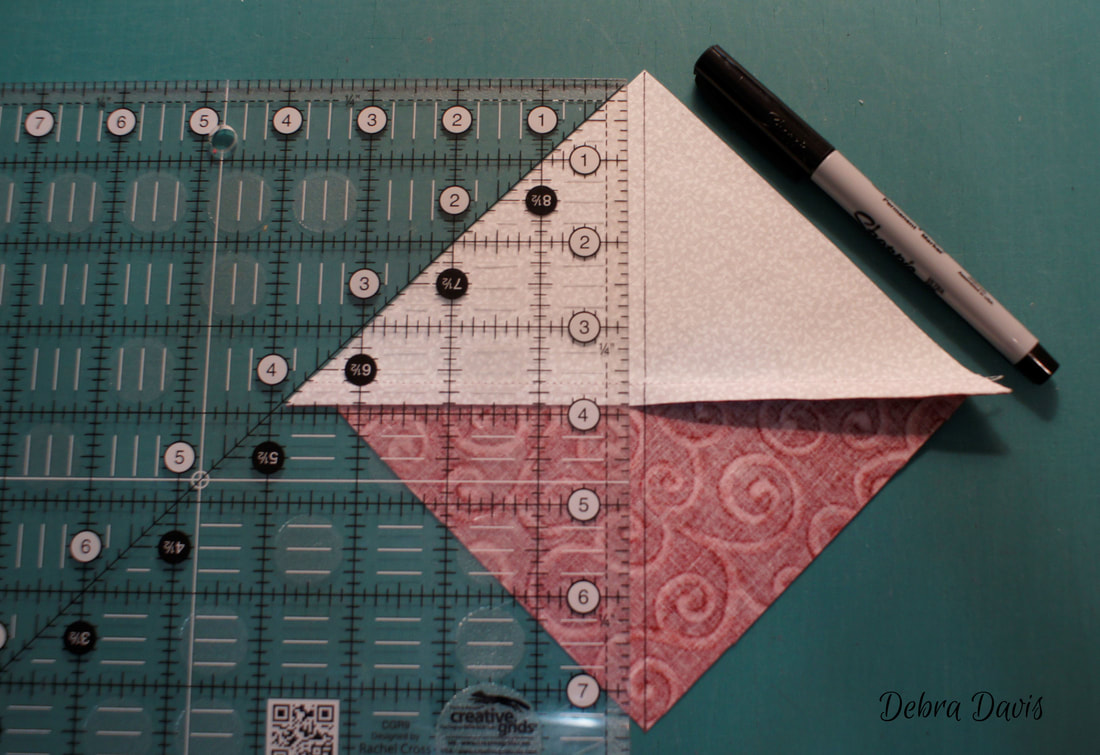
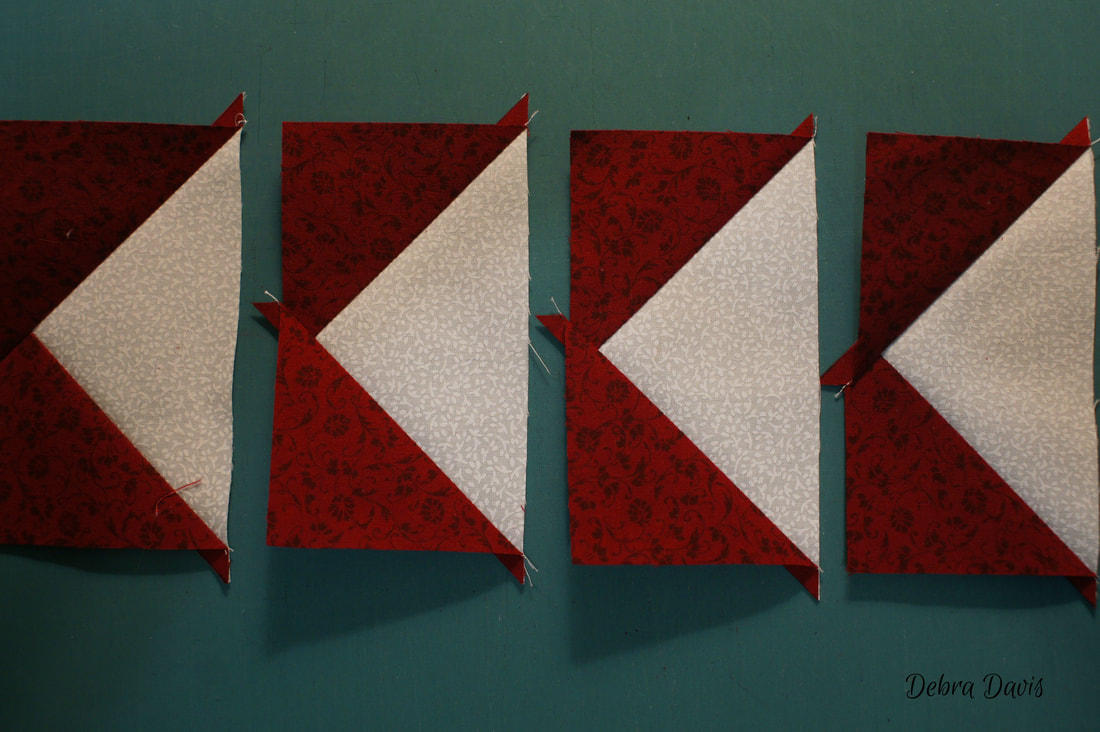
On the back of one set of Half-square Triangles draw a diagonal line down the middle. I did this on the back of my D/C HST's becuase the back was lighter and my line would be easier to see. Place these on top of the other set of HST's as shown in the photo.
Sew 1/4 inch from each side of the drawn line. By sewing these so that the seam is facing towards the needle like this it helps push the two seams together.
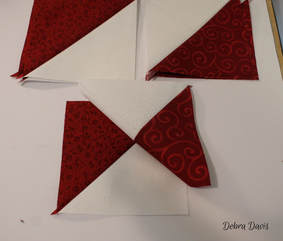
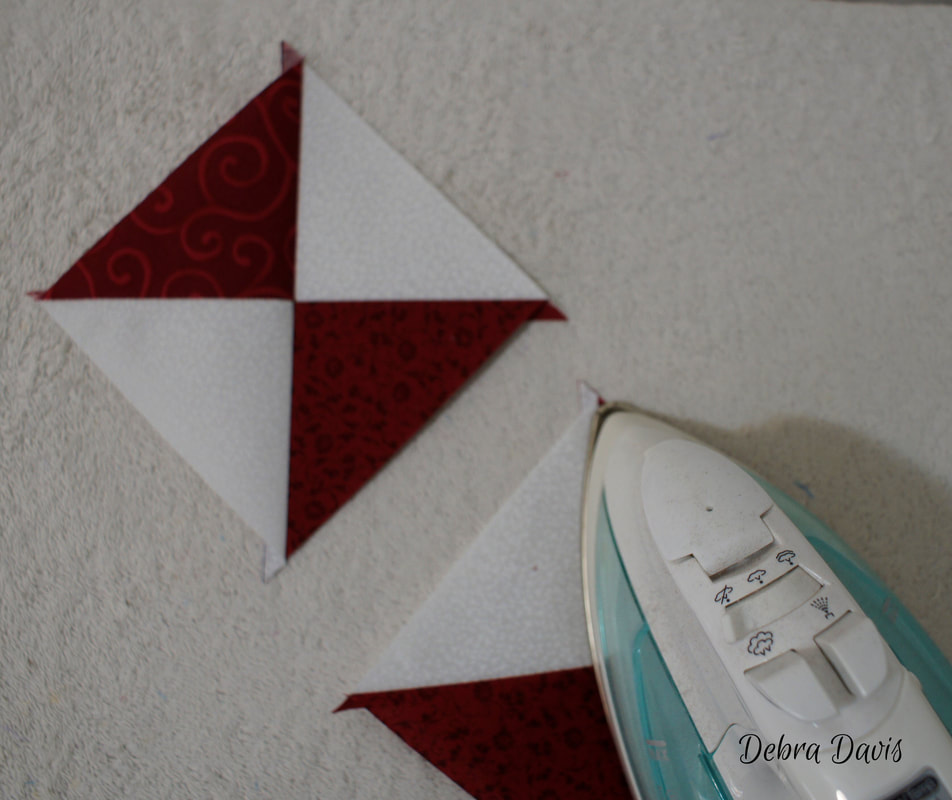
Press half of the Hourglass units to one side and the other half in the opposite direction.
Stack them according to which way they were pressed.
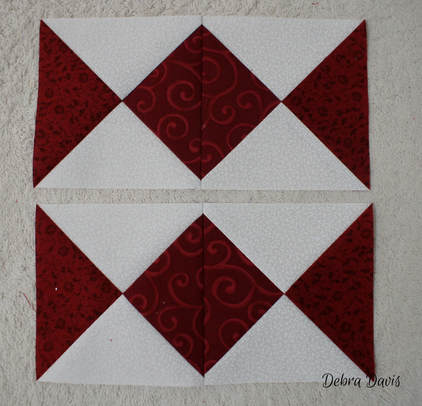
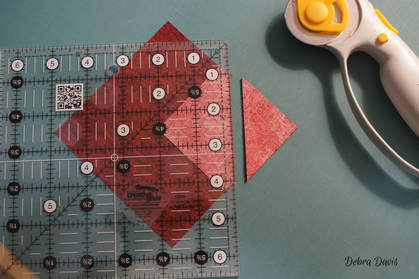
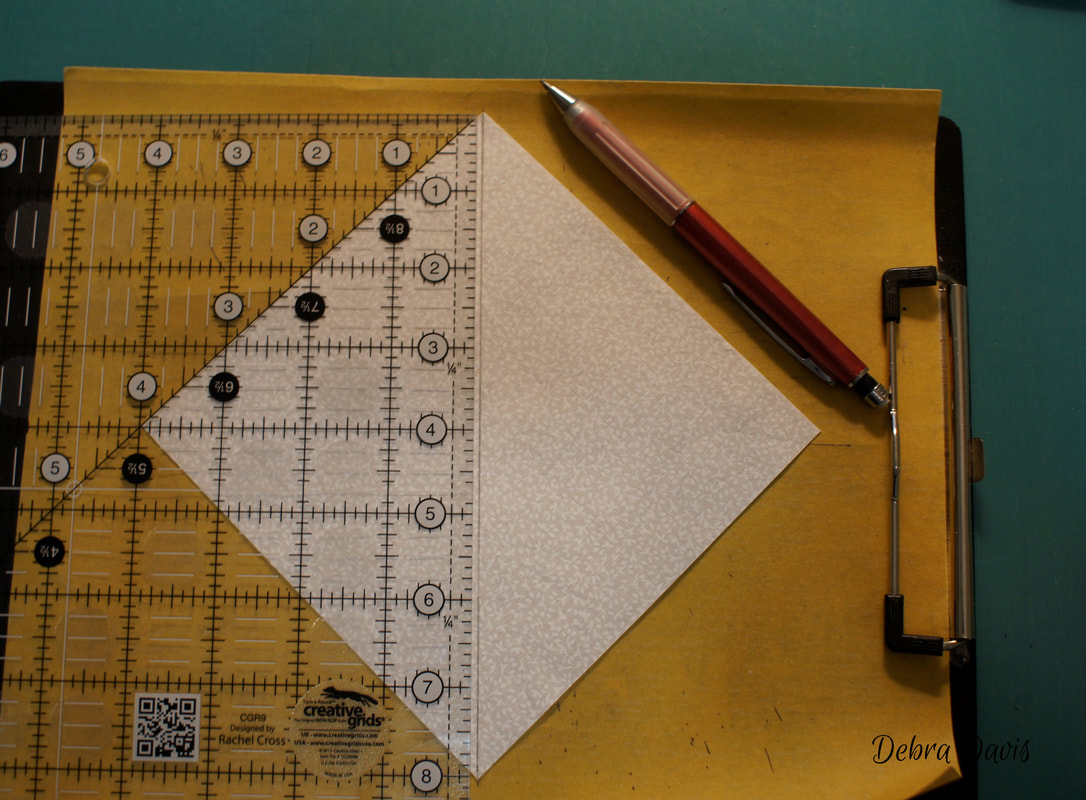
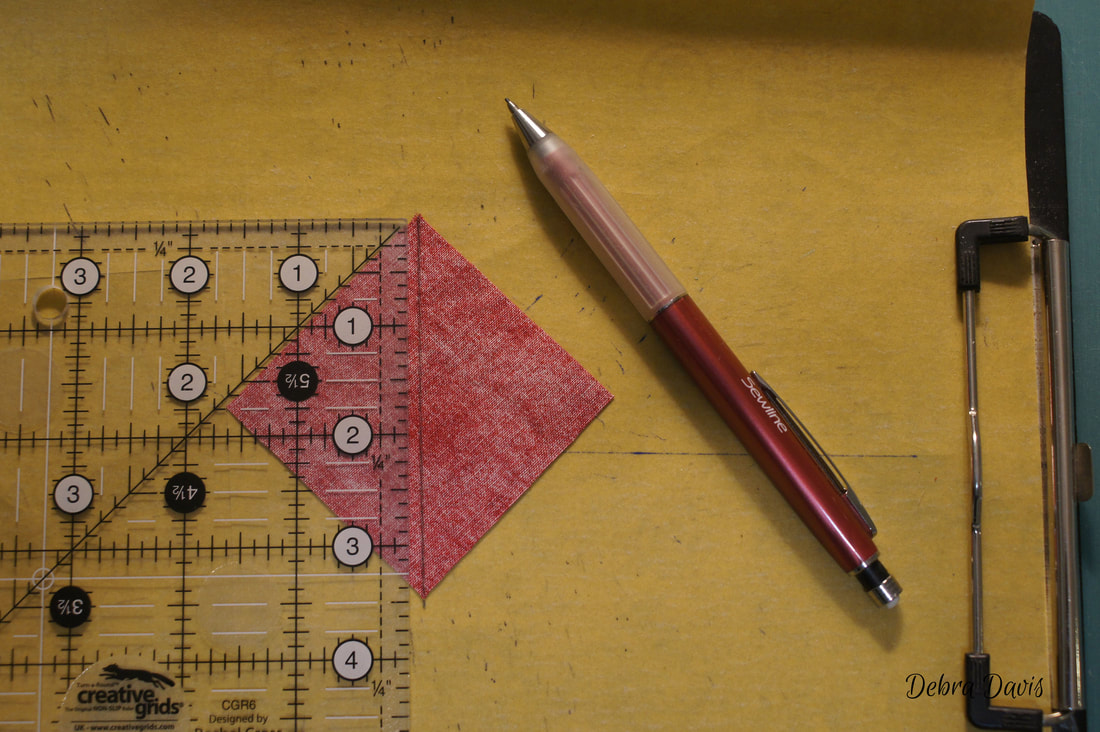
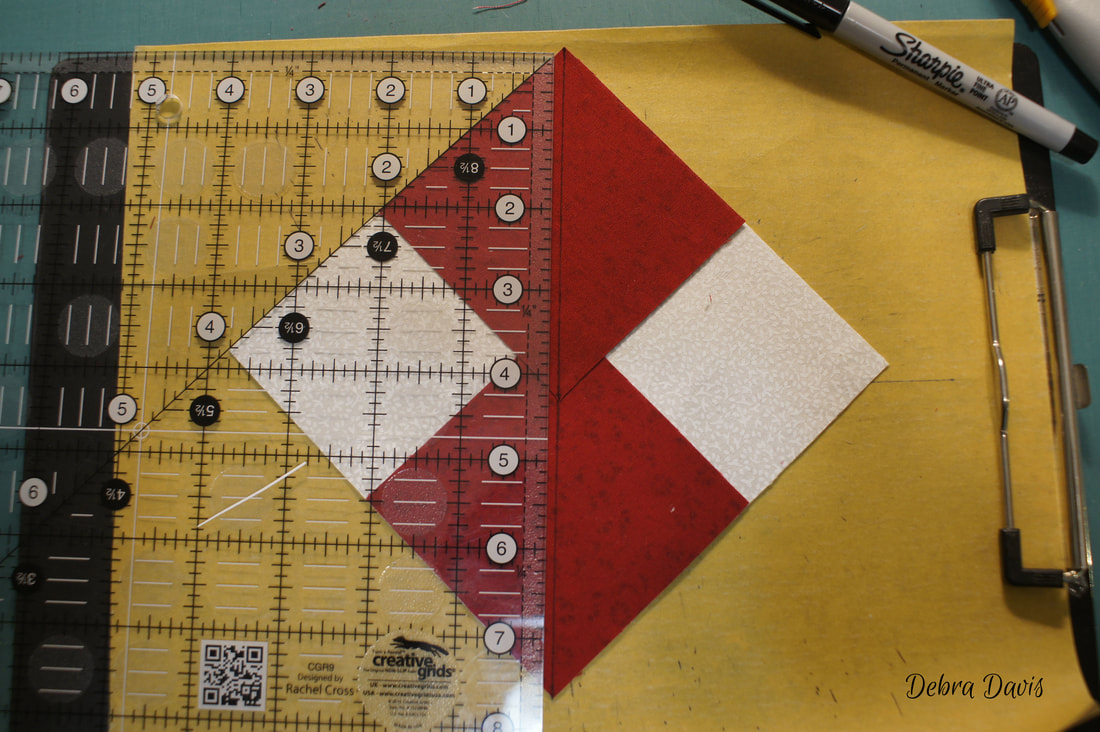
The Hourglass units need to be trimmed to measure 4 1/2" x 4 1/2"
To trim these to size center the 2 1/4" mark on your ruler to the intersection in the middle of the block (I have circled it) You also need to line up the diagonal line on the ruler with the diagonal seam. At the bottom right the 4 1/2" line should come right to the edge of that diagonal seamline. The same happens in the upper left of your ruler with the 4 1/2" line there as well. Once you are satisfied trim off the first two sides. 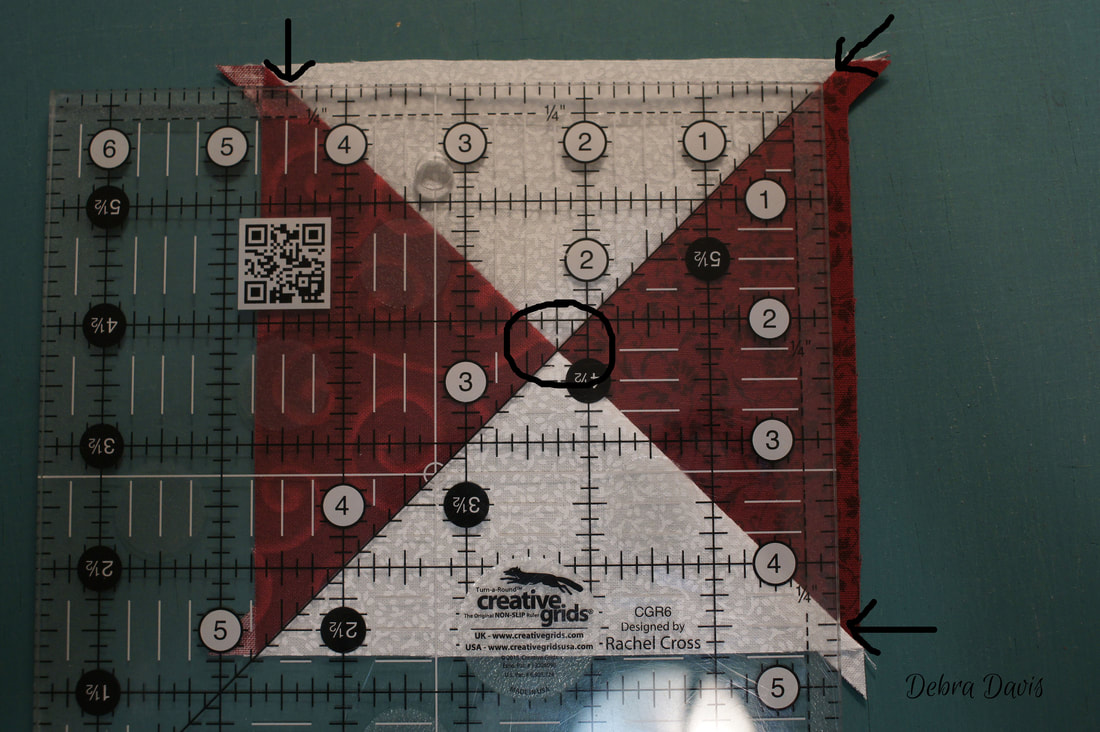
Rotate the block and line up the 2 1/4" mark on the ruler with the center of the block again. The diagonal line on the ruler is once again on the diagonal seam line. The 4 1/2" lines should line up with the trimmed edges of the block-then just trim the last two sides.
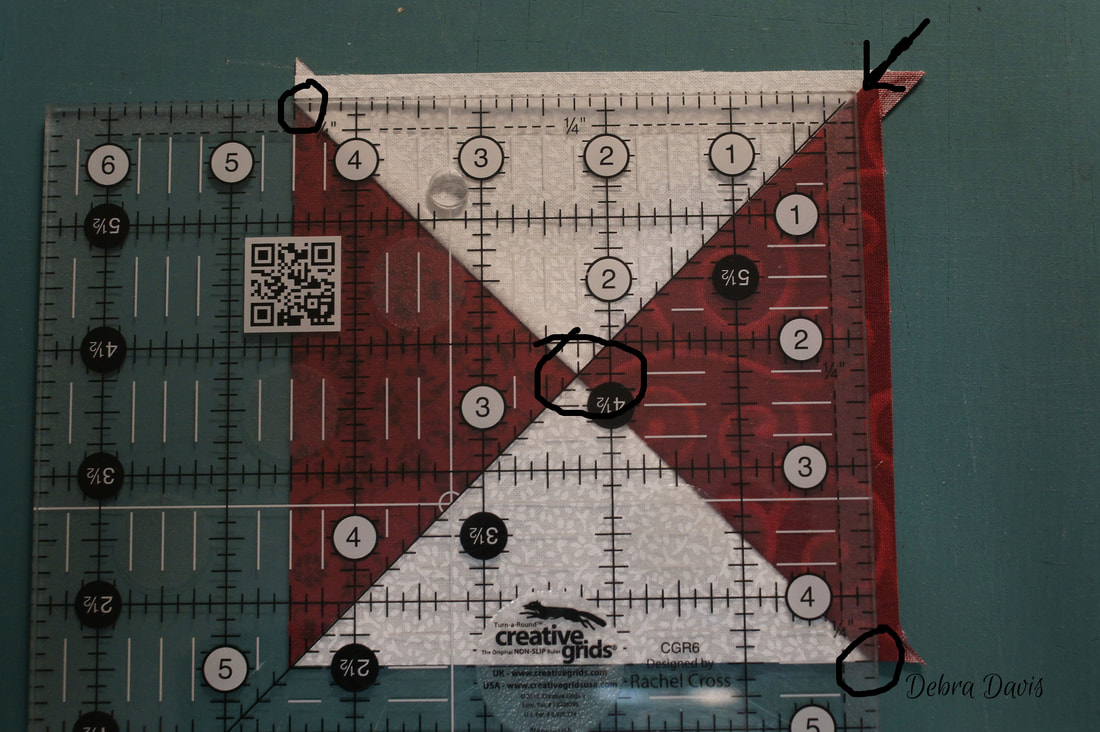
Ideally, you want all of the corners to come to nice sharp points where the two fabrics meet.
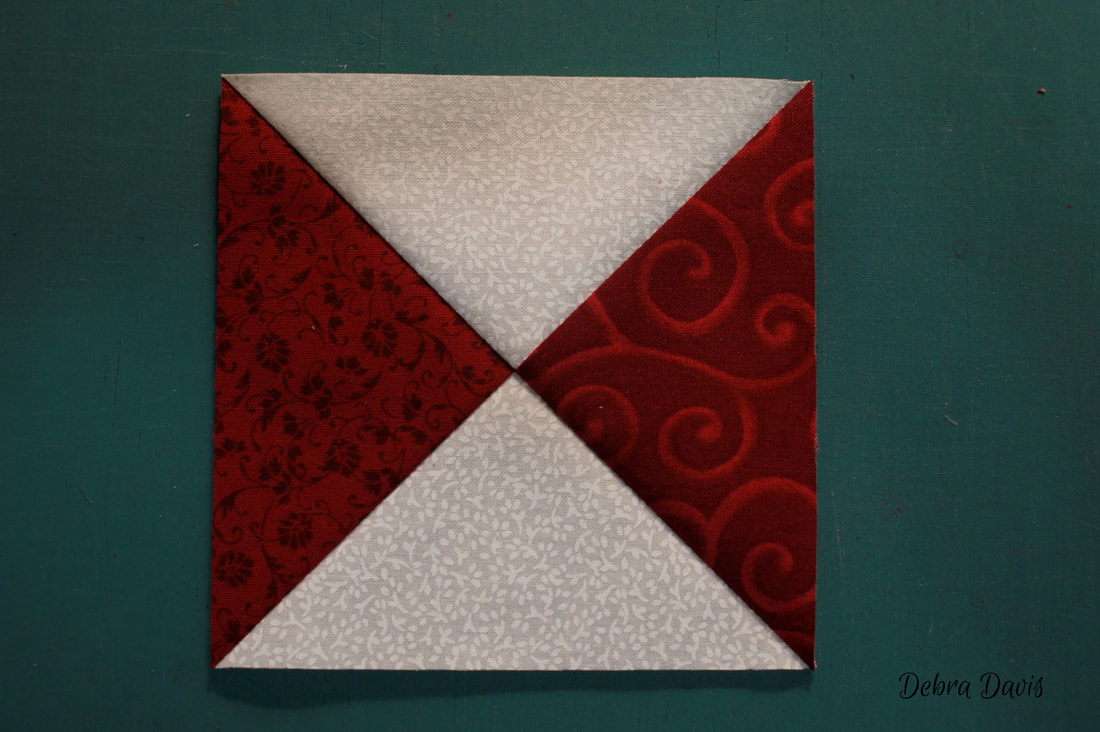
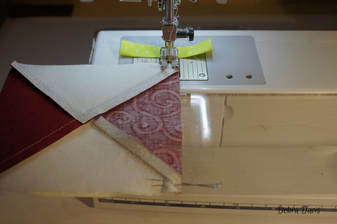
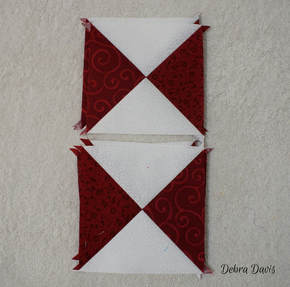
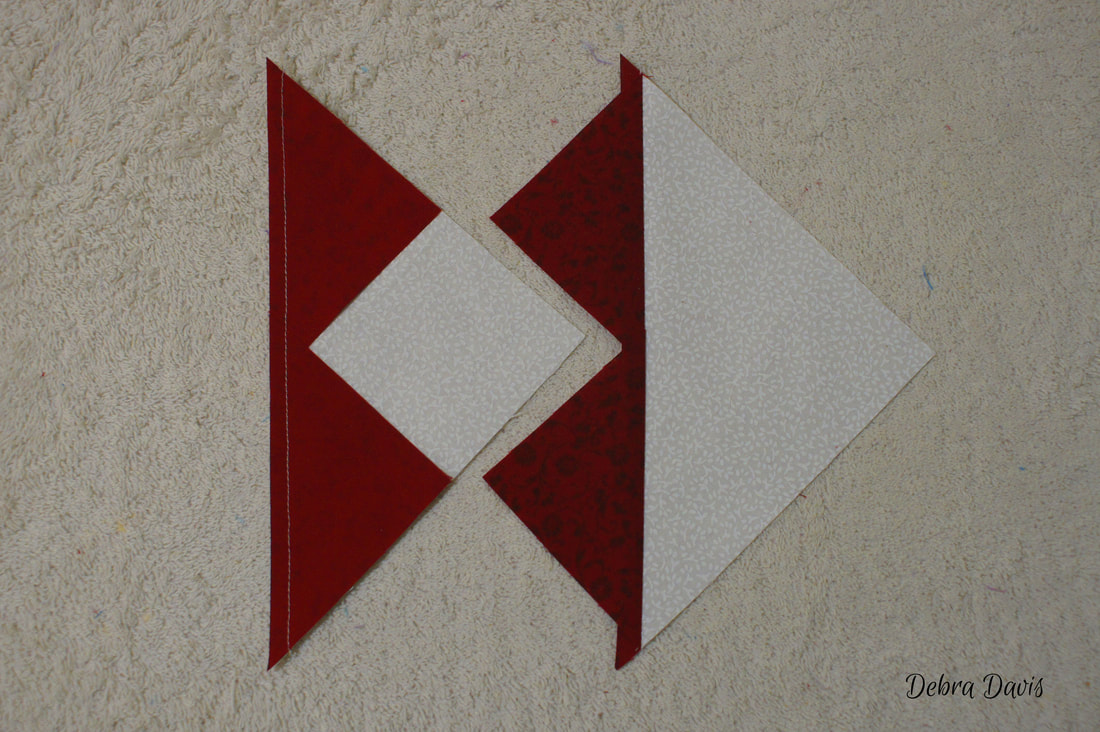
Now with the two stacks of trimmed Hourglass units we need to join them to make Section 1 of our quilt block.
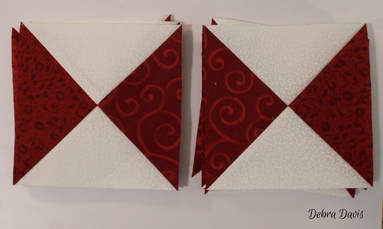
Because the two stacks were pressed in opposite directions the top seams will lock together nicely. The bottom seams however face the same direction so we need to do a little pinning to help keep them line up as we sew. I am using a positioning pin to get things lined up, checking to make sure I have it inserted correctly so that the seams are perfectly matched.
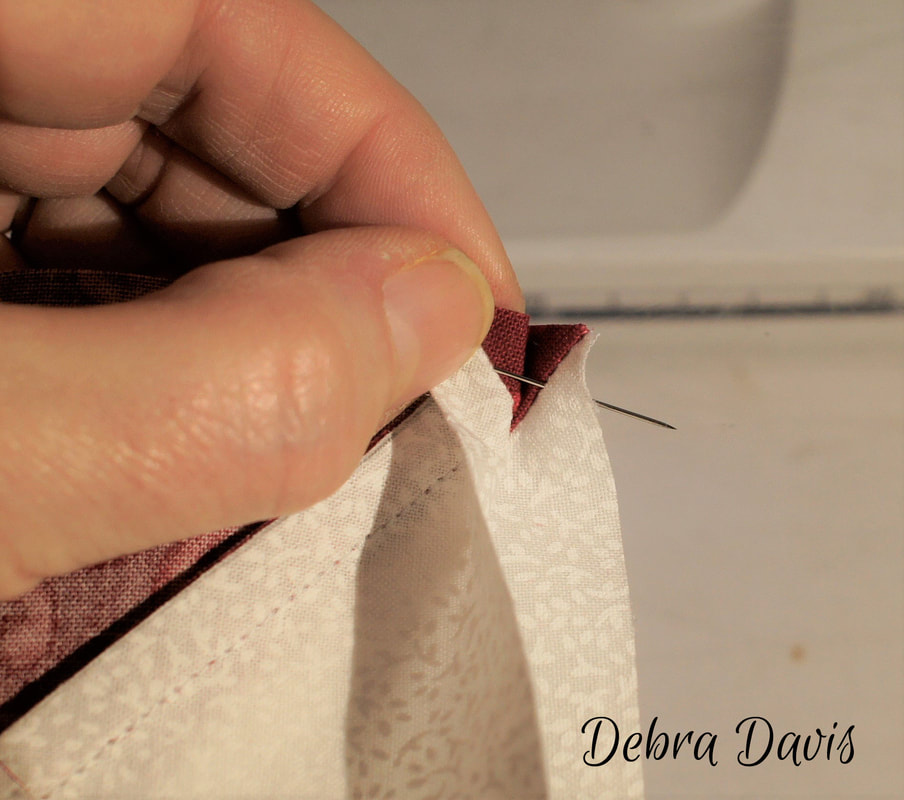
I pull the positioning pin down through the seams to act as the anchor that holds the two seams together. Next I place a pin on each side of the positioning pin as closely as I can. Once those pins are in place I remove the positioning pin before proceeding to sew.
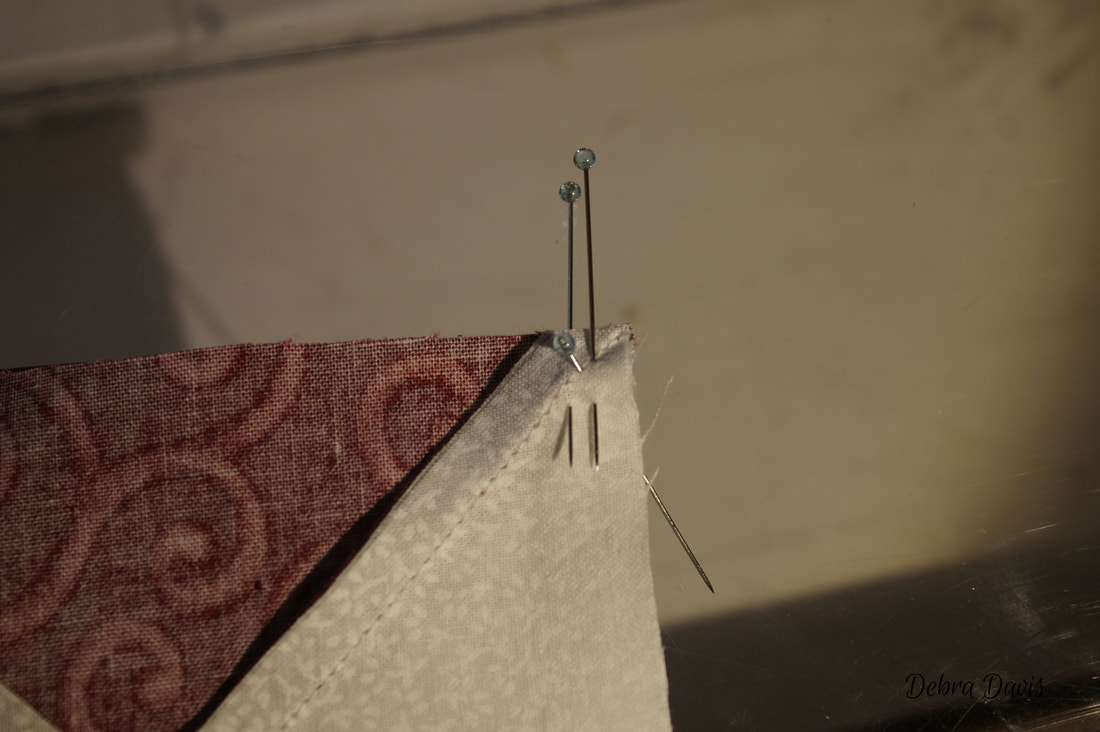
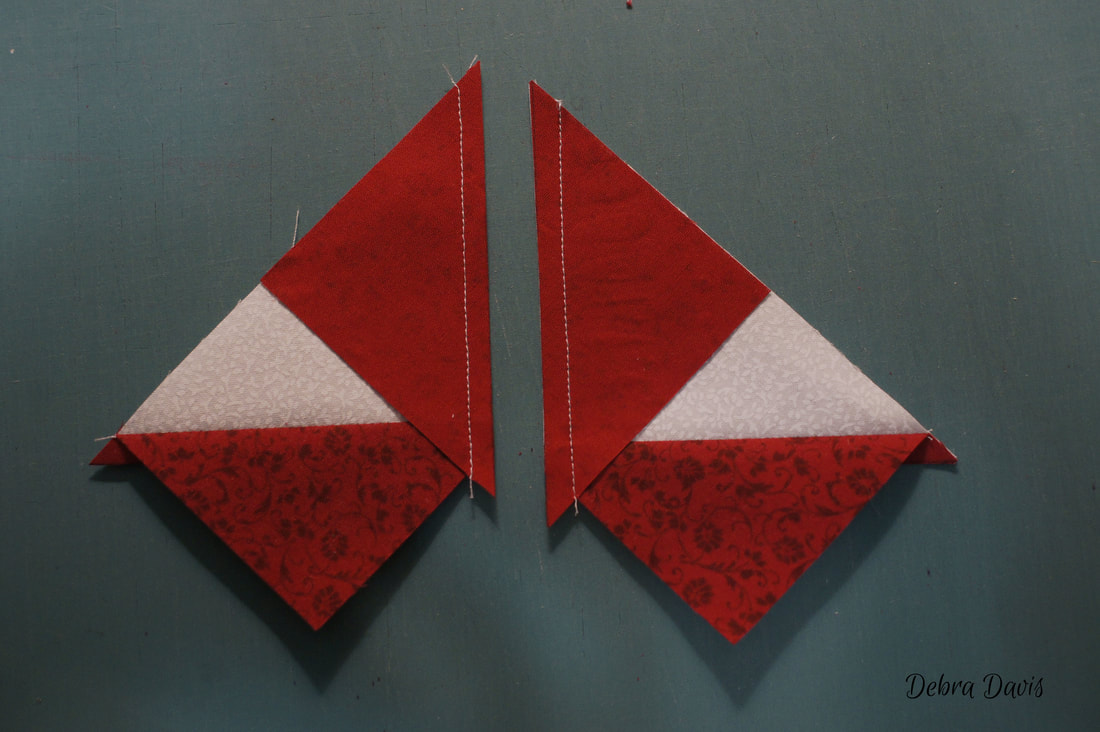
Now sew the two Hourglass units together, removing the pins as you come to them.
Even with careful pinning sometimes I get sharp points and sometimes I am a bit off, I am not going to worry about being off by that little bit. I have a magnet on top of my machine that says, "Finished is better than perfect"--yes I much prefer perfect but my block will still be beautiful in the end.
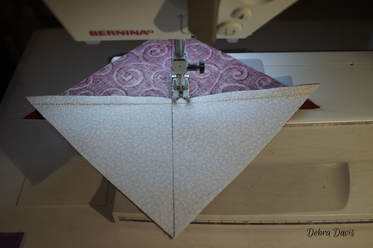
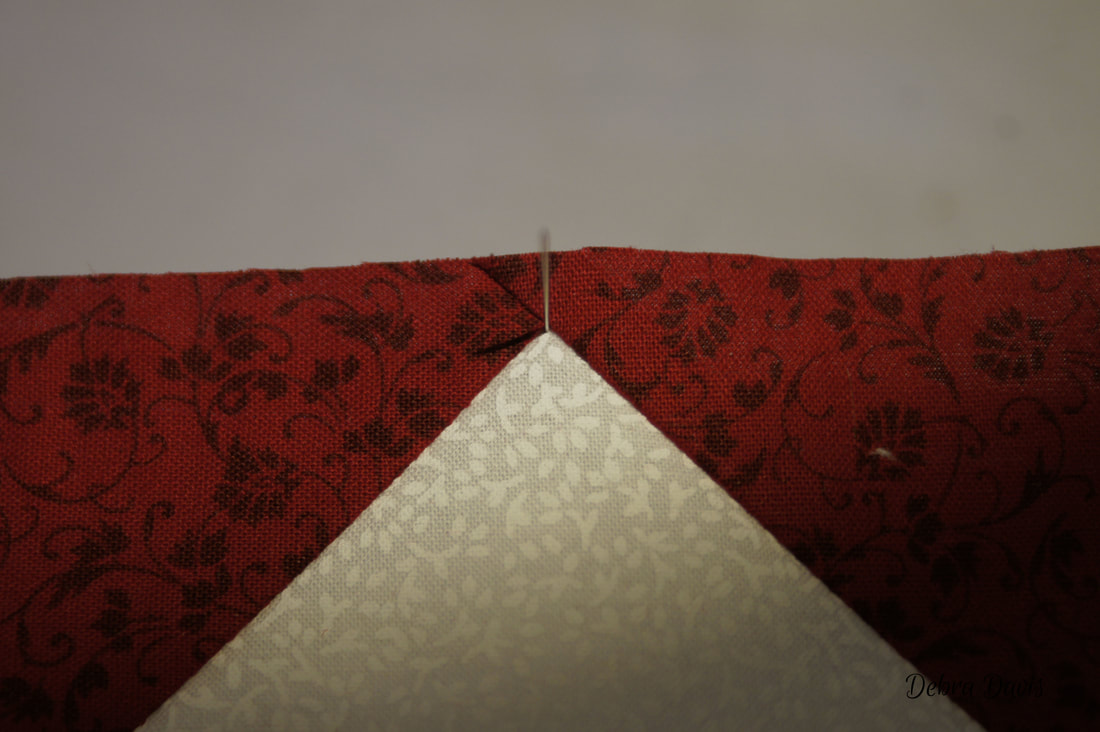
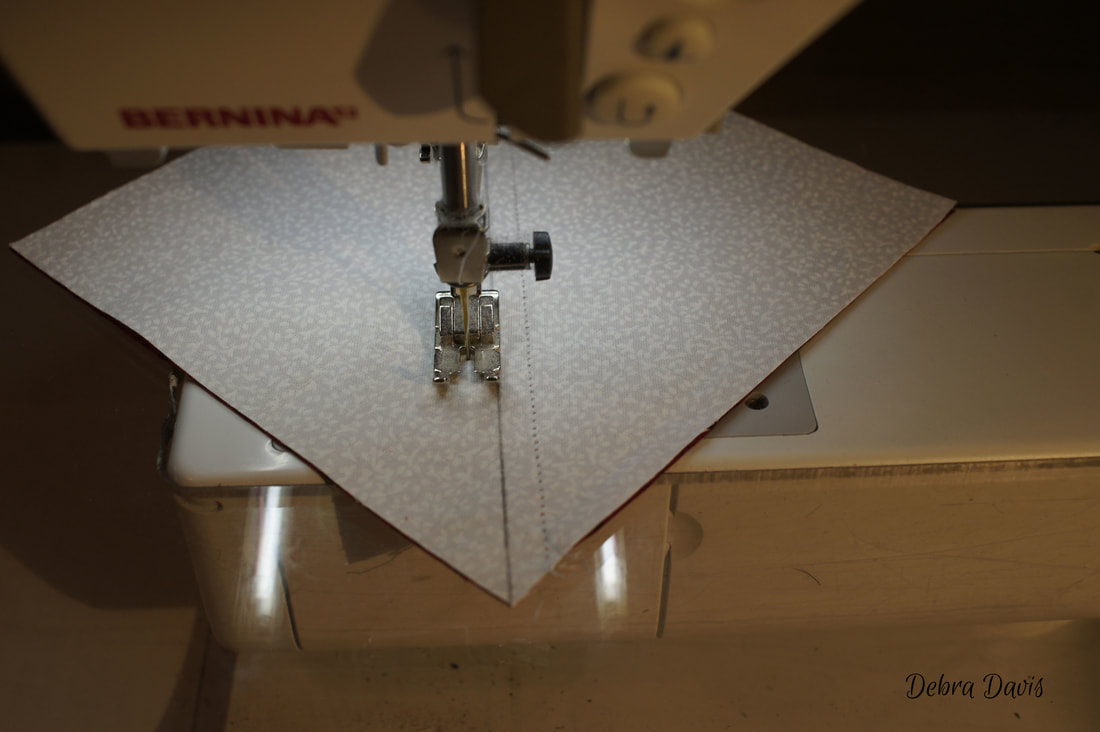
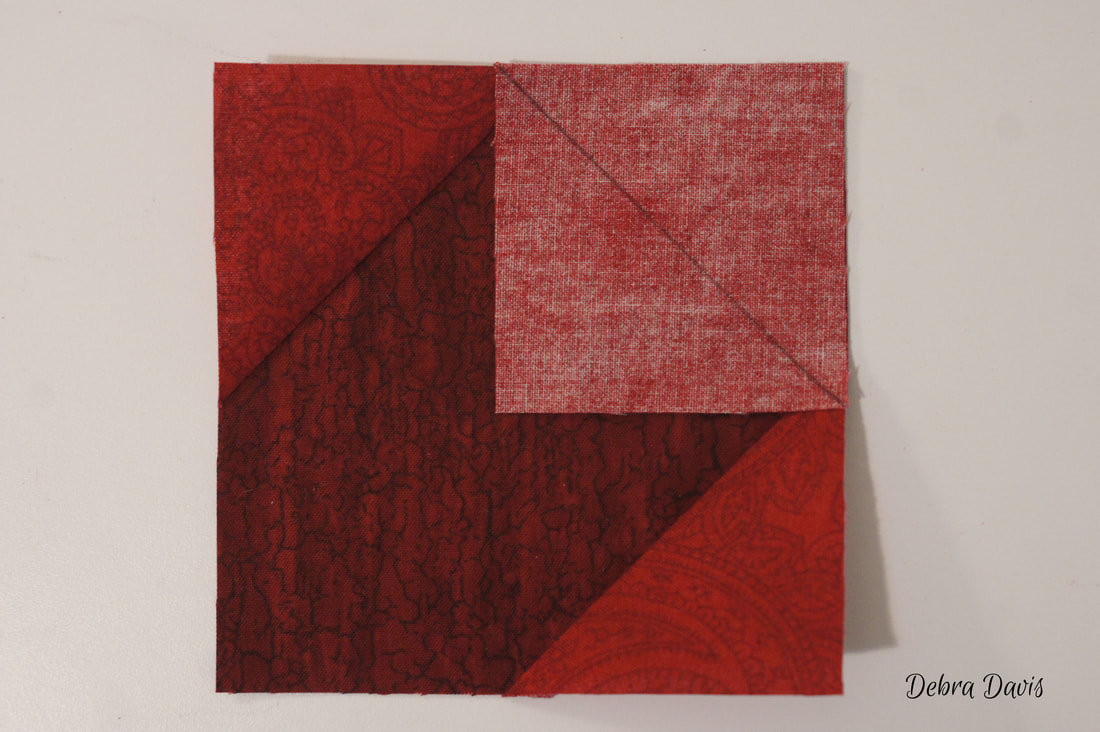
Okay, now let's work on the center section, beginning with the Square-in-a-Square. First draw a diagonal line on the back of the I squares. Be sure and use something that will not leave a mark showing through on the front side of the fabric when you do this.
With rights sides together place one of the I squares in the corner of the H square. Line up the edges and make sure your line is going in the right direction, as shown below.
We want to sew right along the line we drew-not on top of it,
but with the needle just to the outside of the line. 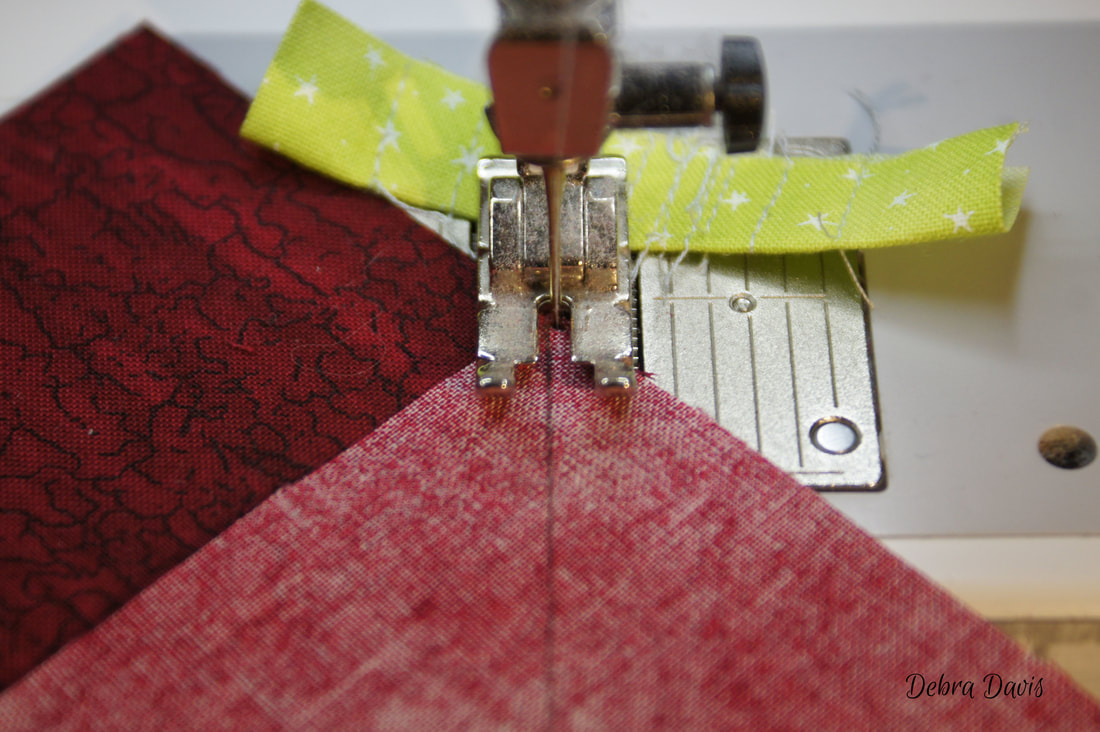
As you can see my stitches are right beside the pencil line I drew.
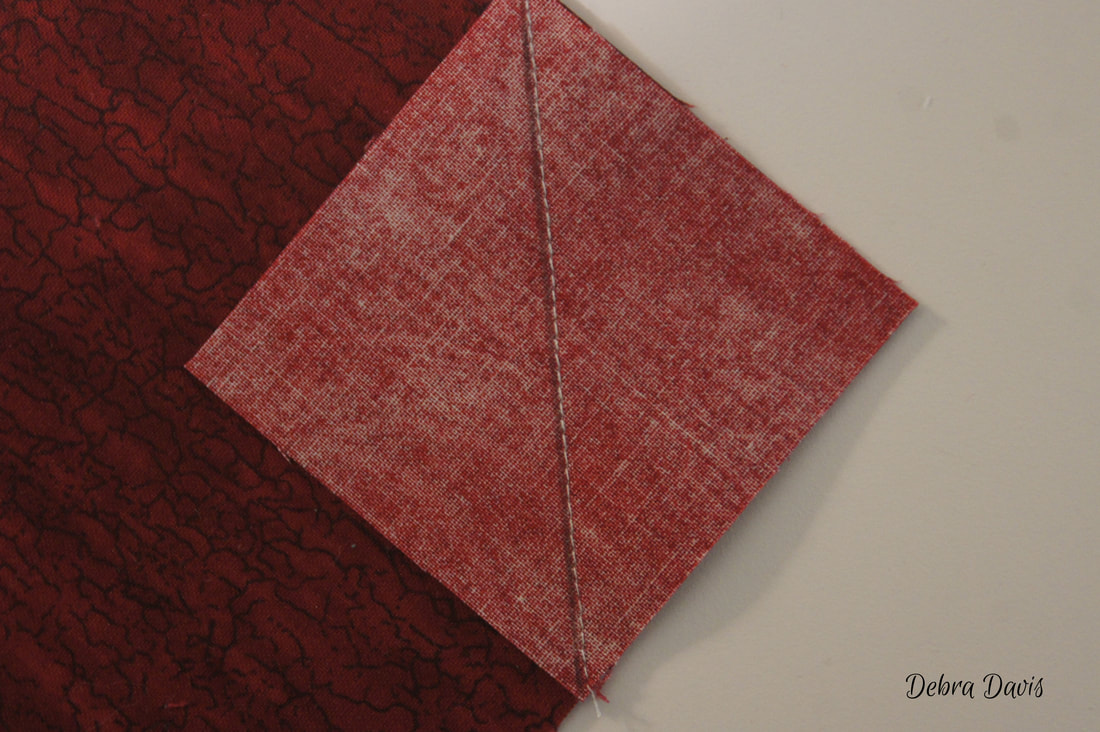
Next, I fold over the fabric to make sure that it totally covers up the H square underneath.
Satisfied, I trim away the excess 1/4 inch from my stitching.
Press towards the small triangle that is formed and check to make sure your square is still 4 1/2" x 4 1/2". I had a wee bit to trim away from the triangle I had added.

Repeat this process to add the rest of the corner squares.
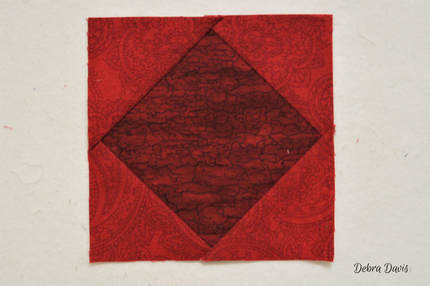
This will be the center of the small star and should still measure 4 1/2" x 4 1/2"
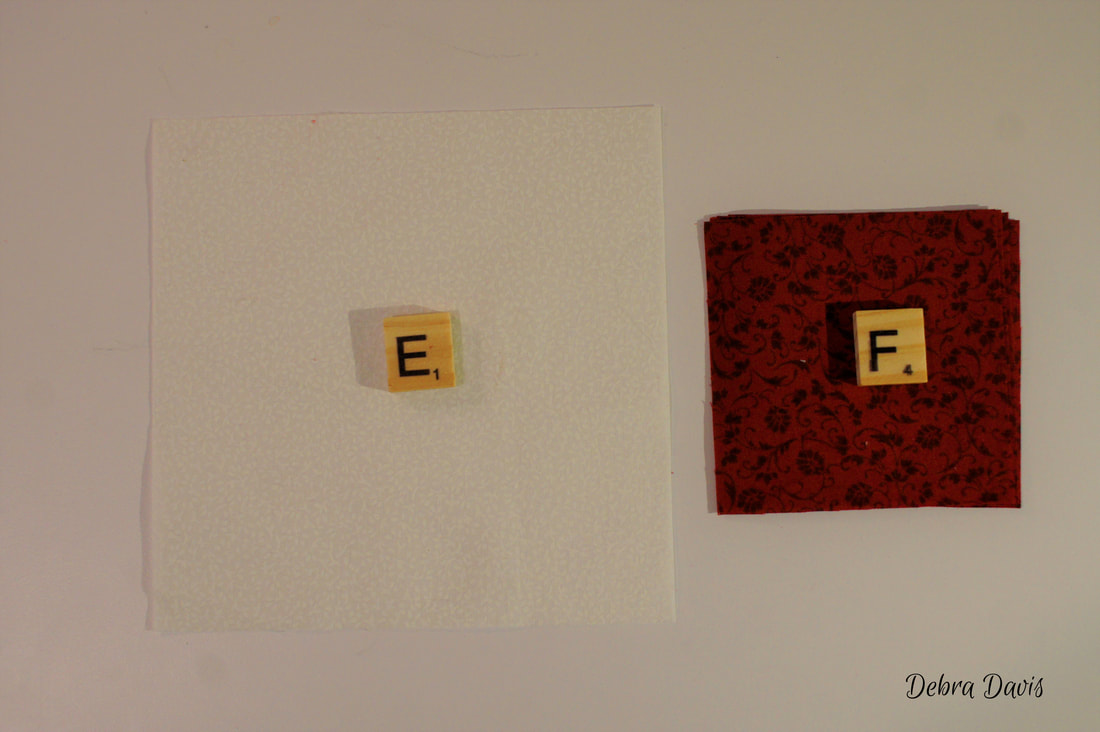
With the E and F squares we will make the Flying Geese using the No-Waste Method. By now you are probably getting pretty good at this. Lay out two F squares on top of the E square and draw a diagonal line down the middle.
Sew 1/4 inch from each side of the drawn line.

Cut apart on the line and press towards the small triangles.
Draw a diagonal line on the remaining F squares and place them on the pressed unit.
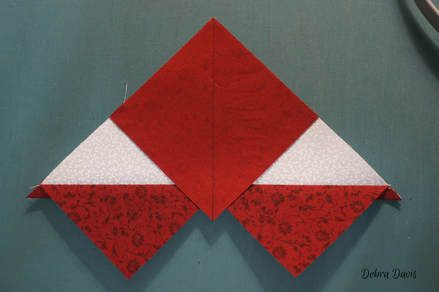
Sew 1/4 inch from each side of the line.
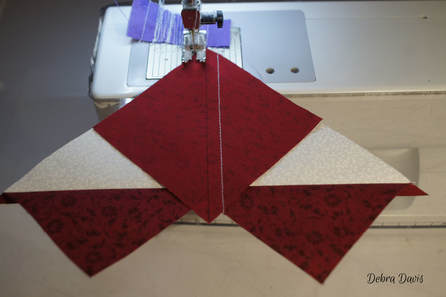
Cut apart on the line and press towards the small triangle. This yields 4 Flying Geese.
Use your favorite method to trim these to 2 1/2" x 4 1/2"
If you need more guidance for this please see my tutorial which goes into detail about how to trim these accurately: Flying Geese Tutorial 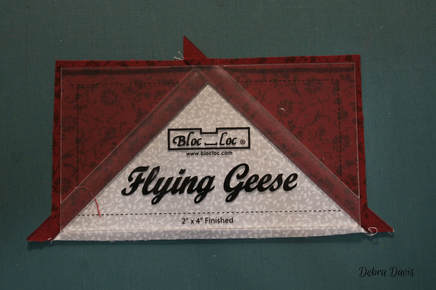
The most challenging part of this block is putting the center star together. Lay out the Square-in-a-Square block, the Flying Geese units, and the G squares to make the star.
A positioning pin is going to be your friend when matching the points on the center square with the Flying Geese points. Start by placing a pin through the wrong side of the top piece.
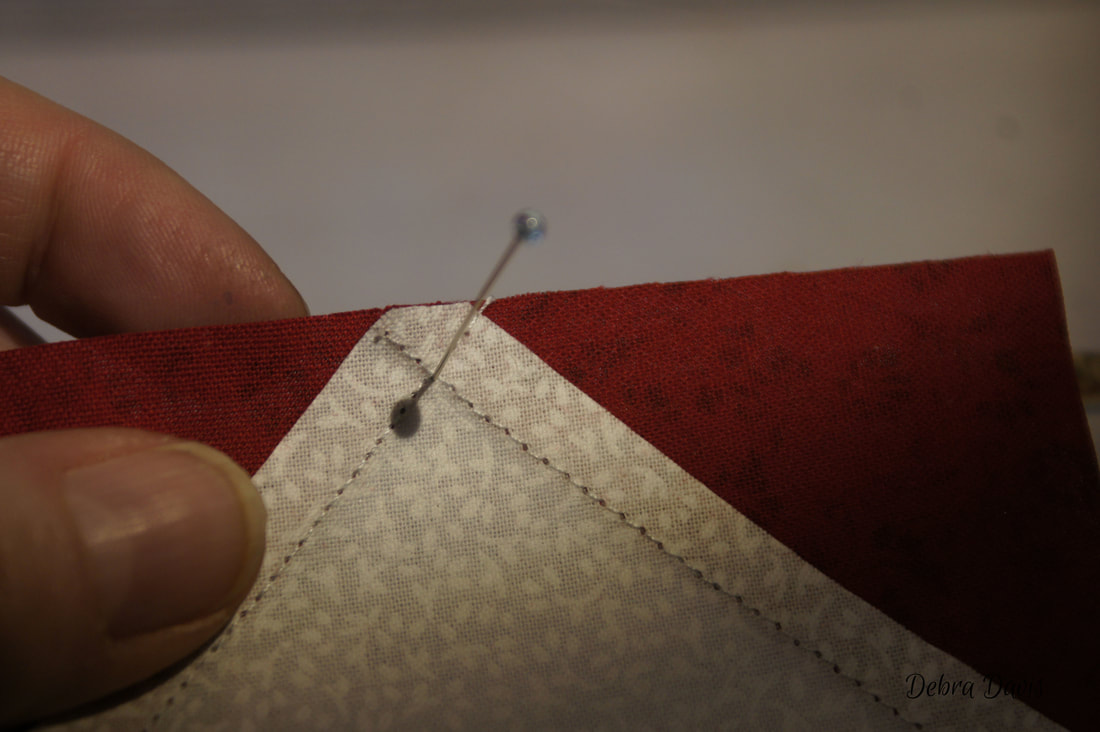
Flip that over to make sure your pin comes out at the tip of the point...
now place that same pin through the tip of the point of the bottom piece...
and flip it over to make sure the pin comes out at the point on the other side.
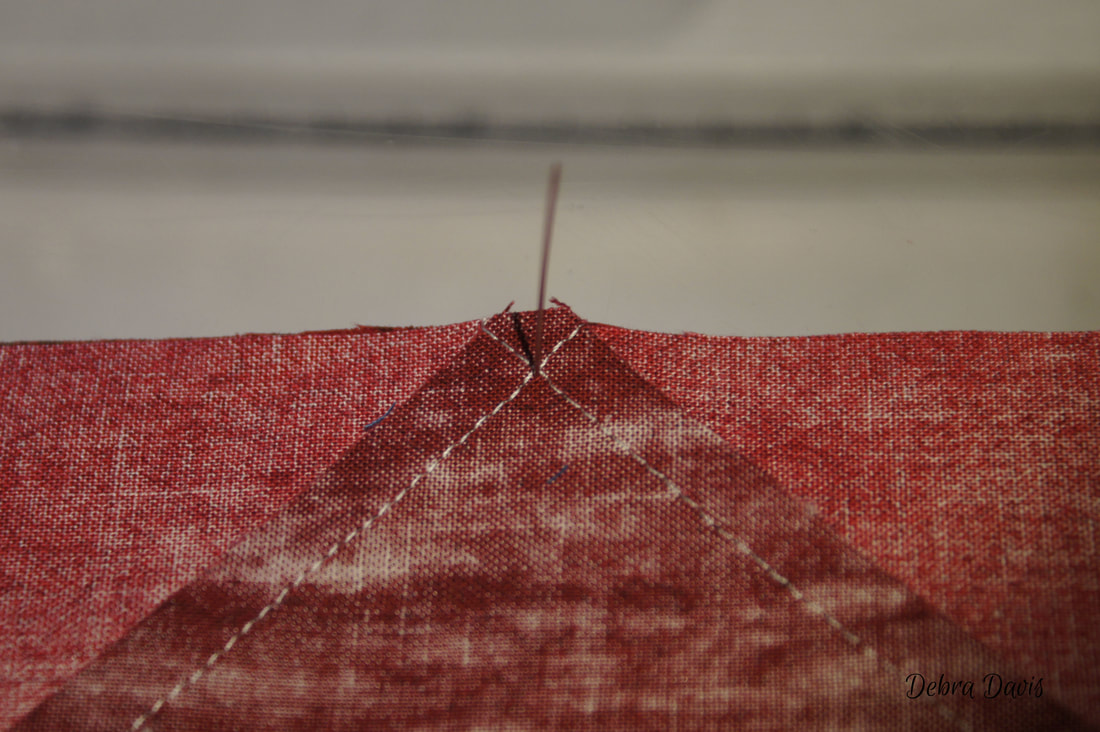
Pull the positioning pin all of the way through both pieces to hold them tightly together. Place pins on each side of the positioning pin. With so many seams here I slipped the pin on the left underneath the top seam, but still caught the fabric of that piece before pinning through to the back. The seam on the right is sewn down so I had to go through all of the layers. Remove the positioning pin before sewing.
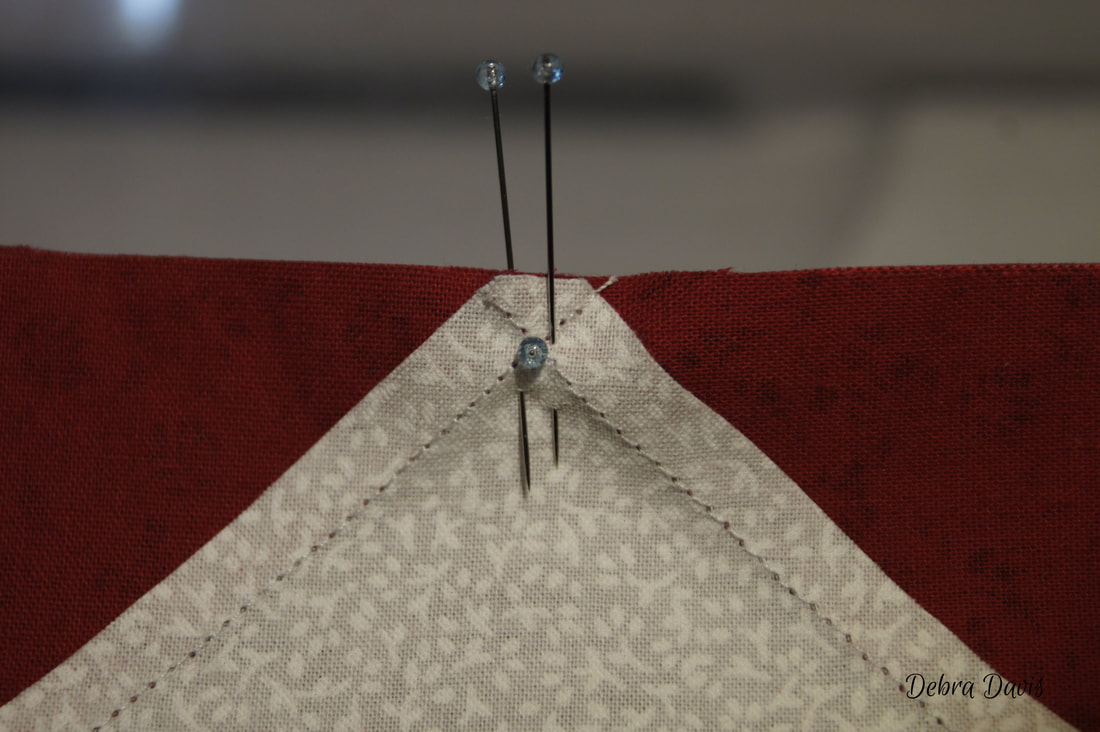
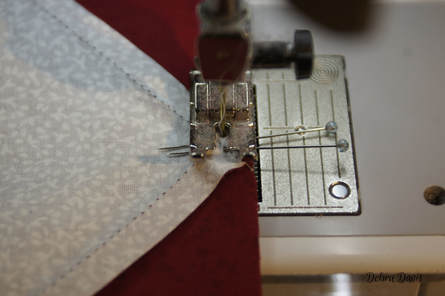
I am sewing VERY slowly over all of these seams and using a stiletto to help guide the fabric under my needle.
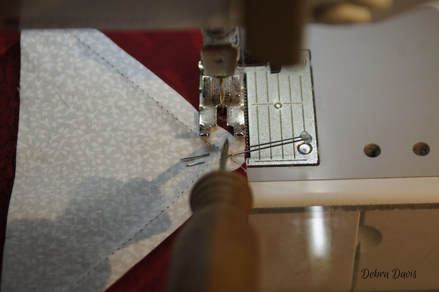
I sew right up to that first pin, stop with my needle in the down position, remove the pin and continue slowly to the next pin, where I do the same thing.
The top row gets pressed to towards the G squares. The bottom row gets pressed towards the Flying Geese Unit, and the middle row is going to be fanned so that the seam on the top half faces towards the center square and the seam on the bottom half away from the square. To fan the seam I had to make a little clip on just the top fabric.
(We did this in Block 5 if you need a refresher.) 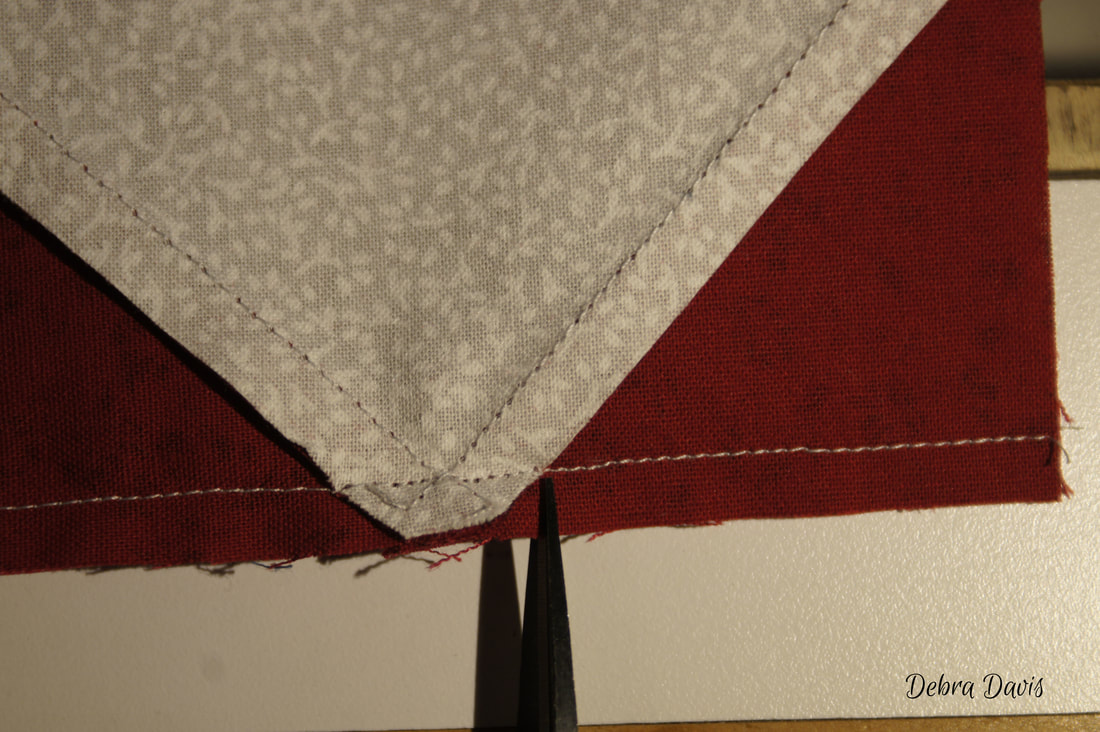
The fanned seam...
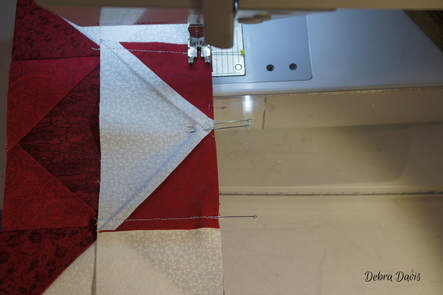
With the rows nicely pressed I can begin sewing them together. Still using positioning pins in the middle and pins where the seams meet.
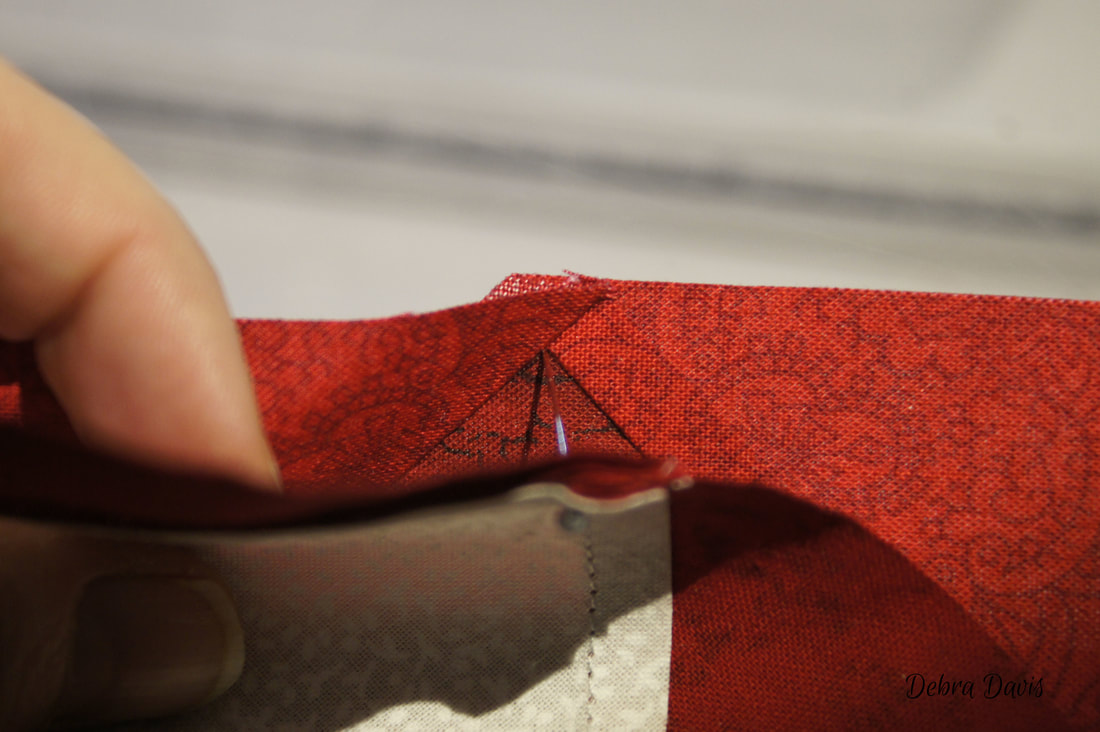
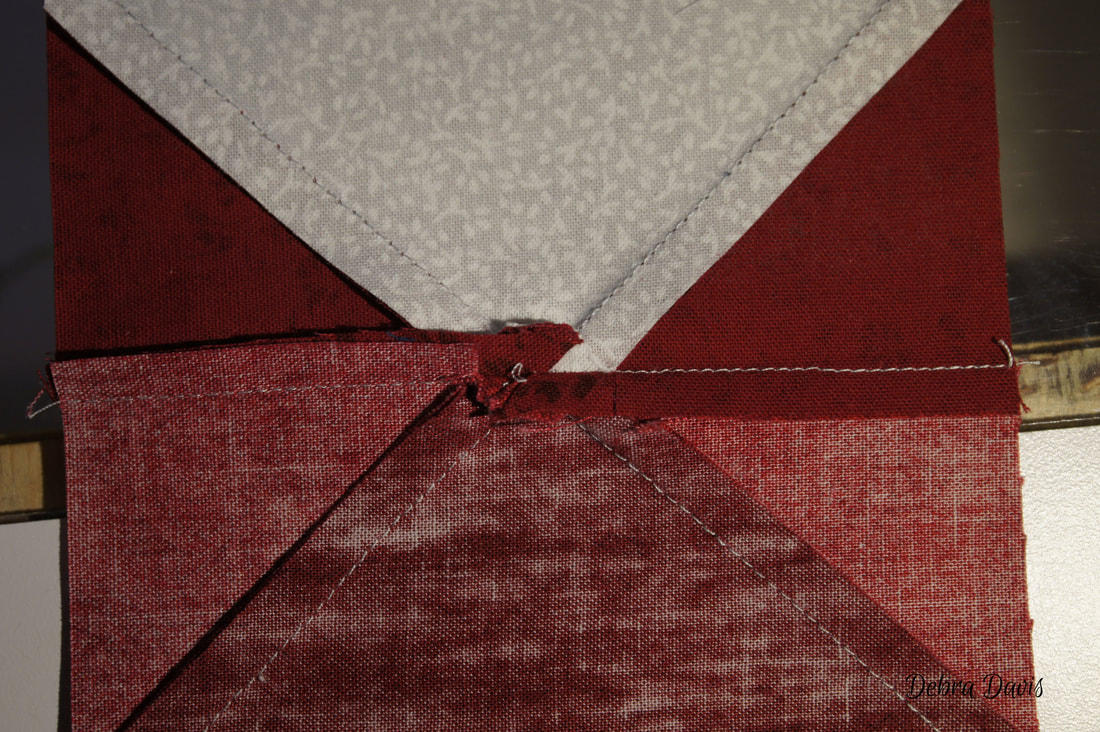
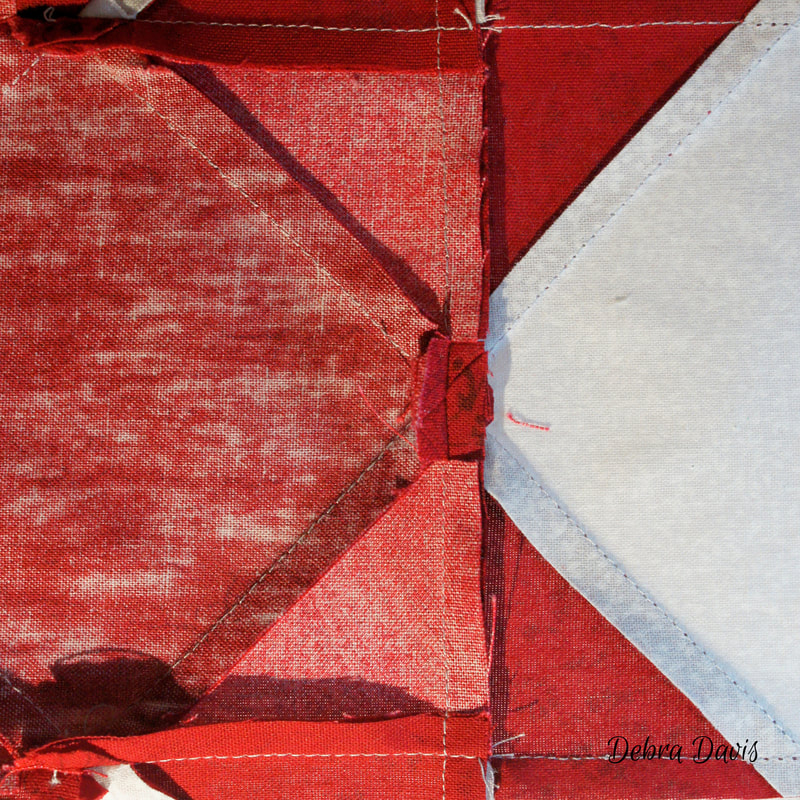
I am going to press these a little differently as I want the block to lay as flat as possible. So I have clipped on both sides of that bulky middle intersection where all the points come together. I counted them up and there are 12 layers of fabric at that point!!!
I am going to split them up! 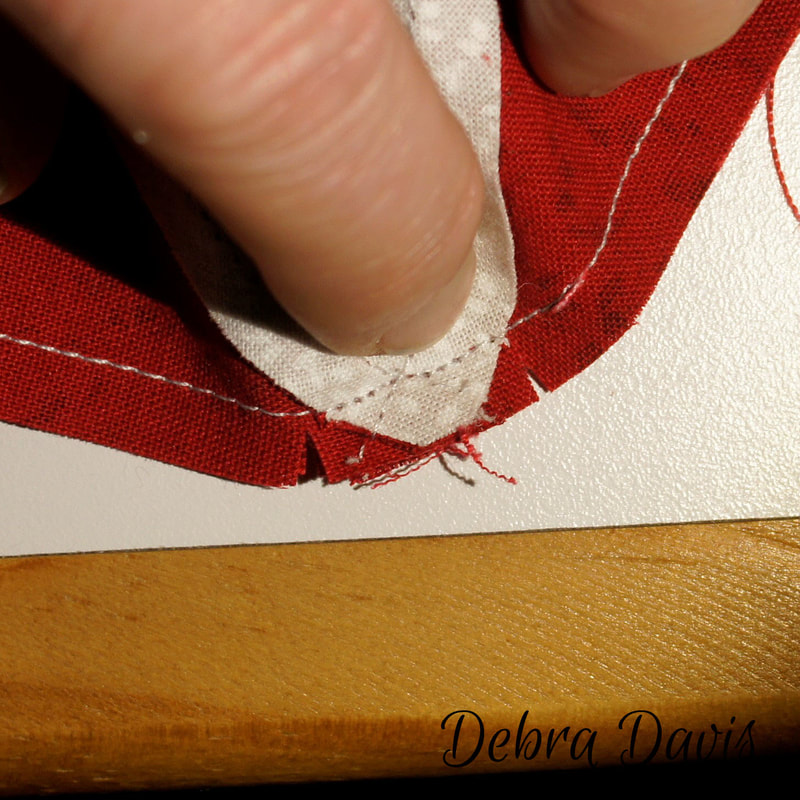
Then when I go to set the seam, I press everything to one side except for at that point-where I open the seam up.
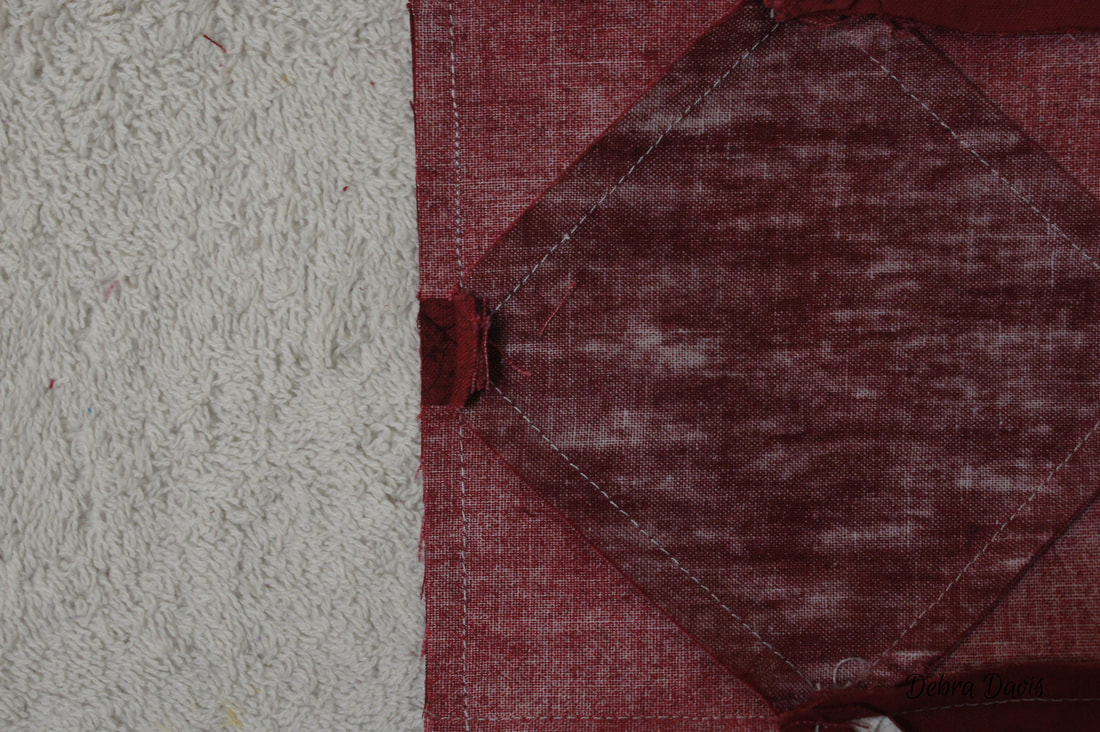
This is what it looks like after being pressed. In general I do not like to press seams open as I feel this weakens the quilt; especially if I am going to stitch in the ditch, and this seemed like the best compromise here.
The hard work is over-I hope you are proud of your center star-after all of that I sure am.
It needs to measure 8 1/2" x 8 1/2 inches now. The center Square-in-a-square is 4" x 4"-if your measurement is larger than that you will need to check your 1/4 seam accuracy as you will lose the points of your star when we add it into our block if that is the case. 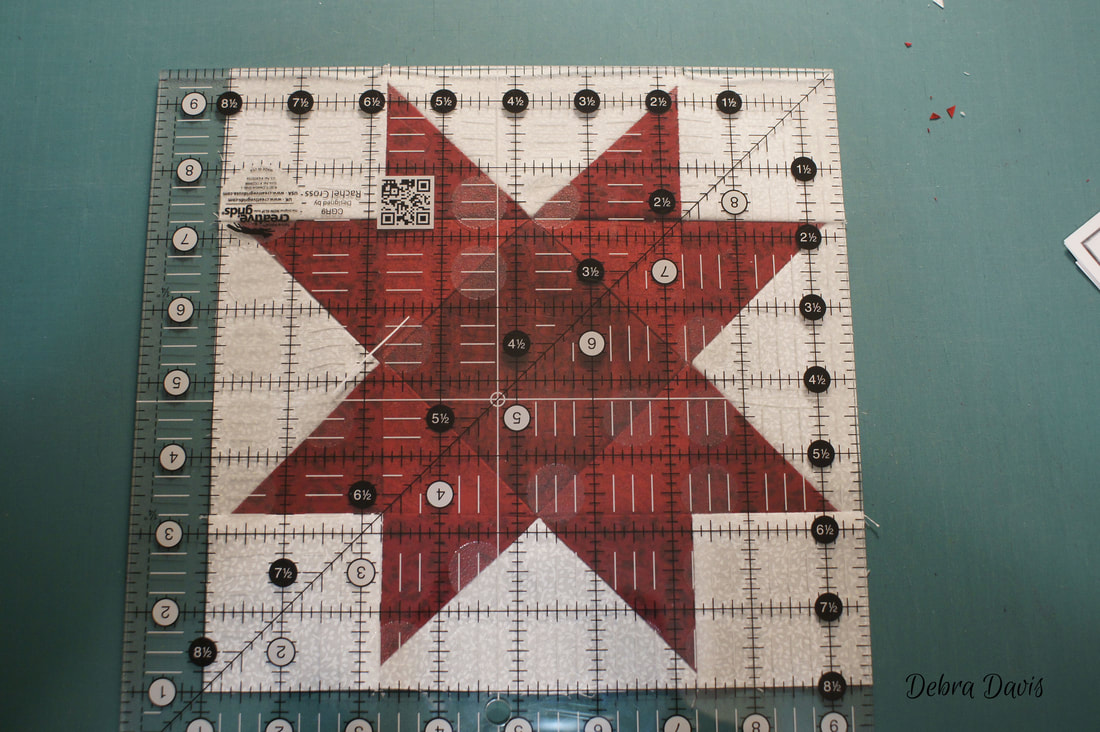
And that is our next step: Assembling the block.
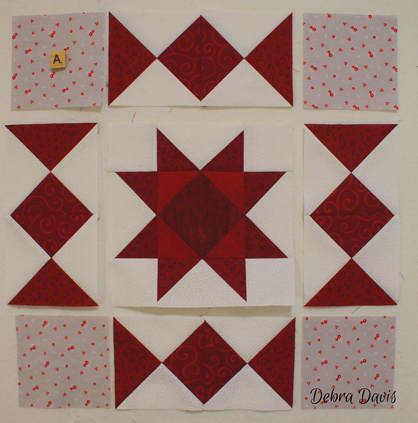
First join into rows, pressing the top and bottom rows towards the A squares and the middle row towards the center. I pinned at the seams.
Then join these rows together to finish the block. I pressed towards the top and bottom rows.
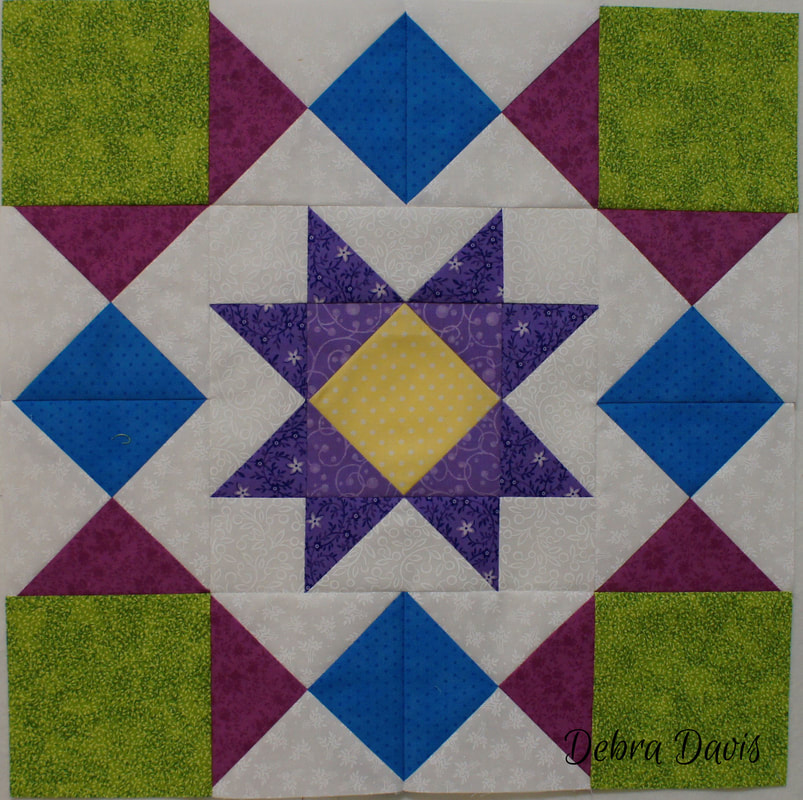
We are over half-way done now! I am sure enjoying seeing the blocks that others are making as quilters of all levels are sharing on our Facebook Group Page: Tuning My Heart Sew Along Consider joining us there to be a part of a wonderful group of quilters around the world who are being such an encouragement and joy.
That's it for now-have fun with Block 6 and Happy Quilting! 
Comments are closed.
|

Welcome to the site of Debra Davis-a woman who loves the Lord and loves to quilt.
My other blog where I share about my walk of faith:
Sitting at His Feet 
|


 RSS Feed