|
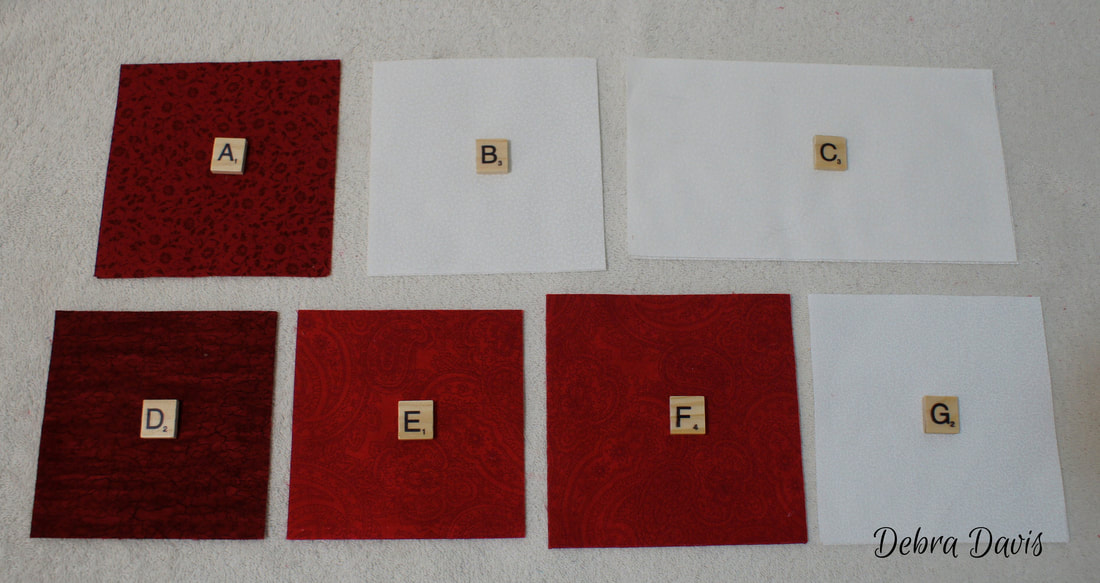
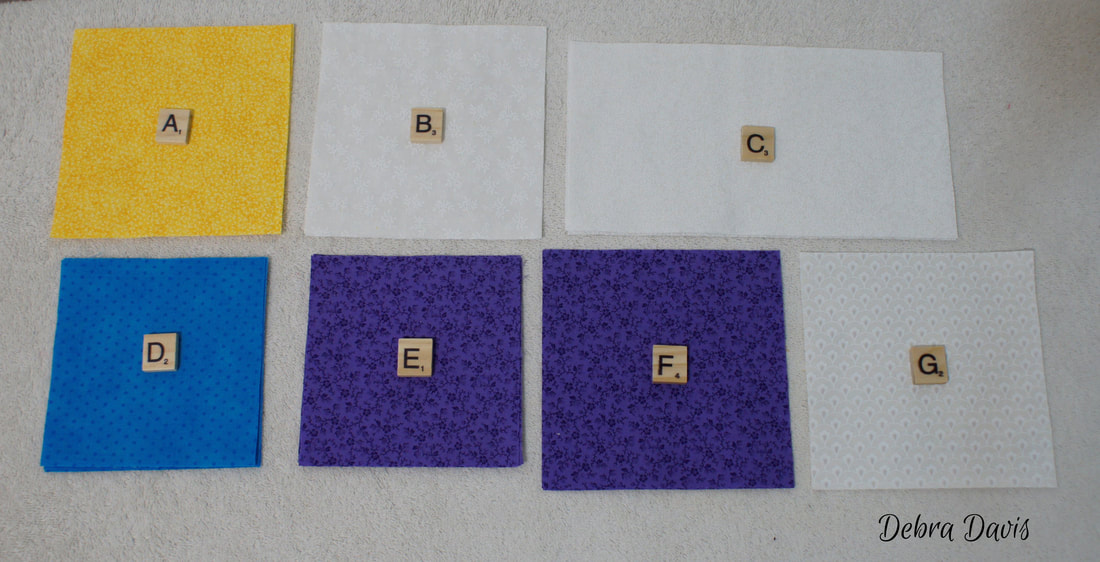
It's week 3 in our little sew along. I hope you are having fun making your blocks. There are some beauties being shared in the Facebook Group. This week's block is a bit of a puzzle to put together and makes use of Half-square triangles and Flying Geese. Click here for pdf pattern Click Here for Previous Blocks and Instructions I am having a Giveaway this week for one of my favorite rulers-entry details will be at the end of this post. 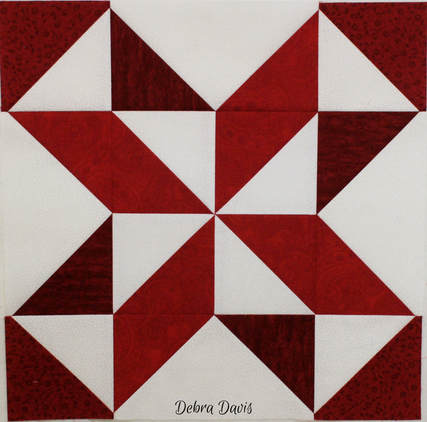 This week the cutting directions are the same for each colorway. I decided to starch my fabric this week-starching before cutting my pieces out. I have found that if I starch the pieces after they are cut I sometimes get a distorted square. I do like the sharpness adding starch gives to my project and it will all be washed out after the quilt is done.
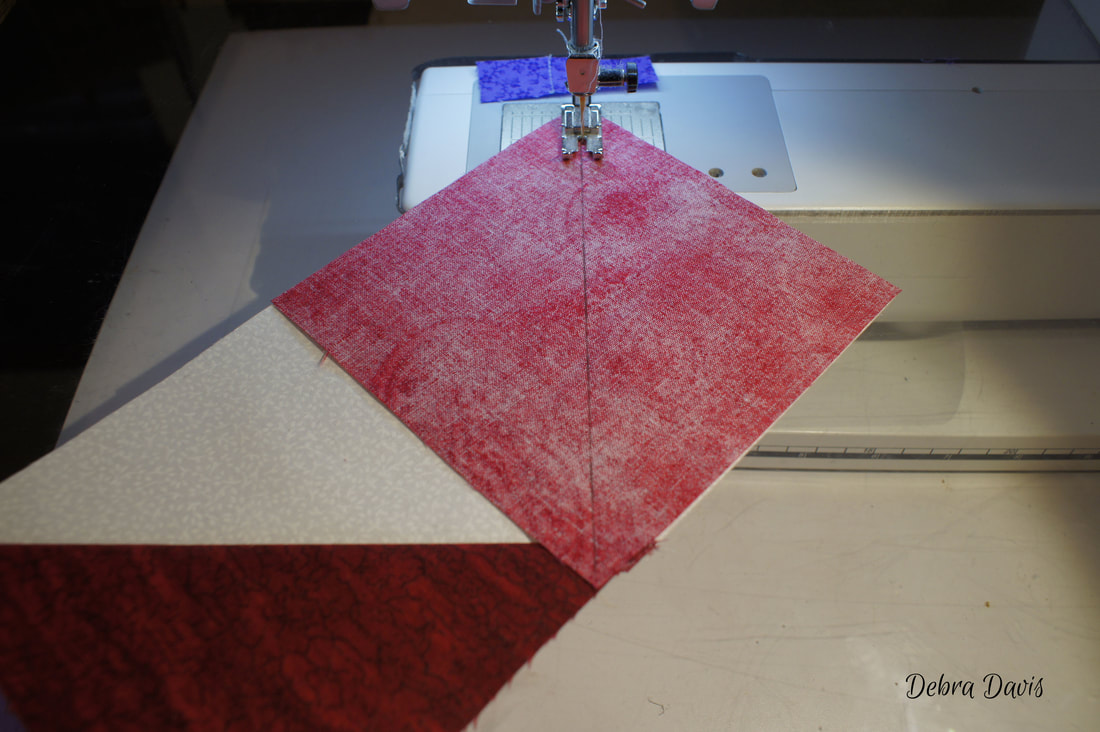
I begin by making some Half-square triangles (HST's) using the A and B squares 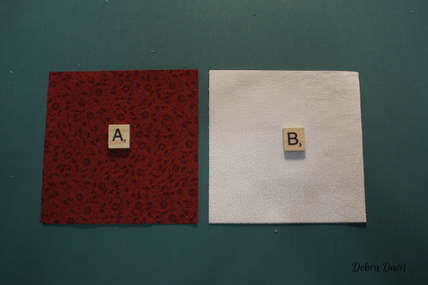 Draw a diagonal line on the wrong side of the B squares right down the middle. I like to line up the diagonal line on my ruler with the edge of the square then I know I am getting a precise line down the middle. 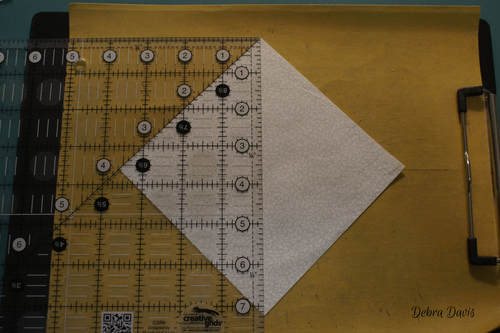 With right sides together, place the B squares on top of the A squares and sew 1/4 inch from each side of the drawn line.
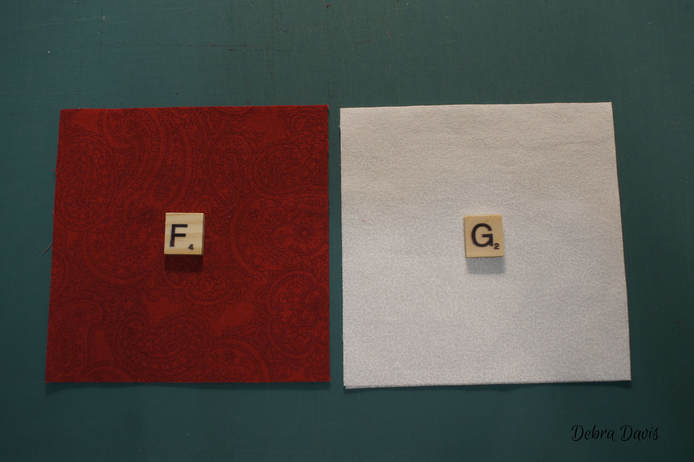
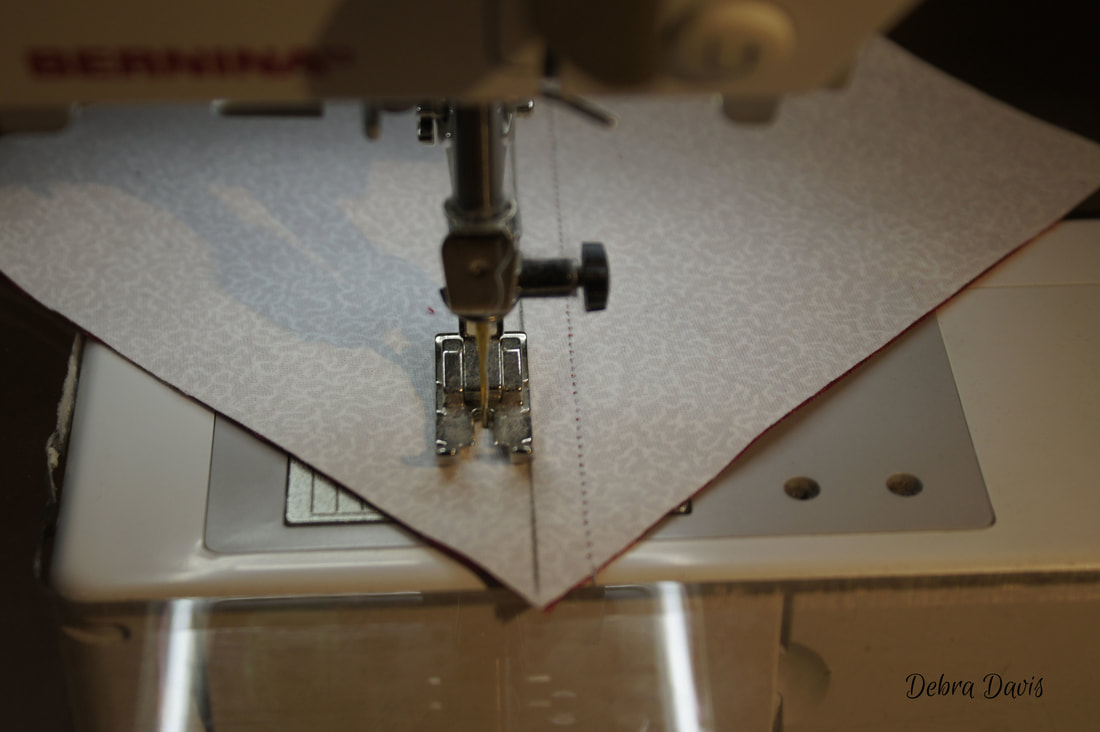
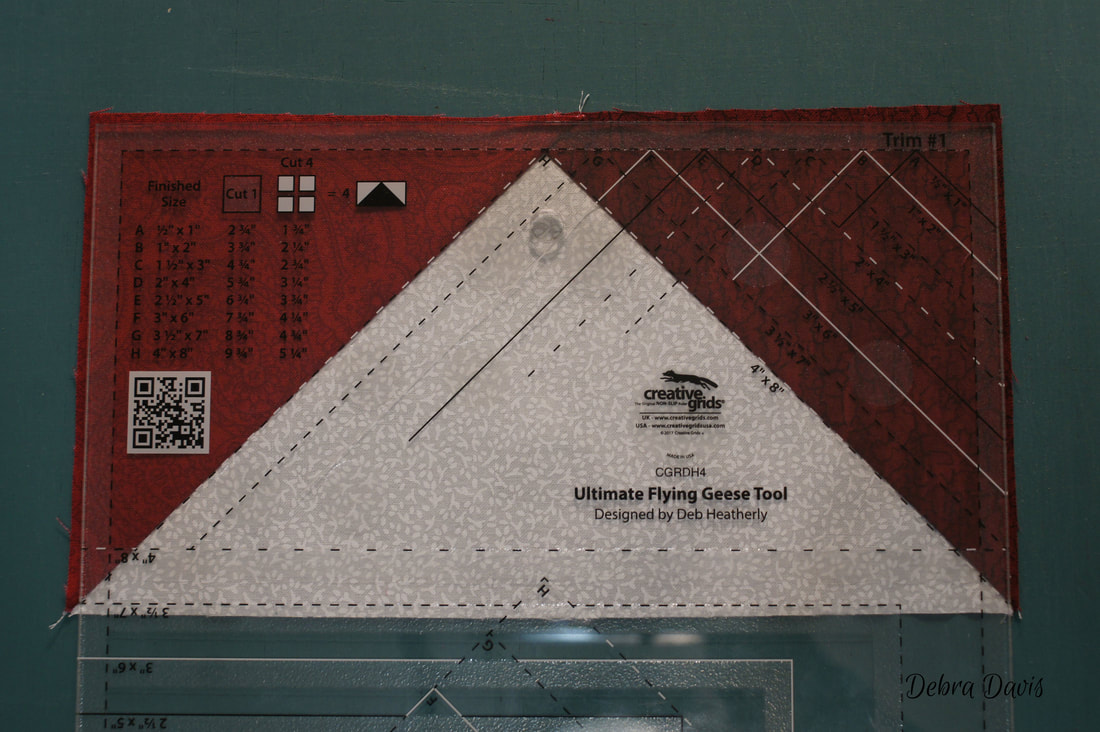
Cut apart on the line. 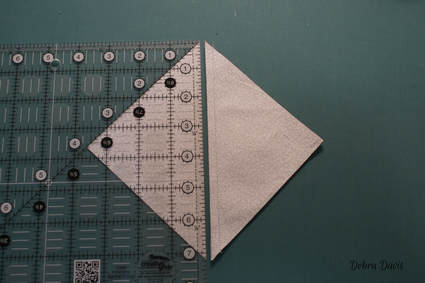 And press towards the dark side. 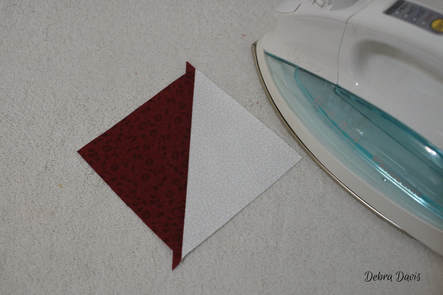 Now I just need to trim these little beauties to 4 1/2" x 4 1/2" I like using my Bloc Loc ruler for this. It has a little groove that the seam fits into and it basically locks the HST in place so I can cut it accurately to size. I have found that I prefer to make the first cut with the pressed seam facing away from me, so lay my HST and ruler as shown and make the first two cuts. 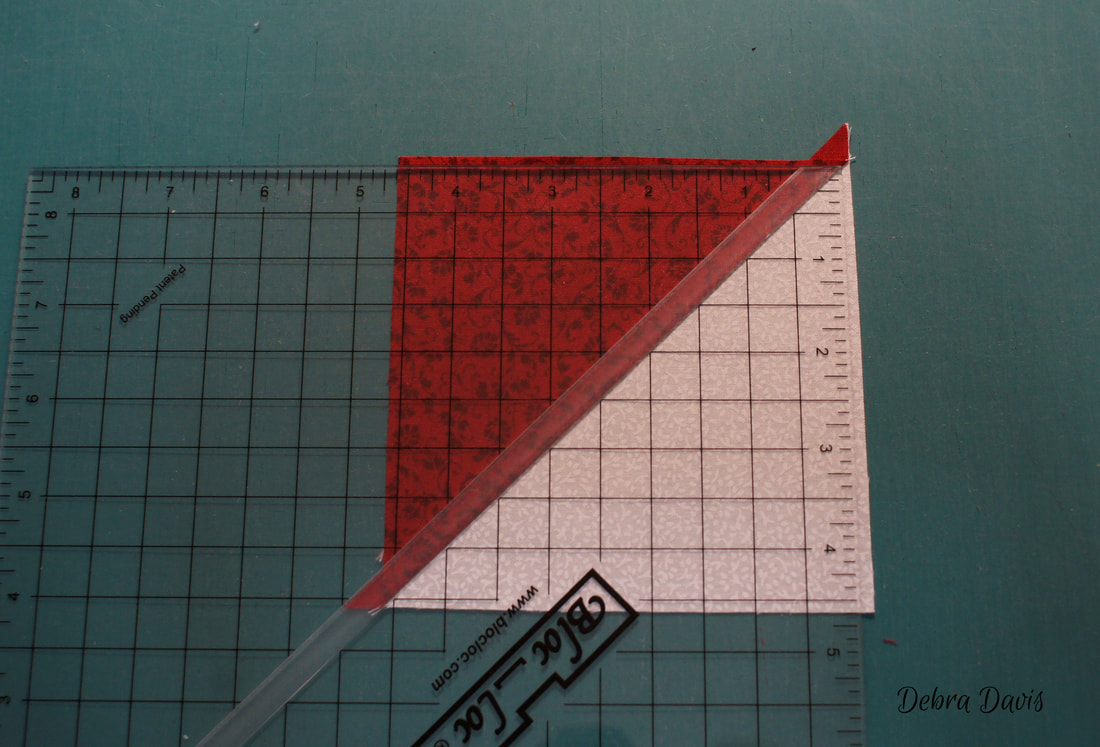 Then I flip everything around, line up the 4 1/2" lines with the cut edges of the HST, and trim the last two sides Set these aside for now as they will be used when the whole block is put together. 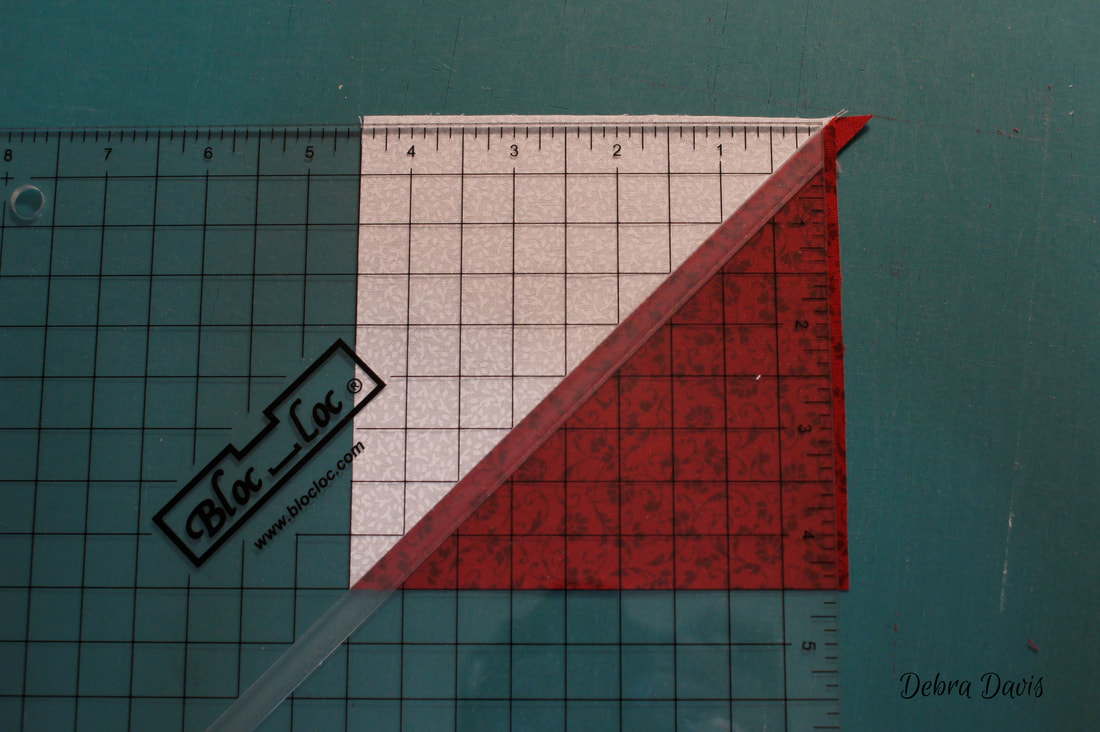 Now I will do exactly the same thing with the F and G squares which will be used to make the center unit. This time I will show you how to trim these accurately with a regular ruler.
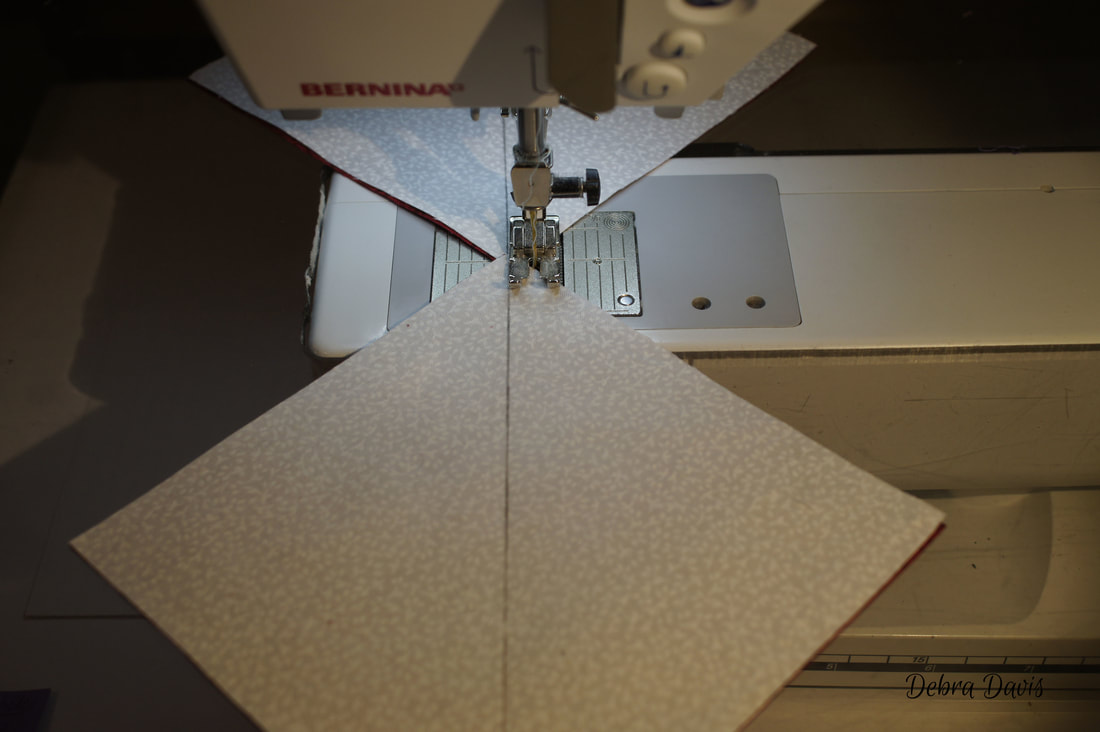
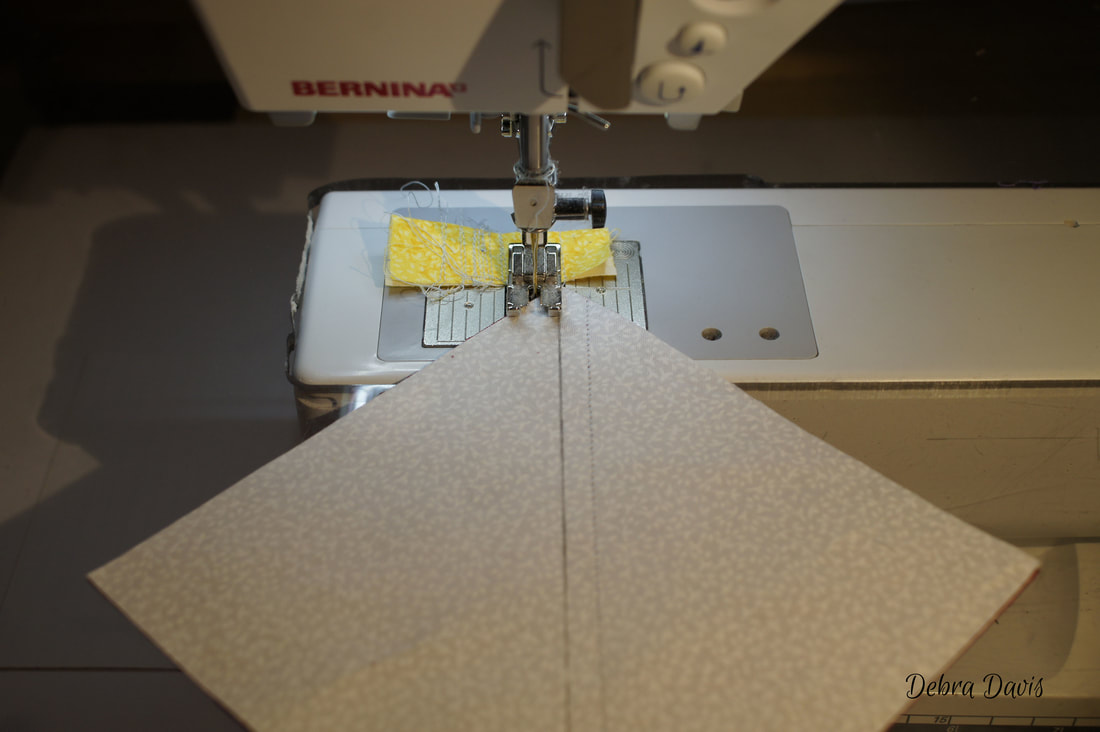
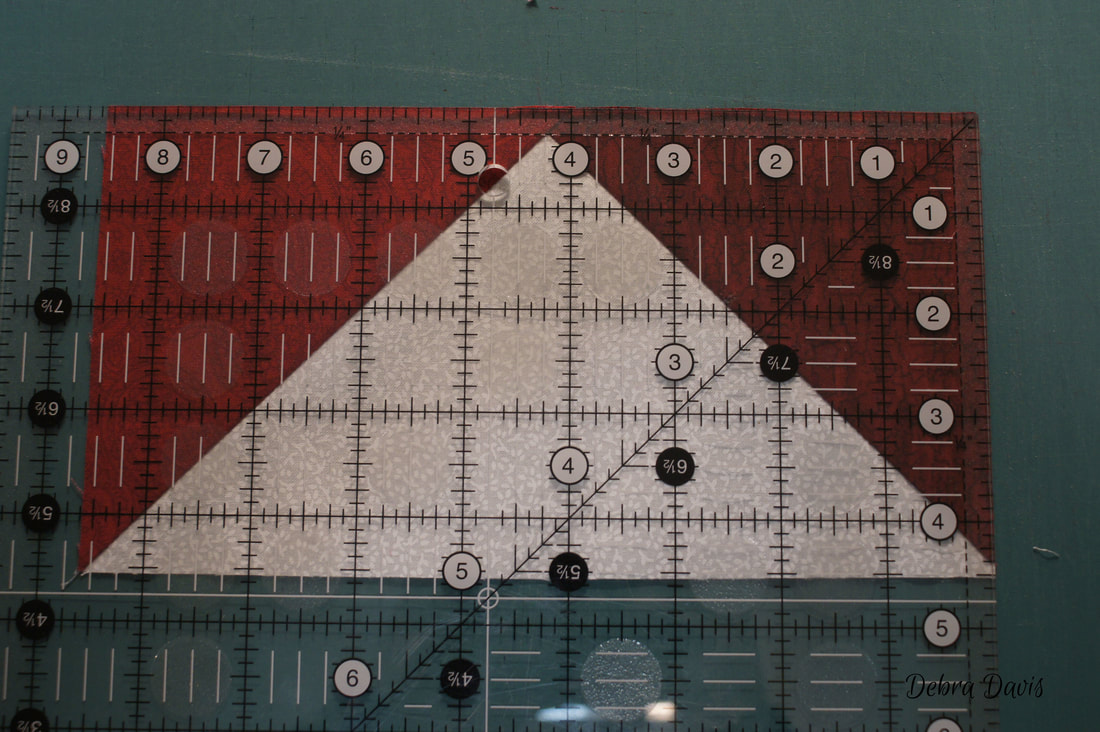
The trick when using a regular ruler to trim HST's is to make sure that the diagonal line on the ruler lines up with the seam line. Then I make my first two trims. 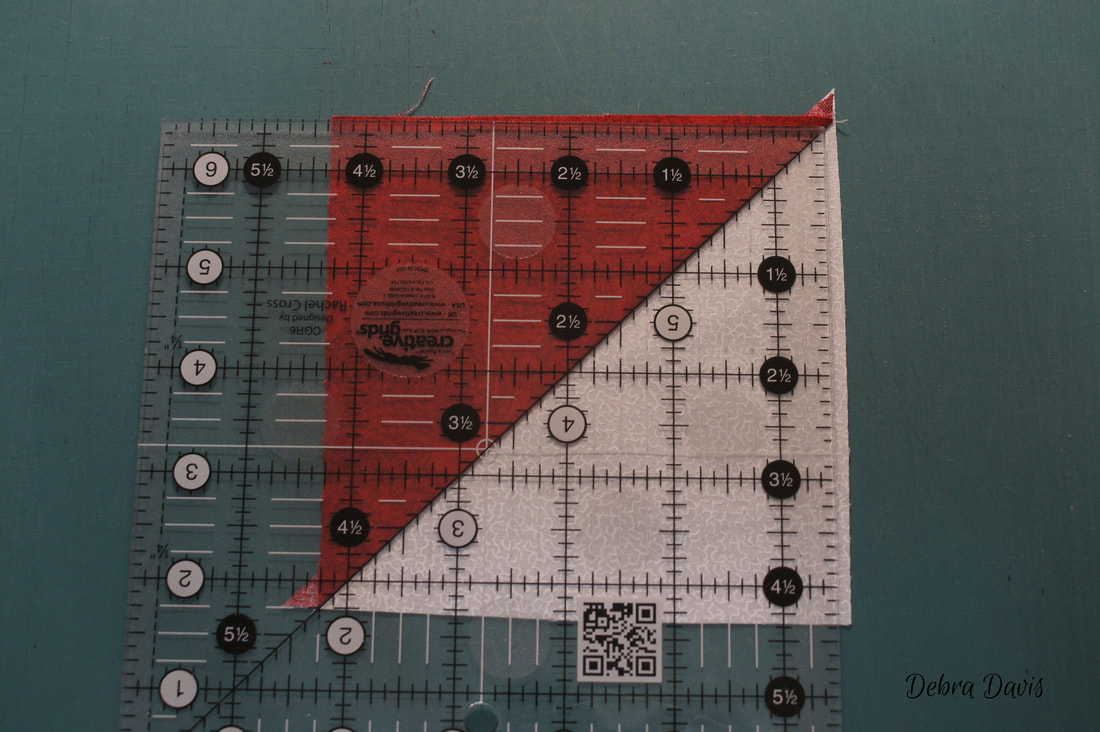 Flip everything around, line up the 4 1/2" lines with the trimmed edges as well as the diagonal line, and trim the last two sides. If you have not tried the Creative Grid rulers I highly recommend getting the 6 1/2" square to try-it is my goto ruler that is always out on my cutting table. Slowly I am replacing all of my old Olfa rulers with these as they really slip a lot less when cutting which saves me a lot of heartache. 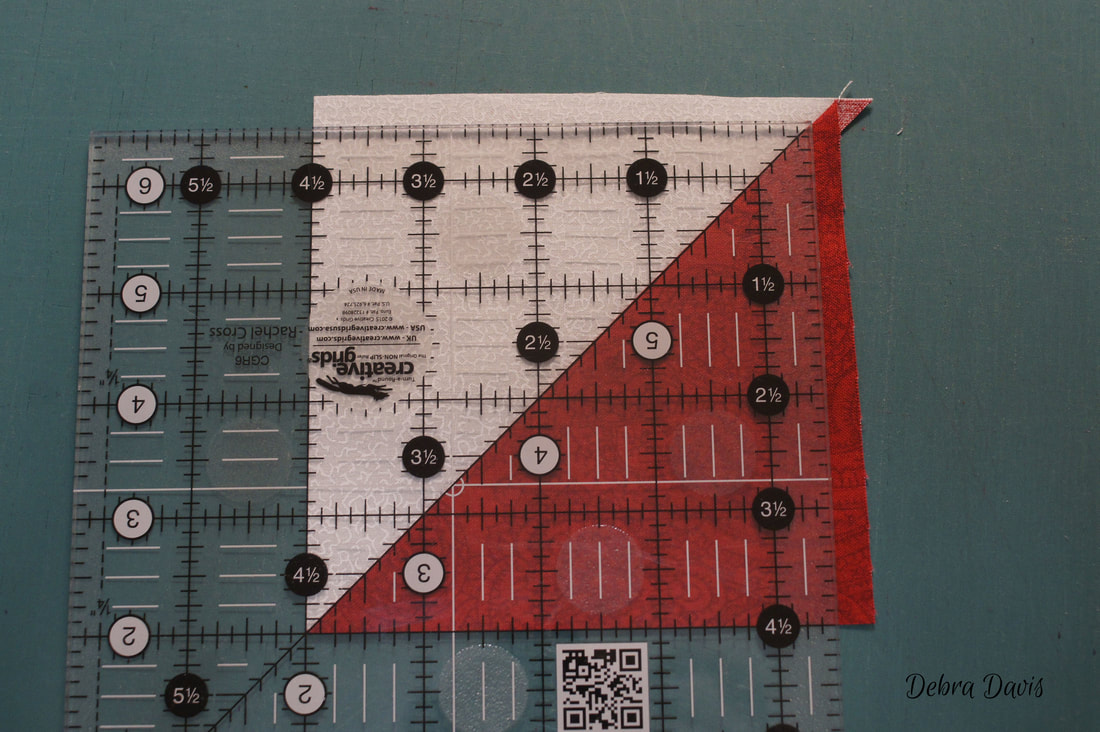 With all of the F/G half-square triangles trimmed I lay them out to form a pinwheel block. This will become the center of our star this week. (I love adding pinwheel blocks to my quilts-they are just so cute.) 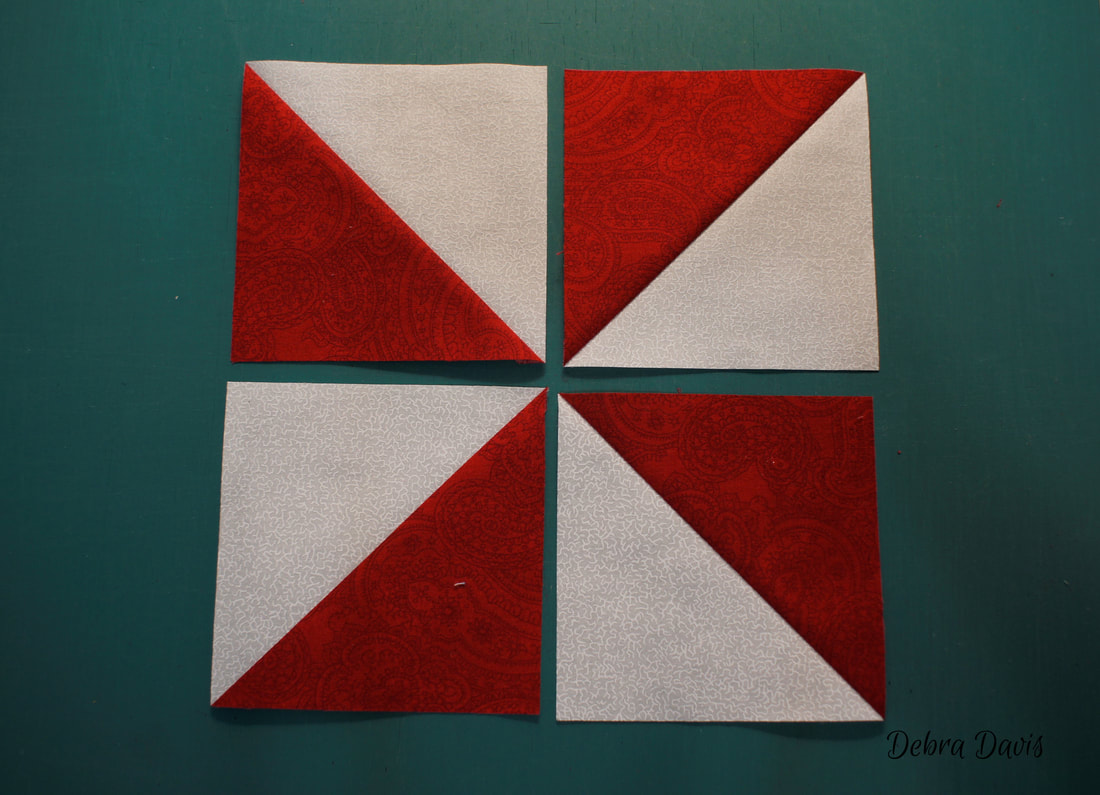 When sewing the squares together there are some diagonal seams to deal with. When the seam is facing up towards my needle I just sew without adding a pin-after having made sure everything is lined up nicely. 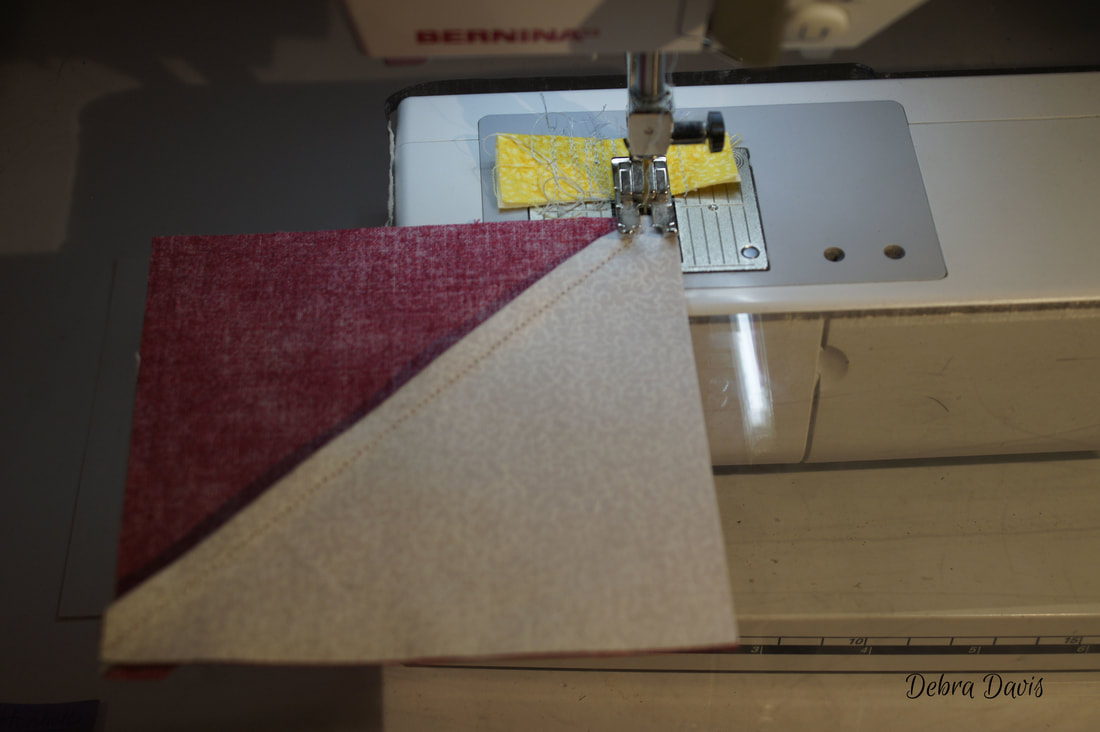 Here you can see how I have pressed the two rows in opposite directions. 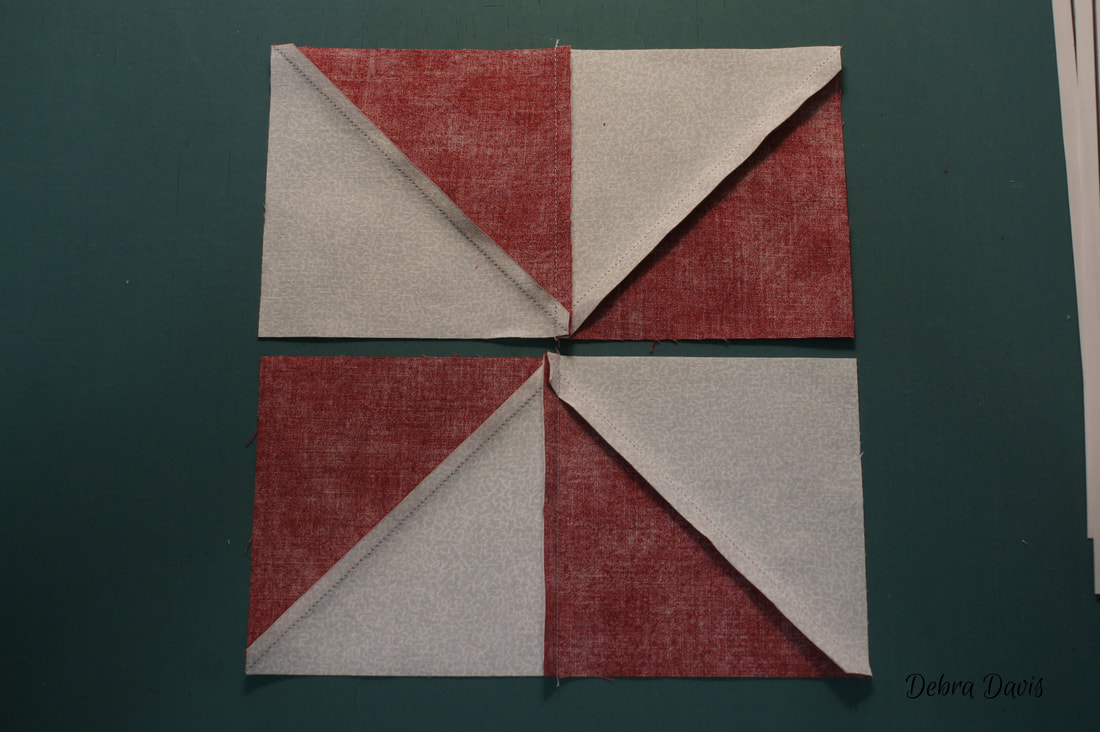 Then I check to make sure everything is going in the right direction before sewing together. 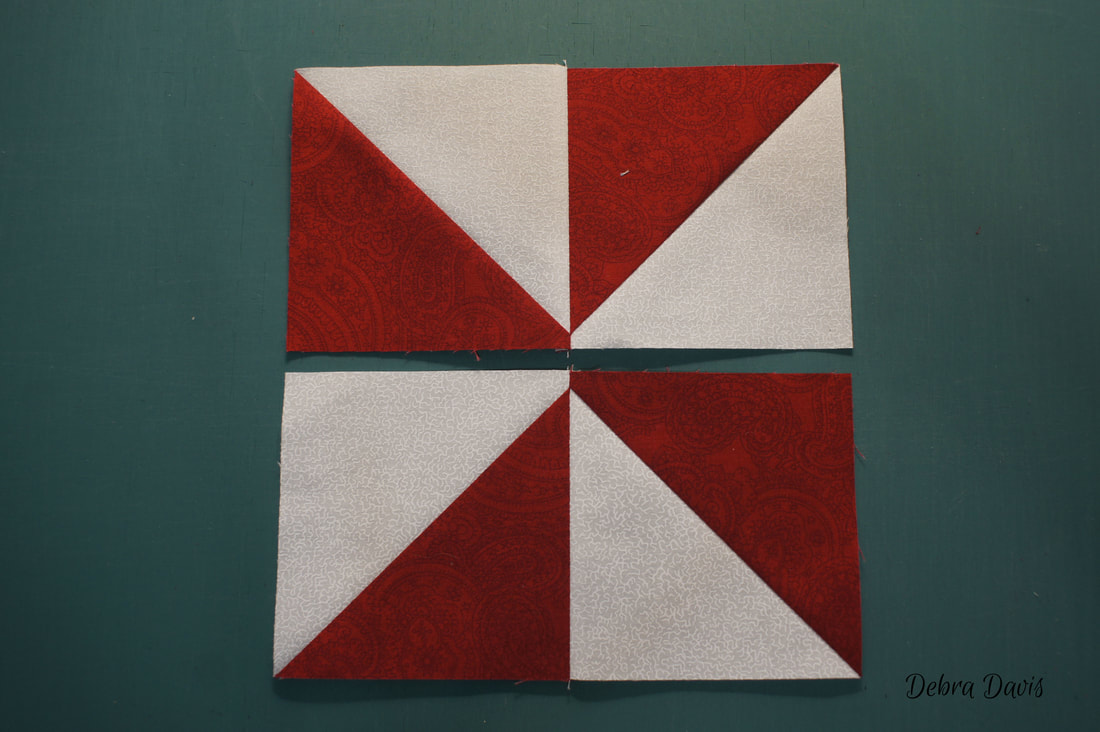 Place a pin at the intersection if you like, I did not as the seam was pointing up towards the needle which tends to push the two locking seams together. The spot where the stitching lines intersect here is going to be the center of the pinwheel. I do not want to stitch on the inside of that spot or I will lose my points- I will aim for the place where those stitching lines cross each other. Remember to slow down when you come to these kinds of bulky intersections- it will help with accuracy.  All of those points coming together make for a very bulky intersection so there is a little trick that will help it to lay flat. 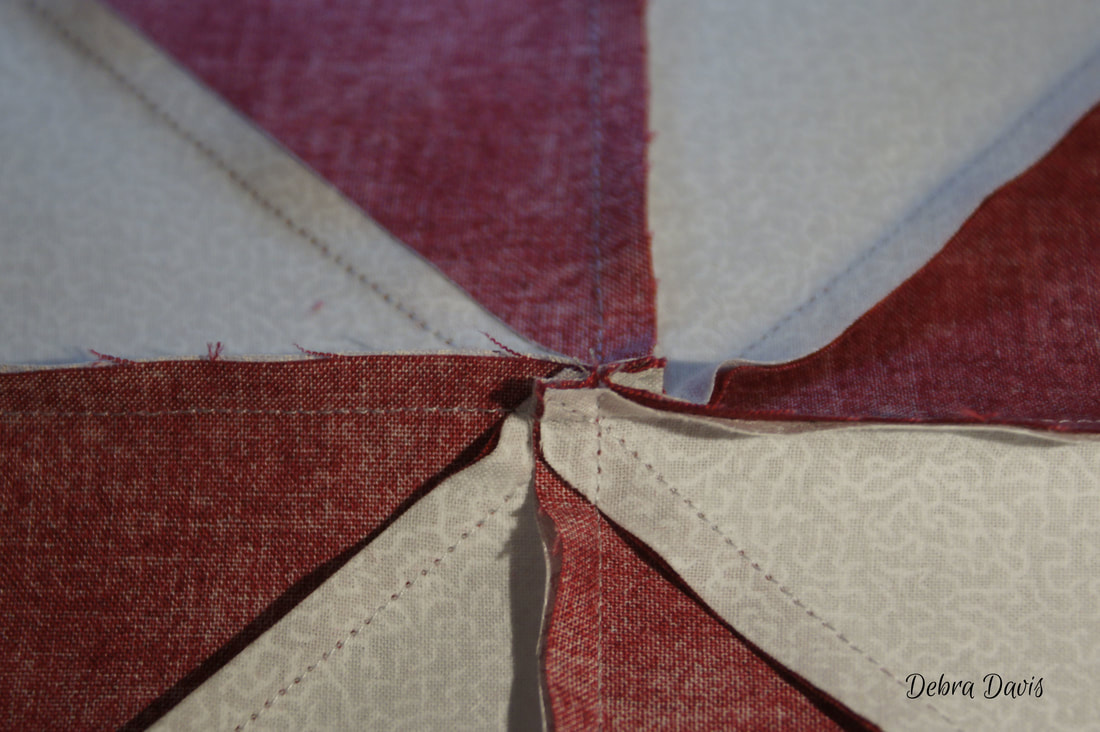 Before pressing I use my fingers to fan out the seams-opening them up so that one side goes one direction and the other side the opposite. You do not need to worry about taking out those few stitches to open up the seam here- it will hold together and you end up with a tiny pinwheel too. 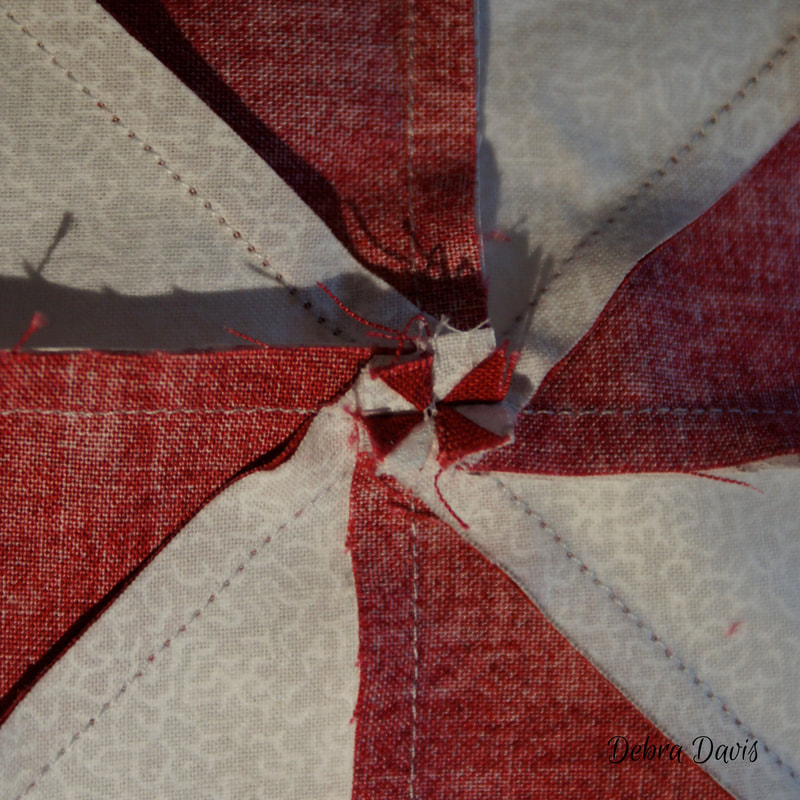 After pressing it lays nice and flat- I pressed from the top, but wanted to show you how neat it looks from the back. 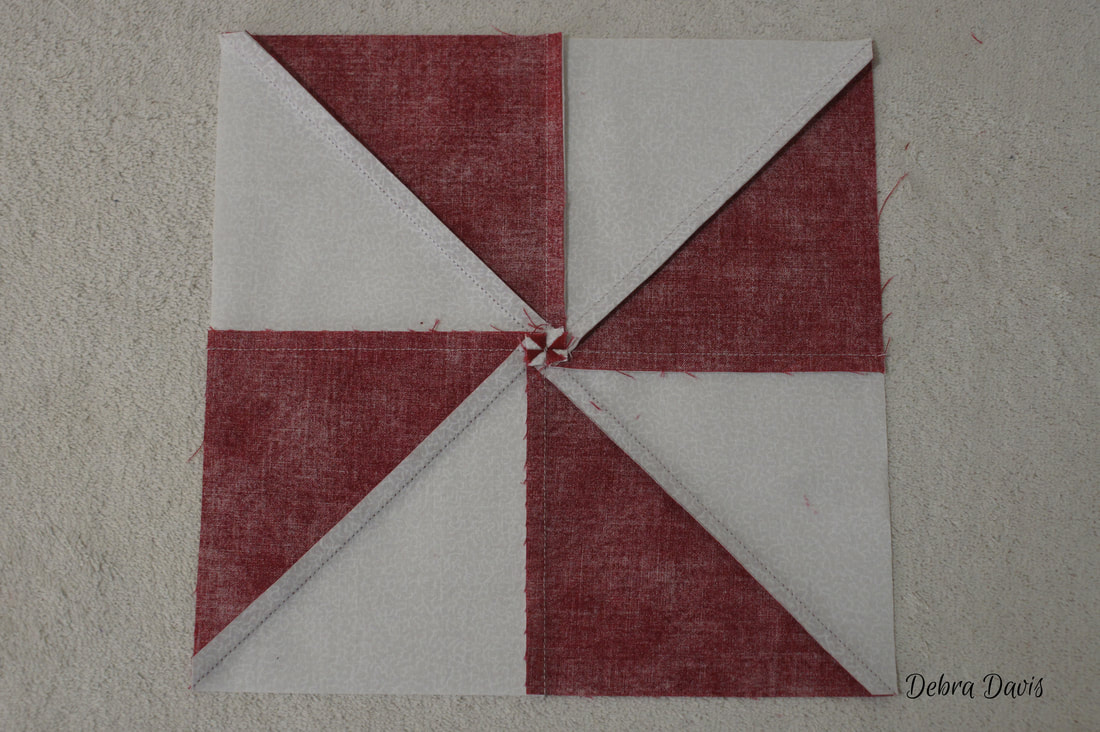 Before moving on to the Flying Geese, I check to make sure this square measures 8 1/2" x 8 1/2" I want the 4 1/4" lines to fall right on the seams in the middle-vertical and horizontal-that is the center of my block so I measure out from there. 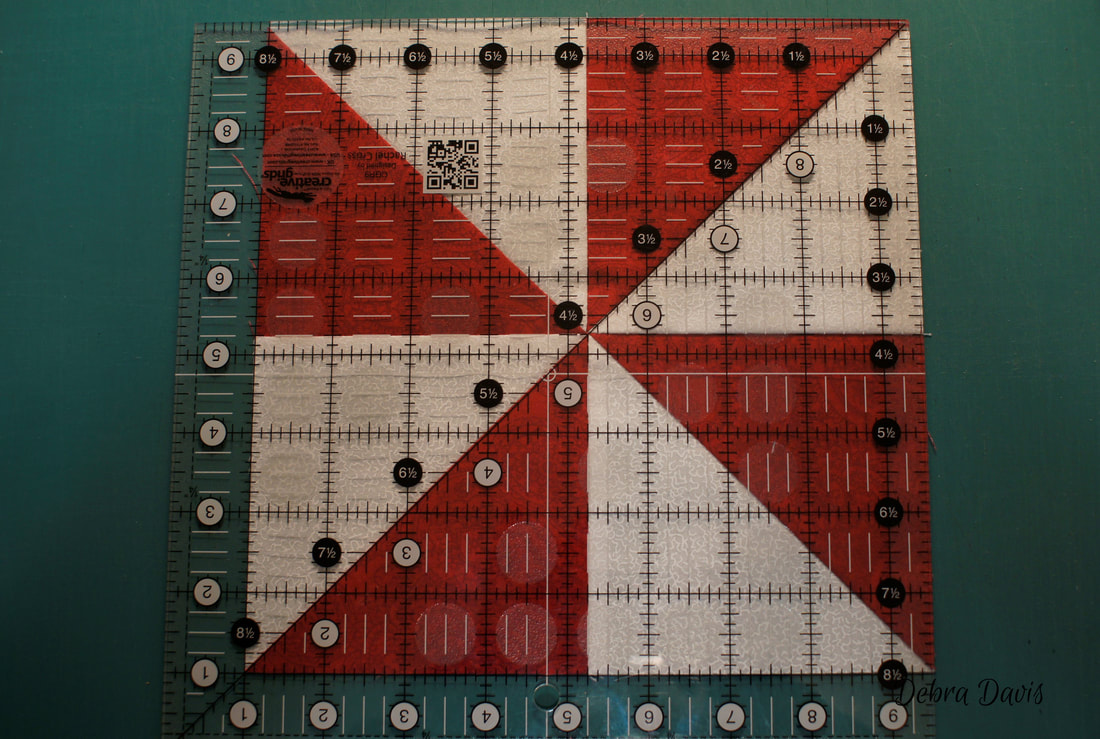 Now for the Flying Geese. I am going to use a different method for making them this week. Since we are using three different fabrics the No-Waste method will not work. The measurements for cutting these pieces are a little larger than what we need so that they can be trimmed down to size. 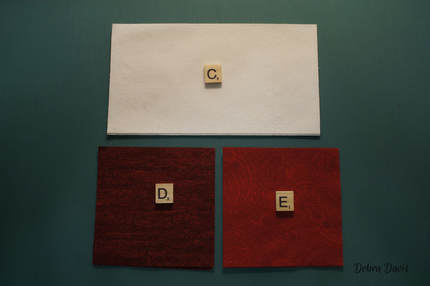 To begin, draw a diagonal line on the wrong side of the D squares. I used a pencil as there is a possibility that the line could show through with this method. With right sides together place the D squares on the left side of the C rectangles. Be sure the line is going the right direction. 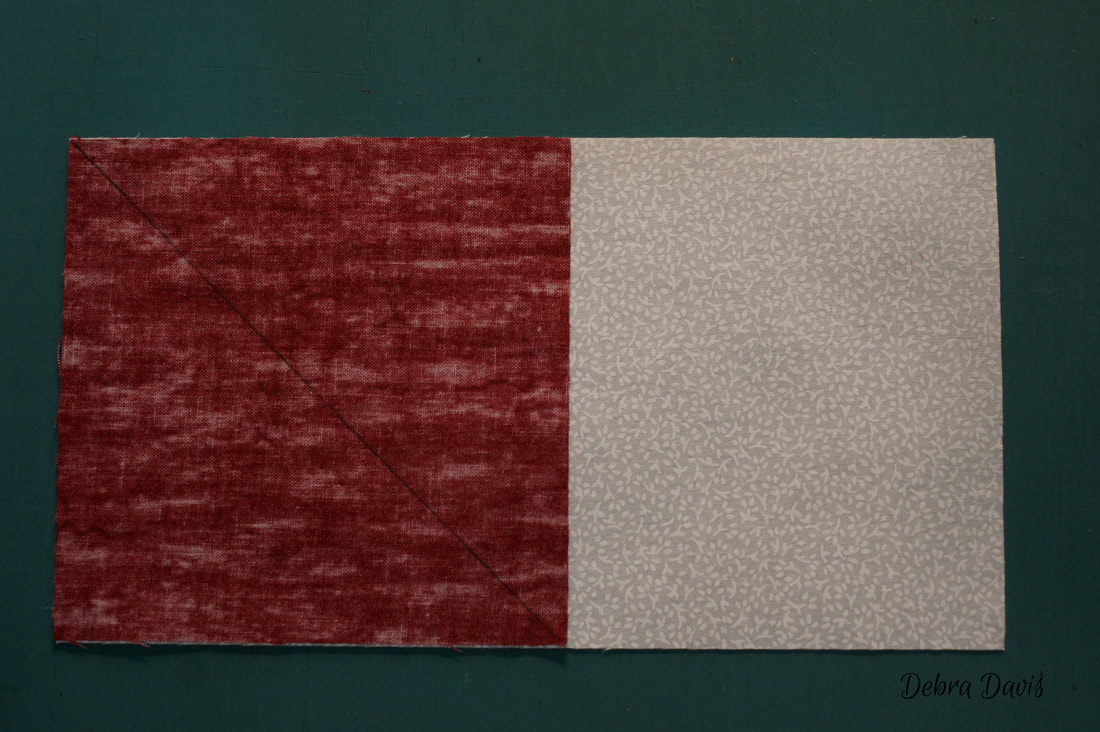 We are going to sew right along the line this time. I flipped the unit around so that I could sew with my needle to the right of the line. It is important not to sew on top of line, but with the needle just to the outside of it. 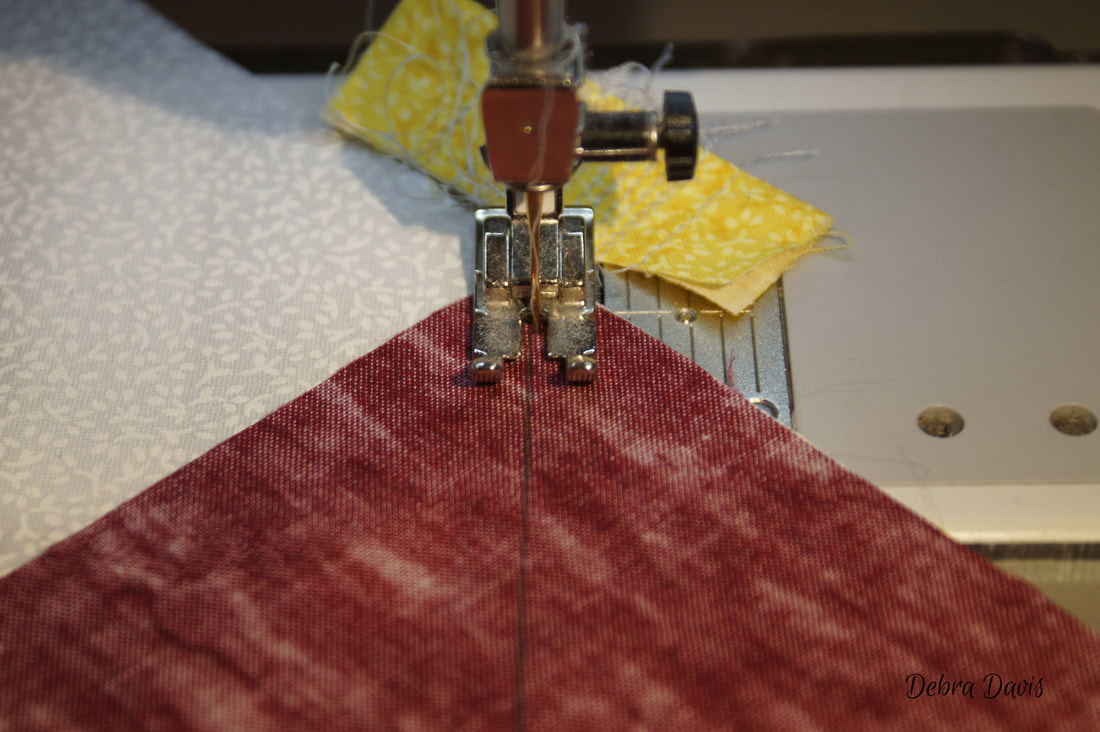 Sewing along the line... 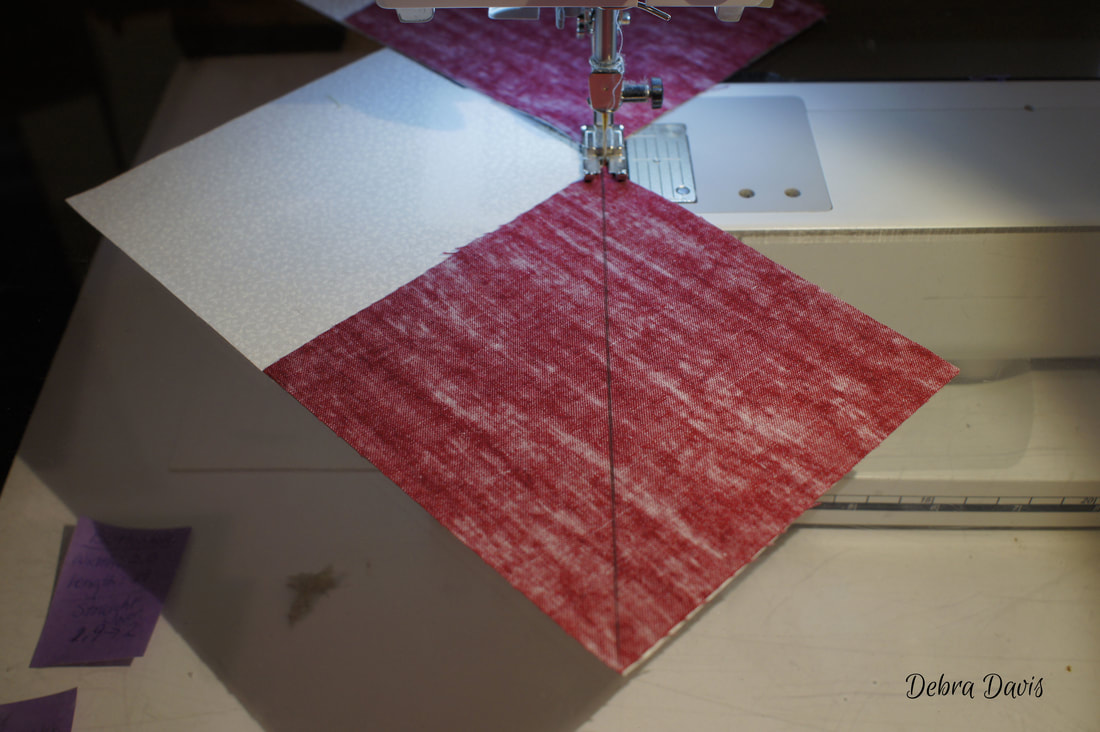 Trim off 1/4 inch from the seam line. Save those triangles for another project. 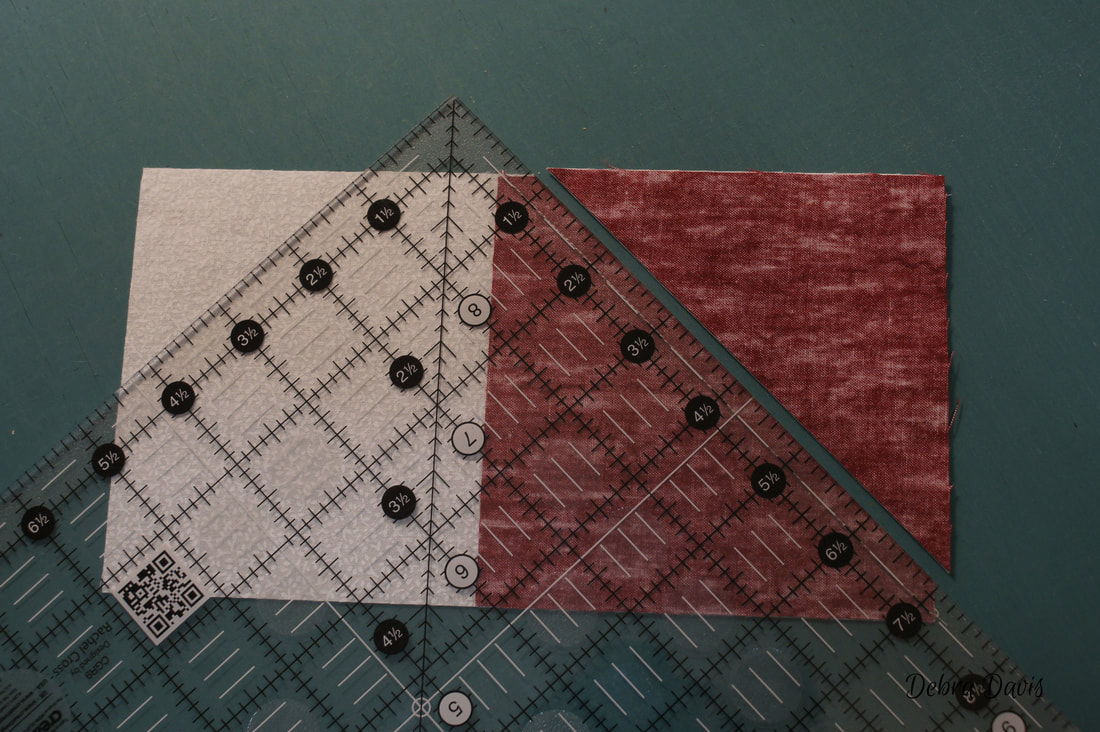 Press the triangle open. 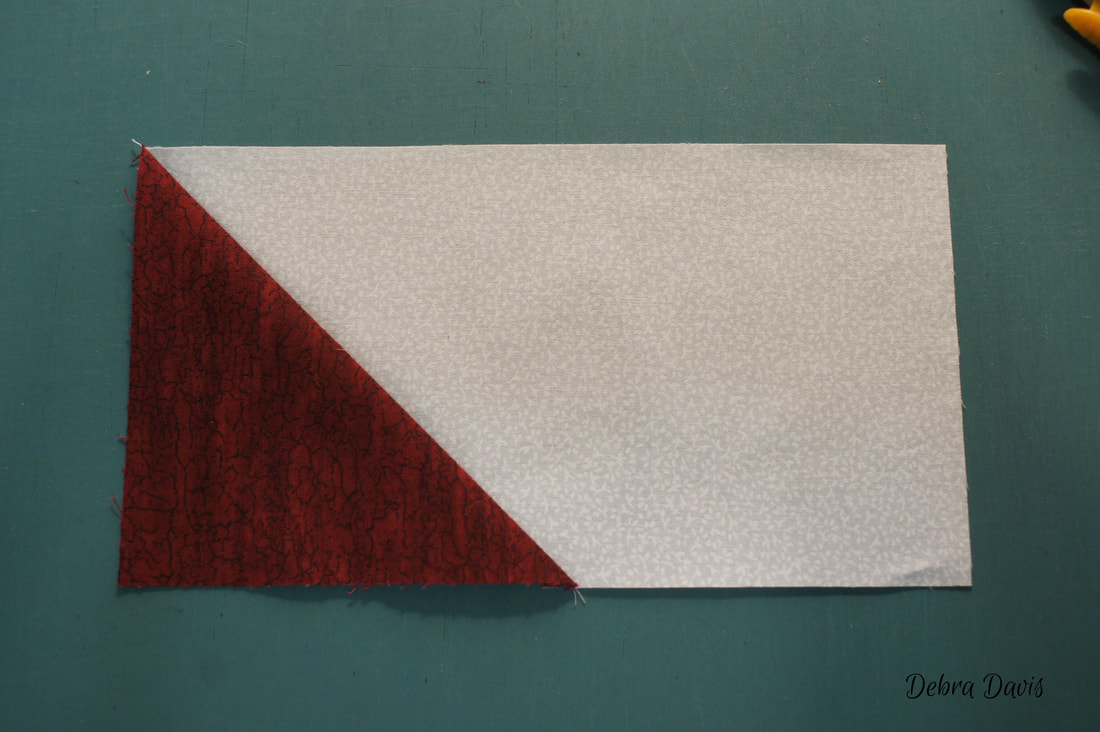 Next, draw a line on the back of all of the E squares. Place them on the other side of the C rectangle-paying attention to the direction of the line. 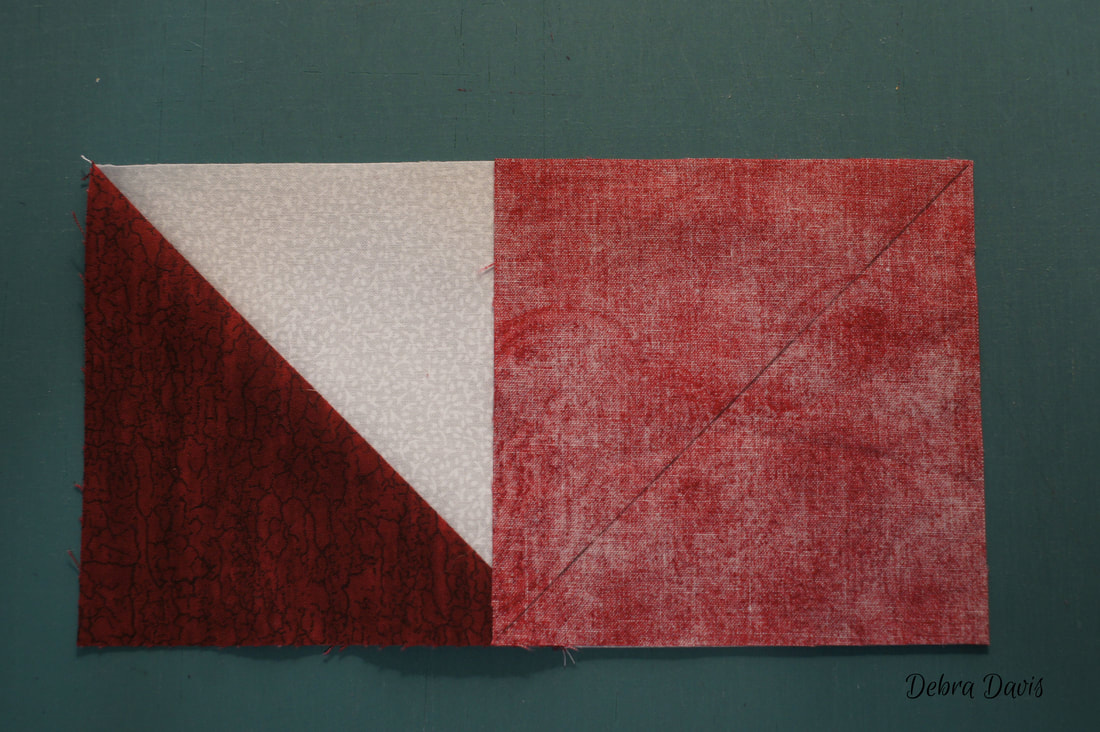 Once again, sew just to the right of the line.
Trim away 1/4" from the seamline. 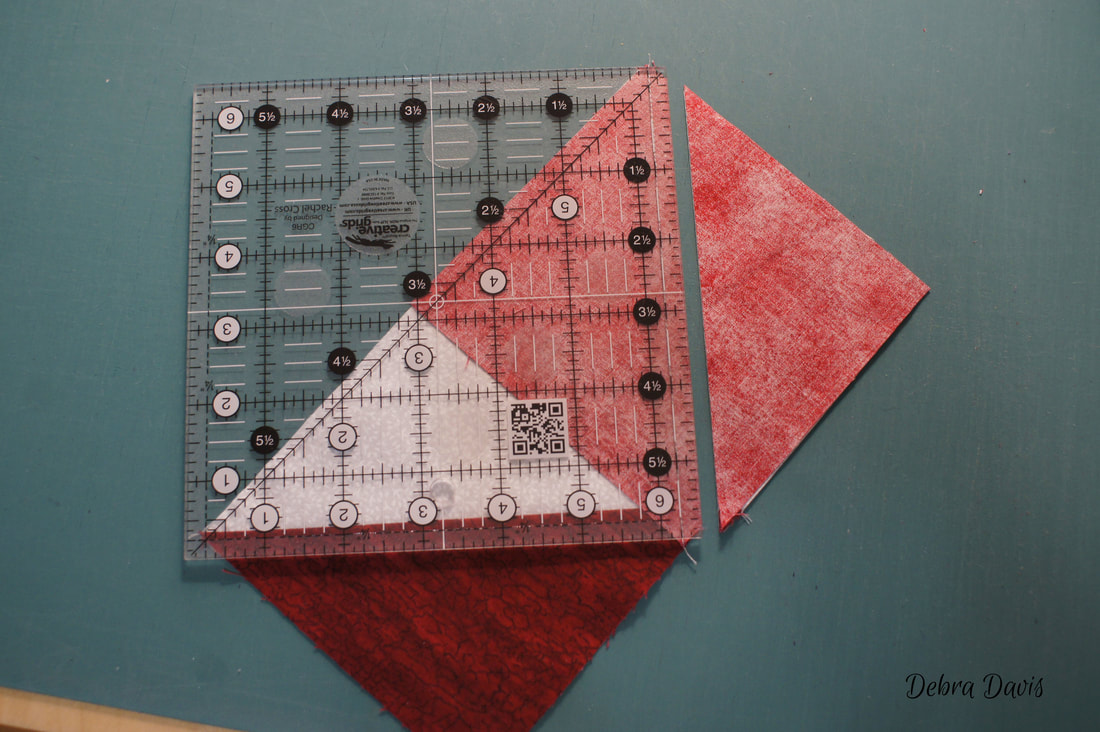 Then I just trim these like usual, trimming the Flying Geese to 4 1/2" x 8 1/2" If using a regular ruler the middle mark you place at the point is 4 1/4"-leaving 1/4 inch beyond for seam allowance. (see the Block 1 Tutorial for more detail about this step.)
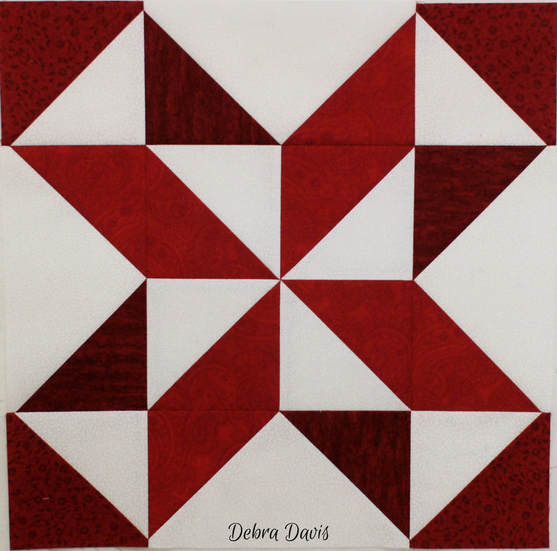
Now I have four perfect Flying Geese and it is time to put all of the pieces to this puzzle together. 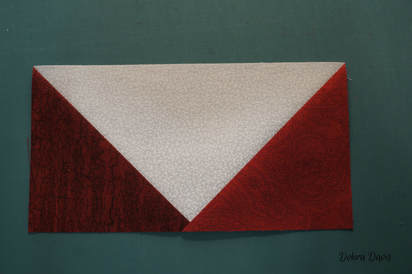 After arranging everything I like to take a step back and compare what I have laid out to the pattern. It is so easy to turn a piece the wrong way and not even notice until after everything has been sewn together. 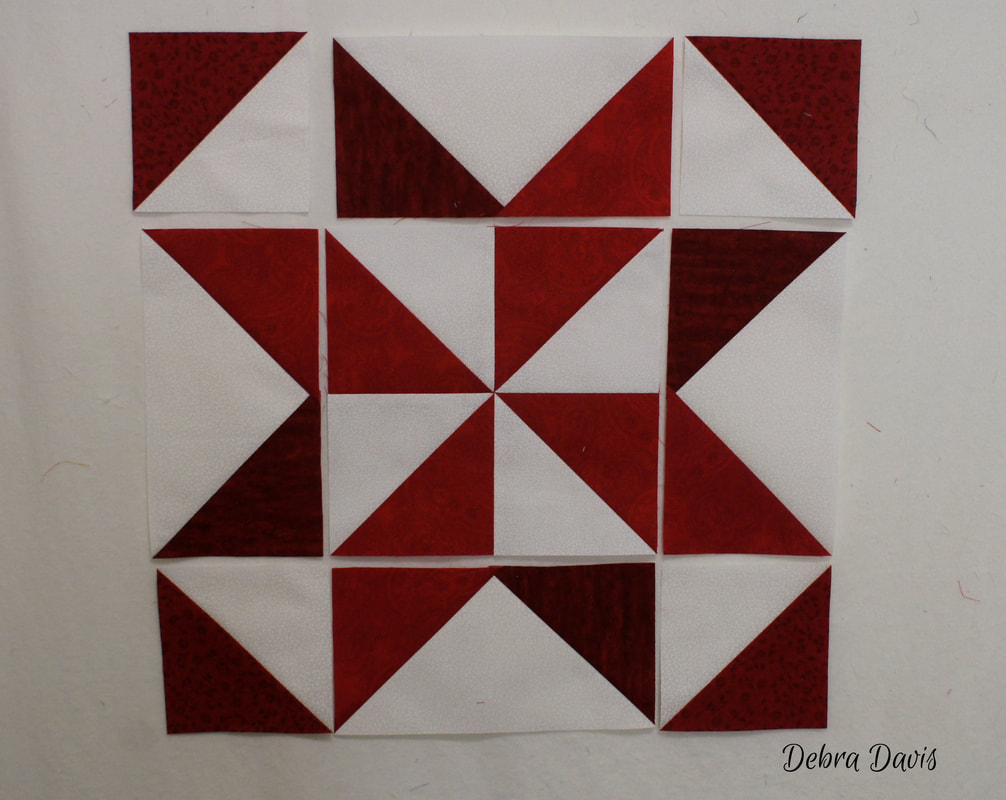 The rows go together pretty easily-there are those diagonal lines to deal with again. 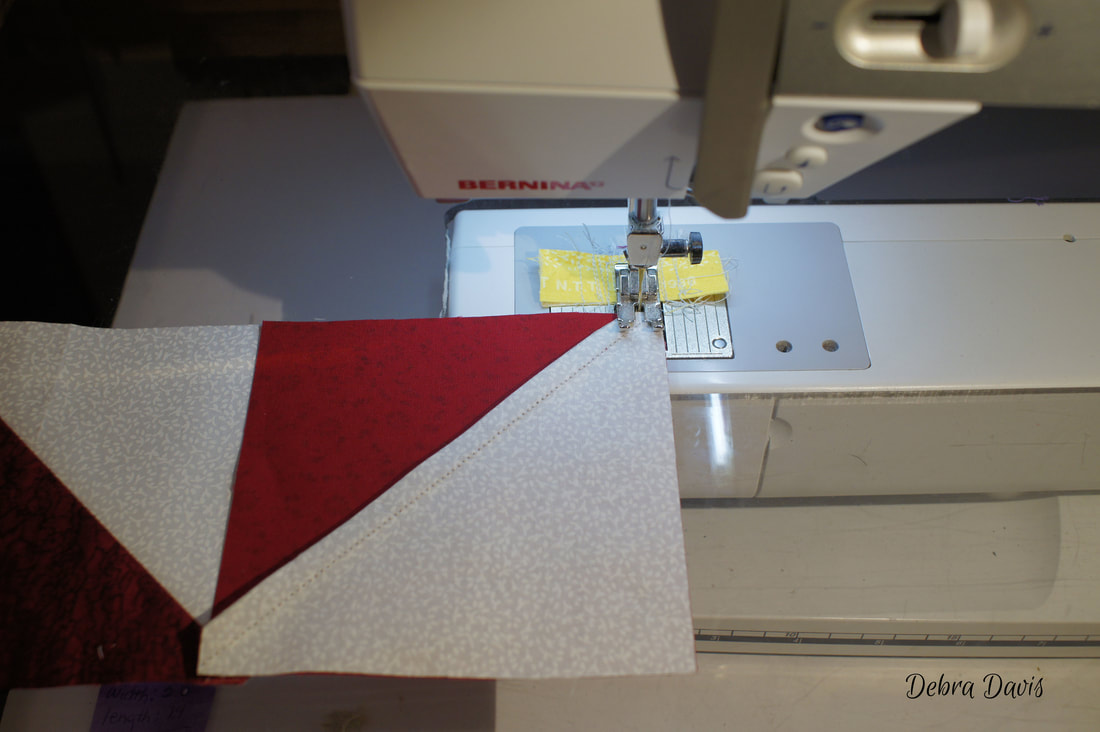 And I need to watch for the point on my Flying Geese. 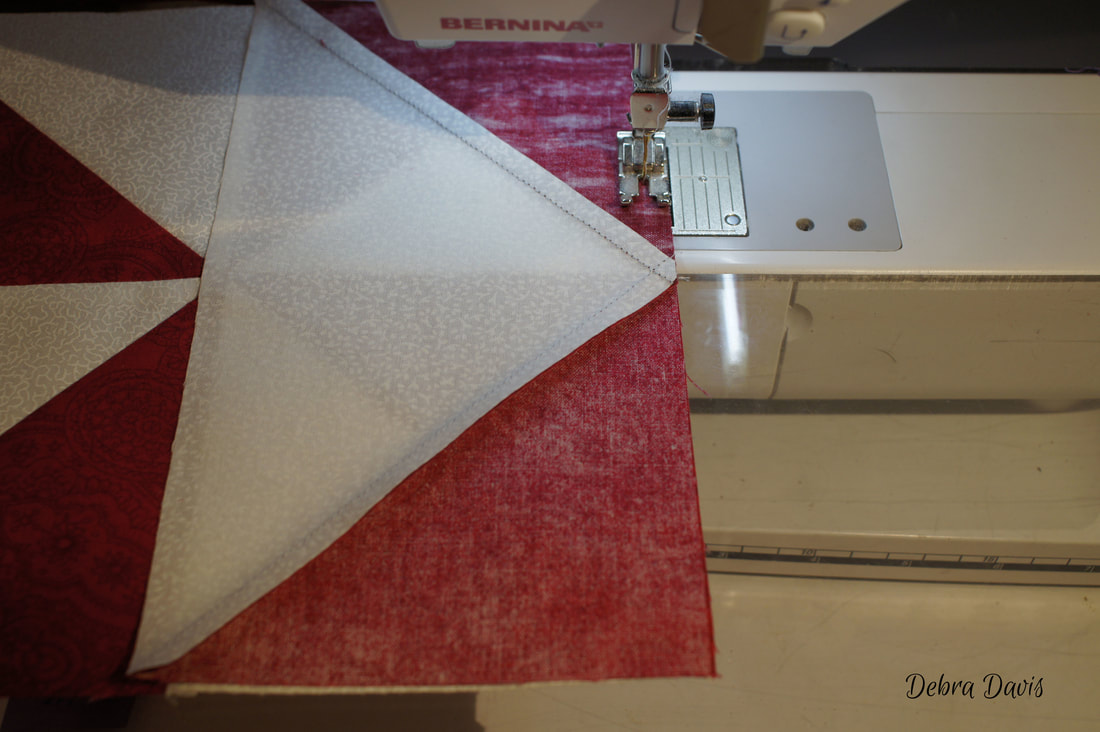 Some of the diagonal seams will face away from my needle so I place a pin in. I like to place the pin so that it is approximately 1/4 inch in from the edge-about where my needle will land. I stop just as my needle comes to the pin to avoid sewing over it, then with my needle in the down position I can safely remove the pin and finish sewing. 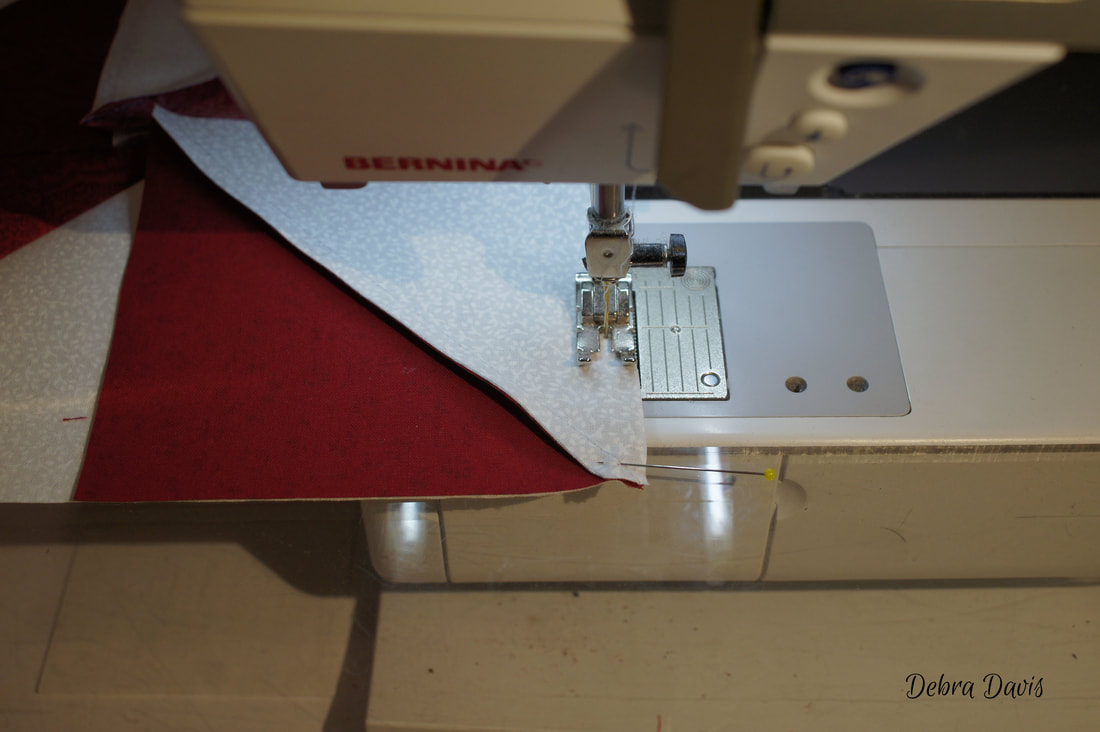 I always check my measurements when joing rows. The middle sections should now be 8 inches. If you look at the bottom left of this row you will see that I am about an 1/8 inch off. Just at the bottom though, so I know I lost concentration and did not sew a straight line-very easy to do where you begin and end sewing. When there is just a little fabric under the presser foot things sometimes end up wonky if you do not take extra care to make sure you feed these end little bits as straight as the rest. If I am going to run off course it is most often when I come to the end of sewing a piece. 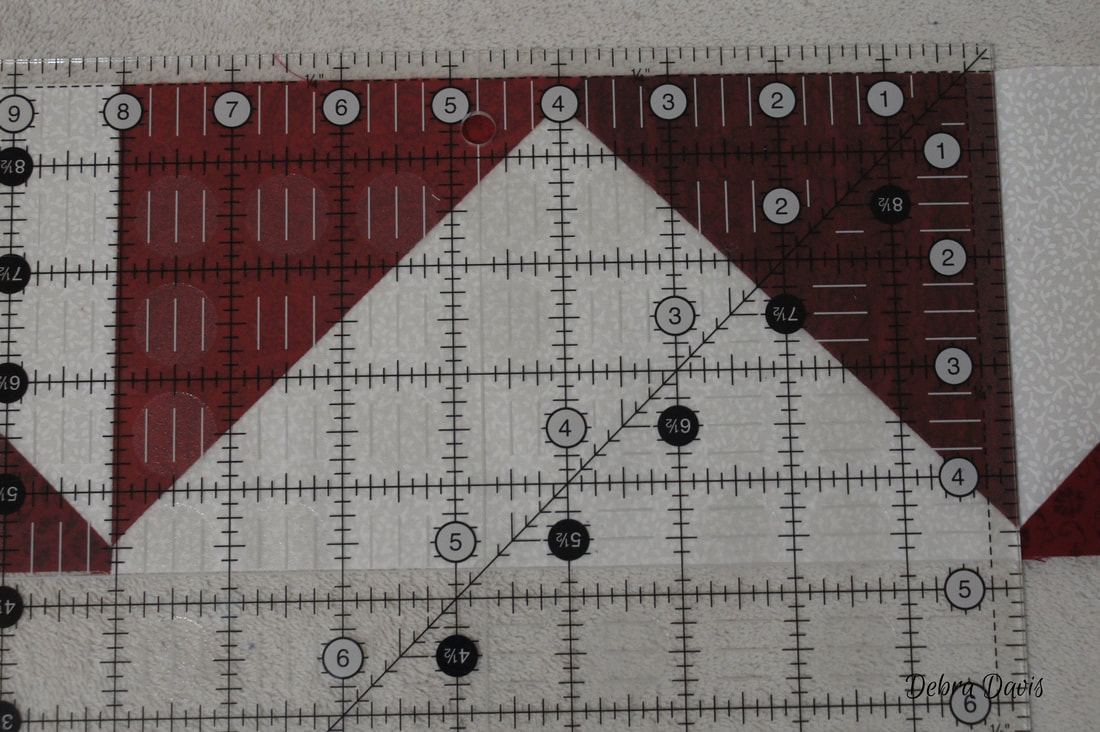 Some time spent with Jack the Ripper (like many quilters that is what I have named my seam ripper) and things are looking much better now. That little 1/8 inch may not seem like much but is enough to end up with mismatched intersections where the seams join or even a bit of a wrinkle. 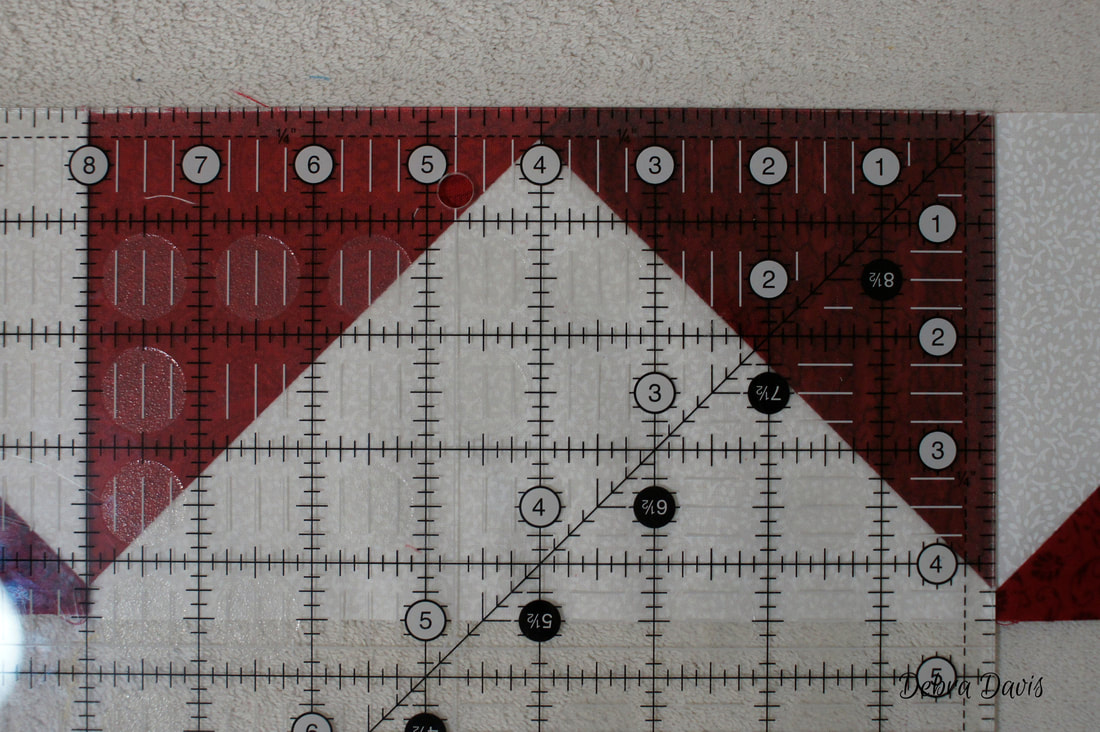 With all of the rows now measuring the way they should I get ready to join them together. Once again I take the time to step back and make sure I have everything going the right way. 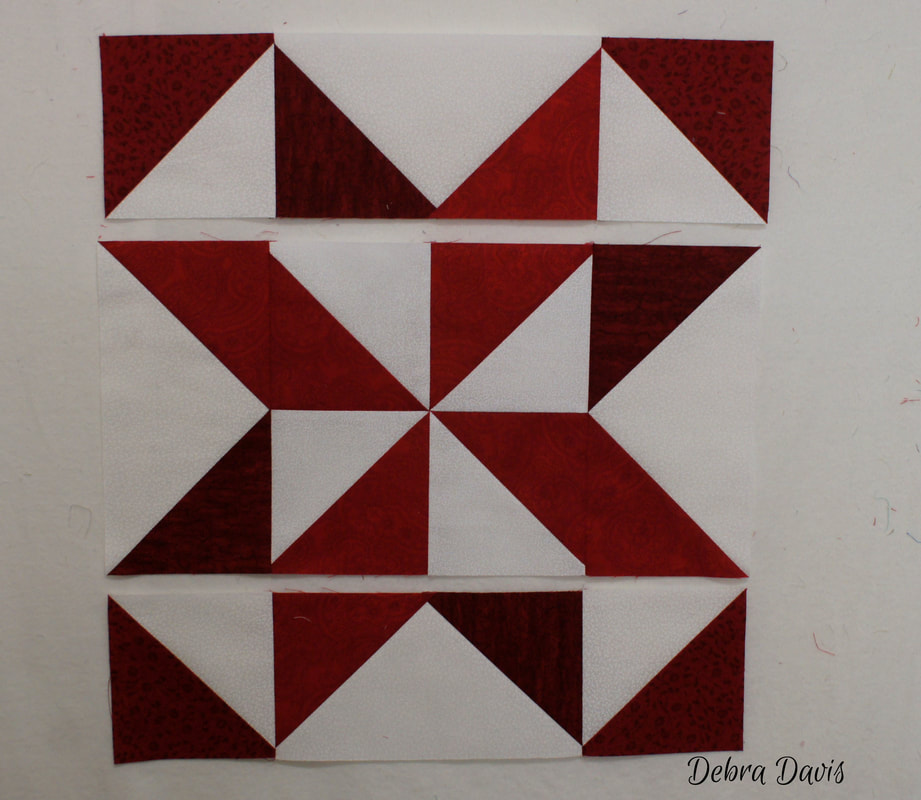 A pin or two helps keeps things in order and I do slow down over those seams. 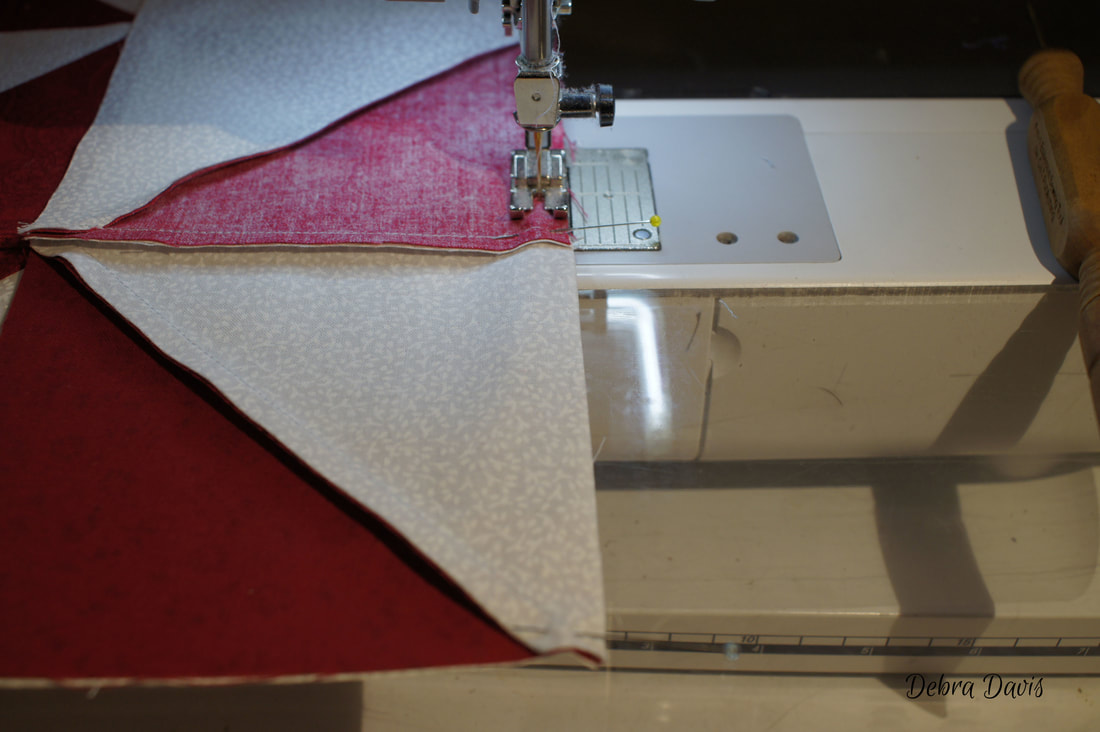 This has been one of my favorite blocks to make. I think I tend to say that about almost every block I finish.
I doI like this one a lot because of the pinwheel center-They make such cute quilts. Here is one I am wokring on from a free pattern I found not long ago. Works up quick and easy with a charm pack too. The designer wrote a tutorial for it over at Moda Bake Shop if you are interested. 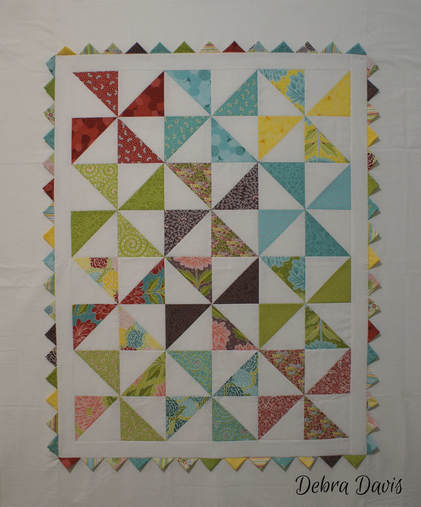 And with Block 3 finished the first row is done! Yay! Time to celebrate!! 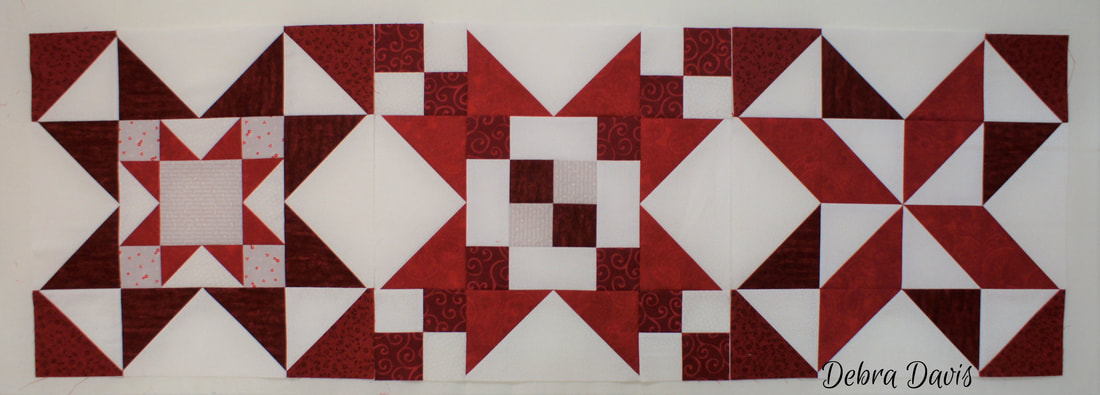 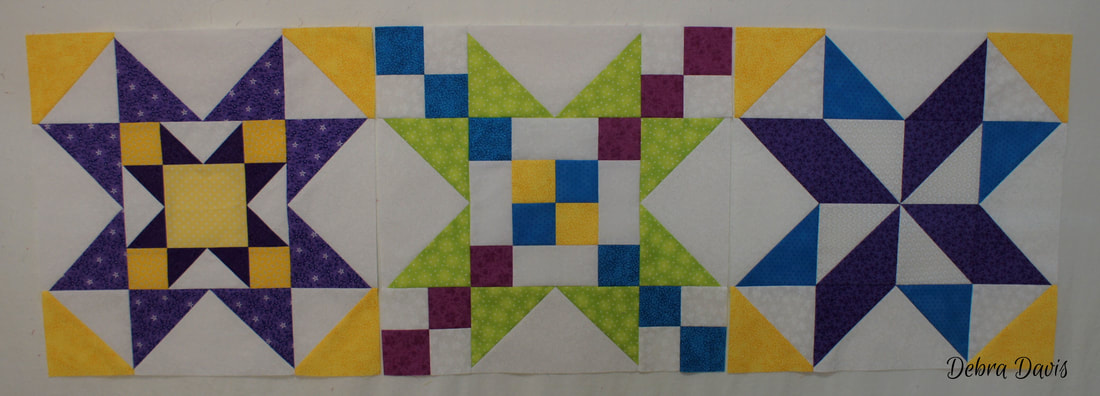 So, for my Giveaway. The makers of Bloc-Loc rulers are sponsoring this one and will provide one 8.5 inch Bloc Loc Half-Square Triangle Ruler (valued at $51.00) just like the one I use. The deadline for entry is Sunday, February 25th. The winner will be chosen by a random drawing and announced on Monday Feb. 26th. This contest is open to everyone. To enter just tell me in the comments something new you would like to learn. You can get a bonus entry by going to my Facebook Page (<---click on link) and saying "HI" to me there. 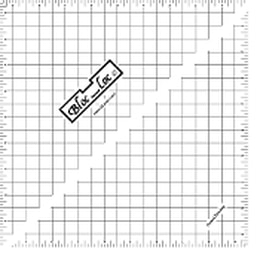 Bloc Loc Website-Click Here That's it for now, so until next week... Happy Quilting! 
Lynn Vogeley
2/19/2018 07:16:08 am
Still need to learn how to do sashing with cornerstones!
Debra
2/20/2018 04:53:57 pm
A very good choice, Lynn. I will keep that in mind when we come to putting this quilt together-that is an option I would like to cover.
Kay Williams
2/19/2018 10:21:15 am
Not sure this is what you can teach more than you already have, but I notice my flying geese are not even. I measure as carefully as I can but is it lack of practice, a real need to buy those Bloc-Loc rulers (I have some but never the size I need) or how can I learn to trim them evenly? I appreciate all your step by step directions and have my iPad open beside me to them as I sew.
Debra
2/20/2018 04:52:29 pm
A very common problem, Kay. I am thinking about how I might address some specific flying geese issues quilters are having. Thanks for your input! I am so happy to be a part of your quilting time.
Monna Shaner
2/19/2018 10:43:01 am
Hi Debra, Yea, flying geese, Not always, but sometimes are off
Debra
2/20/2018 04:49:11 pm
They do take a lot of practice, but so worth the effort.
Sheryll Foye
2/19/2018 11:53:26 am
I would like to learn how to make better choices in selecting fabric. Need to branch out from pre cuts. How do u tell which colors and patterns will go together?
Debra
2/20/2018 04:47:57 pm
Great question, Sheryll. You are certainly not alone on that one. I will be starting to discuss this very issue on my facebook page soon.
Teresa Kee
2/19/2018 11:59:43 am
I would like to learn to set quilts on point.
Debra
2/20/2018 04:44:56 pm
Very good, Teresa. I will be doing some of that with one of the settings on this quilt. Hopefully it will be a good start for you.
Debra Revay
2/19/2018 02:50:26 pm
I always have trouble with matching the blocks up when I have sashing between the blocks. Do you have a neat trick to keep the blocks lined up. That's what I need to learn. Thanks so much for all you do.
Debra
2/20/2018 04:42:35 pm
Great choice, Debra. I have plans to cover sashing when we get these blocks finished. Good to know you would like it to be detailed, not just "add sashing borders."
Vicki Johnson
2/19/2018 04:37:20 pm
Would love to see a video demonstration of the Rulers!
Debra
2/20/2018 04:38:55 pm
I think I might have to learn something new here too, Vicki. I will look into what I need to make video-that is a good idea.
beth
2/20/2018 04:36:31 am
I still need to work on trimming flying geese. My trimming at the point is always off, not straight. But I am having fun with you.
Debra
2/20/2018 04:37:29 pm
I am so glad to hear it Beth. Yes those points can be tricky and always a good one for me to conitnue to cover. May be time to see if I can figure out how to do a video tutorial, oh my. (a new thing for me to learn too!)
Carol Hofstetter
2/20/2018 08:15:26 am
I'm learning so much doing this quilt. I have trouble color coordinating so anything on this topic is helpful to me! Thanks for a fun quilt adventure!
Debra
2/20/2018 04:34:31 pm
I am glad to hear it, Carol. I will be doing a lot more on choosing colors in the future -sharing as I plan my quilts.
Carolyn
2/20/2018 09:06:12 am
I would like to get better at iron on applique
Debra
2/20/2018 04:33:08 pm
I am working on a project to introduce later this year that will do just that, Carolyn. I love fusible applique.
Skeeter
2/20/2018 09:20:14 am
Loving these blocks, wish I had done a better job selecting my fabrics. That would be a helpful lesson but I would really like to learn a quick way, if there is one, to machine bind quilts. I don't have the patience to hand stitch. Thanks for all u do.
Debra
2/20/2018 04:30:03 pm
Good choices-I have played some with machine binding and it is going on my list of future tutorials. I will also continue sharing how I make fabric choices for a quilt. Thanks for your comment!
CATHY L
2/20/2018 05:00:44 pm
Thanks for sharing all your tips, very helpful. Now all I need is time, looks like a fun block. I always have trouble with making flying geese now I will try your way. Thanks
Debra
2/22/2018 09:11:52 am
You are most welcome, Cathy. Time-we all could use more of that! Let me know how the Flying Geese go, if there is an aspect that you need more help with. Any feedback helps me know how to approach the next tutorial.
Vicky Nanneman
2/20/2018 07:43:55 pm
I would like to learn more about mitering corners when putting on a quilt binding
Debra
2/22/2018 09:14:45 am
Good one, Vicky. That would be a great future tutorial. I struggled with getting them to come nicely at first too. I recently pulled out one of the first quilts I made-what a difference experience makes!
jeni
2/21/2018 01:02:21 pm
my biggest challenges are the binding - especially the corners
Debra
2/22/2018 09:16:39 am
I hear you, Jeni-this is a pretty common issue so I think a tutorial on the subject would be a great idea. I will plan to do so when I put this quilt together-if not sooner. Comments are closed.
|

Welcome to the site of Debra Davis-a woman who loves the Lord and loves to quilt.
My other blog where I share about my walk of faith:
Sitting at His Feet 
|


 RSS Feed