|
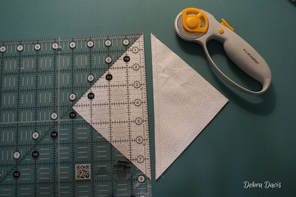
Before I begin with the tutorial for this week's block we have a winnner in last week's giveaway to announce. Congratulations Suz Alpine!!! You will be getting your very own Bloc-Loc Half-Square Triangle Ruler! I hope you love it as much as I do. Thank you to everyone who particpated, I took notes on your comments of what you would like to learn. I hope to incorporate all of your suggestions into future posts. Giveaways are fun, we all like the chance to win free stuff, but my favorite part is learning more about each one of you. BLock 4: Girl's Favorite Block-Debra's VariationTo get the pattern for Block 4 click here. Previous blocks and instructions are available by clicking here. 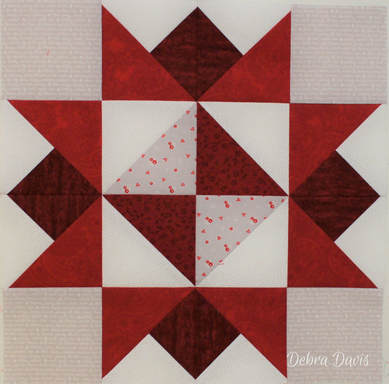 This is a block where I decided starch would be a good idea. Before cutting my pieces to size I starched my fabric. I also have included some very detailed pressing instructions with this block. I find that my seams match up so much better if the two are pressed in opposite directions. So some of these pressing instructions may sound strange but they work out well in the end. This is a block where you need to make sure your 1/4 inch seam is accurate. I wrote a little tutorial on this a few years ago that you might find helpful and it can be found here.  I start with the C and D squares and first draw a diagonal line down the middle of the C squares. I make sure that my line is as perfectly centered as I can get it. I place the C squares right sides together with the D squares and sew 1/4 inch from each side of the line.
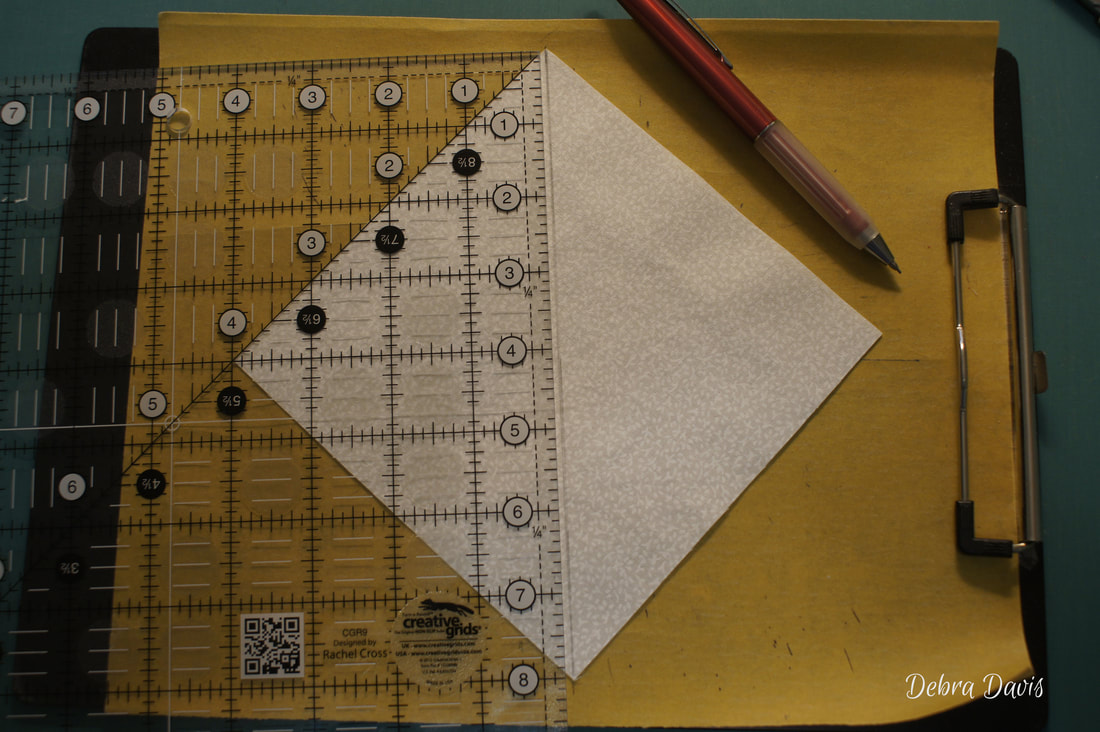
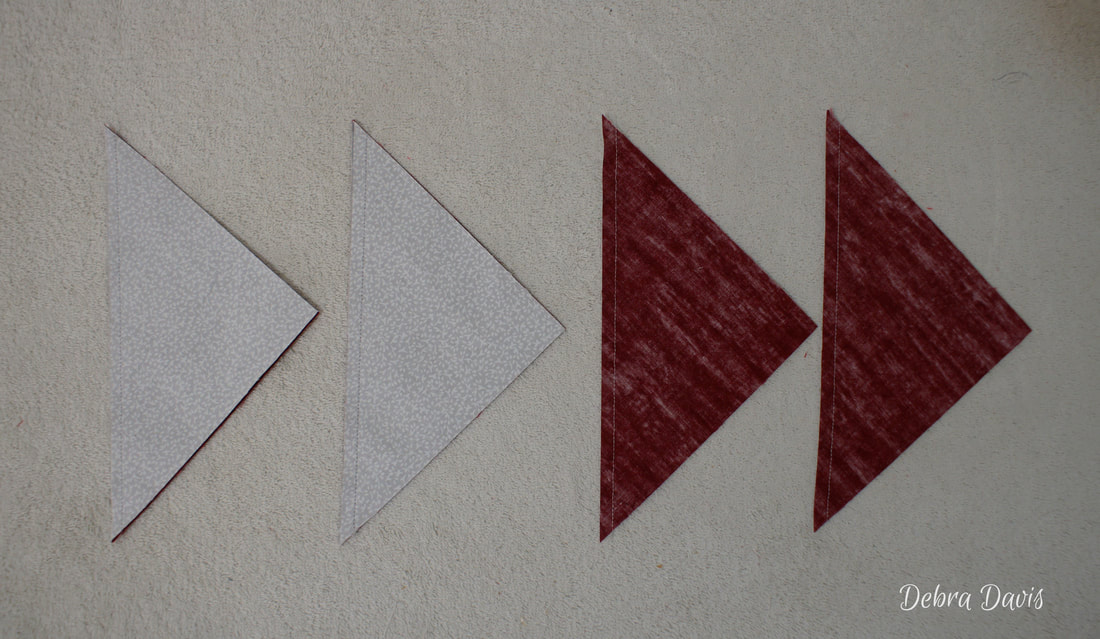
After sewing, cut apart on the drawn line and press two of the Half-square triangles (HST's) towards the dark side and the other two towards the light side.
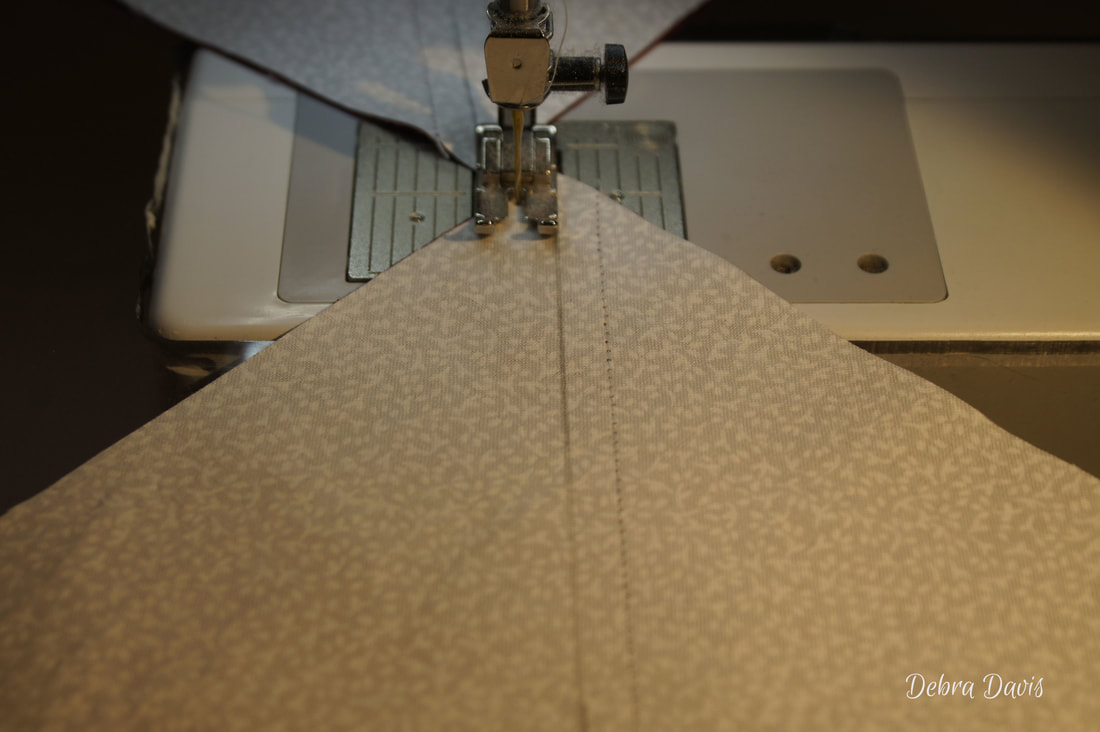
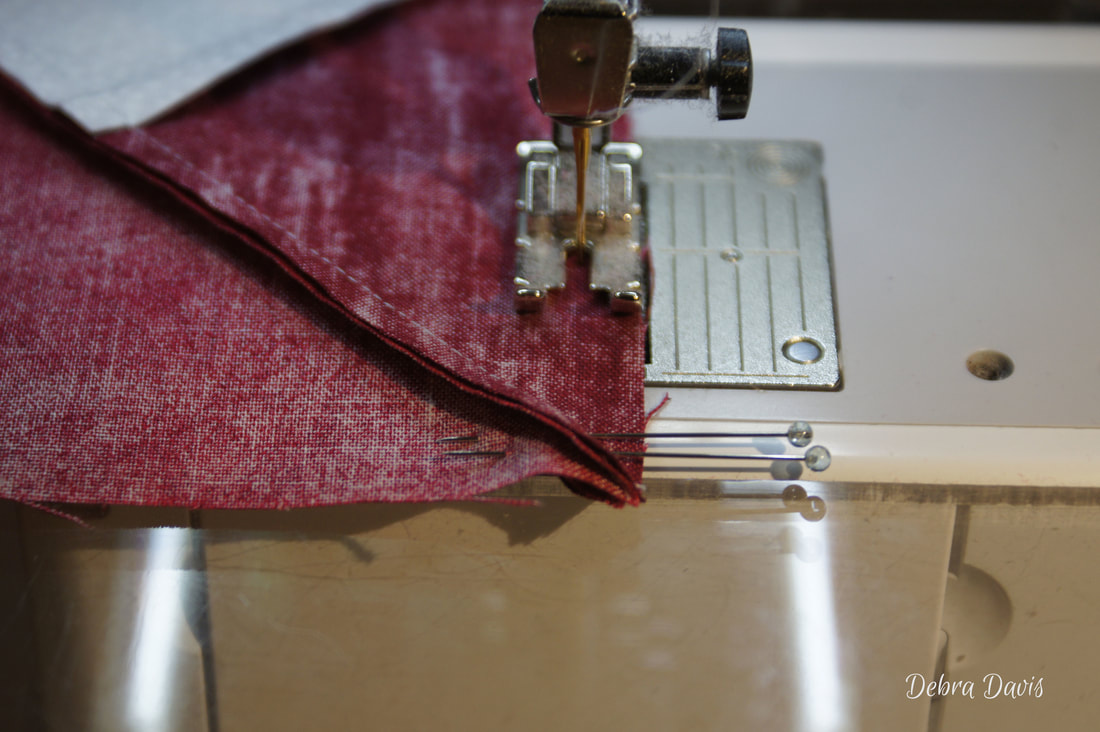
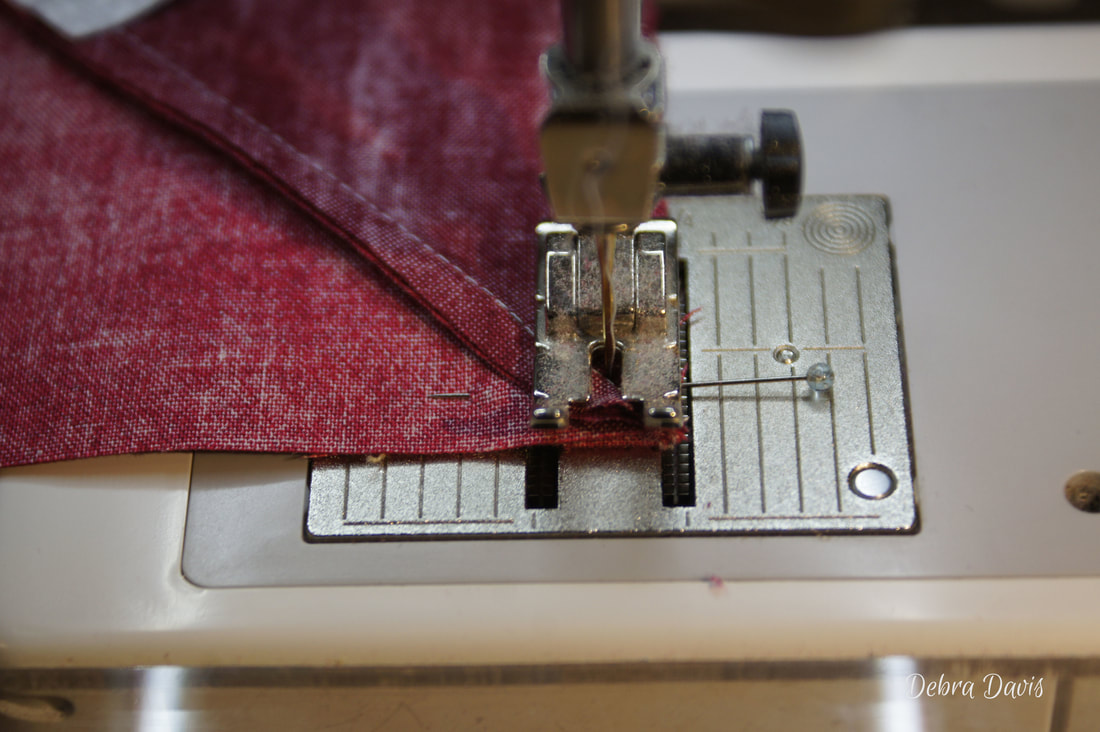
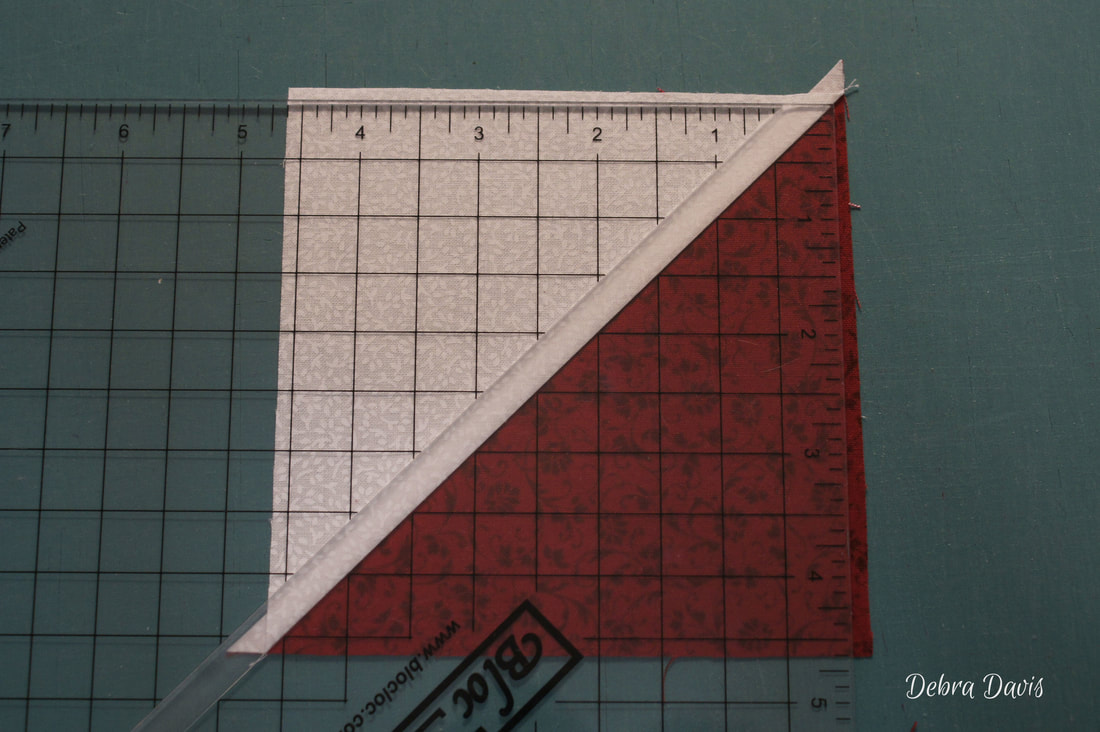
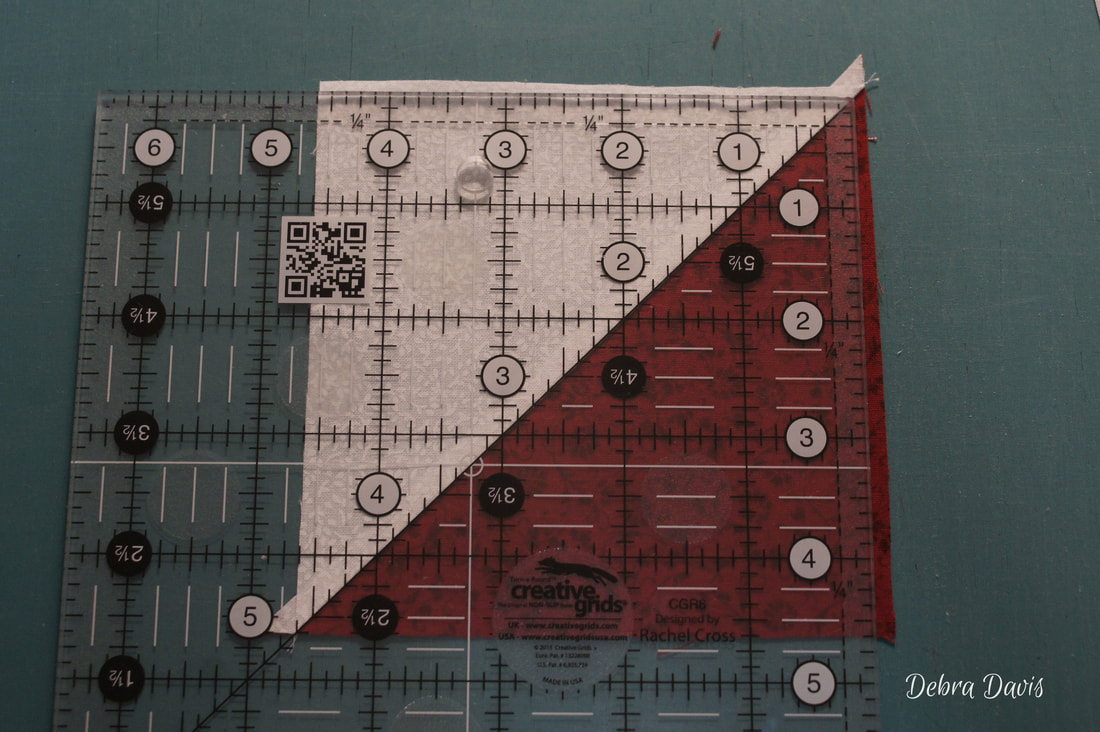
Before continuing trim the HST's to 5 1/8" x 5 1/8" One of the things that ensures you end up with sharp points is making sure that these are trimmed correctly. It is important to lay your ruler with the diagonal line on top of the seam line of the HST trimming the first two sides and then rotating to rim the last two sides. 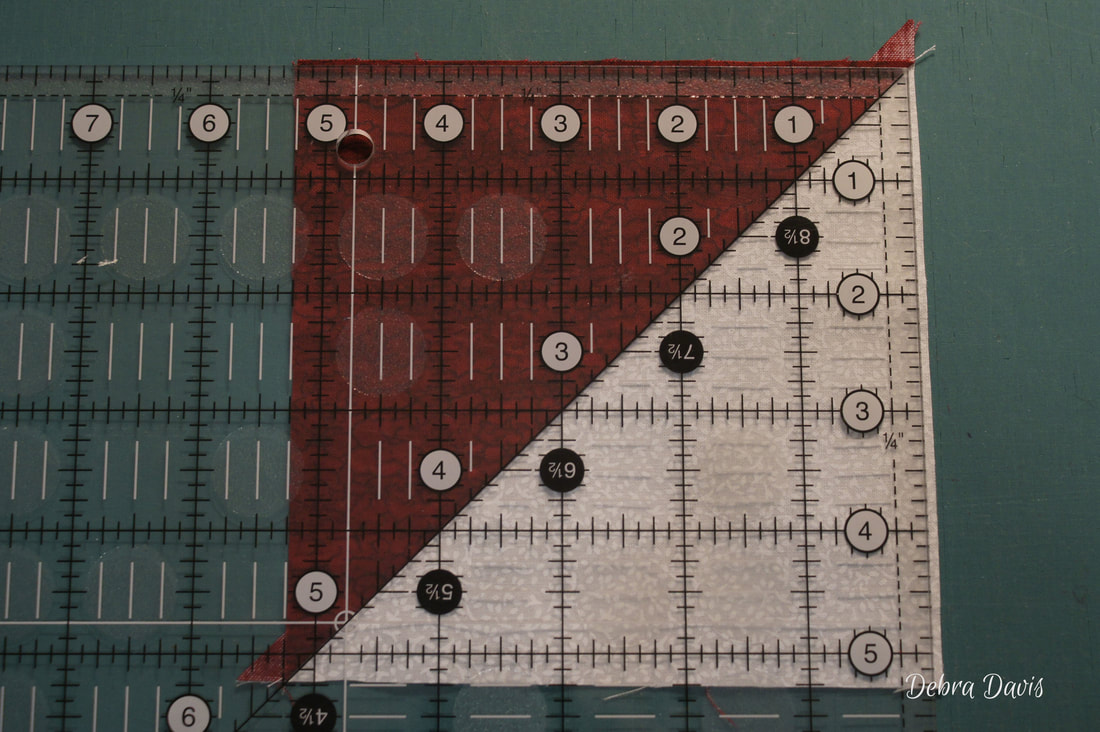 Notice how the corners where the two fabrics meet come to a point together. That is the result you want for your Half-square triangles.  Next I take the B squares and draw a diagonal line on the back of them. 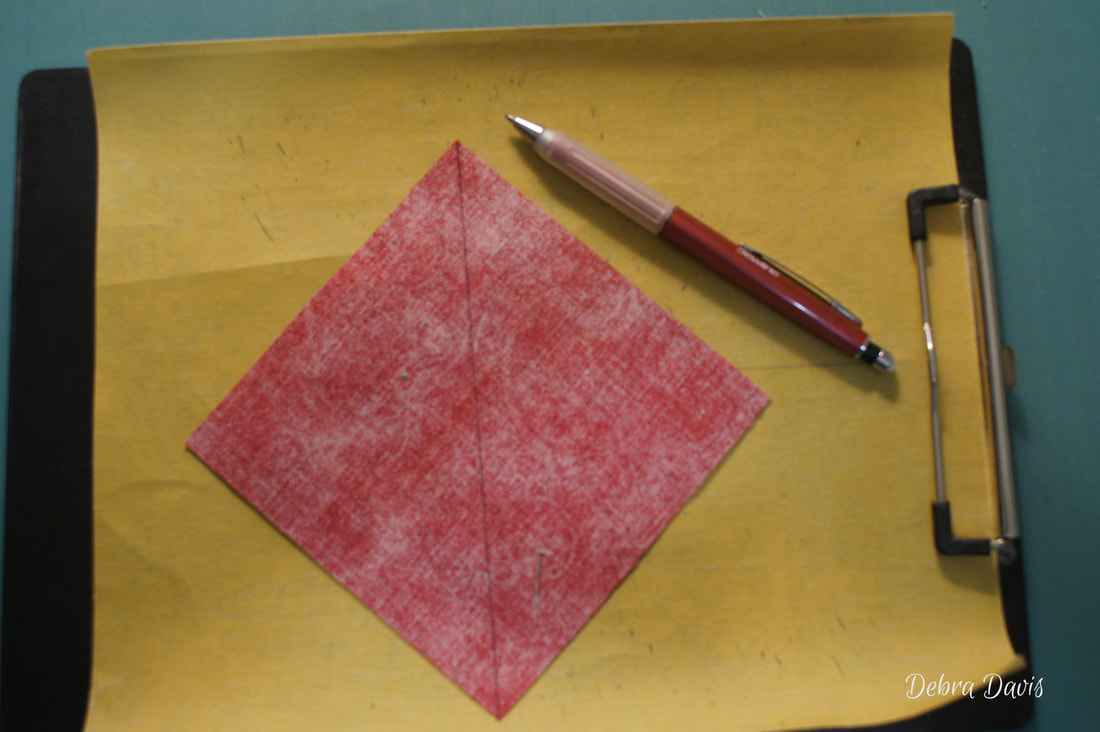 The placement of the B squares on the HST's is very important. The drawn line on the B square needs to go across the seam line of the C/D HST. 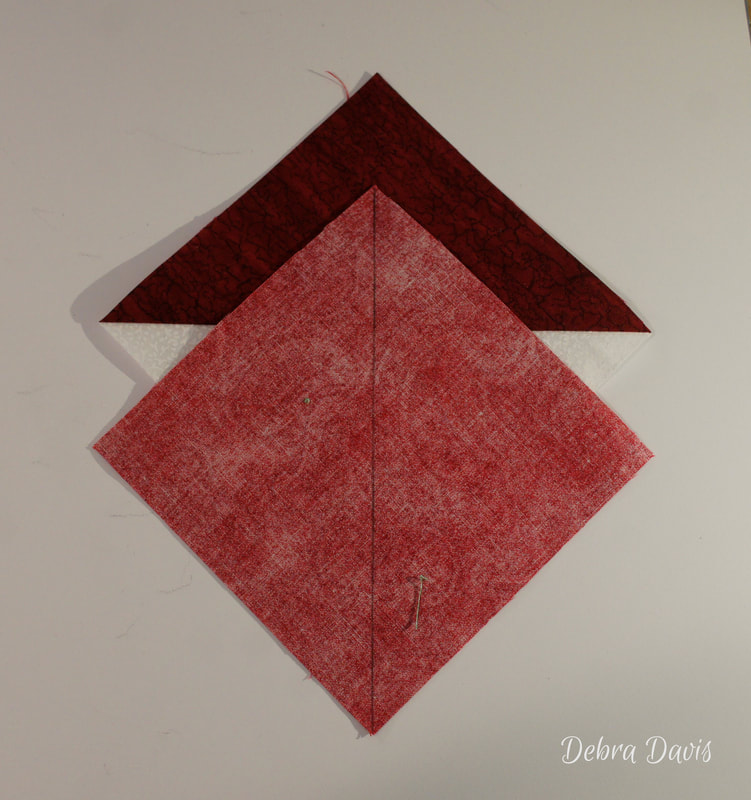 Before sewing I check to see that the seam will be facing away from the needle as I sew. 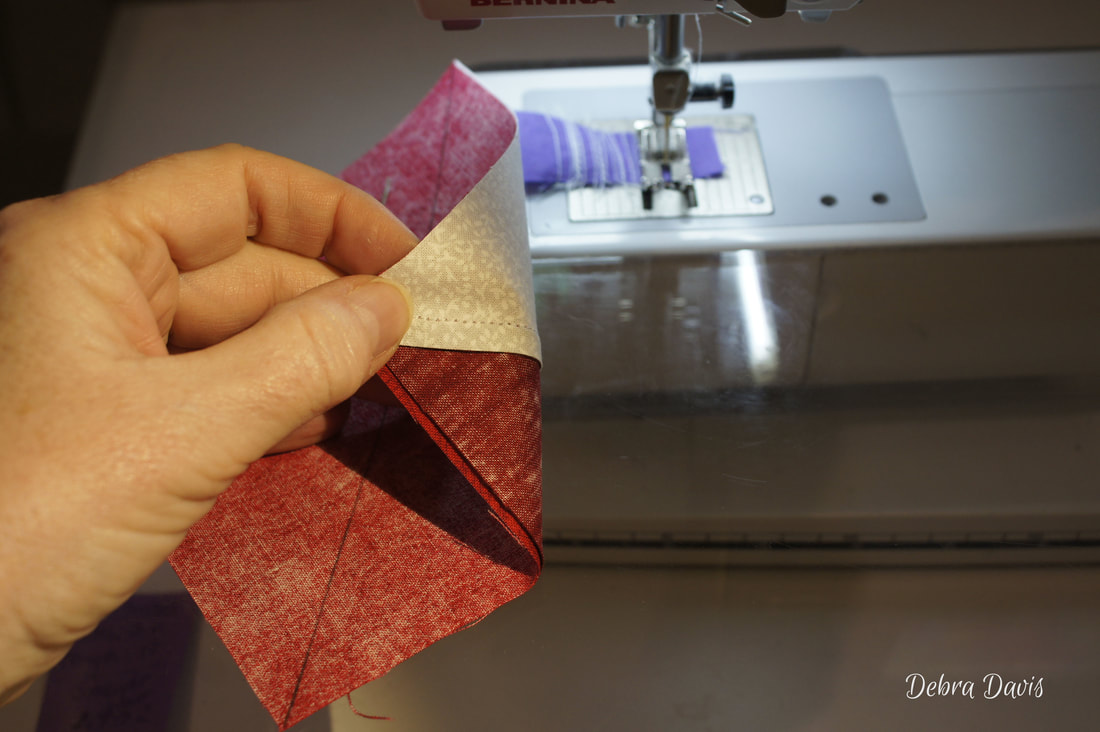 Then I just proceed to sew 1/4 inch from each side of the line. 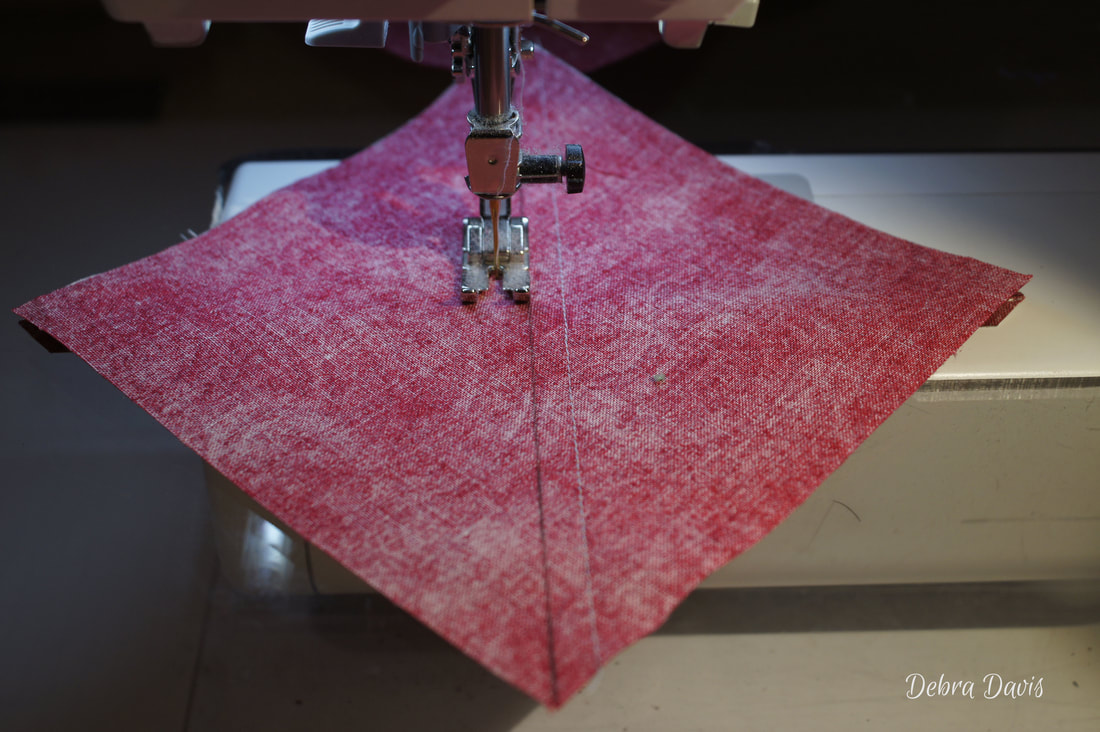 Cut apart on the drawn line and press towards the B triangles. 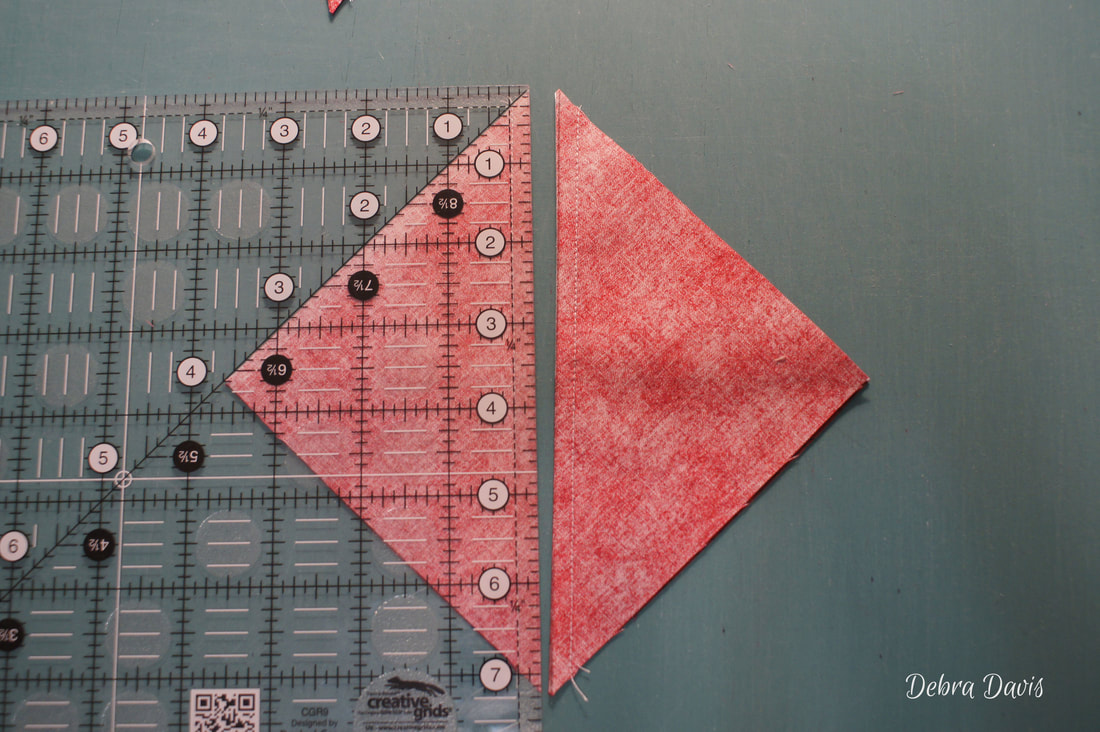 The trick here is in the trimming. We need to trim these to 4 1/2" x 4 1/2" Line up the diagonal line of your ruler with the seam line of the C/D section of the square. Place the 2 1/4" mark of that diagonal line at the point where all three seams come together (The circle in the middle of the photo) This is the measurement for finding the middle of the unit. Also note where the 4 1/2" marks are on the top left and bottom right of the unit. Ideally you want the 4 1/2" line to come right to the seam line 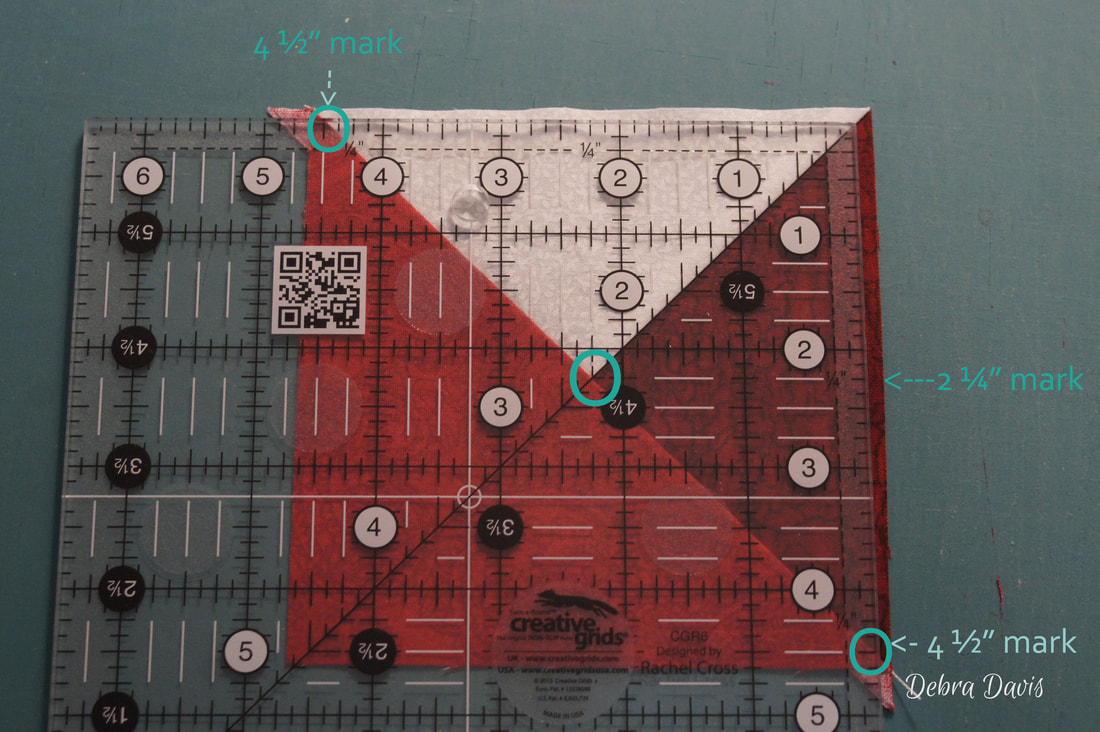 I zoomed in here to show you how the 4 1/2" line should come to the seam line of the unit.  Rotate the unit. Line up the diagonal line on the ruler with the diagonal seam line of the C/D triangle again; making sure the middle measurement-the 2 1/4" mark- is at the center where all the seams come together. Then line up the 4 1/2" lines with the previously trimmed edges and trim the last two sides of the unit. 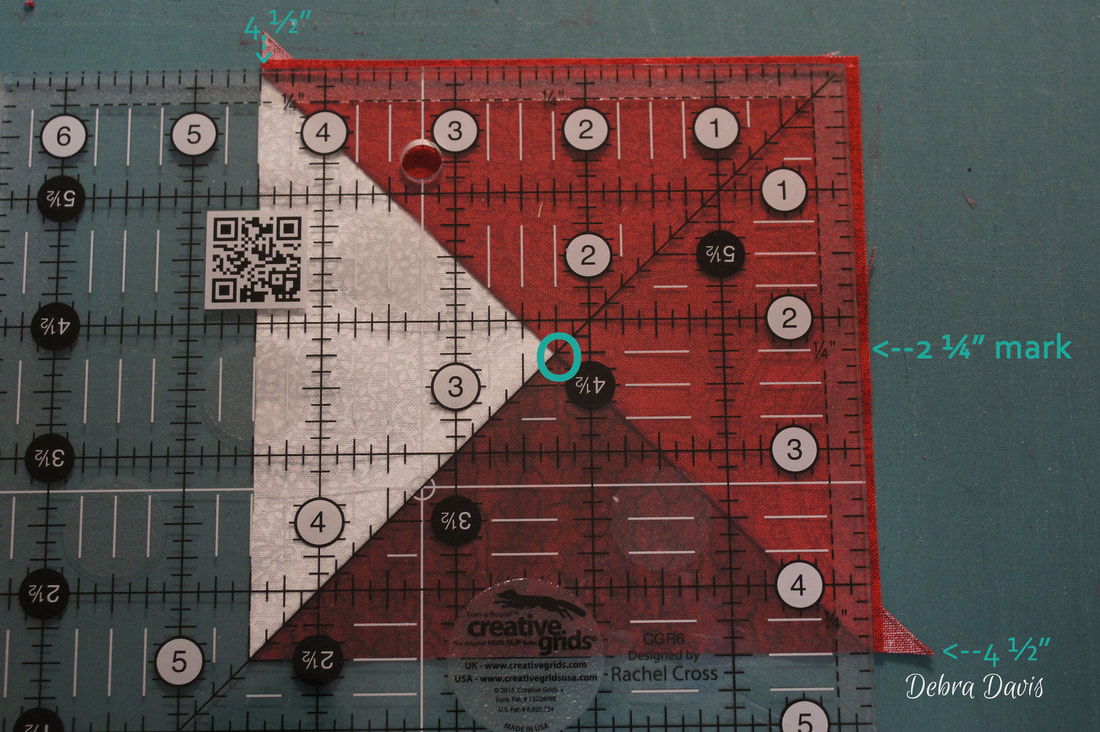 Here is my trimmed unit. 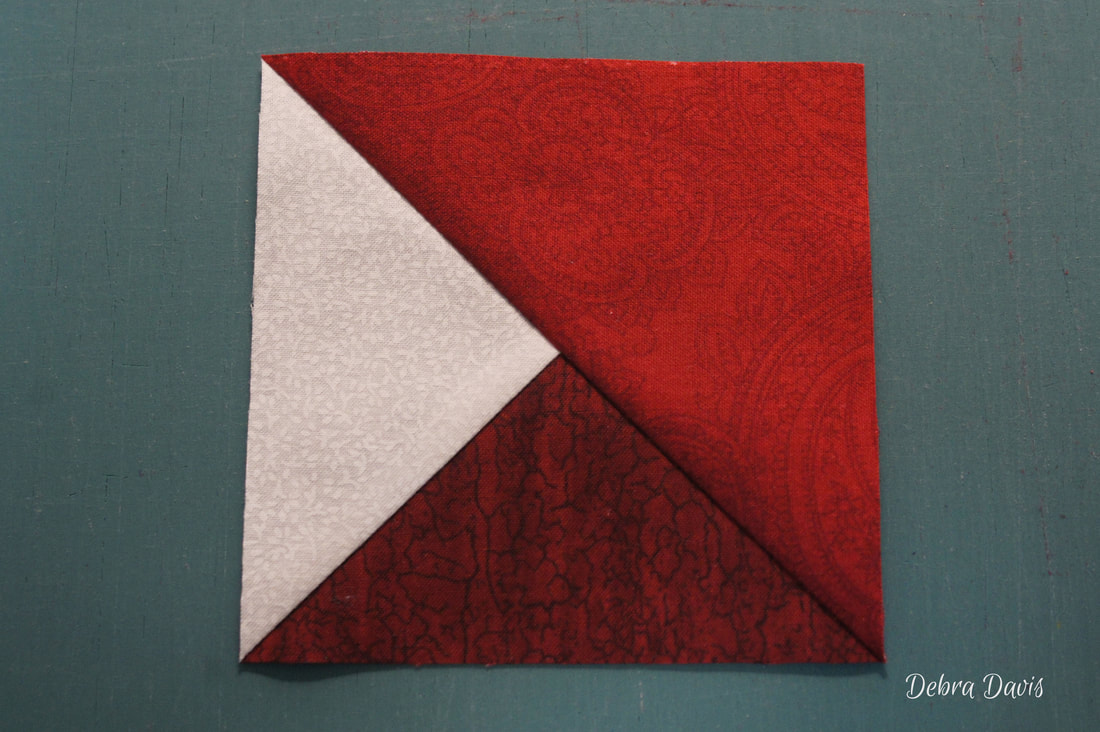 Once they are all trimmed to 4 1/2" it is time to join them together to make the "B units" 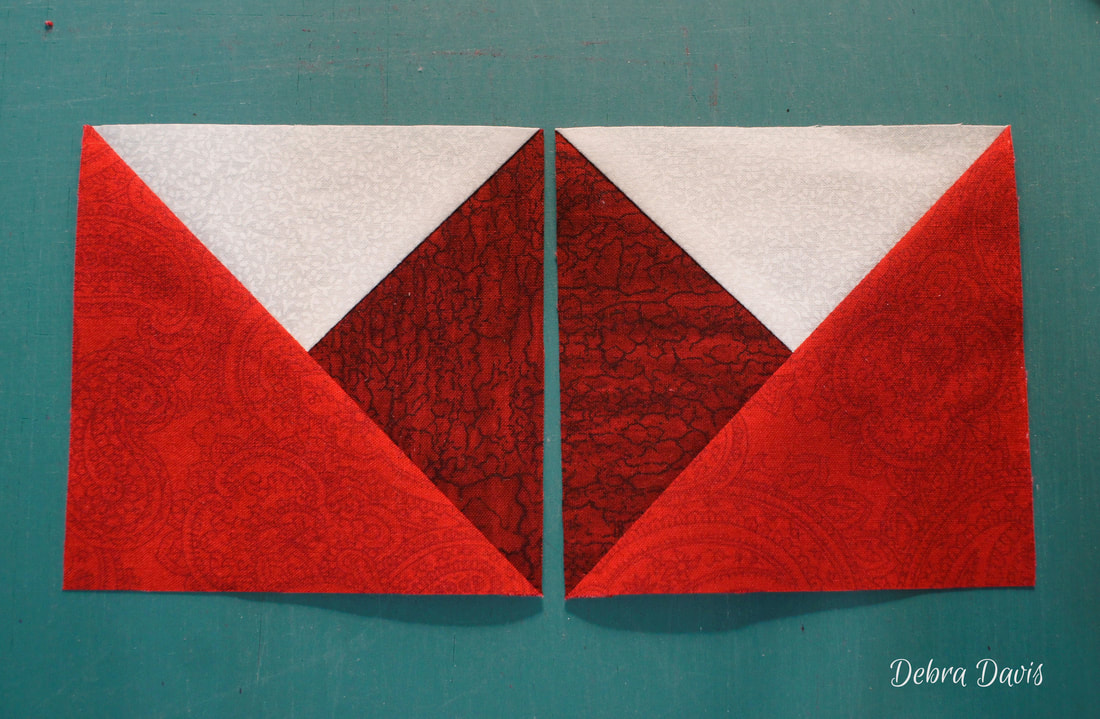 Joining diagonal seams can be a bit tricky so I often use a positioning pin. I place a pin through the back at the seam putting it in right about where the 1/4" seam will be. I never measure this; just sort of guess. 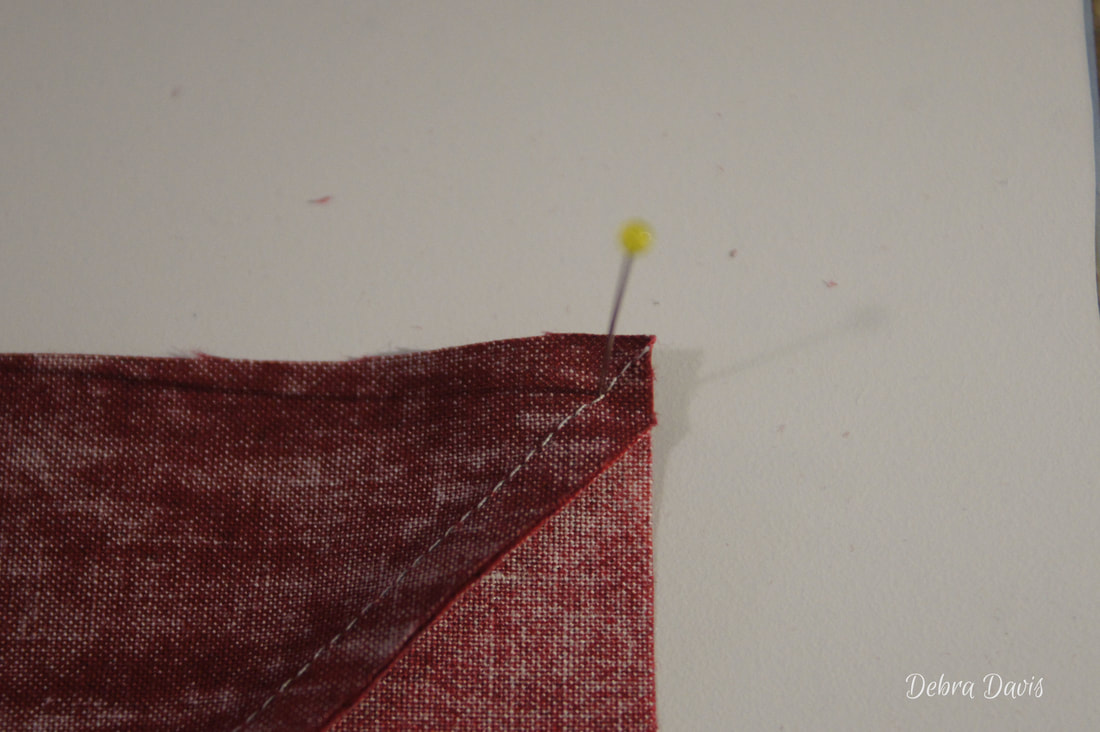 Now look what happens when I turn the unit over and look at it from the front. I thought I was pinning so straight, but as you can see the pin did not come out at the seam line but to one side of it. So I need to make an adjustment to fix that. 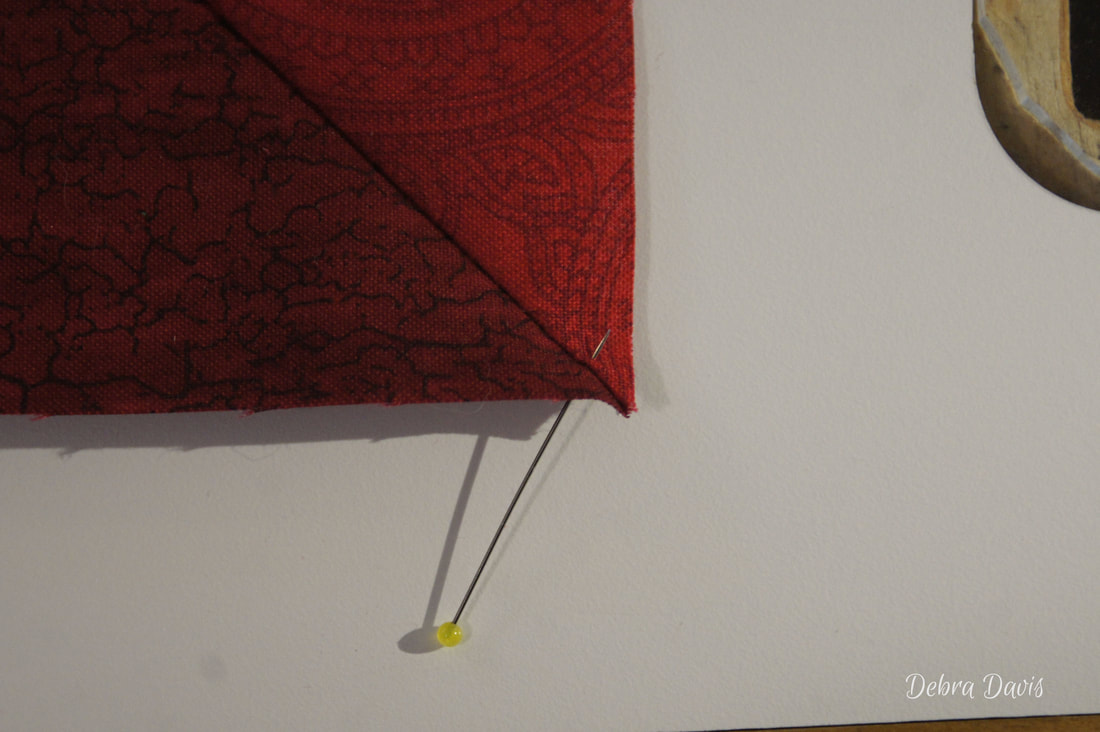 Fixed.  It looks like I am off in the photo as the shadows are hiding the fact that I now pin through from the top the piece I want to join to this unit. 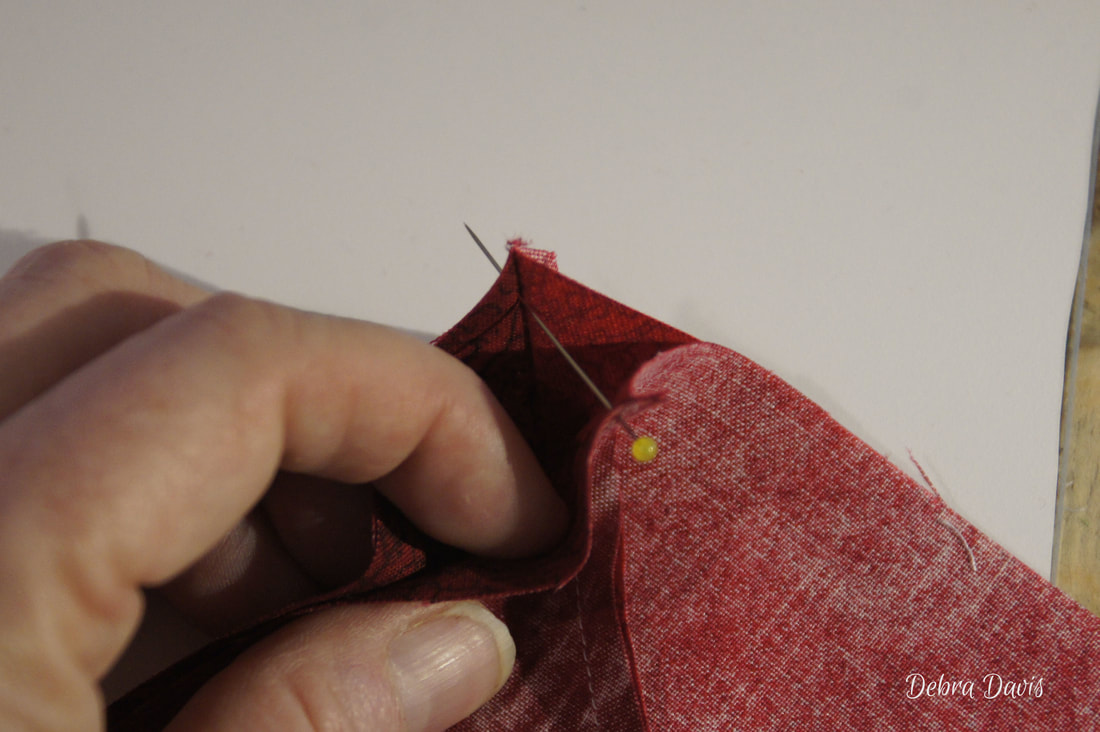 One last check to make sure the seams are lining up nicely before doing the final pinning. 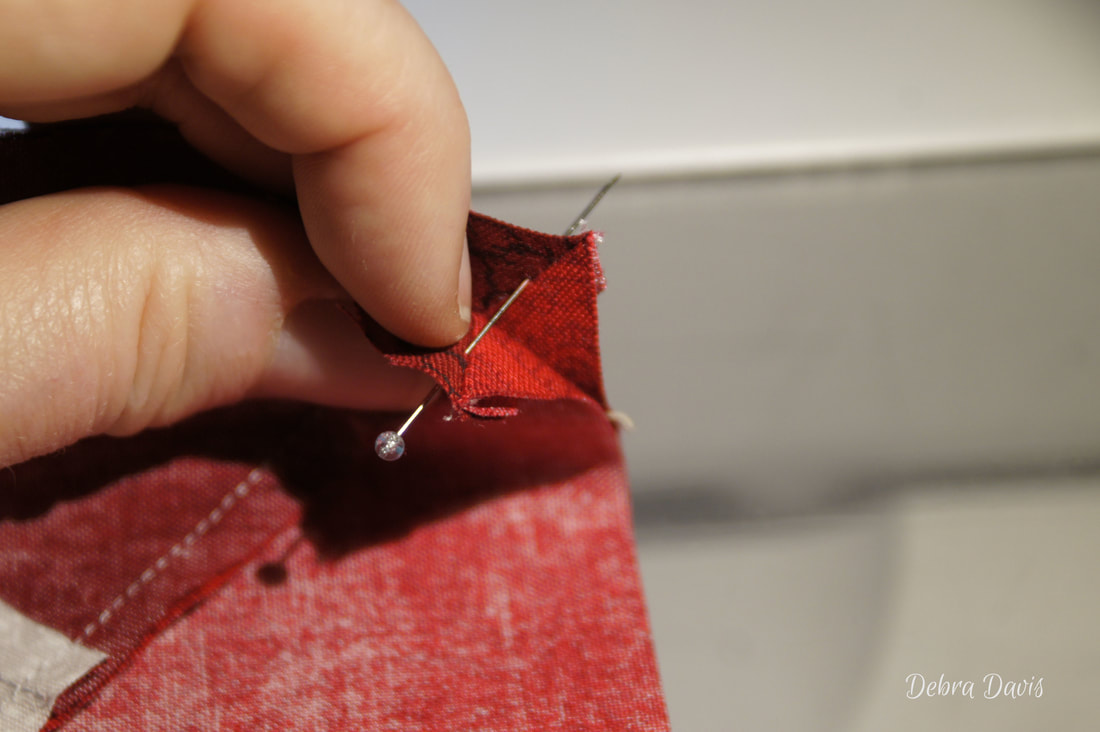 There are two ways to proceed from here. The first is to use the positioning pin to hold everything in place a nd slide in two more pins, one on each side of the positioning pin. I then remove the positioning pin before sewing. 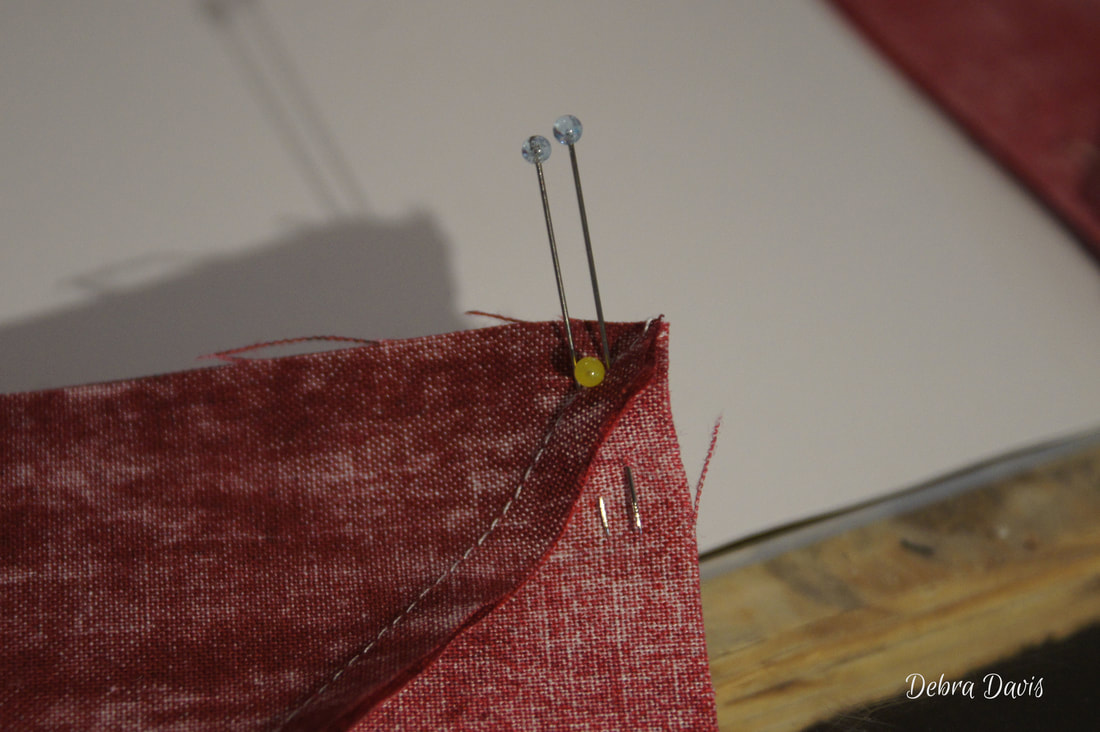 The other method I use for pinning starts just the same with the positioning pin. But this time I jsut slide it into place and will not add the other two pins. I use the first method-with the two pins-when the seams are laying in the same direction-when they do not lock each other into place. The two pins seem to keep those seams from shifting when I sew. I use just one pin when I have seams that are locking together nicely but I want to ensure they do not move out of place while I am sewing. 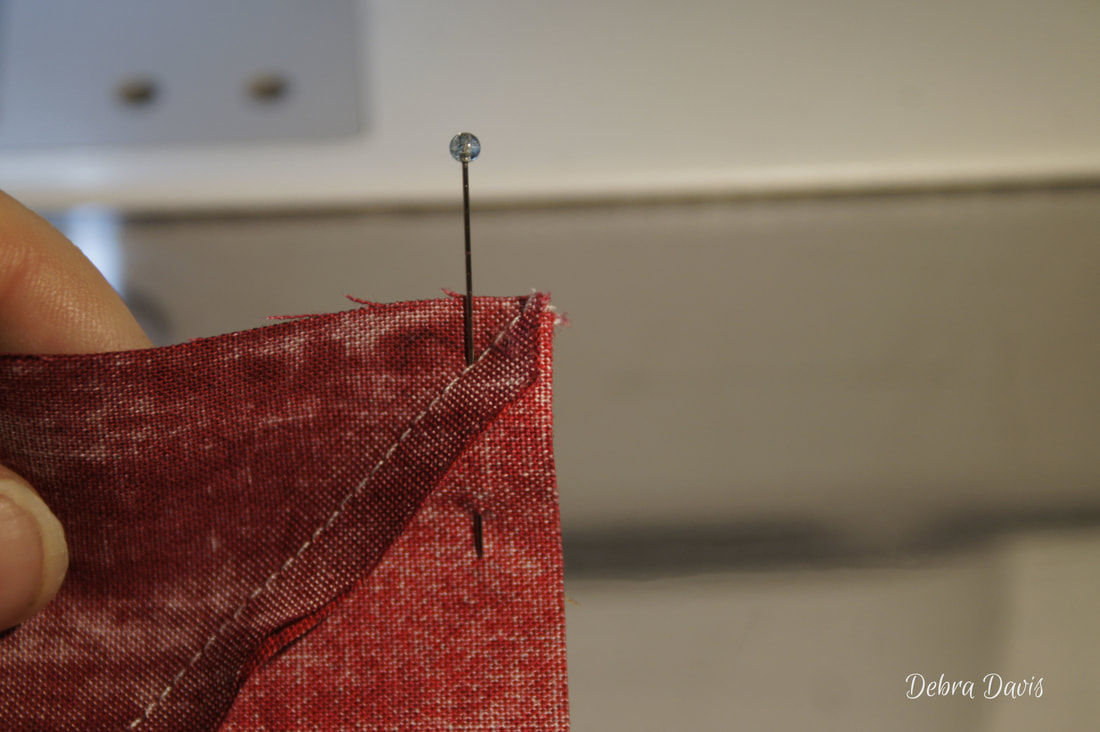 Now I can sew the B units together-removing the pins as I come to them. I am sewing slowly here which also helps with accuracy.
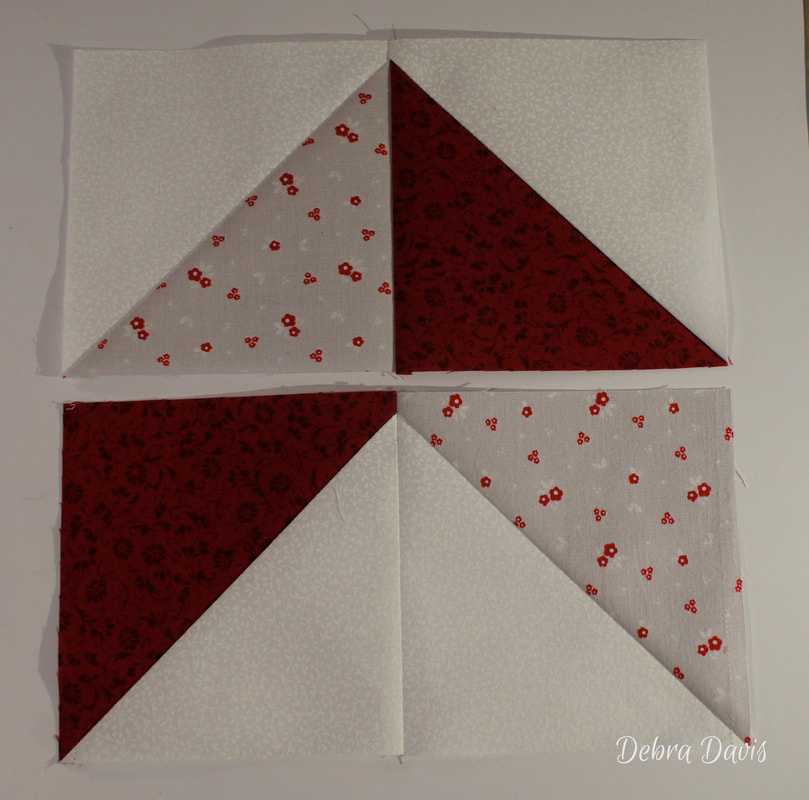
Press three of these to towards the left and one towars the right. The B Units need to measure 4 1/2" x 8 1/2" when done. 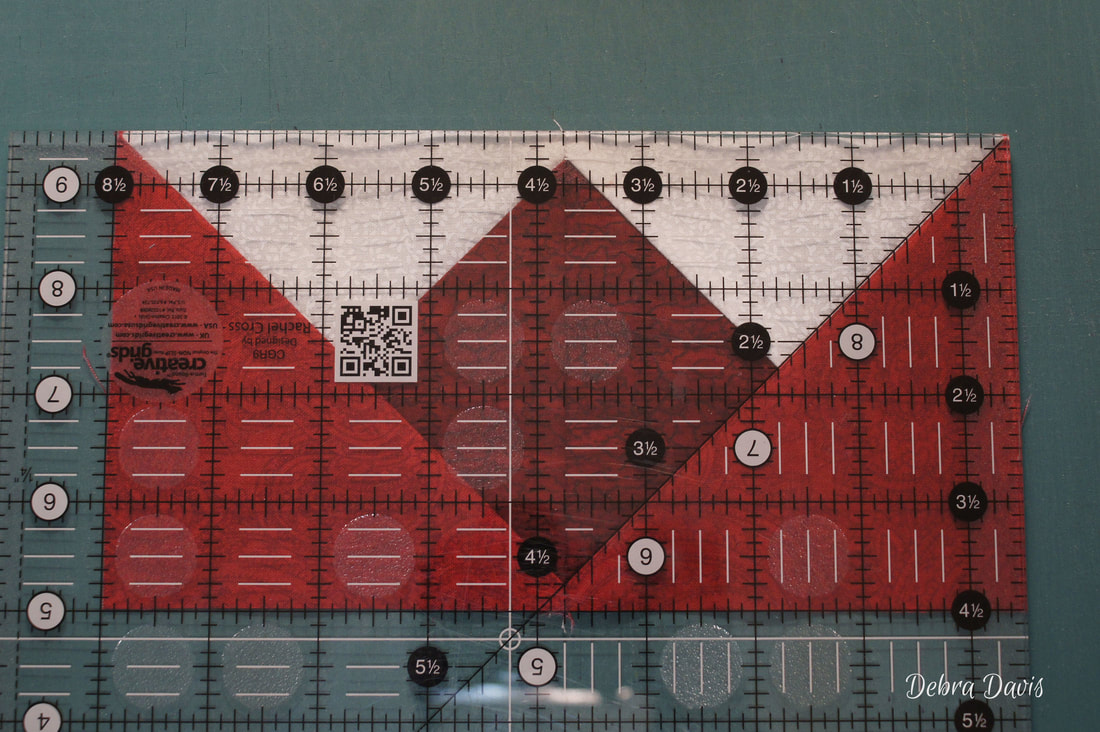 Now I move on to making the Center Unit and get to make more Half-square triangles. Starting by drawing a diagonal line on both E squares 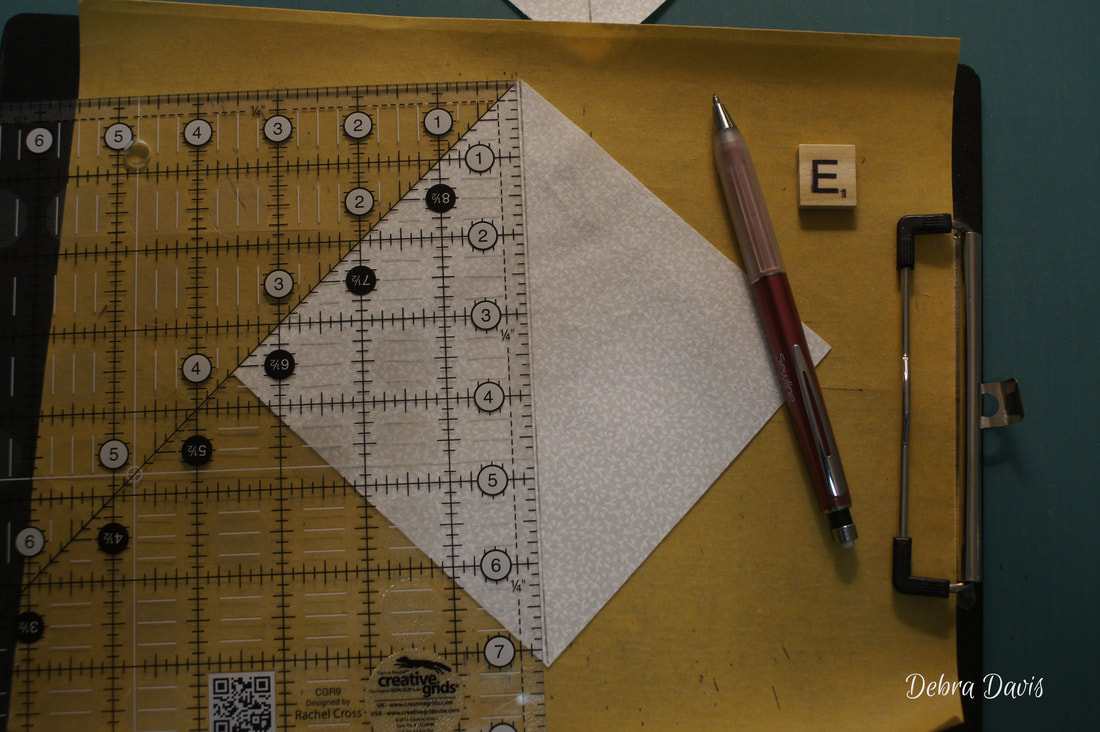 I decided to do the E/F and the E/G combination at the same time. 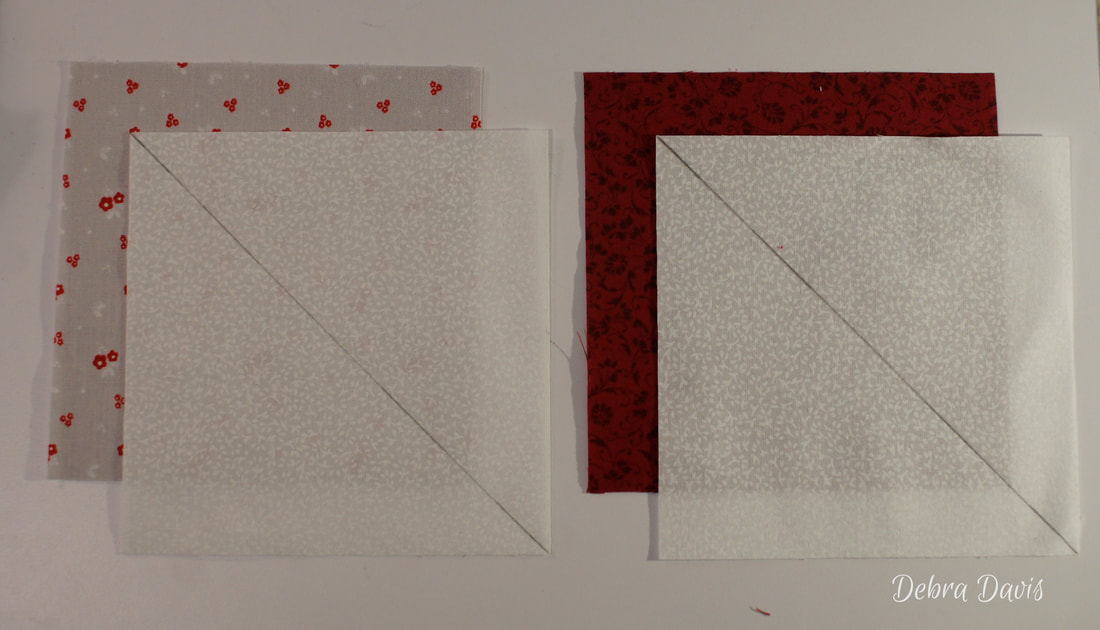 Sew 1/4 inch from each side of the drawn line. 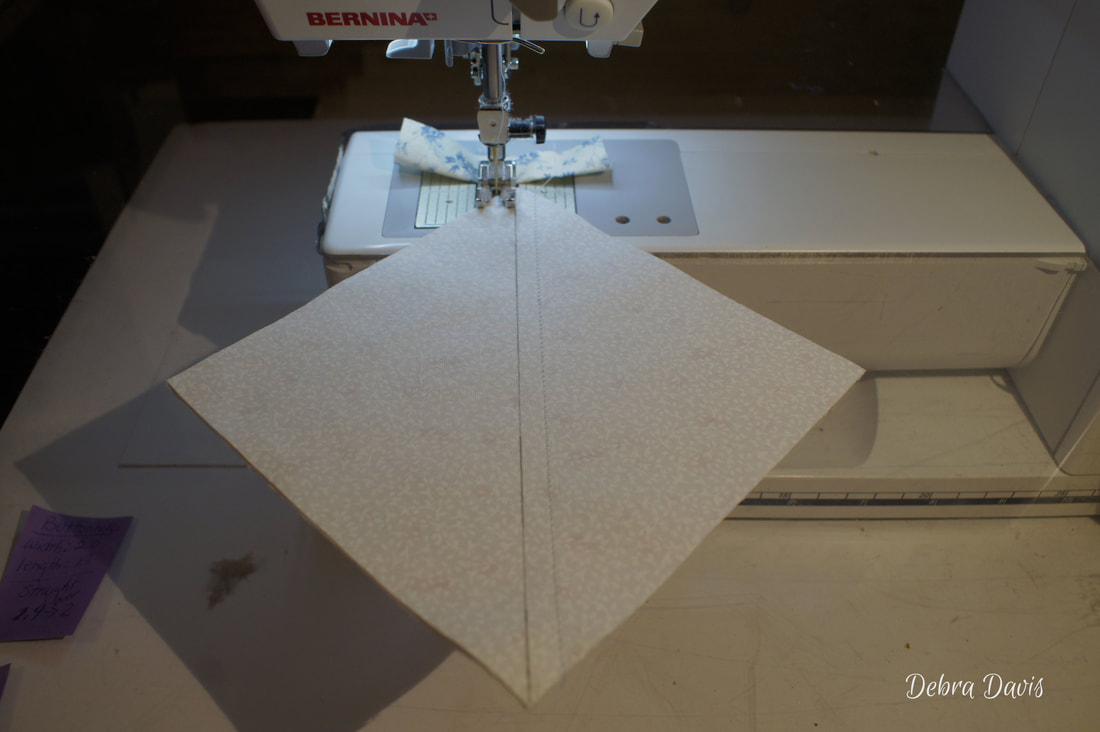 Cut apart on the line and press the E/F units towards the dark side and the E/G units towards the lighter side. 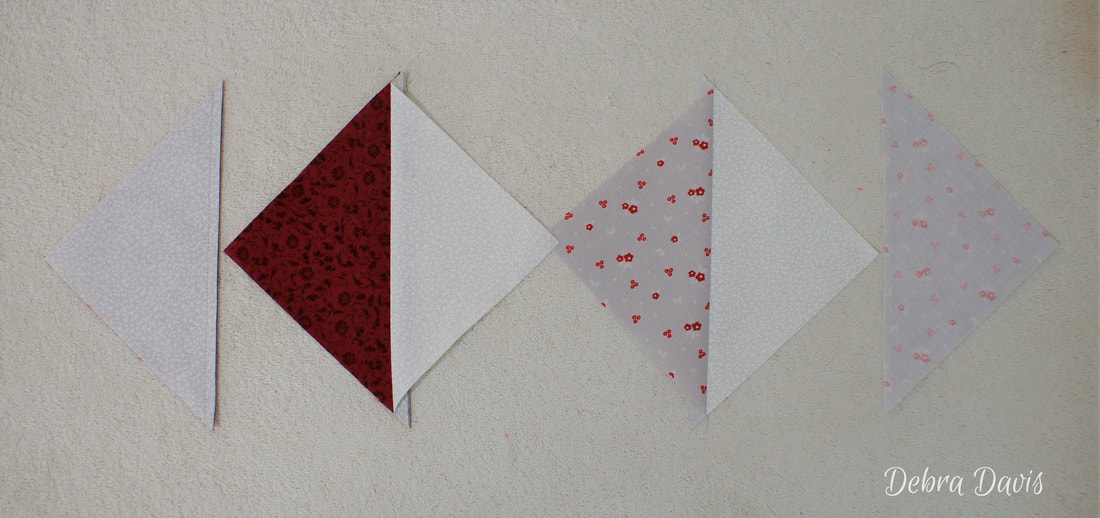 I am actually using my Bloc-Loc ruler to trim these but by way of reminder for a regular ruler be sure to line up the diagonal lines before cutting. Trim to 4 1/2" x 4 1/2"
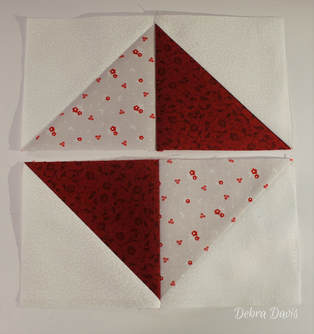
Lay out the units. Sew together in pairs and press towards the E/G HST's. 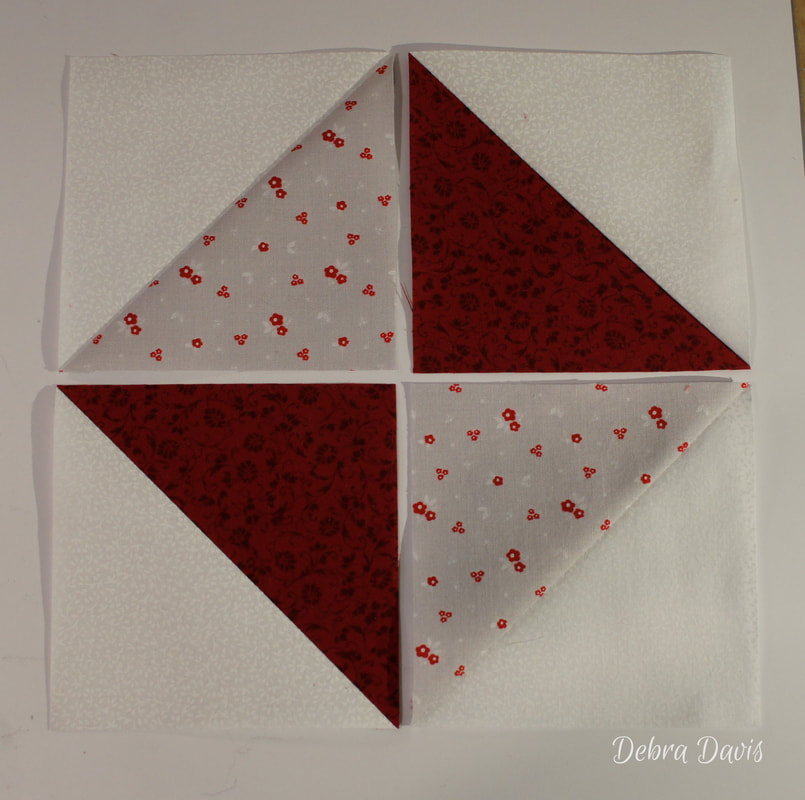 I just have to show you that even I have those kinds of moments...this is the second time I sewed that bottom row together the wrong way! But the third time was the charm
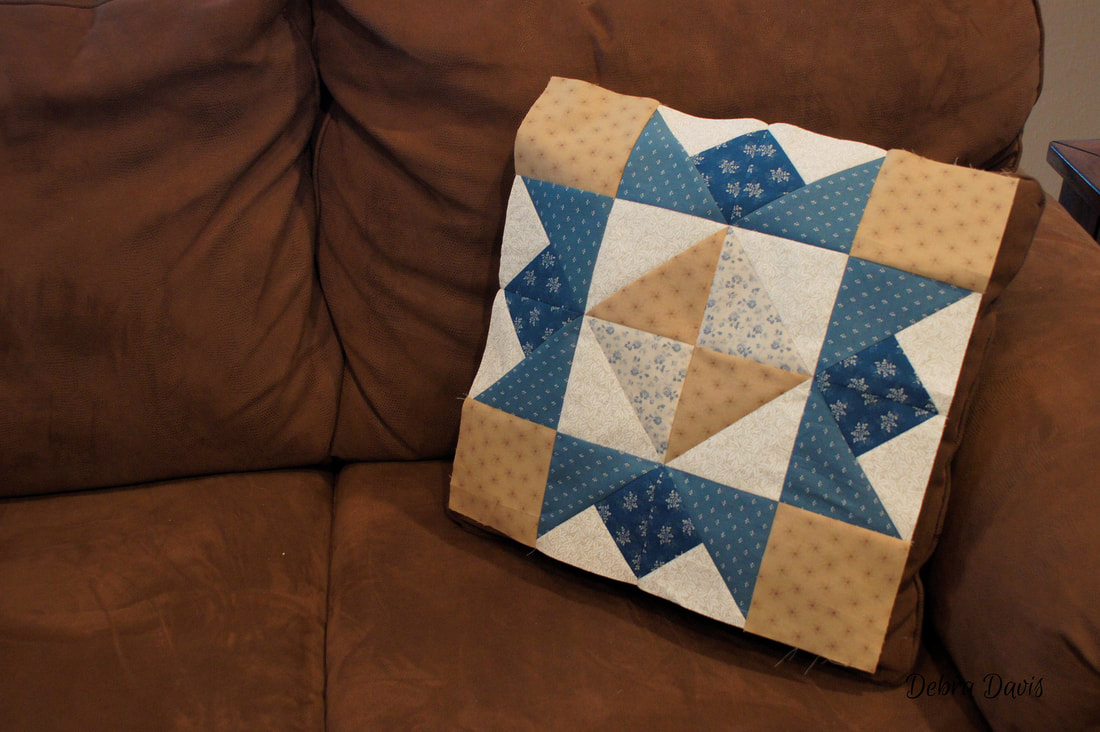
Use a positioning pin on the diagonal sams if desired to join the two rows together. Press towards the top row. The center unit measures 8 1/2" x 8 1/2" 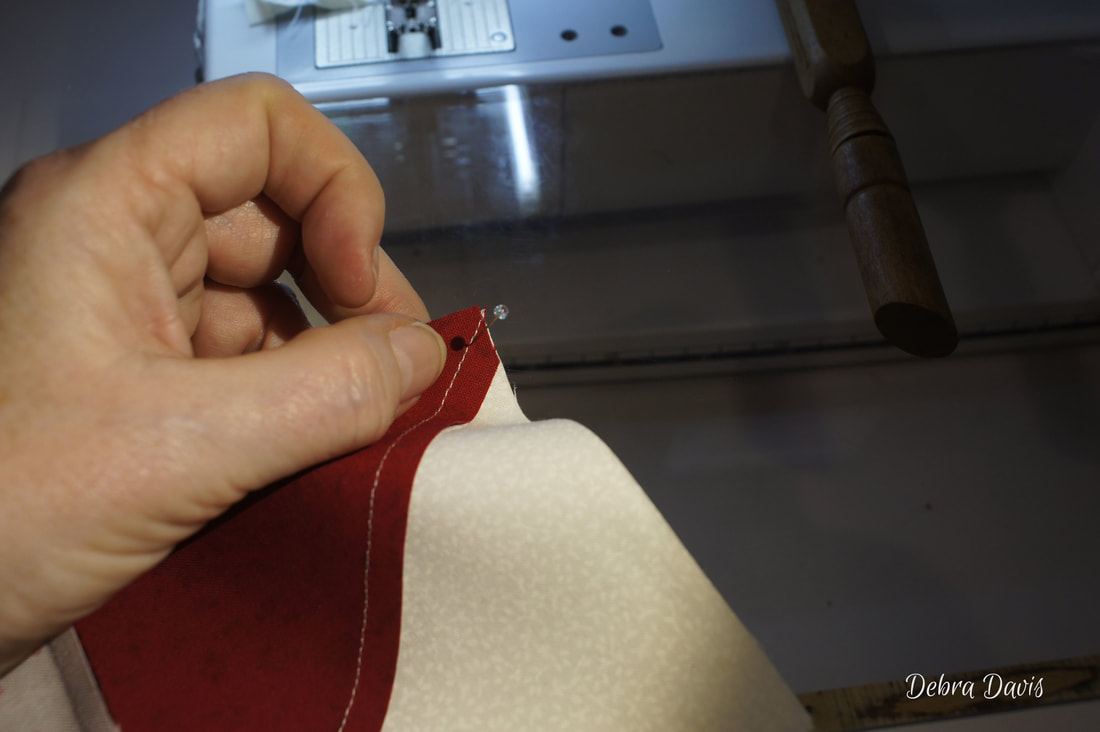 Everything is now ready to lay out for putting the block together. As you lay the pieces out the B Unit that I pressed differently from the rest goes on the bottom. You will need to check how your seams are laying as you put the pieces in place. I really prefer to have my seams going in opposite directions from one another so now is the time to make any adjustments to that. 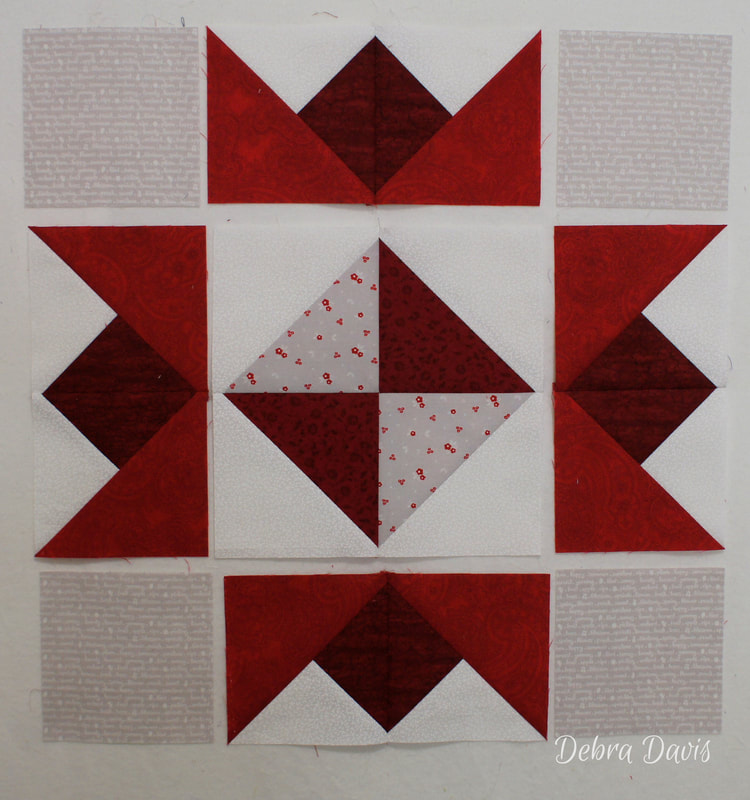 Now I am ready to join together into rows sewing slowly over the areas with seams. The top row I pressed towards the A squares. The middle row I fanned the seams open. The bottom row I pressed towards the center B Unit. 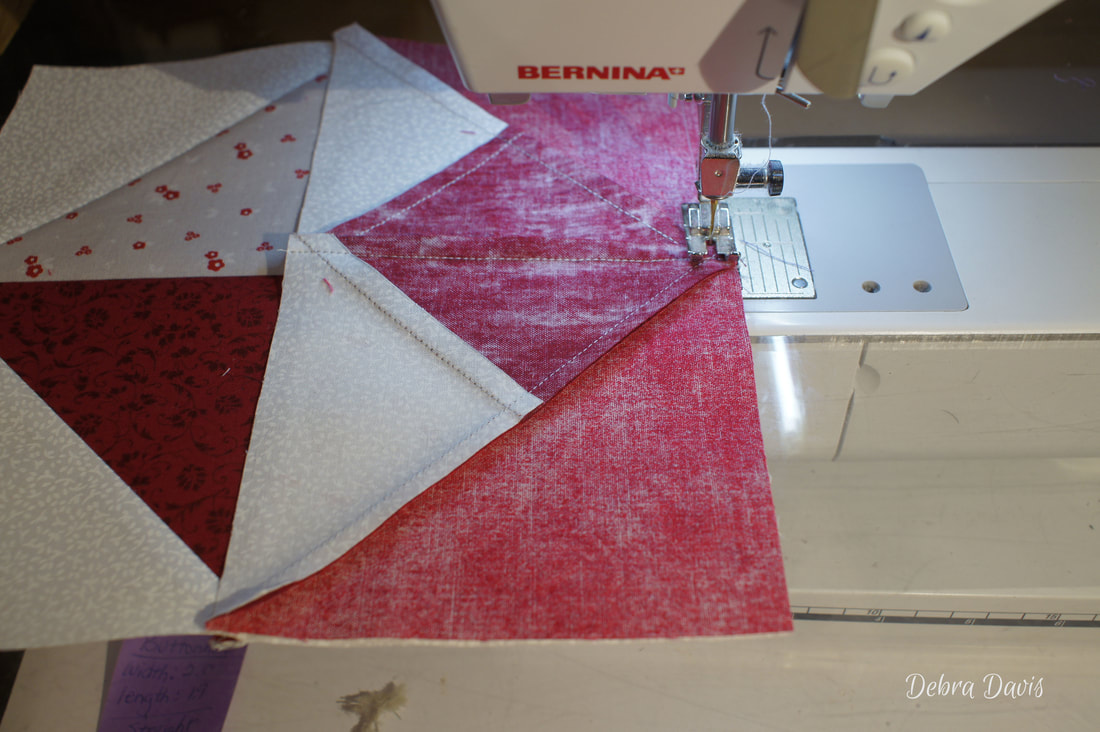 Here is a closer look at that fanned seam. 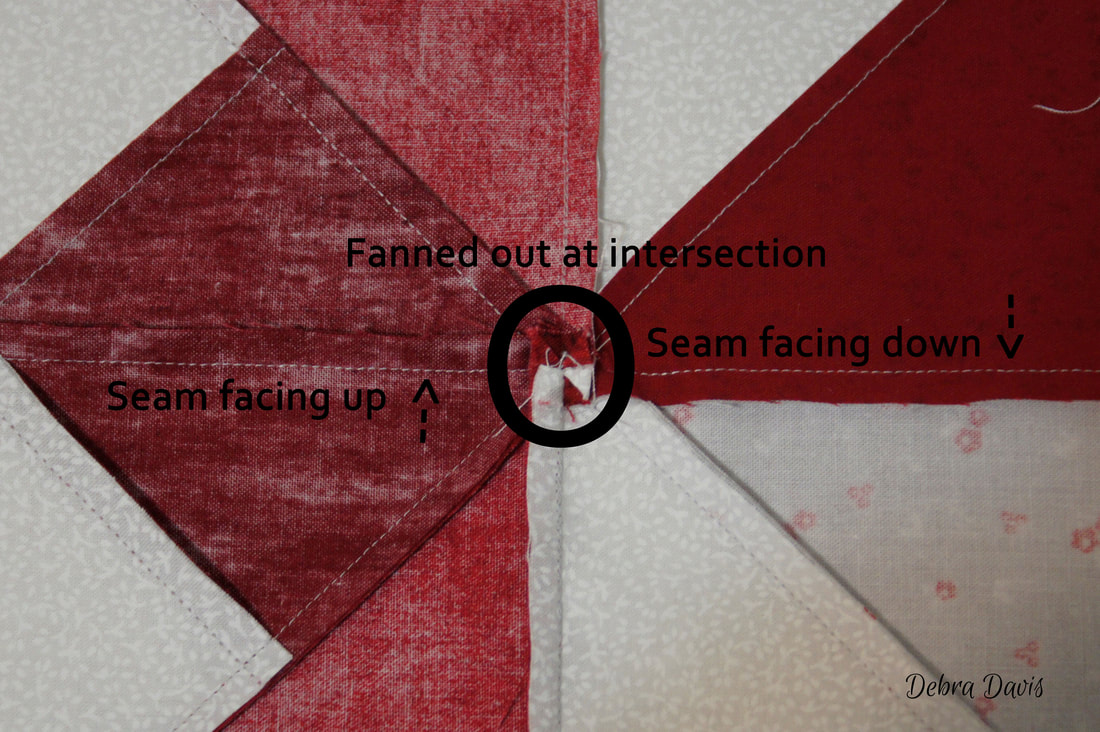 After pressing I checked to make sure the center sections of the rows measure 8" across. 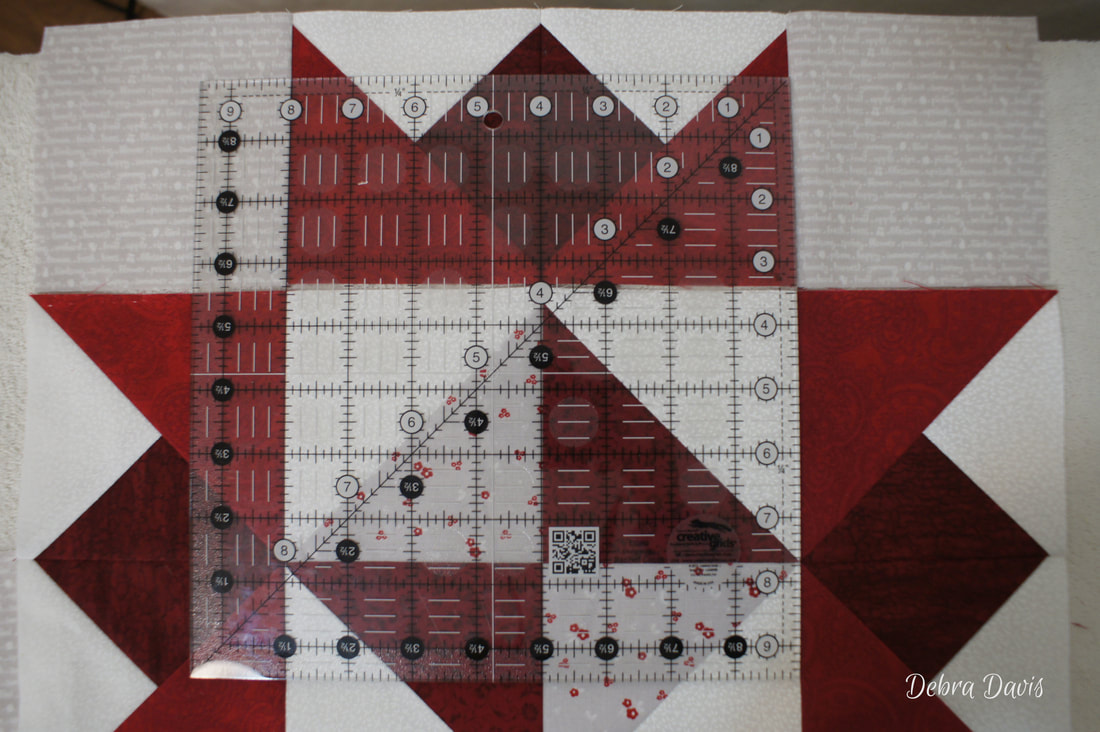 All of the rows are ready to be sewn together. 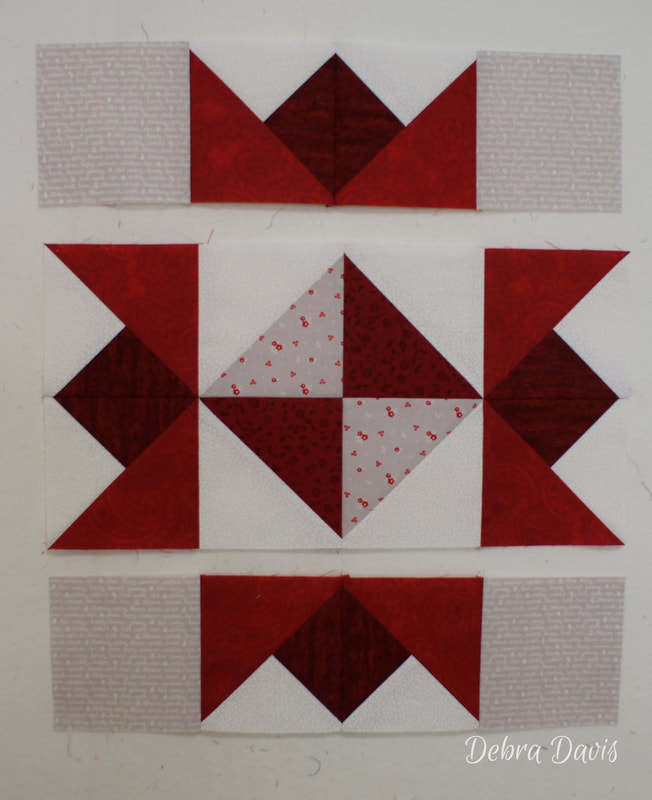 And my block is complete!  I really like this block and had an opportunity to play with some scraps in a new color way this week. Here is my color version and a blue and tan combination. One of the nice things about the size of these blocks is I have discovered they are the perfect size for making some new couch cushion covers. The blue and tans are the perfect fit for that need. I am also thinking I might need to make a table runner-perhaps with three of the blocks set on point
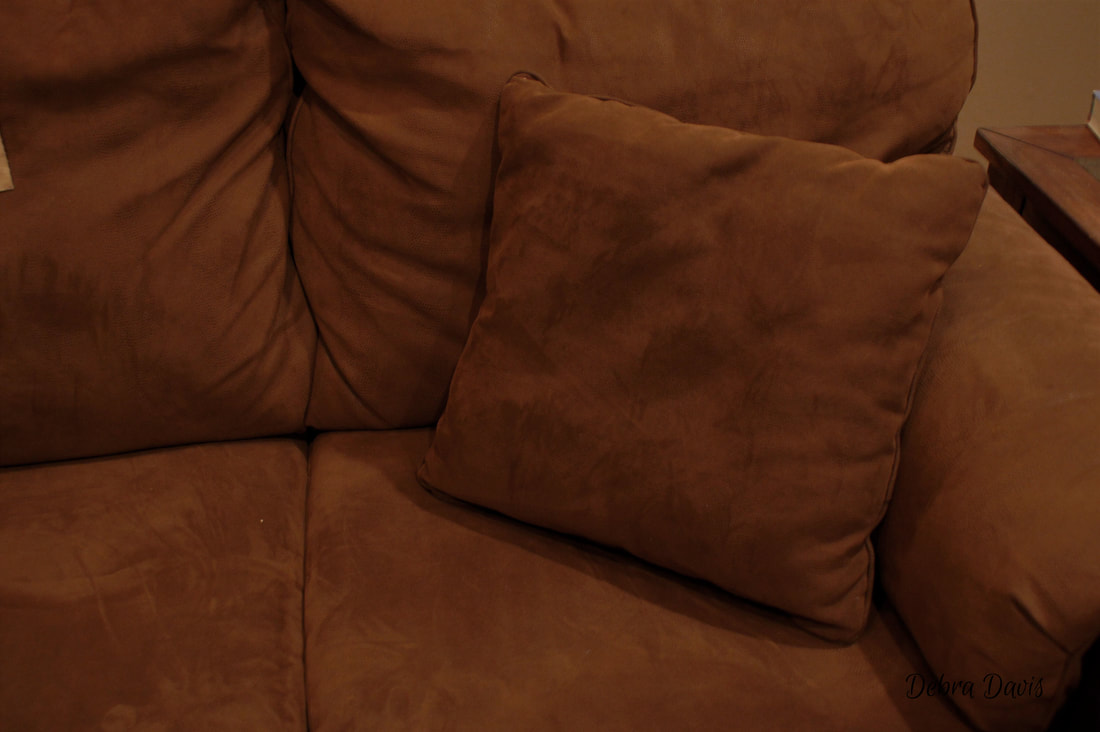
One of the things I love about these larger blocks-they are just the right size to make some pillow covers for our sofa. So I think I will be transforming these plain pillow into something with a little more life. I do tend to use a lot more blue in my home-which I like, but my poor husband is color blind and blue is the only color he sees. Though he does happily indulge me when I ask to branch out.
I hope you have a wonderful week and enjoy making your block. Happy Quilting!! 
Cindy
2/27/2018 03:15:51 am
Debora,
Debra
2/27/2018 07:59:34 am
Thanks, Cindy-I am so glad you find them helpful. Comments are closed.
|

Welcome to the site of Debra Davis-a woman who loves the Lord and loves to quilt.
My other blog where I share about my walk of faith:
Sitting at His Feet 
|


 RSS Feed