|
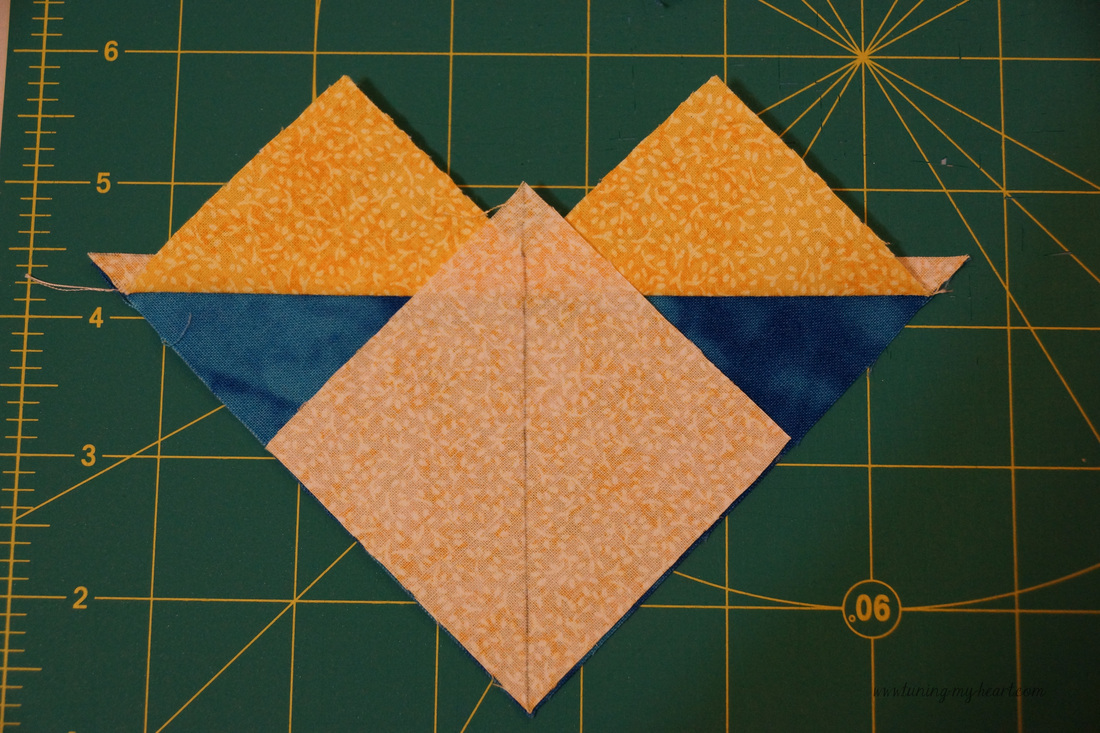
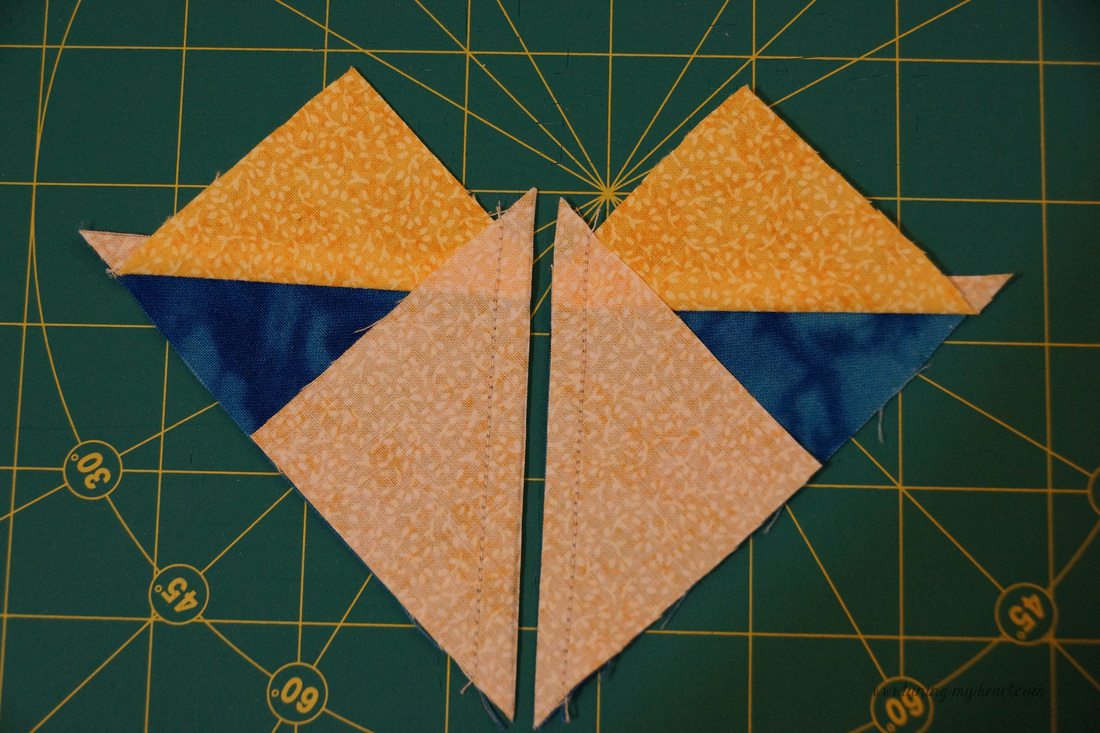
How can it be that after 26 years of quilting I have never made flying geese. That all changed this weekend. I followed the instructions in my pattern and enjoyed making them. I have never liked sewing triangles, stitching on the bias does not make me happy. With this technique, no triangles are required. The flying geese units in this block will finish at 1.5" x 3". From the yellow fabric I cut four 2 5/8" by 2 5/8" squares. From the blue fabric I cut one 4 1/2" x 4 1/2" square. With the larger square right-side up lay two smaller squares wrong-side up on top as shown. Draw a line down the middle and then stitch 1/4 inch from your line on each side. At first you may find it helpful to draw the sewing lines. Just place the 1/4 inch mark of your ruler on the line you have drawn down the middle of your squares and draw another line to mark where you need to sew. Once your unit is sewn it is time to cut along the pencil line between your rows of stitching. 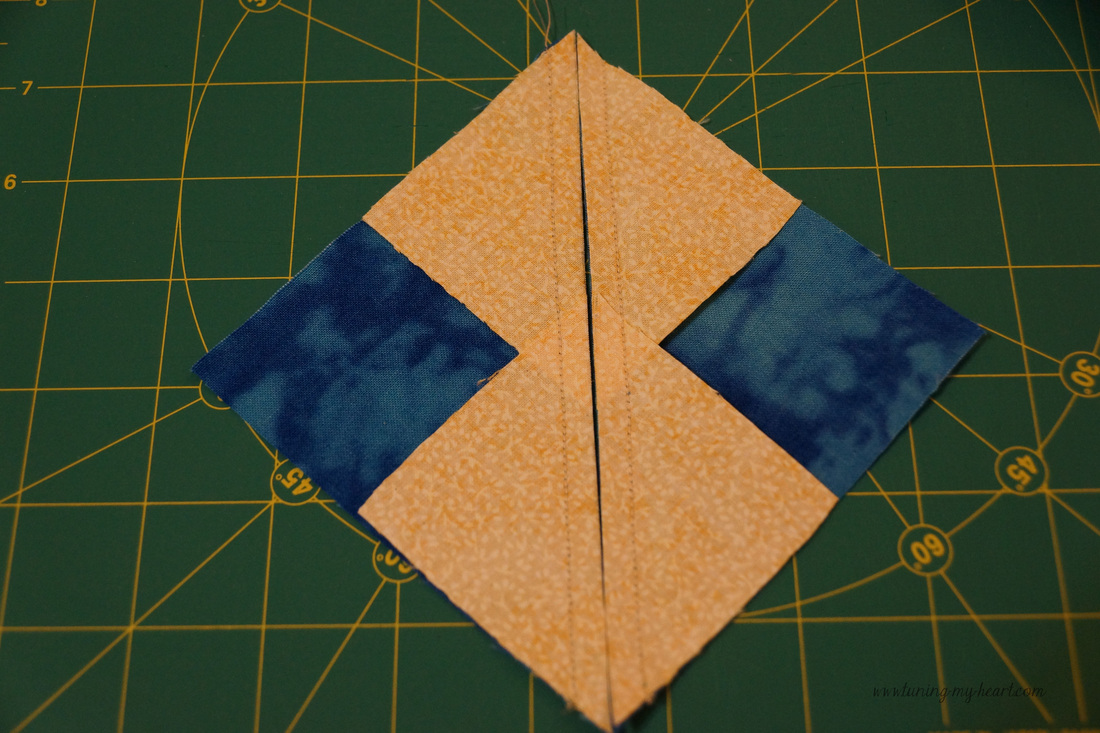 Press towards "the geese" and this is what you end up with. 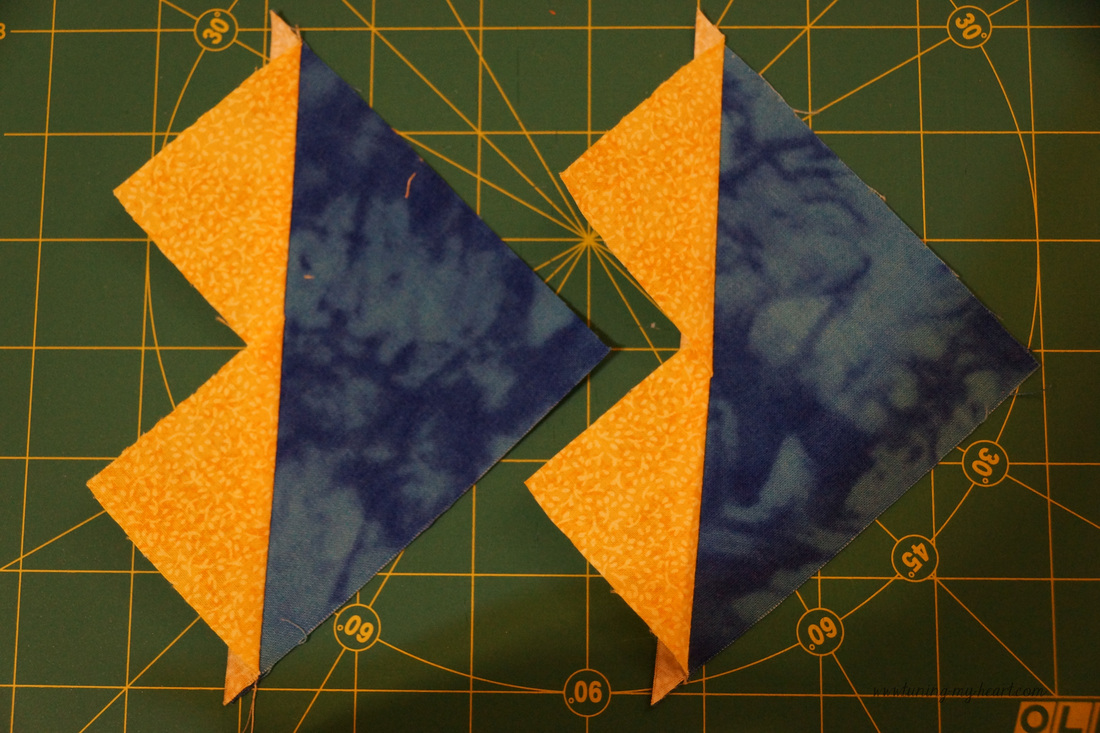 Now for the very cool part: Place another square on top of the unit you just made, Once again, draw a line down the middle. Sew 1/4 inch from that line (on each side of it.) Then cut on the drawn line in the middle.
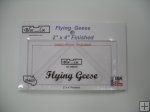
Arre you ready for this? 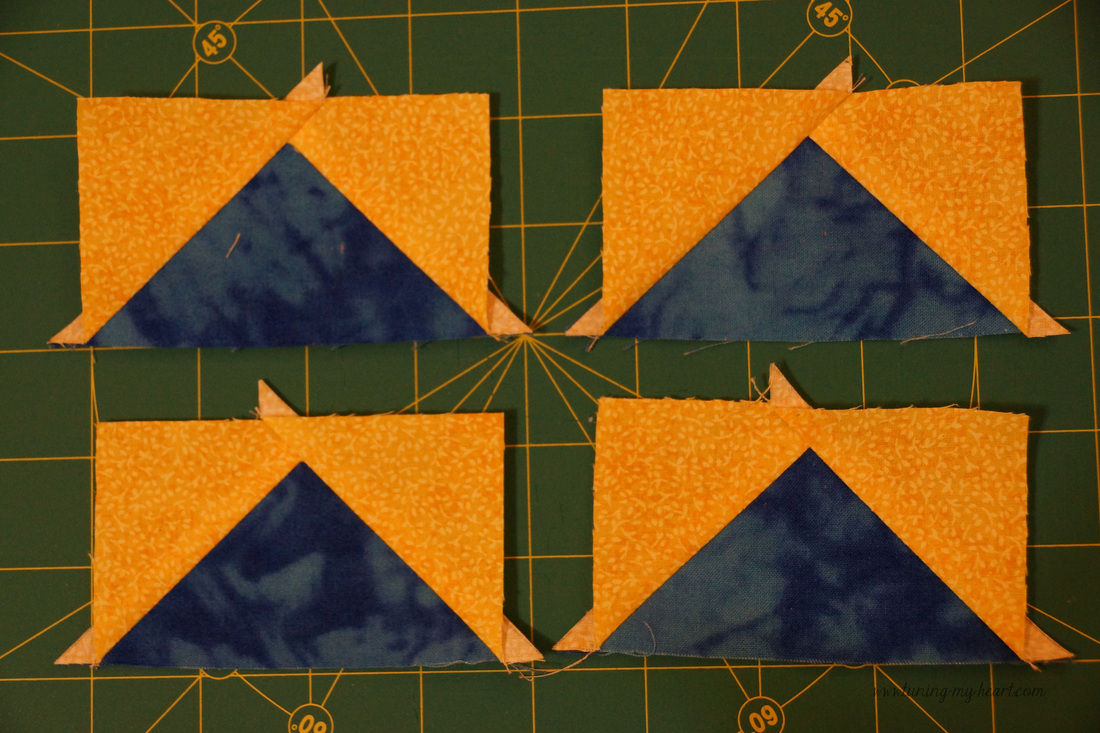 Look at those beautiful flying geese units! My pattern called for making them oversize so now on to the trimming. On the recommendation of the pattern designer I picked up a set of Flying Geese rulers by Bloc Loc. These are really nifty little rulers. The only drawback is you have to get the one for the correct finished size of your unit. So they may not always be an affordable choice for a project. But if this is a size you are going to use again and again then they really cut your time down. Let me show you what I mean. 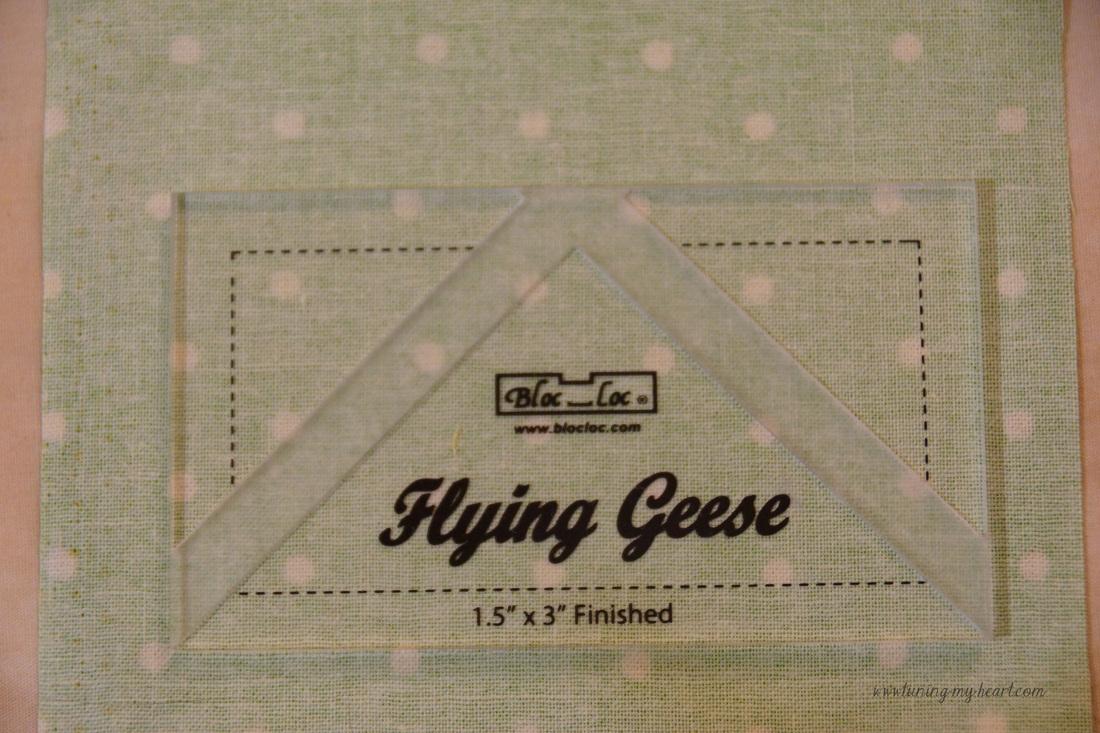 The method I am going to compare to uses a regular ruler for trimming. Line up the 45 degree angle line on your ruler with the seam of your unit. Make sure you leave 1/4 inch above the point of the triangle for your seam allowance and cut across the top. The bulk under that seam can cause your ruler to slip so be careful. 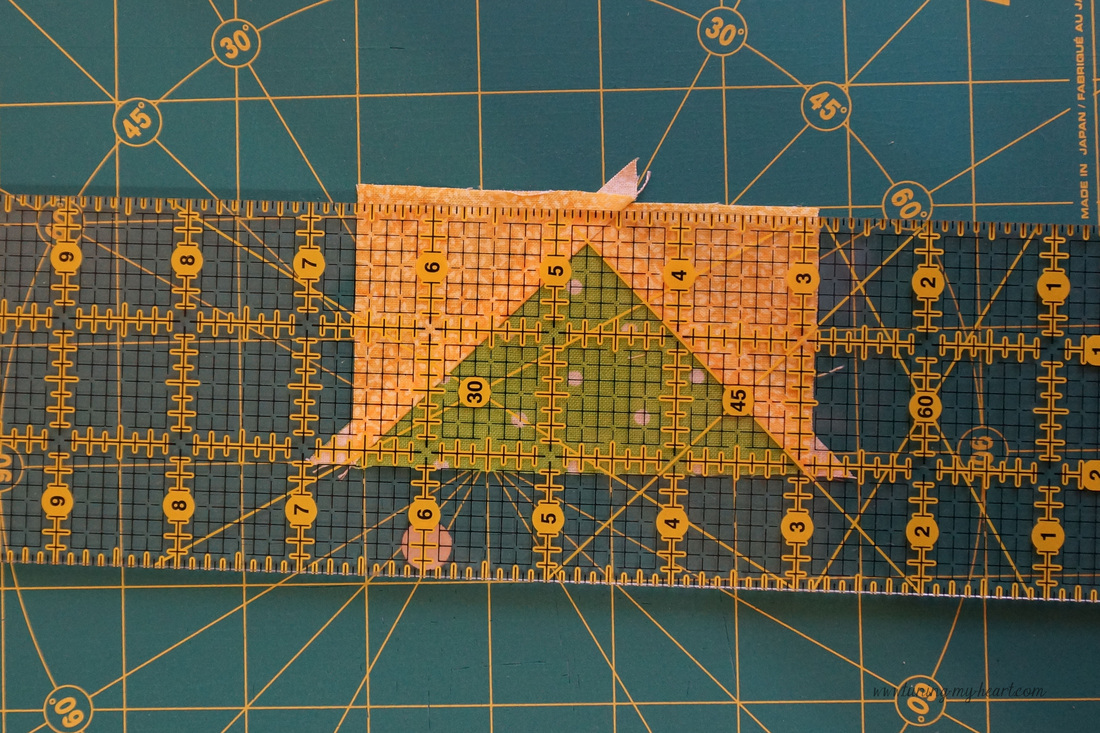 Next, turn you unit 180 degrees, and line up your ruler to the desired size of unit to be sewn (not the finished size of the unit, but the finished size plus 1/2 inch for the seams-in this case I am trimming the units to 2" x 3 1/2". ) and trim again. Notice, that I have lined up that 45 degree line on my ruler with the seam again. Rotate the unit and trim the other two sides in the same manner. 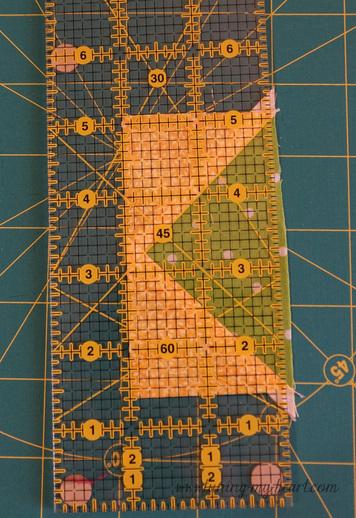 Now for the Bloc Loc version. The indented part of the ruler slides right into place along the triangle. Using the rotary cutter just run it along the right side and top of the ruler. 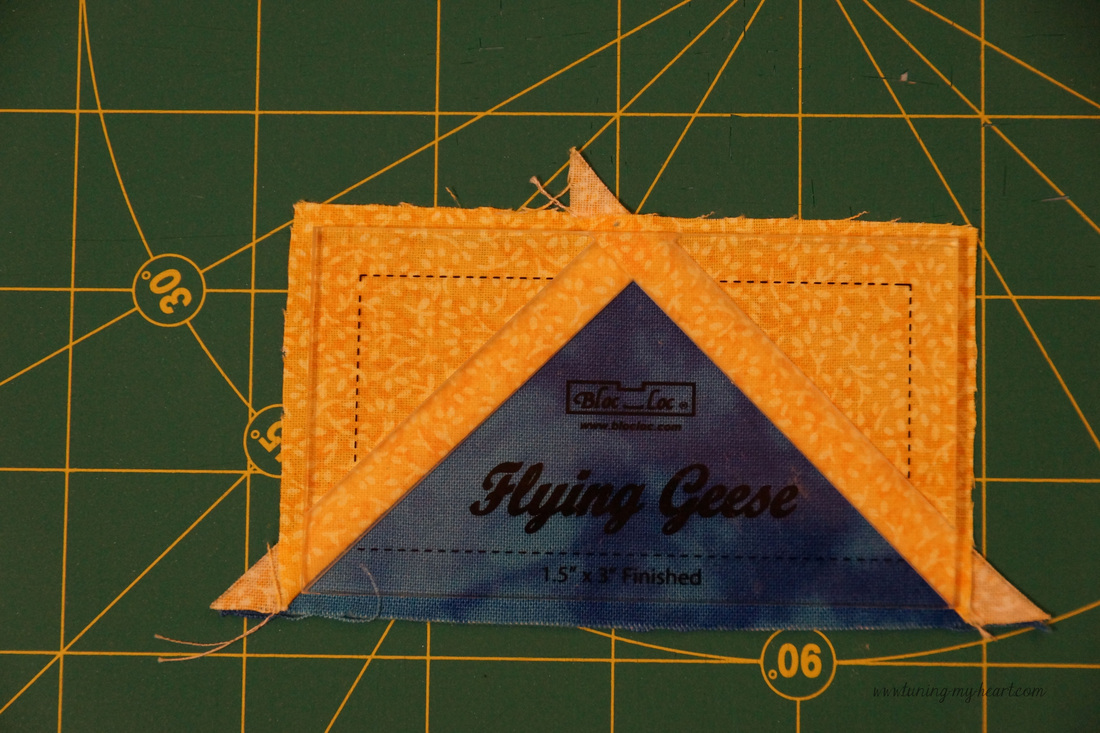 Turn the unit and trim again. ( I have really come to appreciate the rotating cutting mat that I have for trimming units like this.) 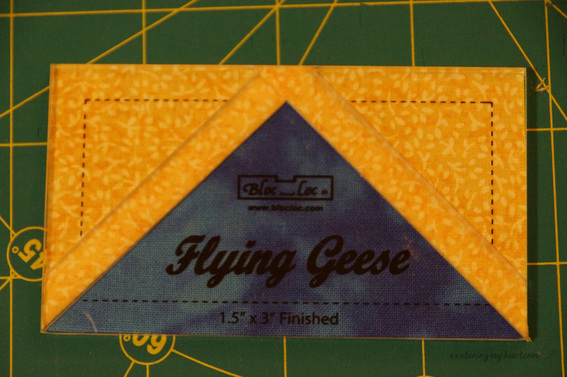 This is how they all went together. 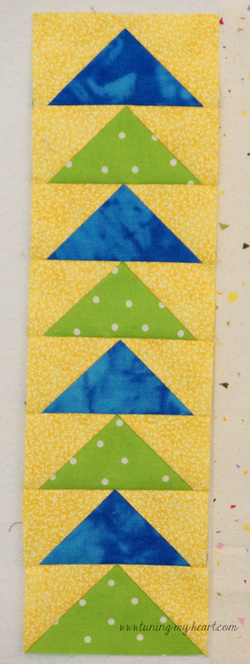 I purchased a set of three of the flying geese rulers at a discount. The other rulers in the set are for flying geese that finish at 1" x 2" and 2" x 4". To use the same method I will cut my fabric as follows: For the 1" x 2" 4-squares 2 1/4" x 2 1/4" 1-square 3 3/4" x 3 3/4" For the 2" x 4" 4-squares 3 1/8" x 3 1/8" 1-square 5 1/2" x 5 1/2" BlocLoc has created a chart with the sizes needed for this method which can be found HERE. 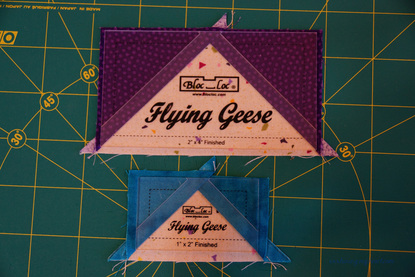 Links for the tools I used:
As always, what seems clear to me in my descriptions may not be so clear to you, so please make use of the comments section if you have suggestions for improving this tutorial.
Happy Quilting! Deb
4 Comments
Alycia Maurer
5/19/2017 09:46:29 am
Took me a minute to visualize, but then I got it! Thank you! Love your tutorials.
Debra
5/19/2017 10:06:59 am
Thank you, Alycia. If there is ever something that I can make clearer please let me know-I try to approach these as if the reader has no previous experience, but sometimes I forget that what is obvious to me is not always obvious-lol.
Roberta Johnston
7/24/2017 04:33:04 am
I enjoyed your tutorial. Is there a formula when you make different sizes of flying geese to figure the relationship between the small squares and the background piece?
Debra
7/25/2017 07:46:35 am
Yes, Roberta there is. Leave a Reply. |
 RSS Feed