|
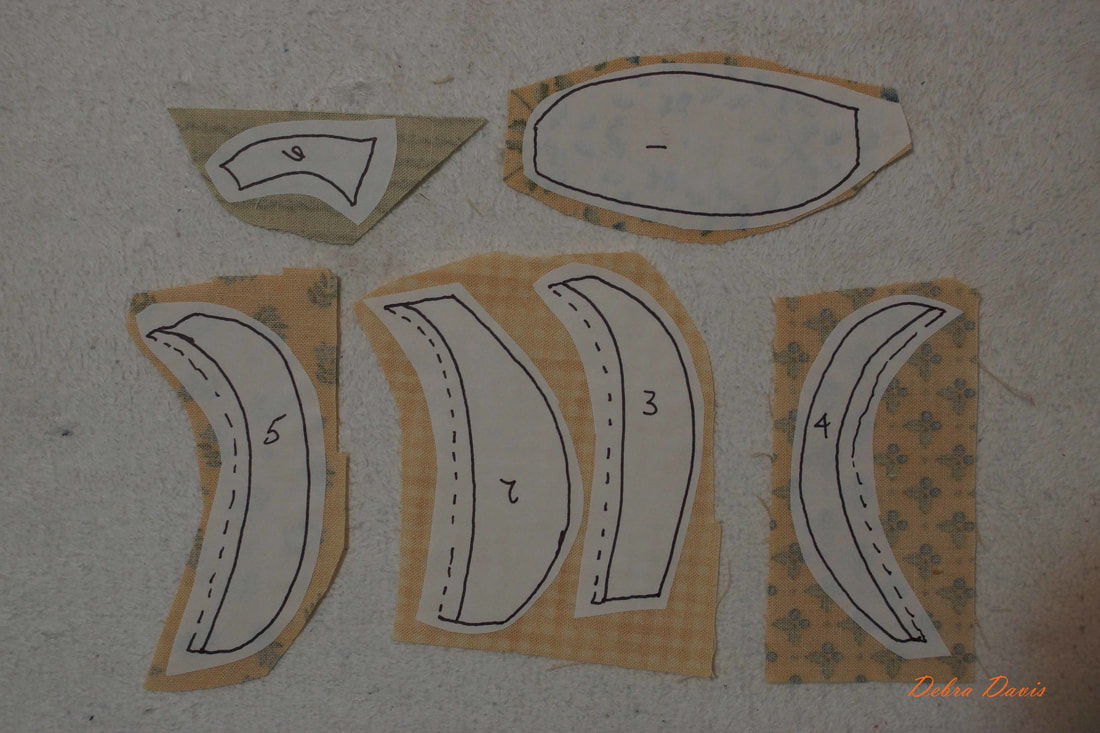
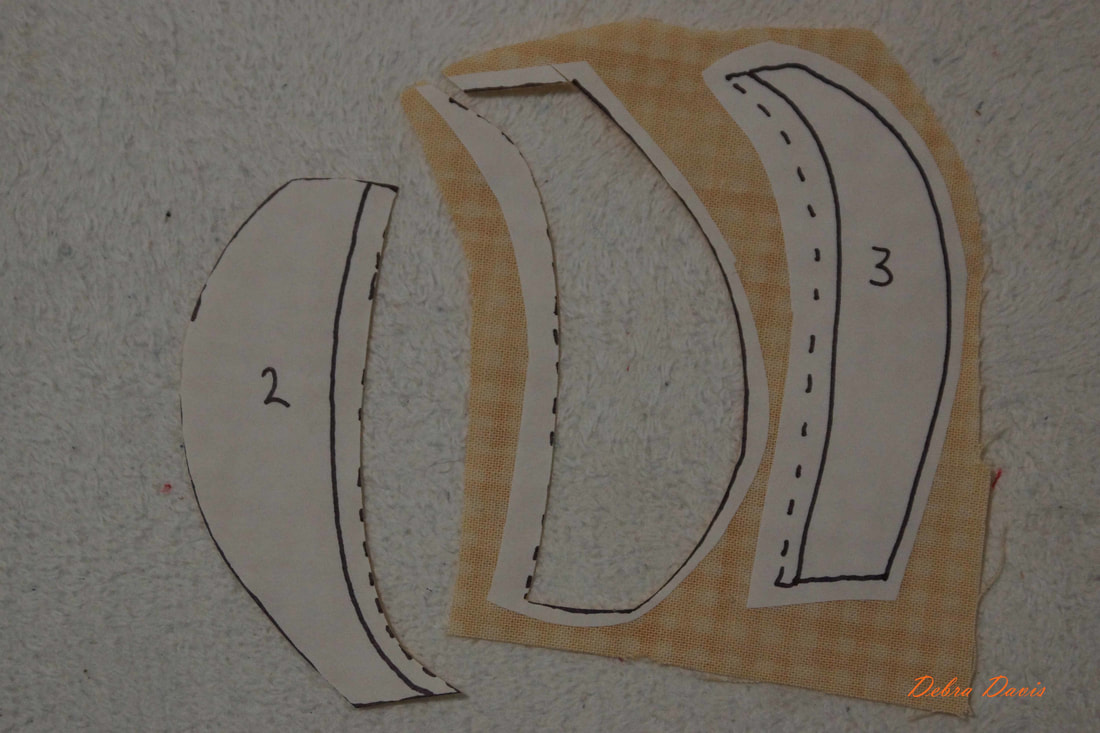
Block 28 is by Jan Patek so a cute little applique is in store for us today. You can find the pattern on Jan's blog HERE As I am playing catch-up with the blocks I chose to use my favorite fusible applique method. This block went together very quickly for me. I started by tracing all of the pattern pieces onto my fusible. Apparently I was a little tired when I started and traced and fused all of my pattern pieces before realizing I had forgotten to turn Jan's pattern over to reverse the pieces as I normally would for fusible applique. No problem, just means my pumpkin will be the reverse of Jan's. When you trace the pattern pieces be sure and add a little extra, 1/8 to 1/4 inch is fine, to the pieces that will be on the bottom of the applique. (I made them dotted lines to help you see) I also numbered them to help me remember how they fit together. 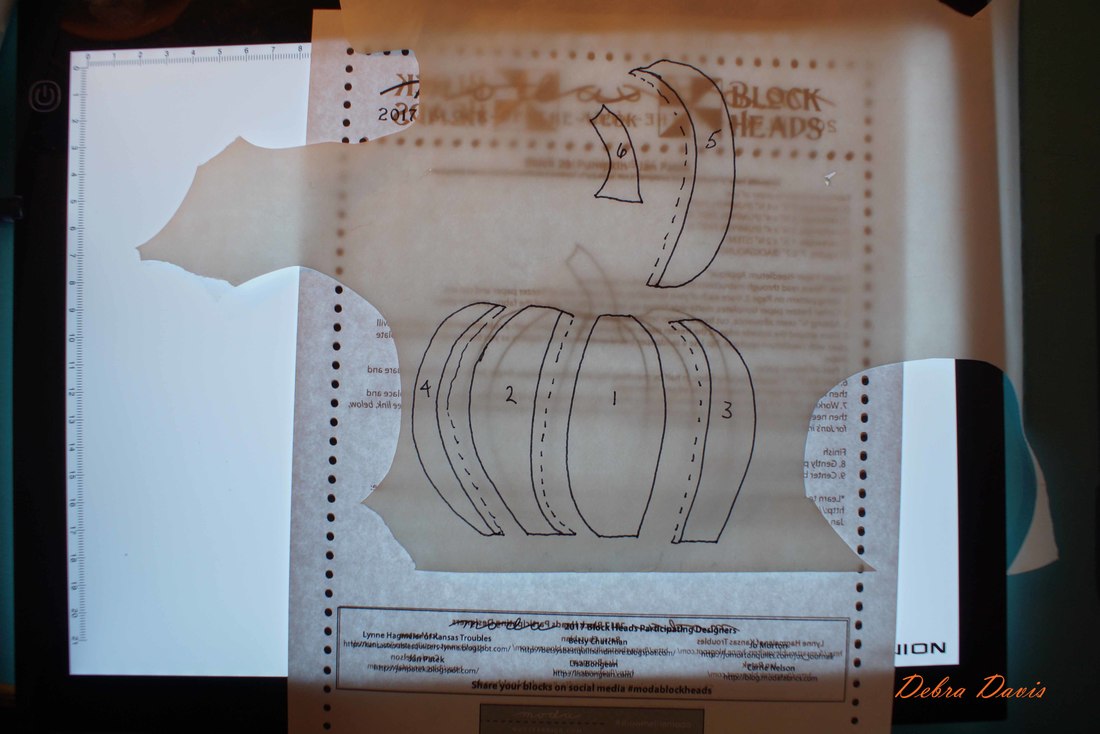 Cut out the pattern pieces leaving a little extra around them, Following the directions on my fusible I used my iron to fused the pattern pieces onto my fabric. When the fabric cools cut them out.
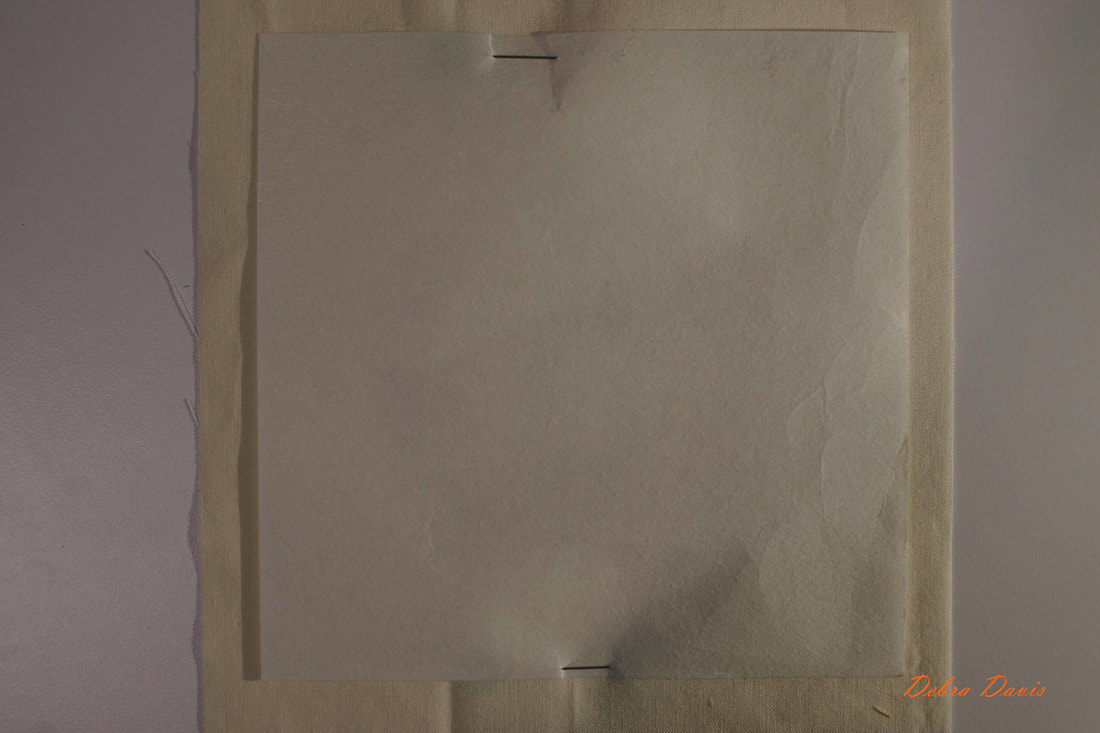
Starting with the pieces towards the back I laid them out on a pressing mat. This allows me to fuse everything together before placing on my background fabric. A light touch with the iron holds them in place as I add the rest of the pieces to the pumpkin. 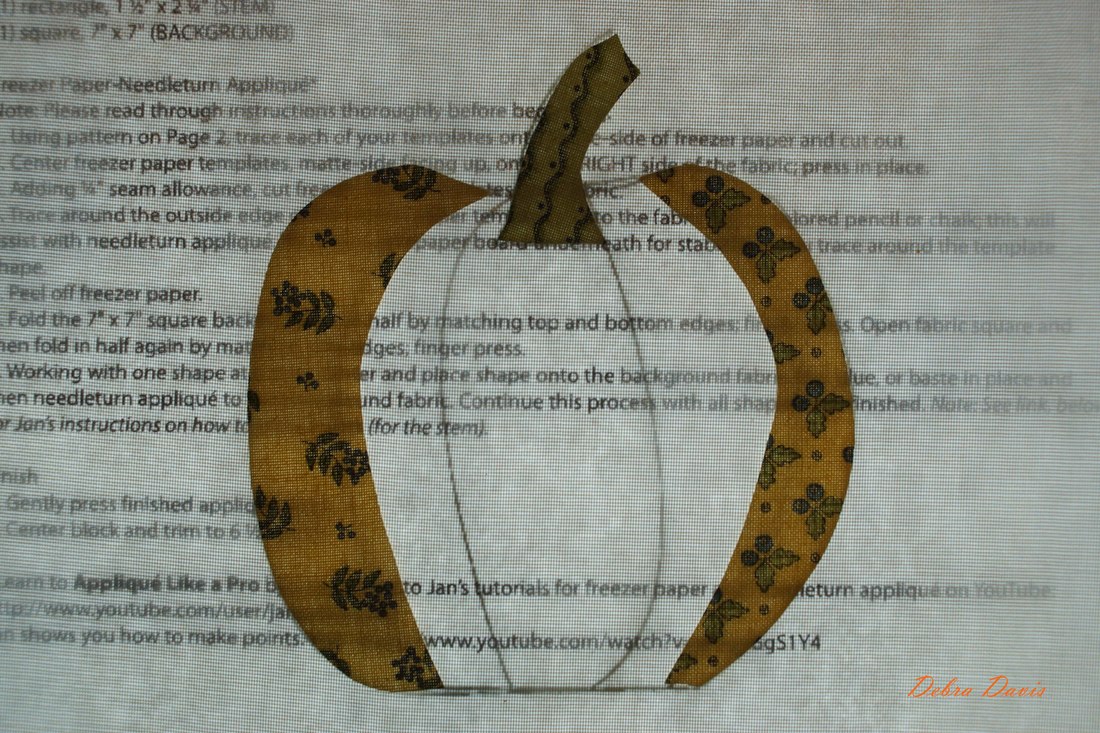 The last three pieces have been added and light fused together on the pressing mat. Now I can just carefully peel the complete pumpkin off of this nonstick mat. 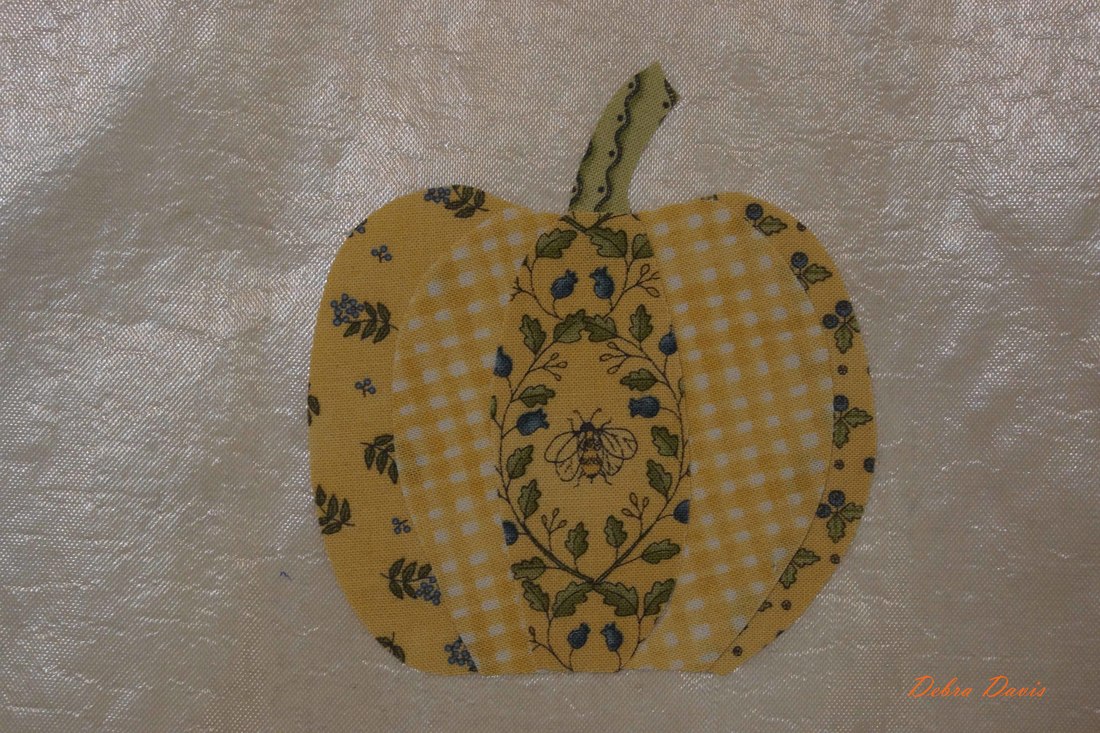 The pumpkin is fused onto the background fabric and I add a piece of stabilizer to the back.
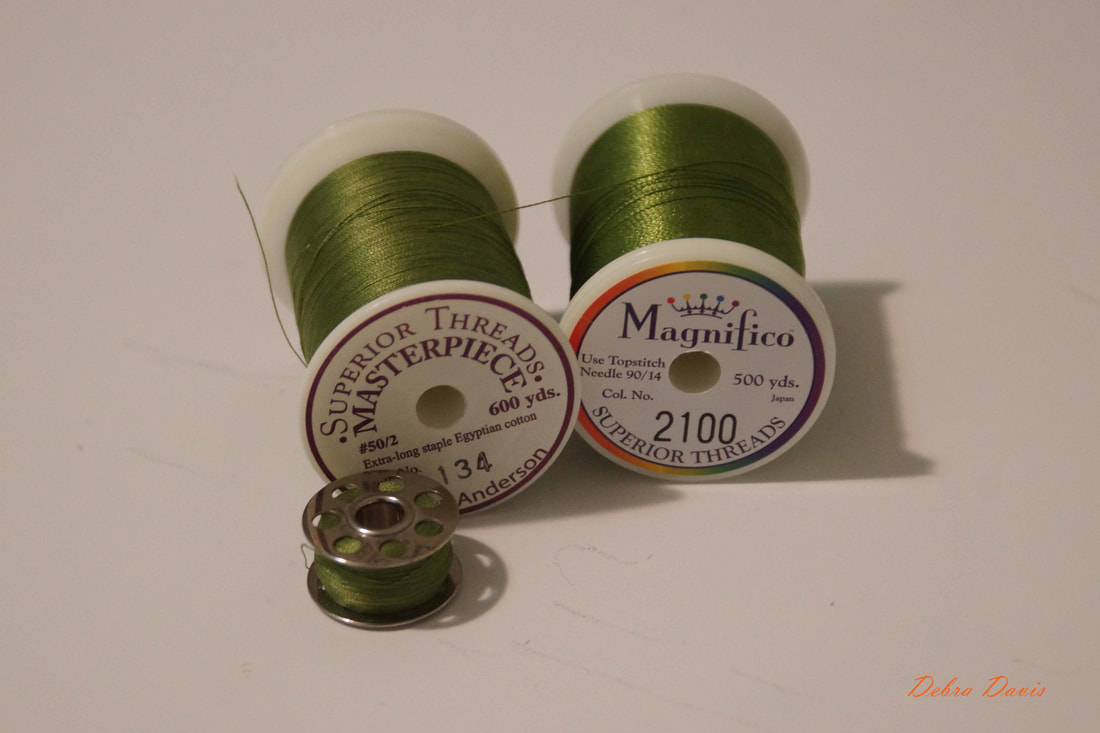
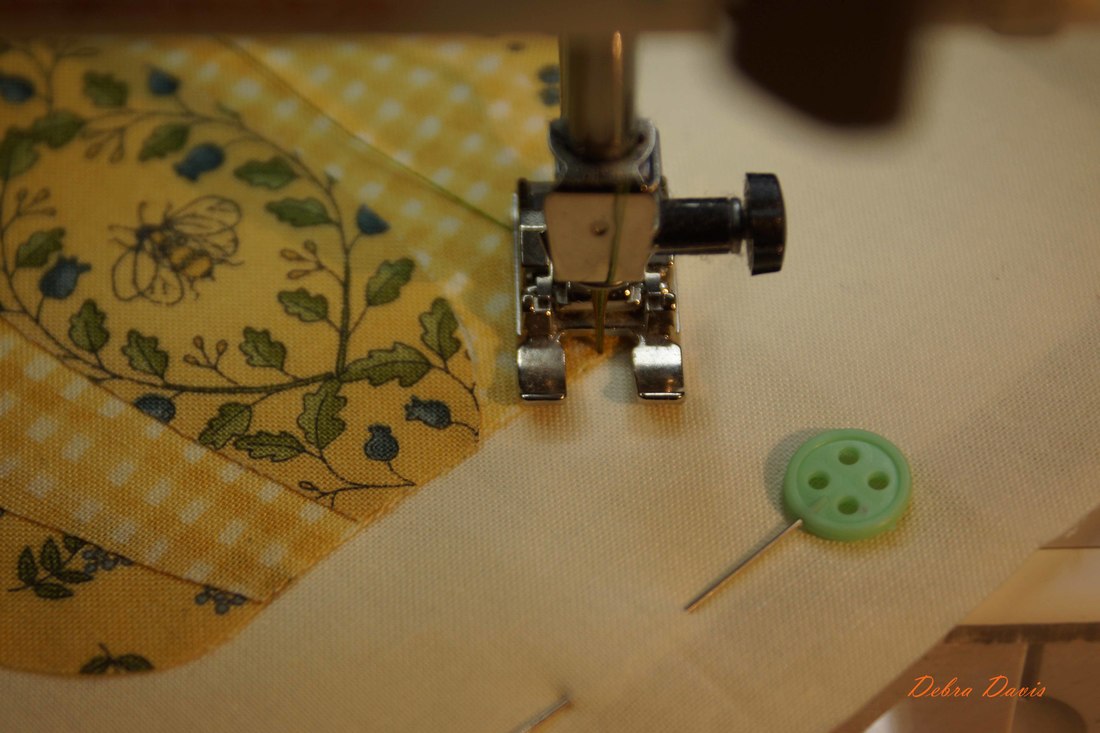
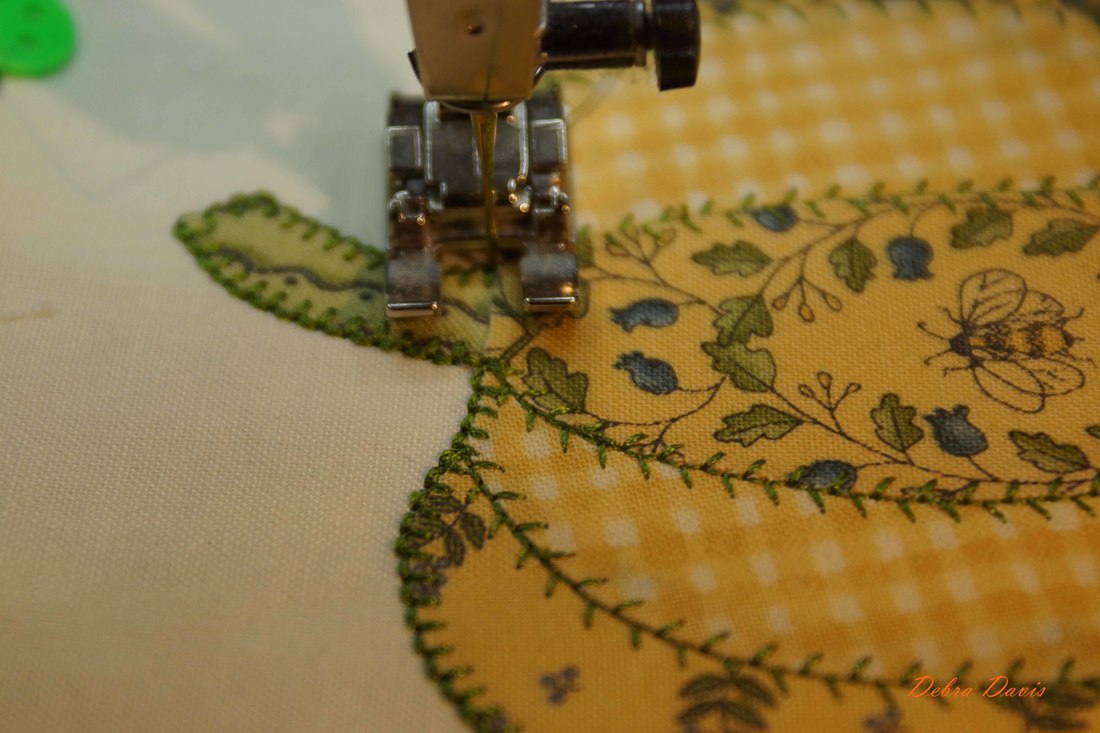
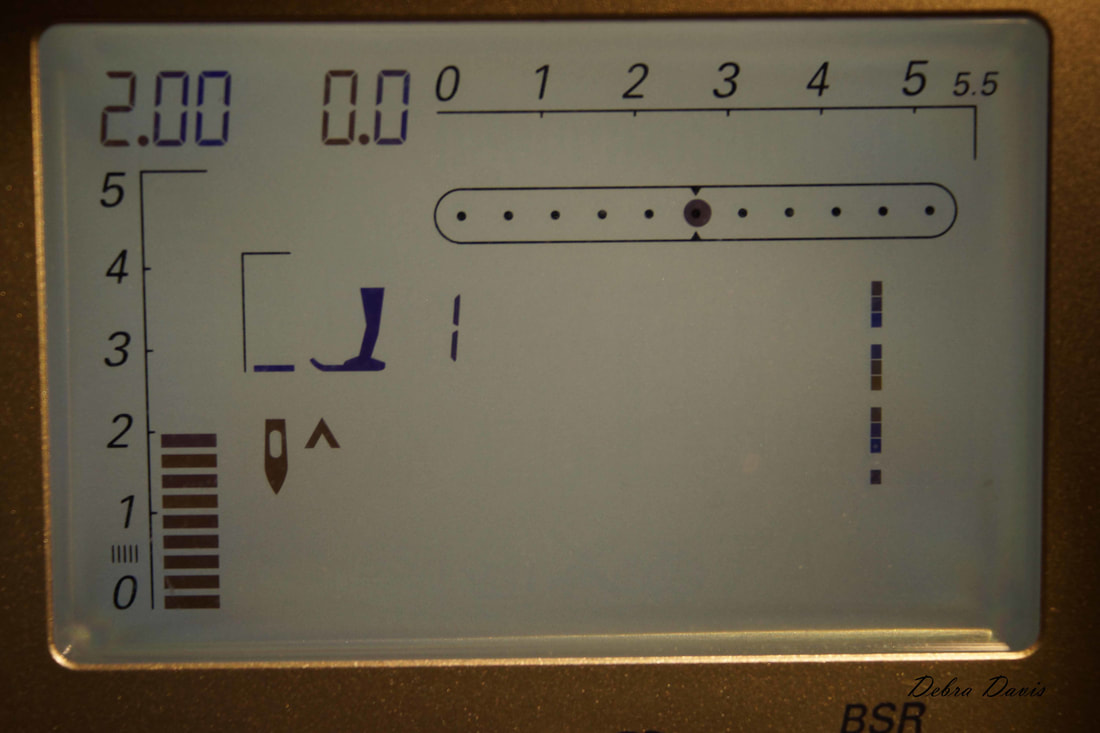
I am trying something new today-one of the feather stitches on my machine. I will be using my usual buttonhole stitch to go around the outside of the pumpkin, but decided I wanted something different in the middle sections. For this stitch I have set my length to 1.9, and my width to 4.0 and I work with my needle in the down position. I am using Superior Threads Magnifico for the top thread and a matching Masterpiece color in the bobbin. The Magnifico has such a nice sheen to it, and I get a lot less lint in my machine with these threads. (Justs a note, I do not get paid in any way by Superior Threads, I just love their products. If you click on the photo it will link you to their site.)
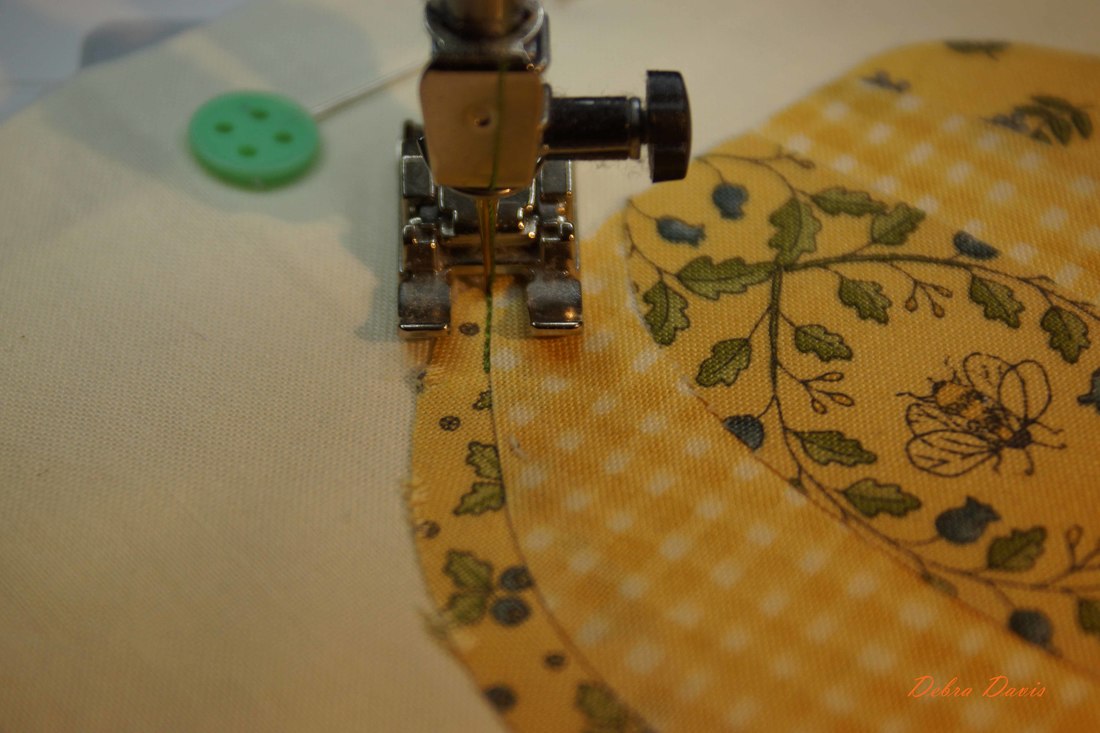
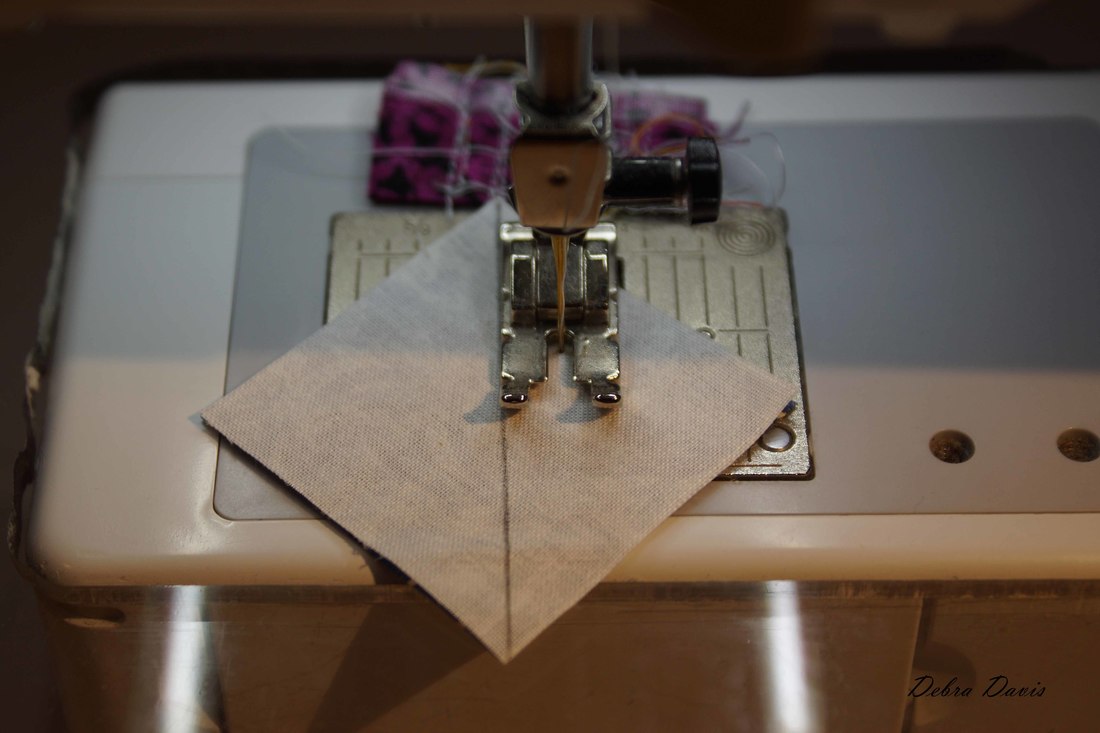
Just like I have shown with previous fusible applique projects I begin with a straight stitch which is also set to 1.9. I take 5-6 stitches right along the edge where the two fabrics meet. 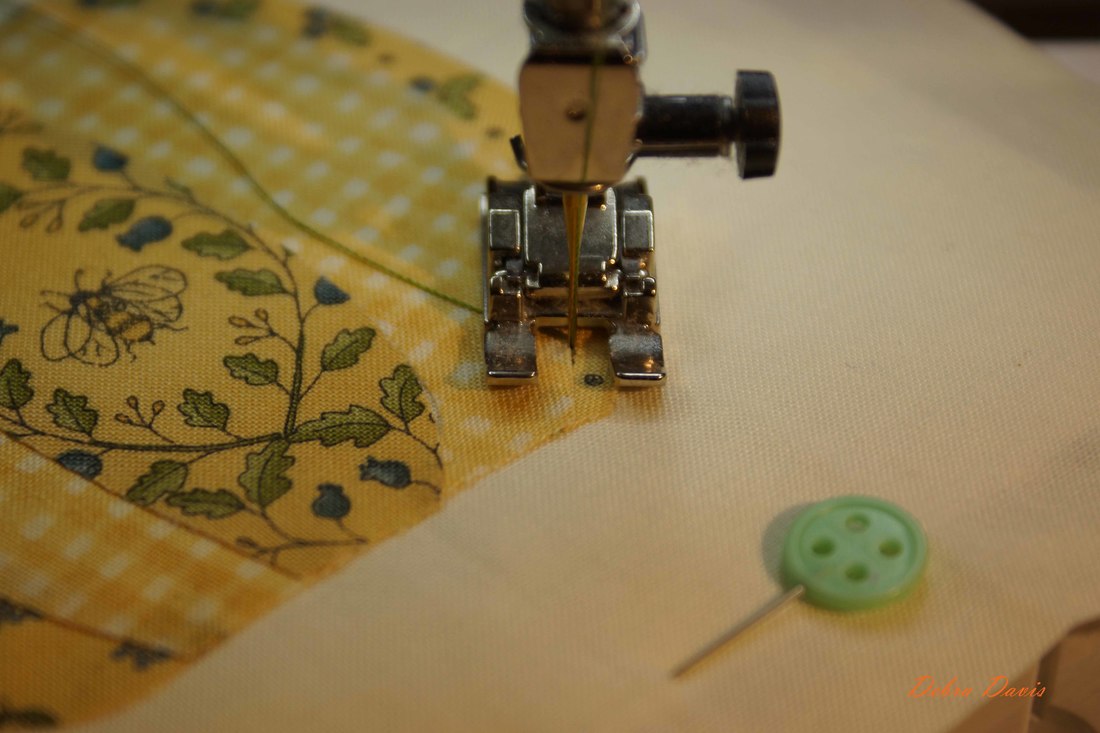 When I get to the bottom of the pumpkin, I stop, lift my presser foot and rotate the applique. Now I start with my chosen feather stitch (or buttonhole can be used if you prefer.) By beginning in this way my starting stitches will be locked into place and I do not have to worry about them coming undone.
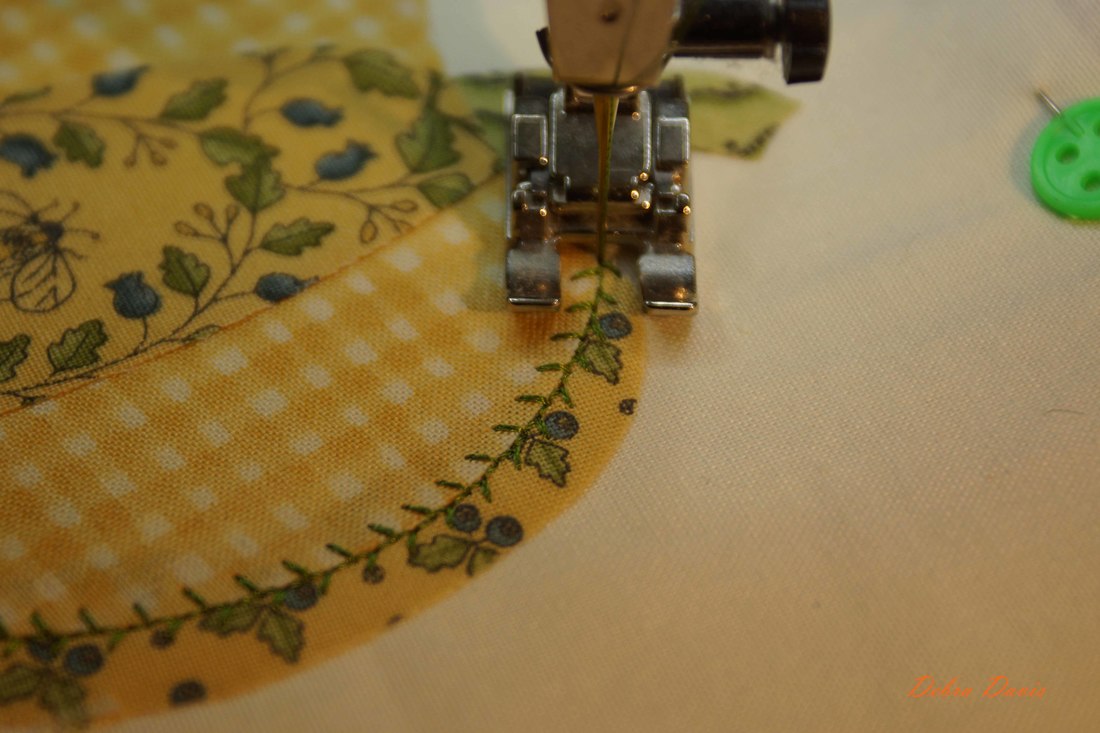
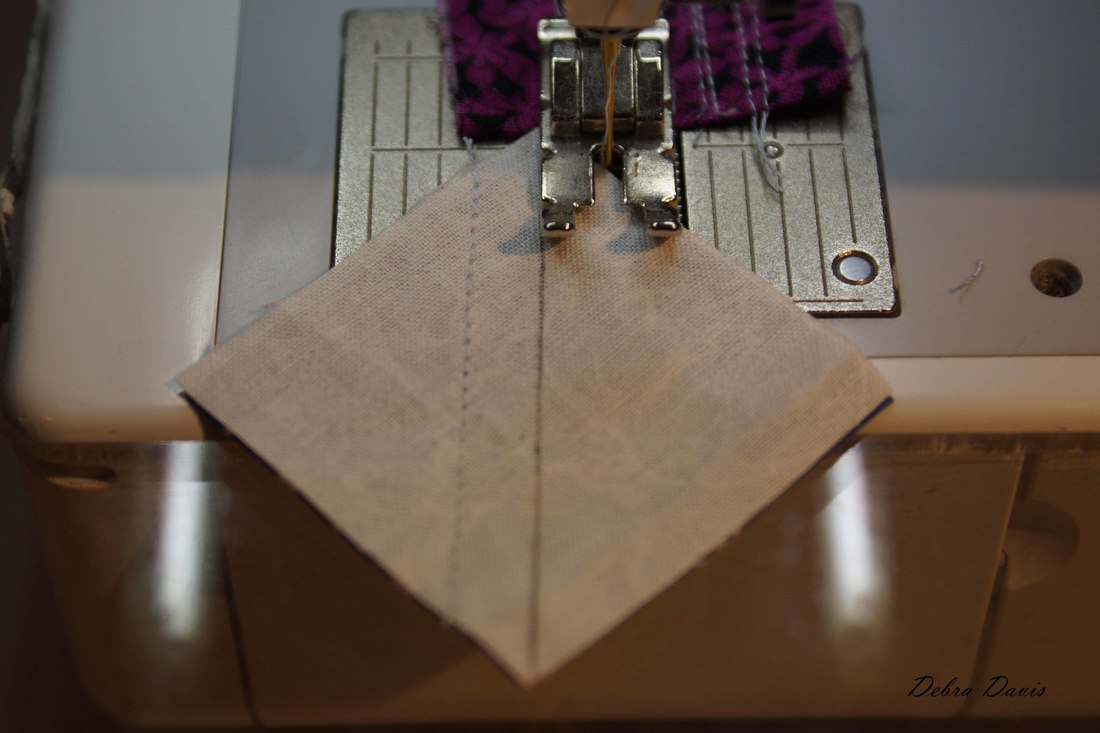
I proceed slowly along the edge of the fabric, turning the applique as needed to keep the straight stitch part of this stitch right along the edge of those two fabrics. 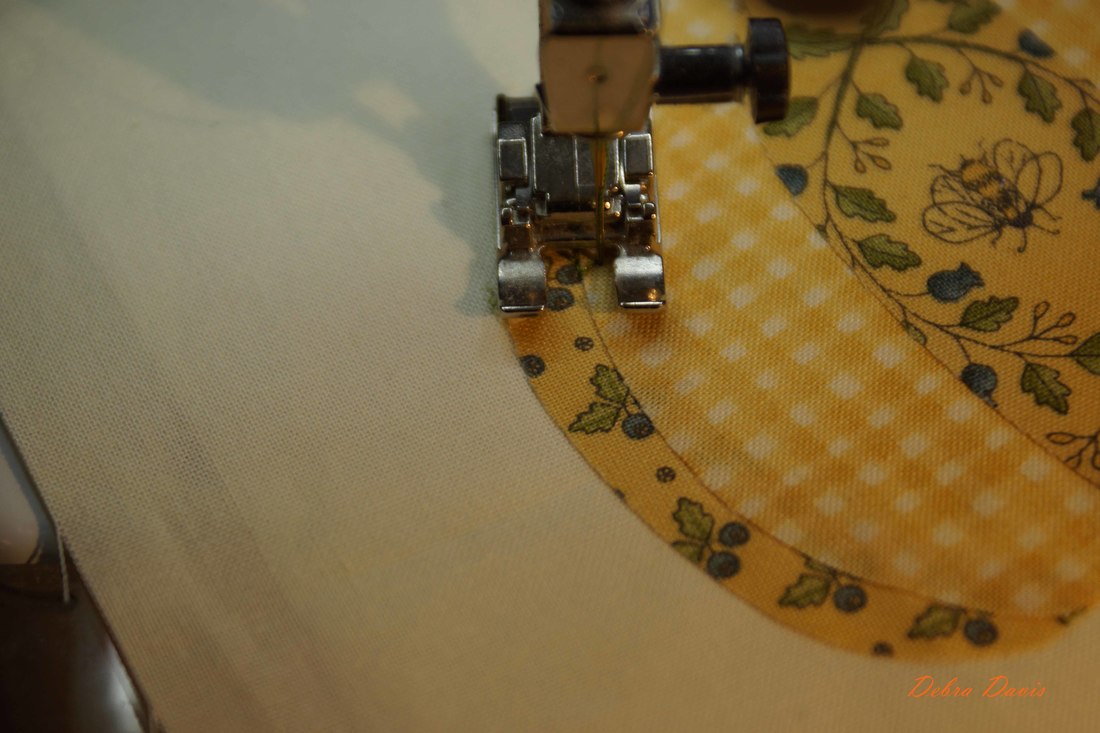 When I get to the top where these two fabrics join I stop, lift my presser foot, keeping the needle in place, and pivot the fabric back around to go the other way. I have switched back to my straight stitch and take a few stitches back over those I have just done and finish with a locking stitch, a nice way to make sure those stitches do not come undone.
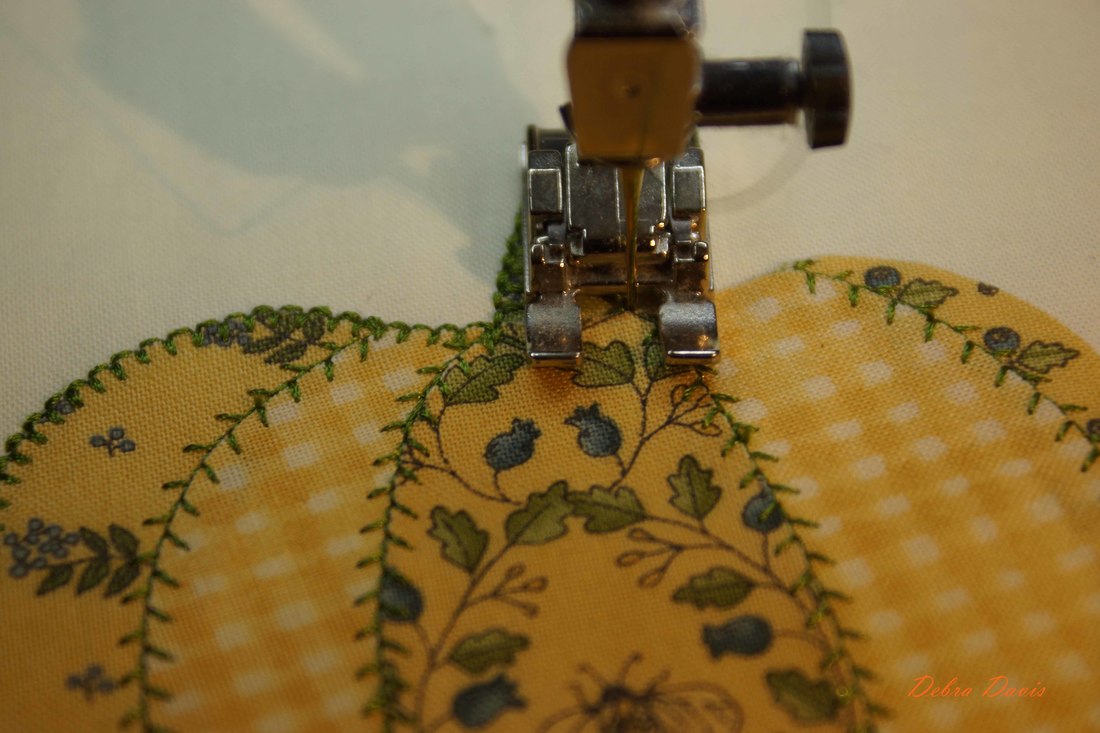
My sticky note to remind me what stitch I am using -handy if you get distracted. 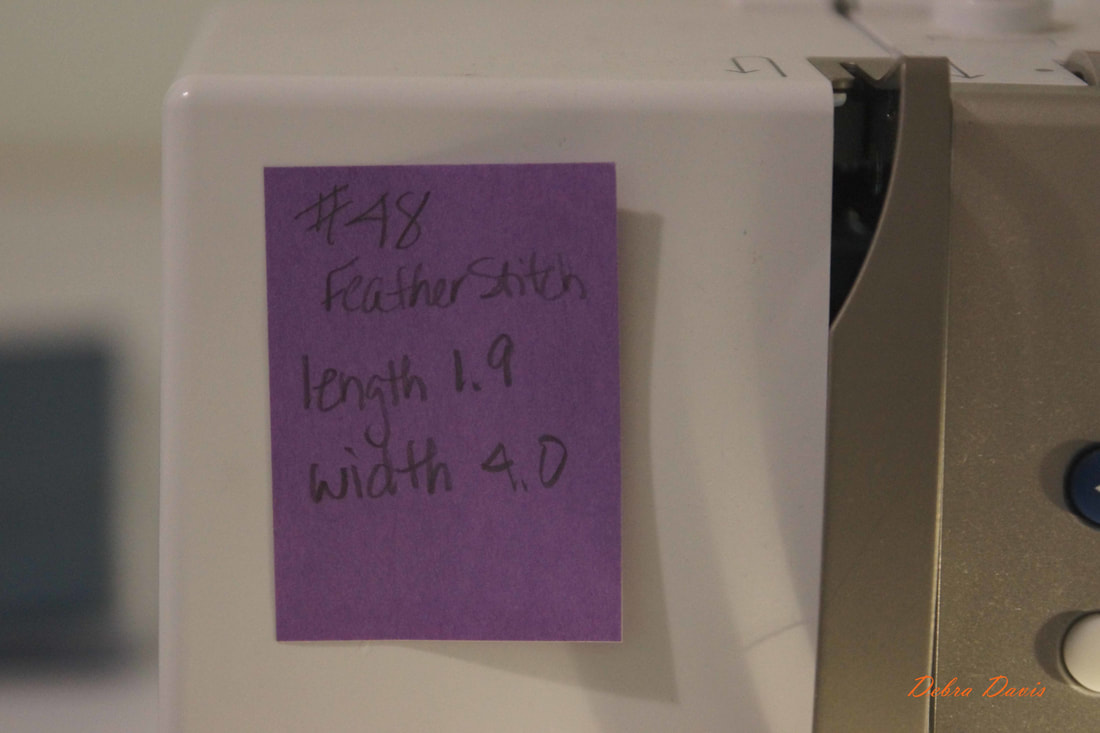 I am going to repeat this process on all of the other inside seams, starting at the bottom of the pumpkin each time so that my feather stitches go in the same direction. 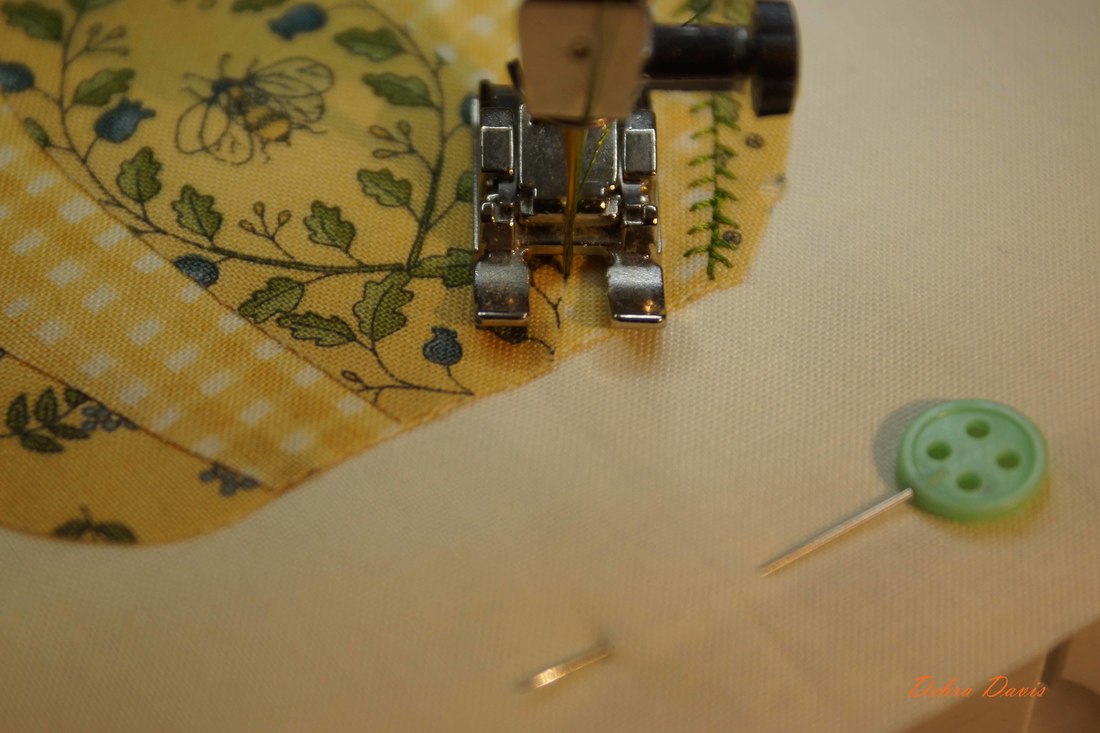 There, all of the feather stitching is done. 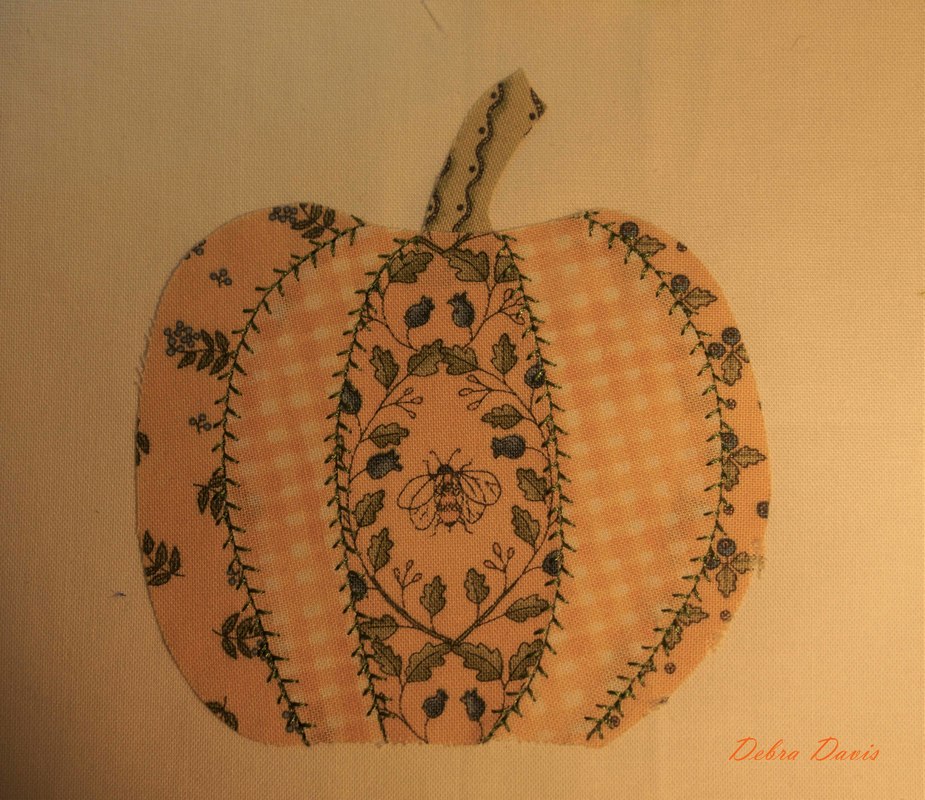 I am going to work the buttonhole stitch now, in a very similar way. I begin with a few straight stitches. 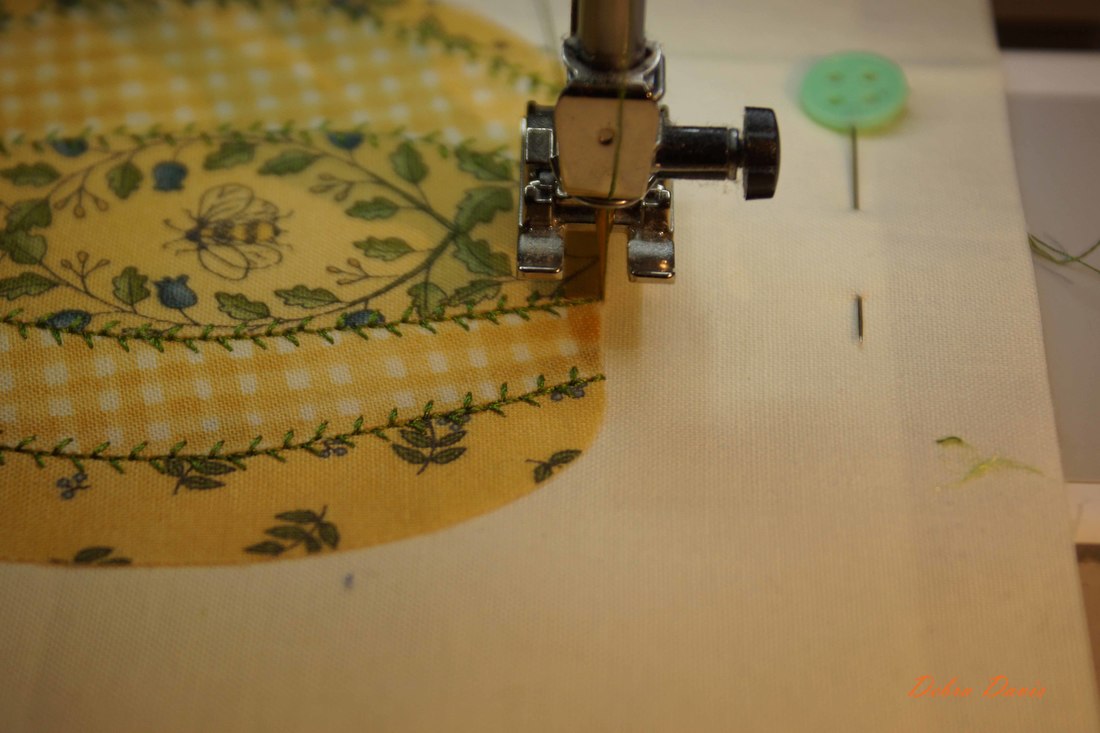 Then I switch over to my Buttonhole stitch. I do not have to pivot the applique as I am going to go completely around the pumpkin and end up where I started. I have my stitch length still set to 1.9 and now my stitch width is 2.0. 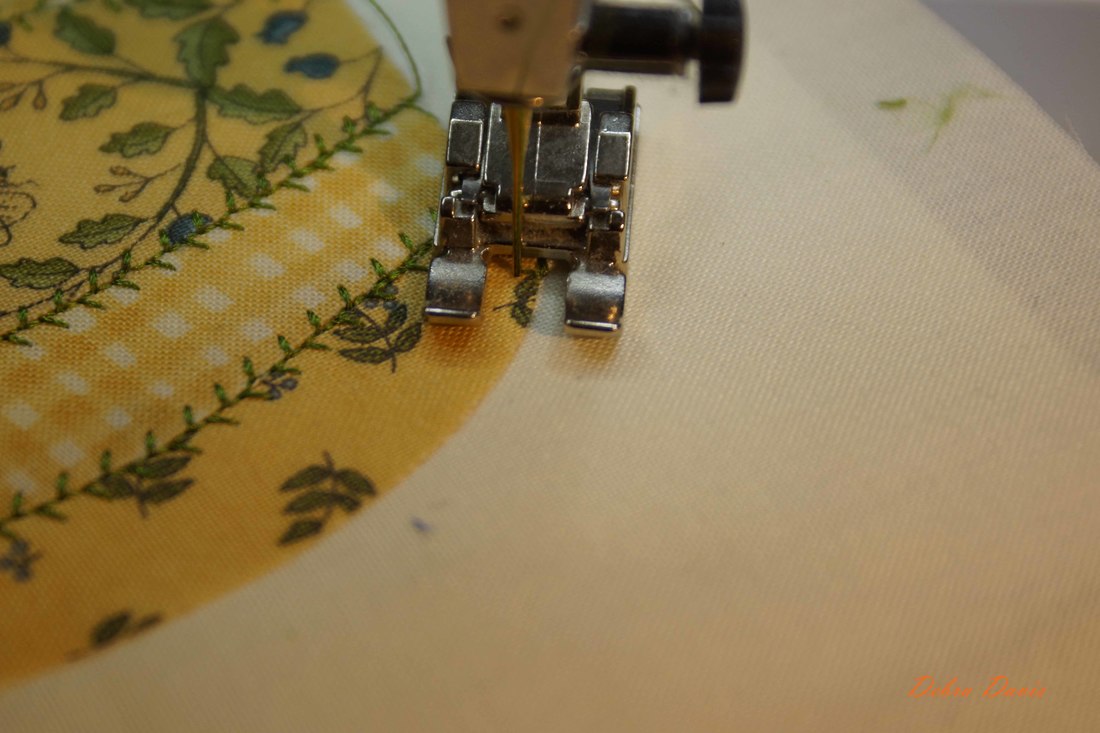 I stop with my needle down when I get to the stem. 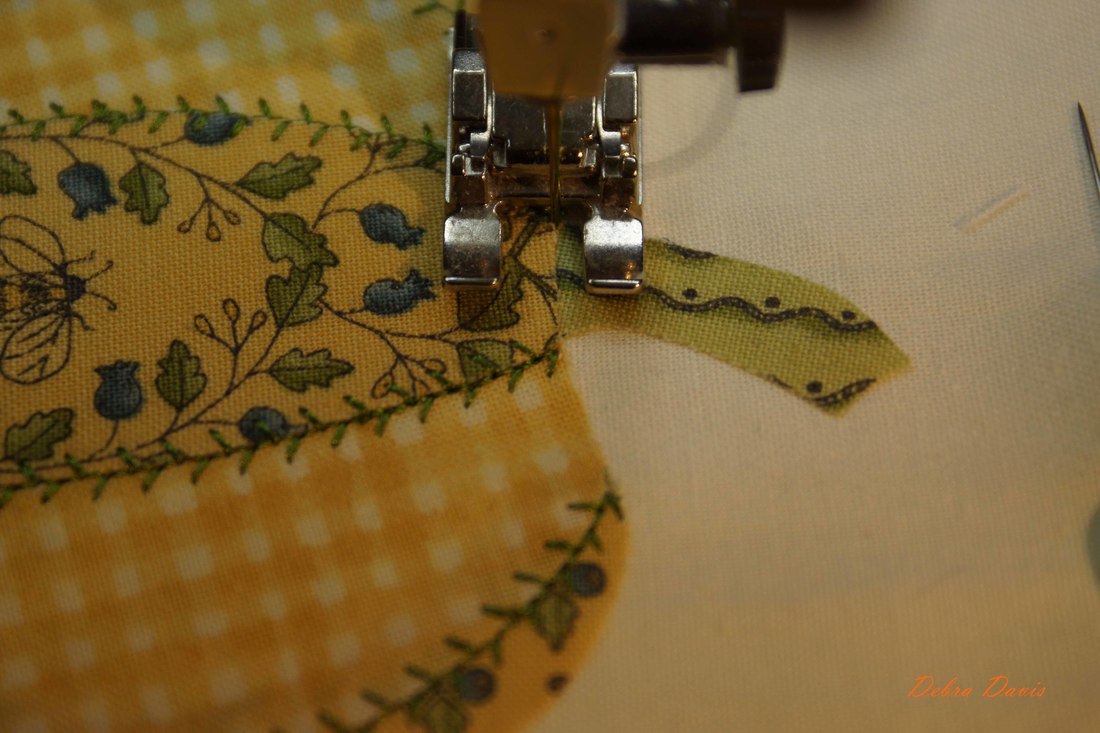 Pivoting the applique piece I continue stitching around the stem. 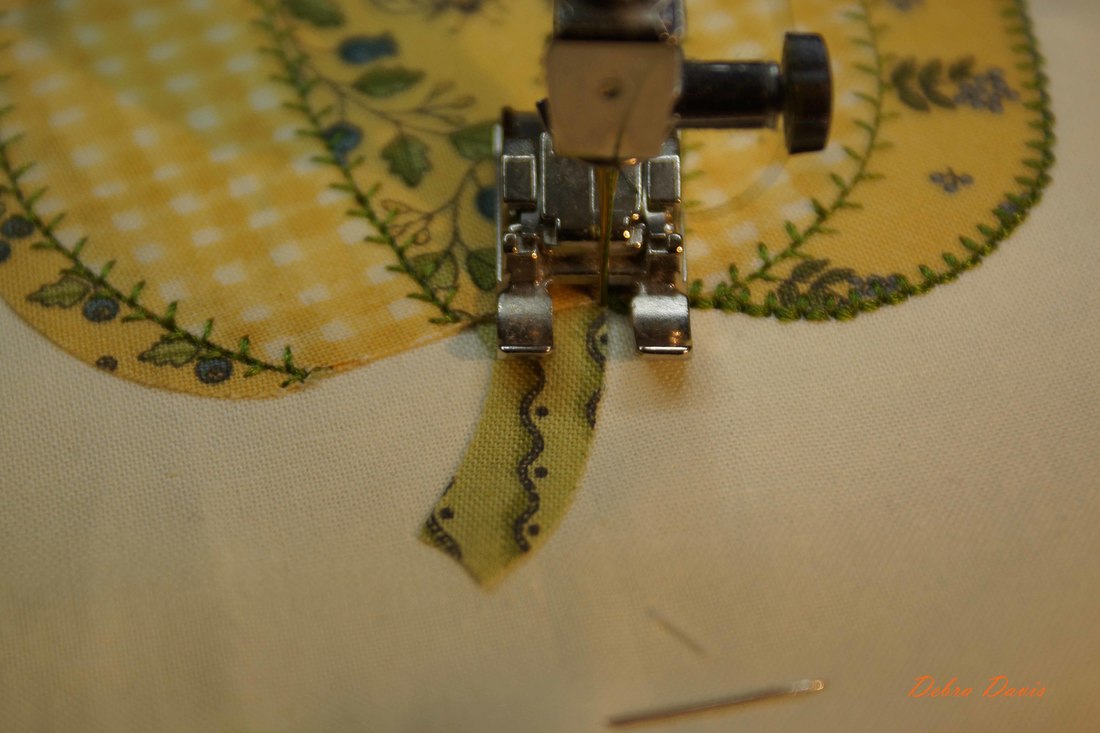 When I get back to the bottom of the stem I switch now to my straight stitch, lift the presser foot and pivot the applique in order to sew across the bottom of the stem.
Once I reach the Buttonhole stitches on the other side, I switch back to the Buttonhole stitch, pivot the applique back around to continue sewing around the rest of the pumpkin. 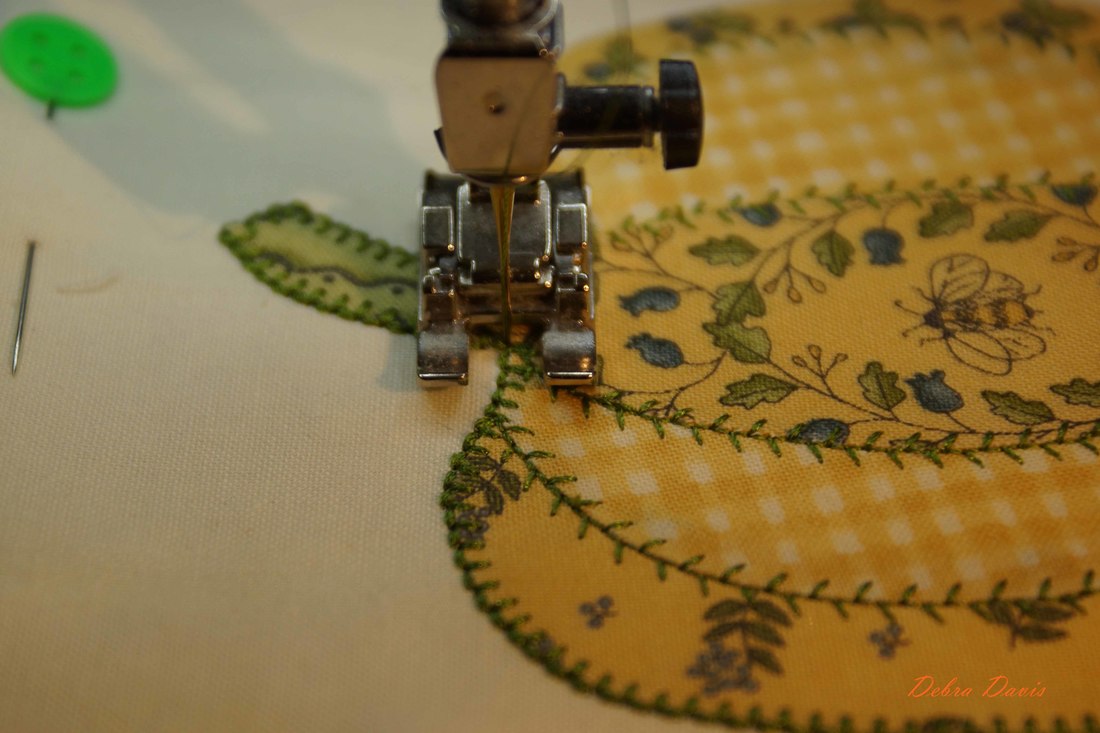 Once I make it back to where I started I switch once again to the straight stitch, take a few stitches and end with a locking stitch to hold everything nicely in place. 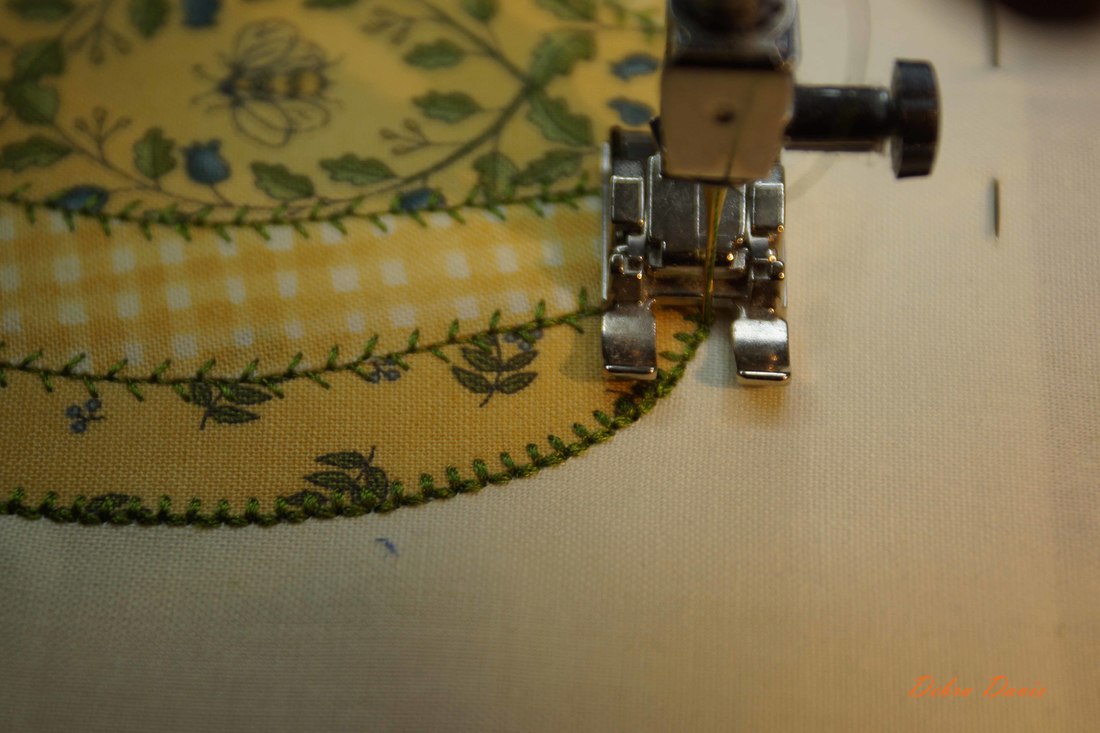 All finished with the applique I felt my little pumpkin needed just a little something more. 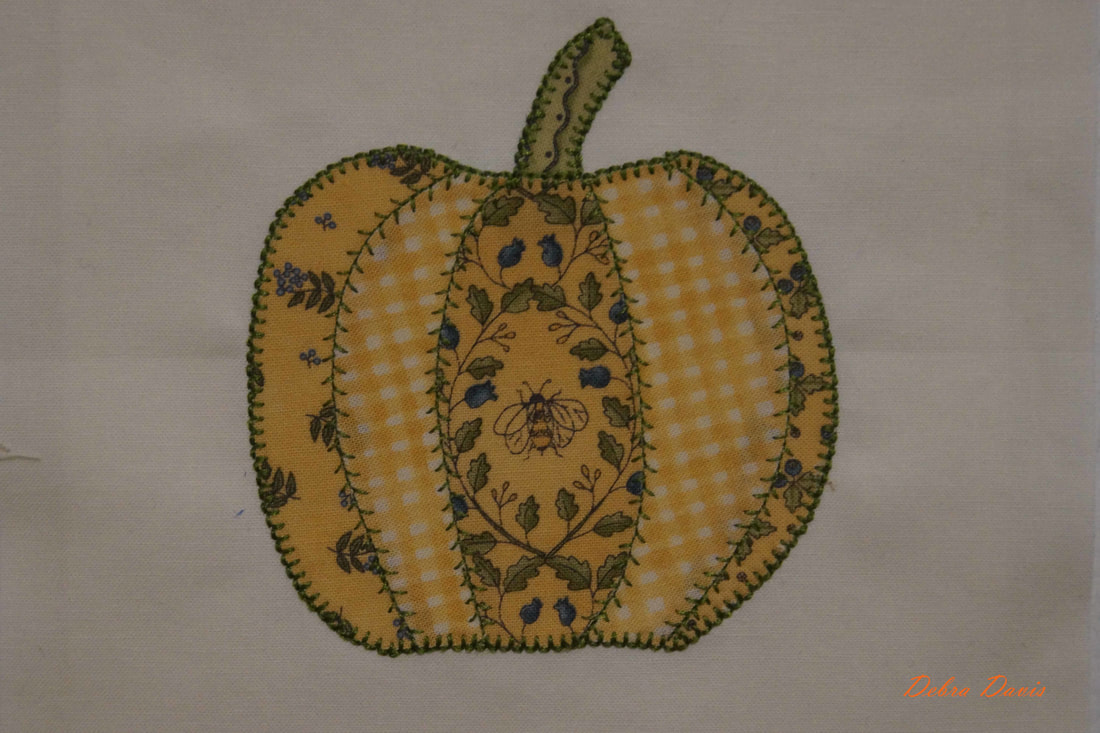 So I drew a line for a little tendril and sew along it with my straight stitch. 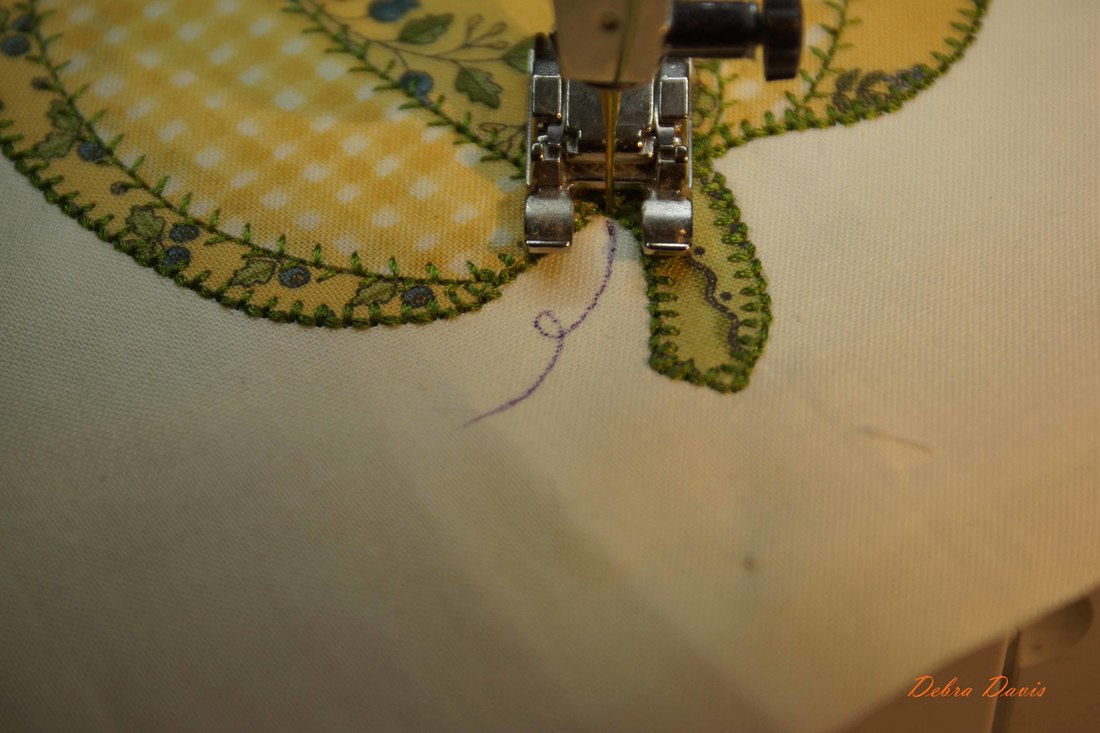 I turned the piece and sewed back over the line to give it a little more depth. 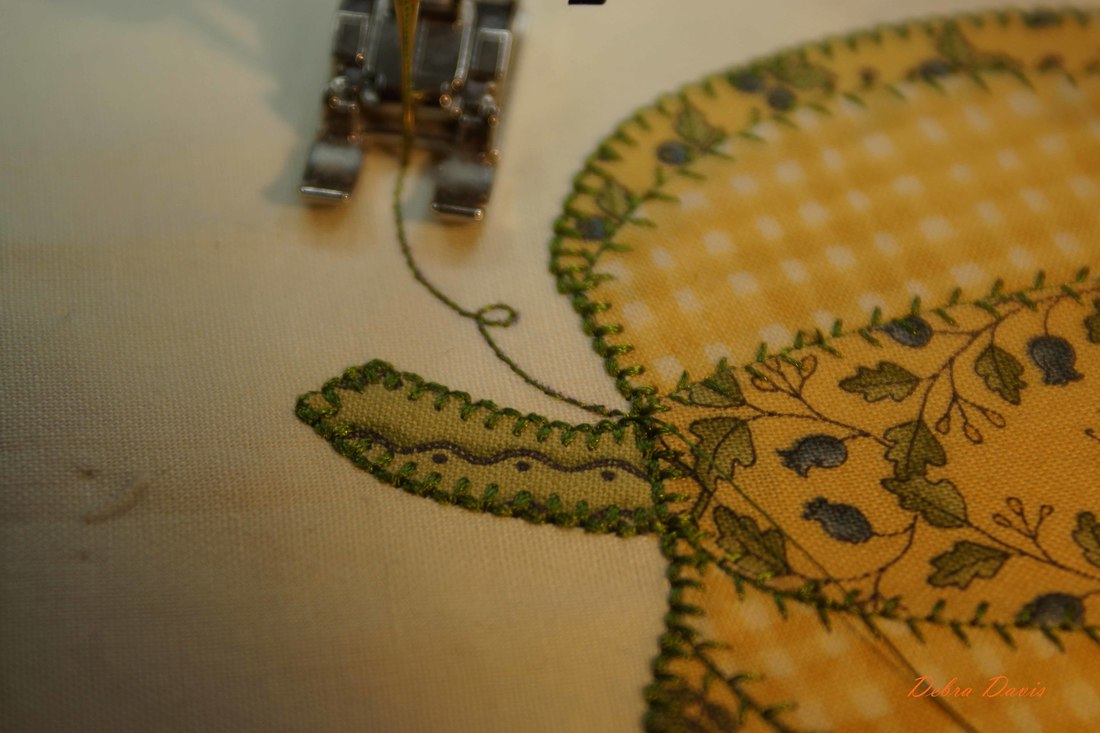 That's better. 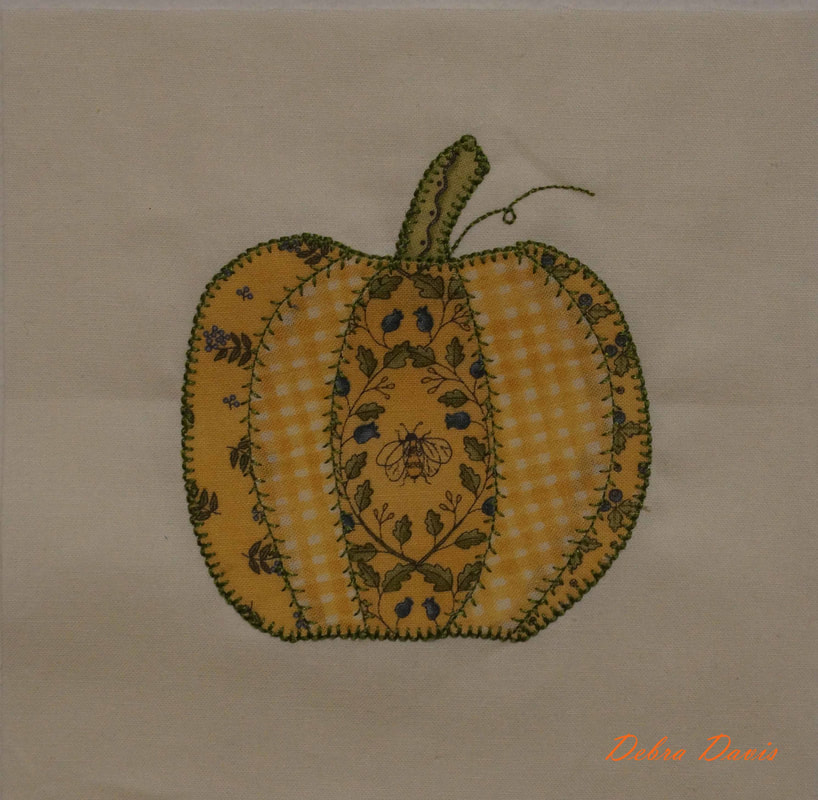 It took a while to convince myself that I could add a yellow pumpkin to my Garden Notes blocks. We grew over 100 pumpkins this year which have all pretty much turned a beautiful orange now. This one is not quite there yet.
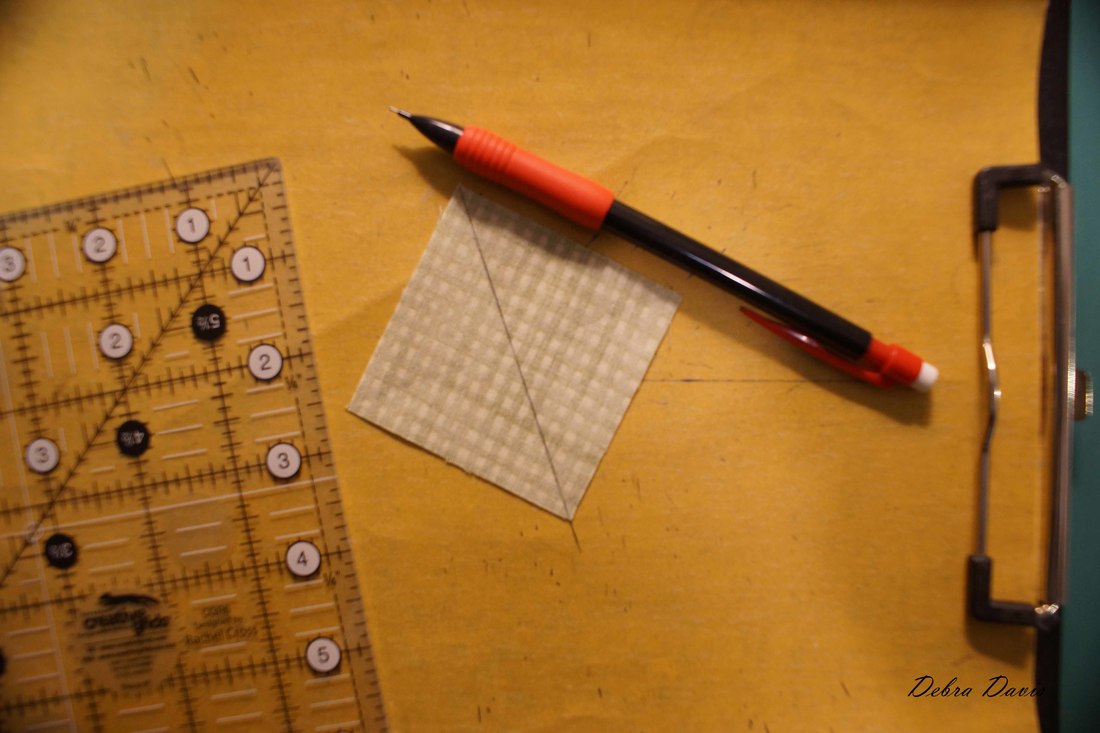
Pdf version of this tutorial I have put together a list of all of my Moda Blockhead tutorials which I will be updating as I add new ones. You can find the links for each HERE Until next time, Happy Quilting!! Debra Block 31 is a welcome relief after struggling with the Alternate 28 block this weekend. This one goes together very quickly and looked like the perfect opportunity to put some bees in my garden. For Lynne Hagmeier's pattern visit her blog HERE  I did not feel the need to use starch on this one, just cut out my pieces and was ready to sew. 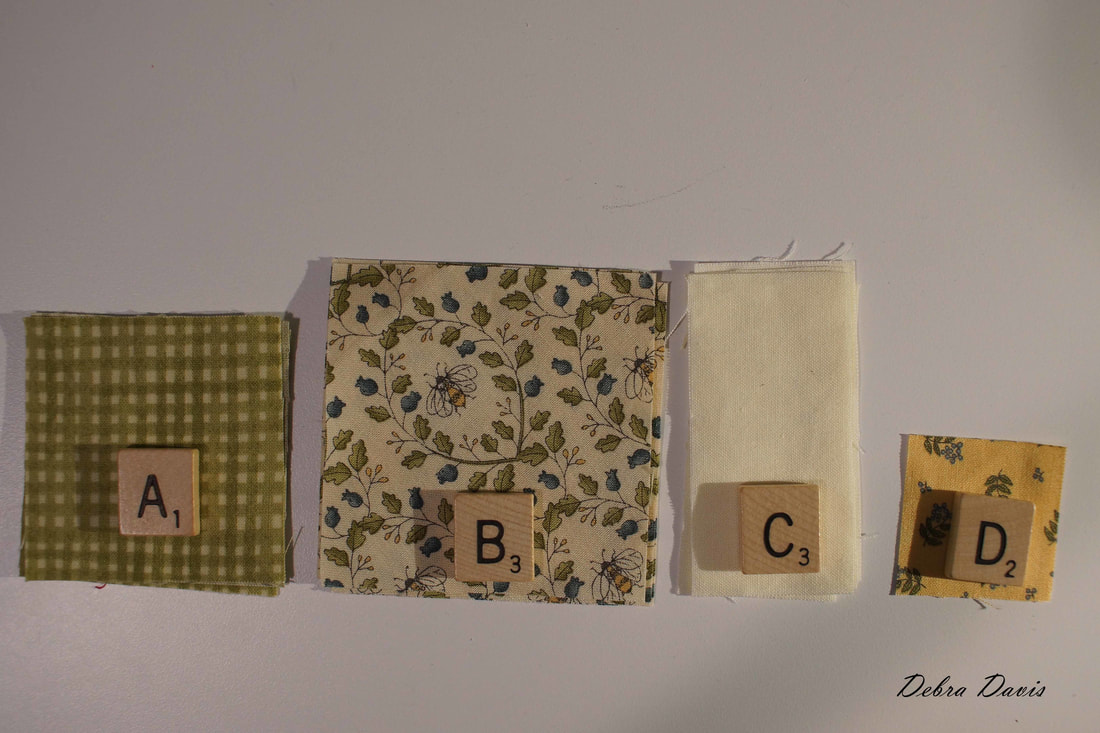 I drew a diagonal line on the back of the A squares. A piece of fine sandpaper on a clipboard keeps the fabric from moving as you mark the fabric. I used a pencil to mark my fabric rather than a pen because the line stays on the finished piece and I do not want it to show through.
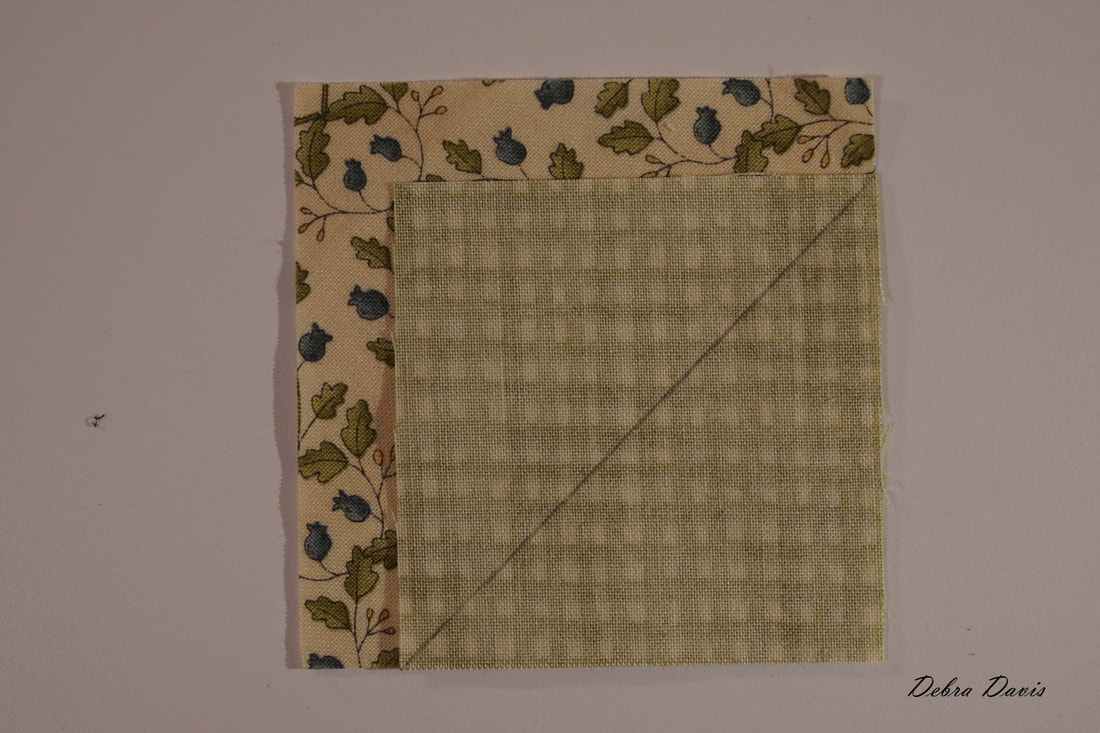
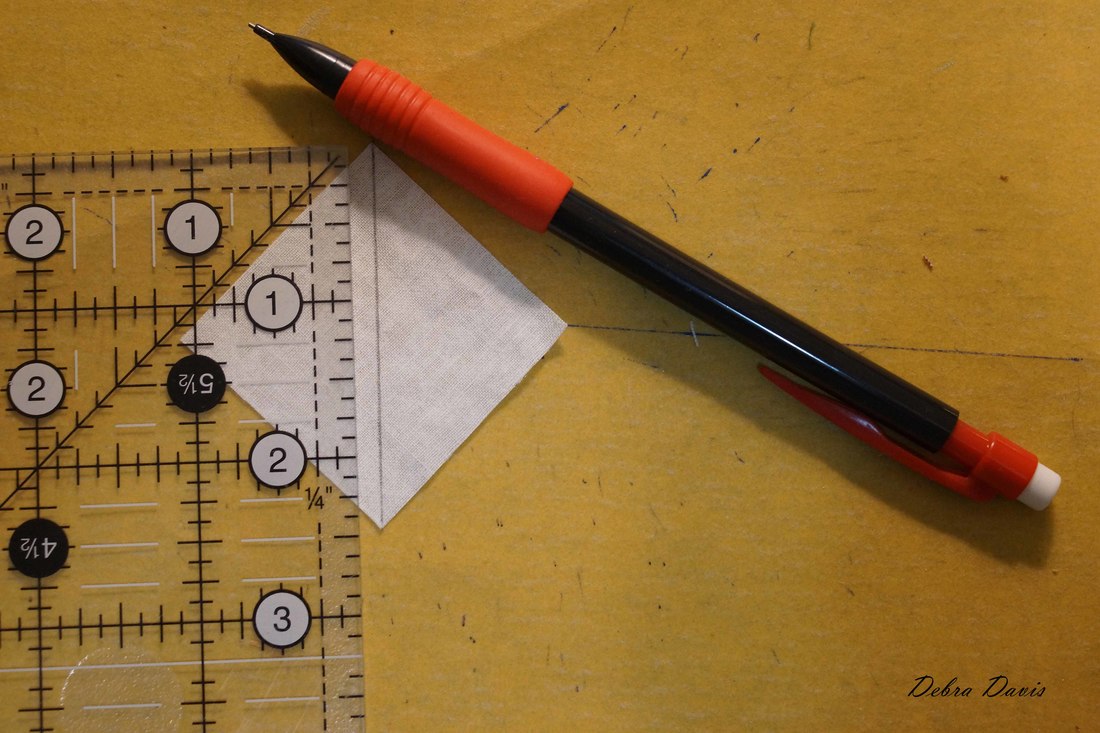
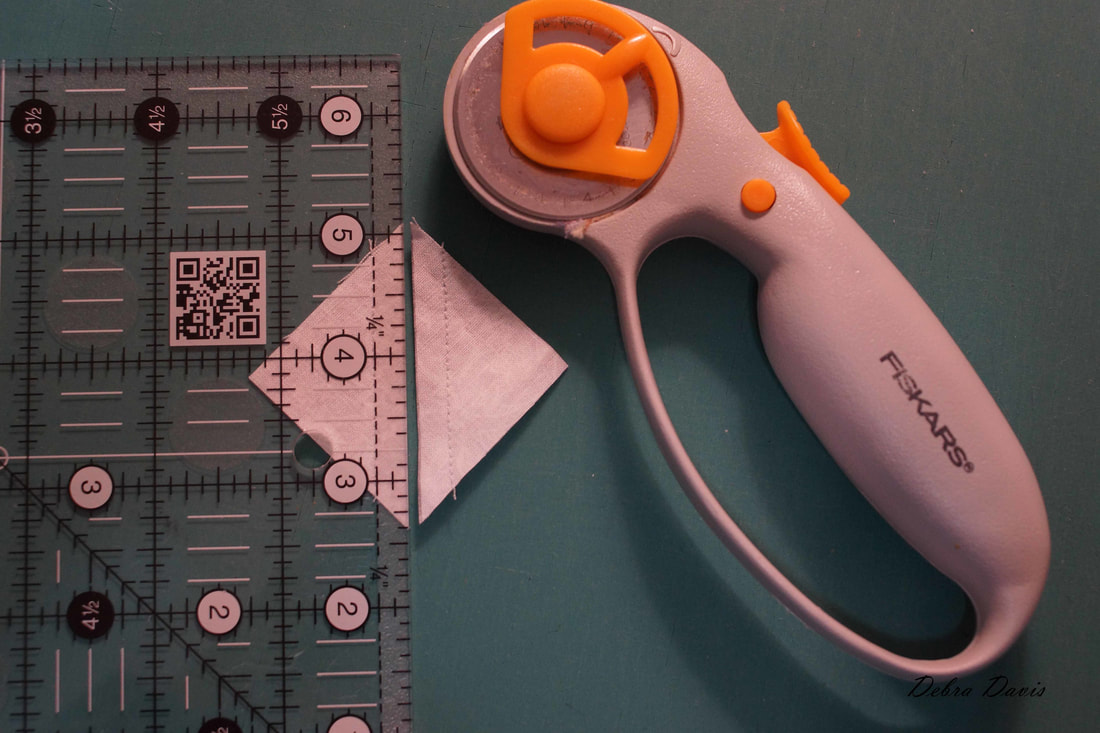
I sew with my needle along the right side of the line, not right on top of it. If I sew directly on the line I will be a little short when I fold over the fabric. 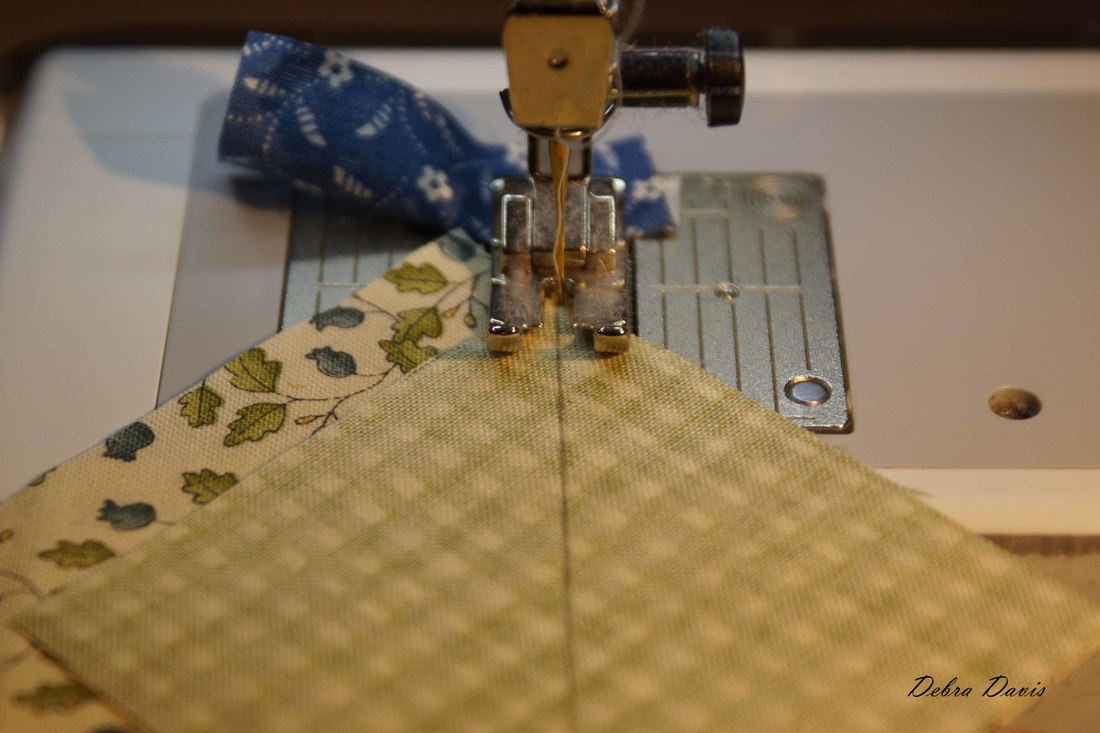 In order to demonstrate a little trick I have folded my fabric a little wonky to show how you can solve a common problem. Here you can see that some of the fabric from the bottom square is showing above the green plaid. 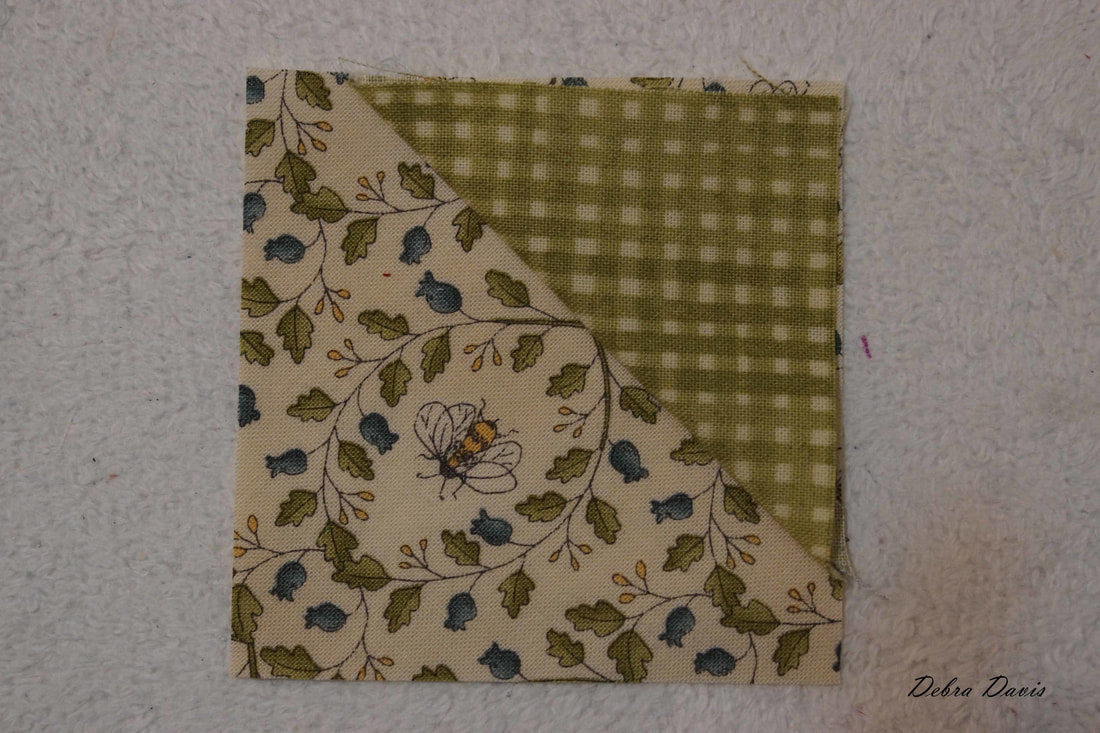 Instead of cutting away both fabrics as I normally would I cut just the green plaid and leave the bottom square intact. That way I will still have a square that is the right size when I go to sew all of the parts together. Look again at the photo above to see how that will help. 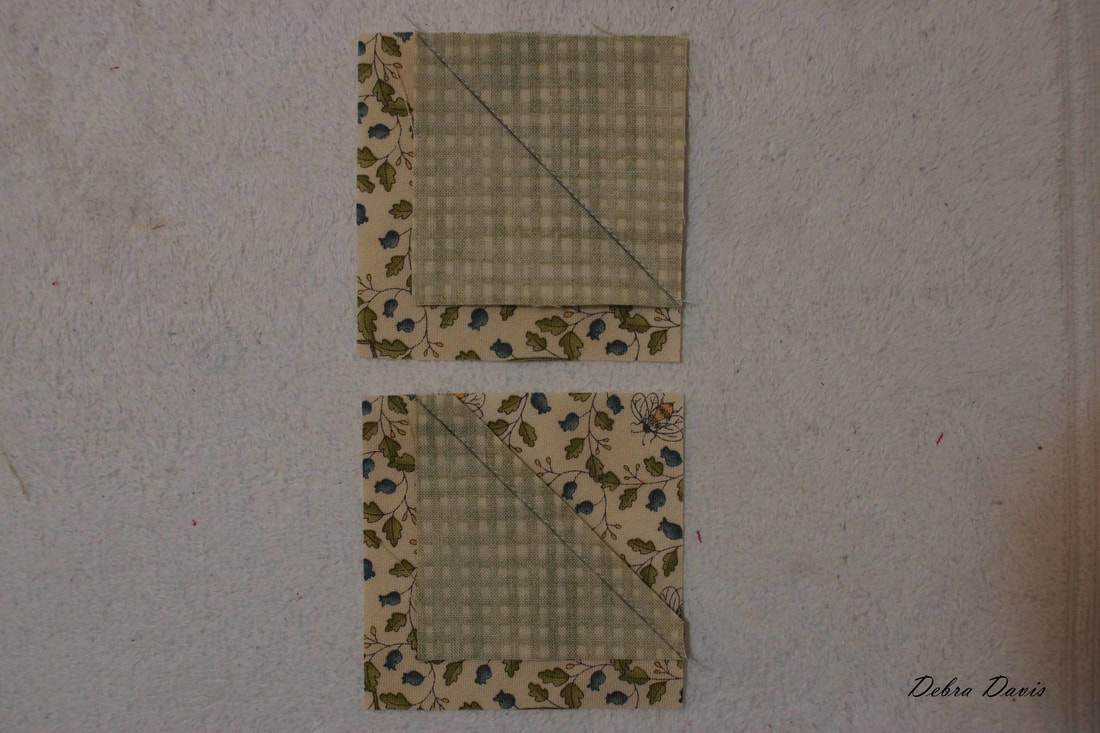 Since my green plaid triangle does actually cover all of the square underneath I cut both layers away-cutting 1/4 inch from the seam and then trimming as need to make sure my block still measures 3" square. 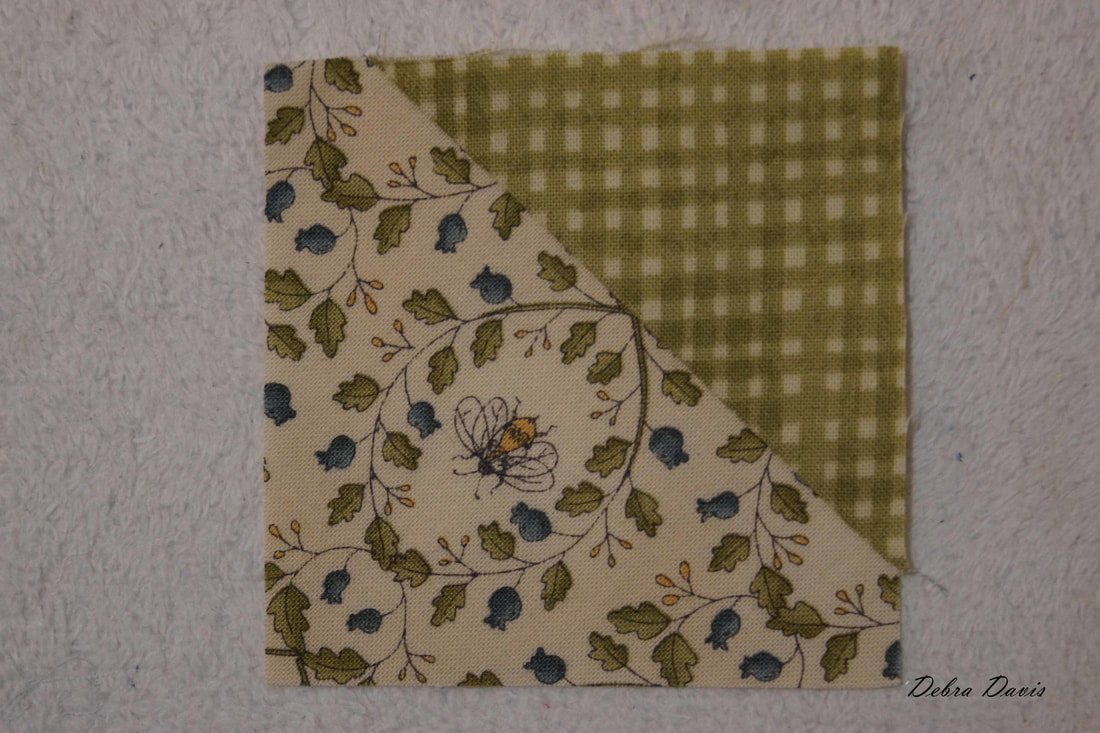 Hard to believe we are now ready to put everything together. So quick and easy! 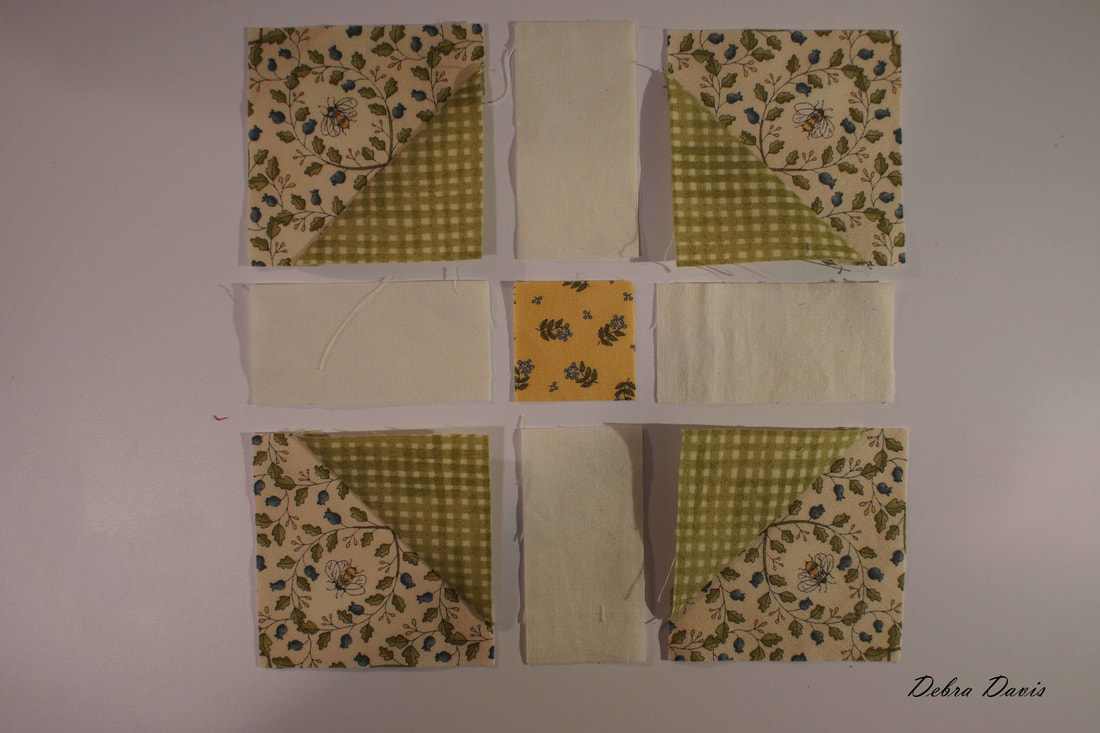 First I sew my rows together. 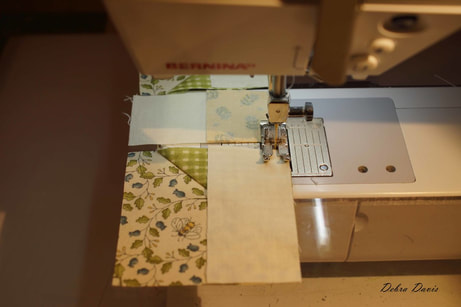 I pressed the top and bottom rows towards the corner units and the middle row towards the center. 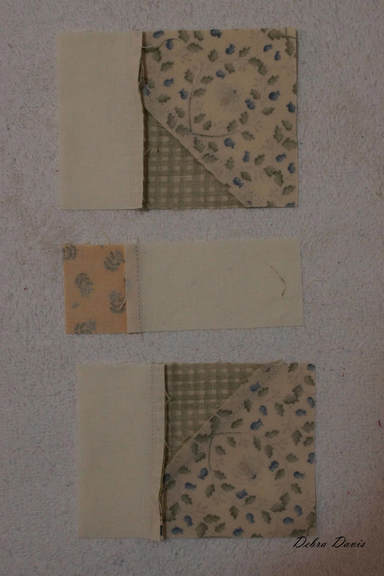 Then I joined the rows together, matching the seams, which I held with a pin. 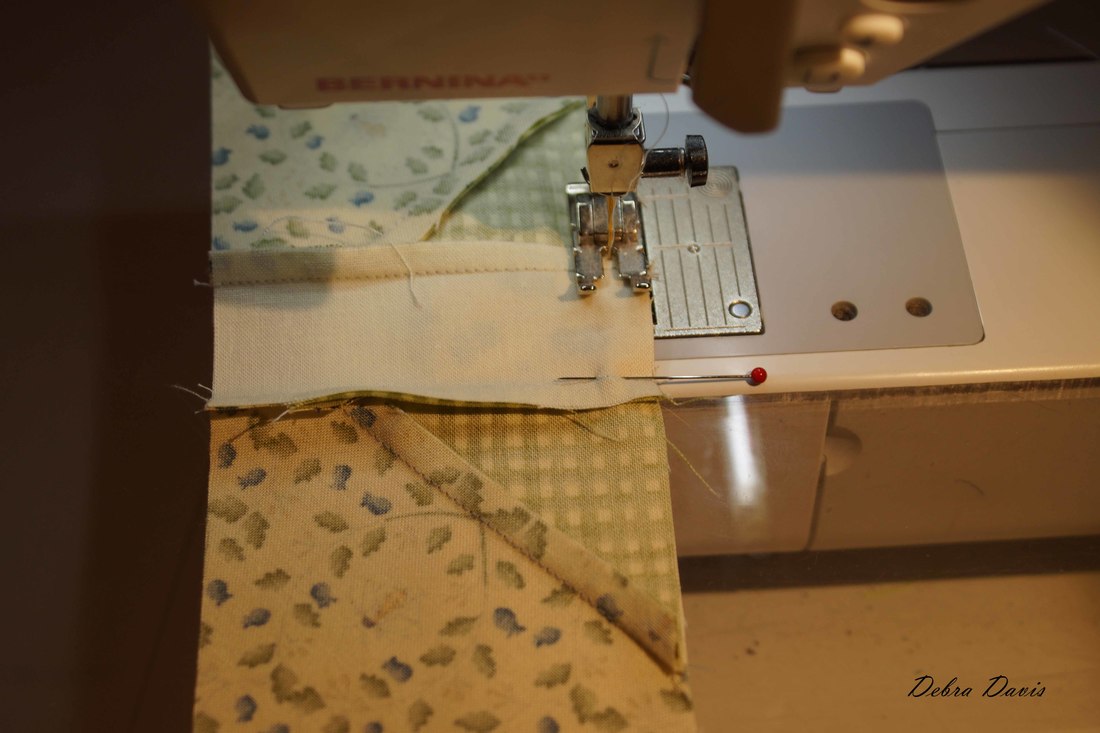 There it is, a sweet little block to add to my collection. Hopefully I can get caught up on some more of the blocks I missed over the summer next. 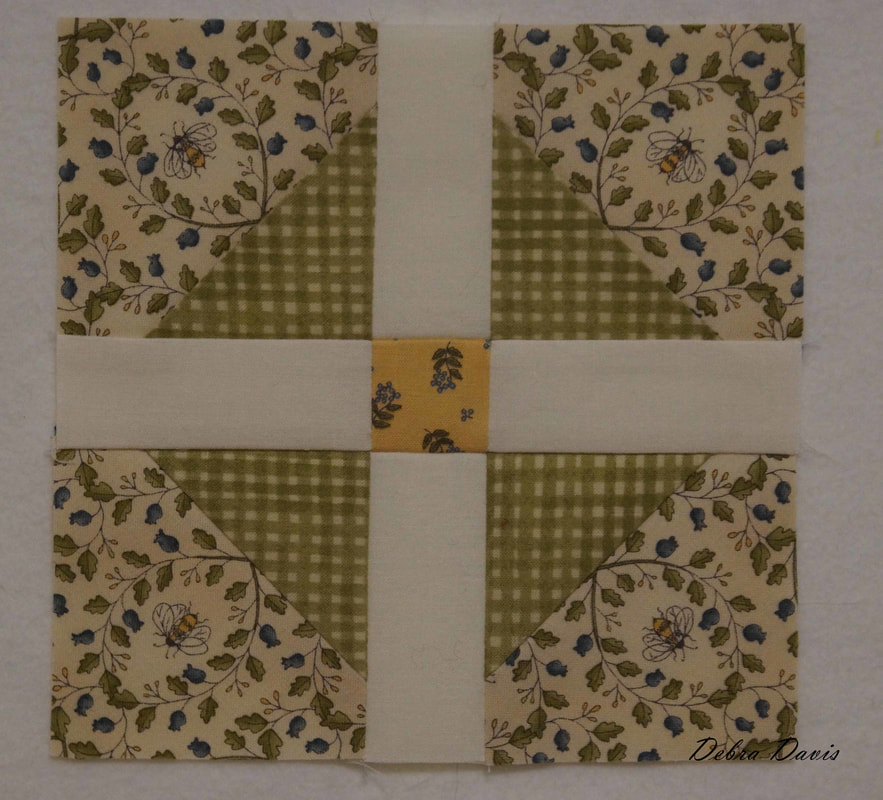 I would love to hear from you if you are sewing along!
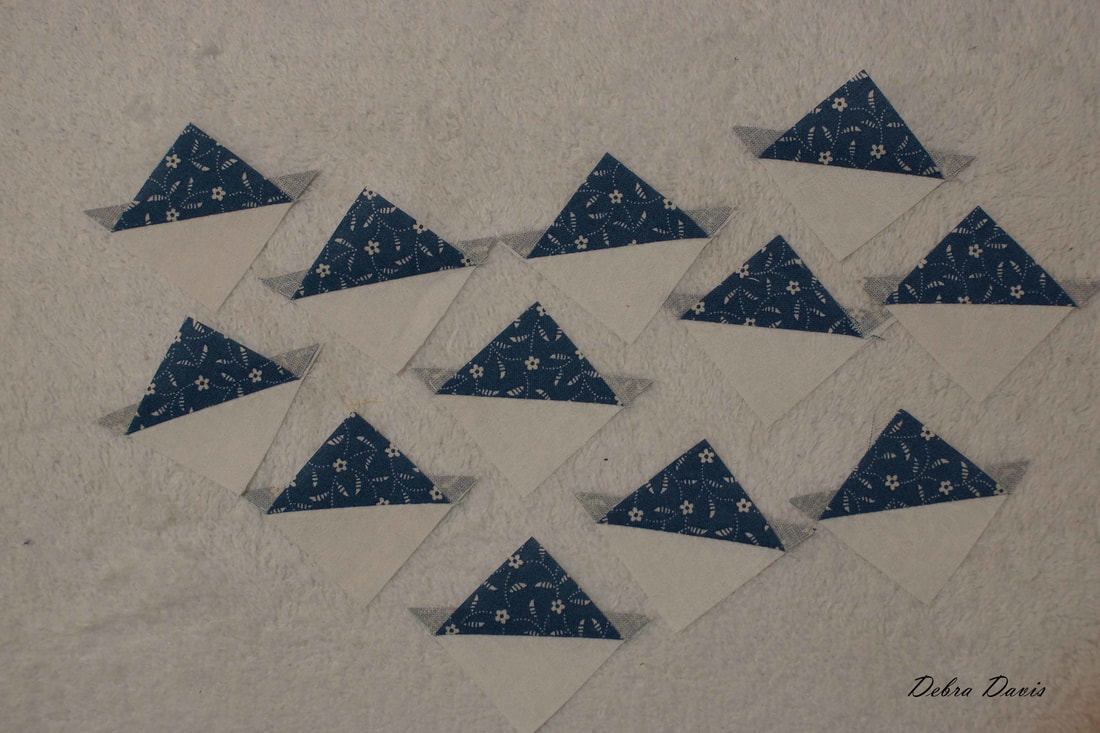
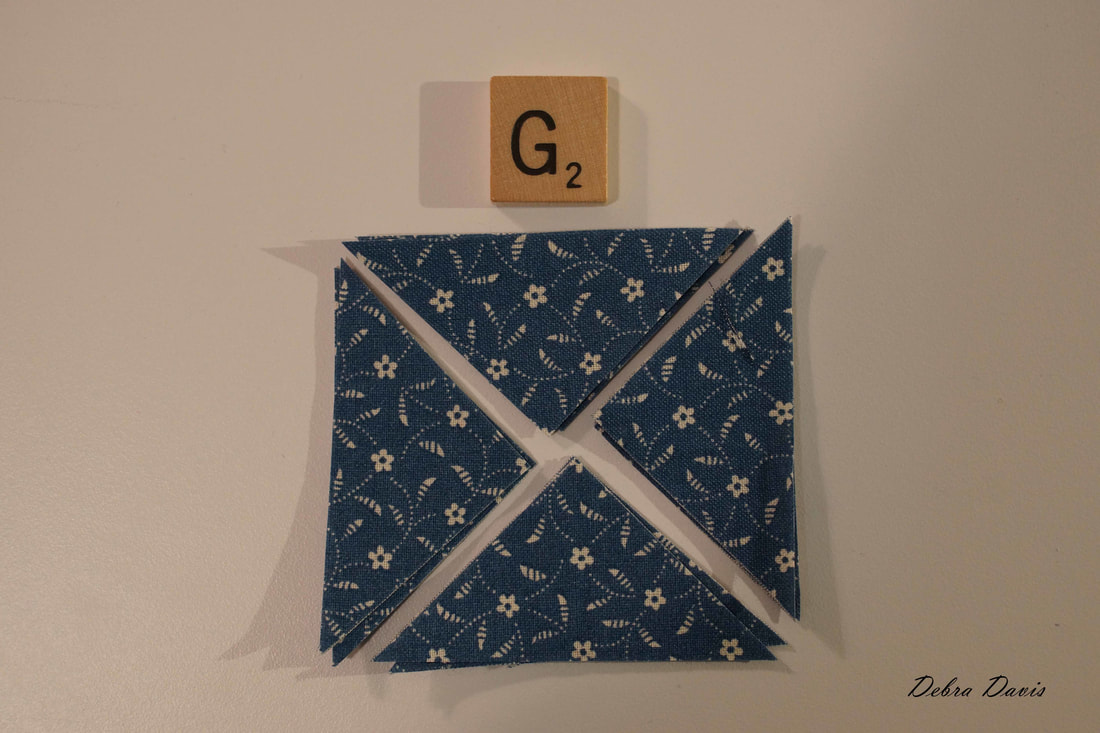
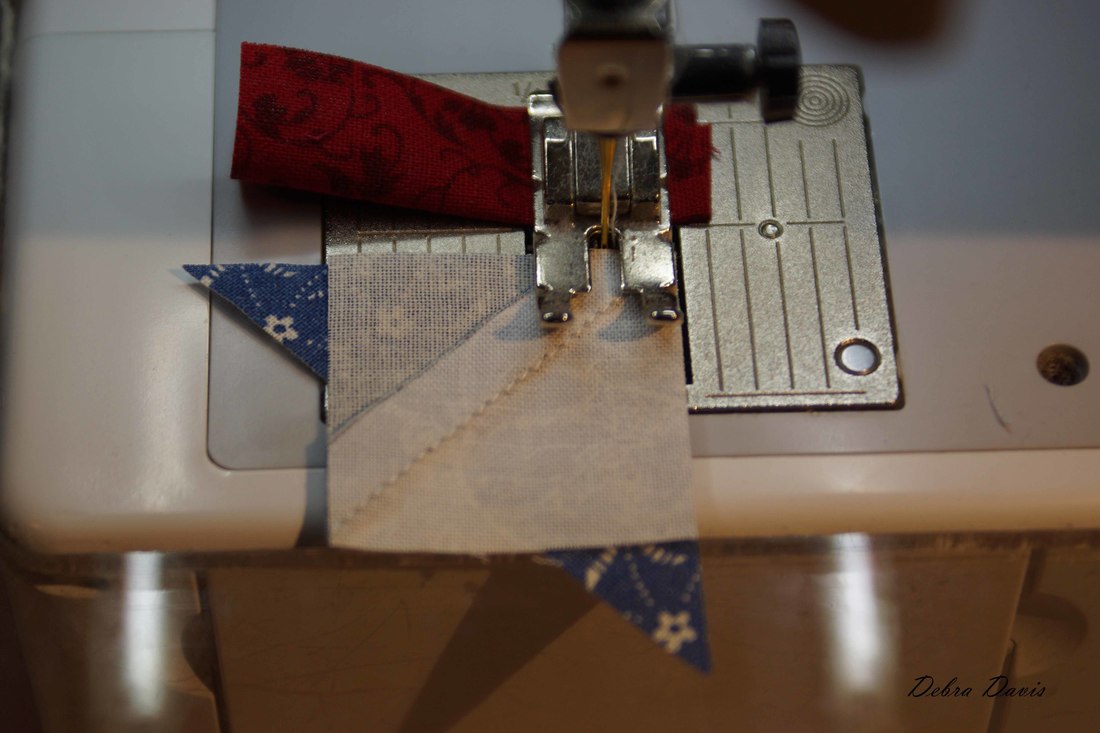
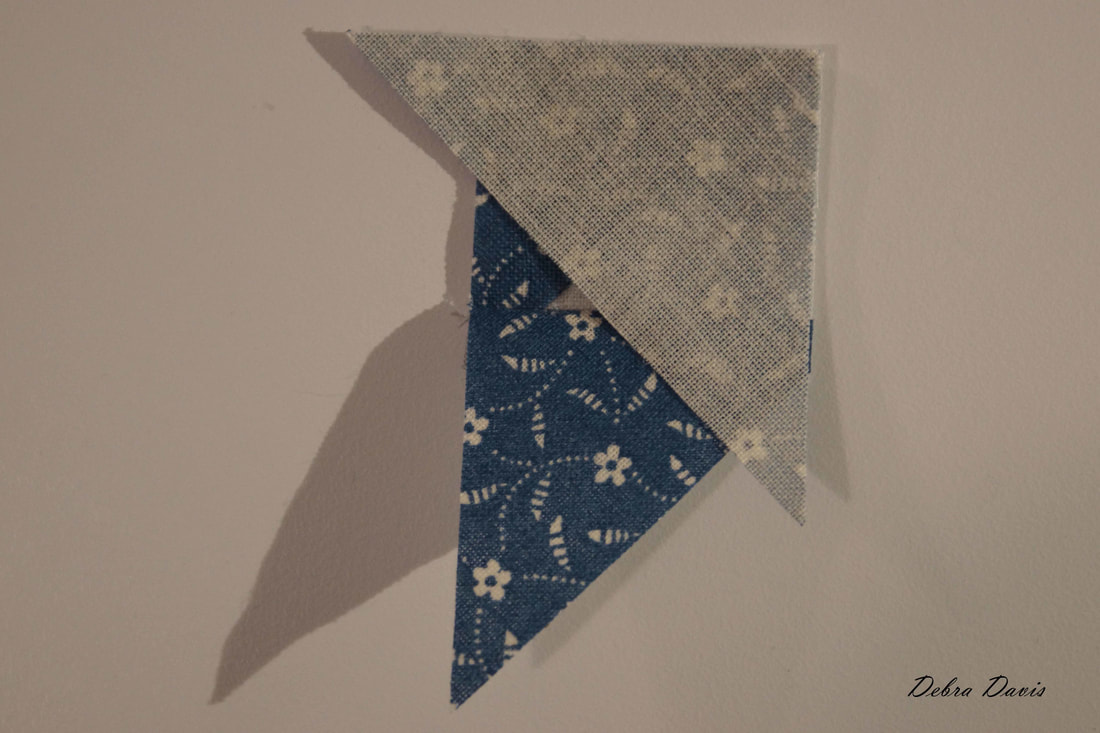
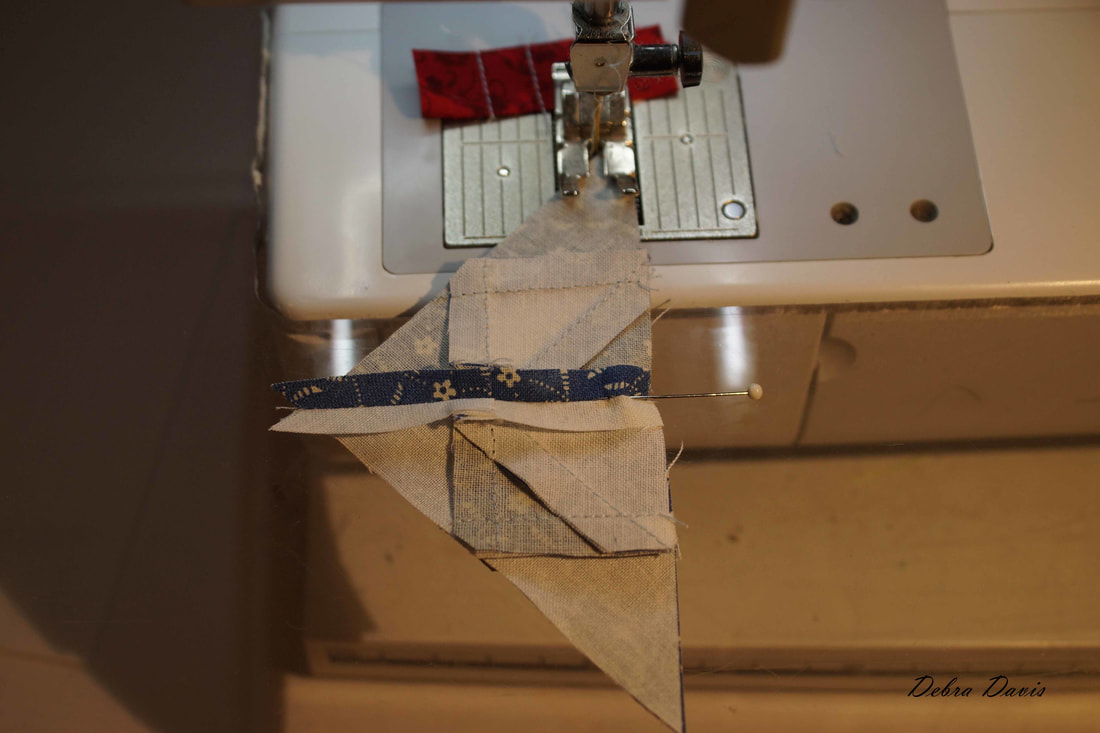
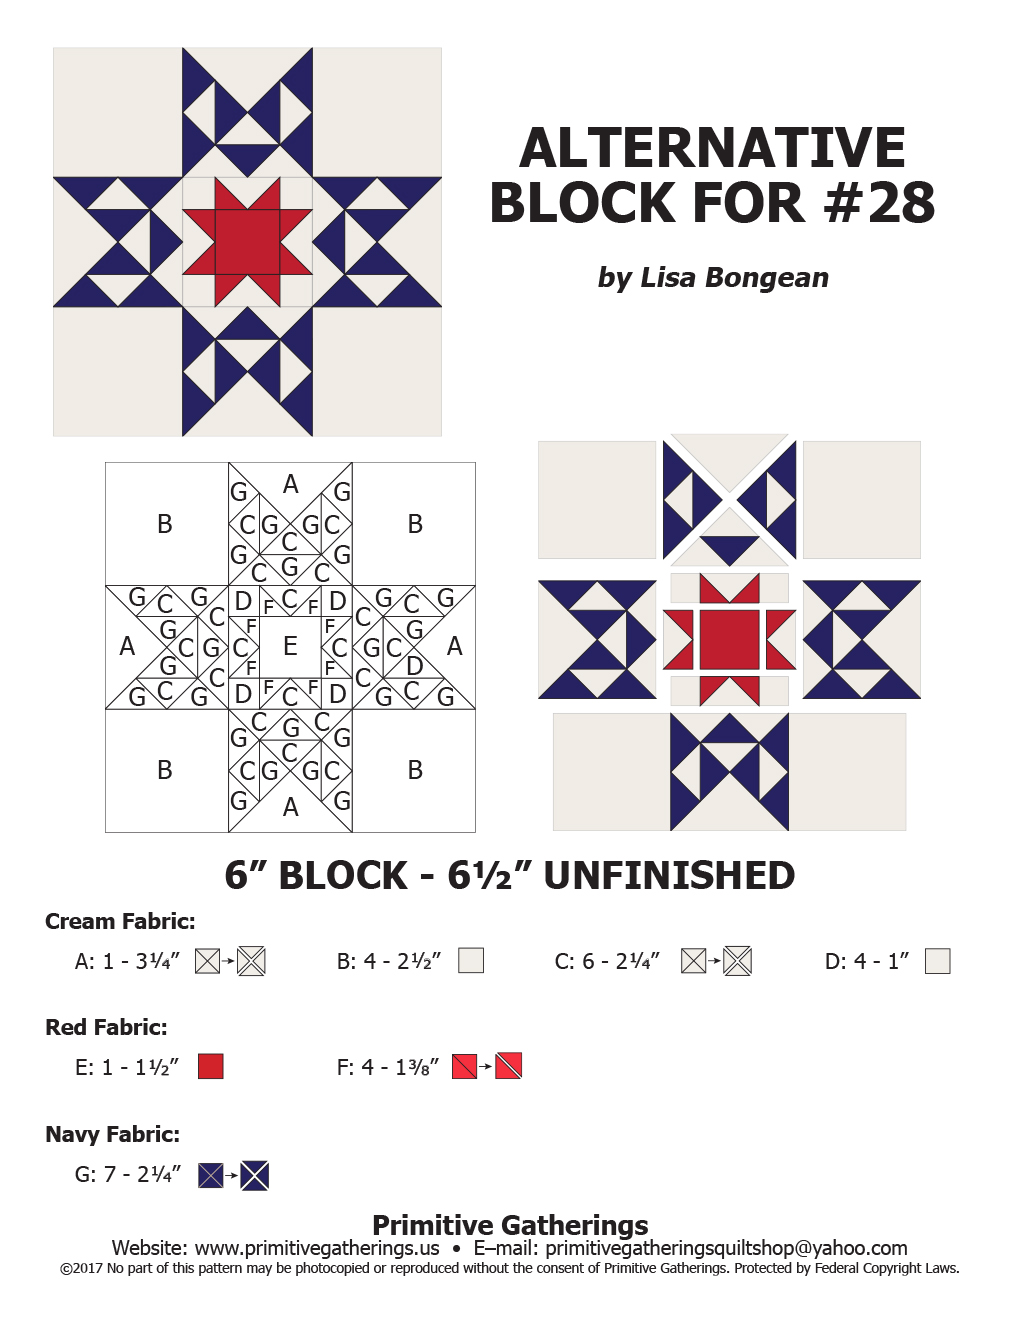
I wonder what this Wednesday will bring? PDF Version of Tutorial Happy Quilting! Debra When I asked you which block you would like to see me do next as I play catch-up, it was a unanimous "Alternate 28." HooBoy-when I took a look at that one I just set it aside for a moment. Looking it over, there are of course Lisa Bongean's trademark tiny triangles. But I also saw some ways of simplifying this block. So with that in mind, I sat down to tackle the block-and proudly announced to my math professor husband that I was doing some math. (He likes it when I talk nerdy to him.) The pattern you need for this block can be found here. This block really needs starch. I am using scraps from old projects which were prewashed so starching after I cut them was fine, If you do not prewash your fabric you will want to starch before cutting out your pieces or they will shrink when you apply the starch. The cutting directions for my method are as follows: A: Same as directions B: Same as directions C1: 2 1/8" x 2 1/8"-Cut 2 and make diagonal cuts to give four triangles as in Lisa's directions C2: 1 3/4" x 1 3/4"-Cut 6 C3: 2 1/2" x 2 1/2" - Cut 1 D: Same as directions E: Same as directions F: 1 3/4" x 1 3/4"-Cut 4 (DO NOT cut the squares into triangles) G1: 2 1/8" x 2 1/8" - Cut 4 and make diagonal cuts to give four triangles as in Lisa's directions G2: 1 3/4" x 1 3/4" -Cut 6 (DO NOT cut these squares into triangles) 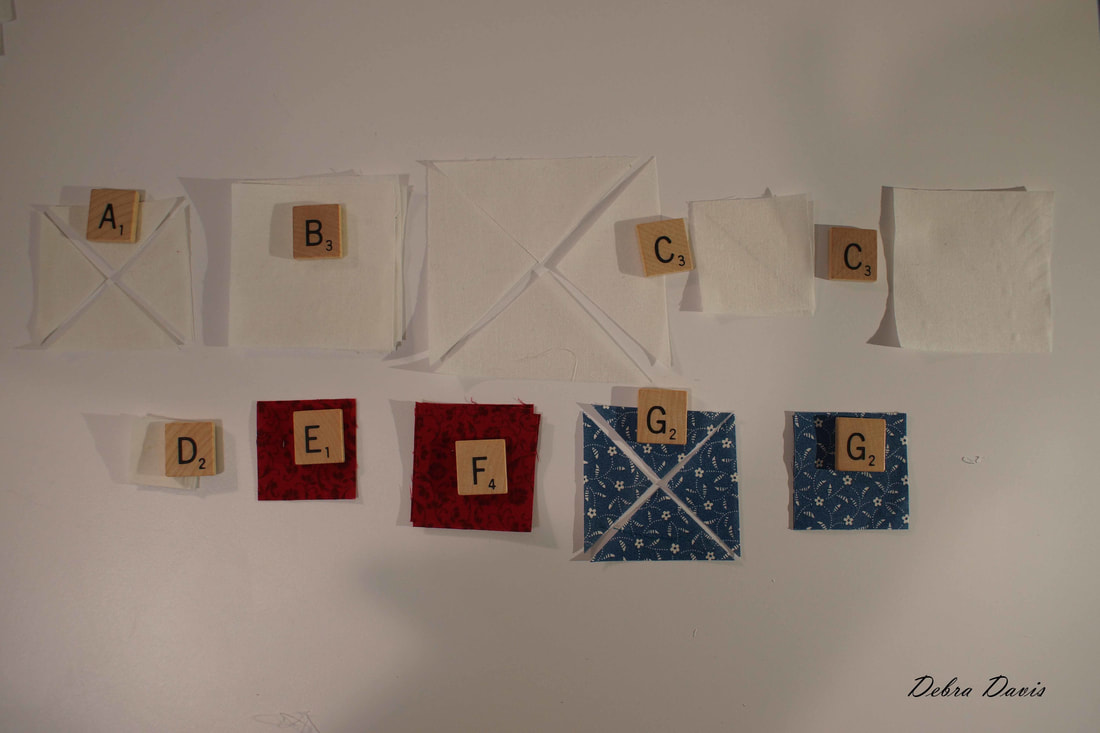 We will start with the C2 and G2 1 3/4" squares to make Half-square triangles. (Since I use pieces from an old scrabble game to label my parts just ignore the numbers on them.) I strongly recommend that you practice with some scraps on the section we are about to work on. 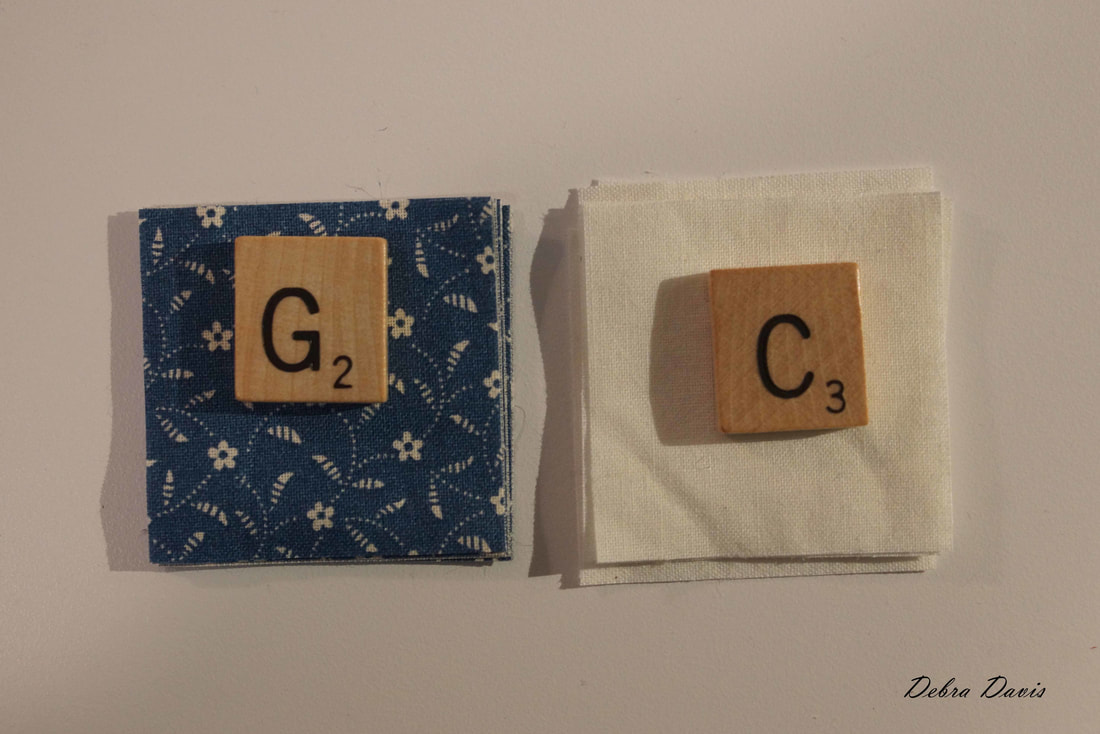 Draw a diagonal line on the back of the C2 squares. We are going to be working with some pretty small pieces so I have set my stitch length shorter than usual at 2.0
Sew 1/4 inch from each side of the drawn line.
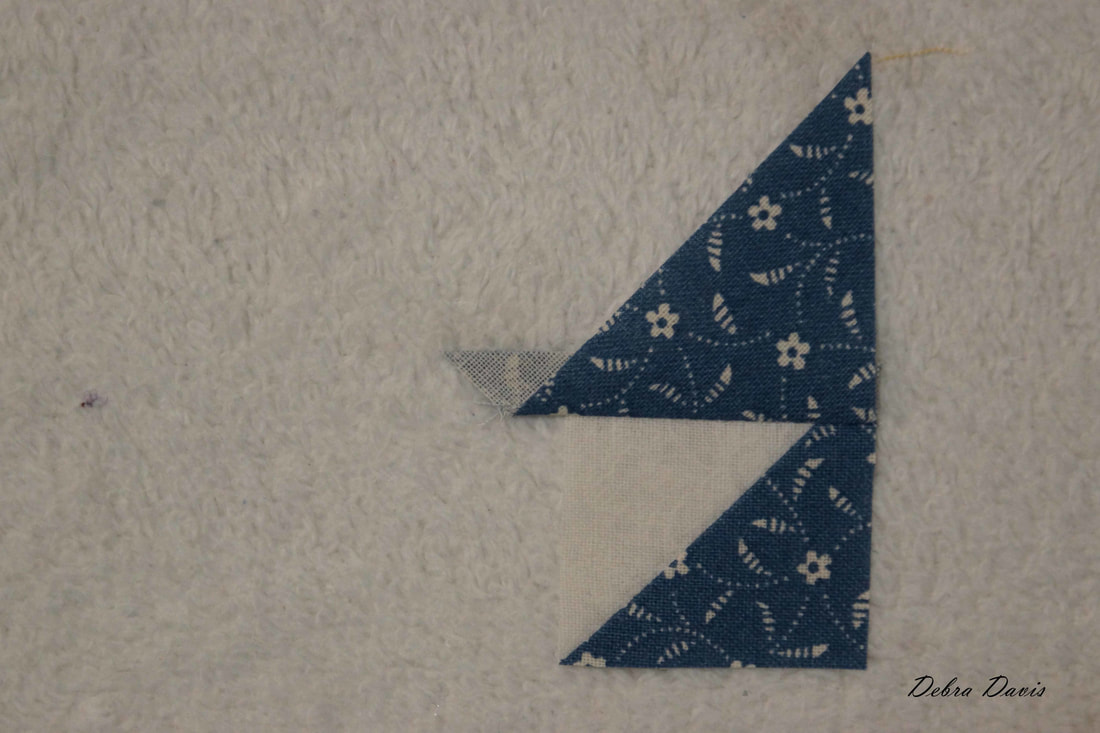
Cut on the line and press towards the dark side. I used more starch on these little guys as I pressed them. We should have 12 tiny Half-square triangles now.
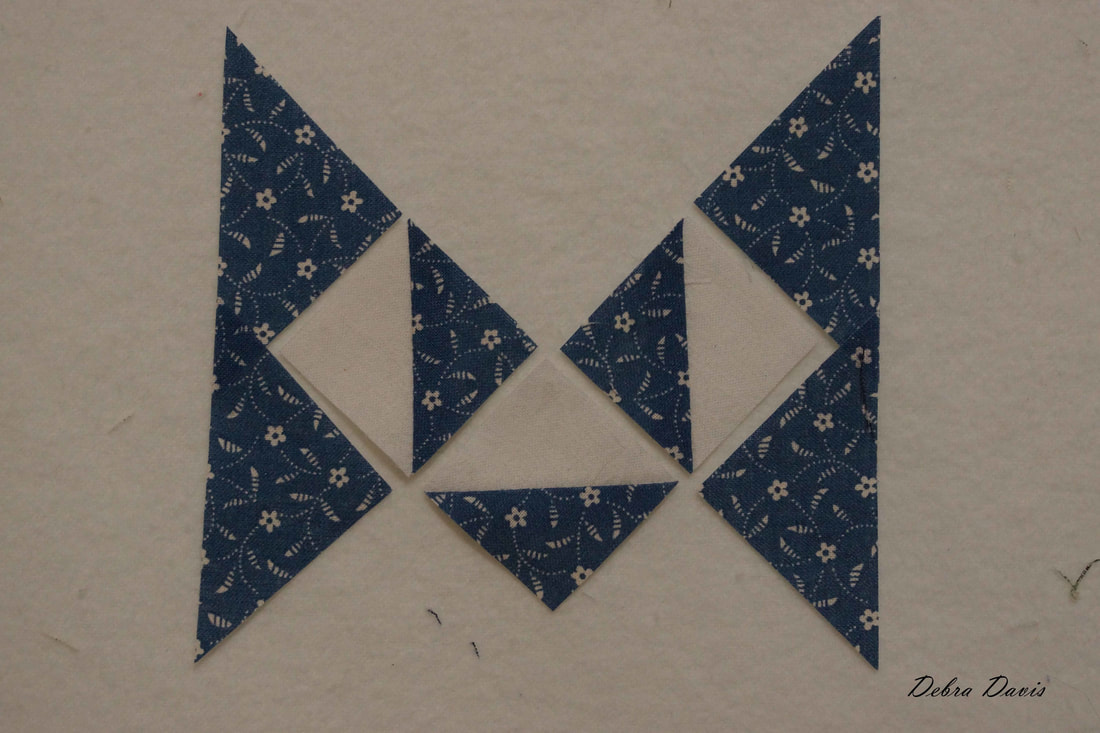
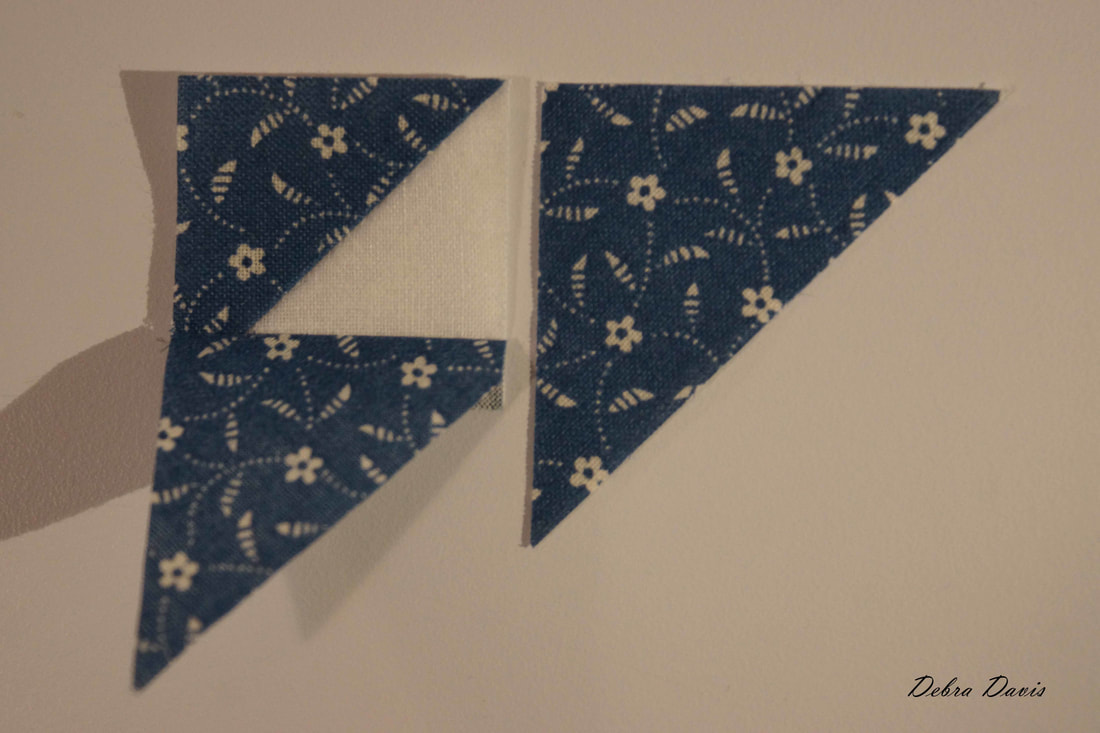
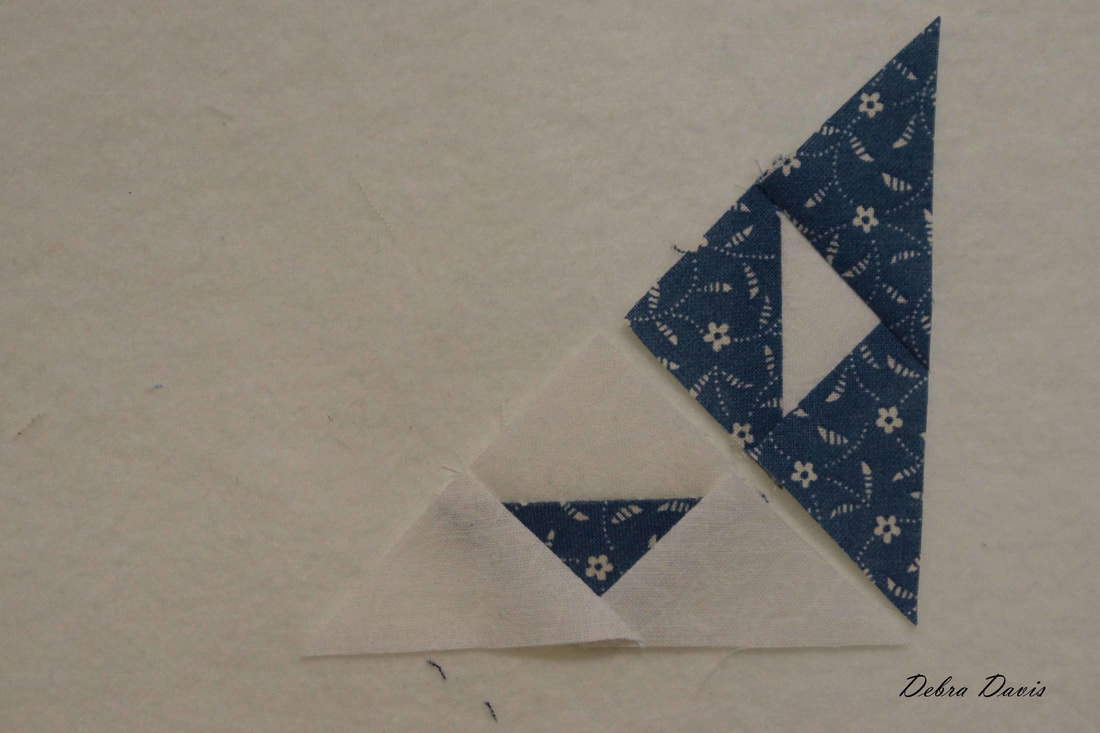
Trim these units to 1 1/4 inches. 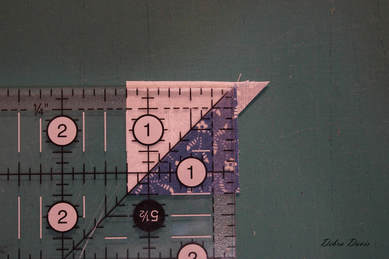 We are going to add the G1 triangles to 8 of the Half-square triangles we just made.
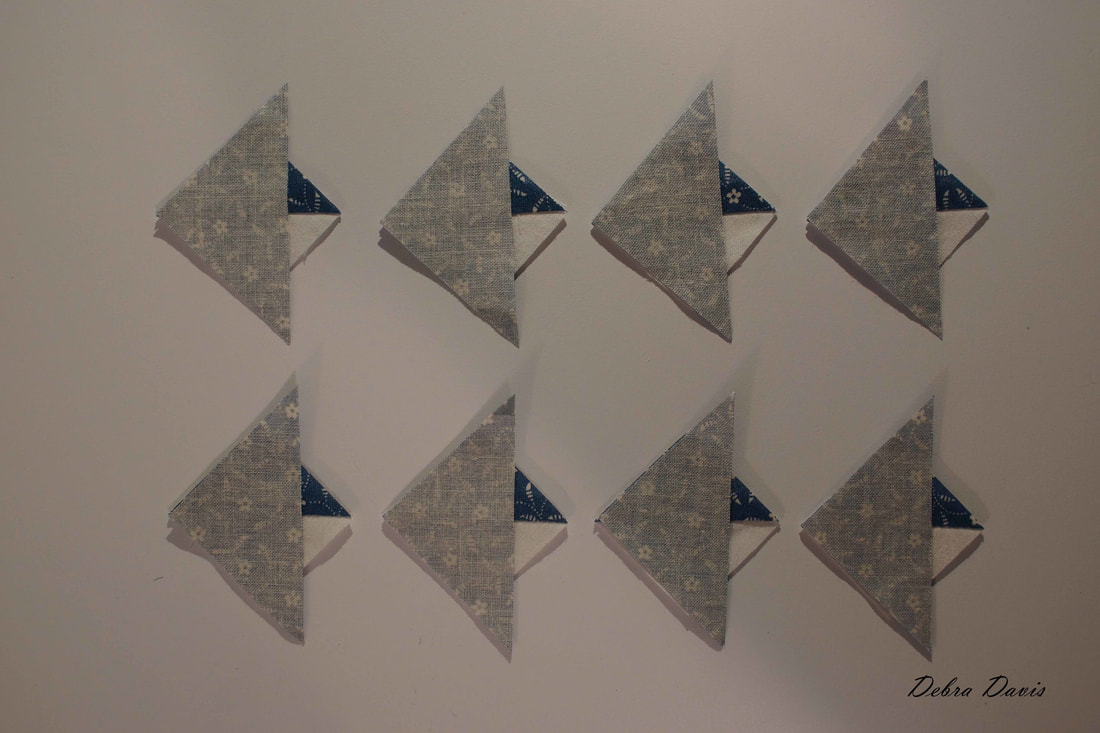
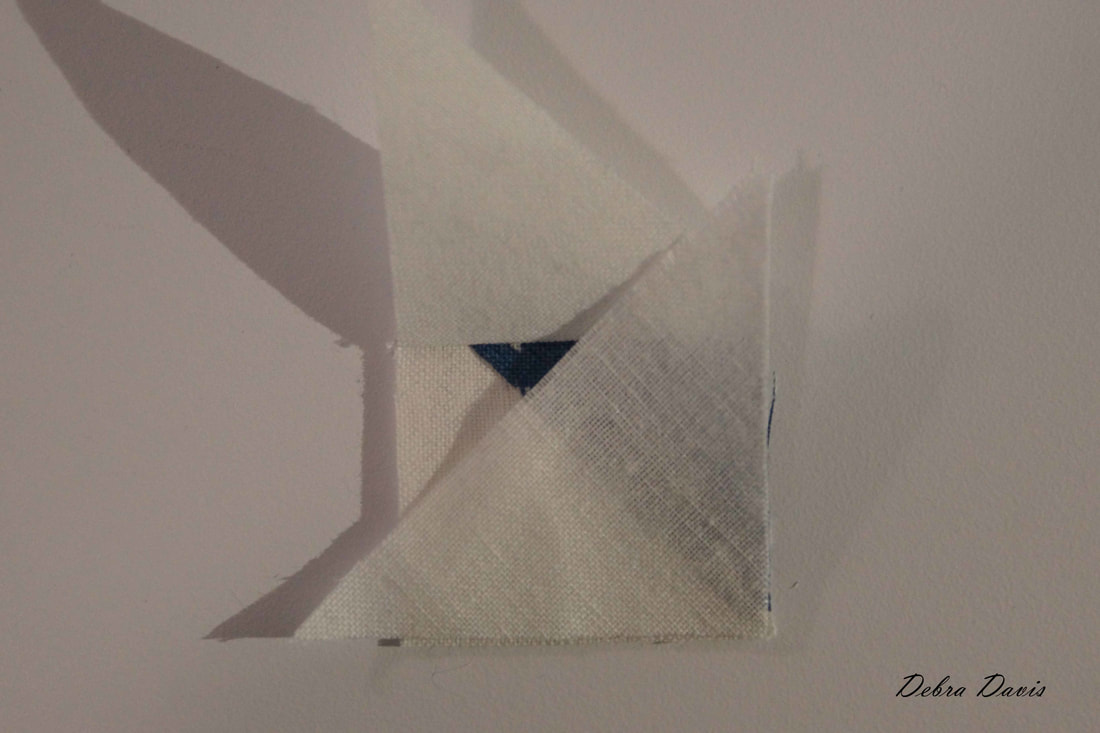
Line up one triangle with the Half-square triangle as shown. 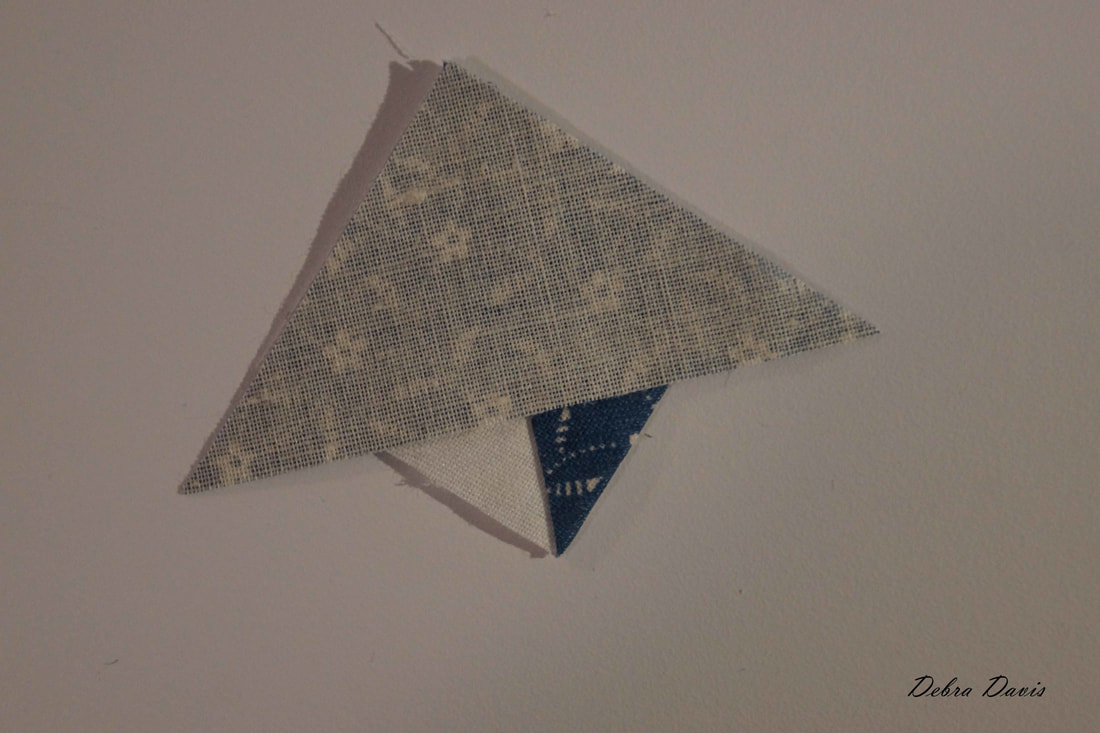 I laid out all eight units making sure everything was facing the same direction before sewing. I find it better to start on the corner rather than the point of the triangles so carefully flipped these over to sew.
I pressed towards the triangle and yes, starched again. Trust me it really helps. Trim off the little extra bit before proceeding.
Time to add a triangle to the other side of our unit. I like to lay them out first and then just flip the triangle into place.
Sew these just as before, starting on the corner. 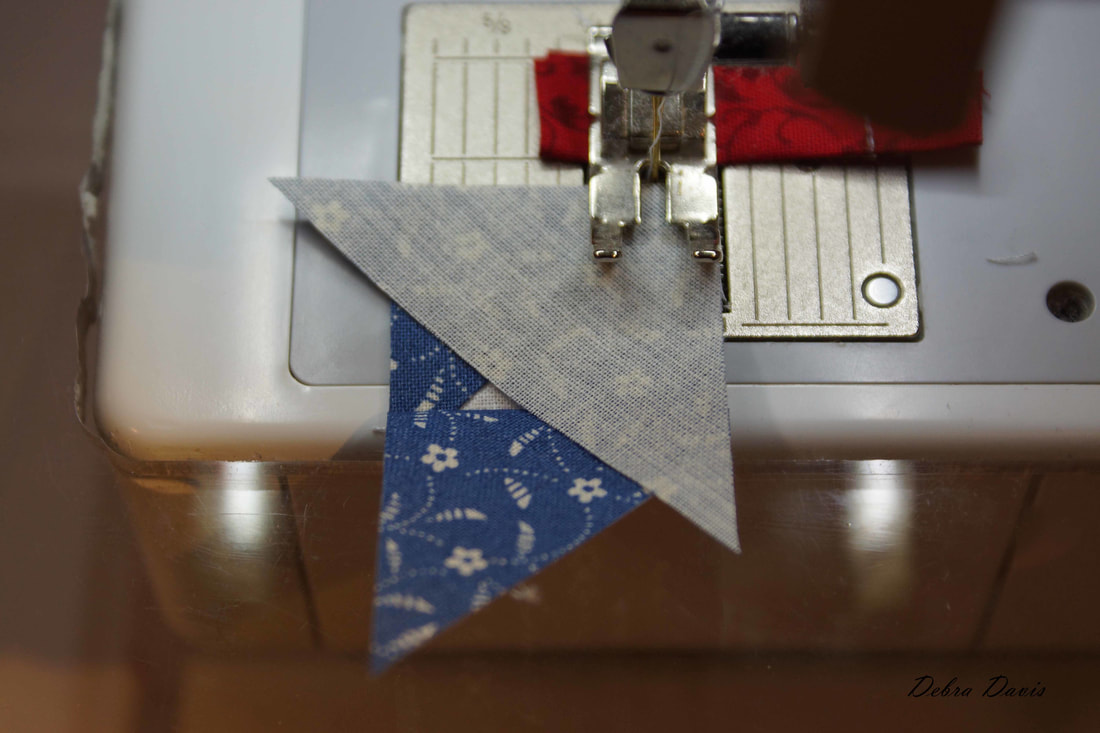 Press open and trim off the little extra bit. 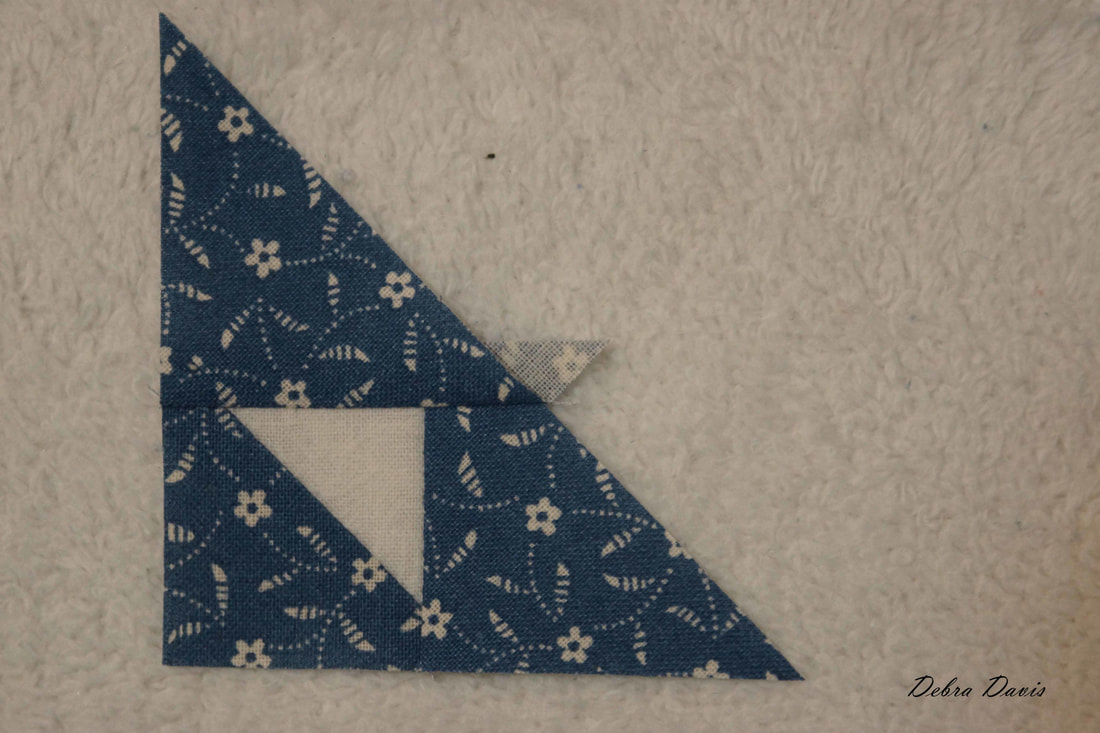 Now we need to do the same thing with the four remaining Half-square triangles, this time using the C1 triangles. 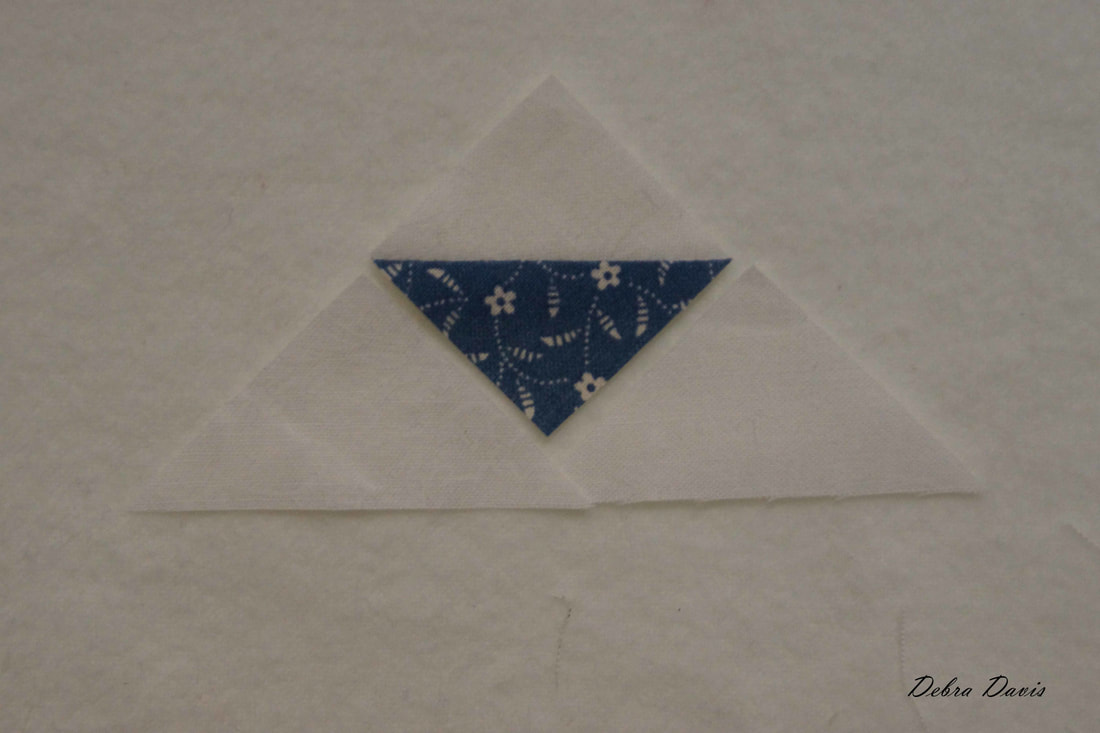 First add the triangle to one side.
Press (and starch) and trim. 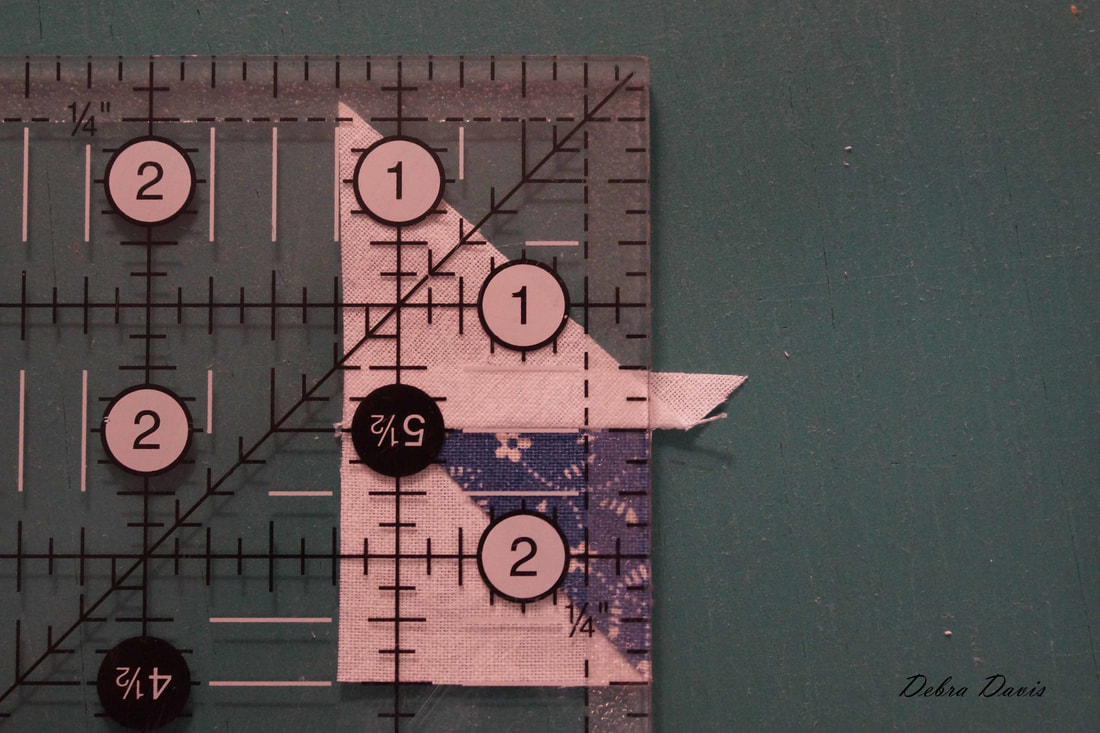 Then add the second triangle to the other side-flipping over when you sew to avoid starting on the little triangle tip.
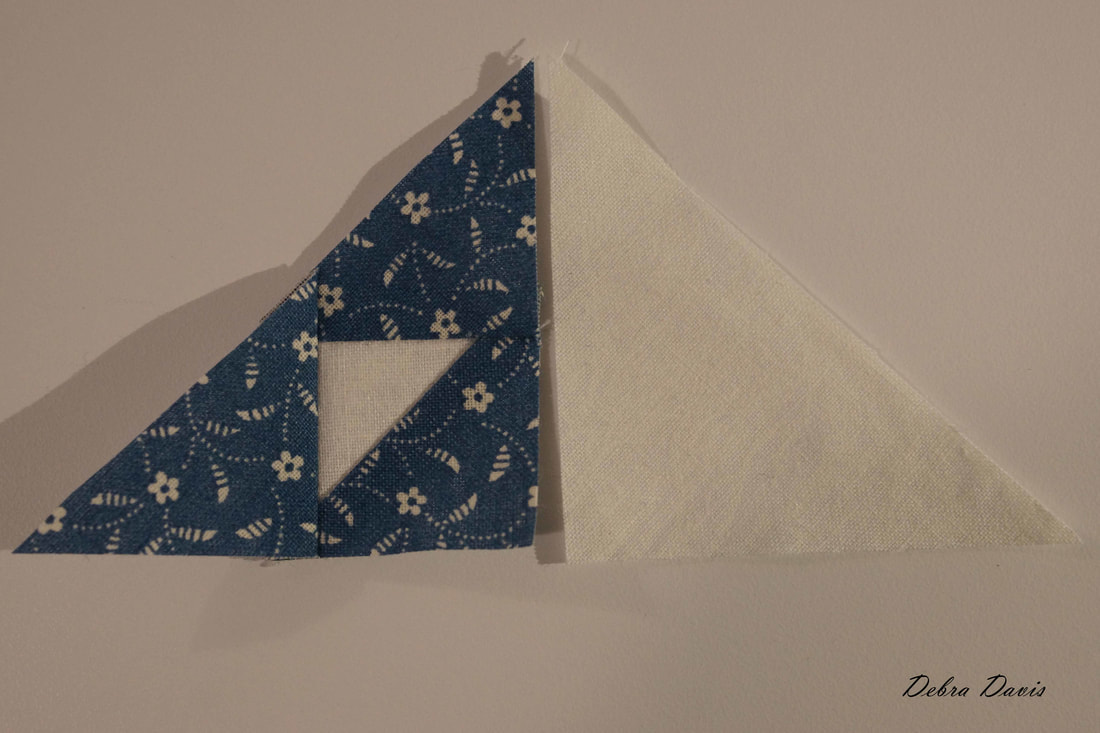
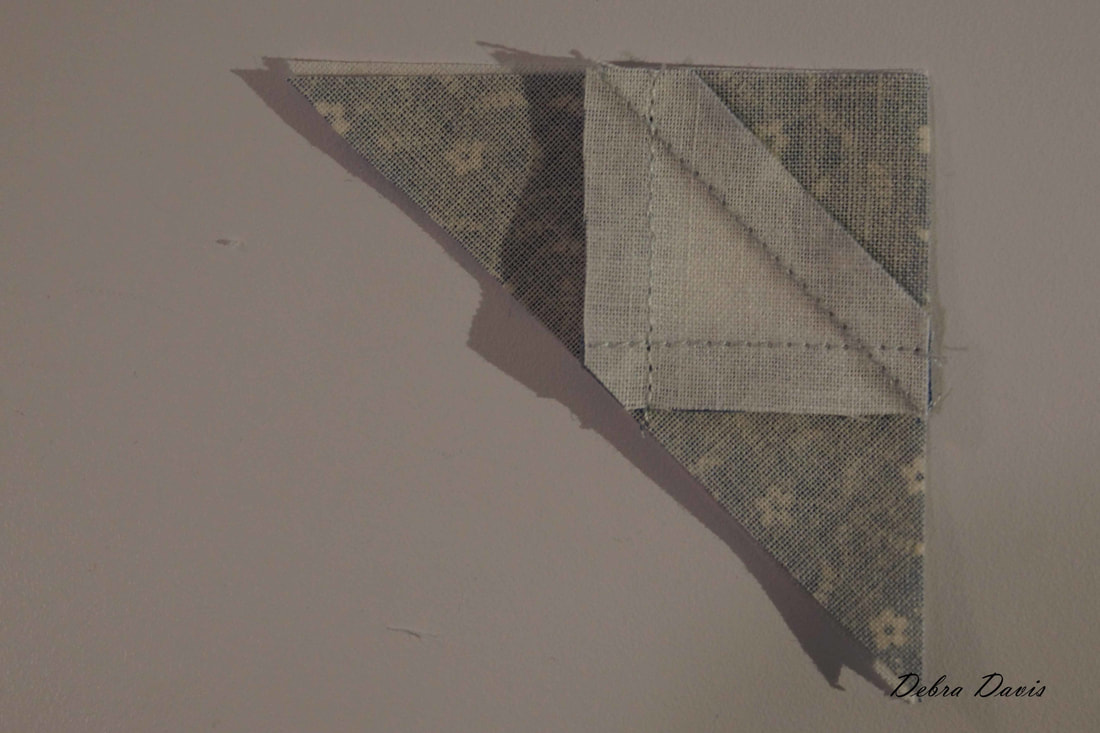
Starch and trim this unit. 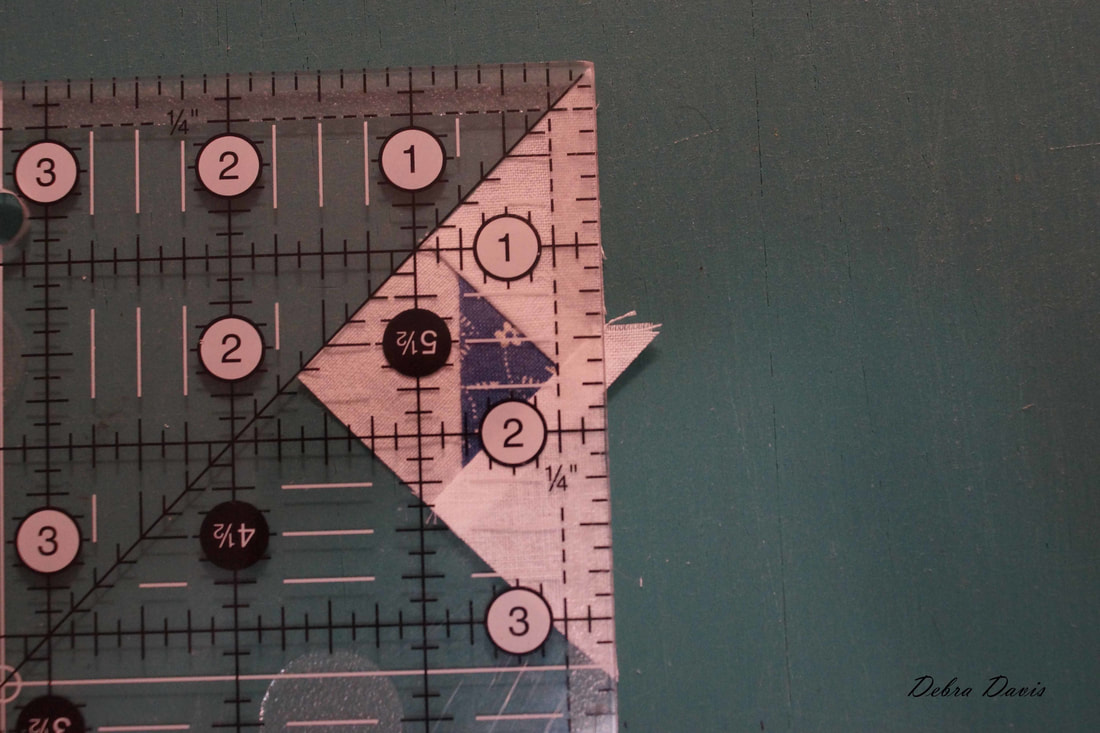 With these units finished it is time to put them all together, adding in the C1 triangles. 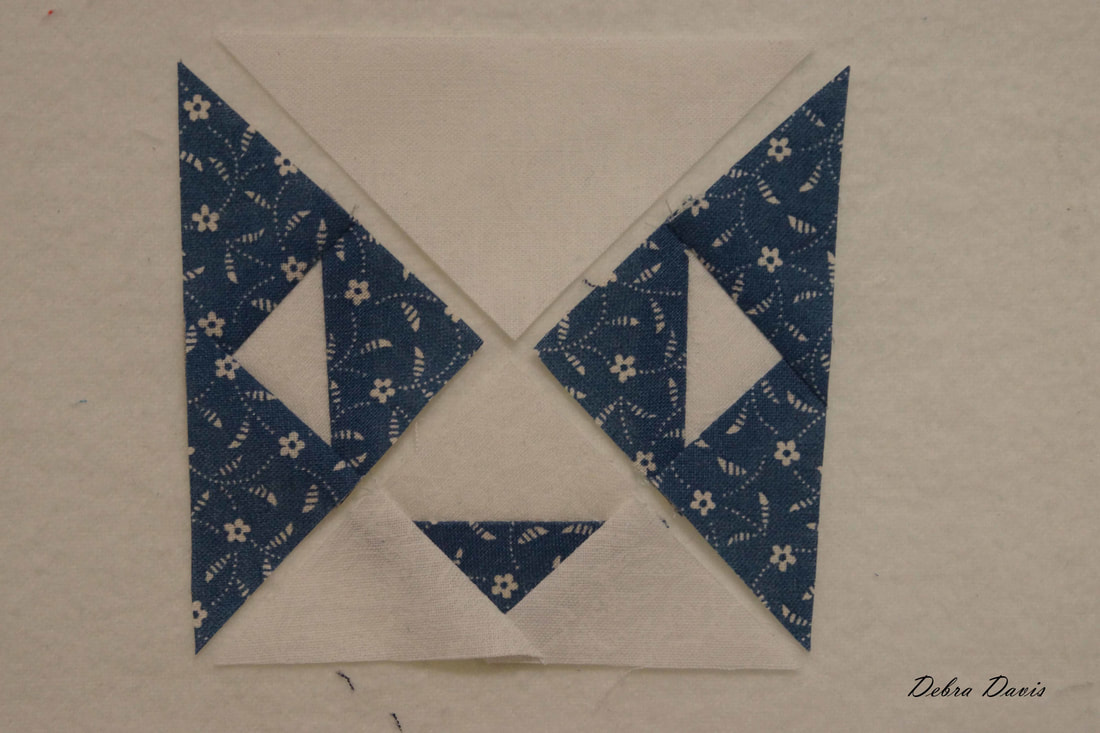 We will sew these together in two parts. First join these two units as shown. (Oh, a little note: you can lay the C1 triangle on top of your units to make sure they are all the same size.)
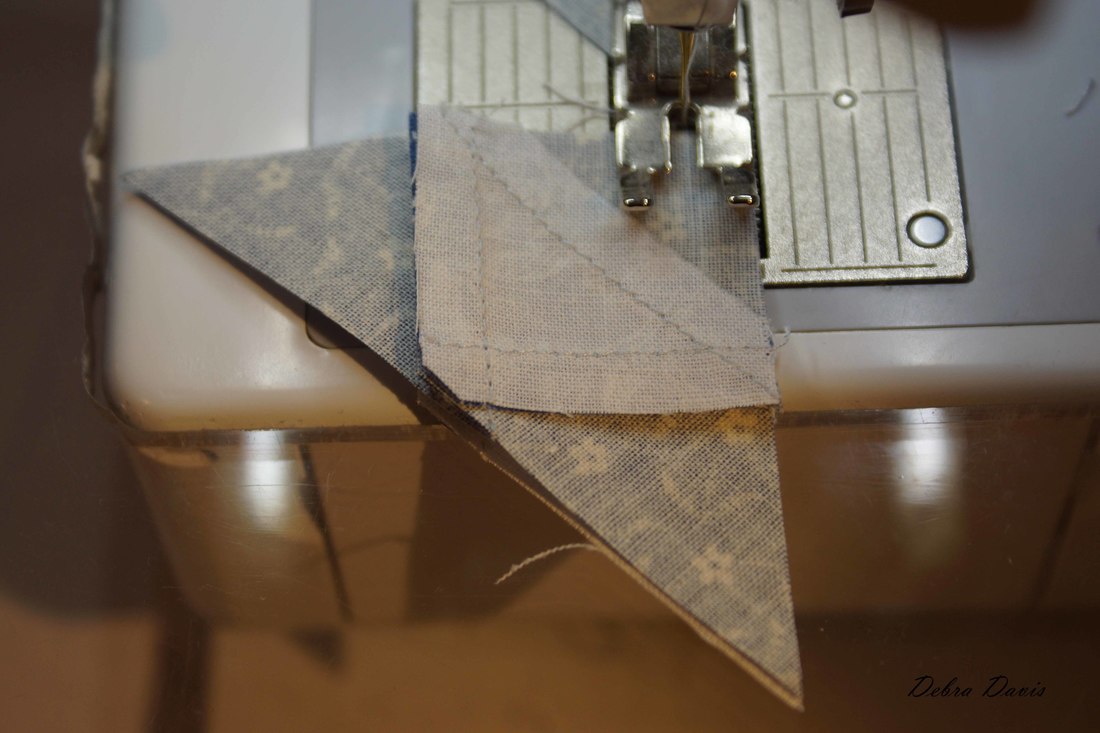
Begin sewing on the corner. It helps to go slow when sewing triangles, they have a tendency to want to stretch and the tips want to wiggle out of place. 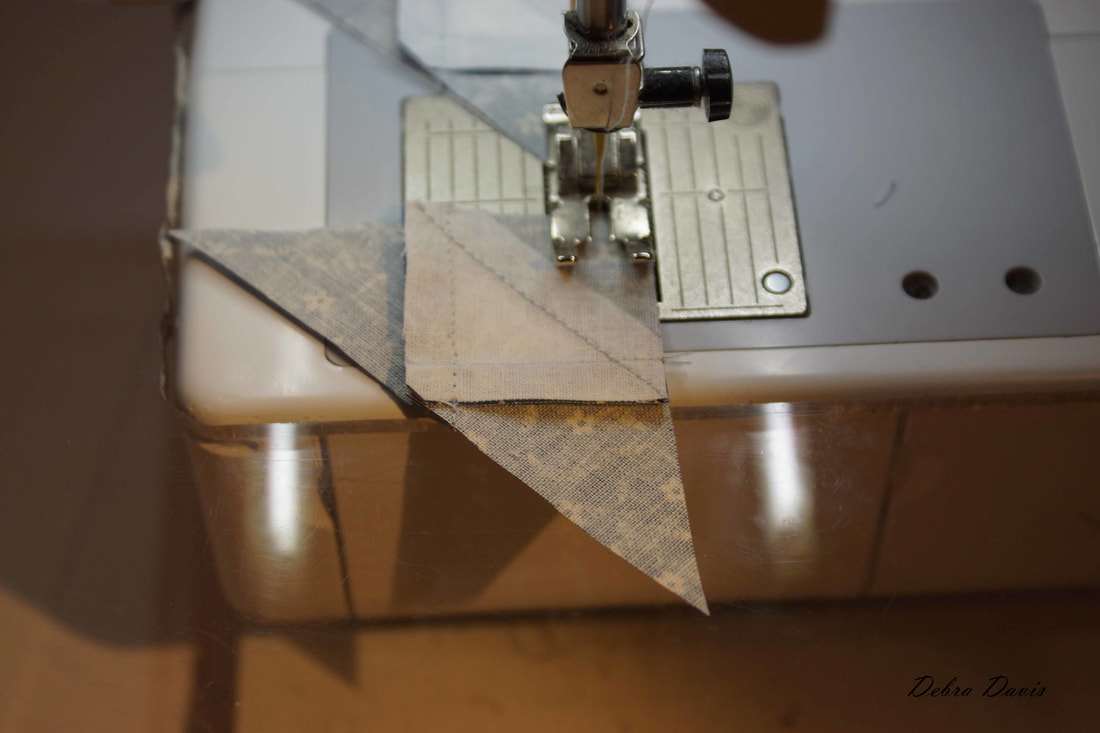 I pressed towards the light side this time to reduce bulk. 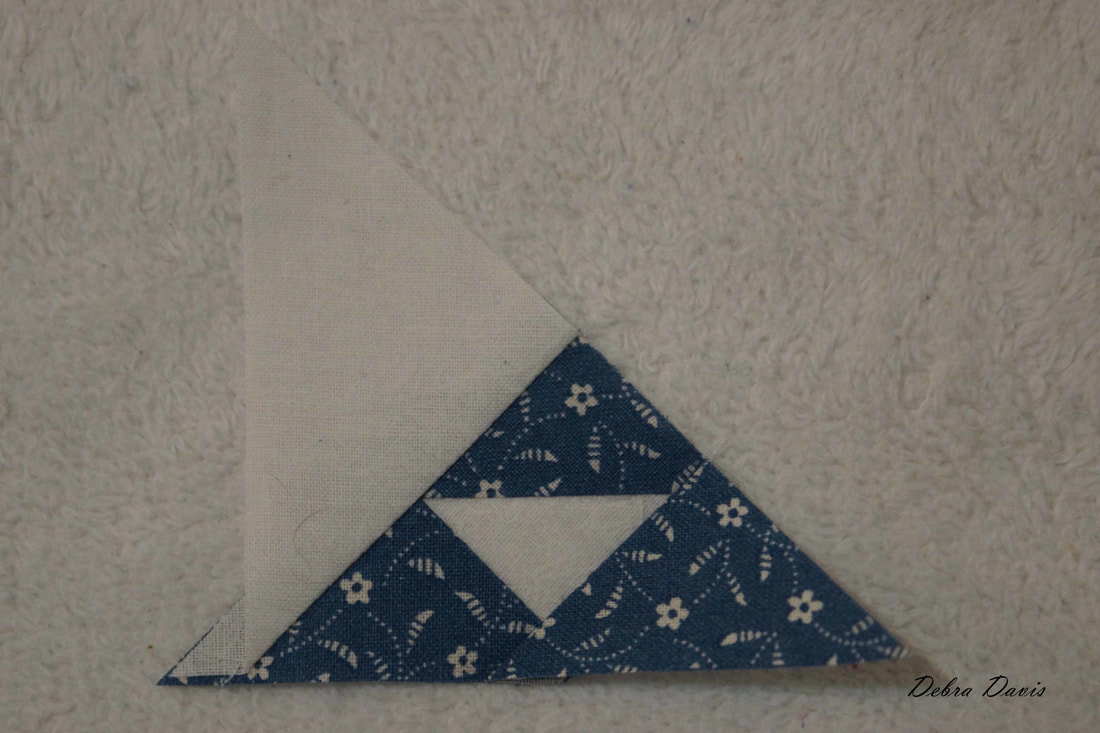 Now join the other two units together in the same way.
I pressed the seams open on these. 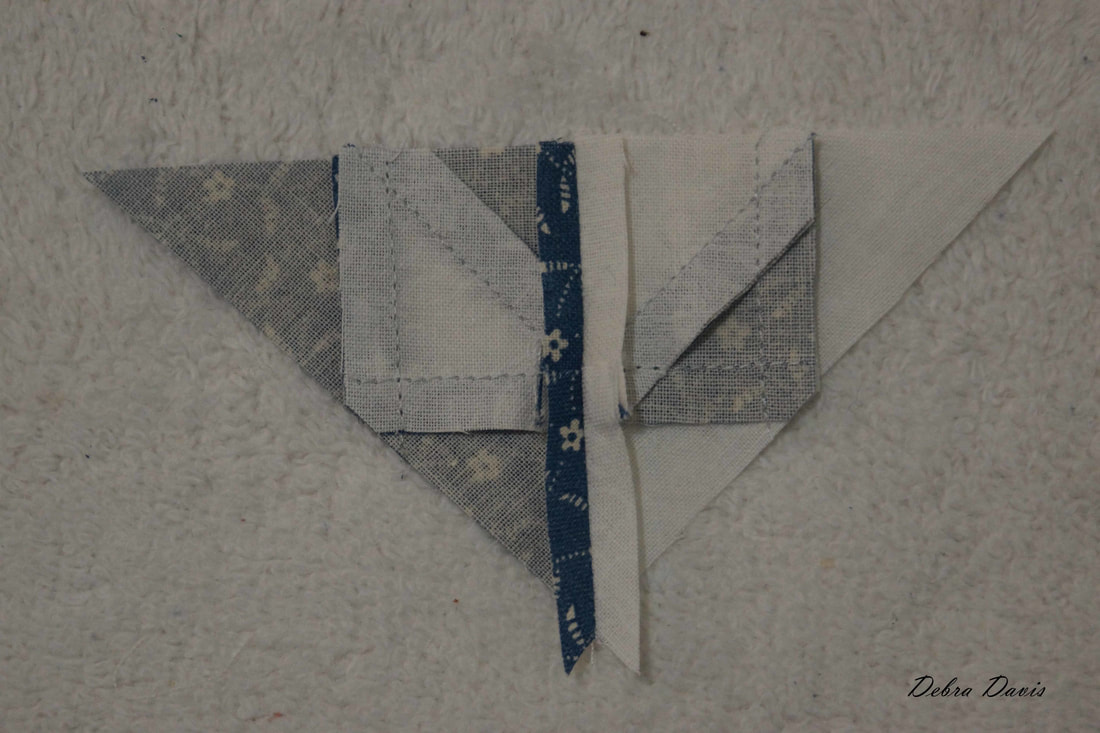 The final step is to join these two units together, matching the middle seam. I did go ahead and pin the seam before sewing.
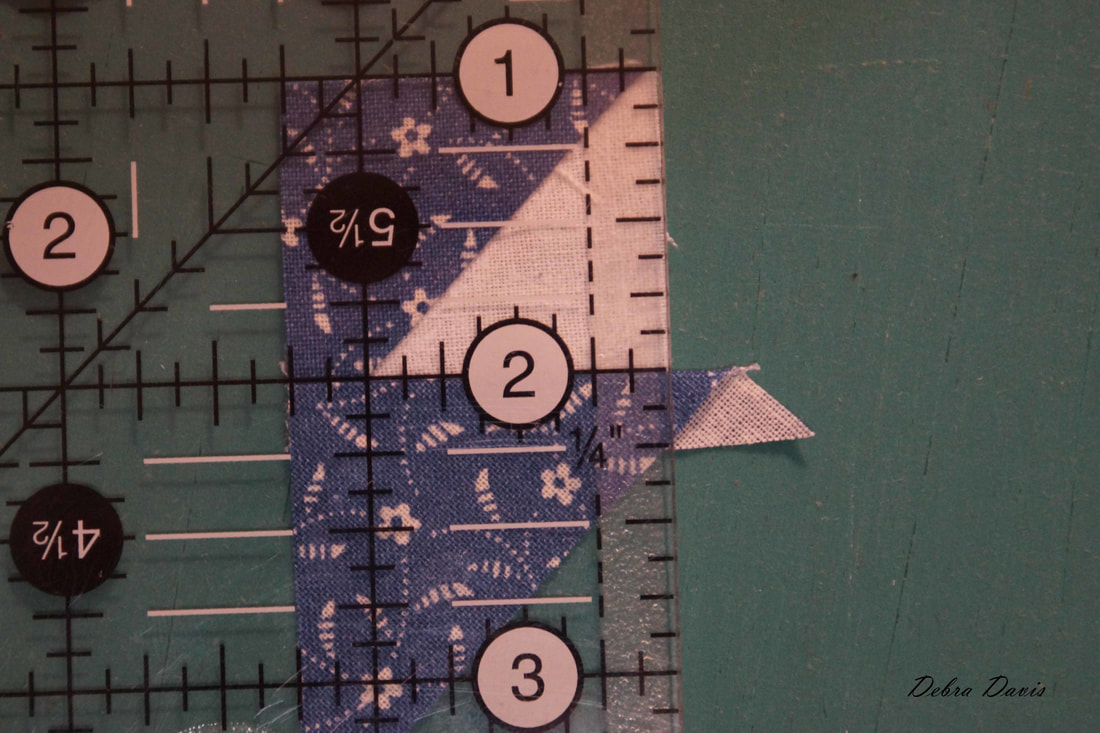
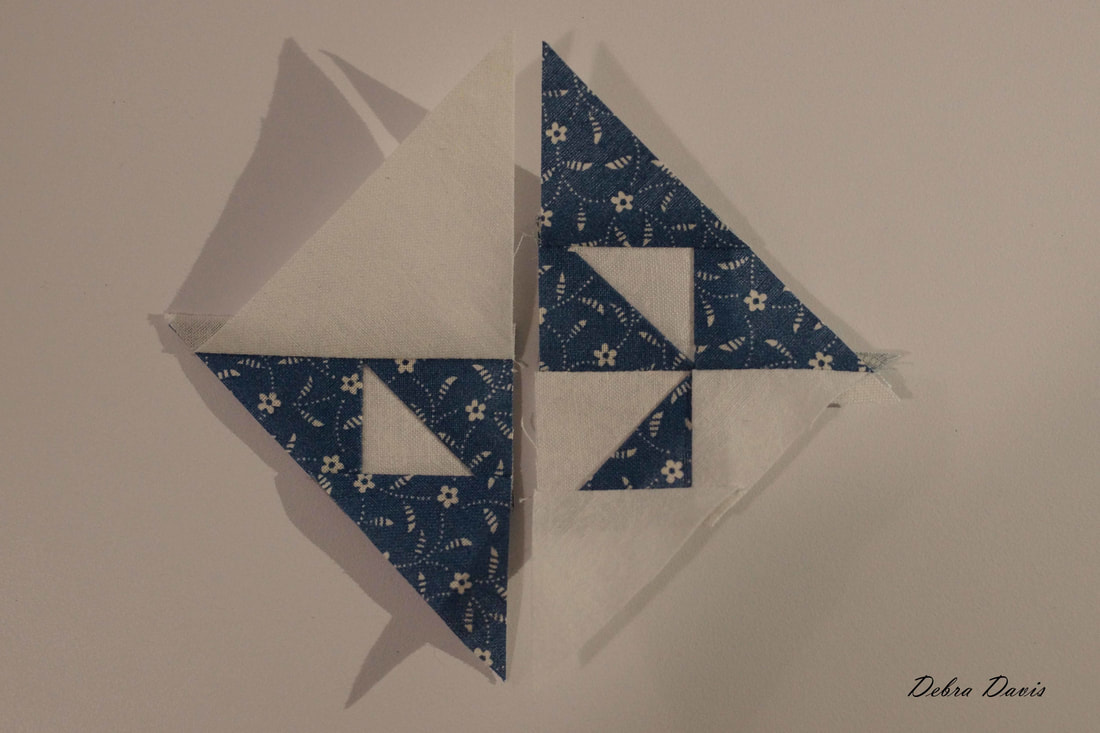
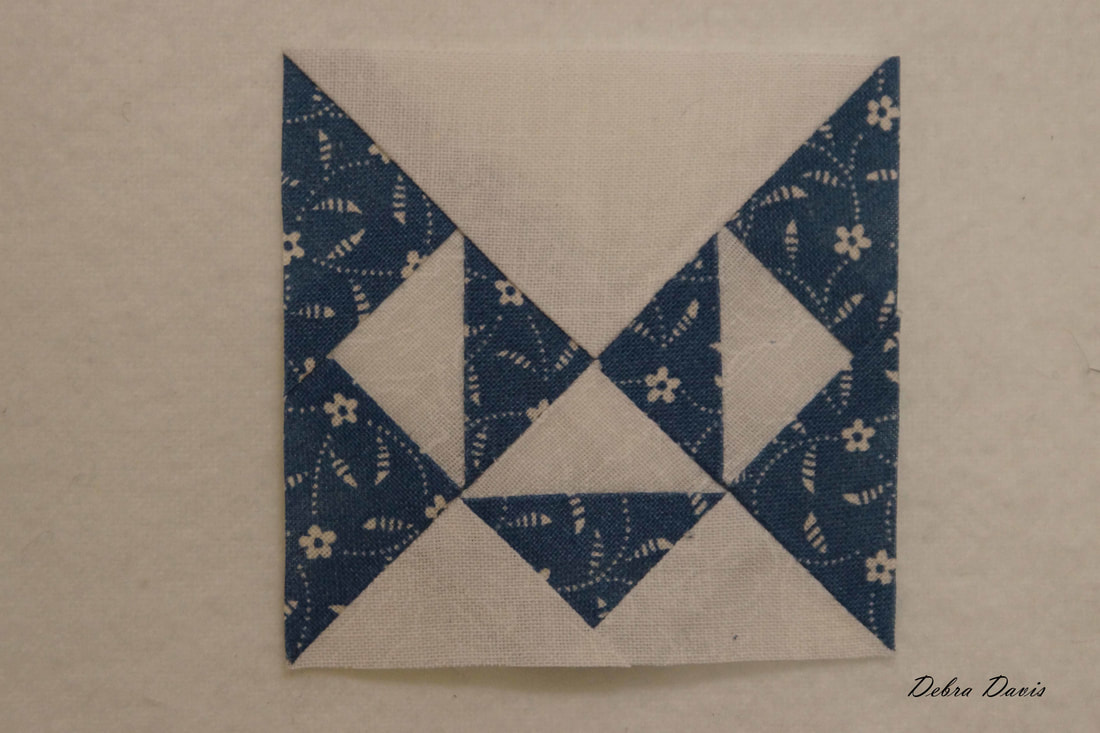
I pressed this seam open as well. The finished size should be 2 1/2 inches. To my dismay I was a little off on most of my units and ended up trimming them to size, but after working on just this one section for several hours trying to achieve perfection, I decided if I lost a few points in the final outcome I was going to simply celebrate that the block was done. If you find you need to trim, be sure that the diagonal line on your ruler lines up with those diagonal seams. 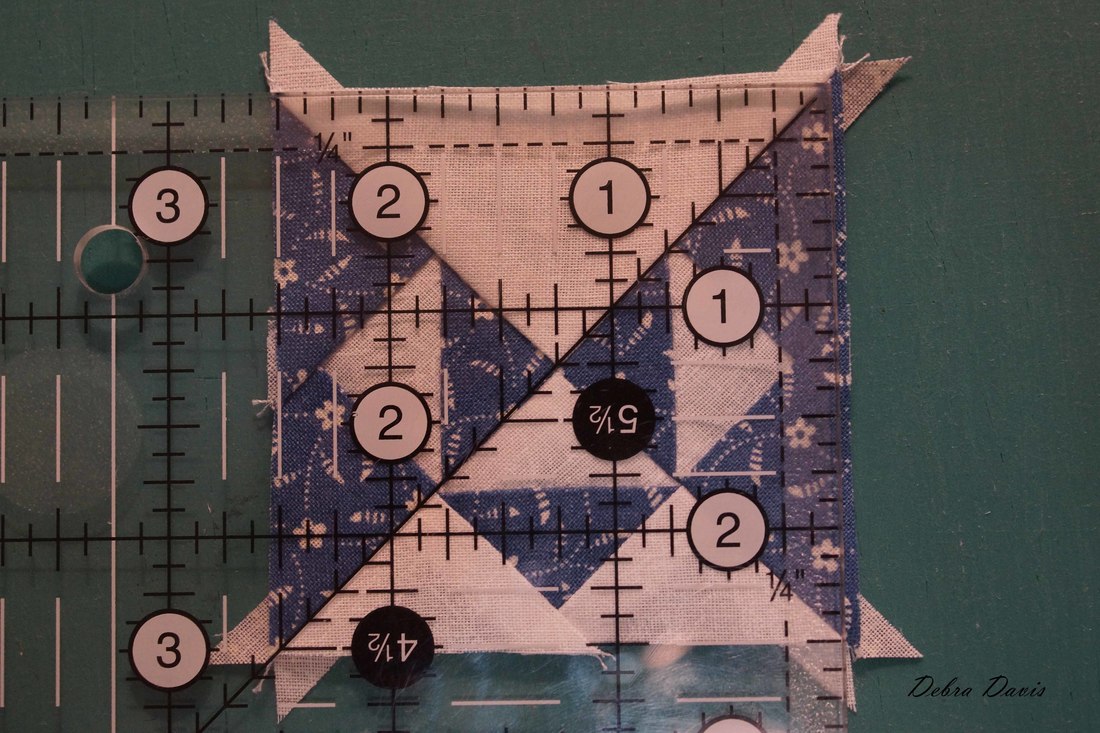 Now we can lay these little beauties aside and move on to a much easier task.
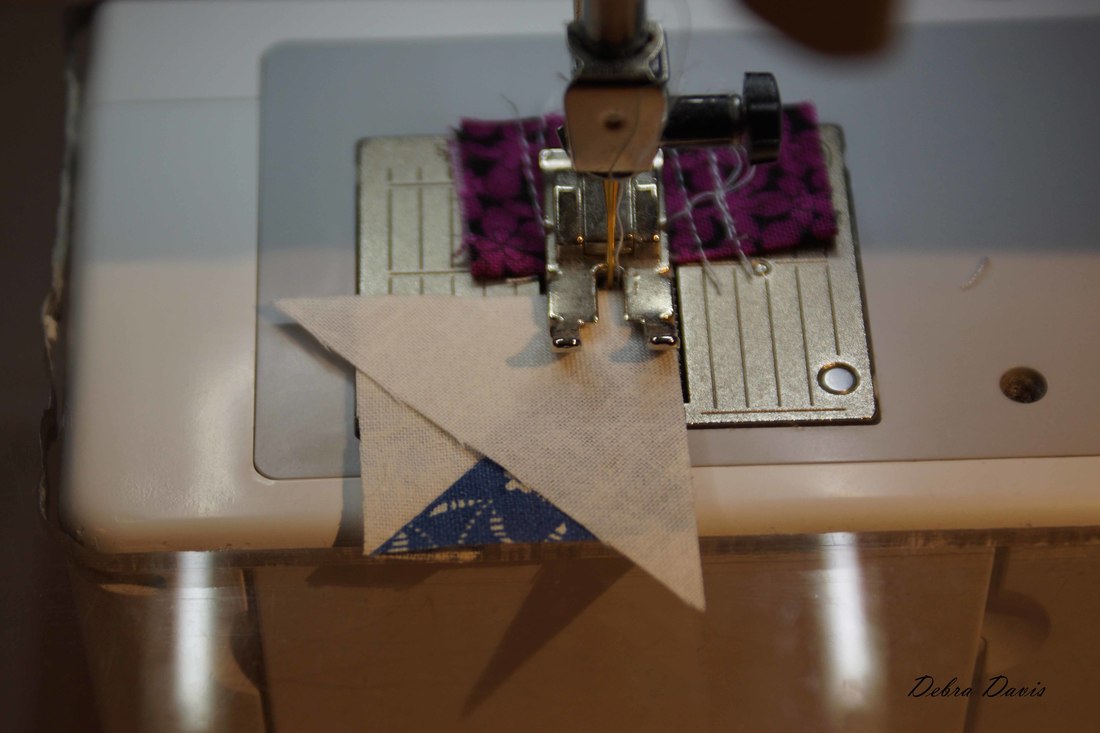
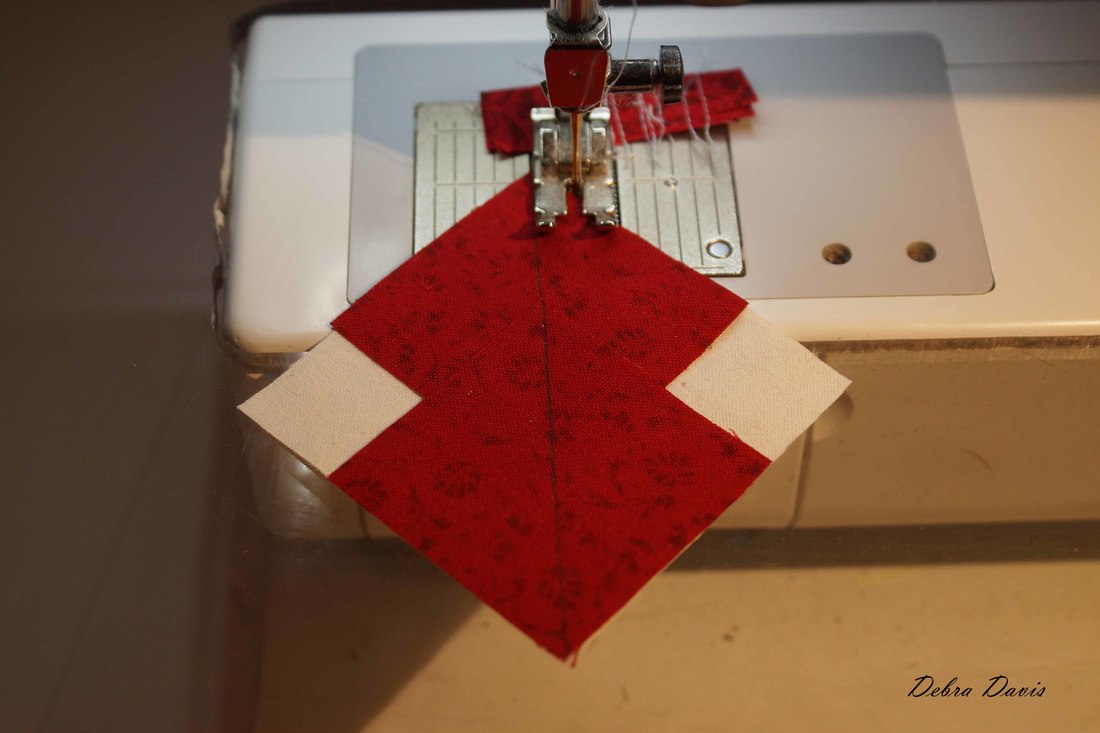
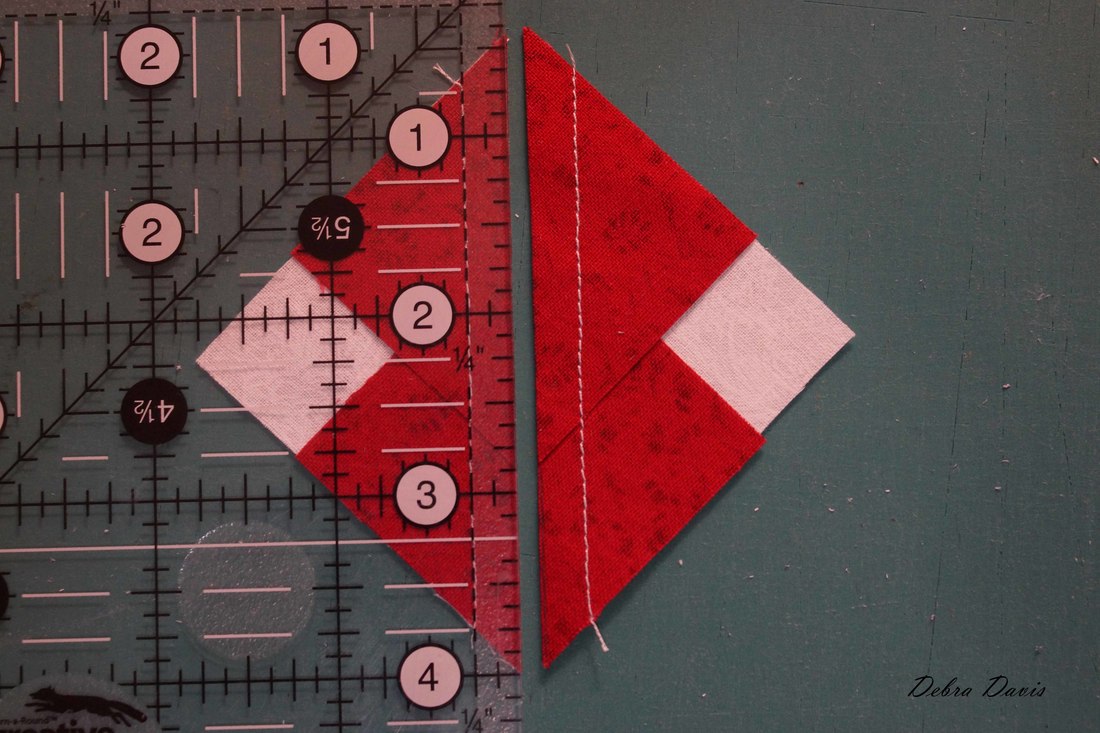
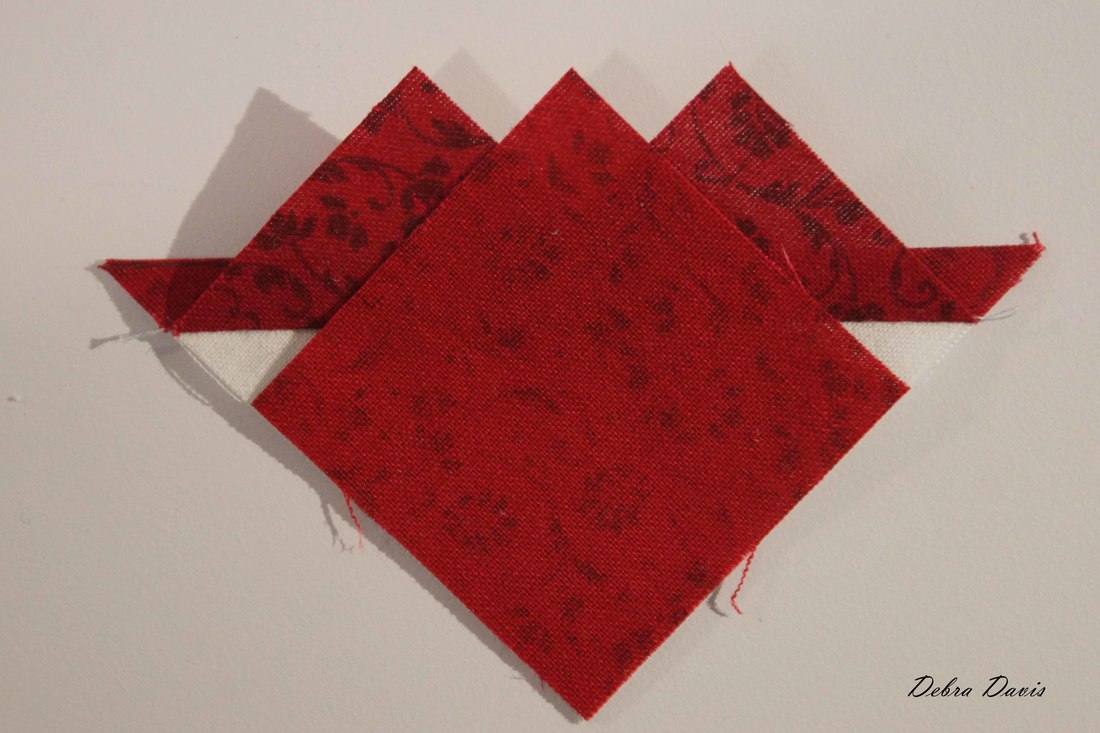
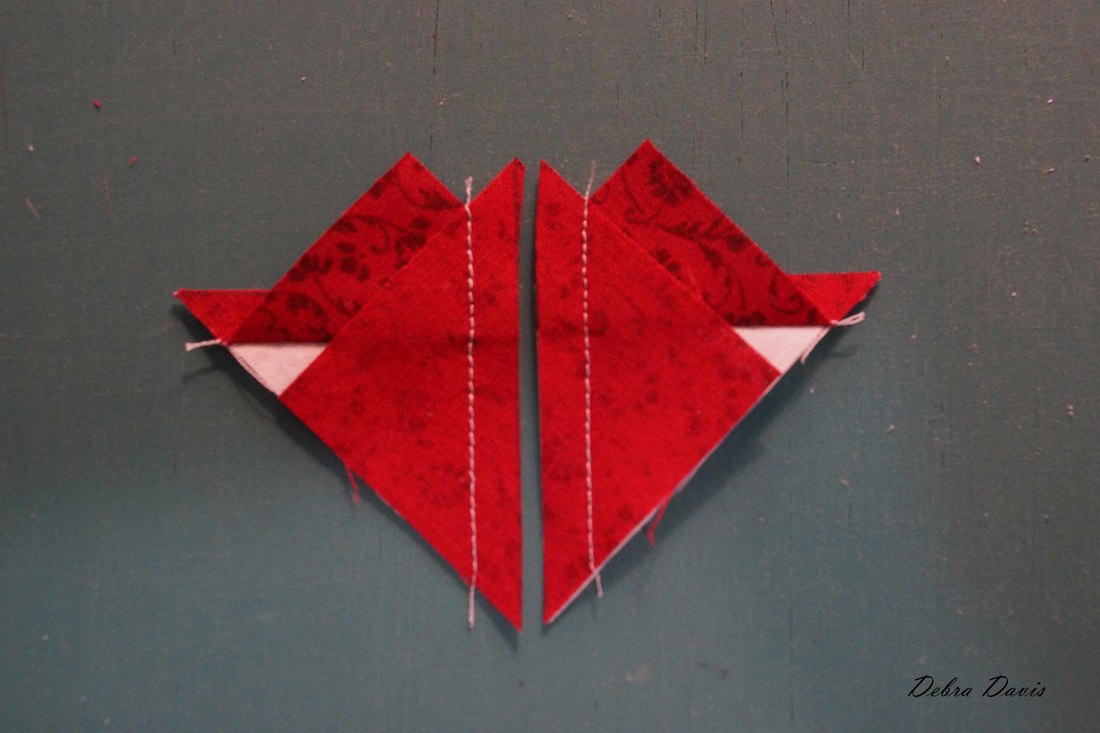
For the center star I am taking advantage of the no-waste flying geese method. To begin I am using the C3 and F squares. Lay two F squares right sides together on top of the C3 ( 2 1/2") square and draw a diagonal line from top to bottom. 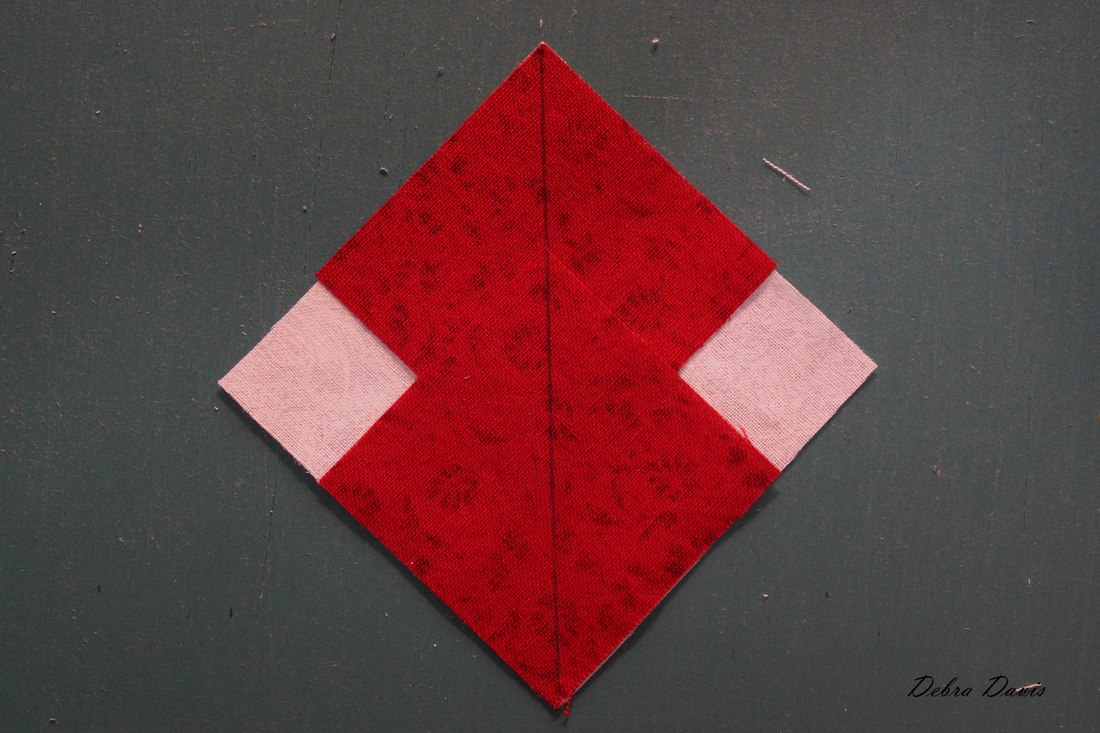 Sew 1/4 inch from each side of the line.
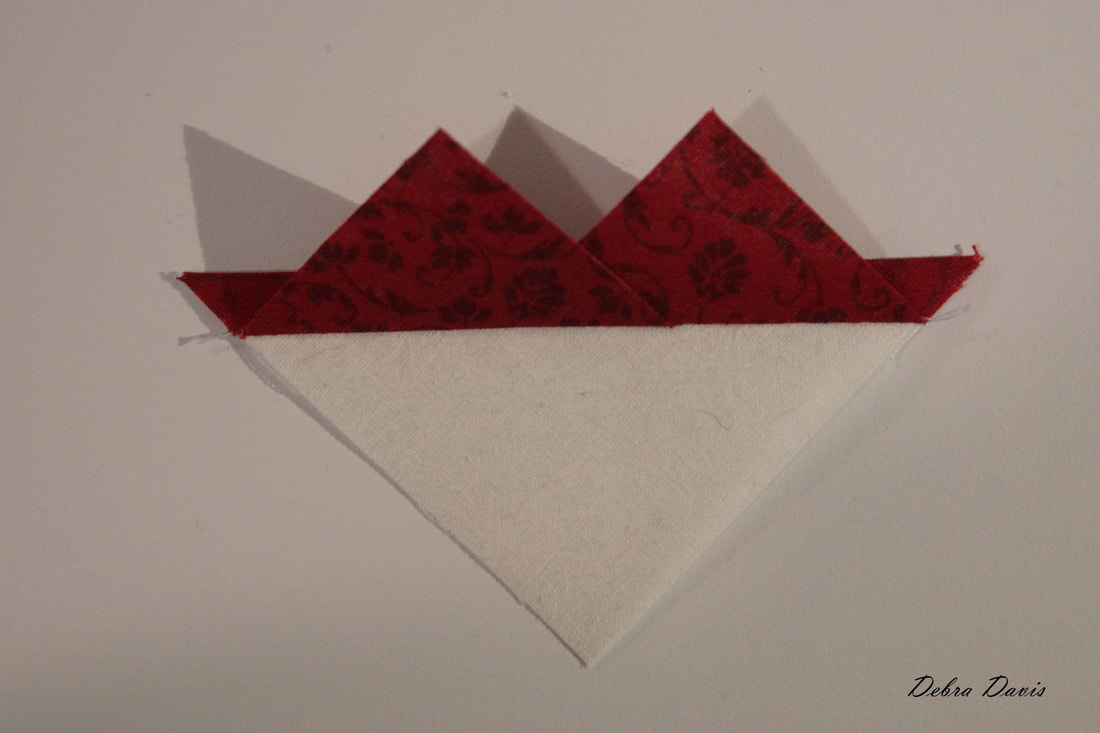
Cut apart on the drawn line and press.
Lay one F square, right sides together, on top of the unit, draw a diagonal line and sew just like before, 1/4 inch from each side of the line. Cut apart on the line and you will have the four Flying Geese units needed for the center star.
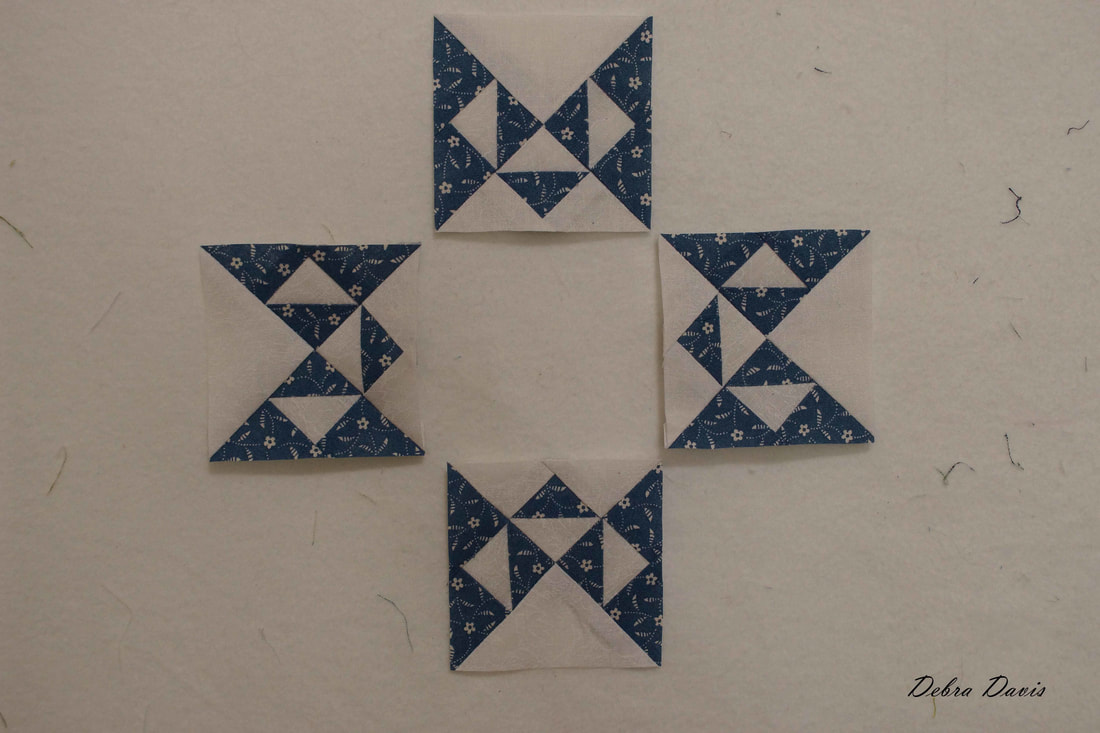
Bloc Loc does make a ruler for this size but I do not have it yet so here is how to trim these with a regular ruler. I am using a Creative Grids ruler-they just do not slip on the fabric like other rulers. The Flying Geese need to measure 1" x 1 1/2" so place the 3/4" inch horizontal mark (which is half of 1 1/2") at the tip of the triangle leaving a 1/4 inch seam allowance extending beyond that point. Line up the 1" vertical line on the ruler with the upper diagonal seam. I want the end of my ruler to lay right on that seam line. Trim away the excess. 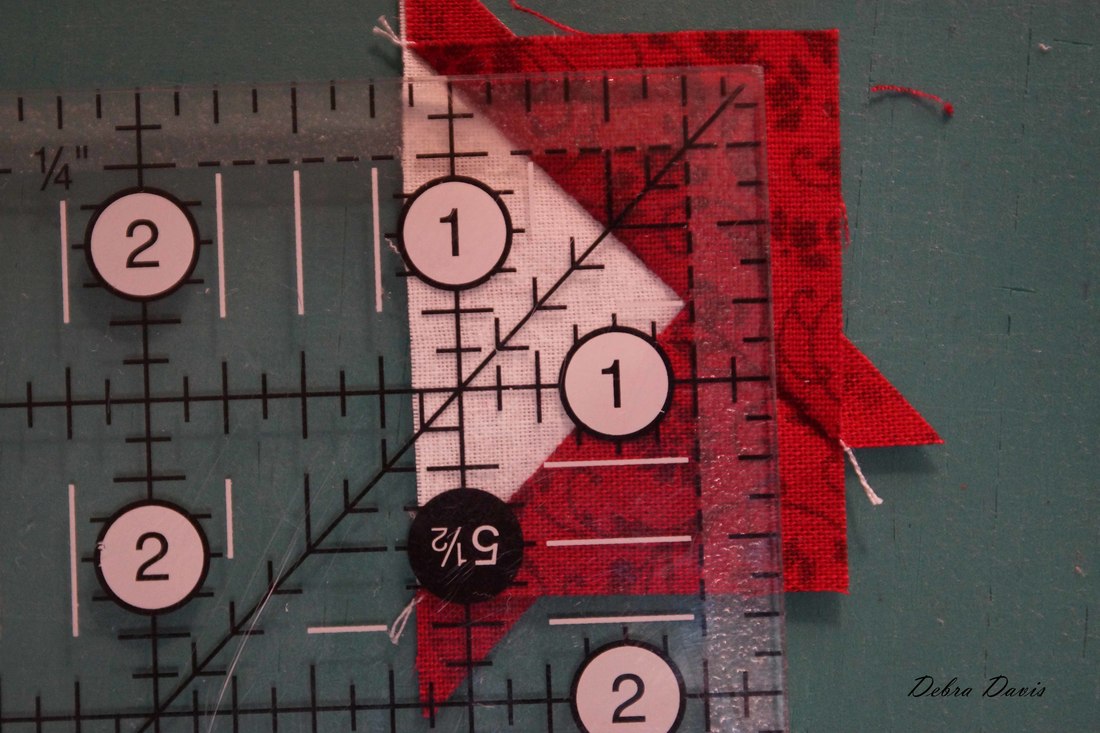 Now I can turn the unit and line up the 1" and 1 1/2" lines of my ruler with the trimmed edges of the Flying geese unit. I also see that the diagonal line on my ruler is laying on that seam. Trim. 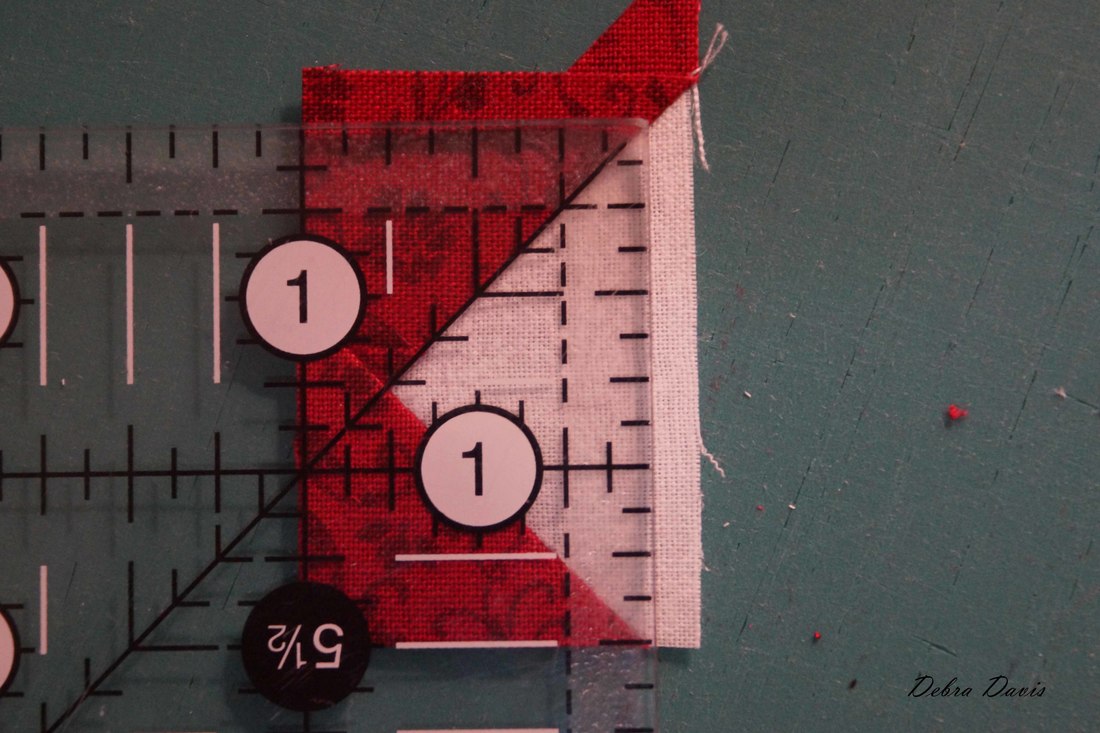 Adding in the tiny D squares I can now sew the star together just like any nine-patch block. 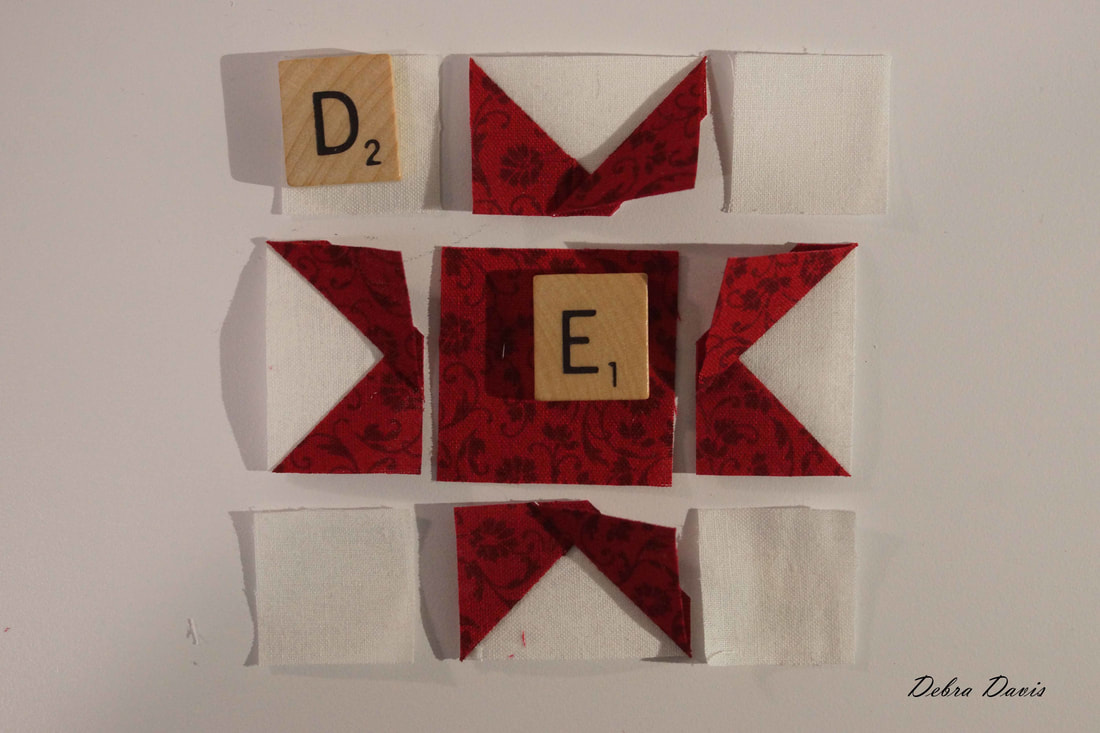 I pressed the seams to the non-pieced squares, so again broke the rules and pressed towards the light side on the top and bottom rows.  The center star should also measure 2 1/2" when finished and happily this time that was the case. Now with all the pieces laid out I can sew the block together, making sure to match the seams as I do. 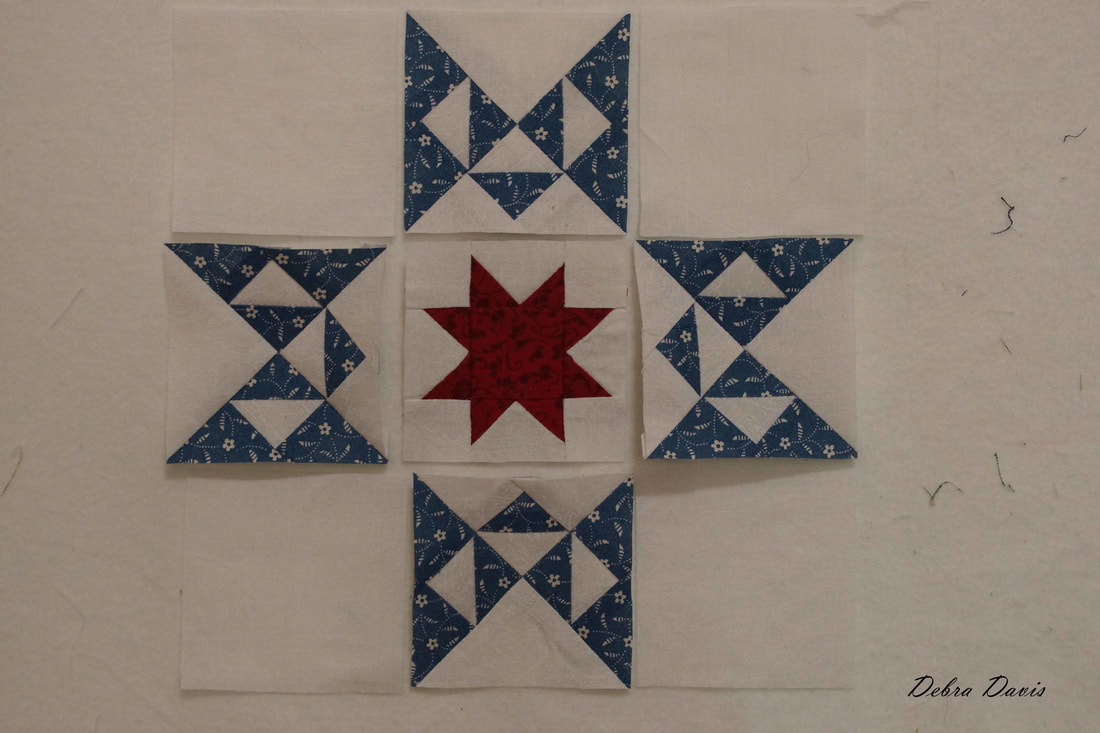 And here we have it, my less than perfect block, but I feel very good about putting this in the DONE pile! 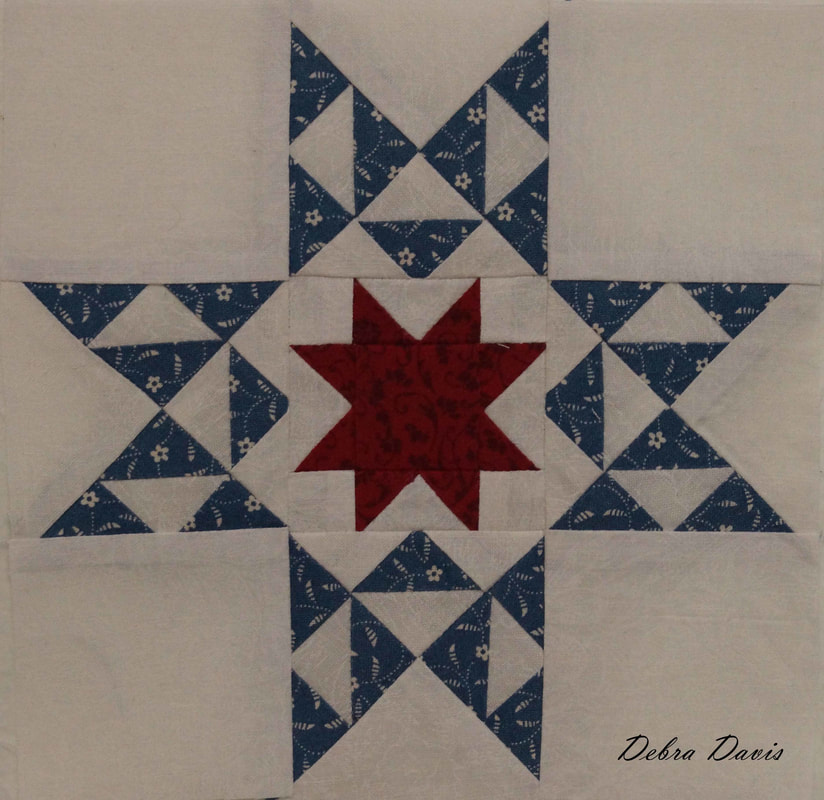 I would love to hear from you if you give this block a try! It is a challenge for sure and though I do not feel I mastered it, I am getting better at working with these itty bitty pieces. Just think how your friends will marvel when you tell them those little white squares in the center are 1/2 inch!!!
Happy Quilting! Debra PDF Version of this tutorial |

Welcome to the site of Debra Davis-a woman who loves the Lord and loves to quilt.
My other blog where I share about my walk of faith:
Sitting at His Feet 
|


 RSS Feed