|
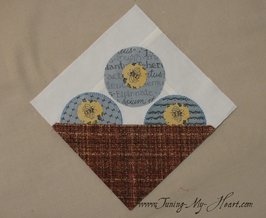
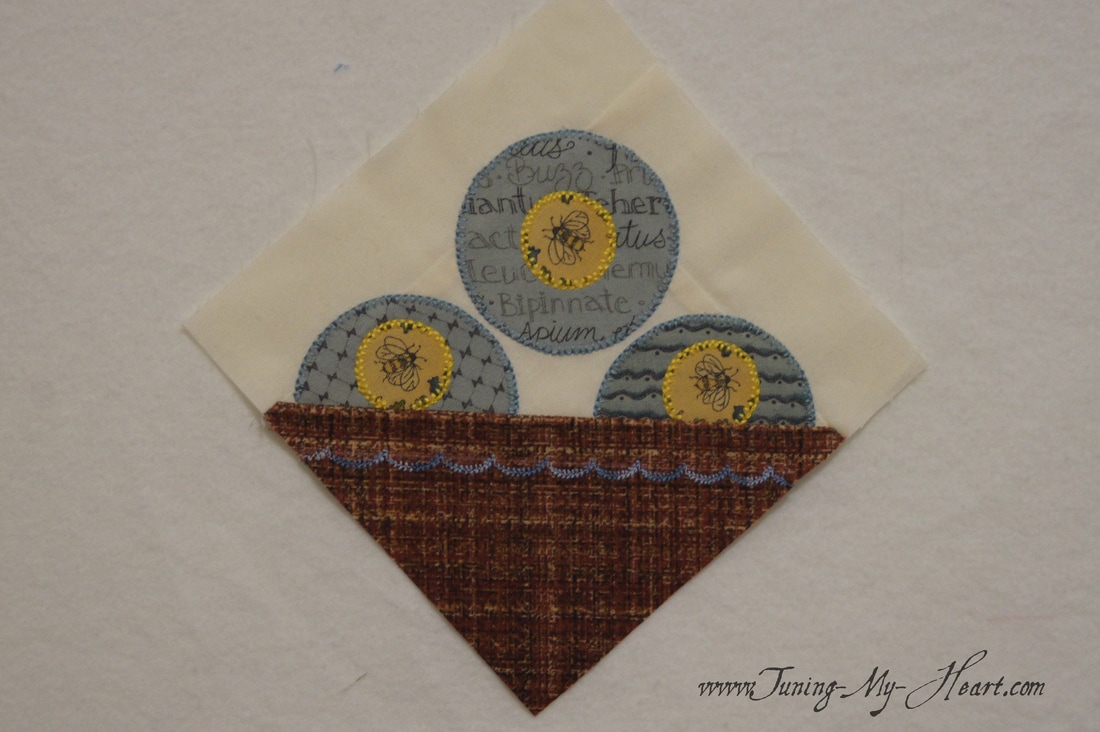
I was able to get back into my quilt studio today for the first time in several days as it doubles as the guest room. What fun to get to make Penny Basket designed by Lynne Hagmeier of Kansas Troubles Quilters. There are a few challenges with this block and I approached a couple of things in my own way. Overall I am happy with how it came out. If you would like the pattern it can be downloaded by clicking on this link: Penny Basket 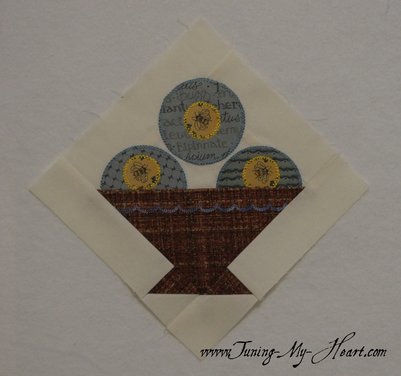 To begin I pulled out my Perfect Circle sets and found matches for the two circle sizes in the pattern 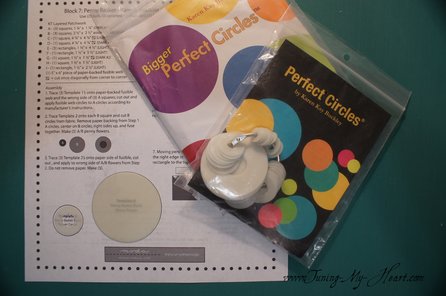 I used the circles to trace onto a paper-backed fusible. Leaving a little extra I cut out the circles. (My favorite fusible for machine applique is Heat N Bond lite, but there are many options out there. Be sure to follow the directions from the manufacturer for best results. 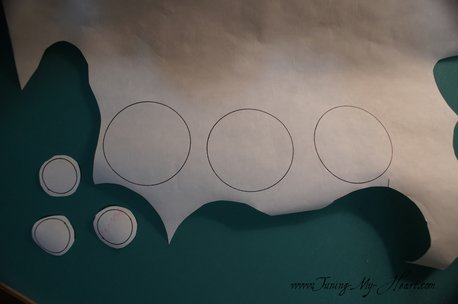 The fusible has been pressed onto the wrong side of my fabric and then I can cut out on the lines. The directions did not have you do the B circles like this, but I think it is easier than trying to fit the cut out fusible circle onto the cut out fabric circle. 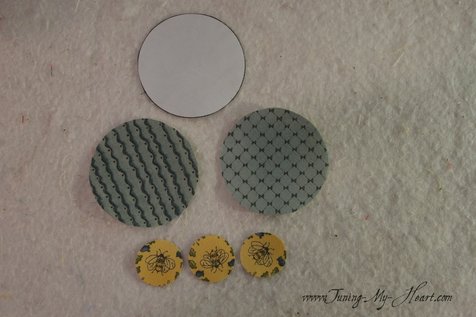 I left the paper backing on the large circles for this step then peeled the paper off of the smaller circles and pressed them into place. I did not want to loose my little bee centers to the basket so folded the large circle in half to figure out where I would put the small circles. 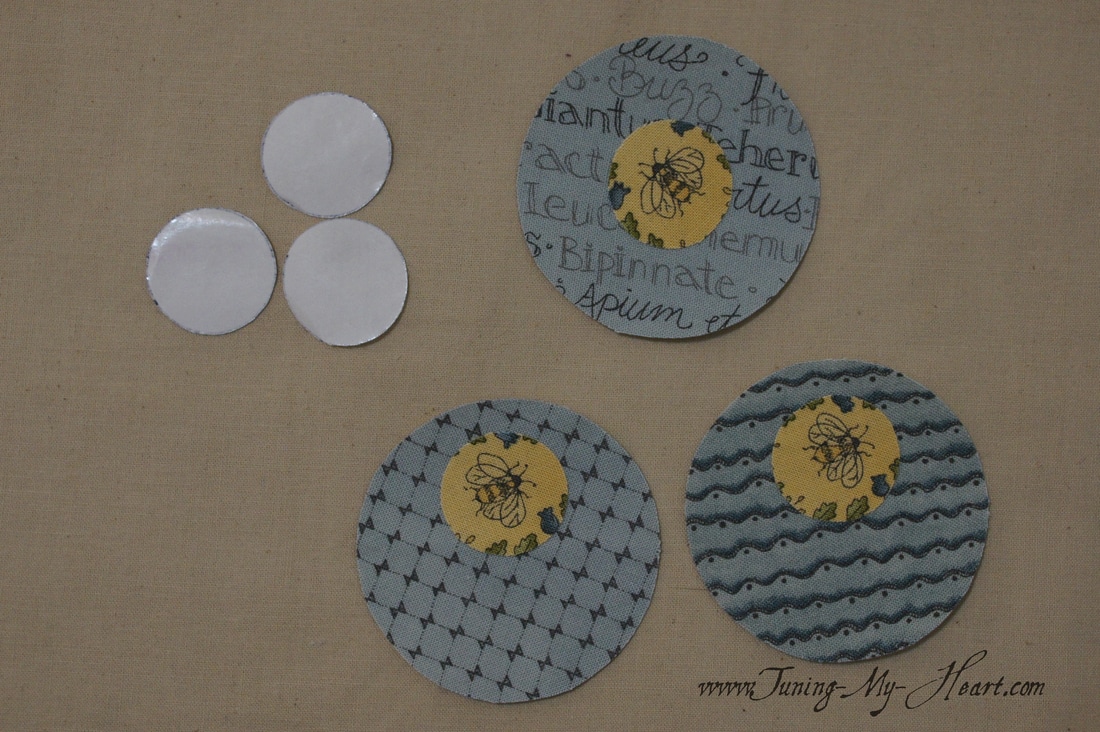 Once again I folded the two circles that will be sewn into the basket and measured 1/4 inch from the fold and cut off the bottom of the circle with my rotary cutter. 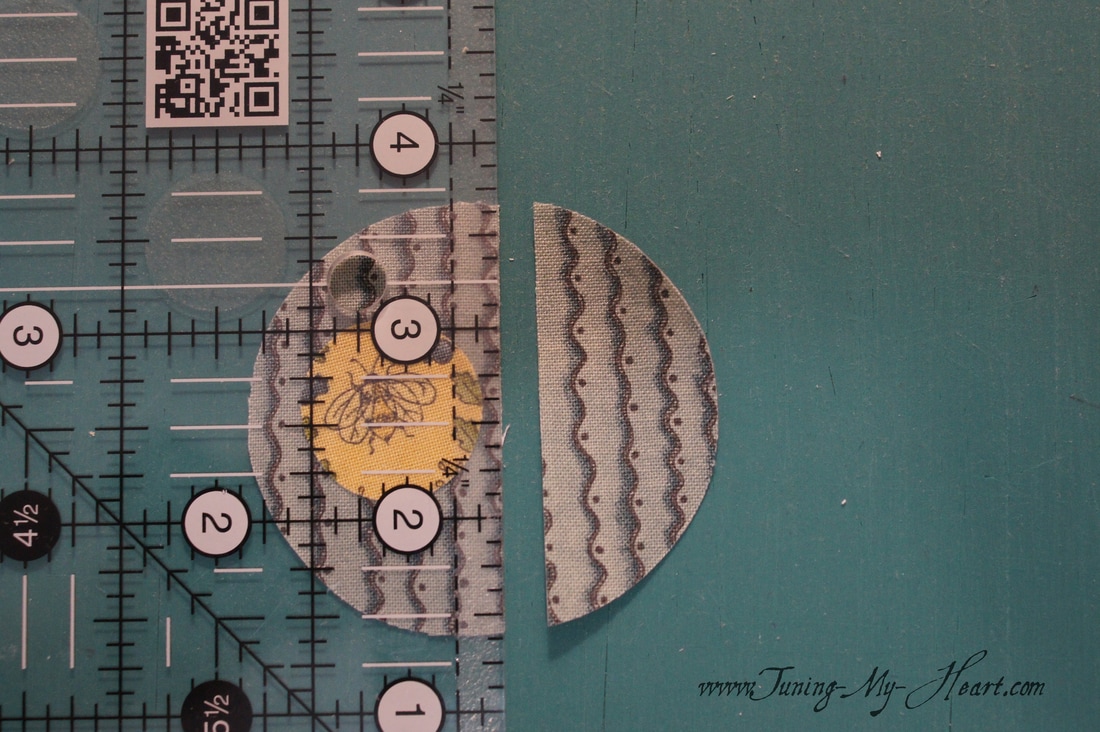 And here we have them... 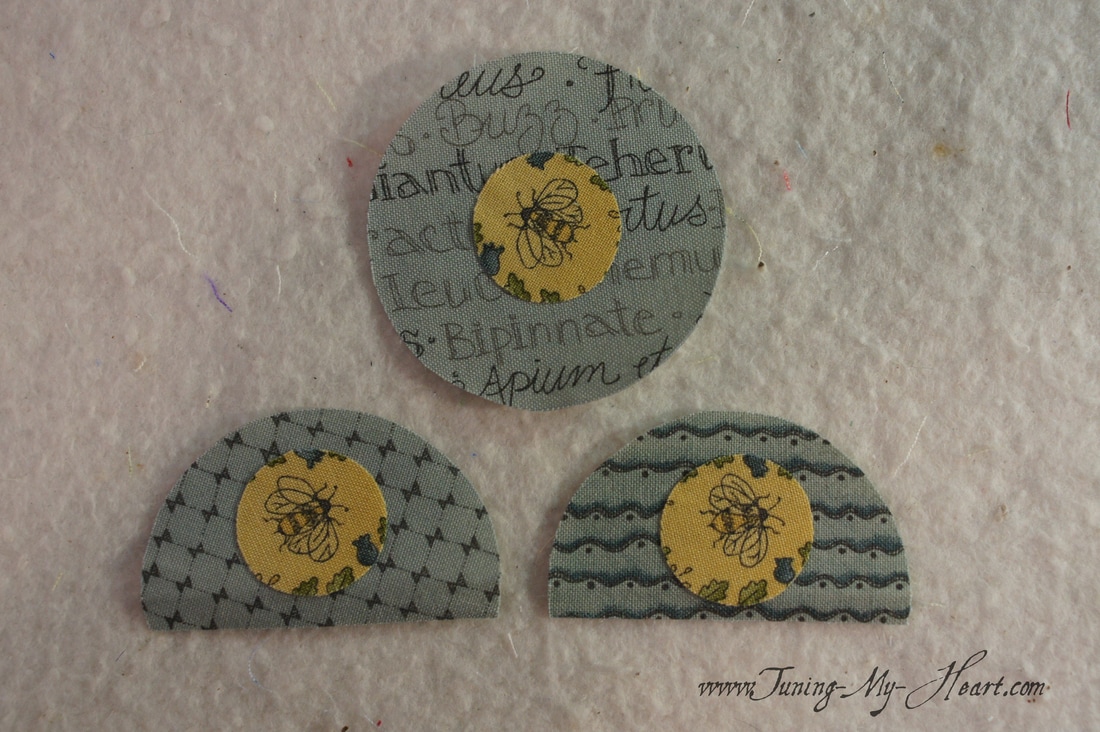 Now I need to prepare the large triangles that will make up the basket. This is my C square being cut in half for the top. 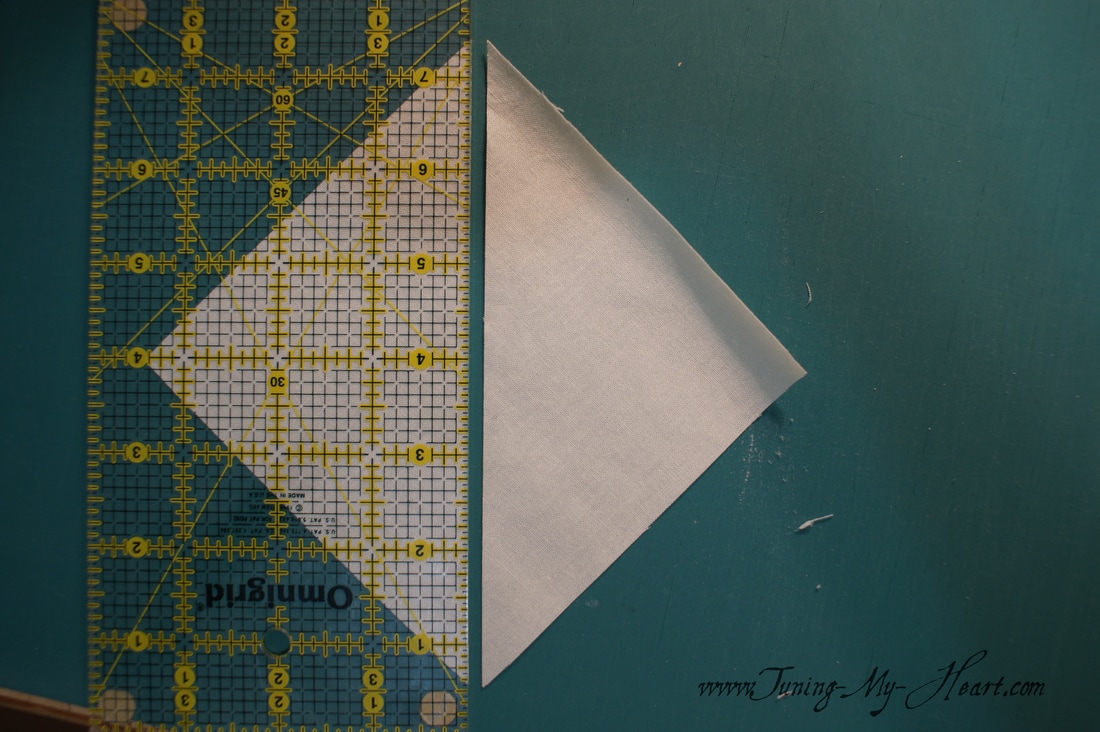 The directions say to align the edges and leave 3/4" inch exposed on the ends... this is how I did that. 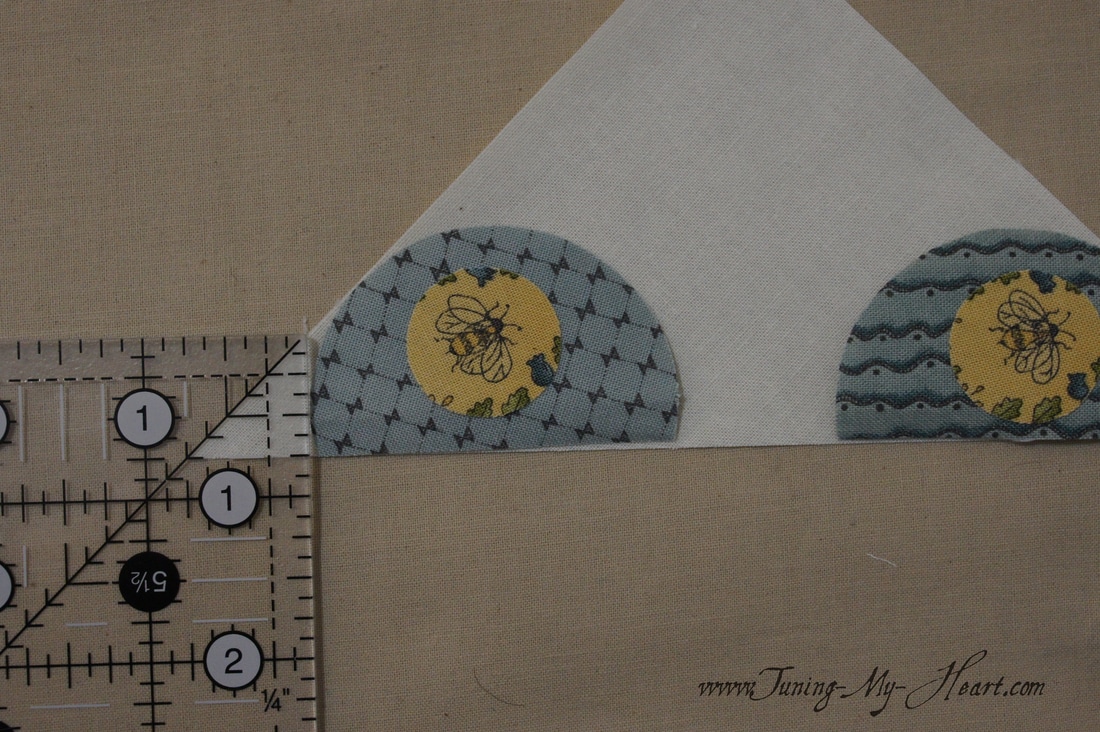 A little tricky part here. I am only pressing along the seam line so that the remainder of the circles will not be attached yet. Again, follow the manufacturer's directions for your fusible. 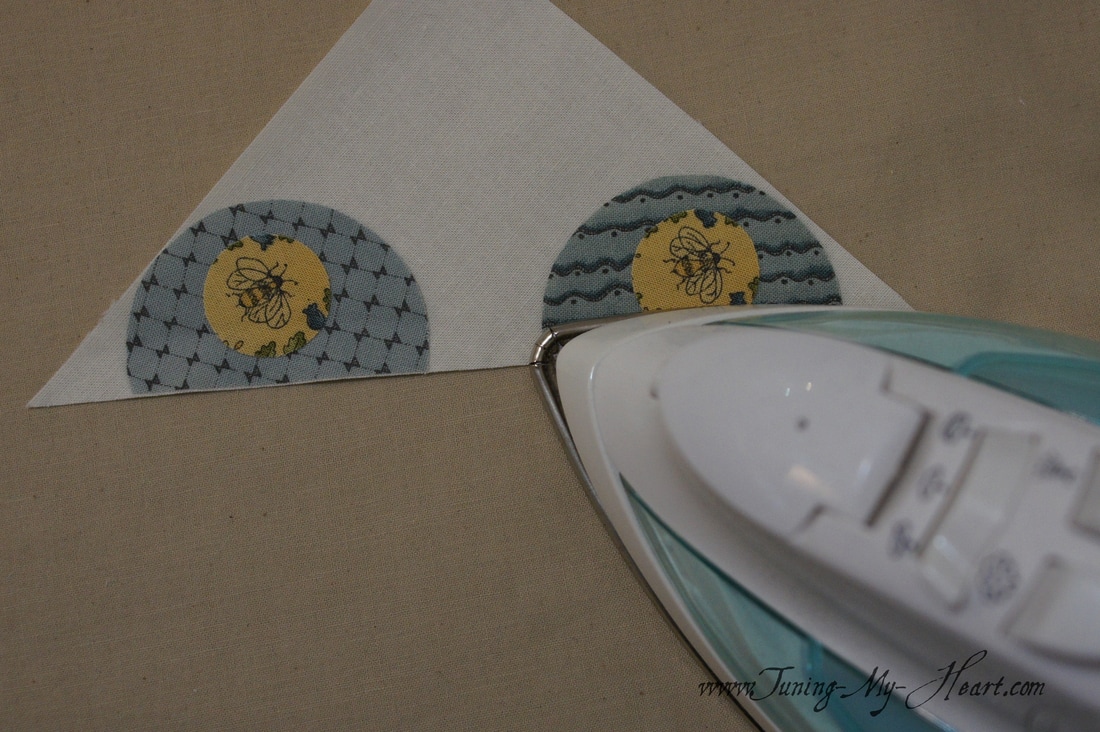 With right sides together I am sewing the C and D triangles together. 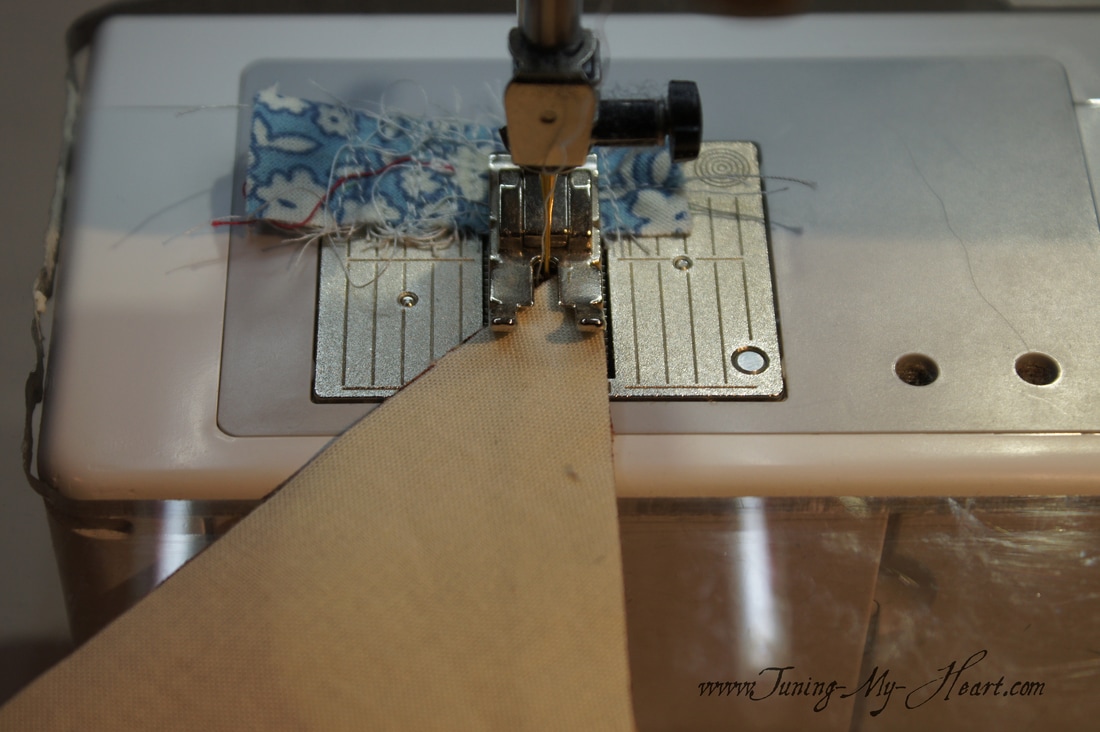 Once, again I need to be careful when I press this open. I still need the circles to be free from the backing-unattached for now. 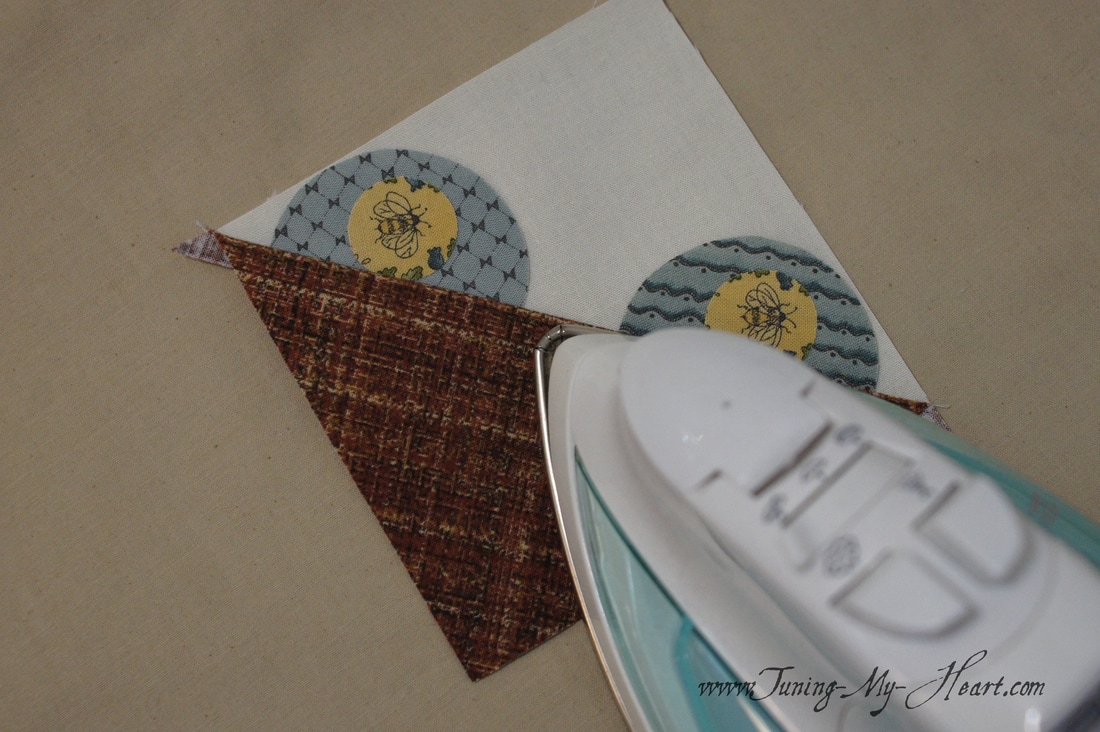 At this point my square needs to measure 4-1/2 inches with the diagonal line running right down the middle. 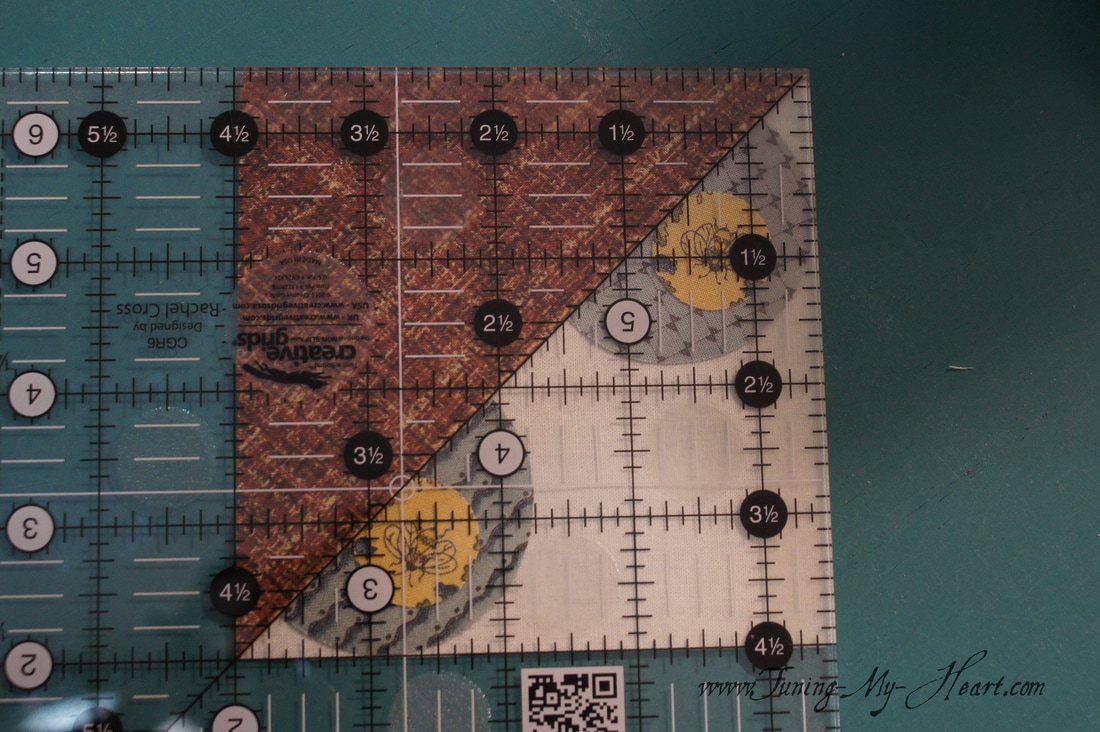 This is where the ability to move those circles out of the way will come in handy. 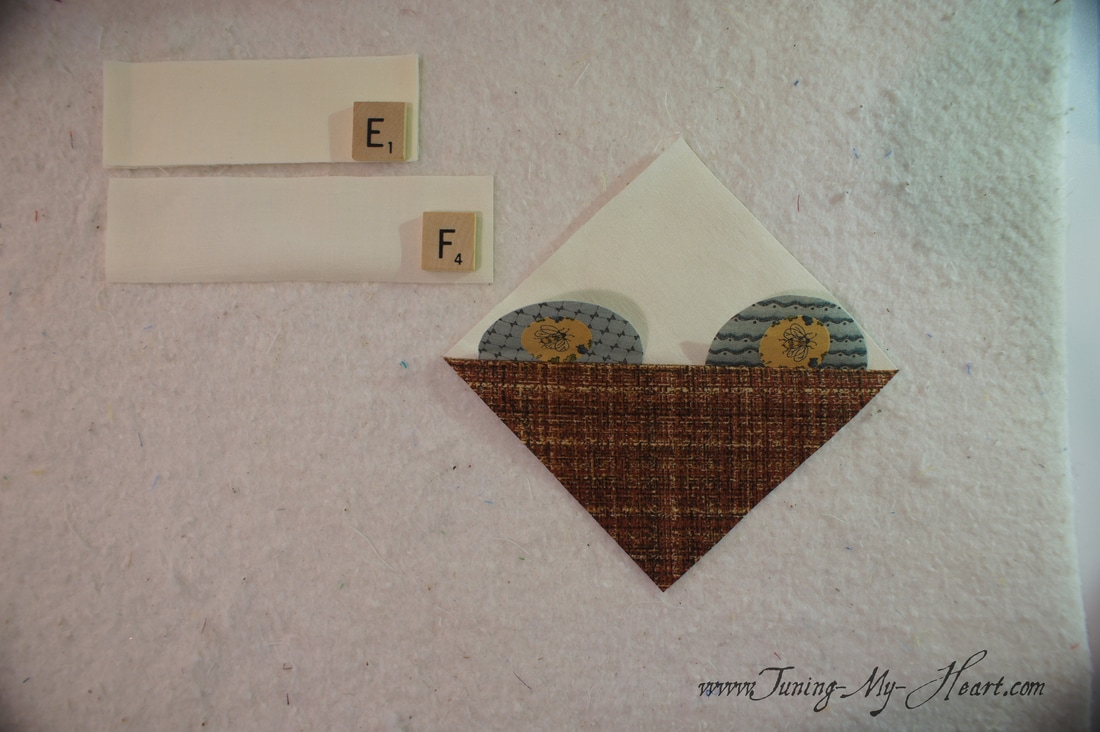 First I attach one E rectangle. Notice that I made sure the circle is lifted as I sew this seam.  A little tricky to press this seam but I want to avoid touching that fusible. 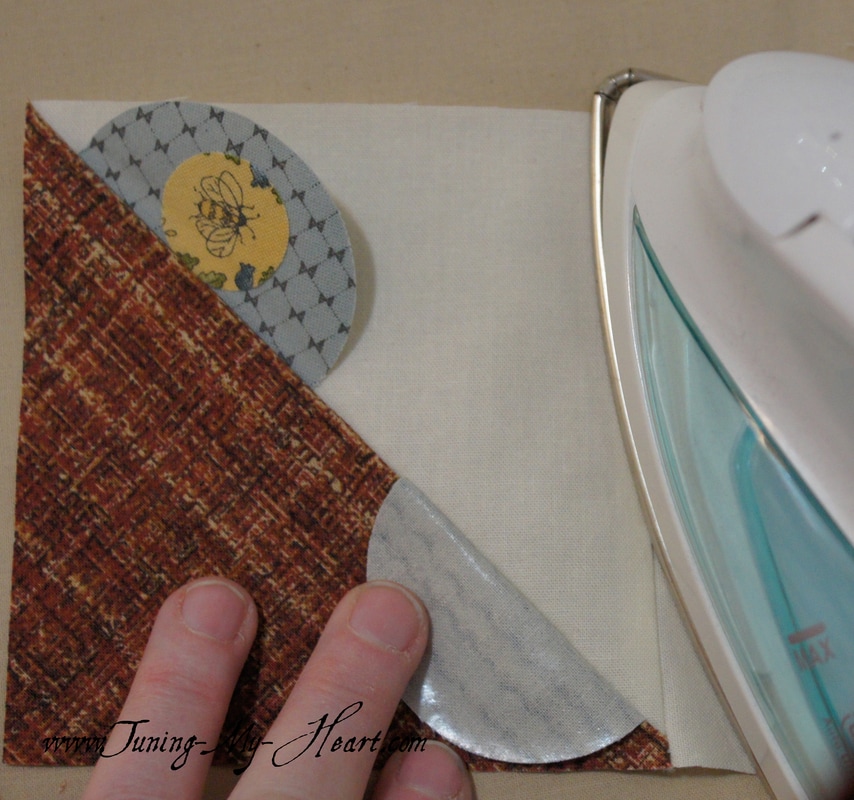 Repeat this process to attach the F rectangle to the next side. After carefully pressing the seam I can now fuse the two circles into place. My measurement is now 5-1/2 inches. 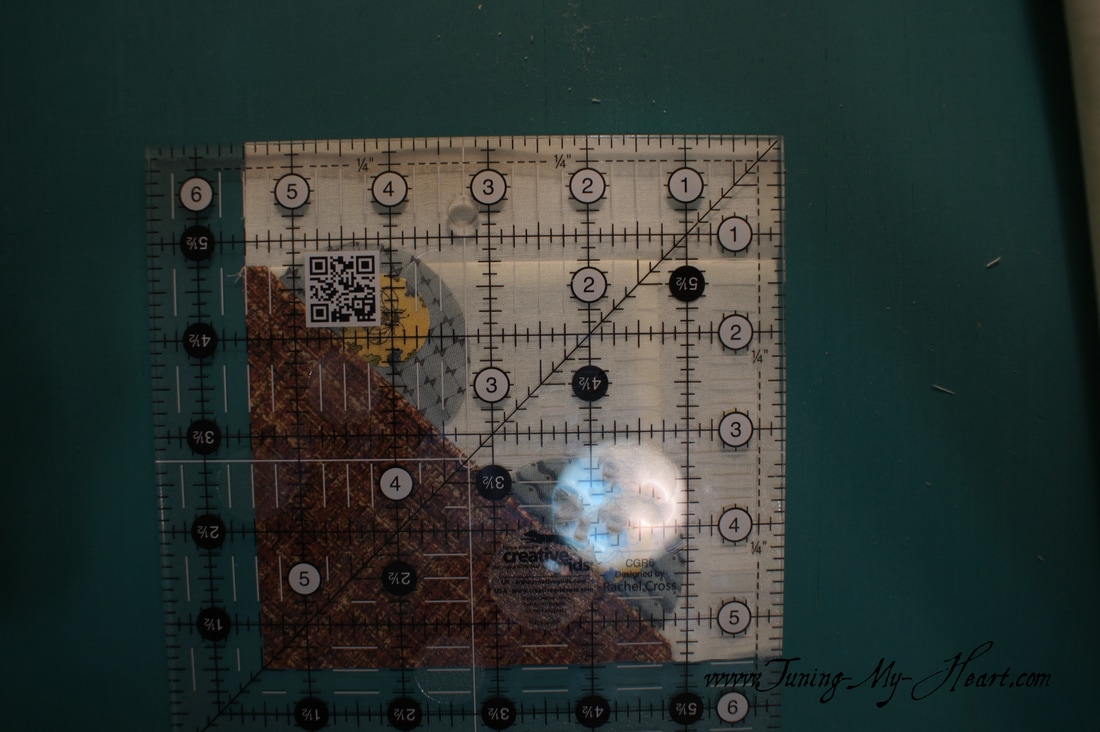 In preparation for the machine applique I attach a piece of stabilizer to the back. 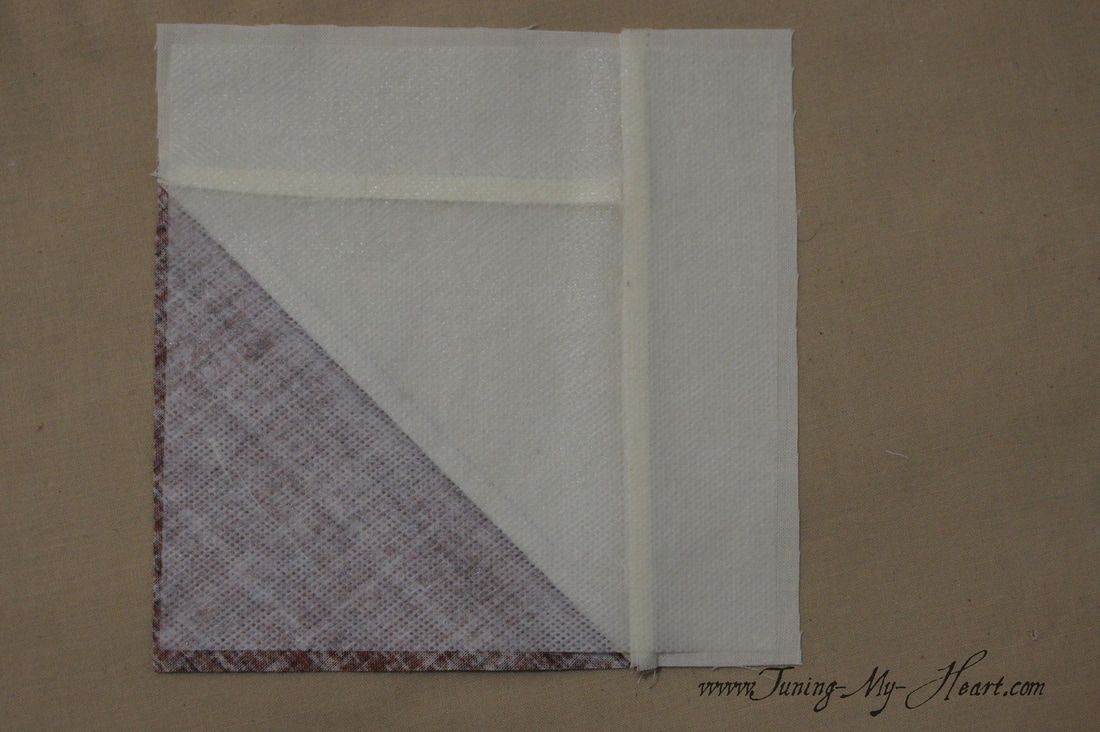 I love how the buttonhole stitch looks for applique. I have set my machine for a narrow width and short stitch length. (On my machine the settings are 2.0 width, 1.9 length) Before I begin my buttonhole stitch I do 5-6 straight stitches along the edge towards the place I want to begin the buttonhole stitch. (Stitch length is also 1.9) 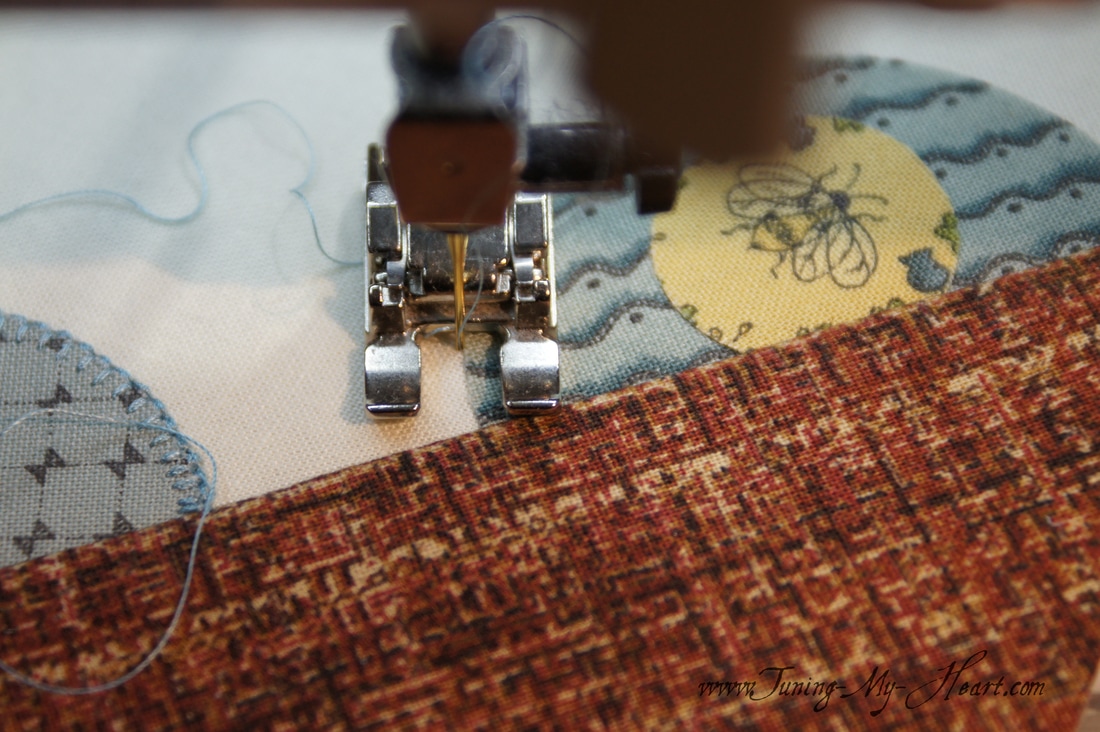 You can see my straight stitches here. With my needle in the down position I pivot the material around to begin my buttonhole stitch. It will go right back over those straight stitches locking everything into place. ( I left my threadtail in here just to make it easier for you to see the stitches, I will cut it before I stitch over it. 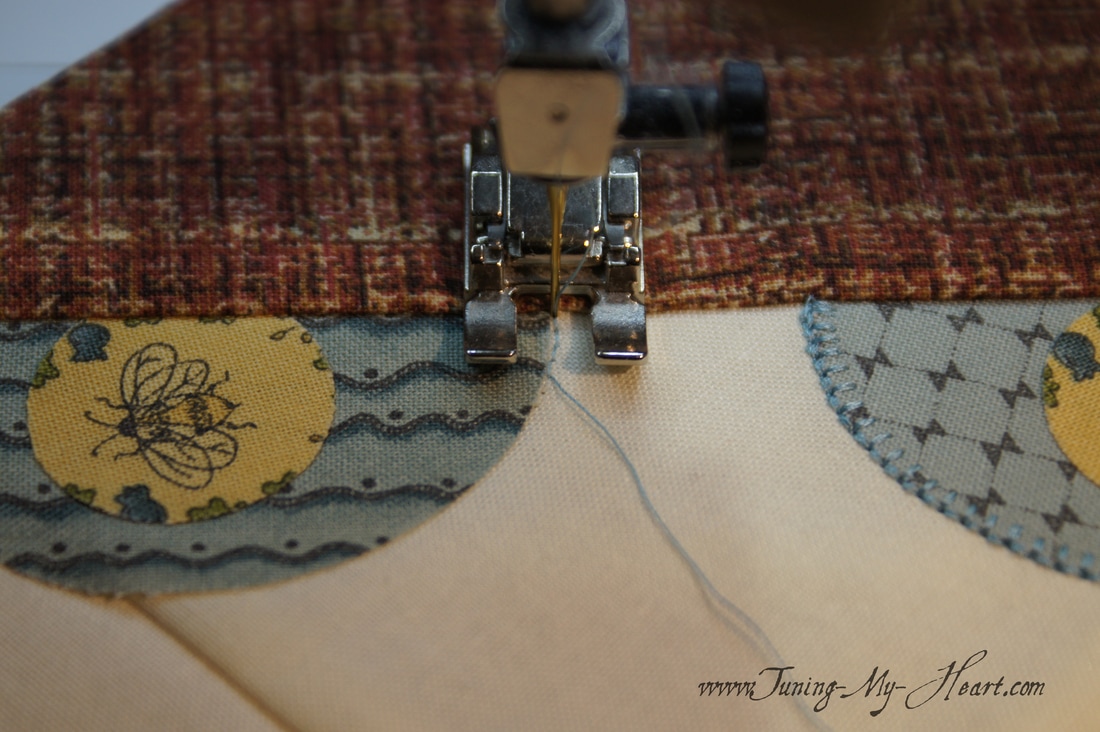 I want the needle to fall right along the edge of the applique during the straight part of the buttonhole stitch. Whenever I need to adjust the fabric, as one does to go around a circle, I make sure the needle is in the down position before repositioning my work. 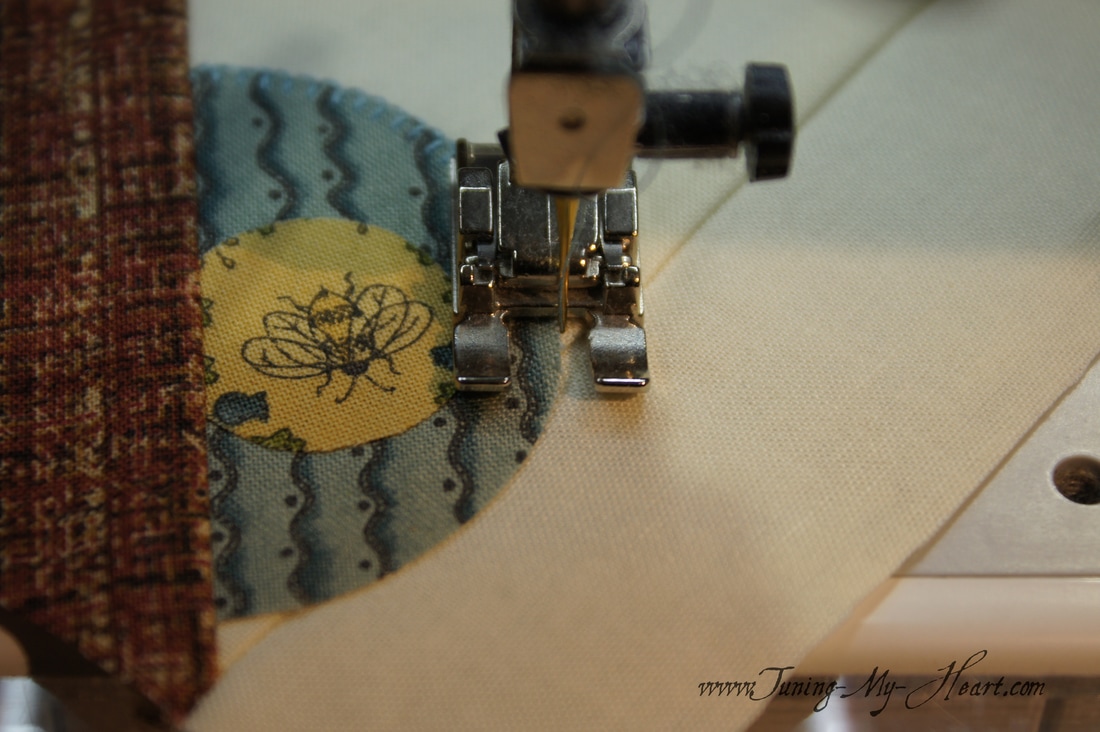 Having made it to the top of the basket I turn my piece around and switch back to the straight stitch to finish off with 5-6 stitches and a lock stitch. Since the stitch length on my buttonhole and straight stitch are the same the new stitches will lay right on top of the previous ones. 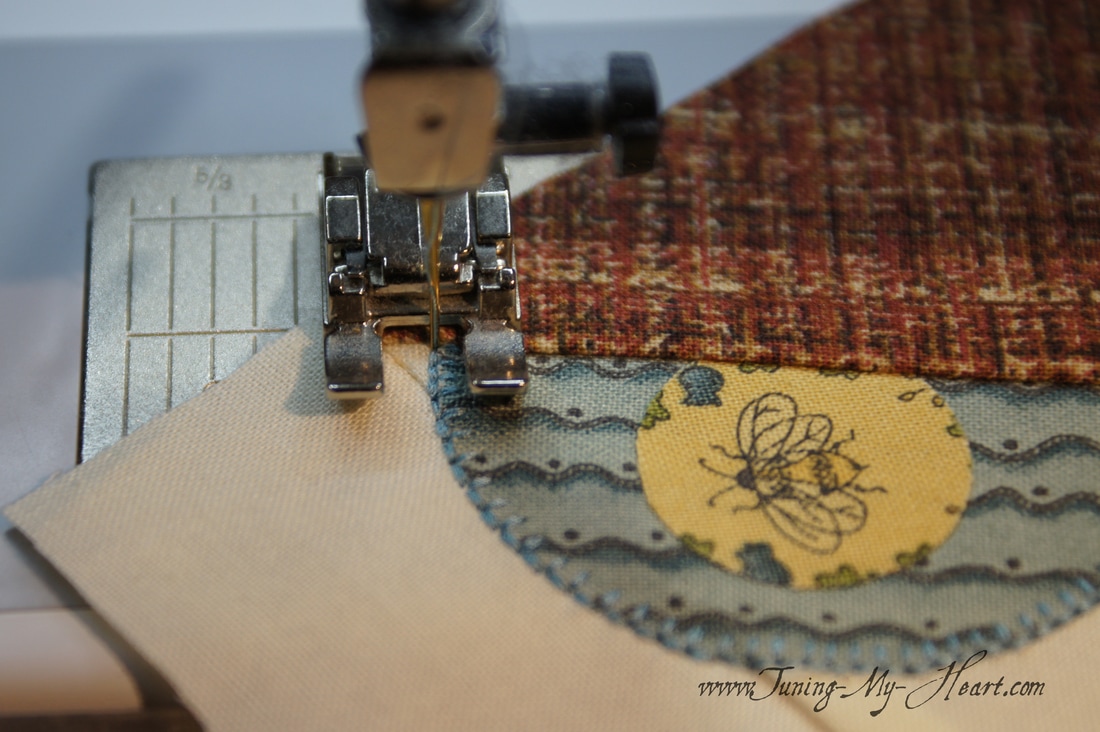 I have now fused the top circle into place and will stitch around it in a similar manner. With the bulk I decided to move this one up a little higher on the basket so as not to overlap the other flowers. I start with a few straight stitches along the edge. Then switch over to the buttonhole stitch and work my way around the circle. I will continue right over those first straight stitches I made. 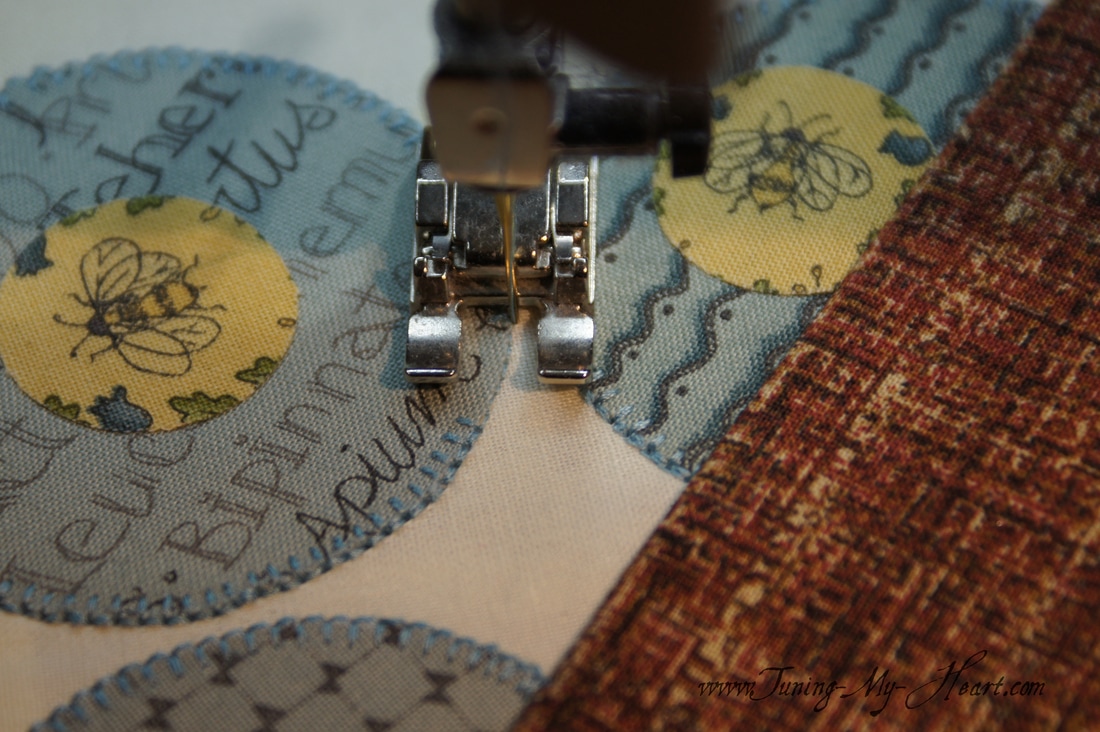 When I reach the beginning of the buttonhole stitch I switch back to the straight stitch and finish off as before.  All the little middle circles are done in the same way. I decided to add a little decorative stitch to the top of the basket at this time too.
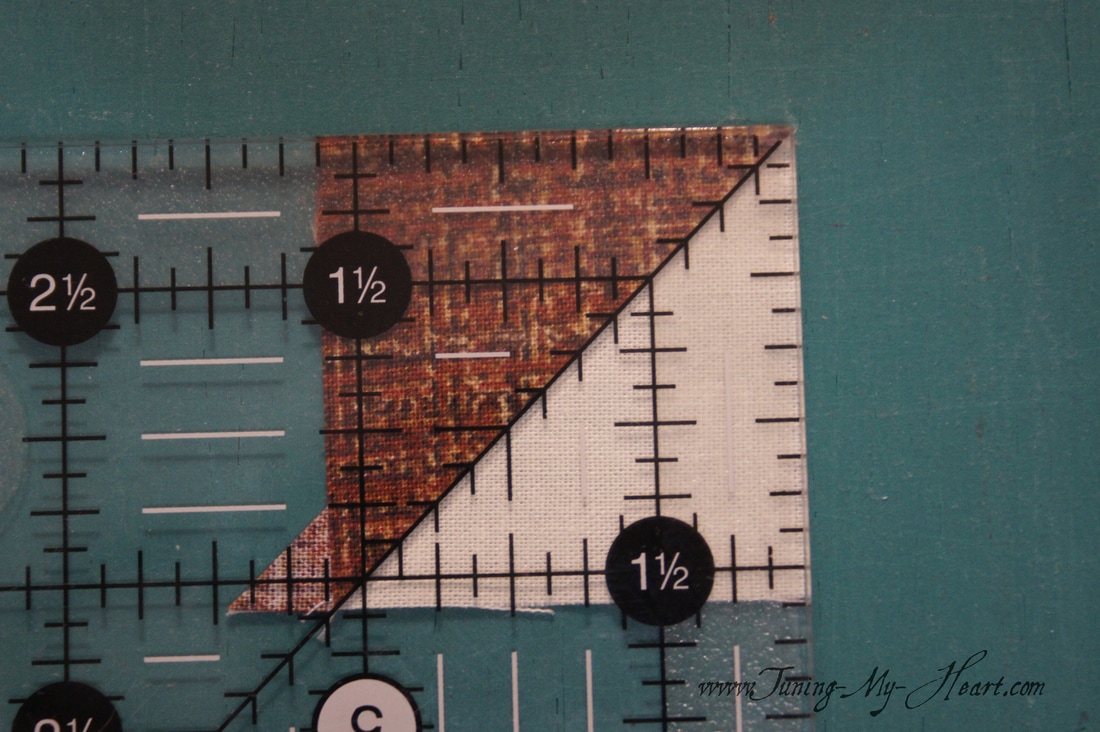
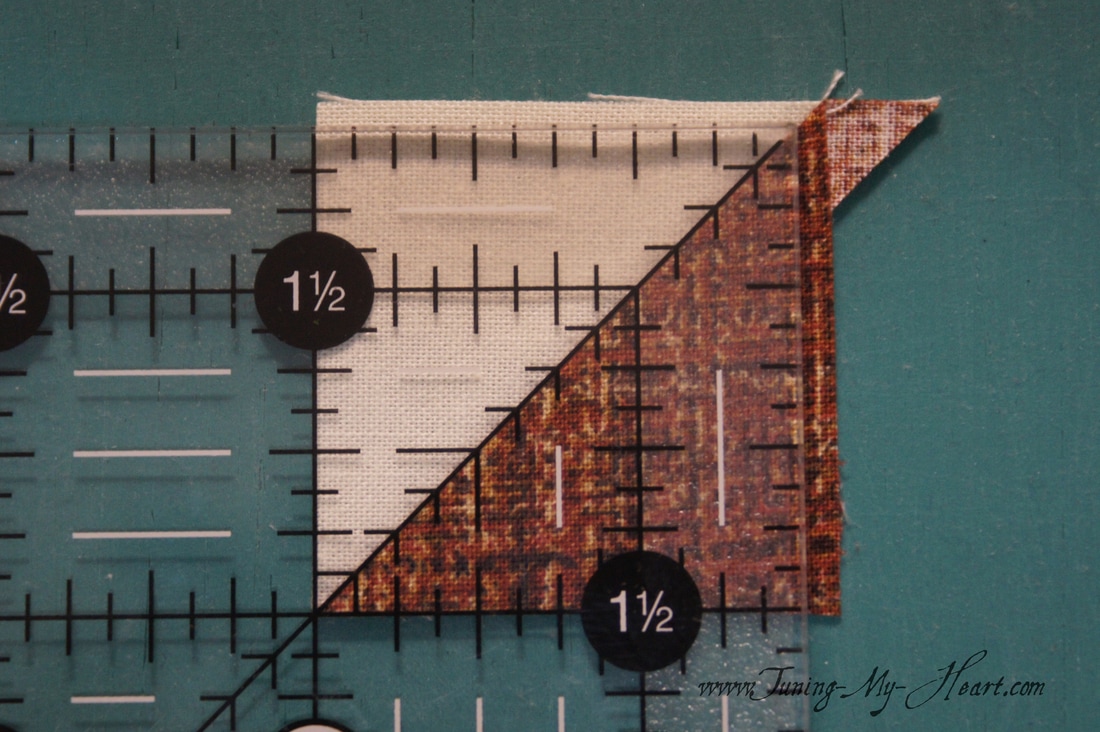
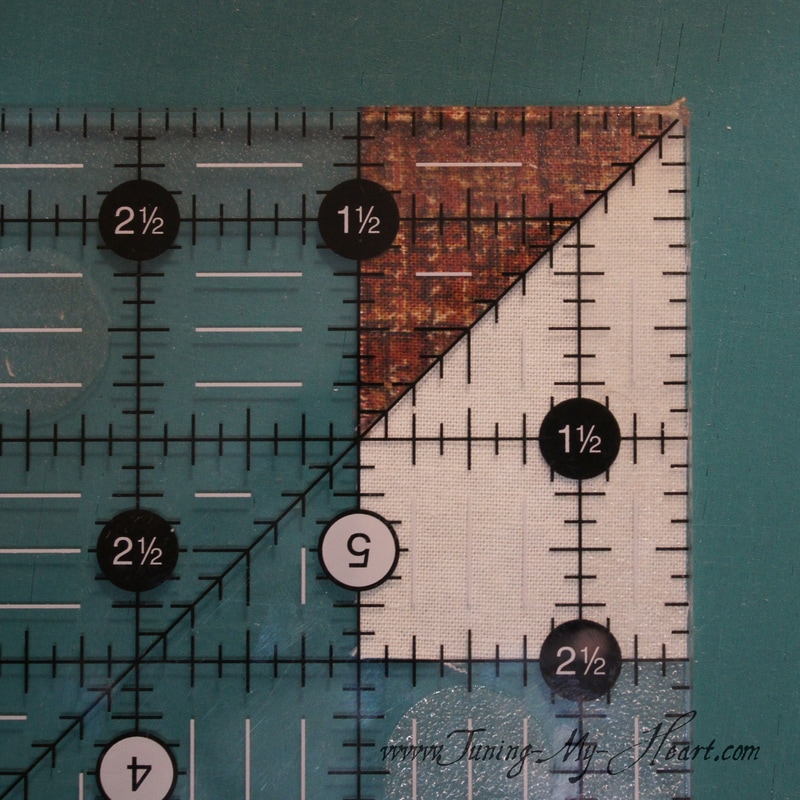
This is where I changed things a little bit. If you have been following my progress on the National Quilters Circle Challenge you have seen me make a lot of Half Square Triangles this way. I like it for the accuracy it gives me and I do not have to be careful about sewing on the bias which can easily become distorted. For this method I cut one G and one H square 2x2 inches On the lighter square I have drawn a diagonal line down the middle. 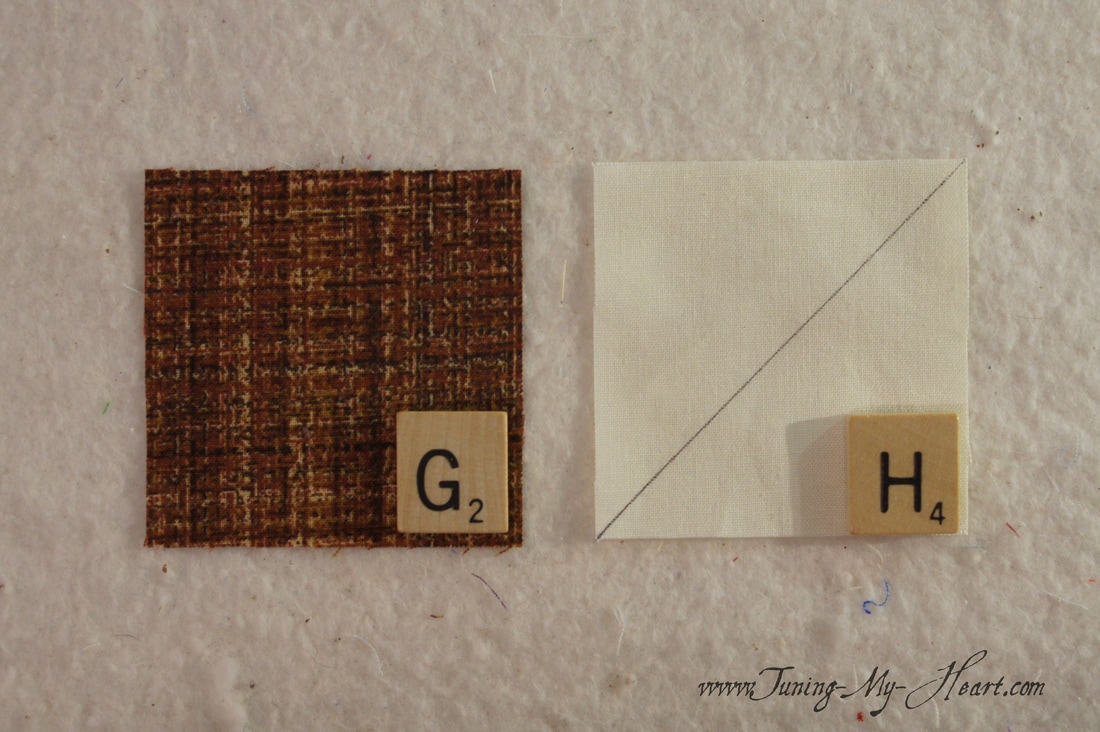 With right sides together join these two squares by sewing 1/4 inch from both sides of the drawn line. Using a ruler and rotary cutter cut on the drawn line to give you two half square triangles. We only need one for this block so the other will be saved for use in a mini. 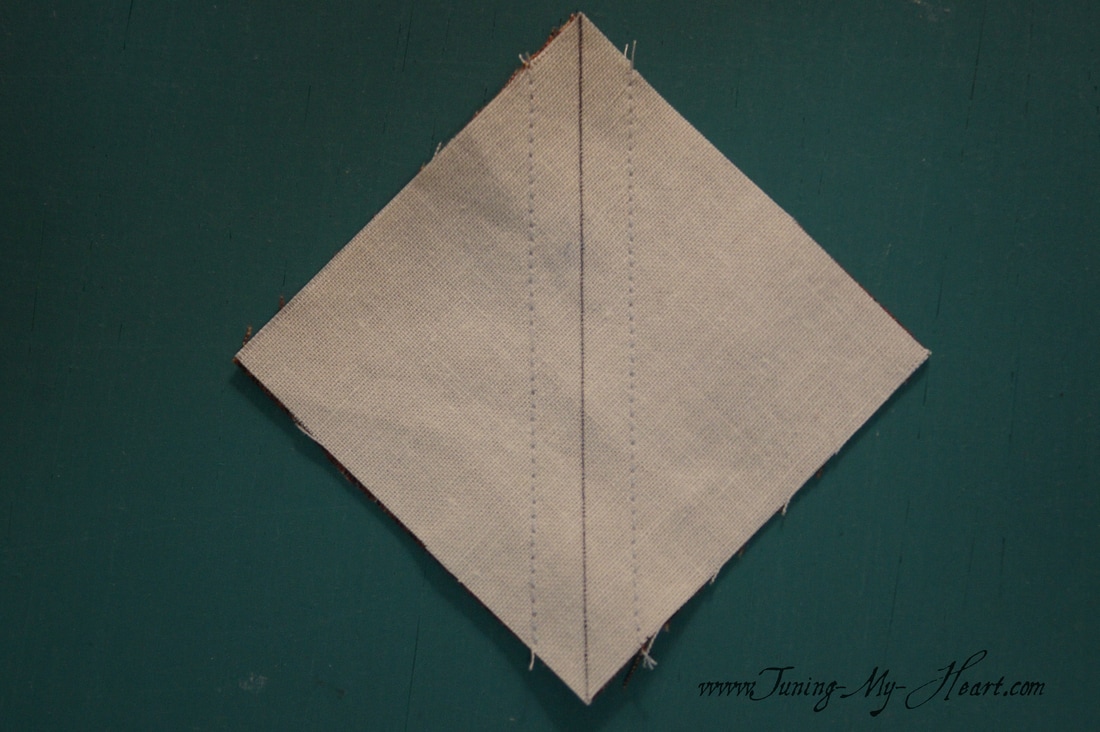 Trim this unit to 1-1/2 inches. It is important to line up the diagonal line on your ruler with the seam line. Trim off two sides, rotate the unit and trim the final two sides.
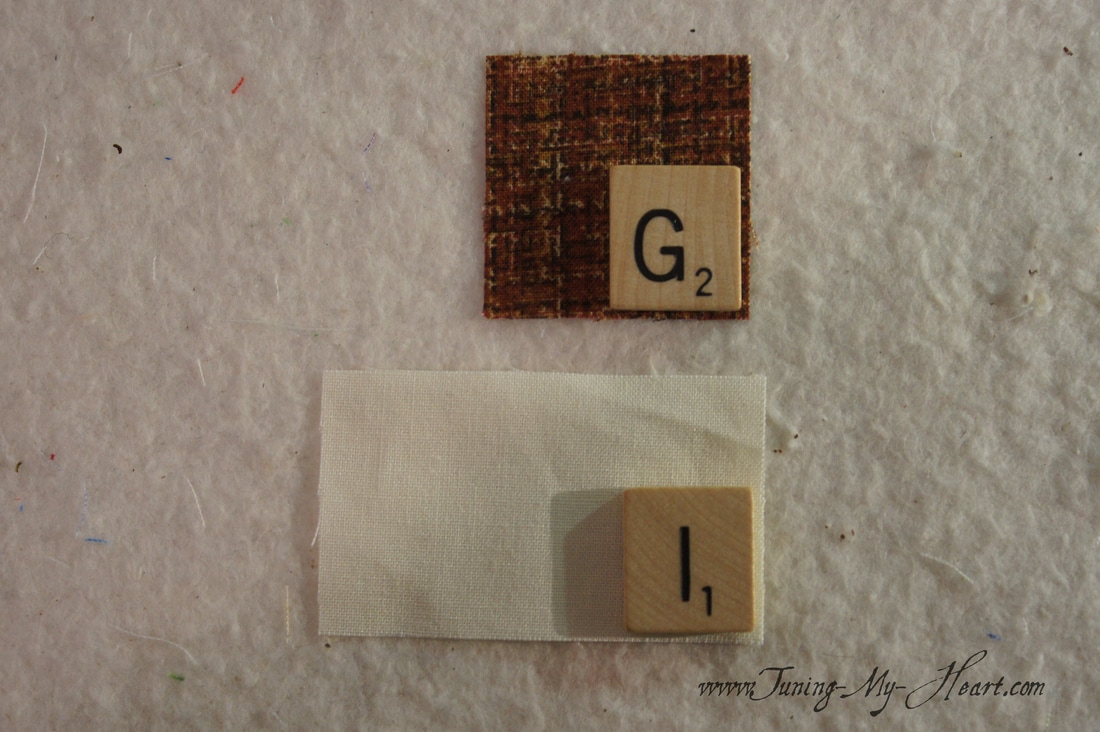
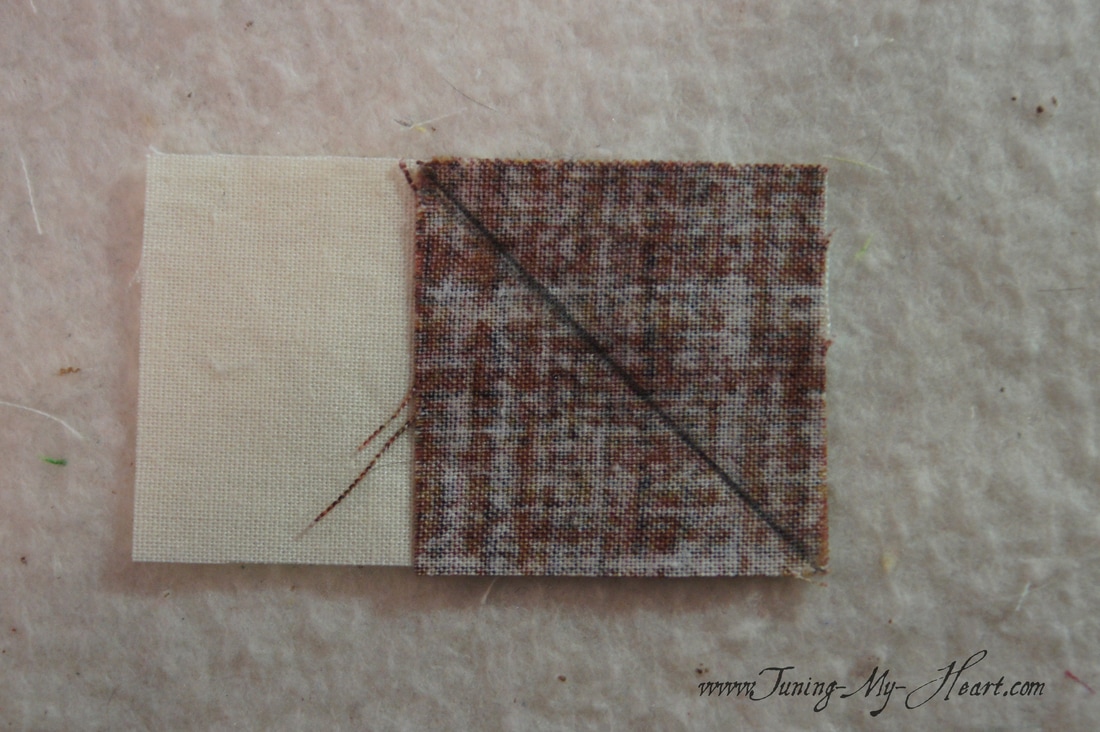
All trimmed and ready to go. I will set this aside for now and work on the next step. 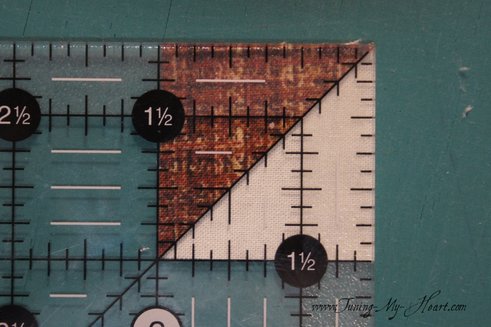 I am not going to cut my G square in half as the directions tell me to. Again, I avoid sewing on two bias edges together if I can so here is my method of joining pieces G and I. I start by drawing a line on G. Making sure I have my diagonal line running in the right direction I am going to sew along the diagonal line this time.
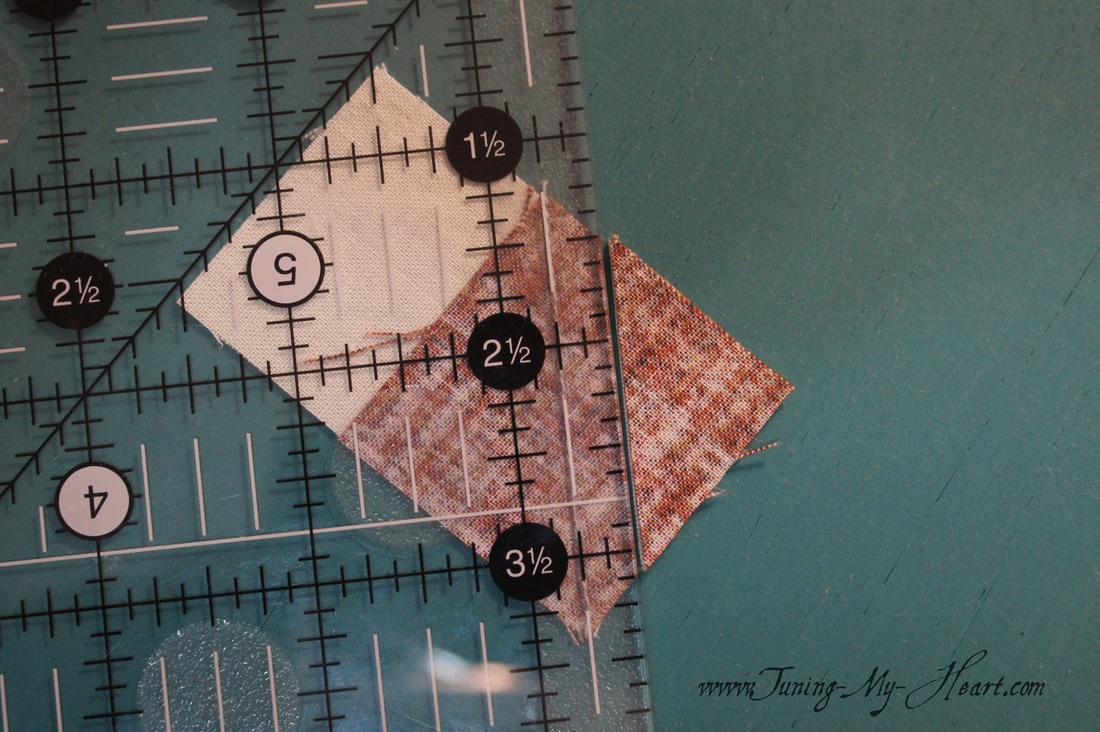
I find it works best to sew just to the outside of the drawn line- just a needle's width. 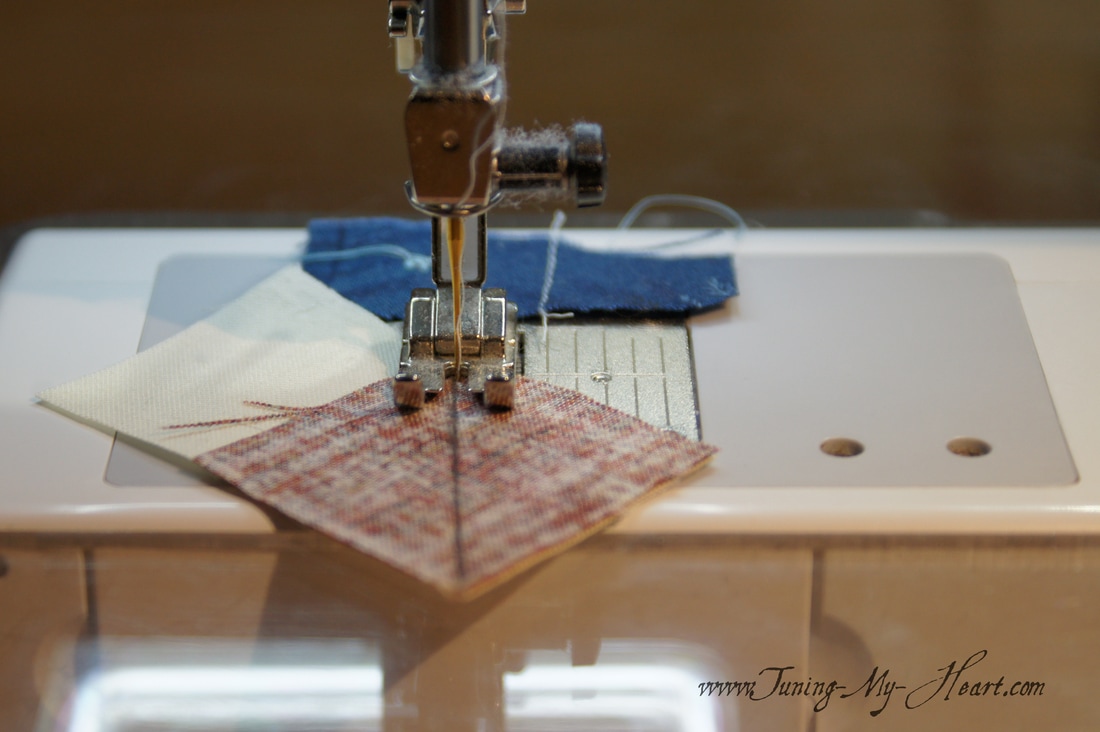 I can now trim away 1/4 inch from the sewn line, press, and end up with a unit that is 1-1/2 x 2 1/2 inches.
With all of my pieces laid out I can sew the two units I just made onto the E rectangles 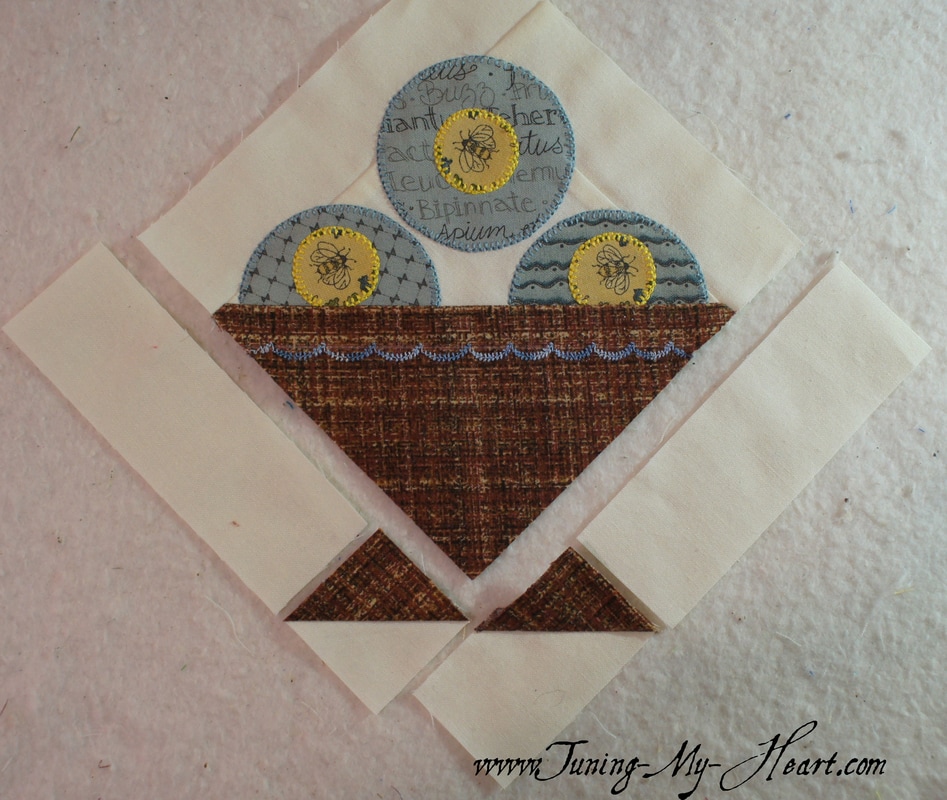 Time to add those sections to the basket unit. First one side and then the other.  My Penny Basket is complete! Just in time for the release of tomorrow's block!!! 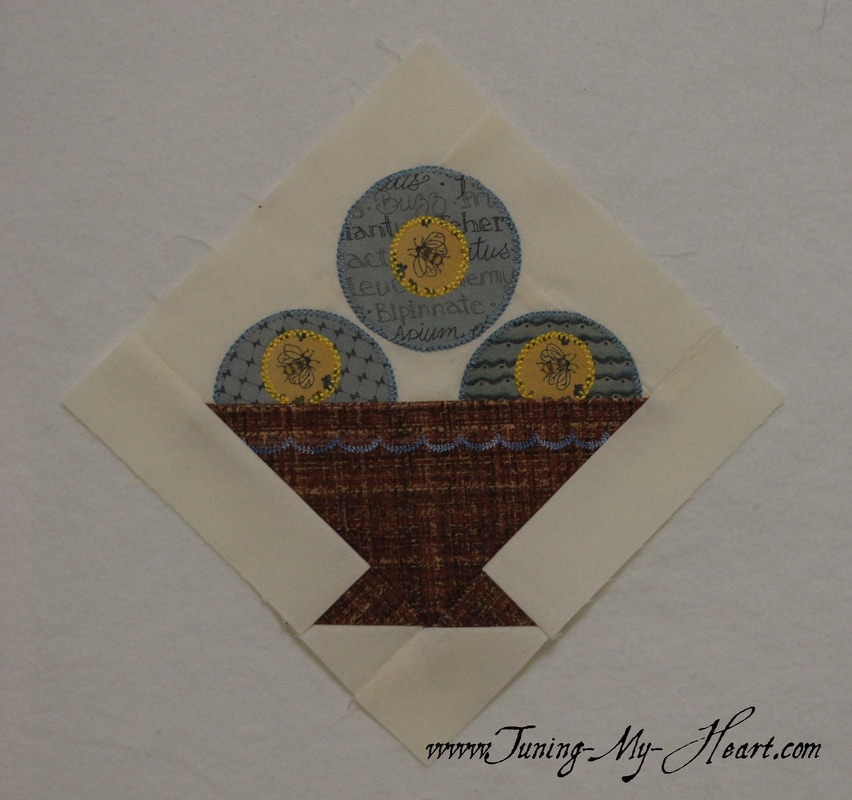 Until next time... Happy Quilting!  Comments are closed.
|

Welcome to the site of Debra Davis-a woman who loves the Lord and loves to quilt.
My other blog where I share about my walk of faith:
Sitting at His Feet 
|


 RSS Feed