|
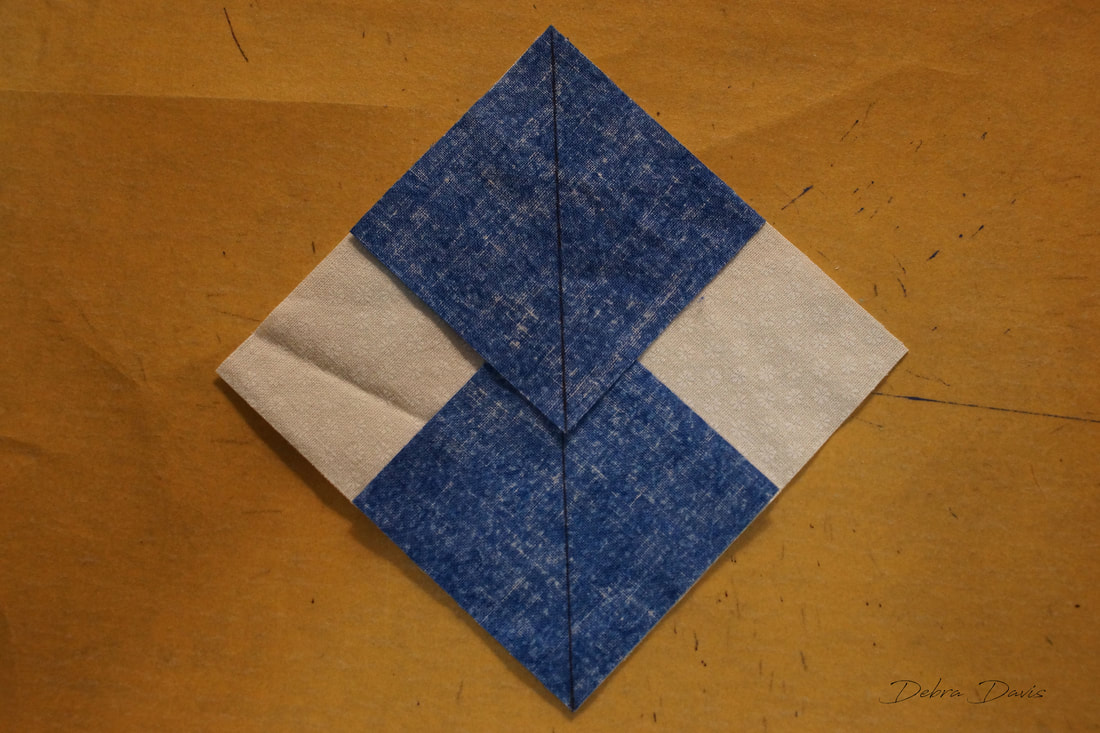
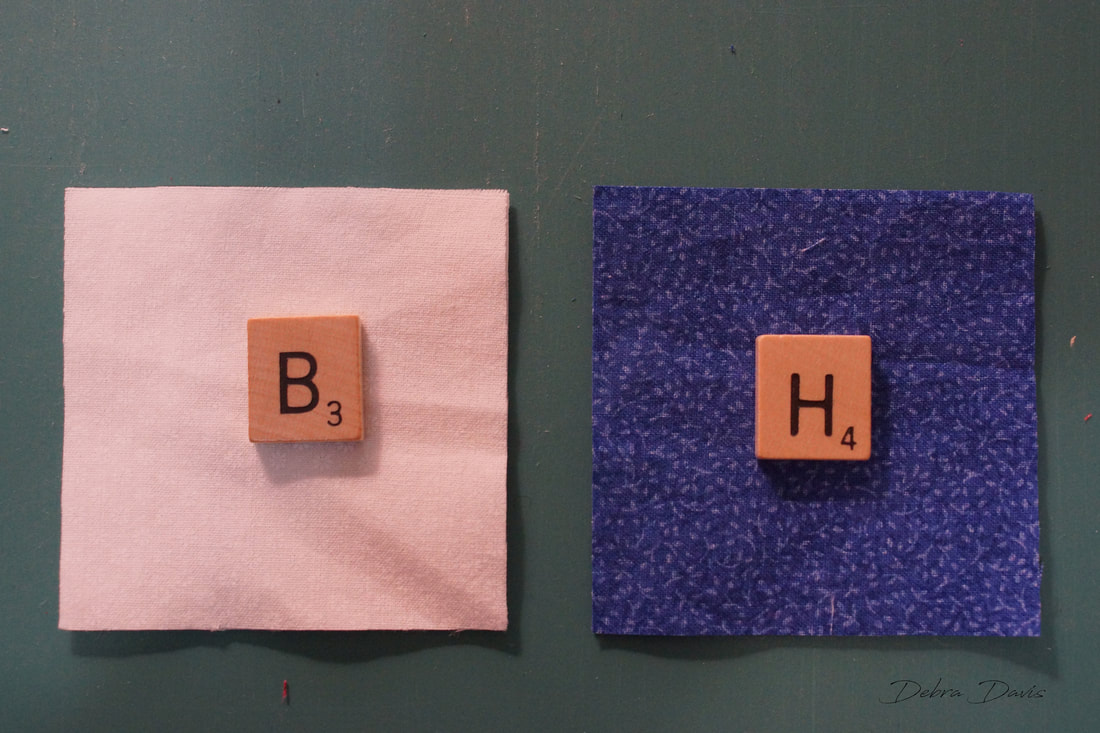
Lisa Bongean has once again provided an alternate block for those who do not want to do the applique blocks. I have to say that I can credit Lisa with losing my fear of working with teeny tiny pieces. This block is no exception as some of the squares finish at 1/2" but what a beautiful block it is when done. You can find Lisa's pattern here. 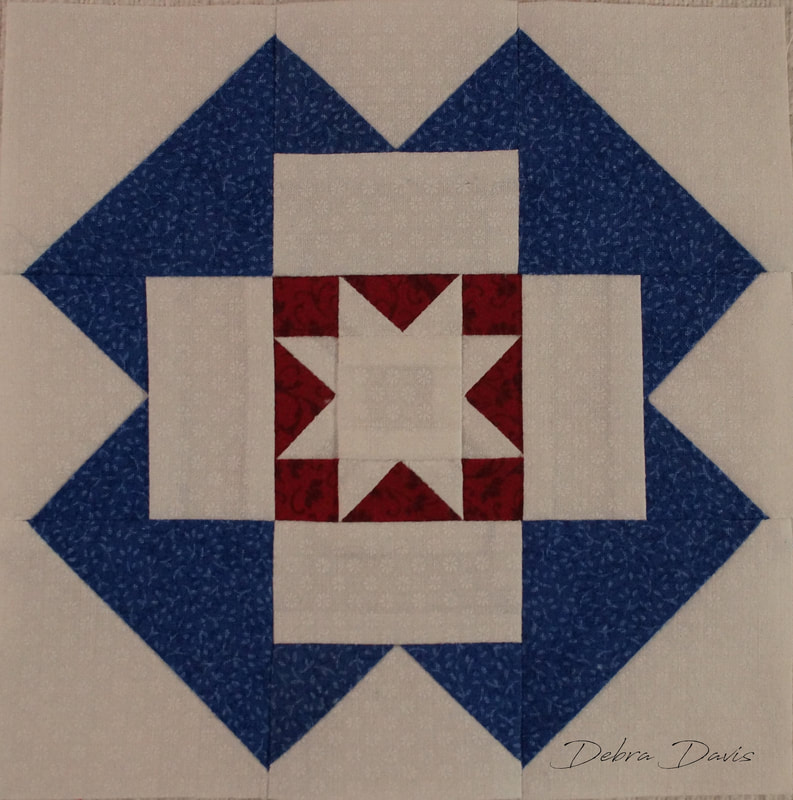 I made a few changes to the cutting directions and did not cut any of the them intro triangles. With these tiny pieces I decided to starch my fabrics before cutting them. Cutting Directions: A-(cut 1) 3 1/2" x 3 1/2" square B-(cut 2) 3 1/8" x 3 1/8" squares C-(cut 4) 1 1/2" x 2 1/2" rectangles D-(cut 4) 1 5/8" x 1 5/8" squares E-(cut 1) 1 1/2" x 1 1/2" square F-(cut 4) 1" x 1" squares G-(cut 1) 2 1/2" x 2 1/2" square H-(cut 2) 3 1/8" x 3 1/8" squares I-(cut 4) 2 518" x 2 1/8" squares 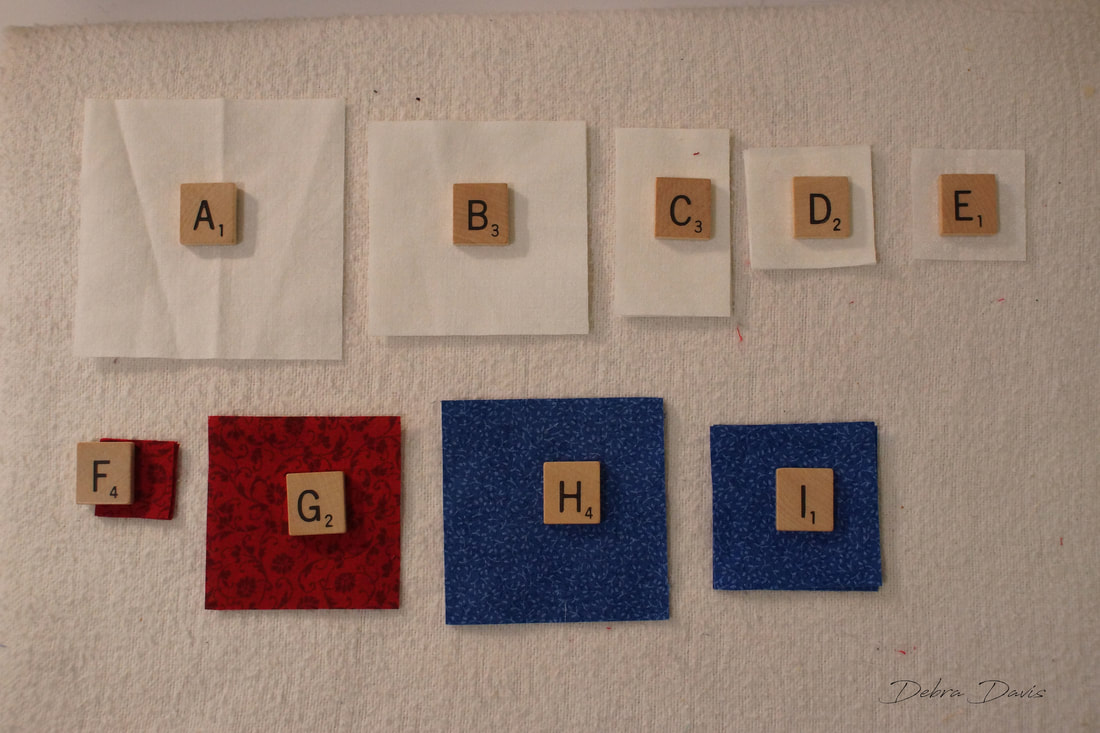 I started with the A and I squares to make the large Flying Geese Units. 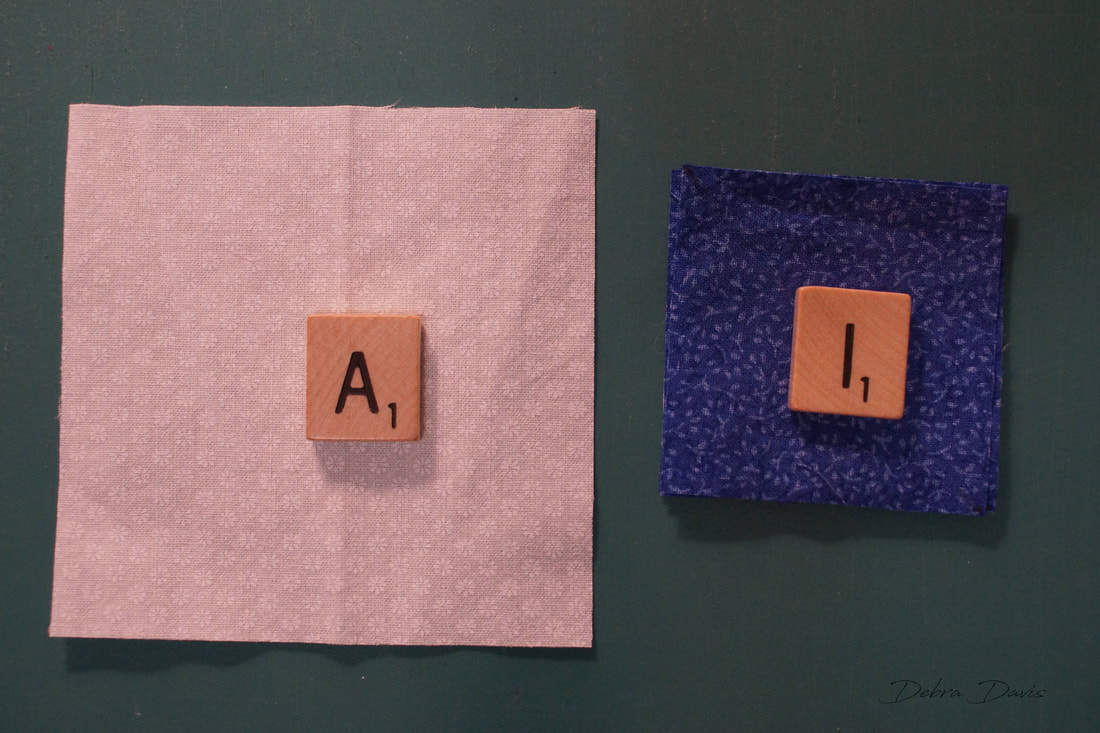 Place 2 I squares right sides together on top of the A square and draw a line down the middle. I used a fine tip Sharpie pen for this. Sew 1/4 inch from each side of the line.
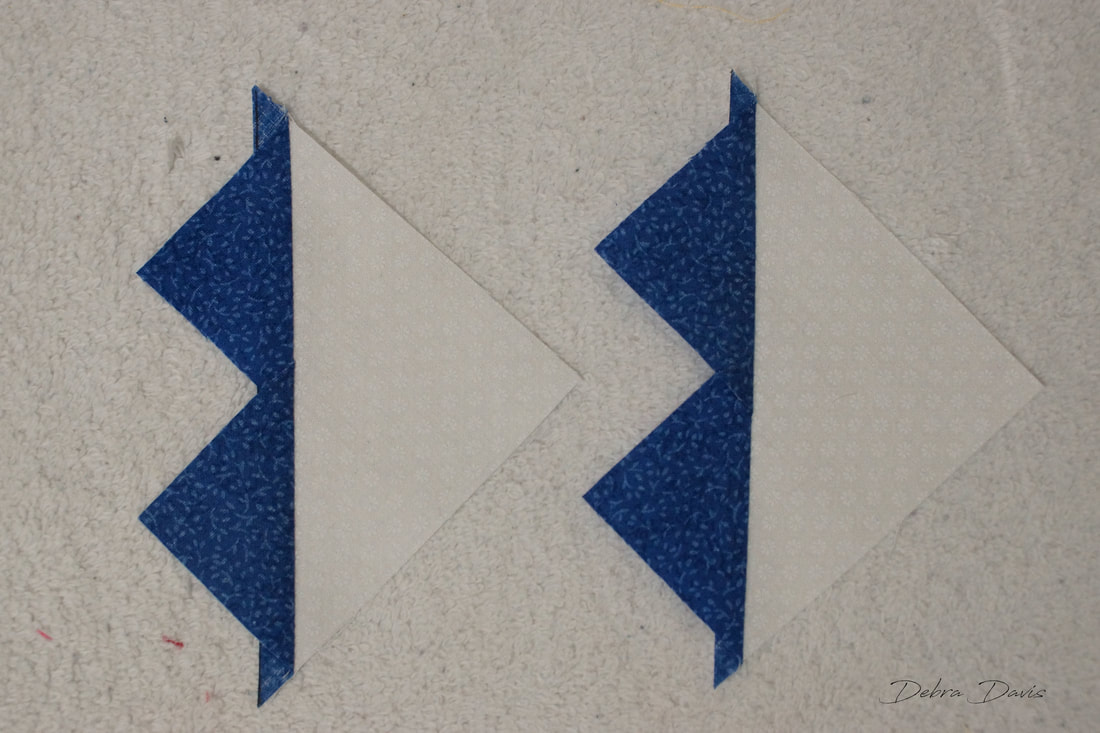
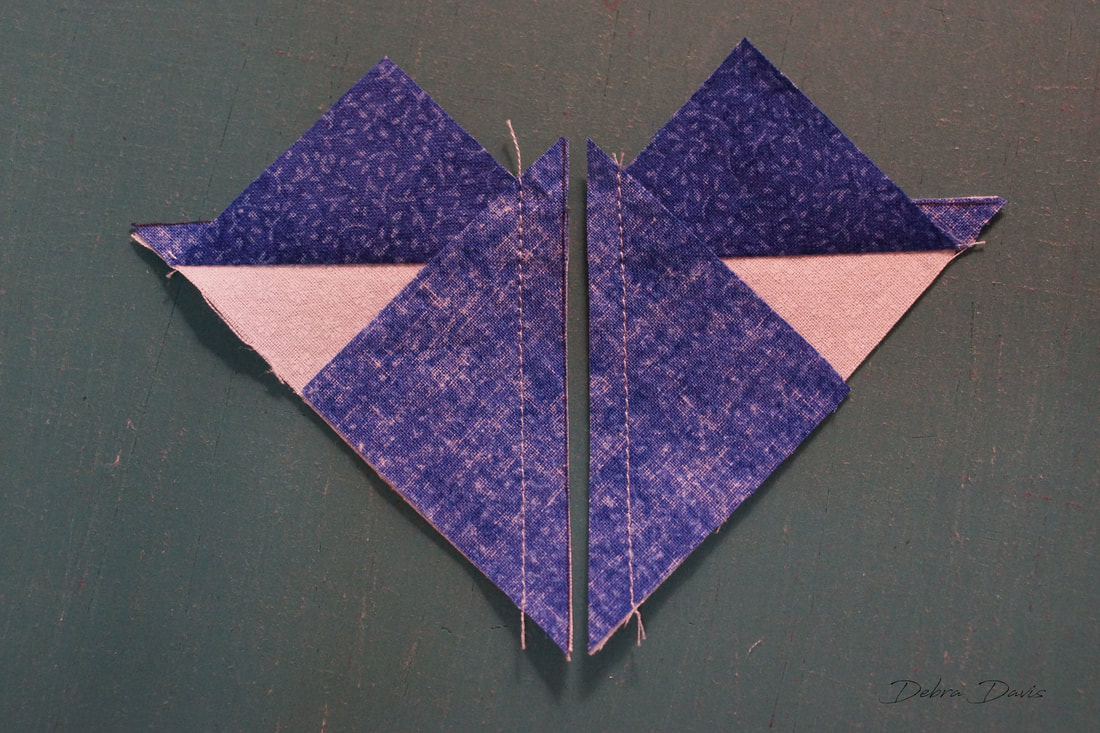
Cut the units apart on the drawn line and press towards the small triangles.
Place the remaining I squares on the units and draw a diagonal line dwon the middle 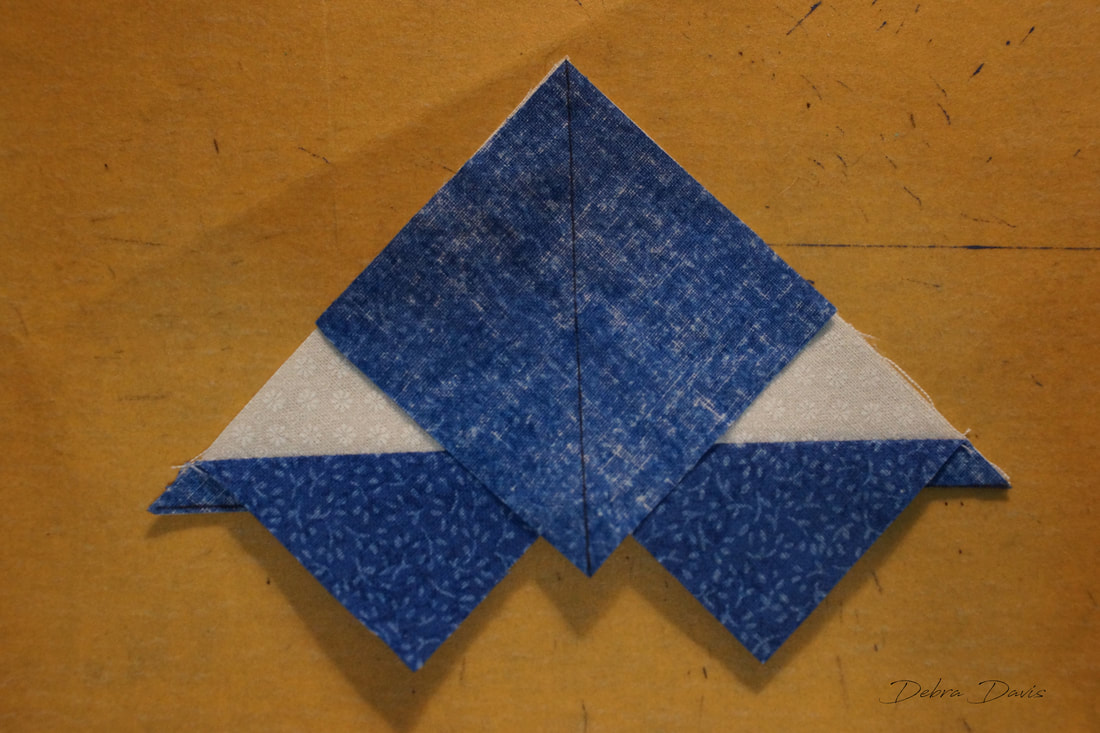 Sew 1/4 inch from each side of the line, cut apart on the the line, and press towards the small triangle.
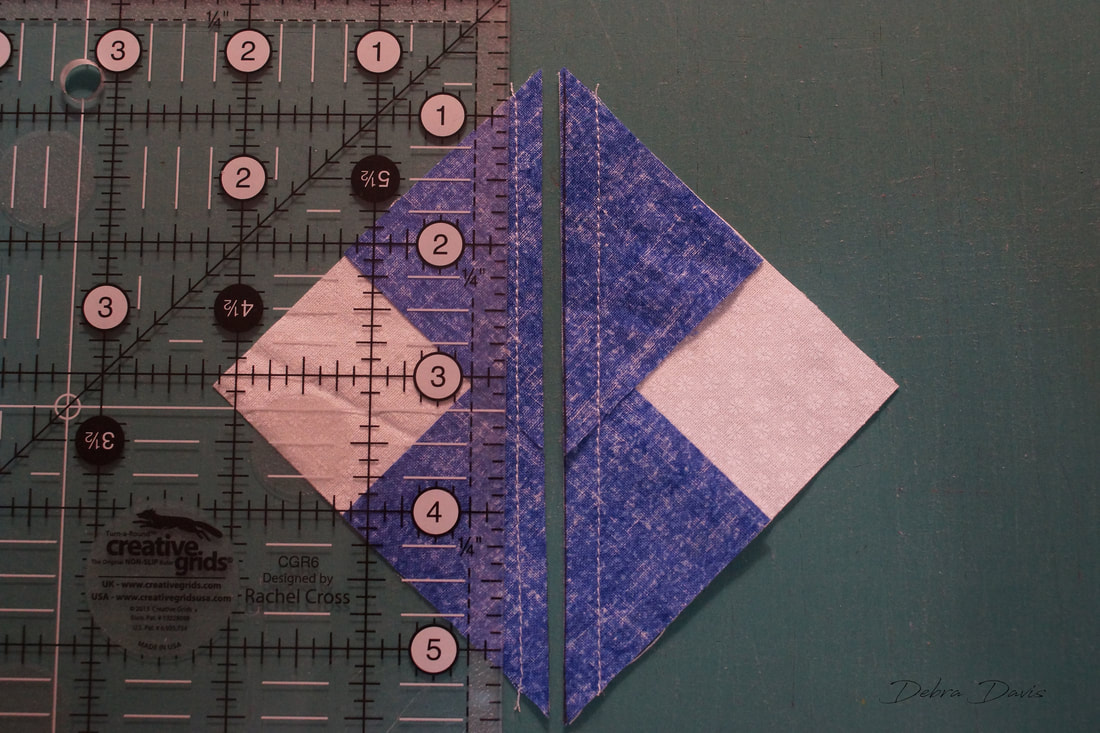
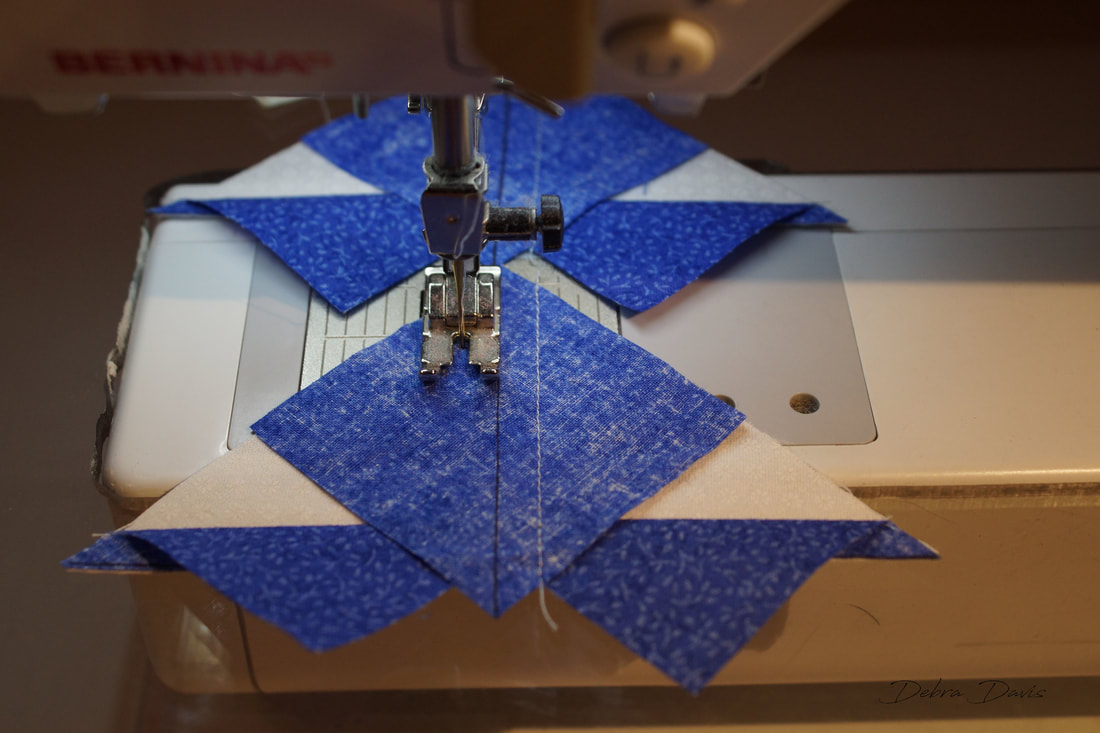
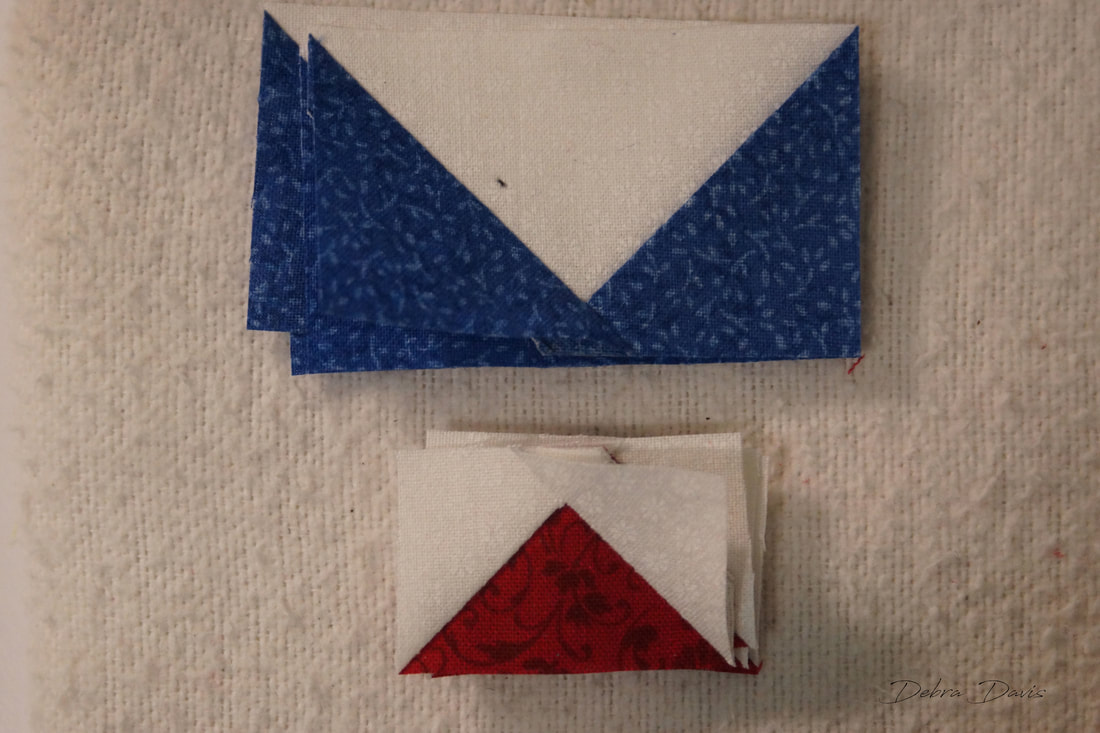
I now have four Flying Geese units that need to be trimmed. I am using Creative Grids "Ultimate Flhying Geese Tool for this. I love that this one ruler does many sizes and is easy to use. It also benefits from the Creative Grids non-slip design. Since they finish at 1" x 2" I find that mark on the ruler and make the first trim. 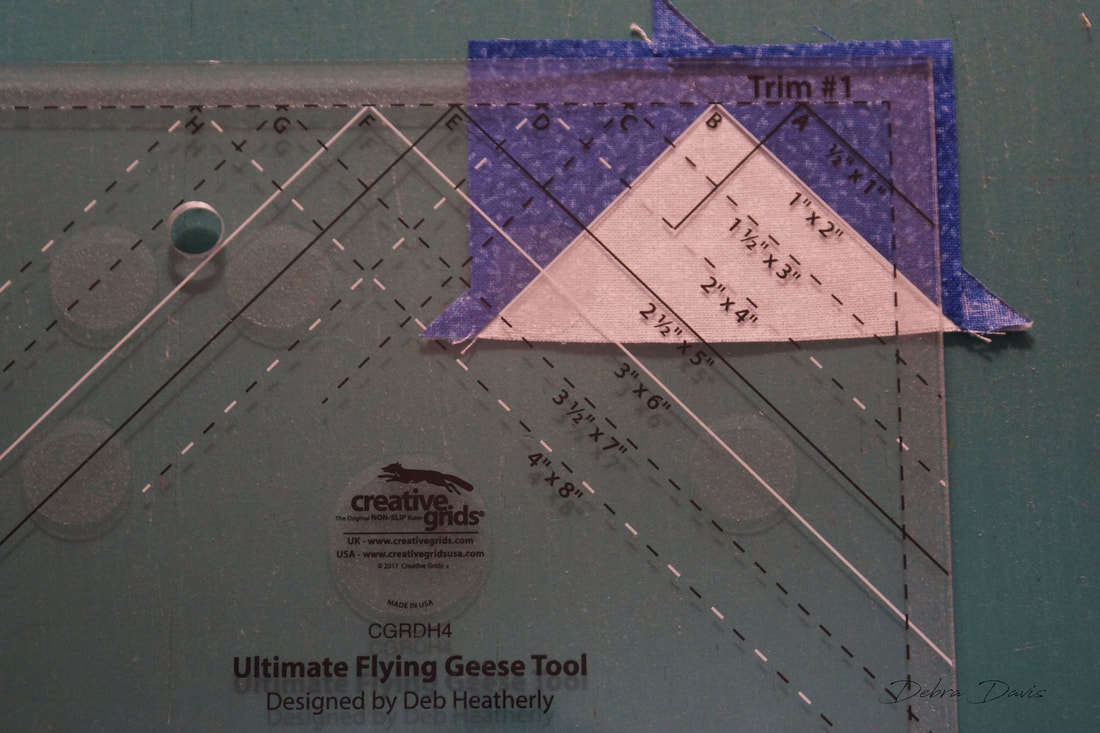 Then just rotate the block and turn the ruler for Trim #2. The Flying Geese now measure 1 1/2" x 2 1/2" 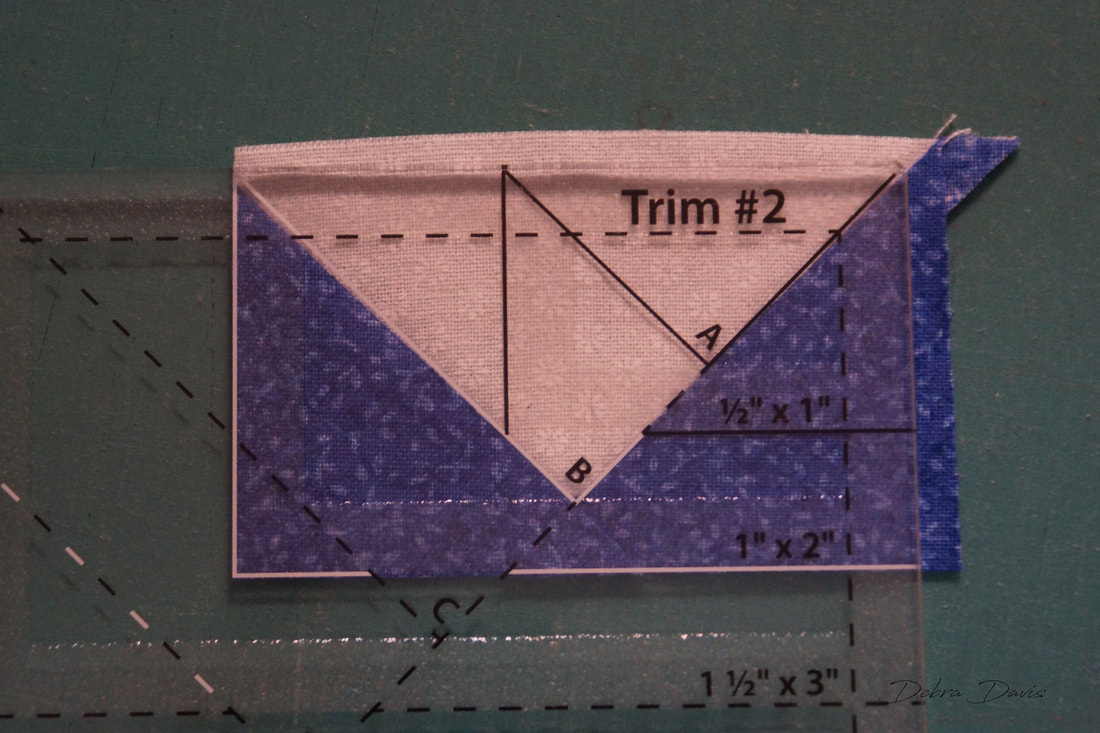 Next I repeat the process with the G and D squares. 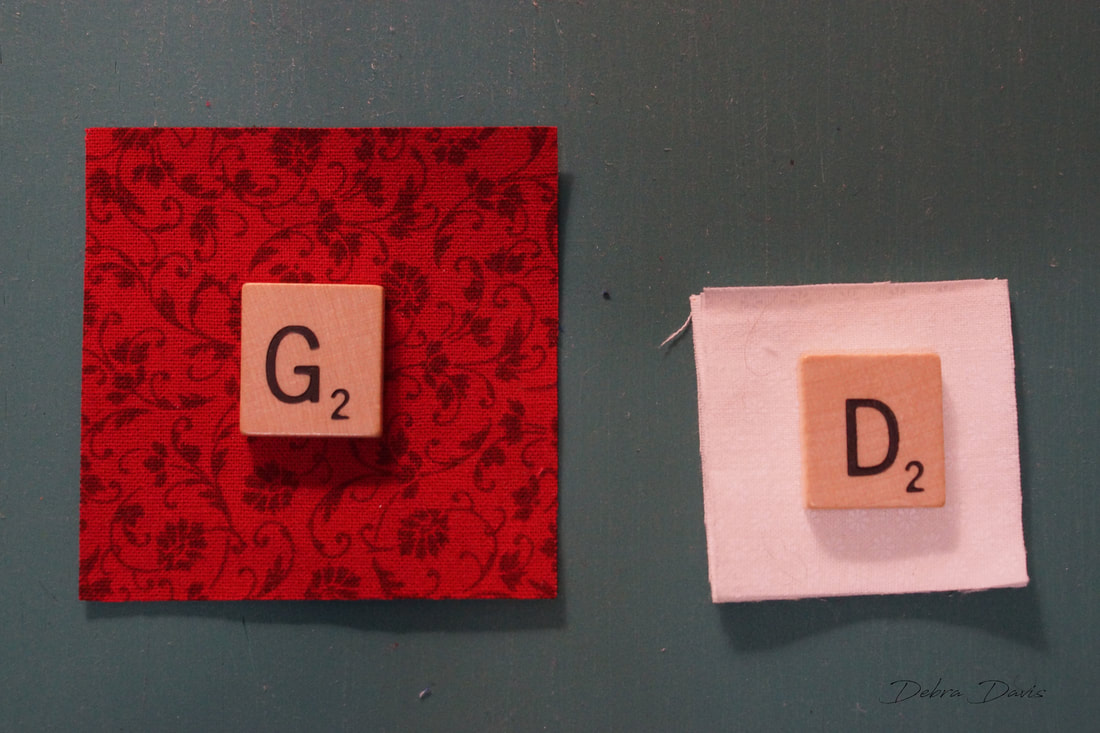 Marked and sewing on each side of the line. 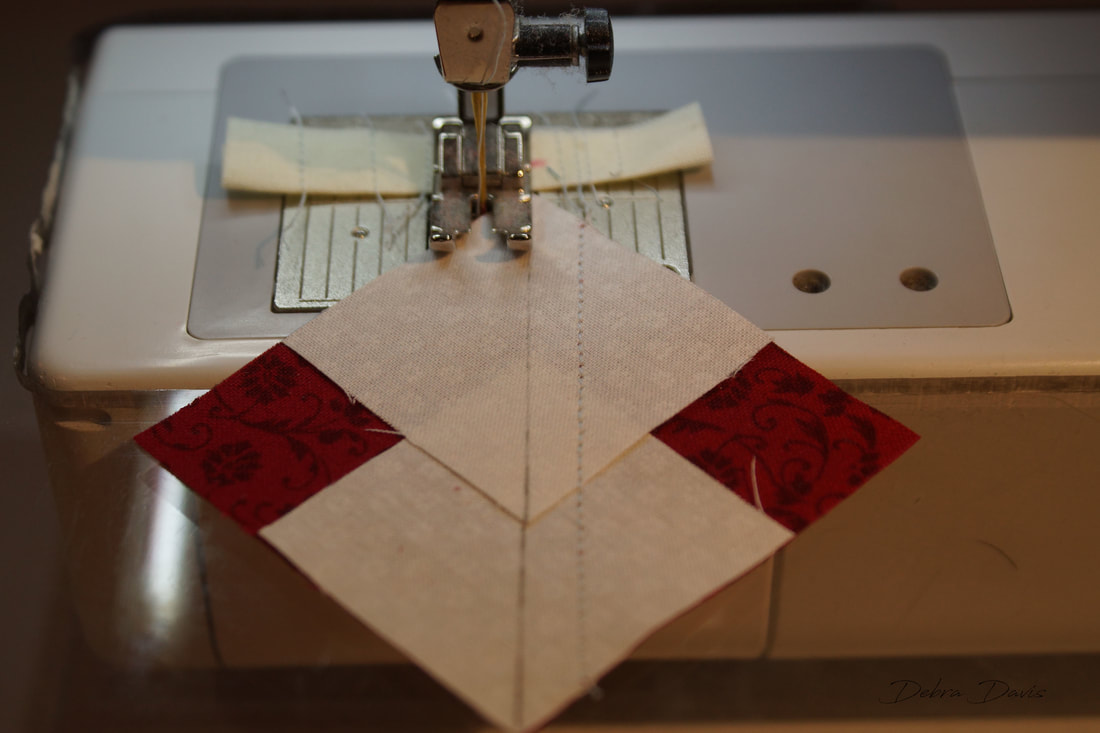 Using the ruler I trim these to 1" x 1 1/2" It is vital when trimming to make sure that there is 1/4 inch left above the point of the triangle. If you do not have 1/4 inch you will most definitely lose those points when you put the block together. -itty bitty Flying Geese!!! 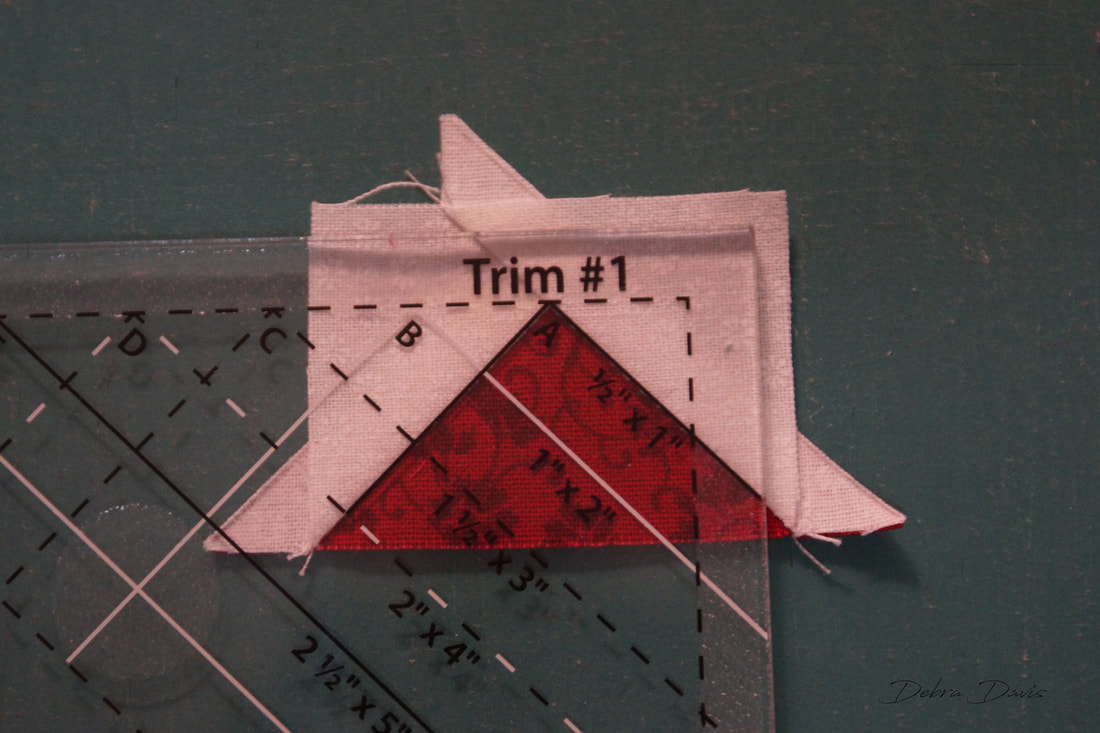 I set the Flying Geese aside and start making Half-square Triangles using the B and H squares.
I have drawn a diagonal line on the back of the B squares then place them right sides together on an H square.  Once again I am going to sew 1/4" from each side of the line. 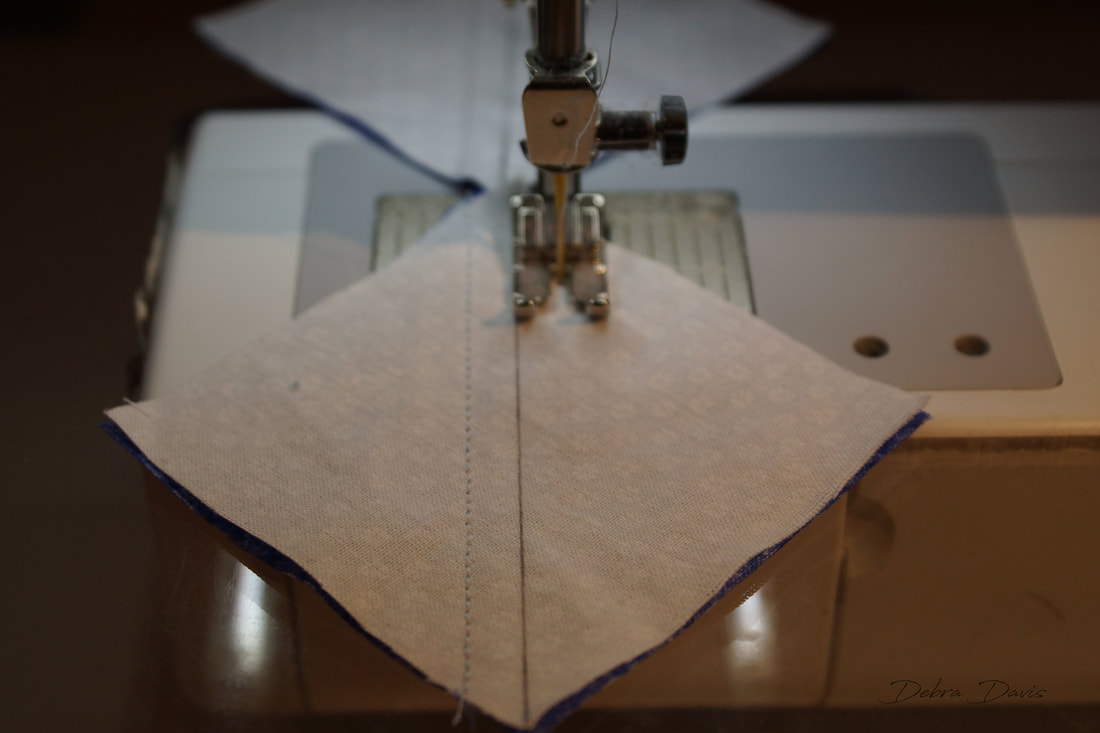 These are cut on the line and pressed towards the dark side. 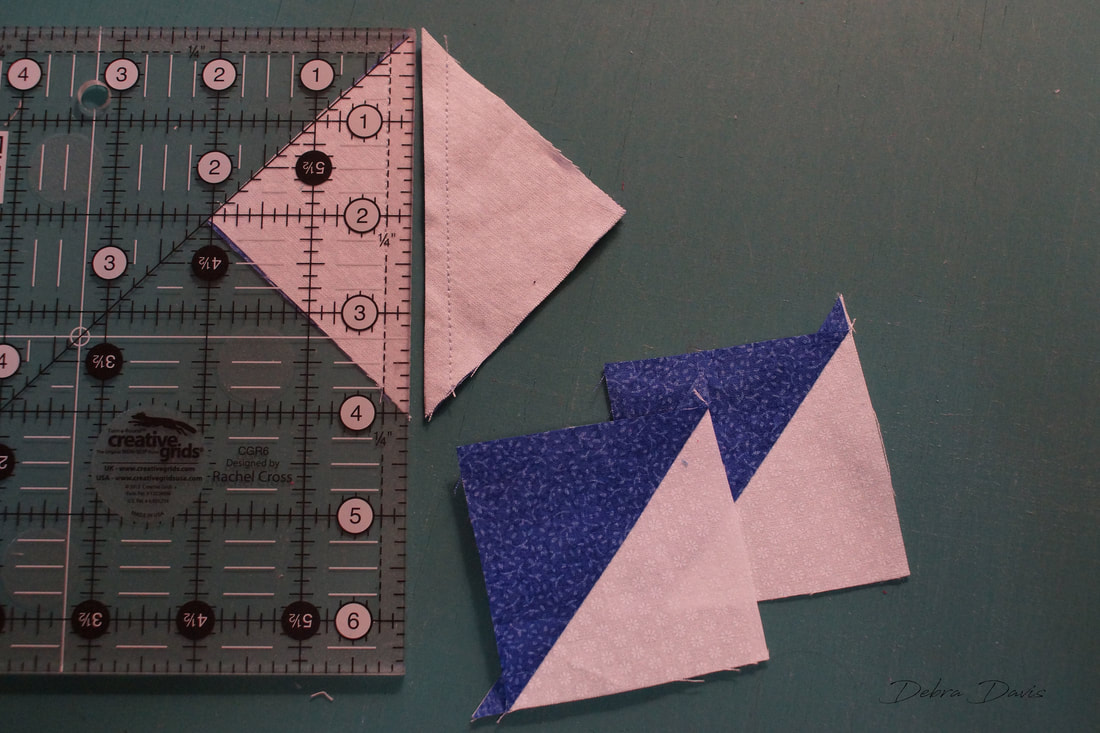 Using my Bloc Loc ruler I trim these to 2 1/2" squares. 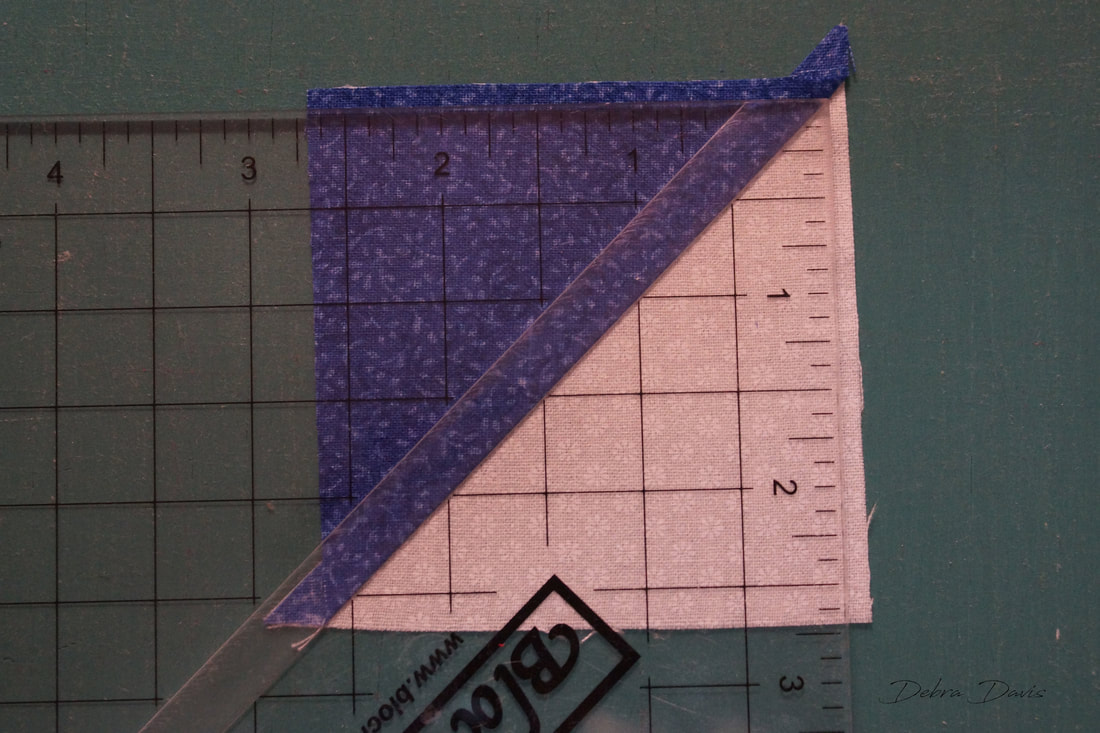 Time to put all of the pieces together. 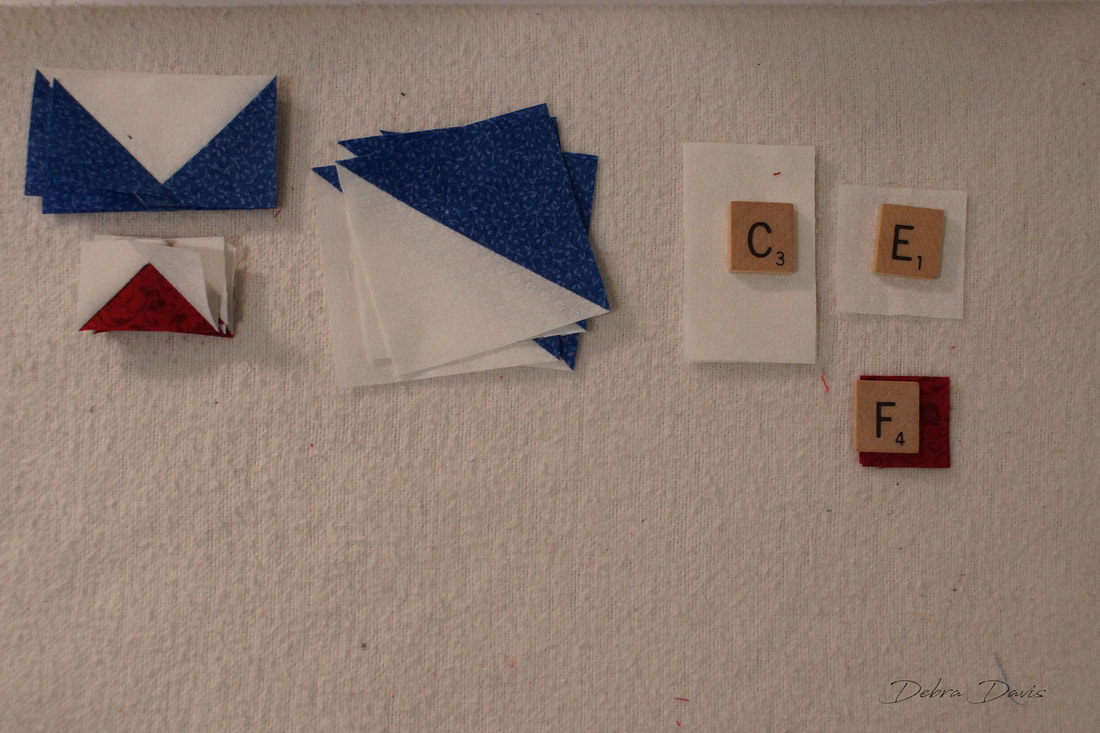 I started with the center square and lay out the small Flying Geese with the F and E squares. 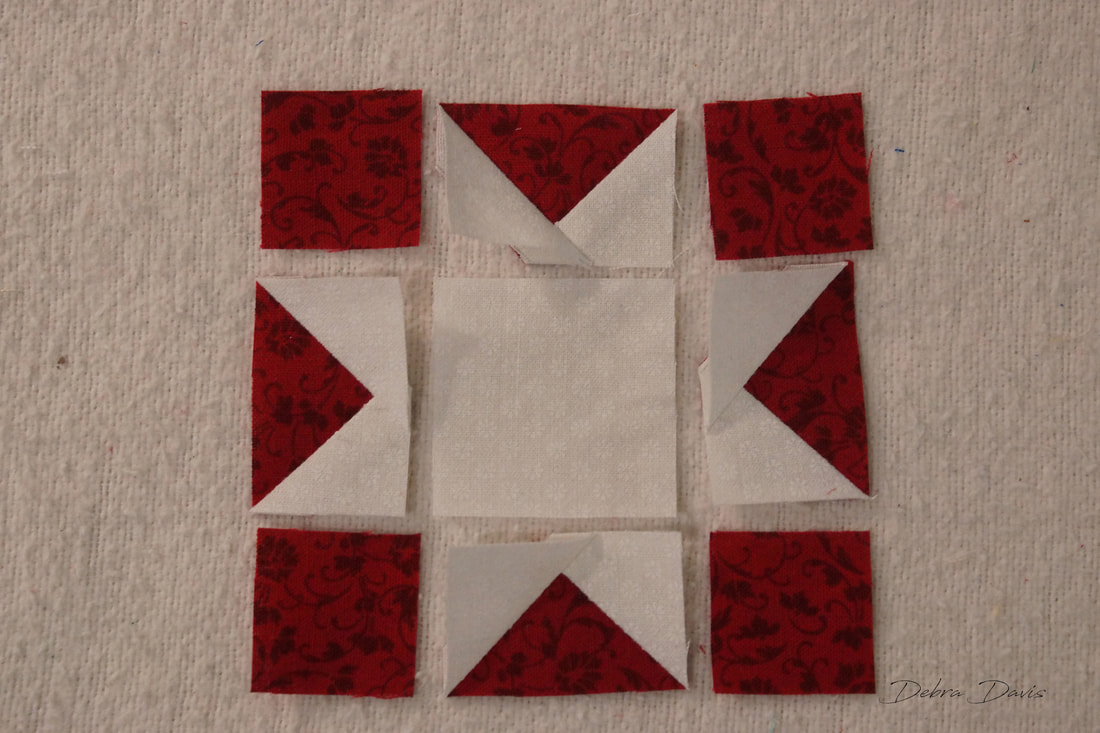 As I sew the rows together I work with the Flying Geese units on top so that I can see that my needle falls right on the intersection of the "X" made by the stitching lines. This will ensure nice crisp points. 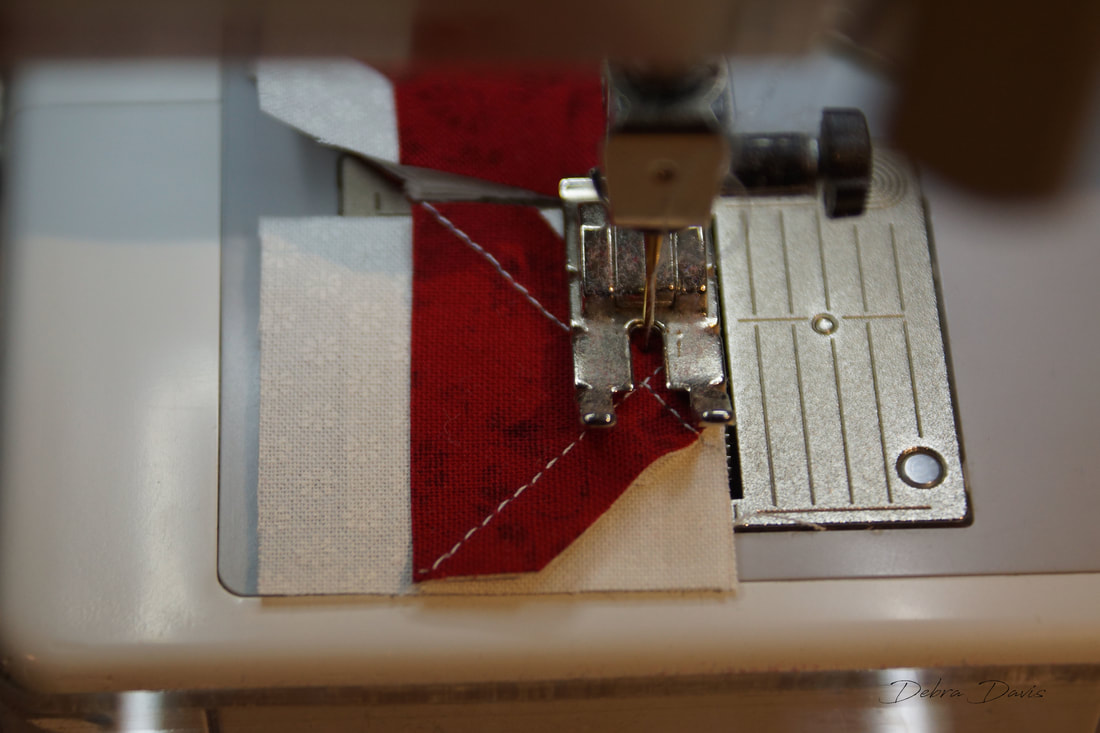 I pressed the top and bottom rows towards the F squares and the middle row towards the E square. After stitching the rows together I now join them to make the center square of the block I did place pins at the intersections where the seams were nested together. 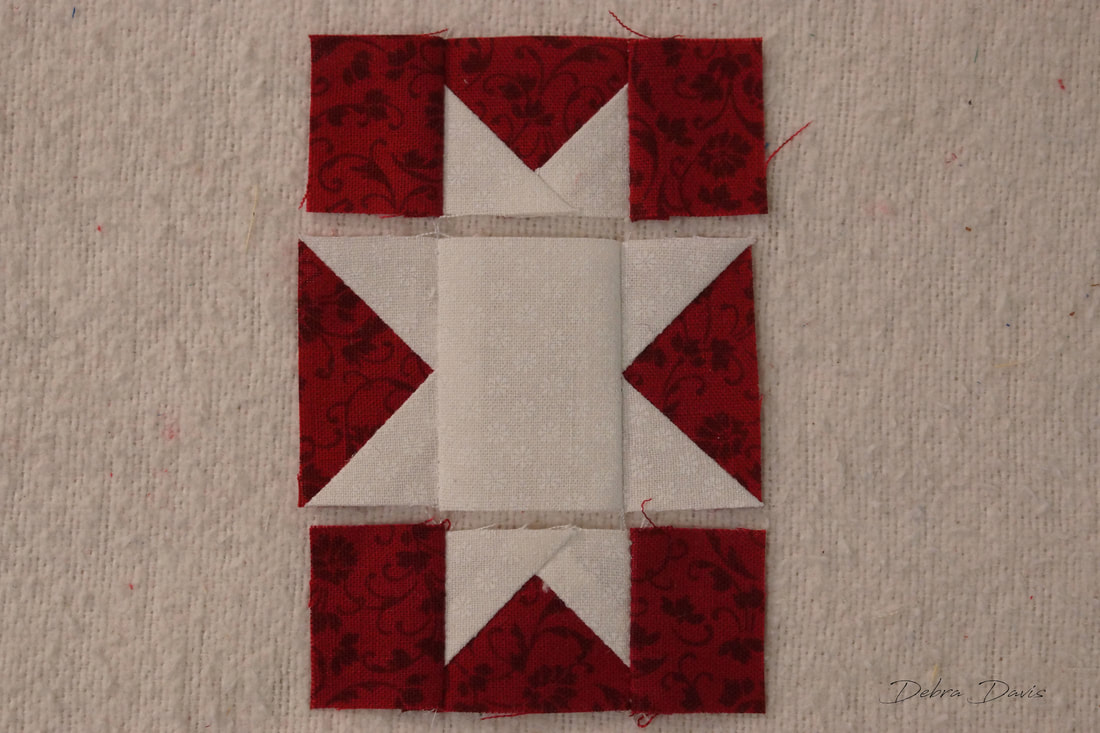 This square should measure 2 1/2" x 2 1/2" now. 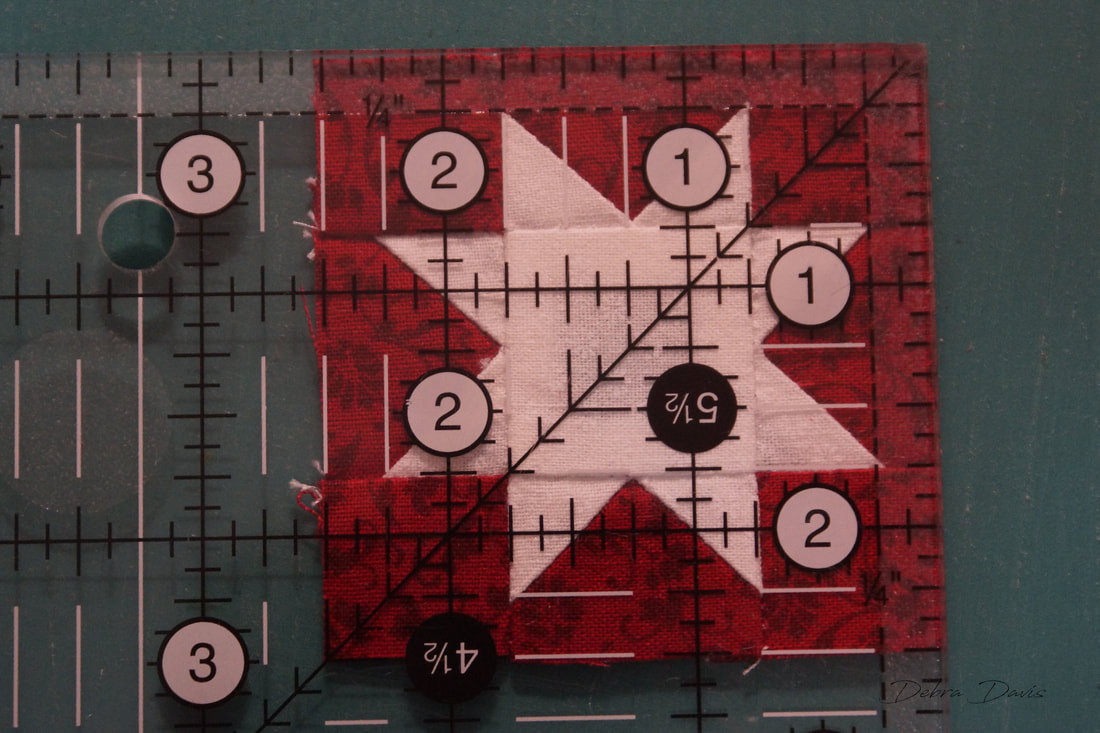 I need to join the large Flying Geese with the C rectangles now. 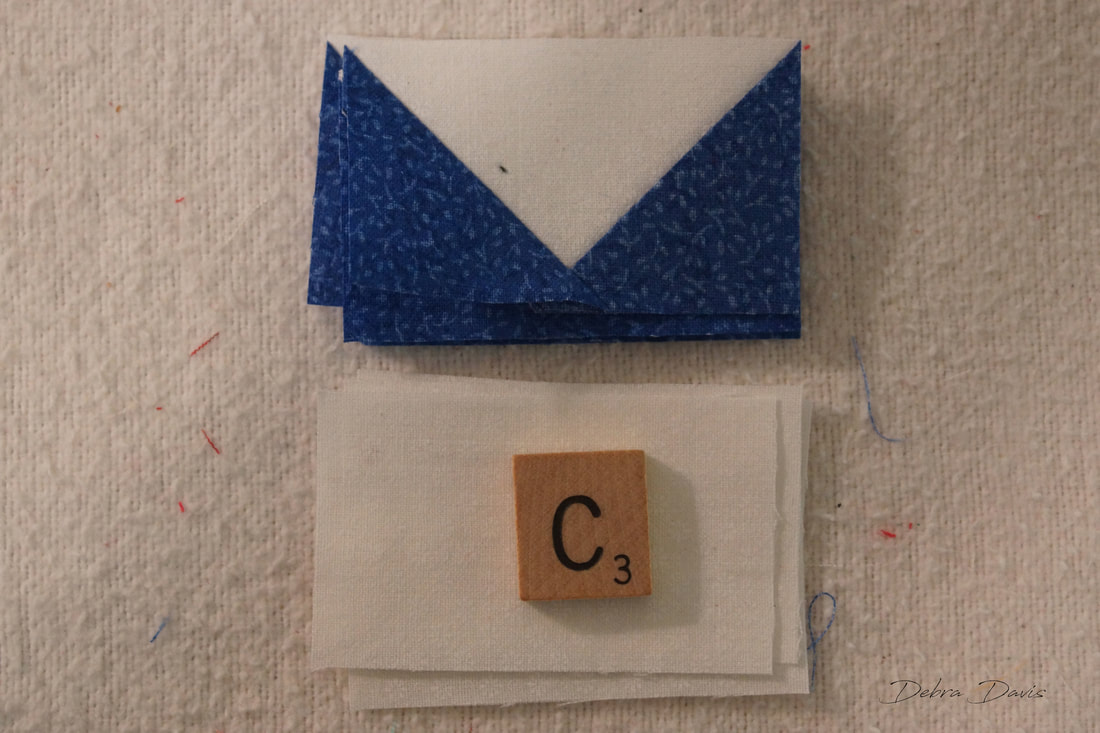 Again, as I sew these I aim for the center of the "X". 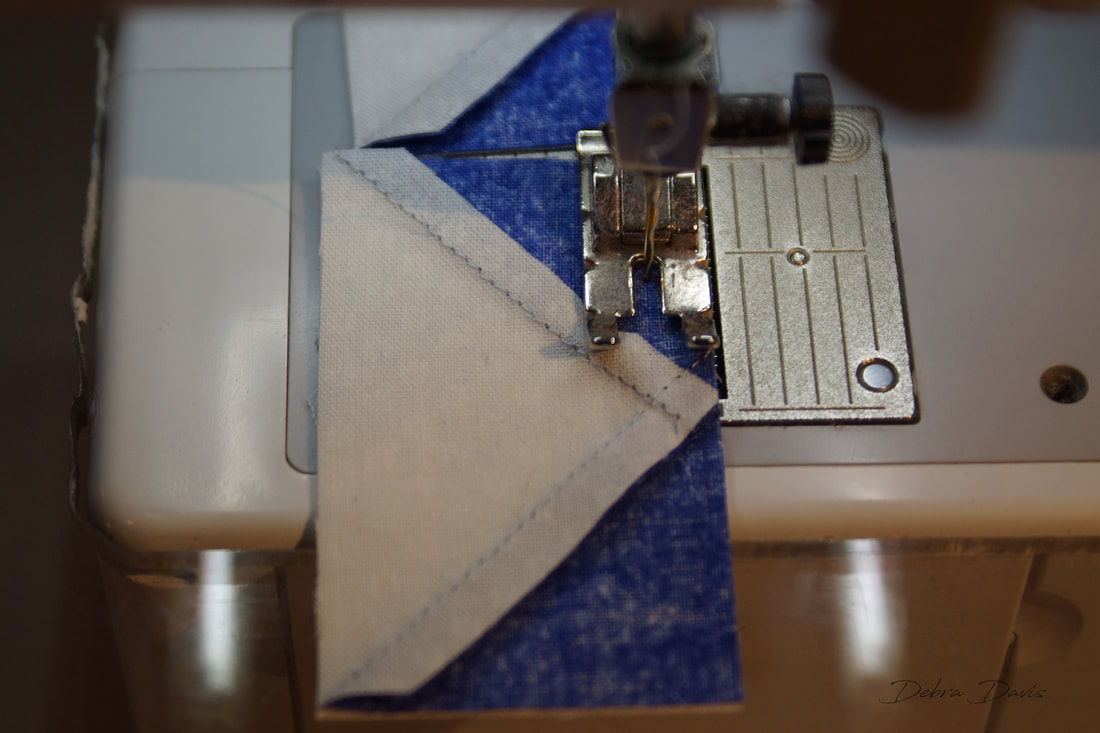 I pressed these towards the C rectangles. 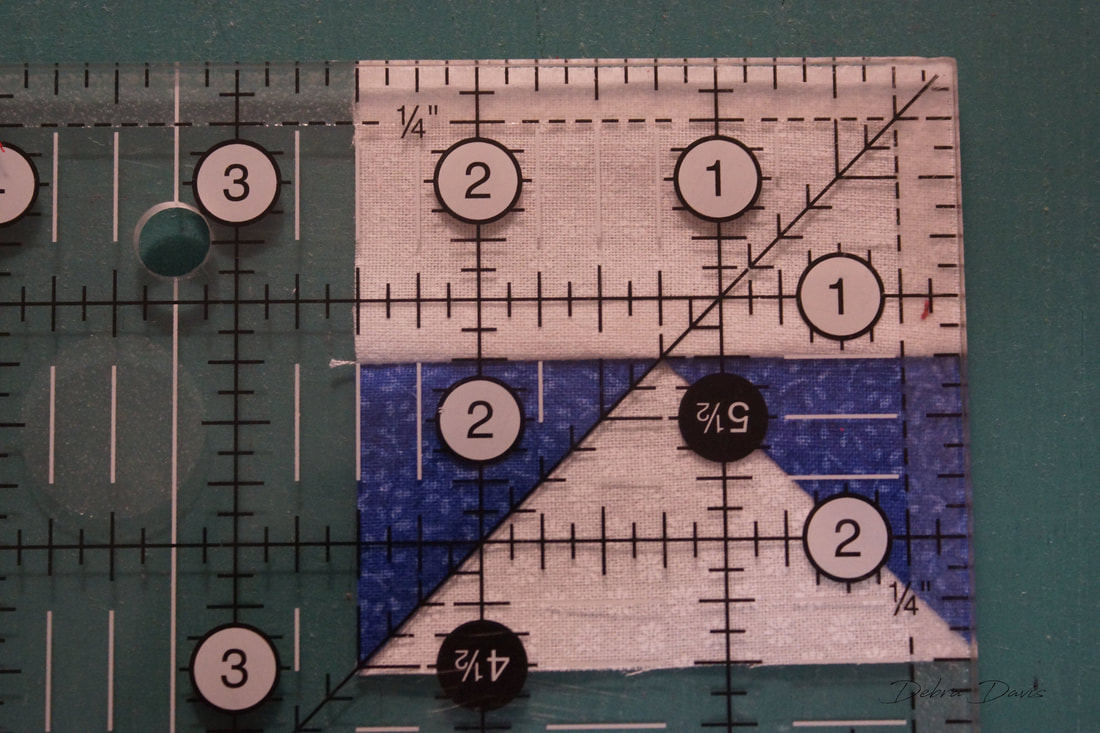 Now to put all of the pieces together. 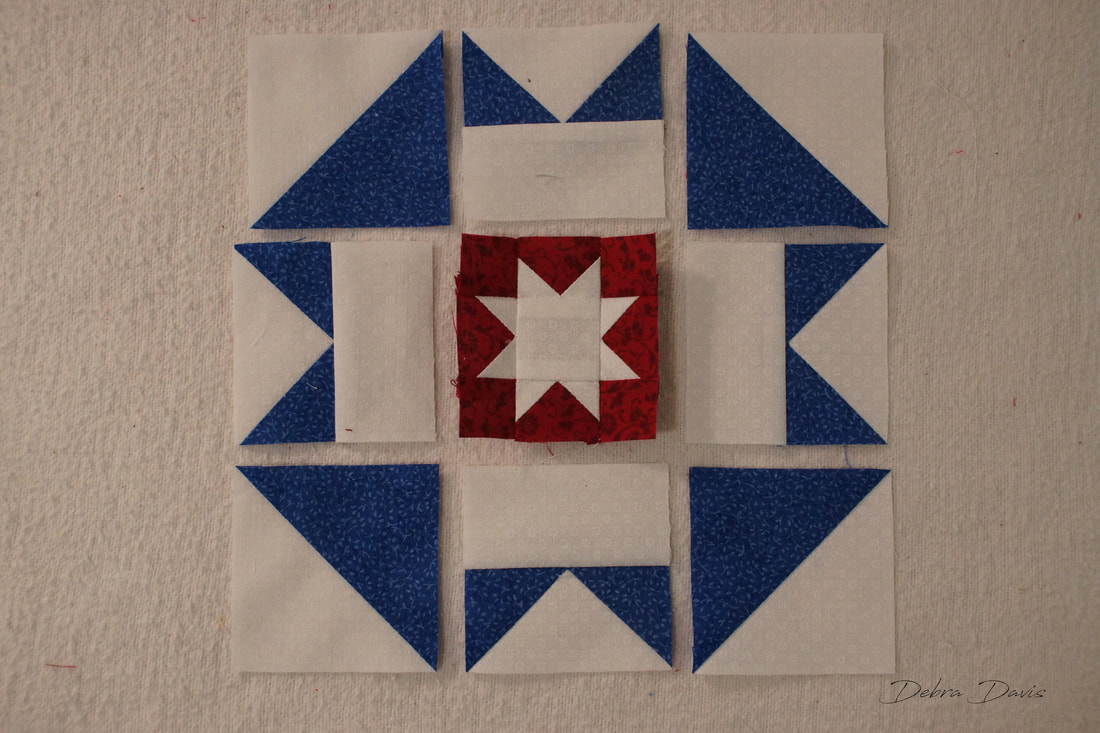 The only tricky parts are making sure my needle crosses at those X intersections again. 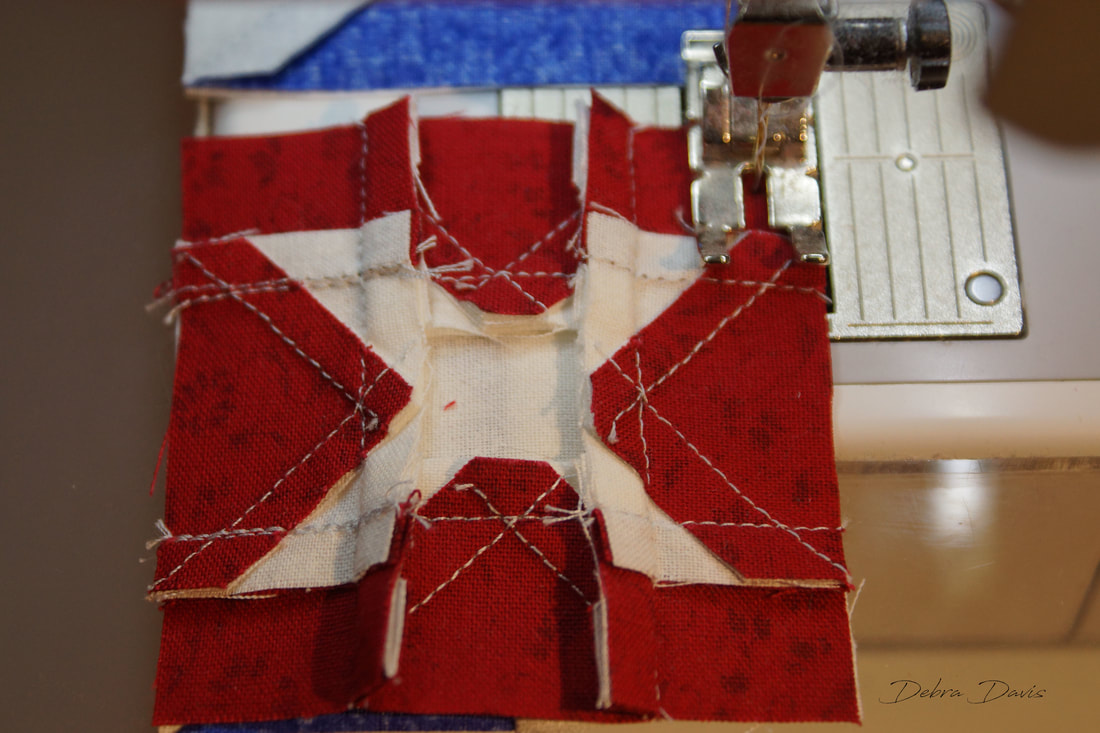 There are diagonal seams meeting in the corners-the best way I have found to deal with these is to sew with the seams faceing away from the needle as this seems to help push them together most of the time. A pin snuck in to hold them can help too. 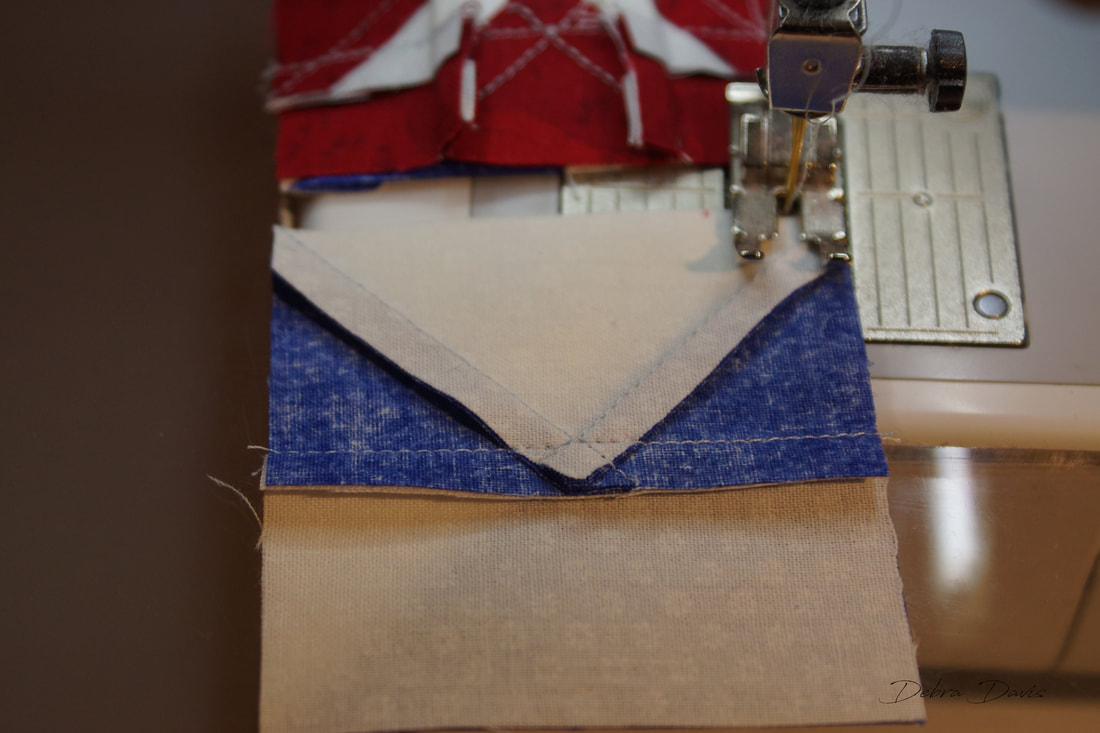 I pressed the top and bottom towards the middle sections and the center row towards the C rectangles. Just a matter of sewing these rows together and I am done. 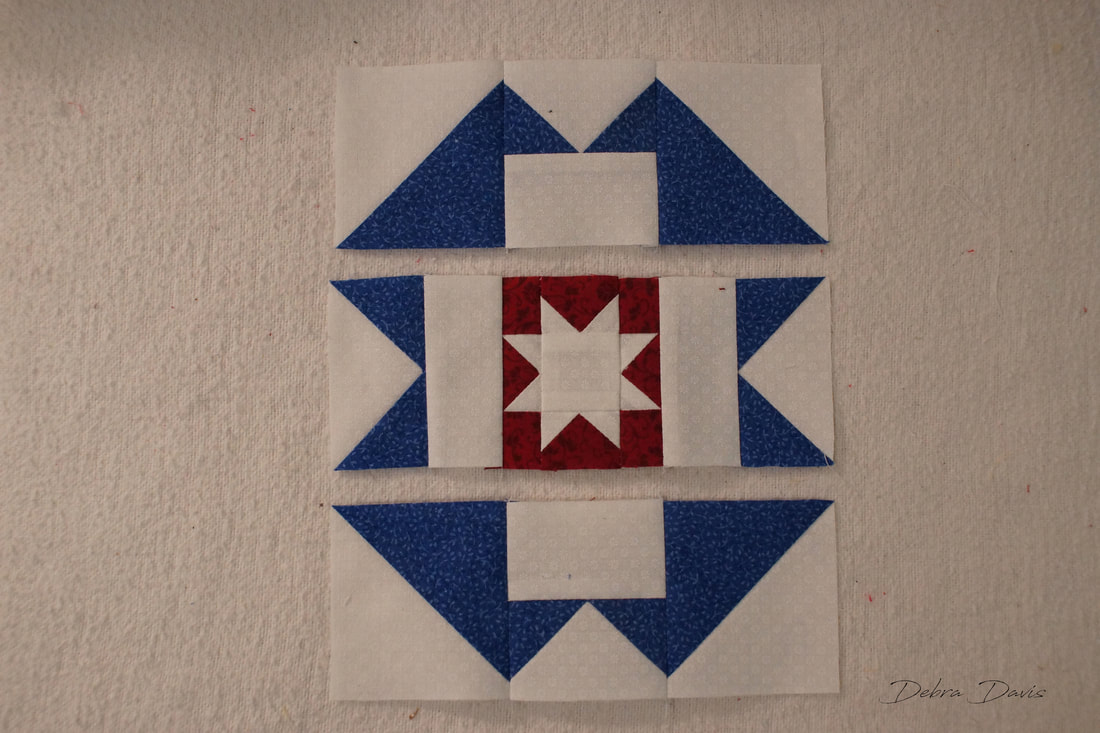 I am very happy with this one-I love it when things fall into place like this.  I have been doing Lisa's alternate block with red, white, and blue scraps. I have a few more to add to my collection and then I am not sure what I am going to do with them. Time will tell. 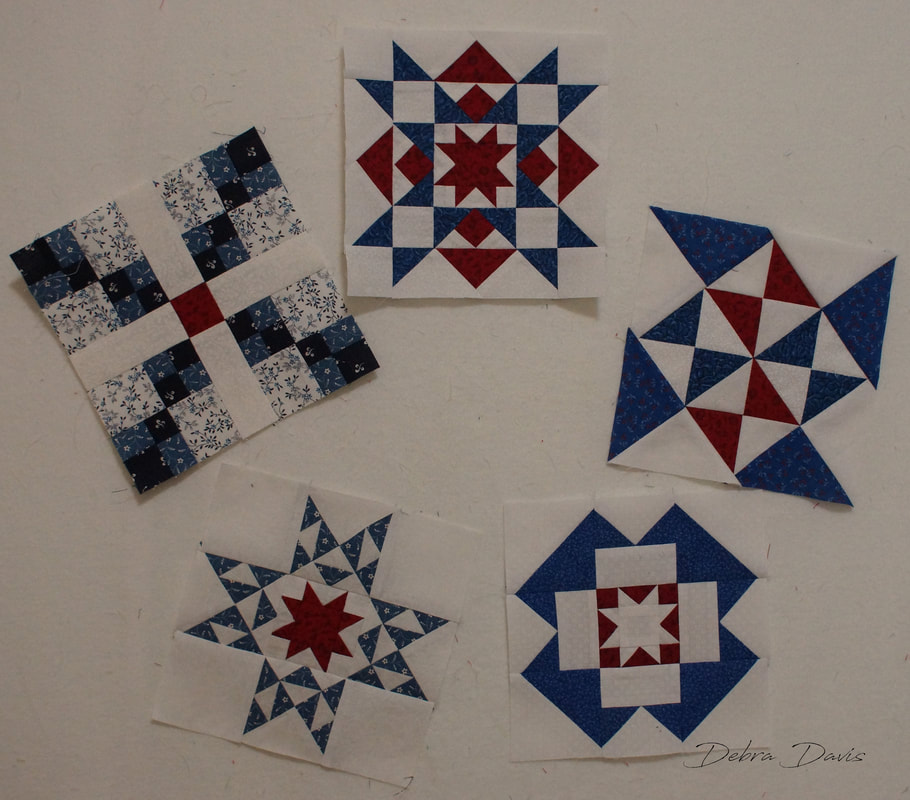 Hard to believe the journey is almost over-two more blocks to go--well two more blocks to be shared by the designers, I still have some to catch up on. Feel free to join me on my Facebook page to keep up with what I am doing-I hope the friendships forged her will continue!! My Facebook Page Until next time... Happy Quilting!!  Comments are closed.
|

Welcome to the site of Debra Davis-a woman who loves the Lord and loves to quilt.
My other blog where I share about my walk of faith:
Sitting at His Feet 
|


 RSS Feed