|
This week's block was designed by Carrie Nelson. You will find the pattern and another variation of it on her blog post which can be found HERE. I like the variation she shows on her blog and might have to do that one as well, after all this is my year for HST's. This block went together so easily, which I greatly appreciated after Lisa's more challenging block last week. And I am feeling better so things just went smoothly with no silly mistakes because I wasn't thinking very well. 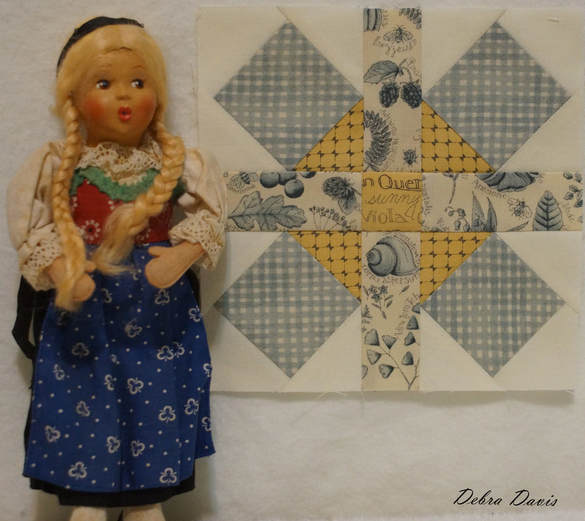 I did not make any changes to the cutting directions with this block. You will need to draw diagonal lines on the back of all the A and C squares. 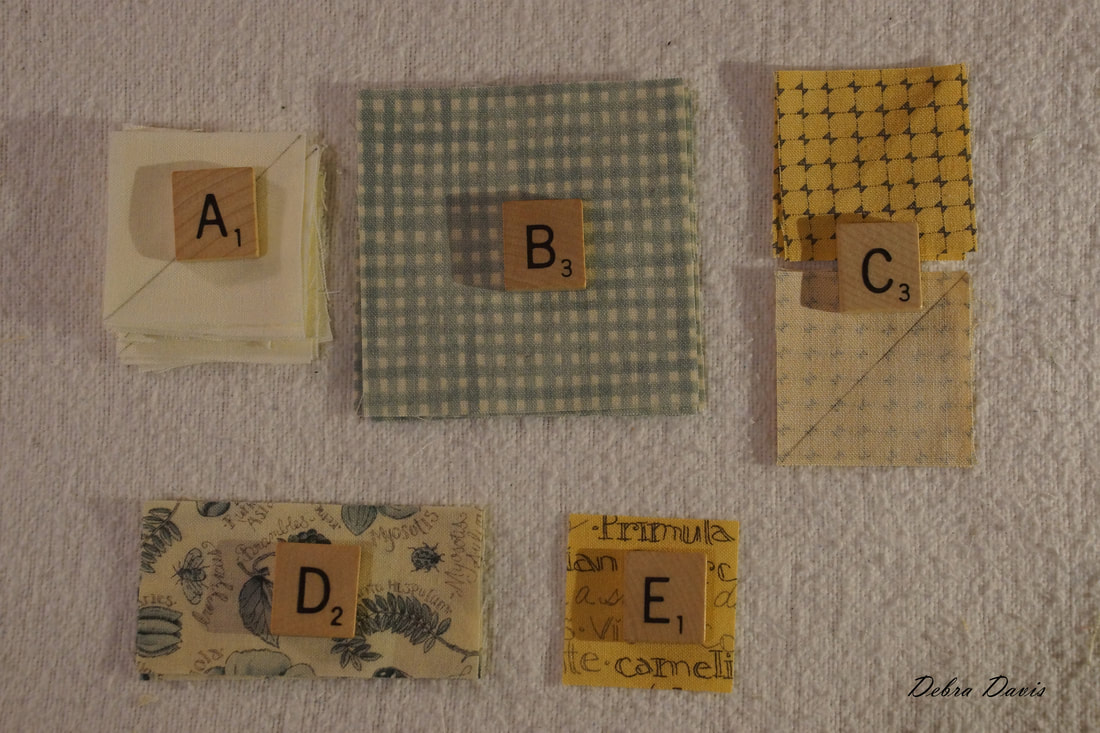 This first part will look quite familiar if you did Block 35-this is the same as the center of that block. This time we will be making four of these Square in a square blocks. Start by placing an A square in one corner of the B square. 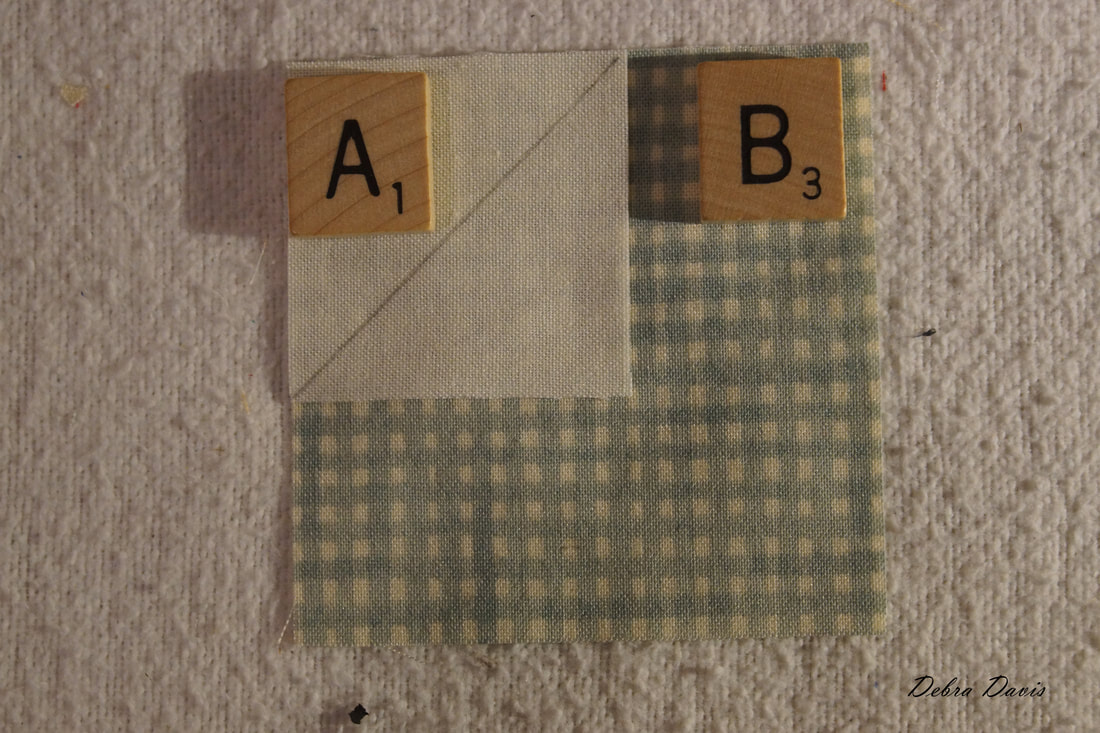 I like to stitch just to the outside of the line rather than right on top of it. 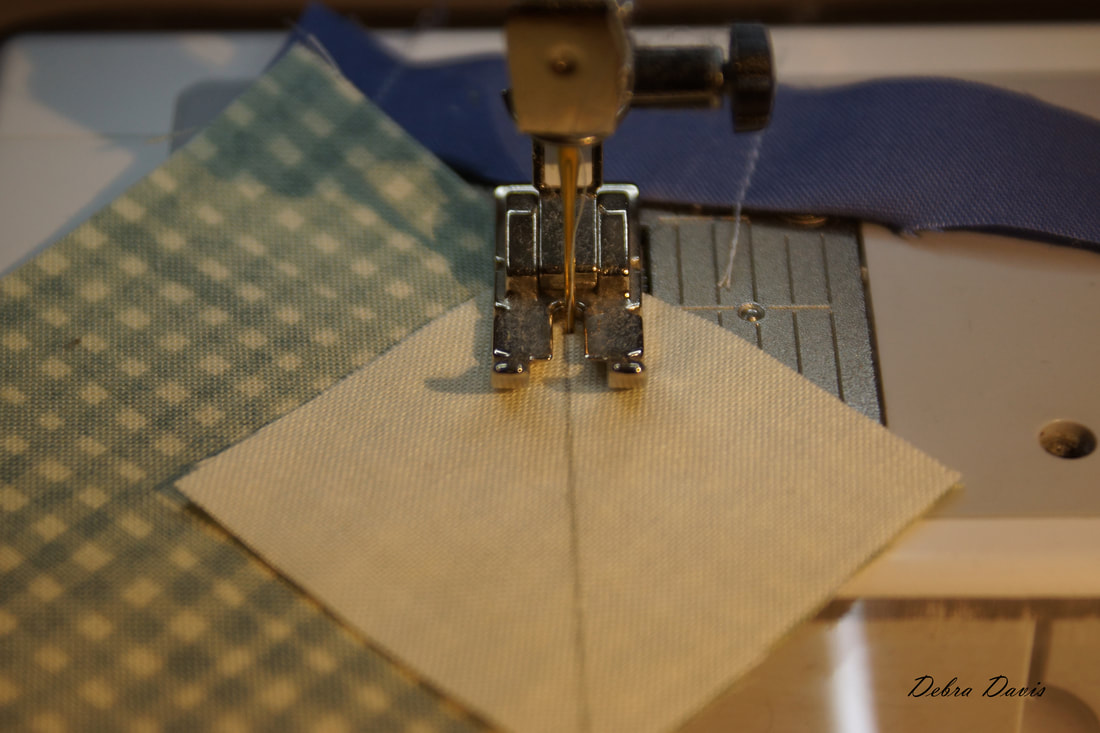 Next I fold over the triangle to make sure that it completely covers the larger square. 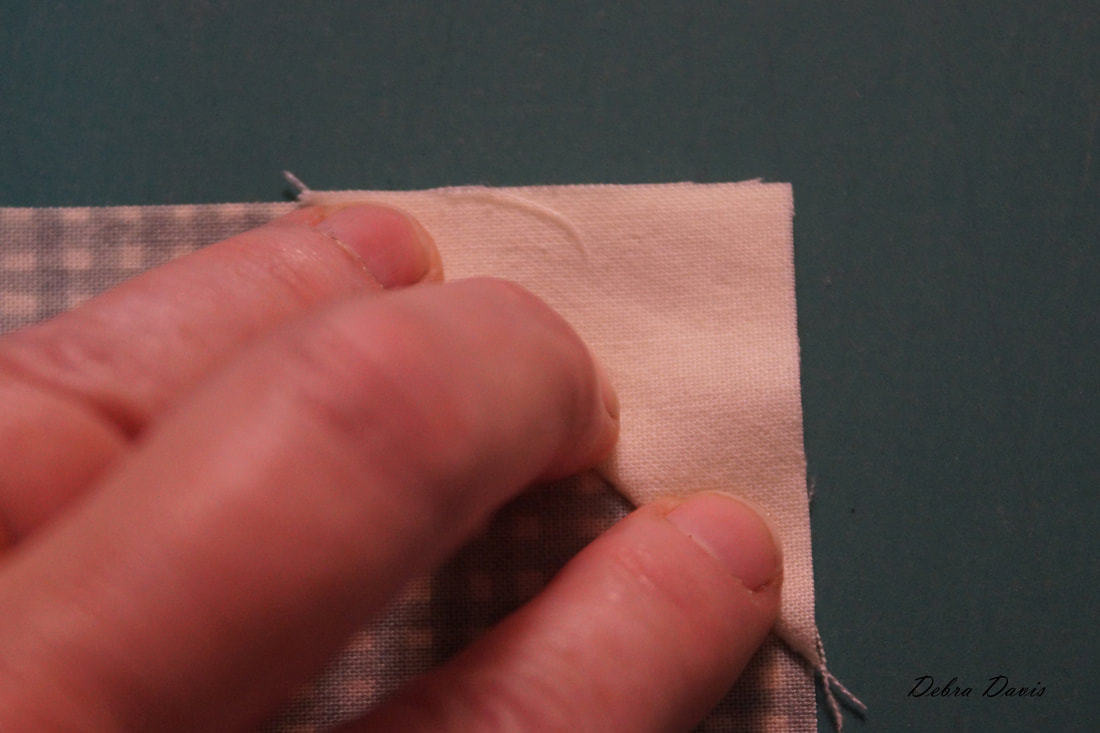 Using a ruler and rotary cutter I trim 1/4 inch from the seam line. 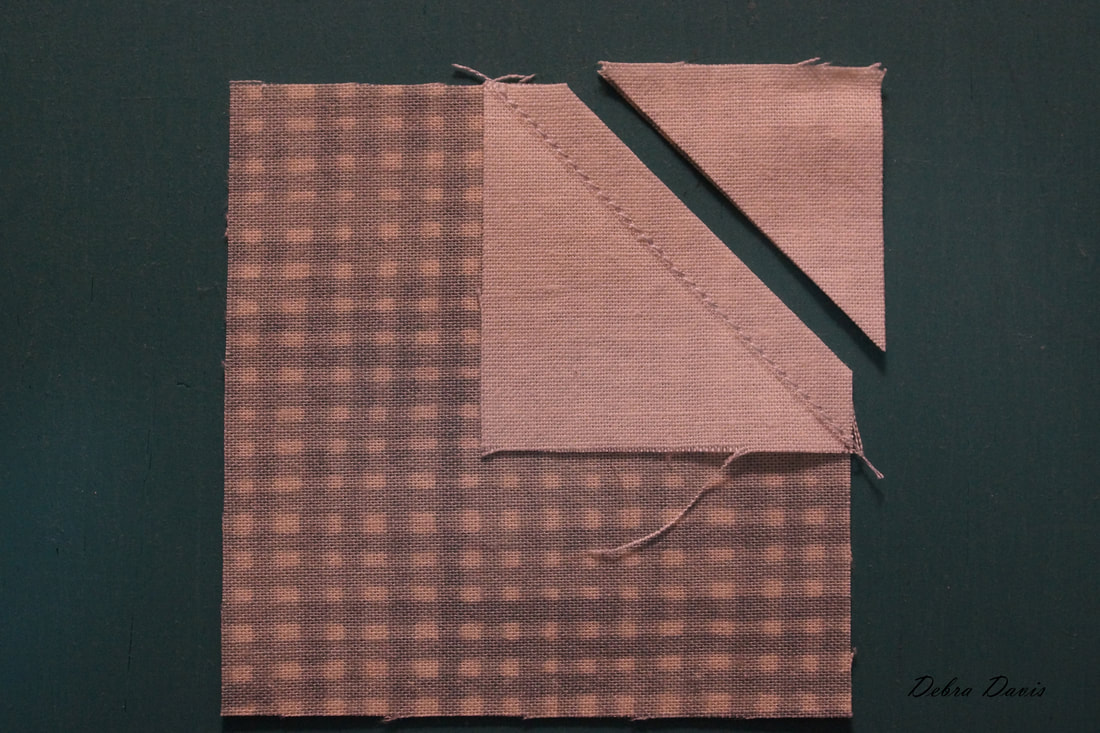 And I press towards the large square. 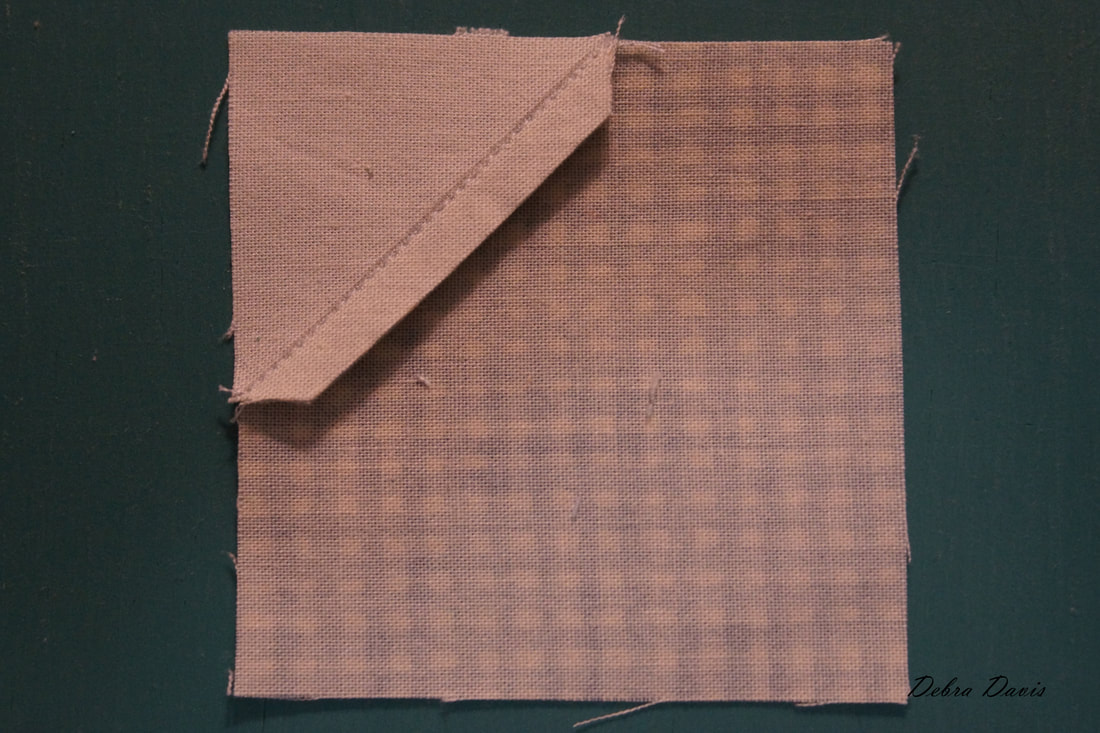 Now I repeat those same steps with the C squares placed on the opposite corner. 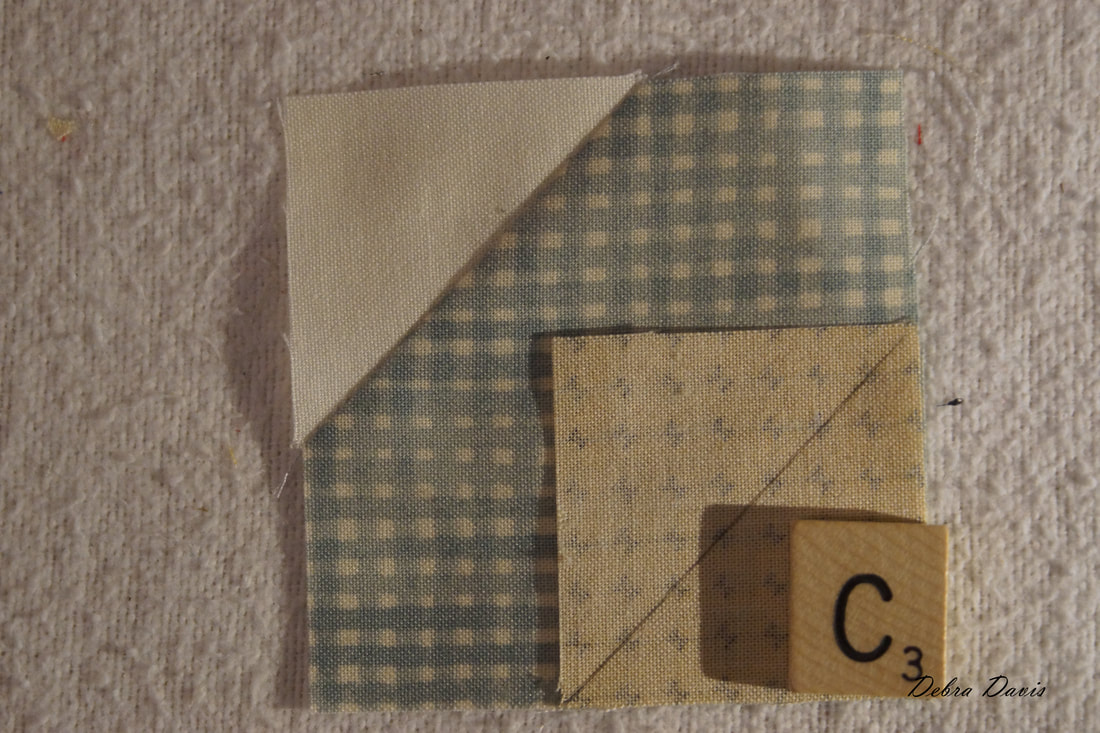 Stitch, check, trim, and press towards the large square. 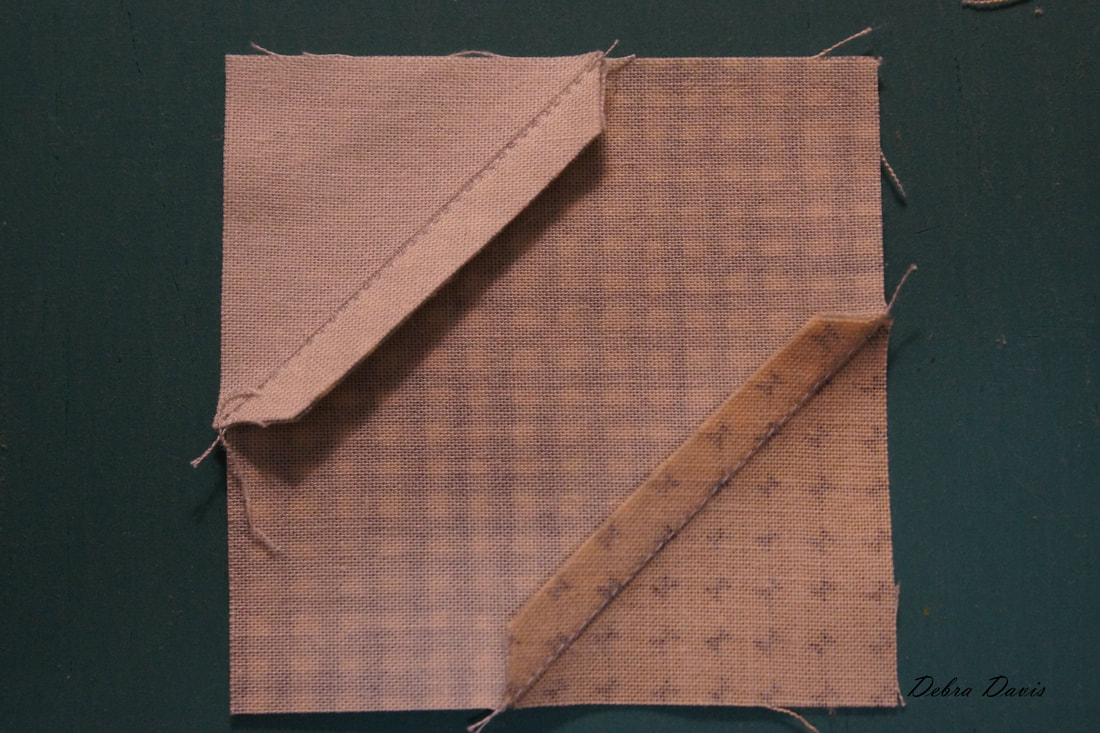 These steps need to be repeated with the remaining A squares with one small change... 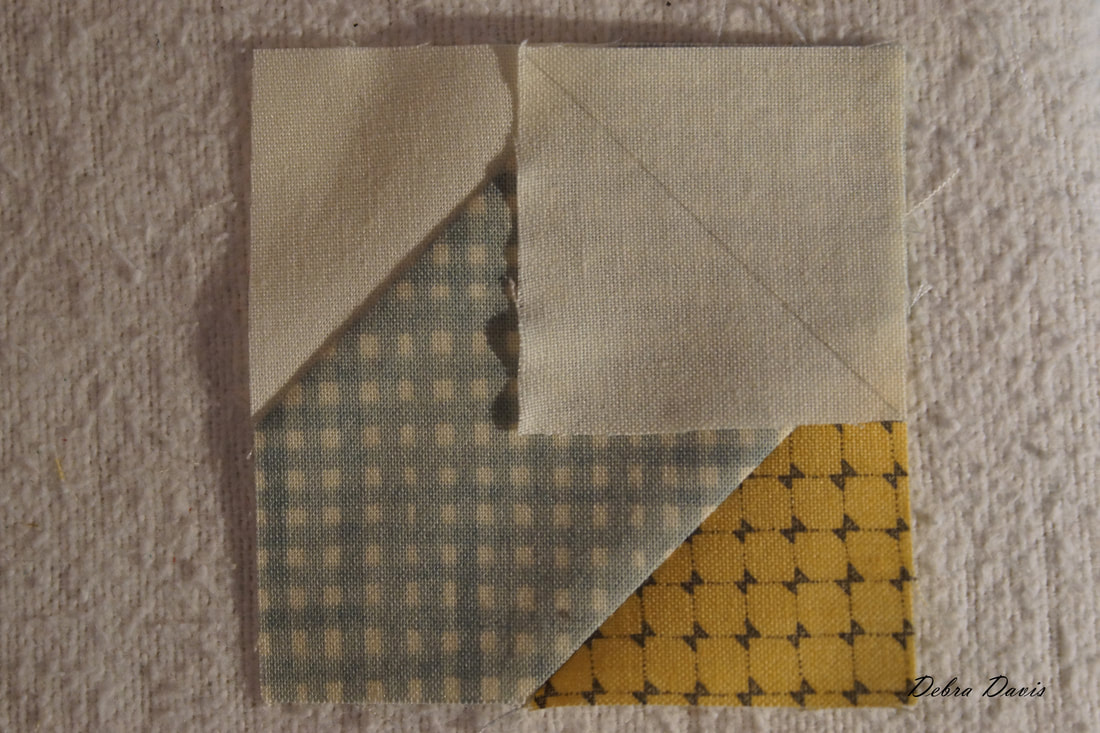 I prefer to press these seams open. It gives me less bulky seams which I think helps to achieve the sharp points we want when the block is sewn together. 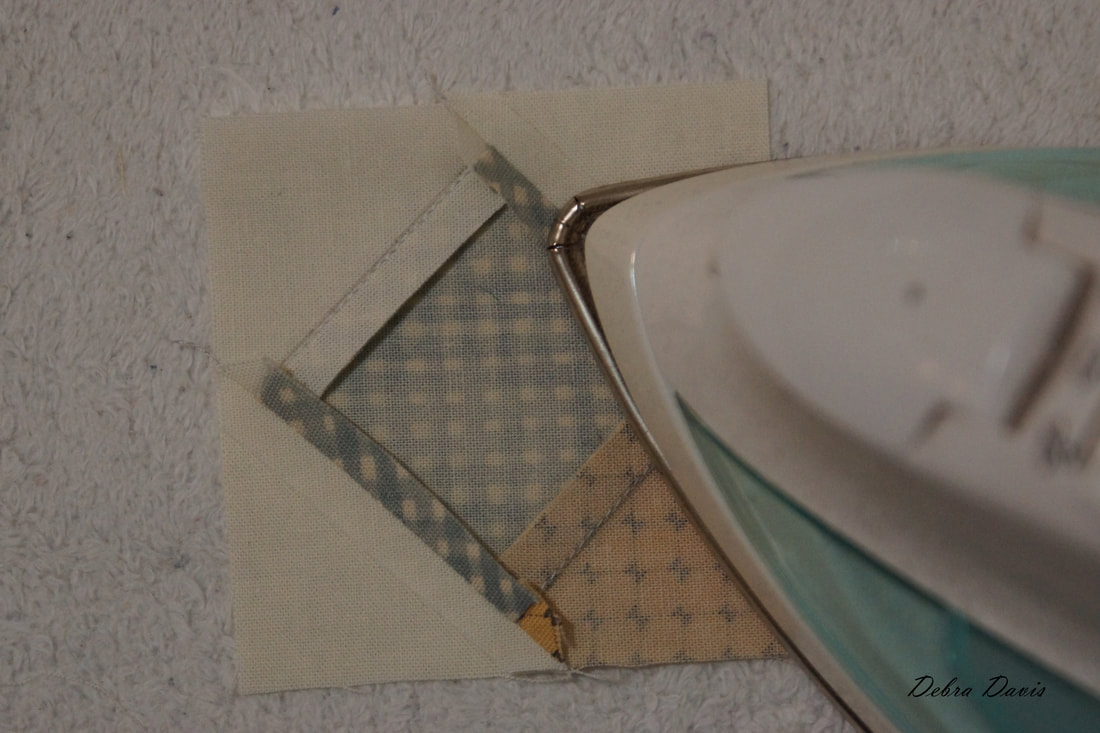 Before moving on I take time to trim if needed for a nice 3" square. 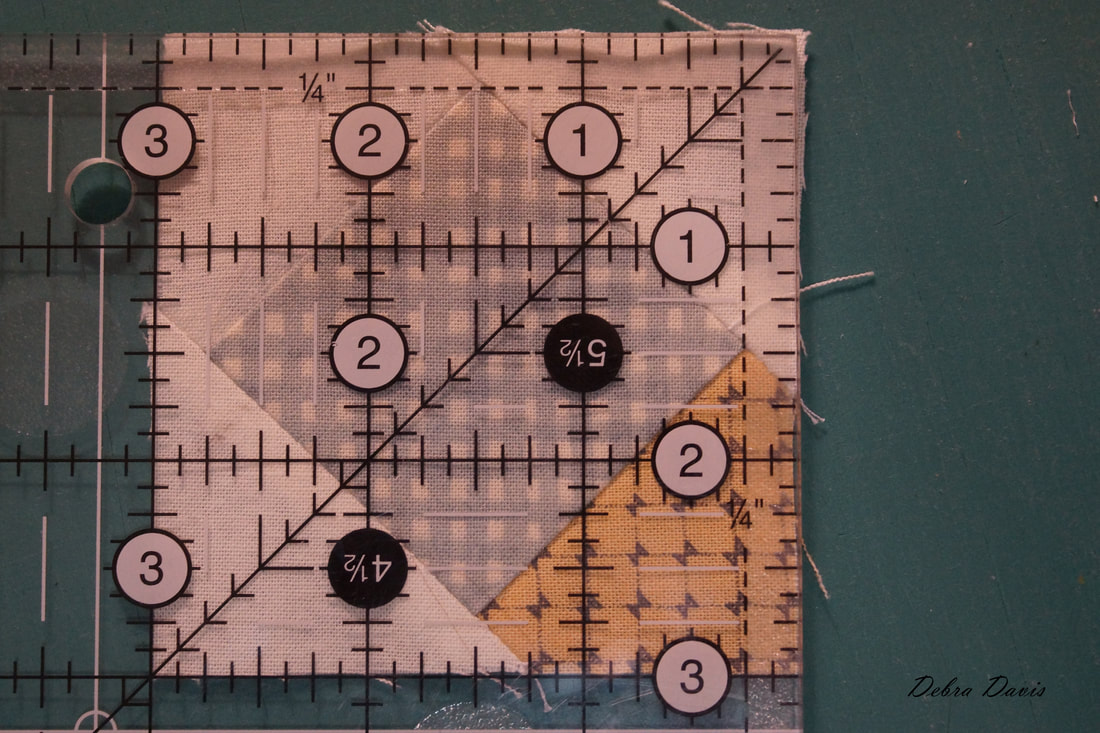 Now I lay out all of my pieces and will sew the rows together. 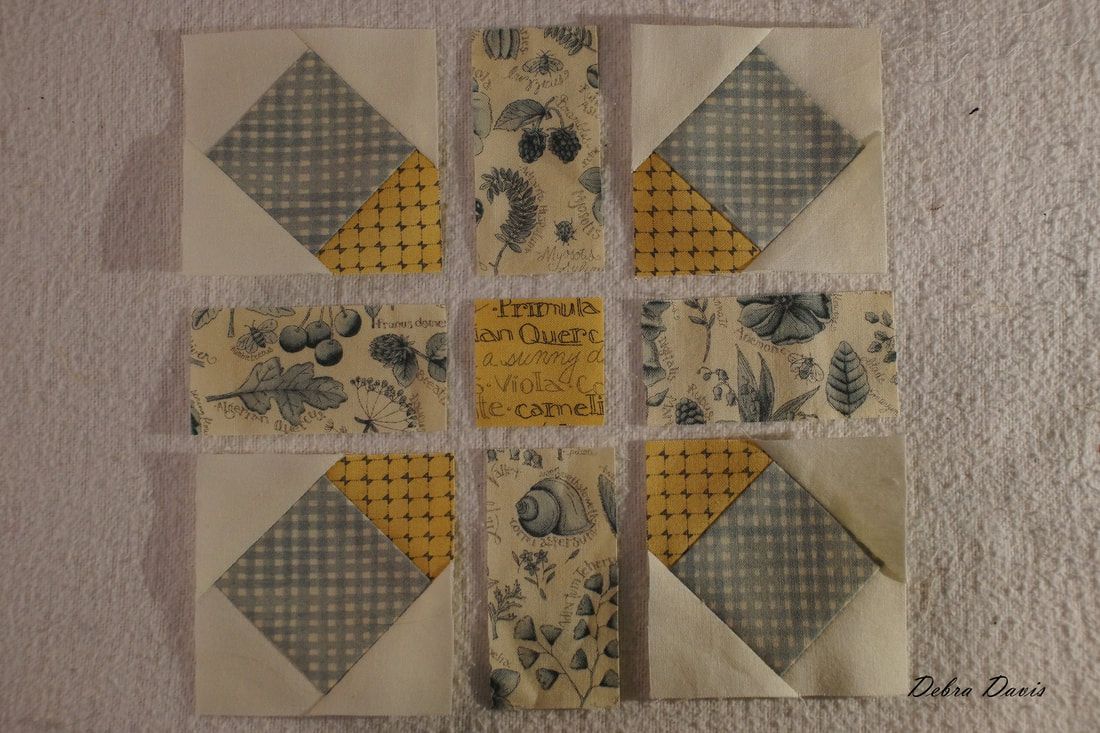 I find it best to sew with the sqsuare-in-a-square block on top. I can see very clearly where I want my needle to fall as I sew to ensure I do not lose my points. 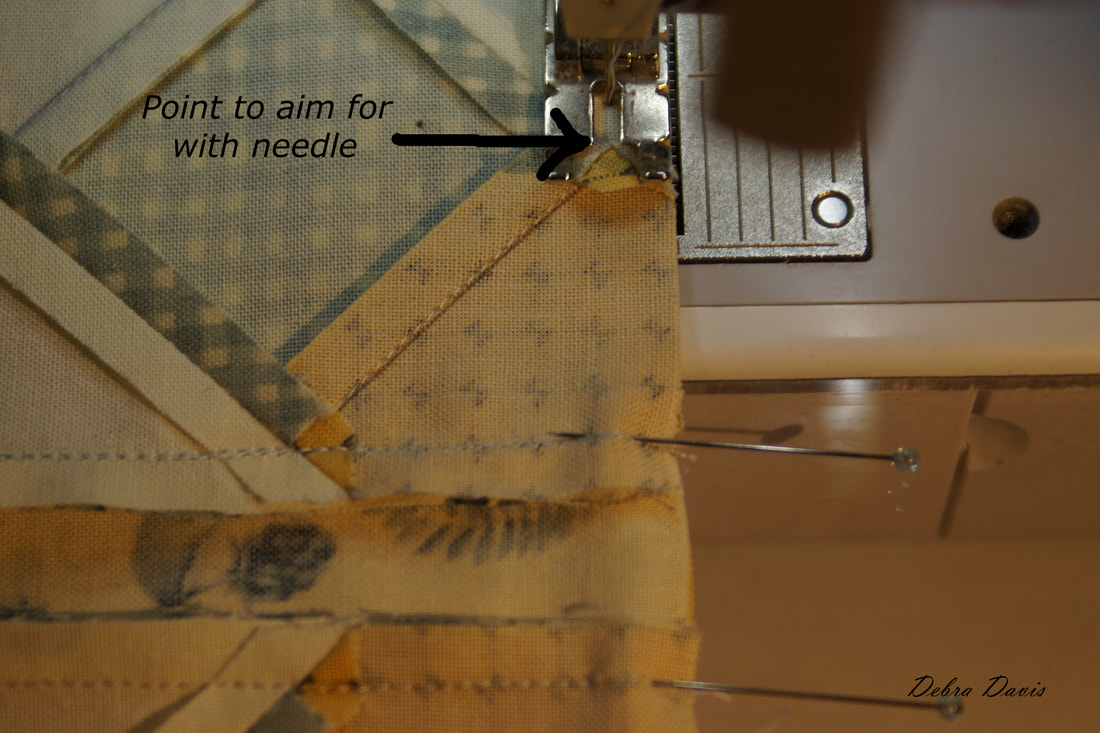 I am pressing the top and bottom row towards the rectangle and the middle row towards the center square. 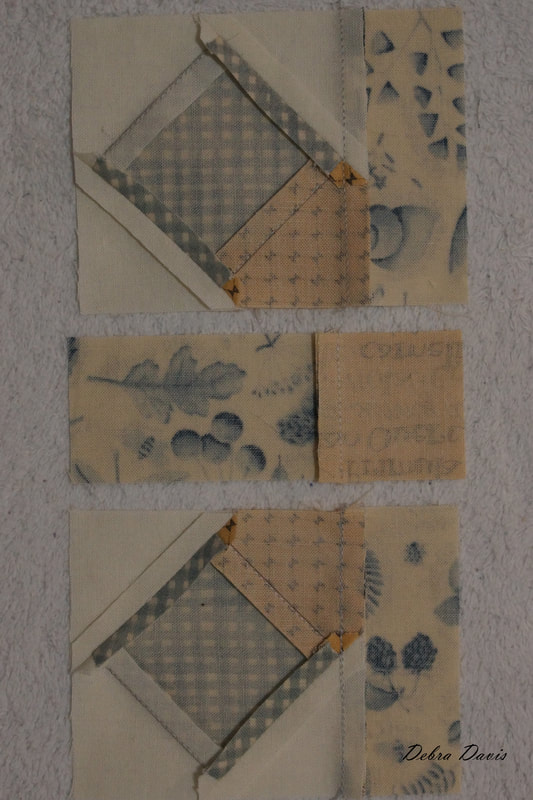 To join the rows, I match up the seams, which will want to "lock" into place with one another and hold them with a pin. Again I am sewing with the square-in-a-square blocks on top. This is one area where it helps to have the needle down option on my machine. I sew right up to the pin. stop, remove the pin, and then continue sewing. The needle holds everything in place while I carefully remove the pin and I do not break any needles sewing over the pins. (I got a broken needle jammed in the bobbin area last week and thought I had broken my machine!) 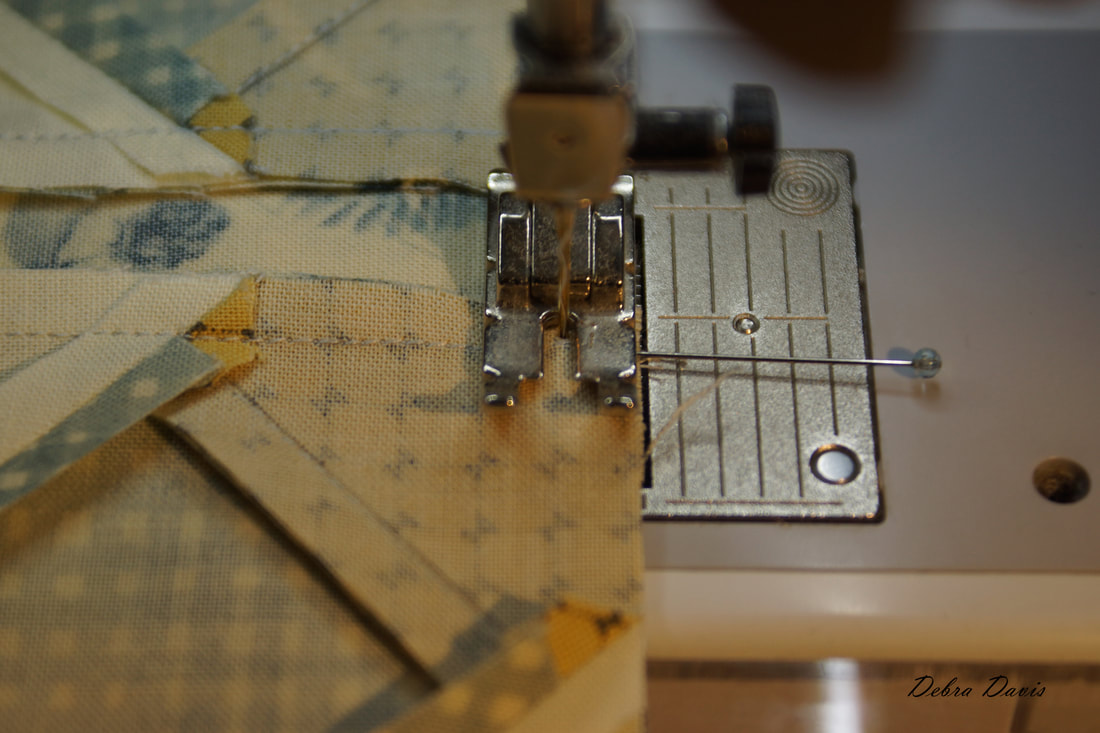 I pressed these seams towards the middle as well. 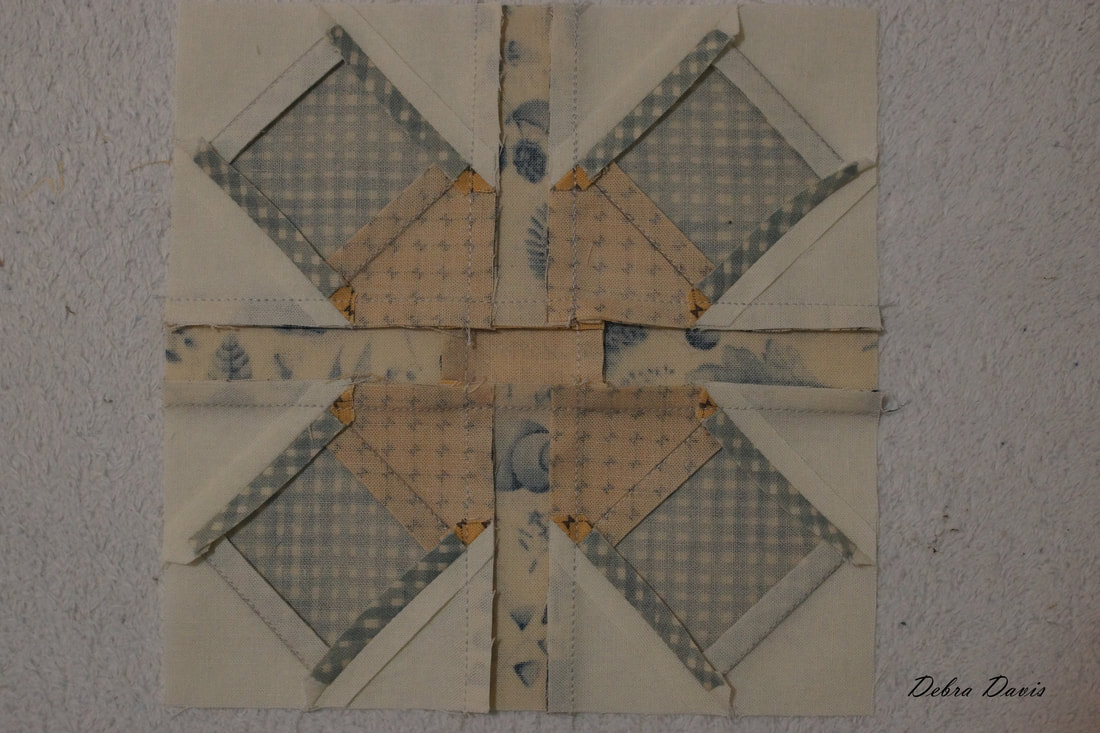 I think this is a really cute block and it was so quick I may do another one just for fun. By changing the fabrics around one could achieve several different looks with this one. 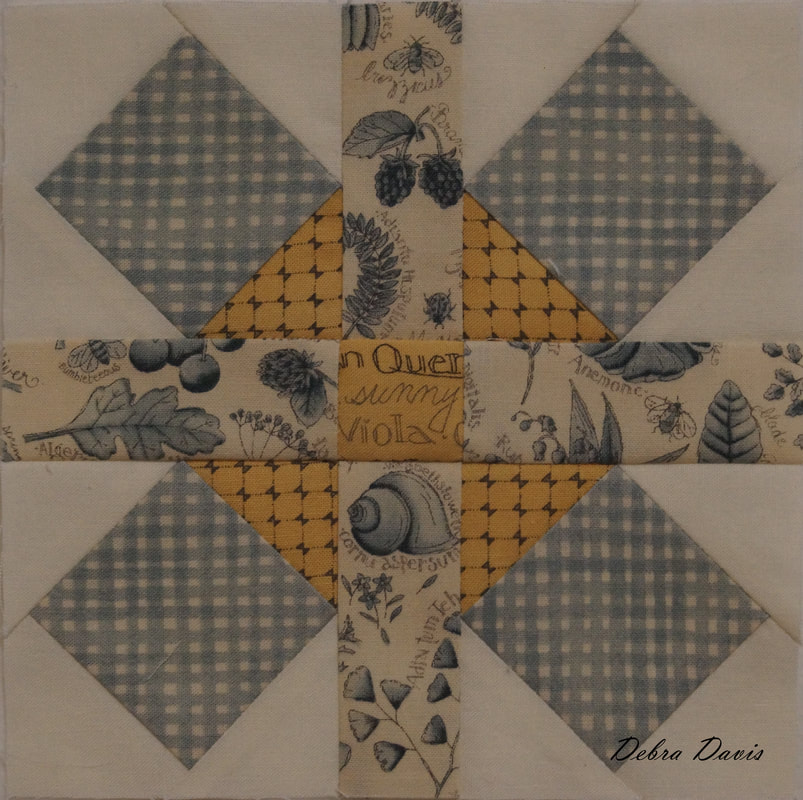 Maybe this week I can get caught up on another of the blocks I missed over the summer.
Here's hoping! Until next time... Happy Quilting!! Debra
Alycia
11/27/2017 09:12:10 pm
Love this tutorial! You make it seem very easy, so I may go ahead and do this one. I am about 20 blocks behind!
Debra
11/28/2017 10:56:17 am
Hi Alycia! This one is not as hard as it looks. You are not alone on being behind-but so many are just starting that you could probably consider yourself ahead of the game. I try not to stress about getting them done "on time" and just enjoy them as I can. Happy Quilting! Comments are closed.
|

Welcome to the site of Debra Davis-a woman who loves the Lord and loves to quilt.
My other blog where I share about my walk of faith:
Sitting at His Feet 
|


 RSS Feed