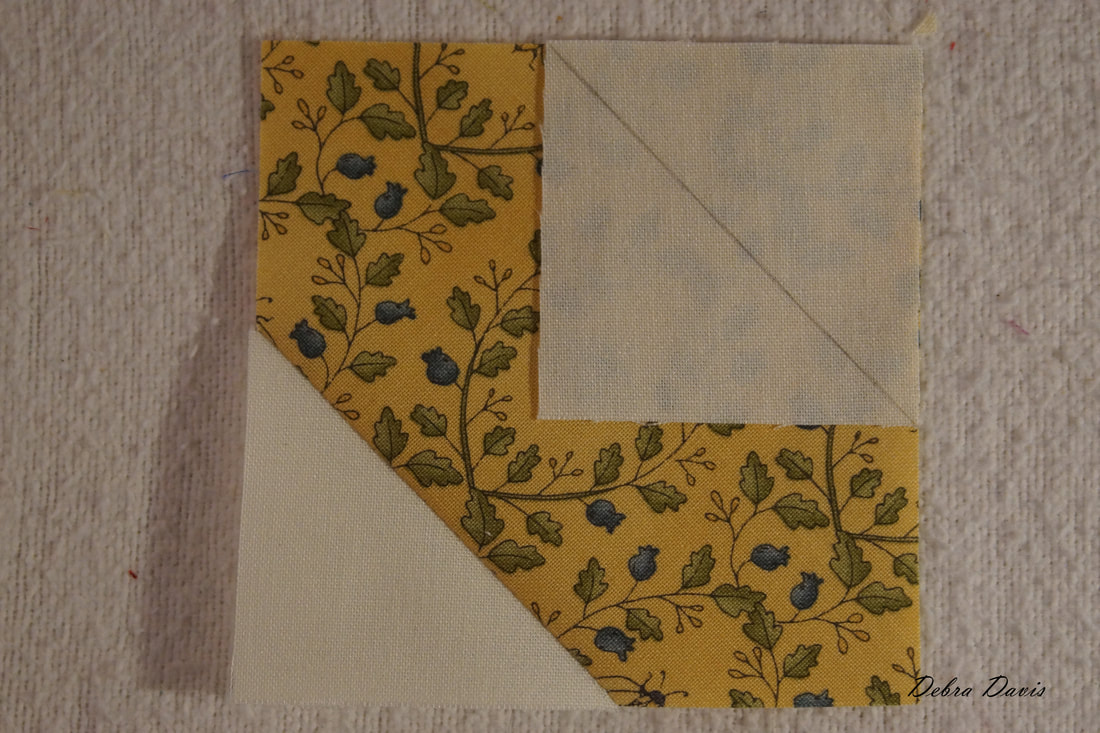
the I was getting over a bug when I started this block, and so I took it rather slow as I seemed to be prone to mistakes. So let's start with the center square of this block. For this I need the 4 A squares and 1 B square. And just like that I see that I labeled these wrong in my photograph-at any rate draw a diagonal line with a pencil on the smaller squares. (I have one A square cut 3 1/2 x 3 1/2" and four B squares cut 2" x 2") 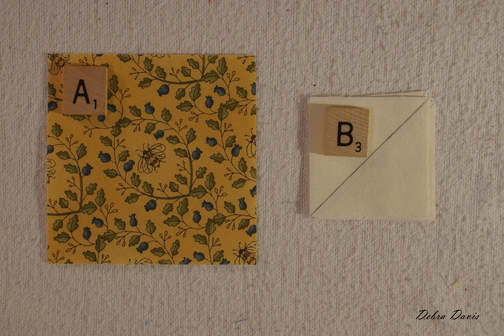 Start by placing one of the smaller squares right sides together with the larger square. 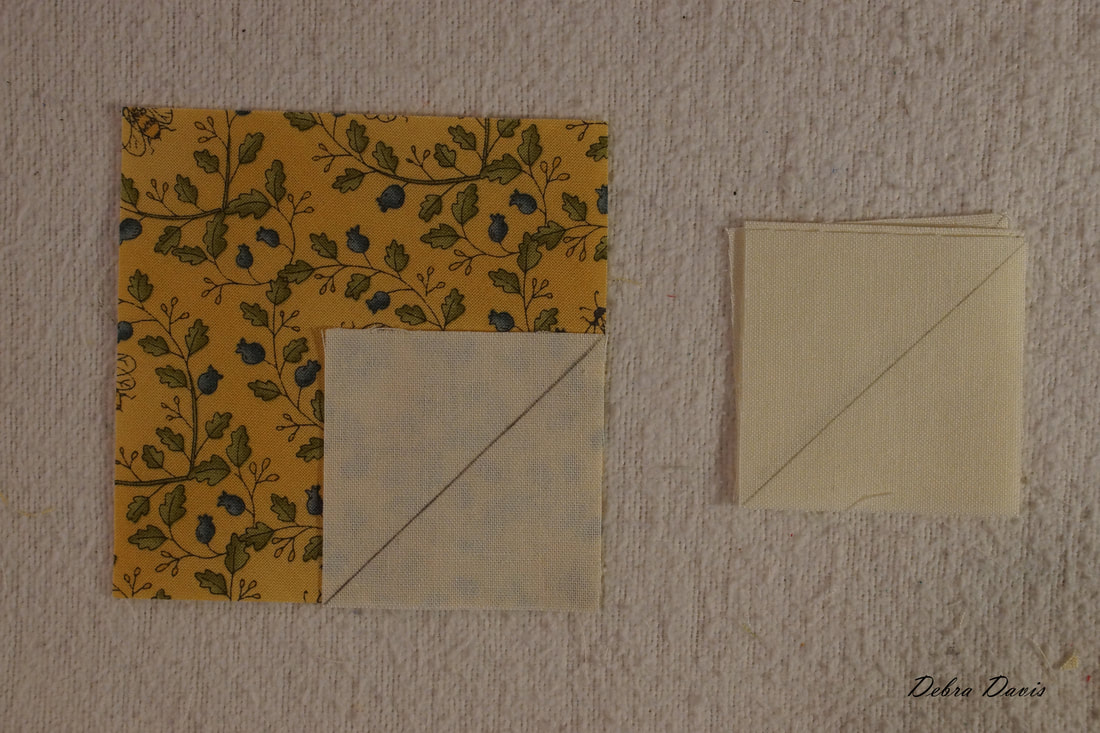 Sew right along the outer side of the drawn line rather than right on top of it. 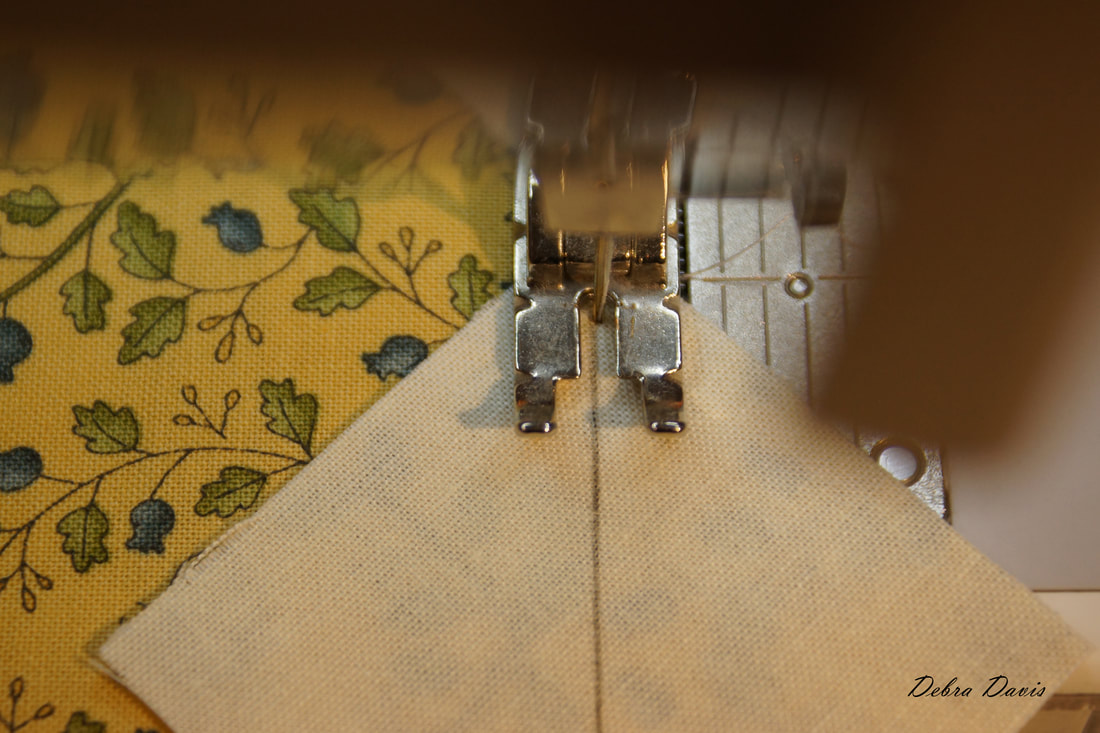 I always flip the sewn sqaure over to make sure it covers the larger block underneath before trimming the excess away. To trim just lay your ruler with the 1/4" mark on the sewn line and trim away leaving a quarter inch seam allowance.
I pressed towards the yellow square. 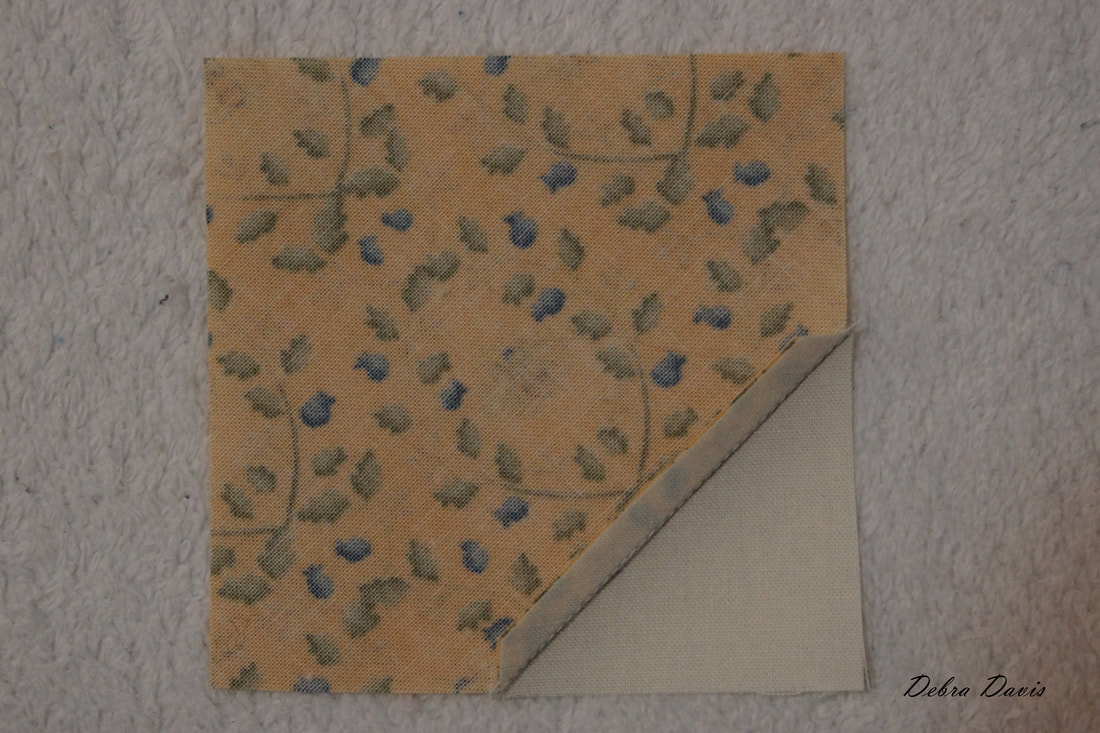 Add the next square and sew in the same way, trim, and press towards the yellow square. This is a good time to make sure you still have a square that is 3 1/2" x 3 1/2"-I find I often need to trim a little bit to get it square.
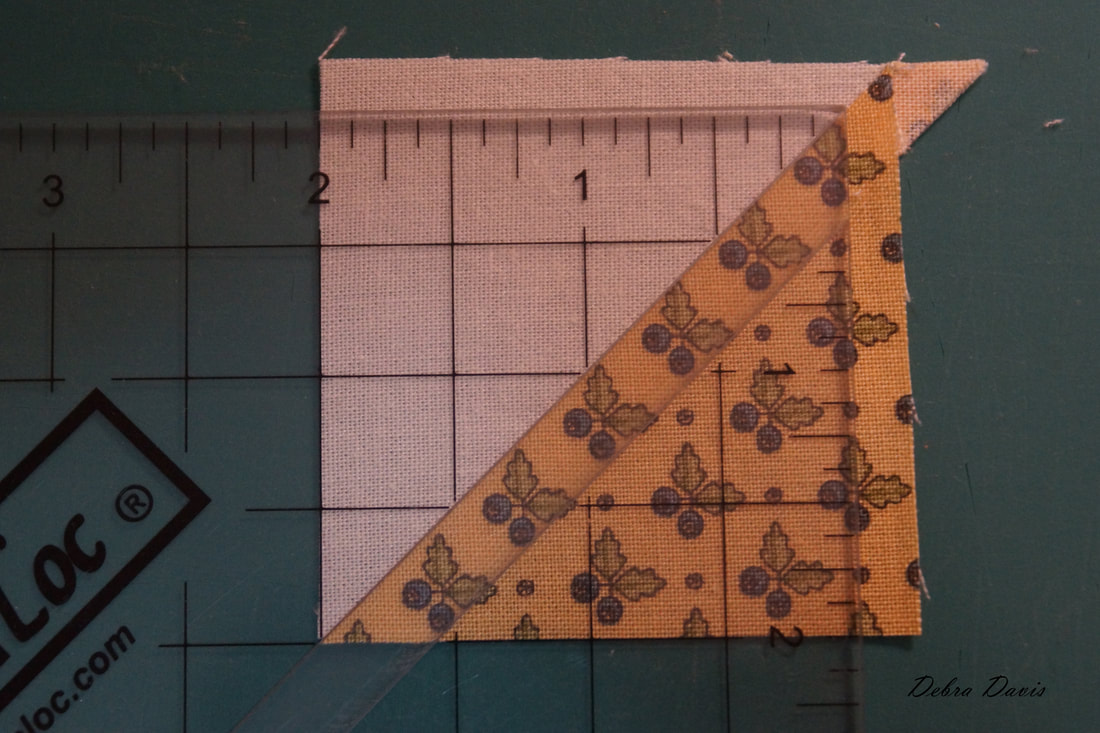
I added the last two squares in the same way except I pressed the seams open so that there was less bulk. 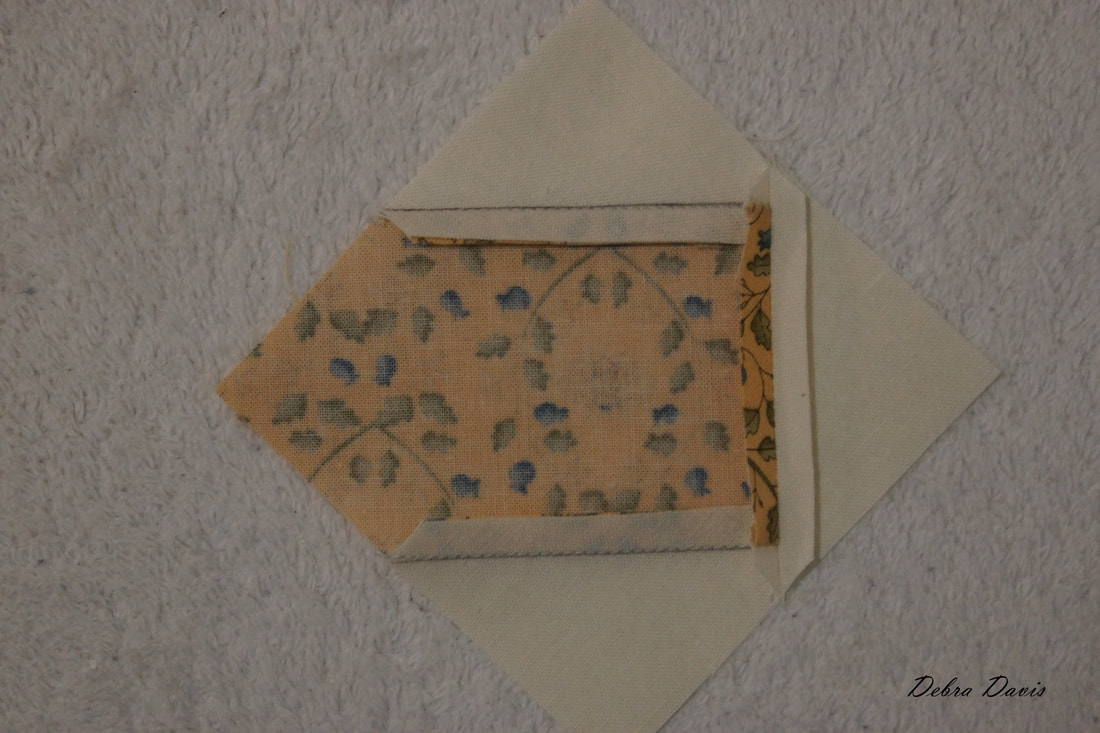 My center square is done and I have made sure it is still 3 1/2" x 3 1/2" 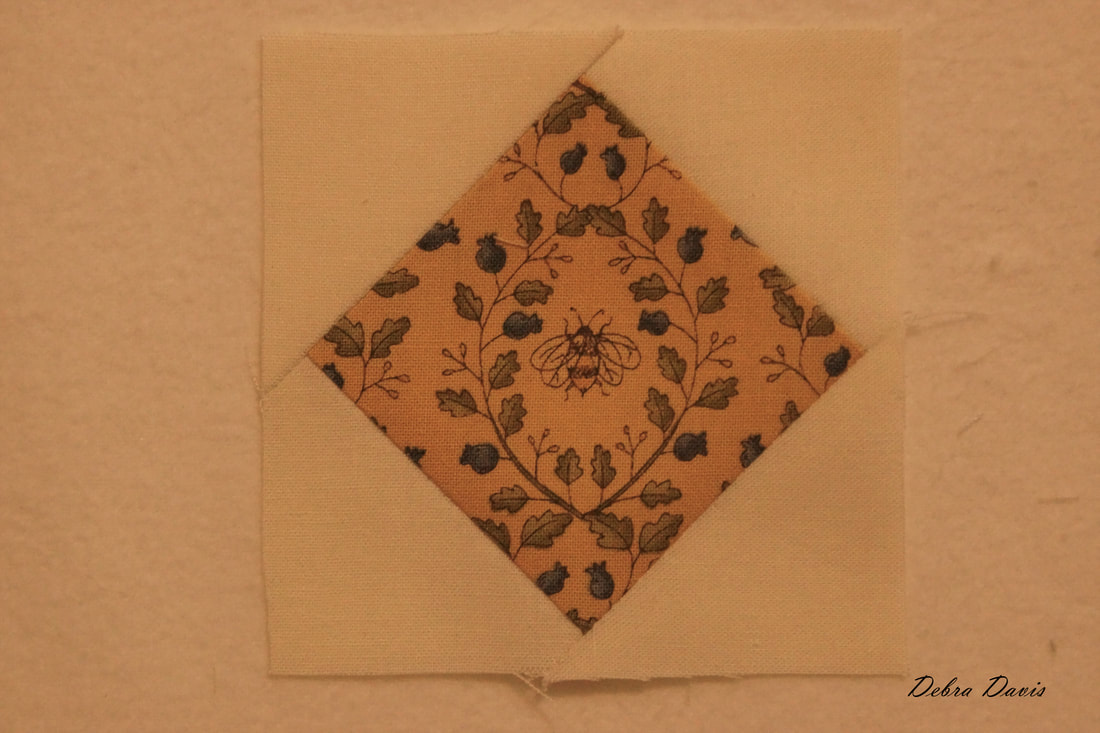 Next I worked on the corner squares. I cut two C squares 2 3/4" x 2 3/4" and two D squares also at 2 3/4" x 2 3/4" On the C sqaures I have drawn a diagonal line in preparation for making Half-square triangles. 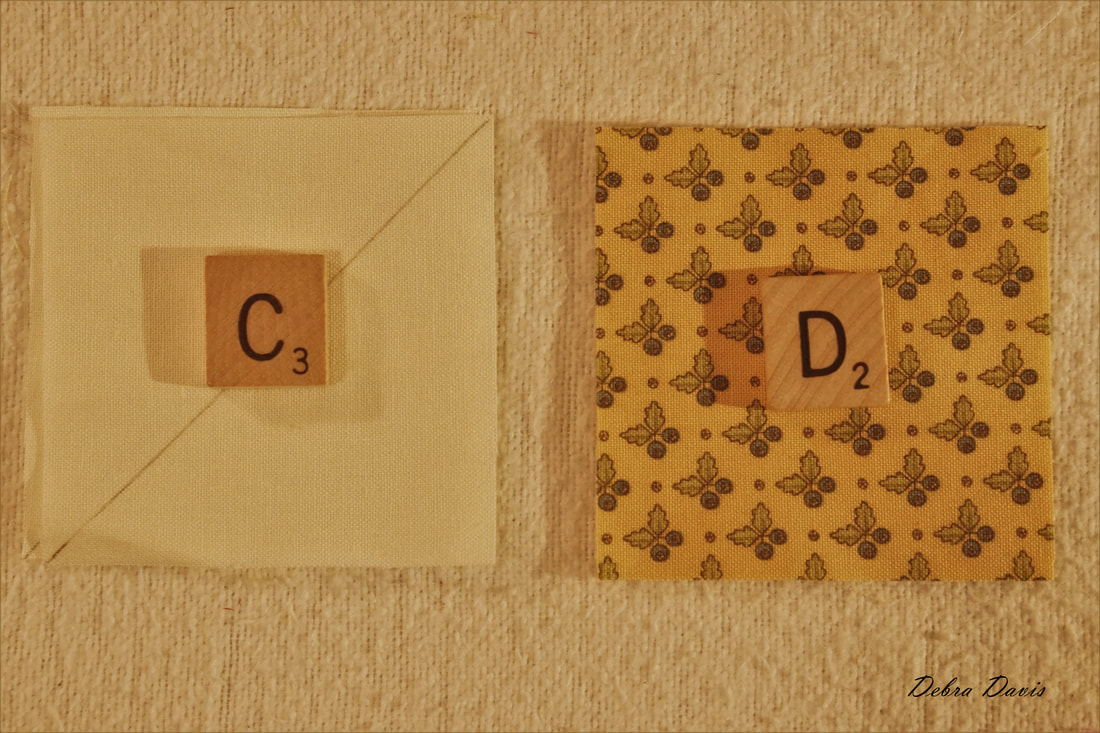 This was the year of the HST for me it seems, and this project has been no different. Like we have done many times before sew 1/4" from each side of the drawn line. 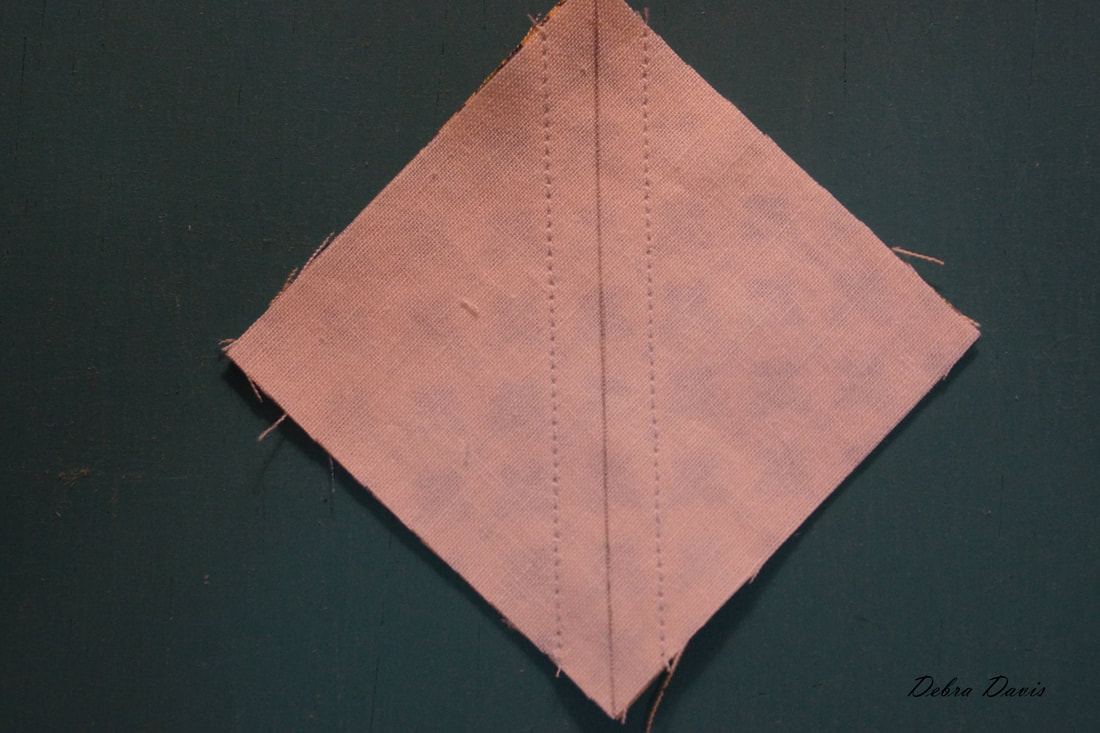 Cut apart on the diagonal line and press towards the dark side. Trim these to measure 2" x 2".
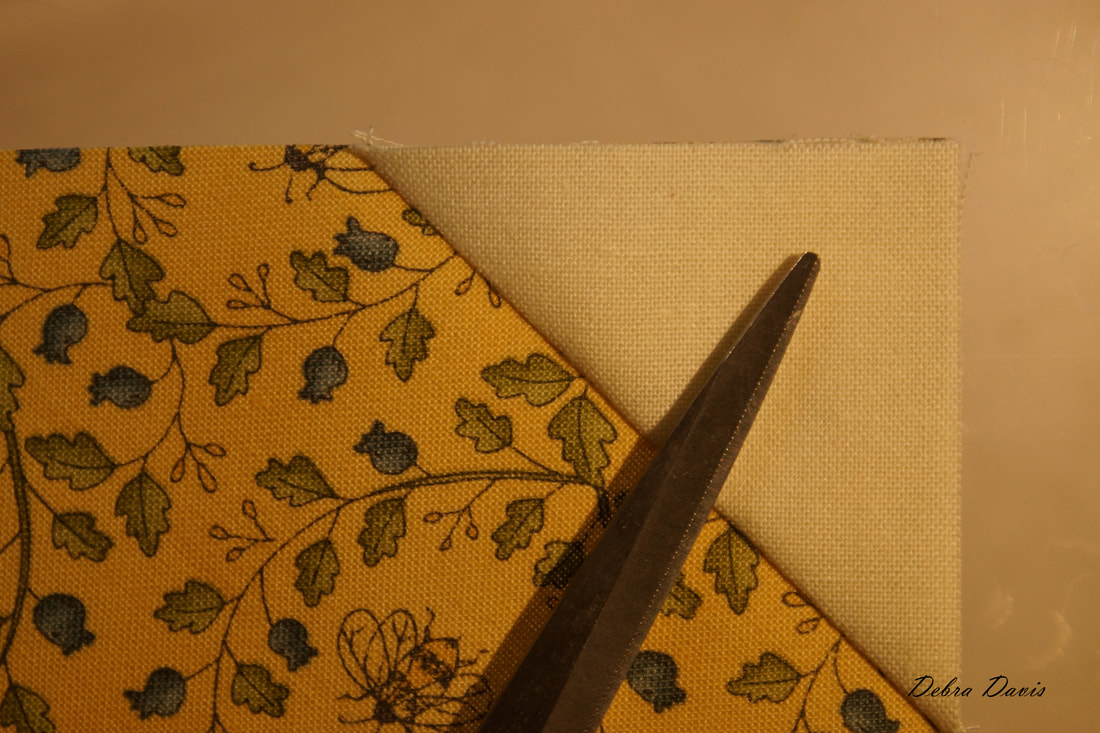
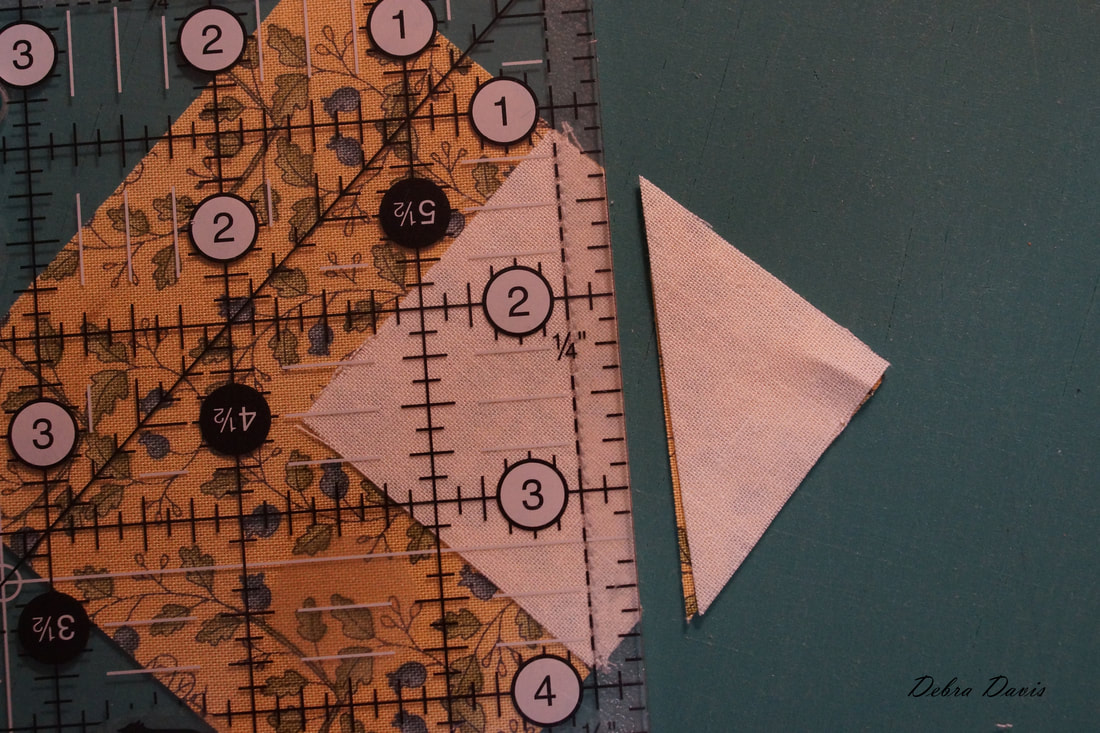
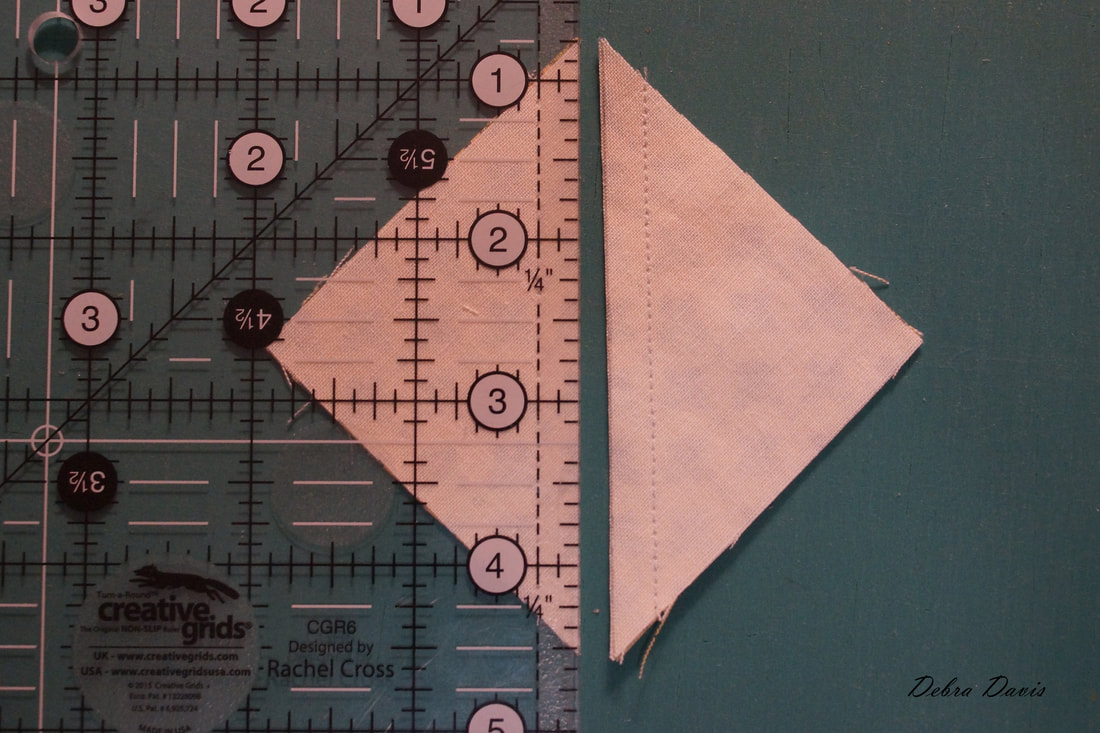
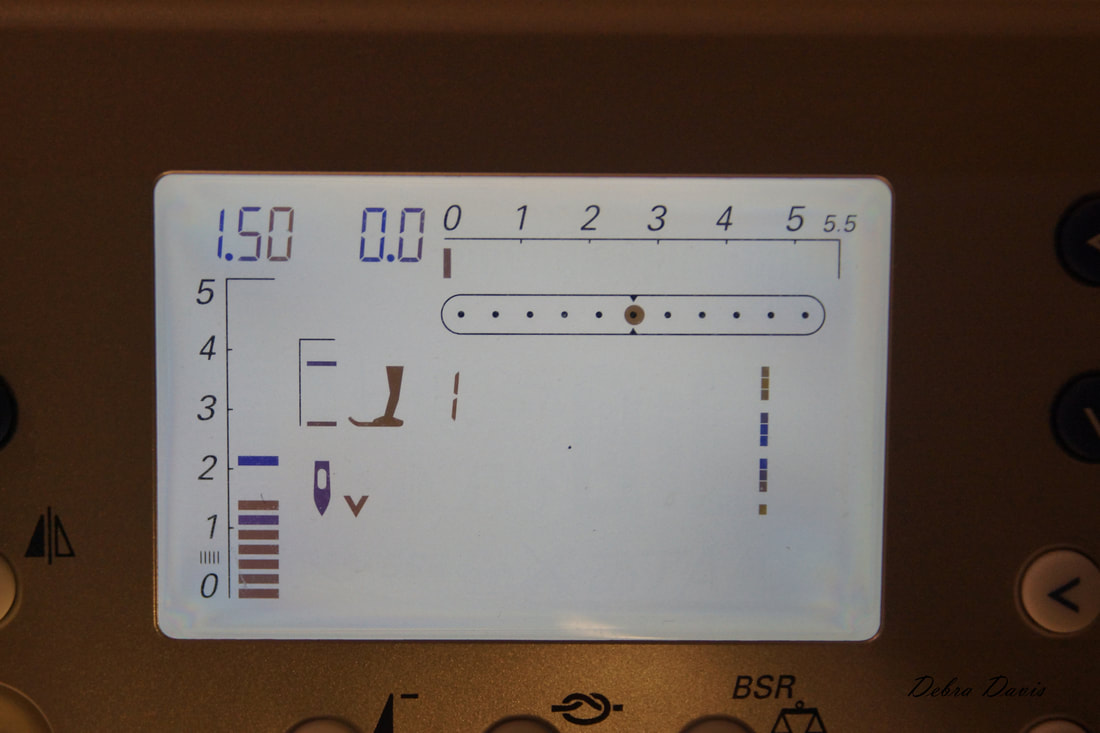
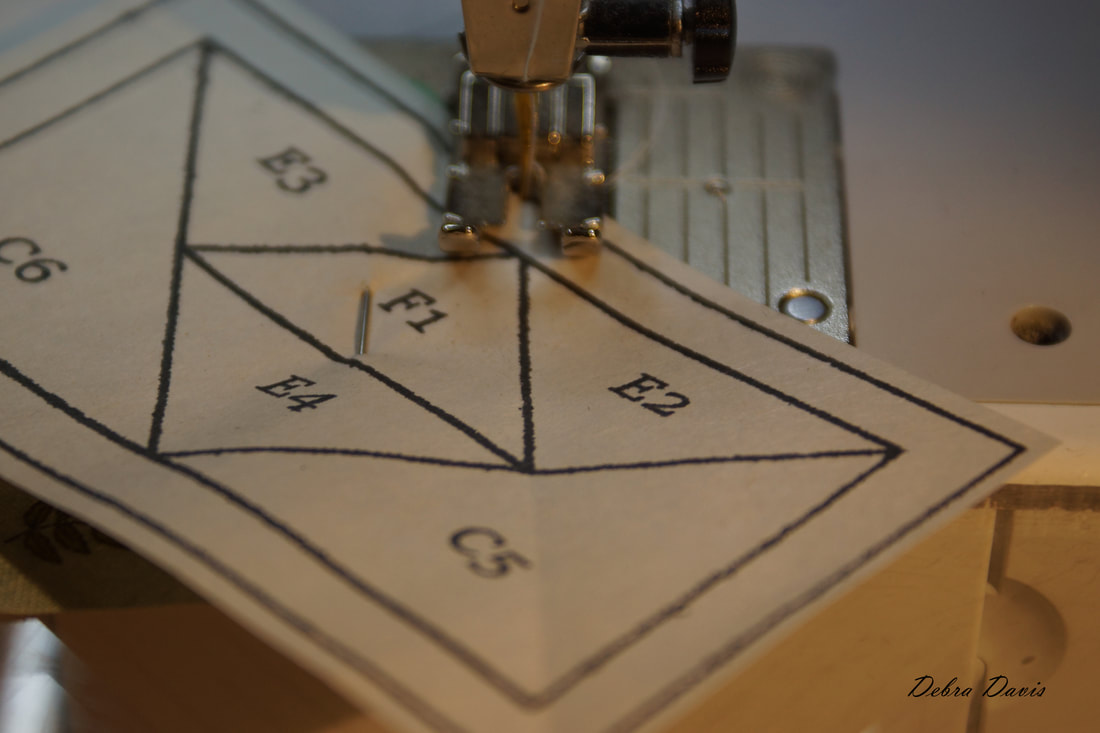
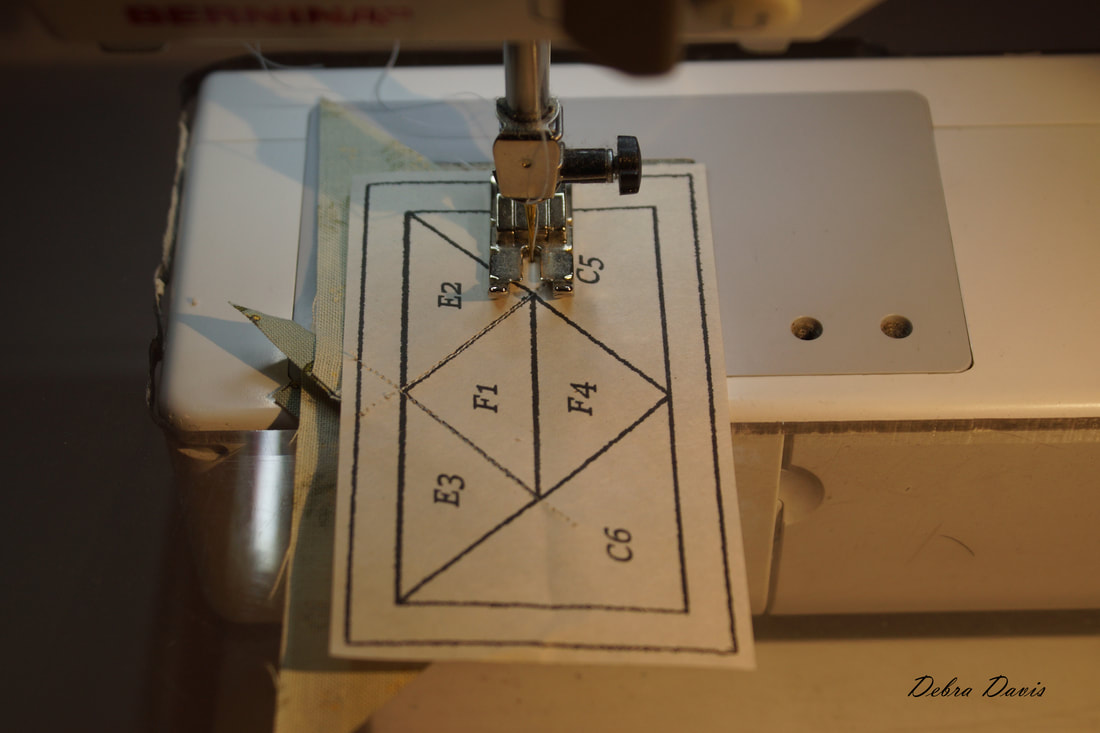
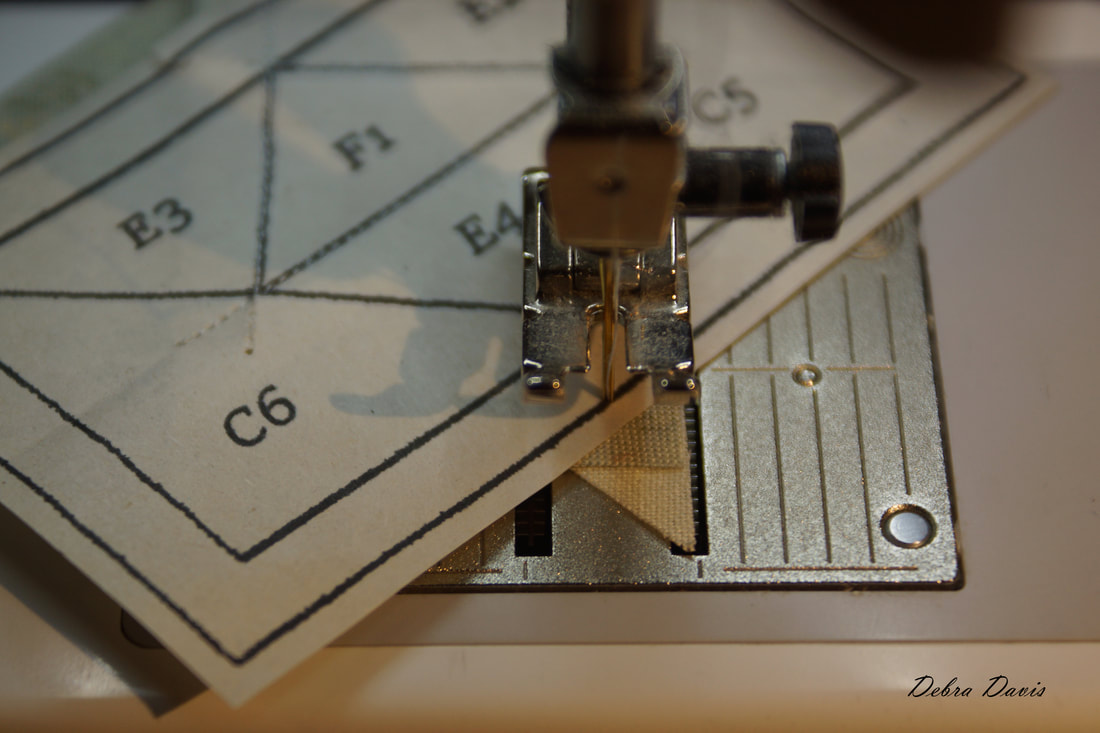
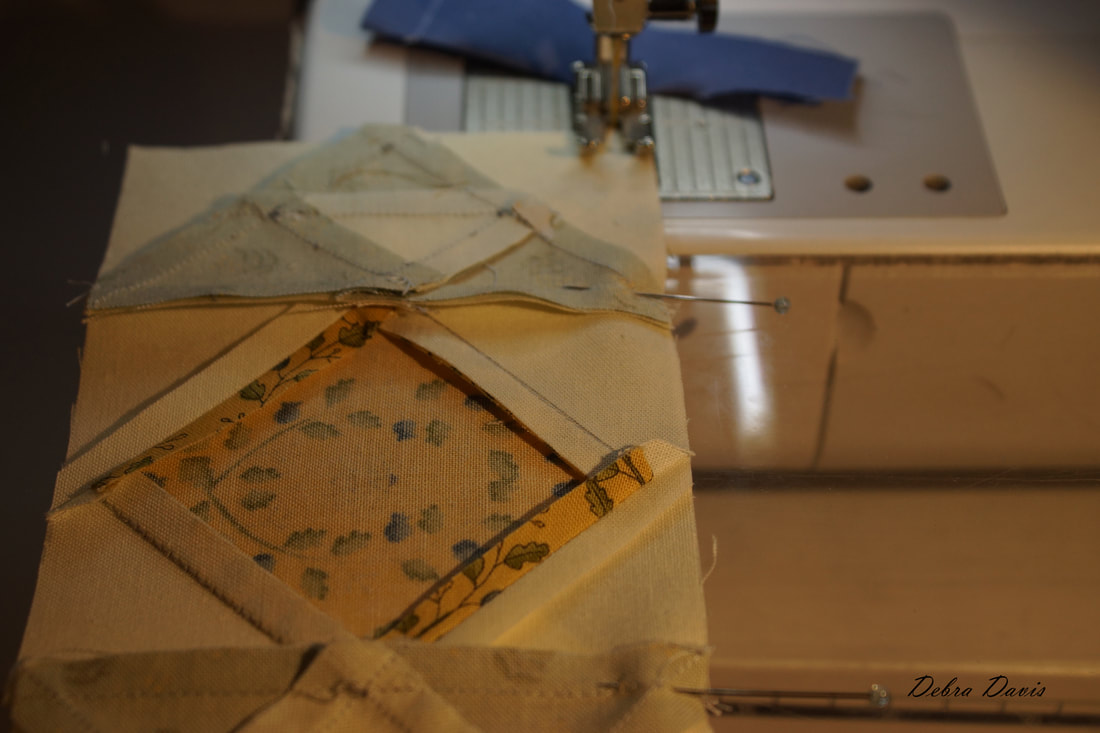
Now that I have the easy parts done it is time to tackle those tricky little triangle units. 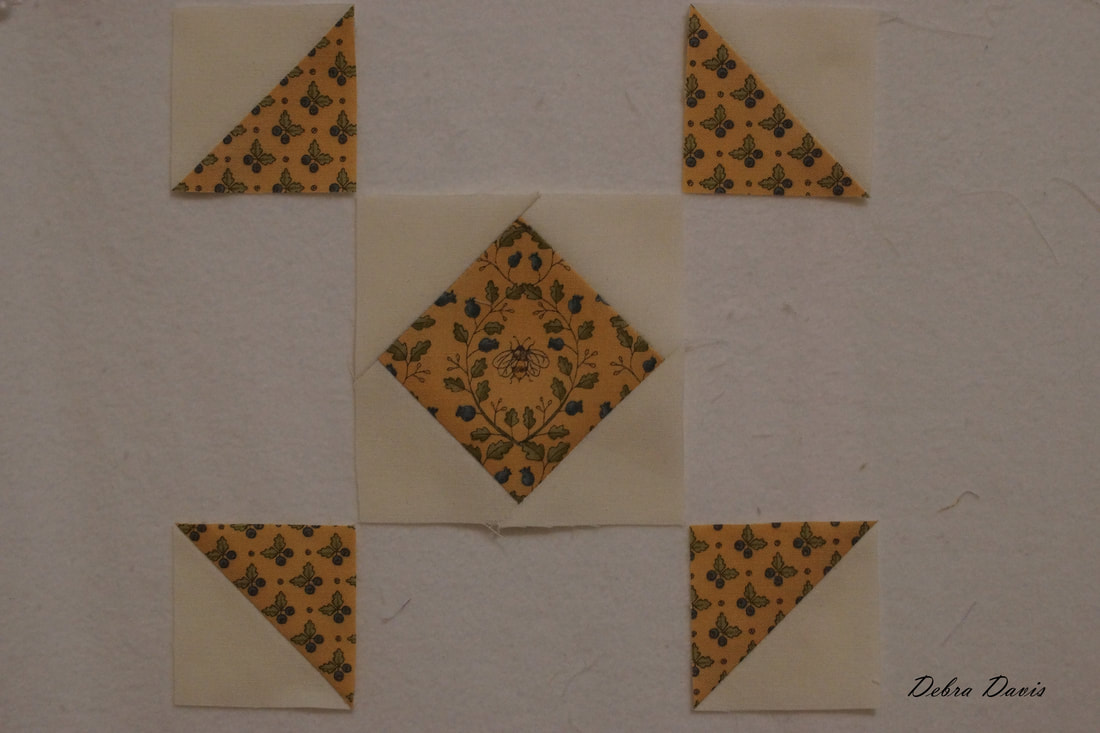 As I said, I tried to follow Lisa's directions but every attempt was too small at the point so on to the paper piecing method. You can download my pattern for these HERE. 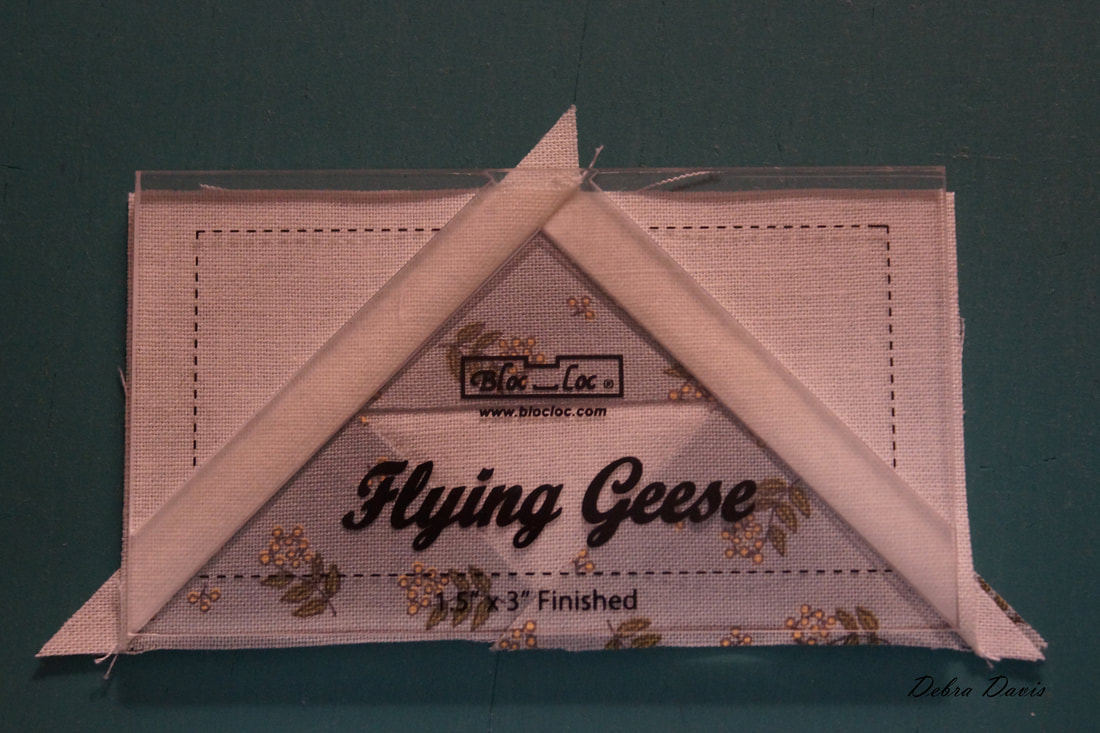 With the paper patterns cut out leaving some extra beyond the outer line I prepare my fabrics. E and F fabrics are first cut 3 1/2" x 3 1/2" (for E cut 3 and F cut 1) and then two diagonal cuts are made to get the triangles. From the C fabric cut 2 squares 4" x 4" and then make two diagonal cuts. I like to use newsprint for my paper-it comes in 8 1/2" x 11" size so is perfect to run through the printer. 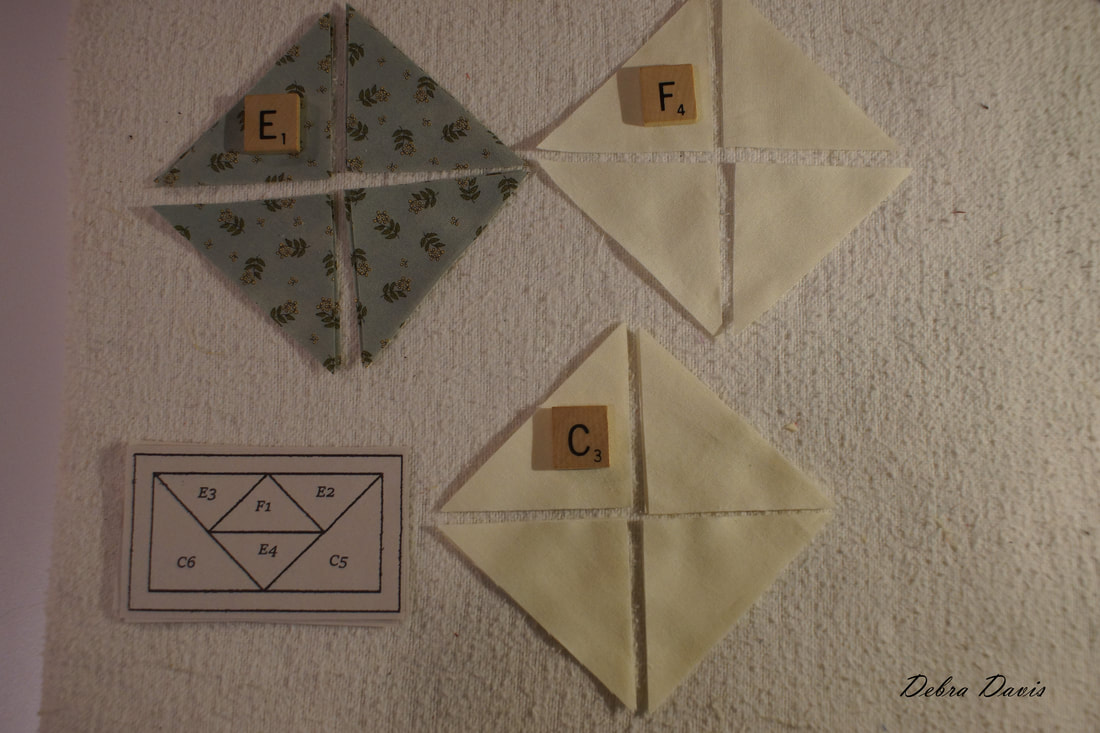 Placing the first piece is always the trickiest when paper piecing. On the wrong side of the paper place your F fabric so that it covers F1 completely. Holding it up to a light helps you see how it looks. This fabric gets placed right side facing you. When you are satisfied with its placement put a pin parallel to the line where F1 abd E2 meet. I have labeled the Paper piecing pattern with the letter of the fabric being used followed by the order in which it will be sewn onto the paper. 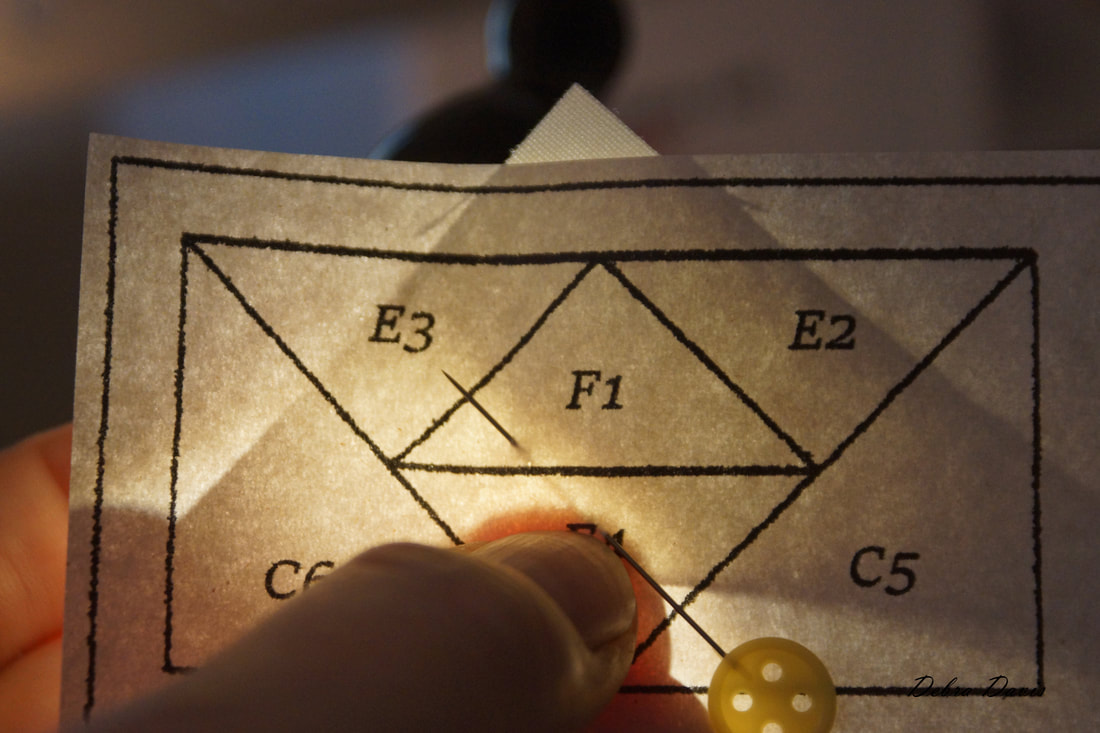 At your cutting mat flip the paper with the fabric pinned in place so that the paper patter is now on top. Using a postcard or similar weight paper line it up along the line between F1 and E2.  Use the postcard as a straight edge to fold over the paper pattern along the line-leaving the fabric on the mat. 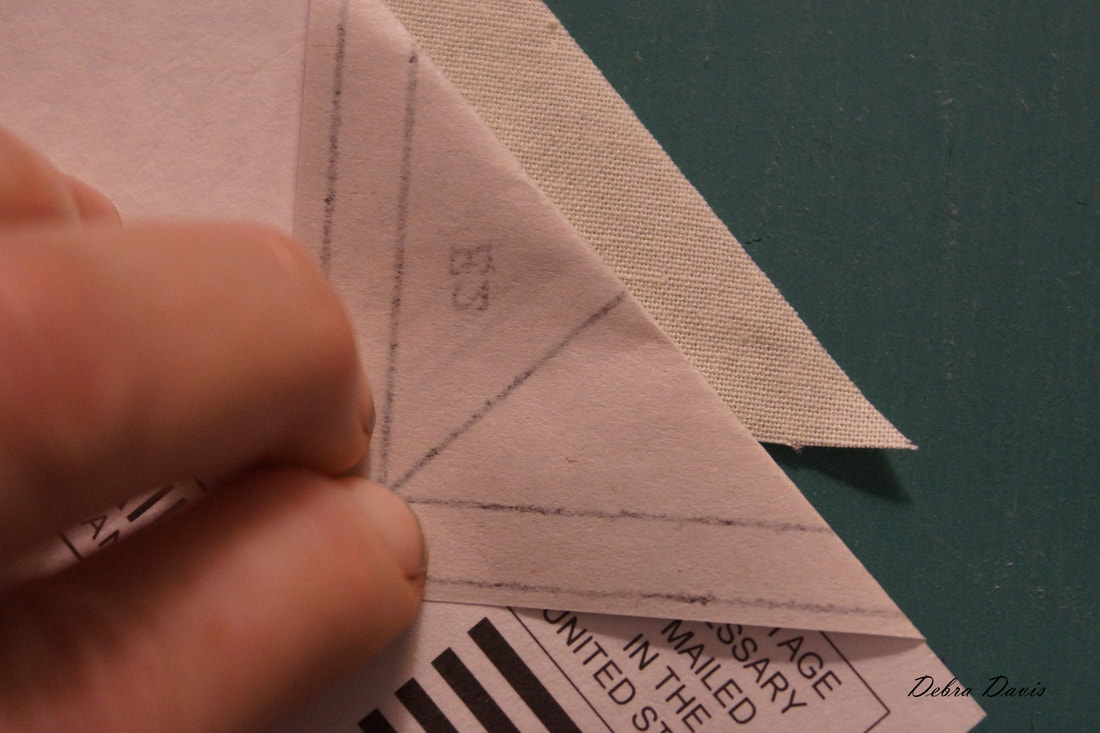 I have taped the postcard to my Add-A-Quarter ruler and just flip it down over the postcard. I now will have a perfect quarter inch from the sewing line on the paper and trim off the extra fabric. 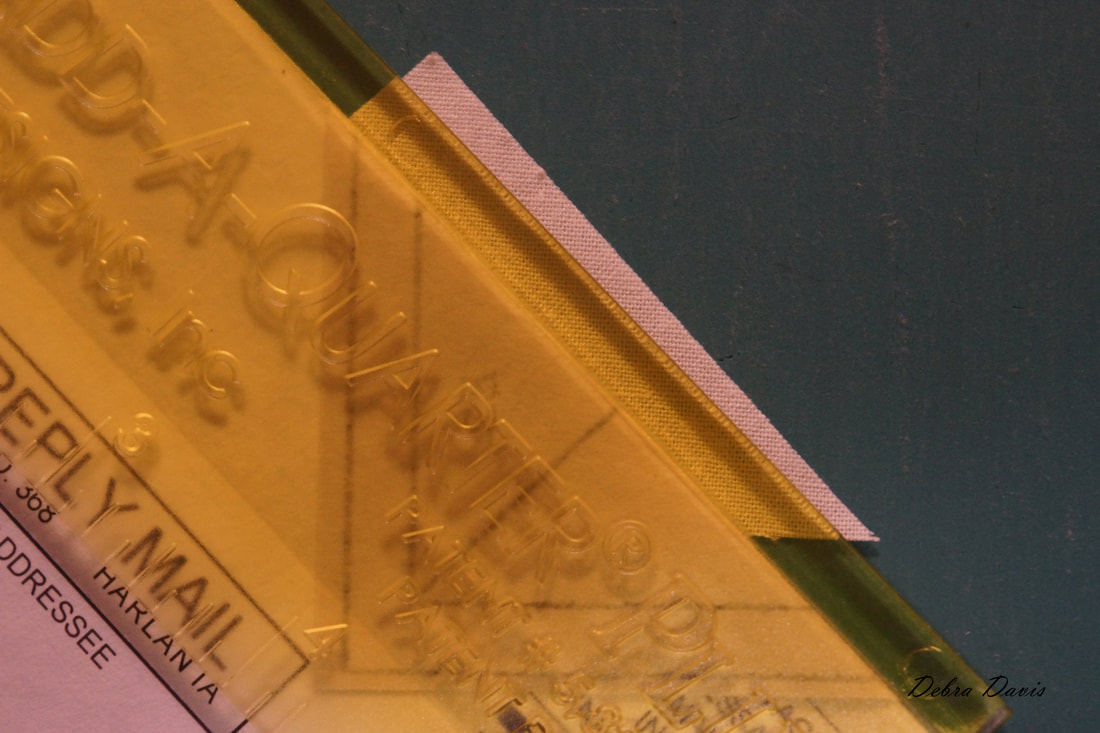 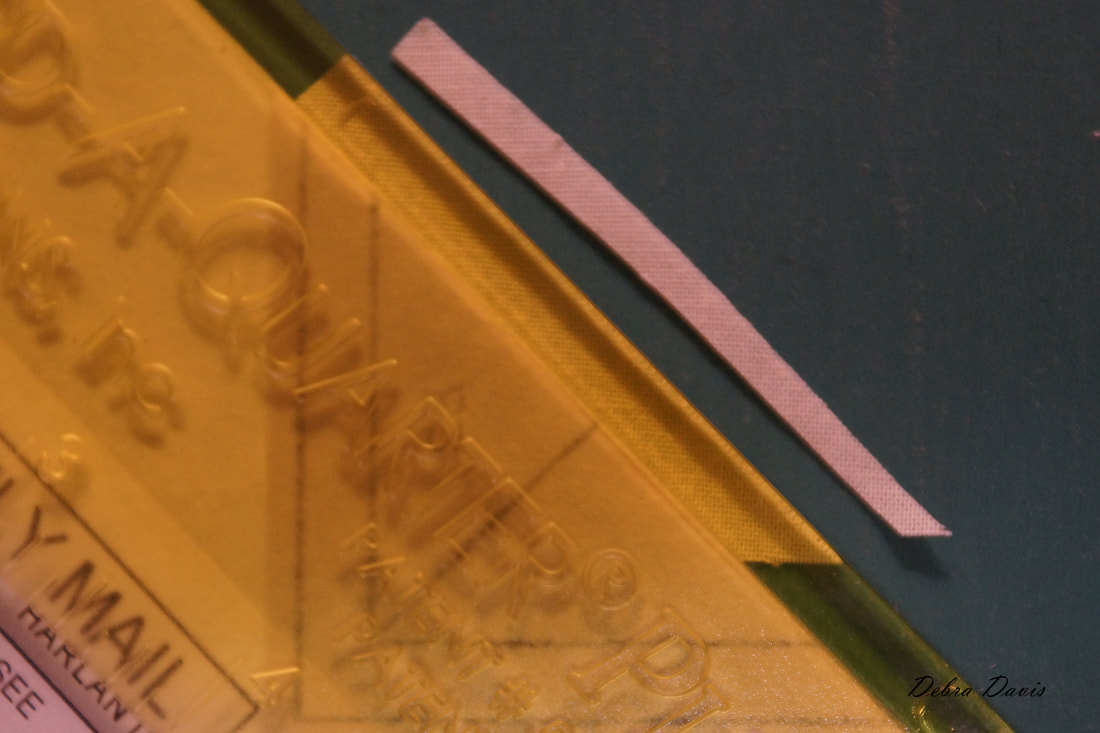 Now I place an F triangle on top of the E triangle right sides together. Notice that I have the upper edge of this triangle about a 1/4" from where the seam line that is visible through the paper.  Before I sew I take a quick check to make sure that my fabric will cover the entire E2 triangle and give enough extra for a seam allowance. (I have cut my pieces plenty large so that this should not be a problem.) It is a matter of personal preference whether or not to put a pin in to hold the new piece in place. I personally do not like to pin and so just carefully flip everything over at my sewing machine.  When paper piecing I will use a much smaller stitch length, setting my machine to 1.5 or approximately 20 stitches to the inch. By doing this the paper will tear away from the fabric very easily. Starting at the very outside line I will stitch across the line between F1 and E2. The fold line I made in the paper is a nice guide to follow across the area where I do not have a line marked.
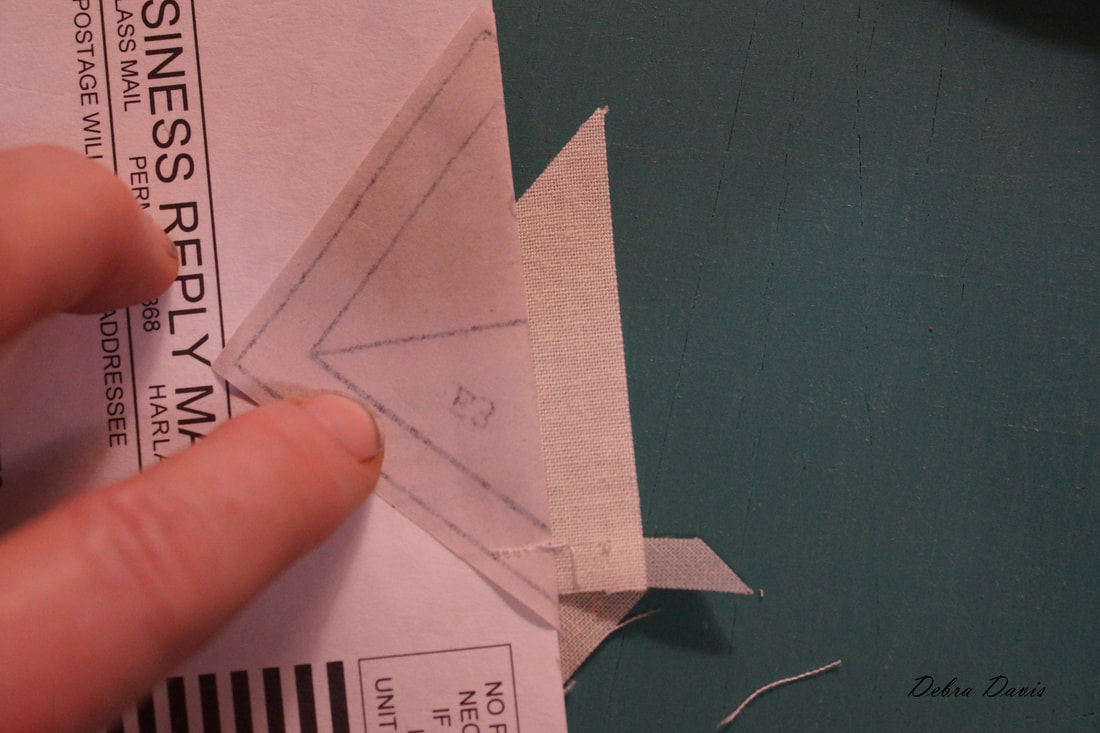
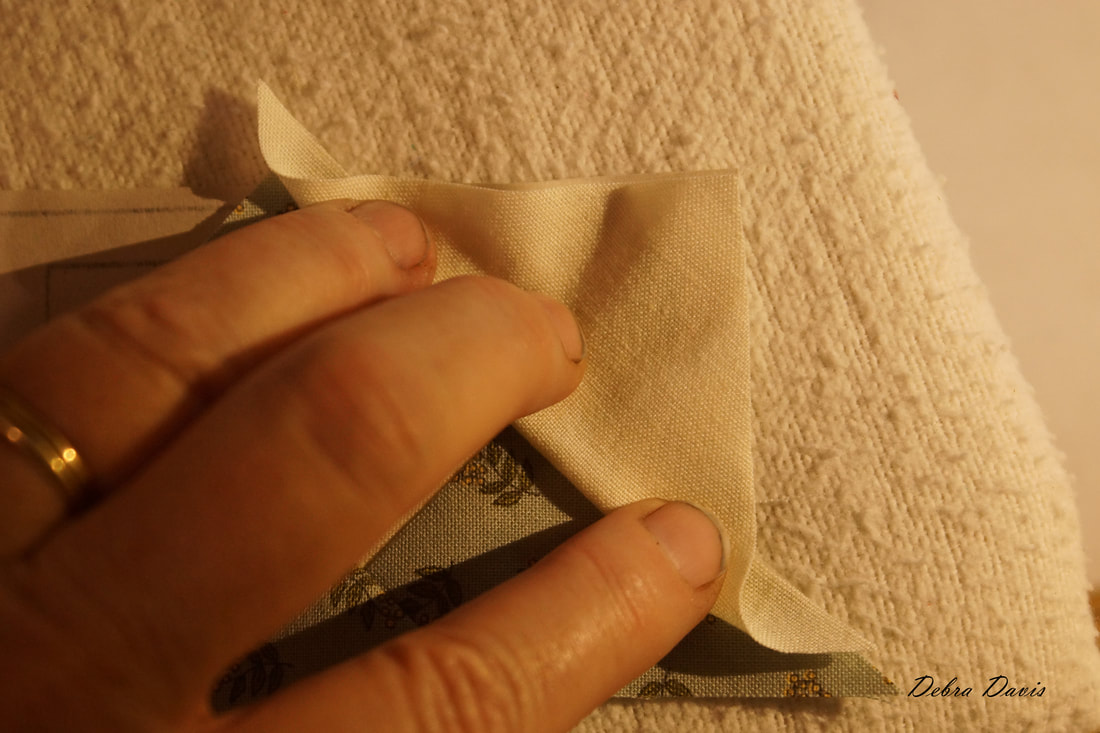
I stop about 1/4" from the other side of the line. At this time I remove the unit from my machine and clip all of the threads. Since I need to make four of these I go ahead and do the same step on each at the same time. One cannot exactly chain piece these things but at least I am doing the same step with each. 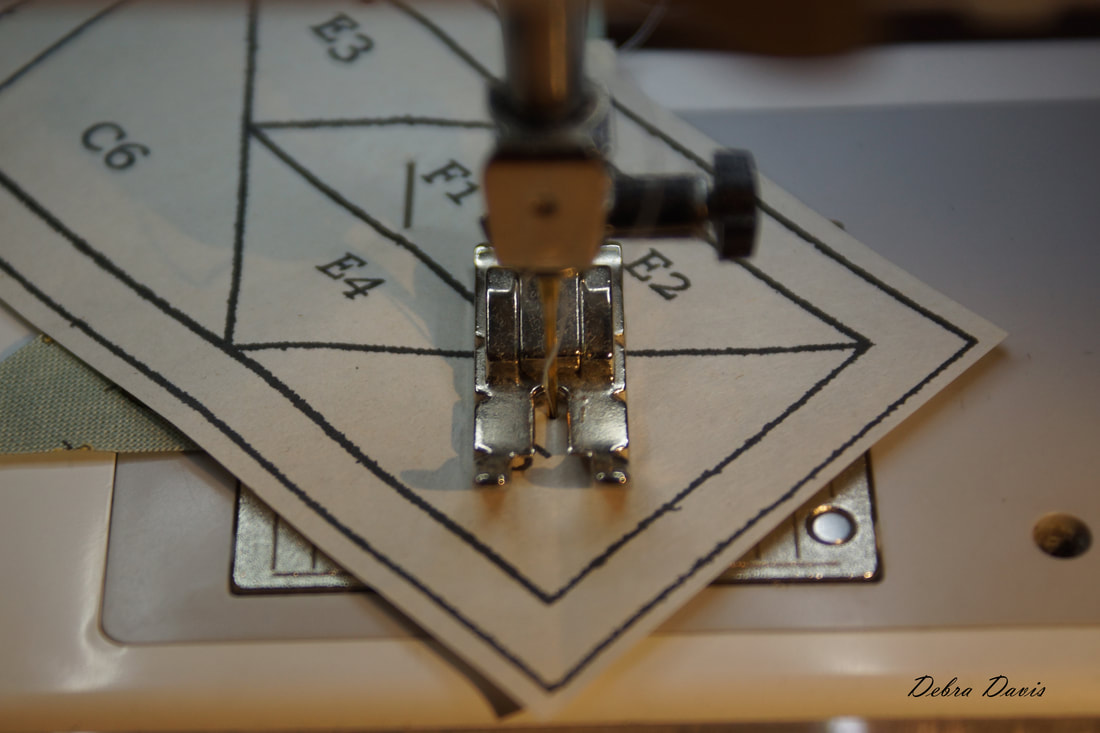 Press towards the new dark triangle. You will always press towards the piece you just added. 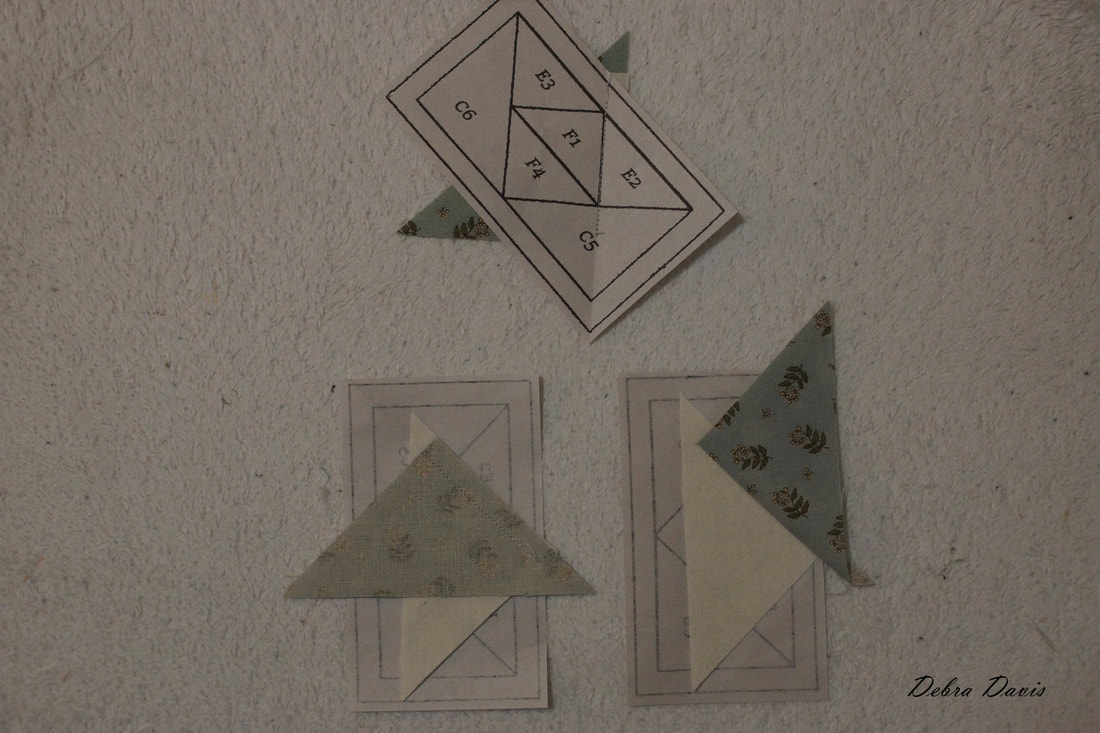 Back at the cutting mat I line up the next line I will sew-E3-with the postcard and fold the paper over on this line. As you fold the paper back you will need to genlty pull the stitching loose from the paper.
Just like before I use my handy ruler to trim the excess. 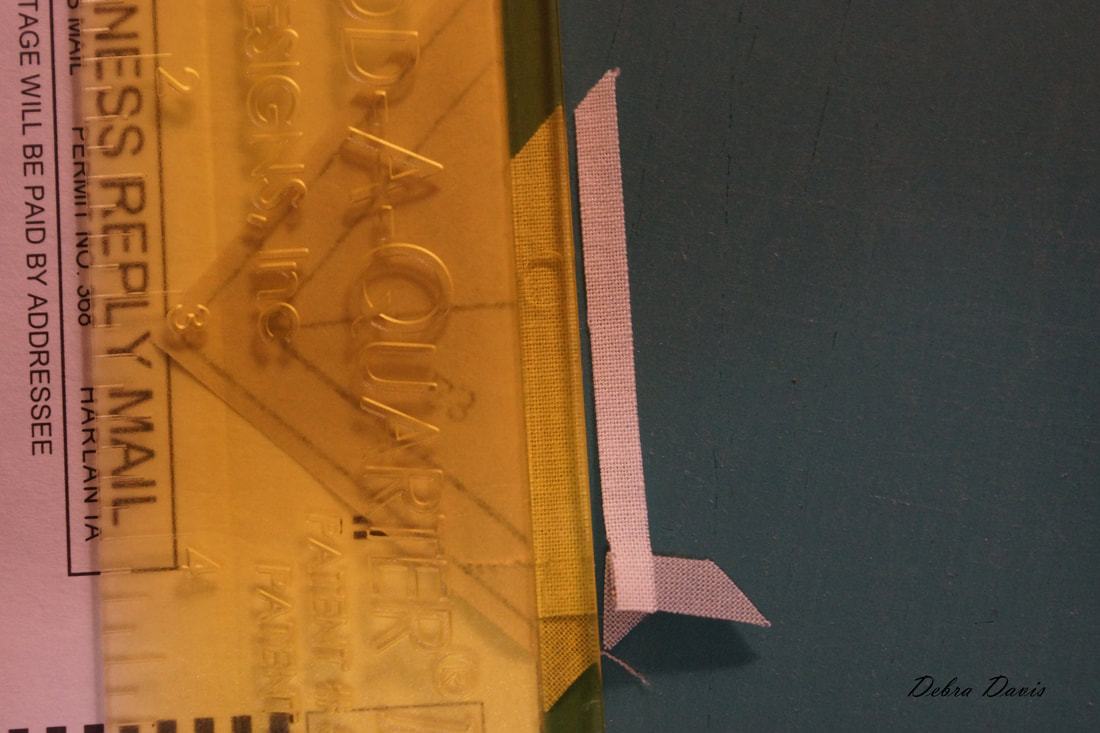 Now I lay another E triangle in place, checking to make sure it covers E3. 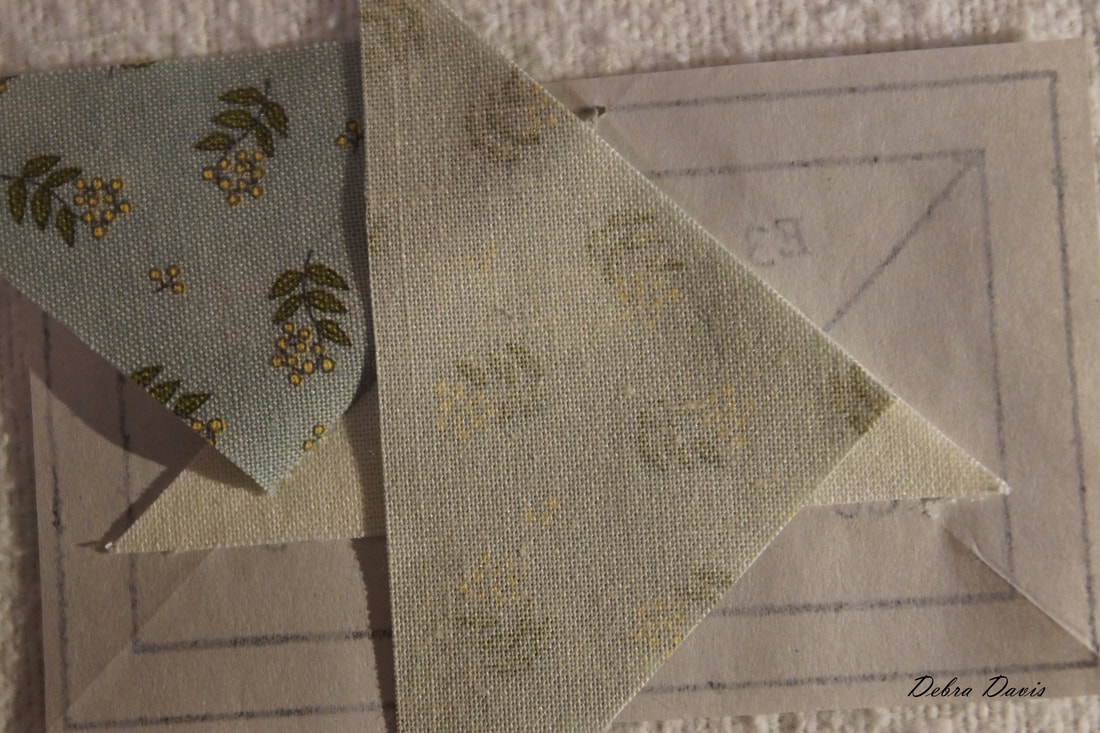 I start approximately 1/4" from the start of the line and sew across to the outer line (the line that is outlining the whole unit)
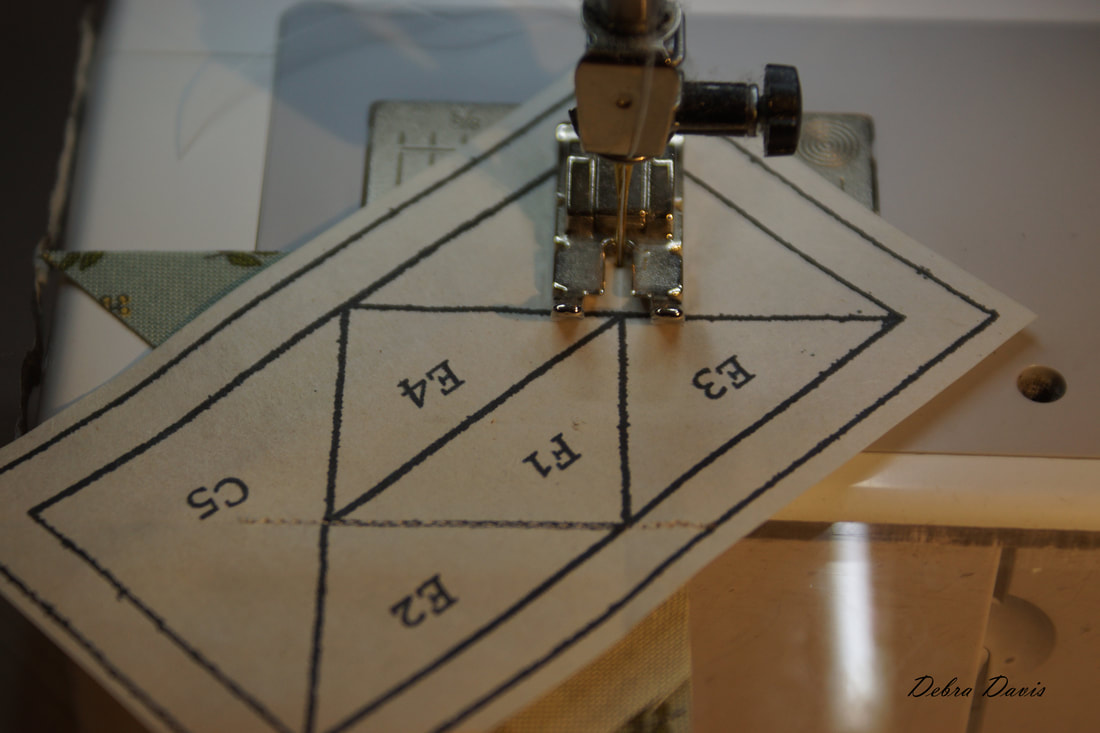
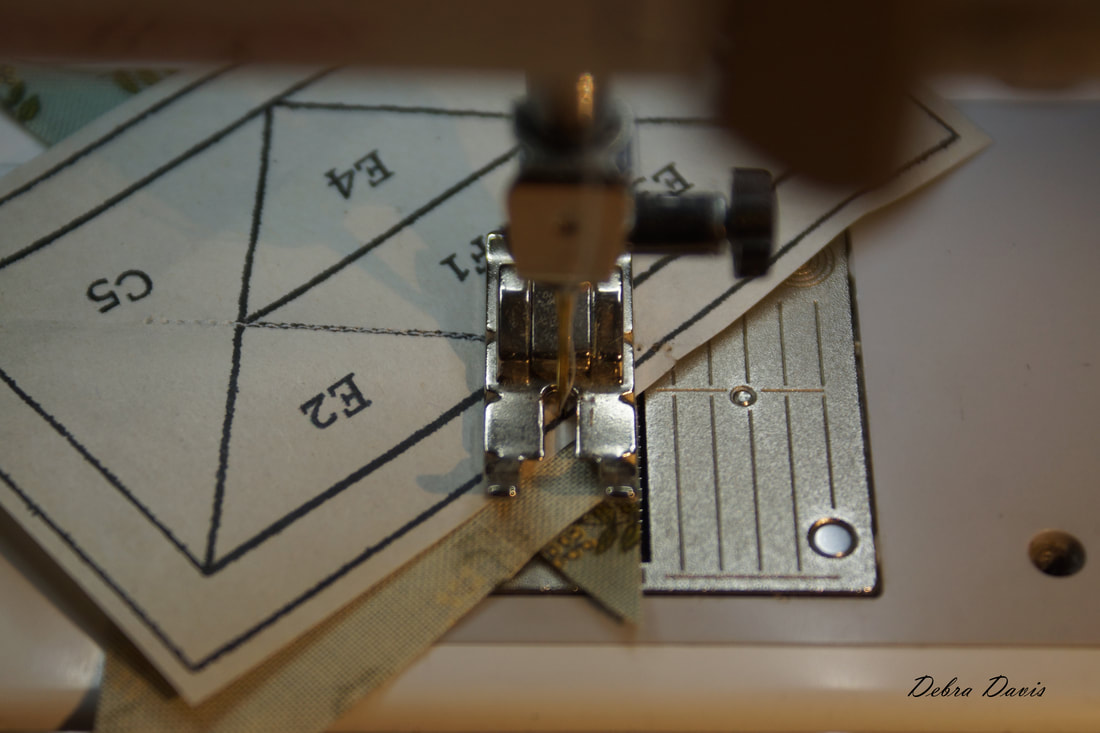
Press towards the new triangle.  Each time I add a new piece I do these same steps: 1-Use postcard as straight edge to fold along next sewing line 2-Line up ruler along folded edge to trim fabric 1/4" from the fold 3-Place new fabric piece checking to make sure it covers the area 4-Sew along line-stopping and starting 1/4" from the beginning and end of the line. 5-Press towards fabric piece just added. 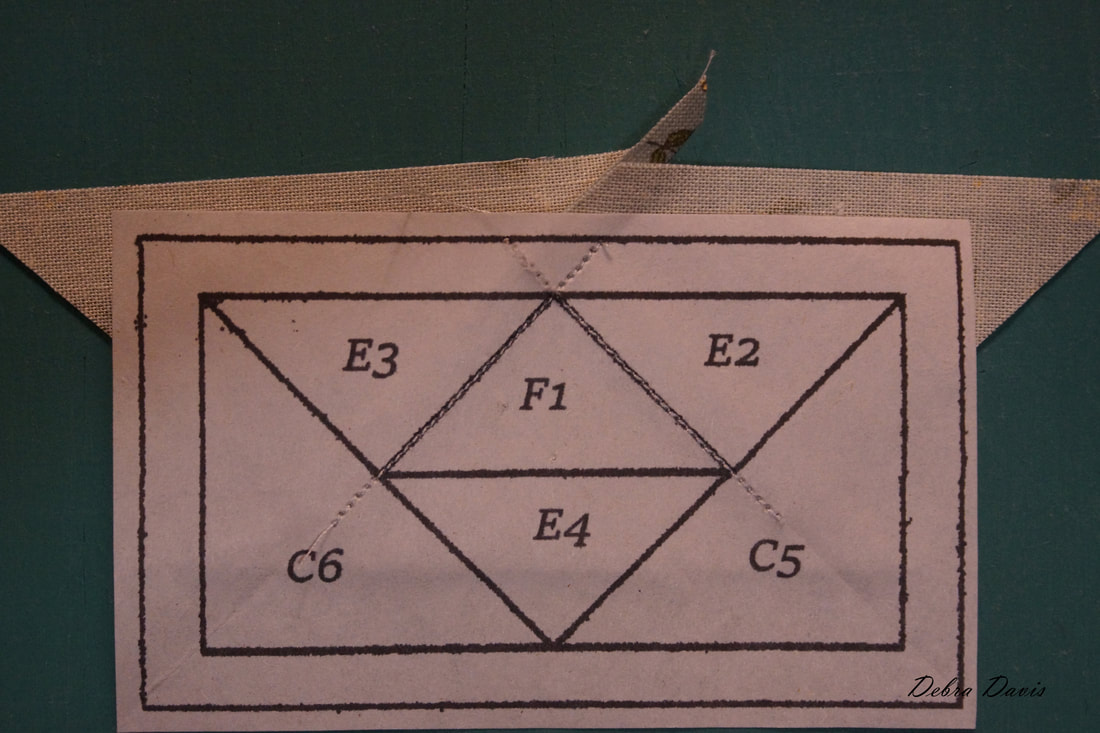 With that in mind I move on to E4 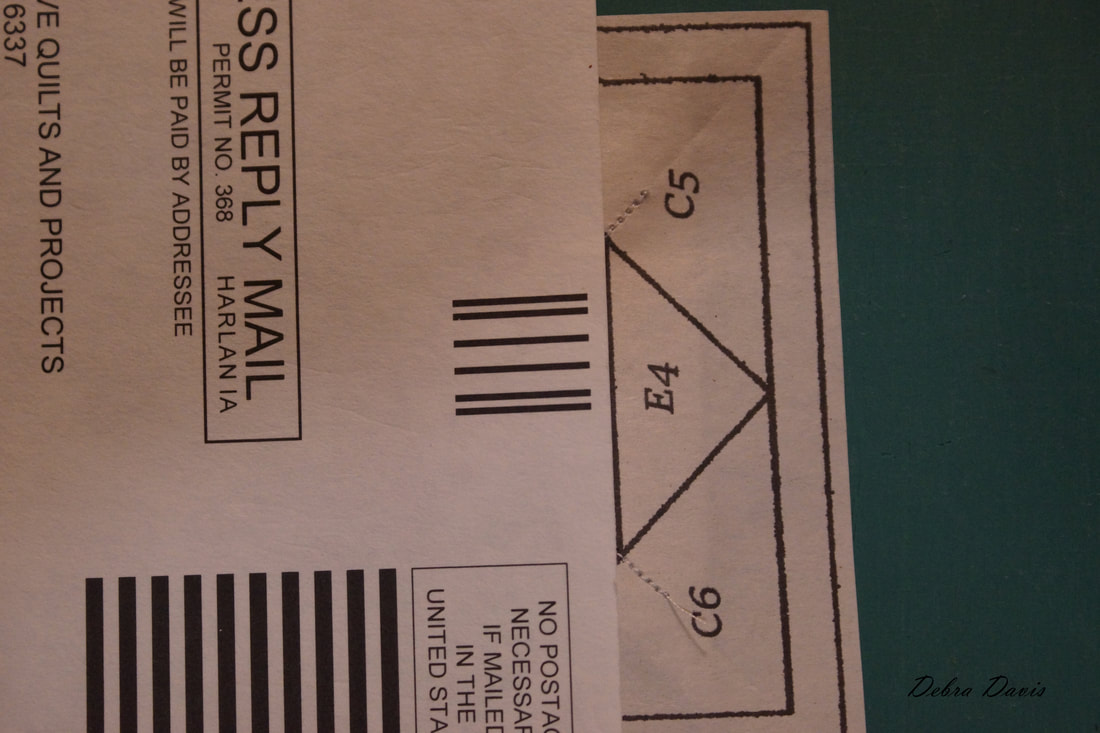 Line up the final E fabric triangle to be sewn in place. 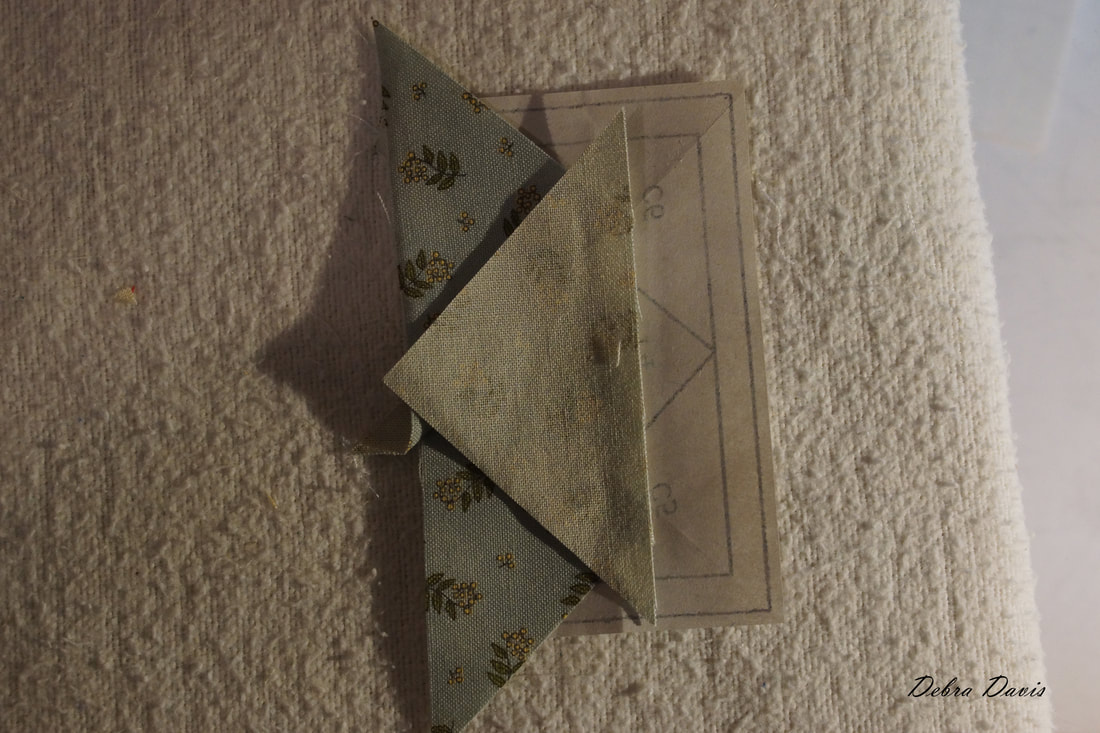 Starting and stopping 1/4 inch from the sewing line...and here is what things look like so far. Almost done.
Repeat our steps for C5. 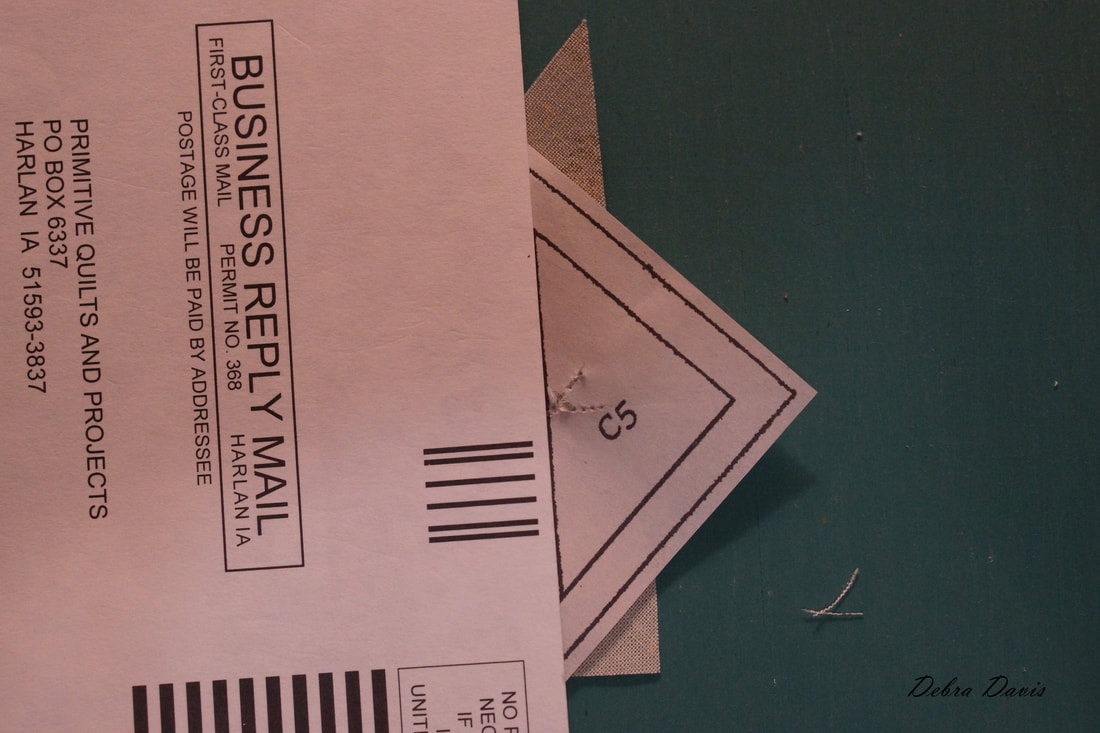 Place a C triangle checking to make sure it covers the entire area all the way out to the outer line, which is our seam allowance line for the unit. 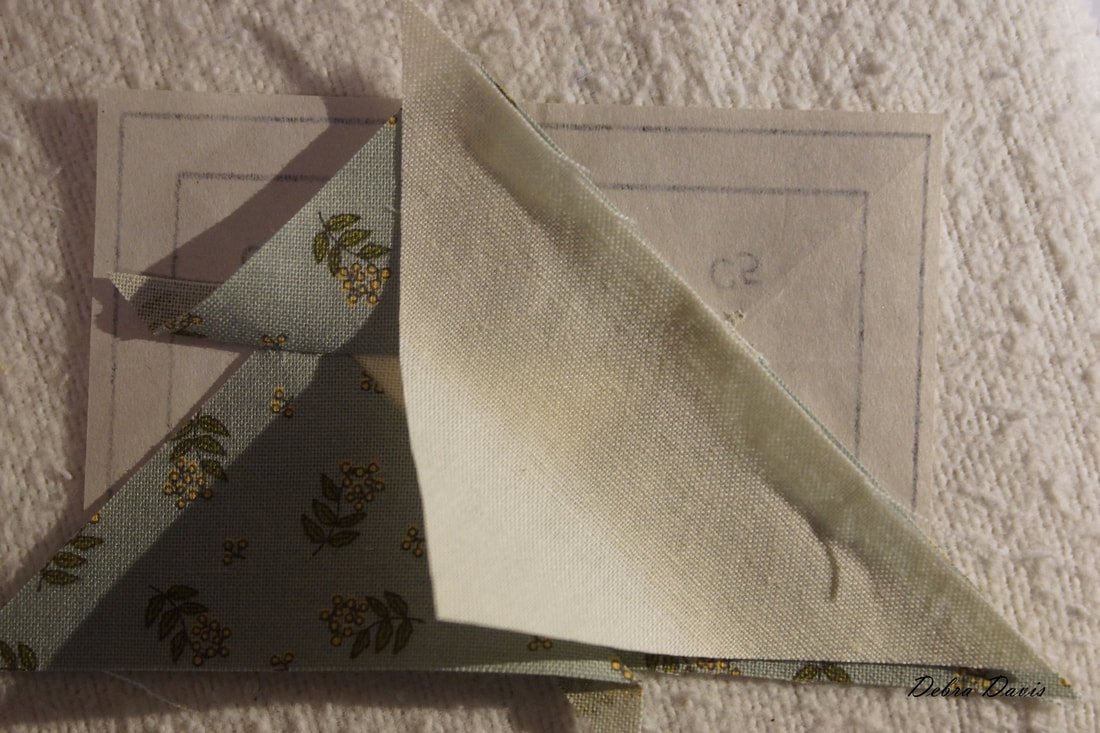 After checking to make sure everything will be covered and carefully flip the whole thing over and stitch along the line.
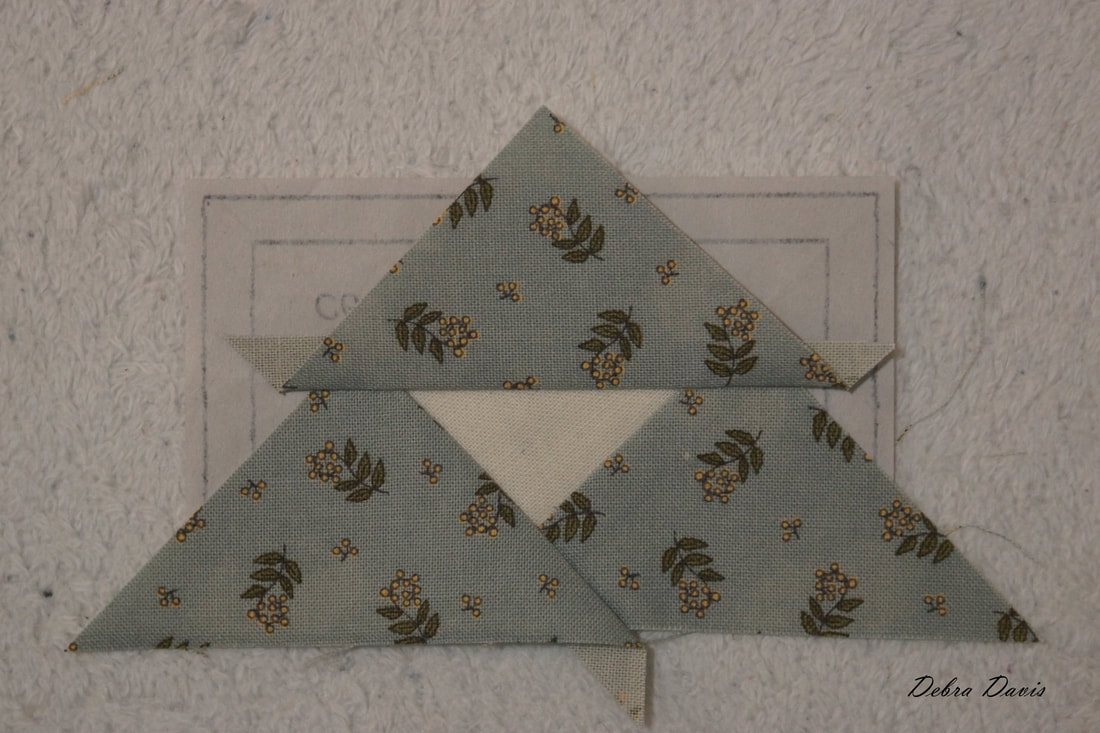
Just one piece left to add and these little cuties will be complete. 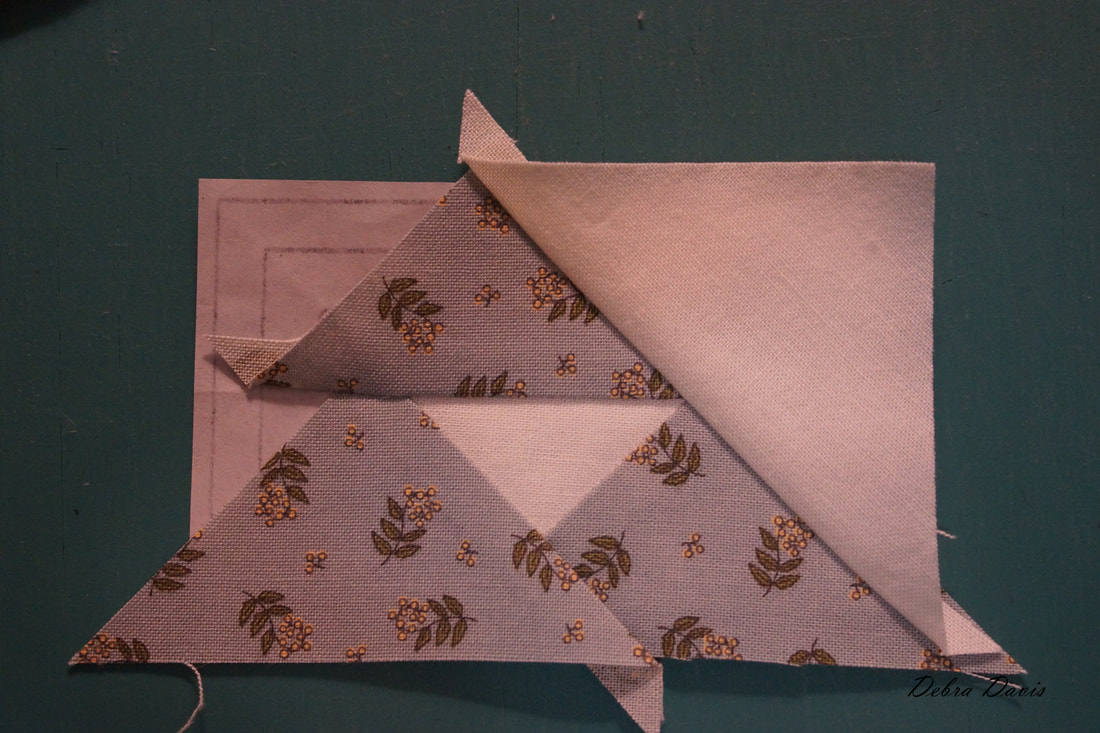 Fold, trim, and lay the last piece in place. 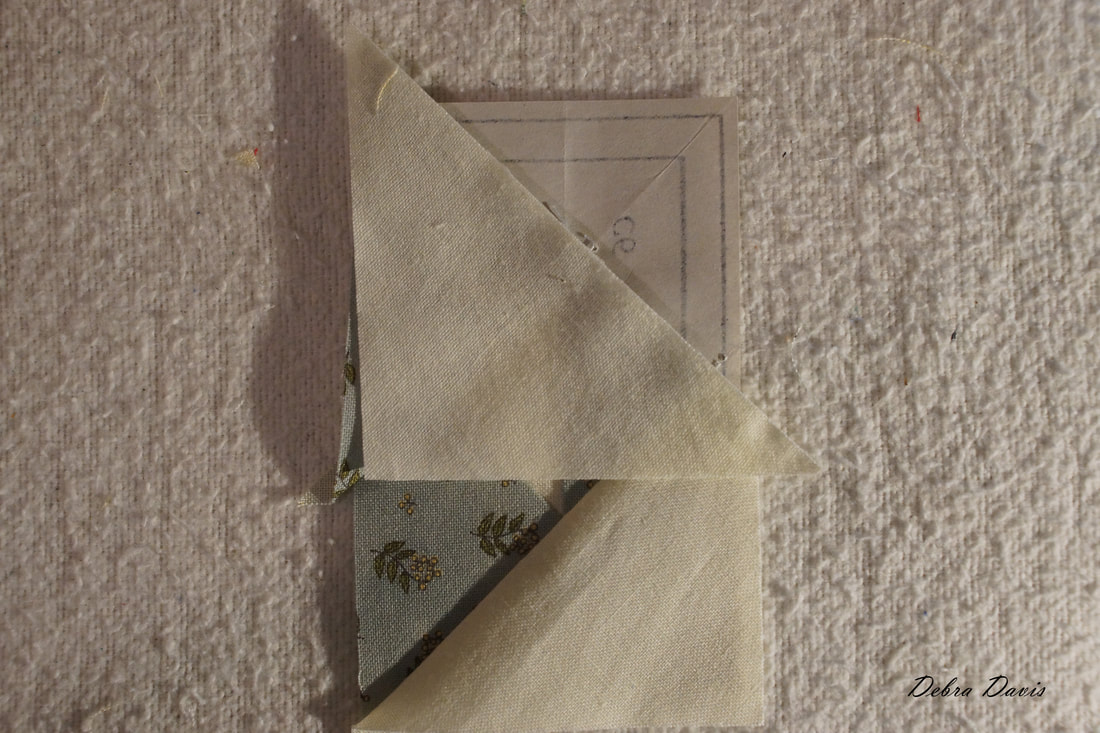 The last step is to trim along the outer line of the unit. I do not need to worry about measurements when paper piecing but these should measure 2" x 3 1/2" at this point. 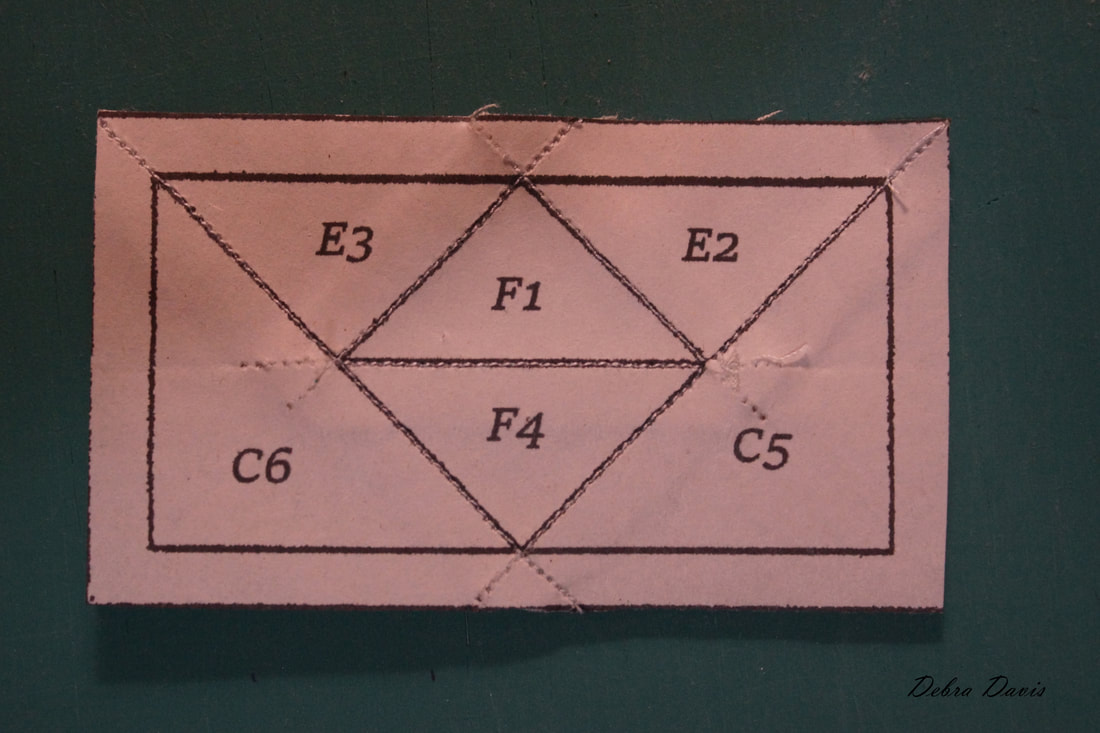 Just for fun I tried one with my Bloc Loc ruler but it really isn't necessary as we have the exact line we need to cut on already marked for us. 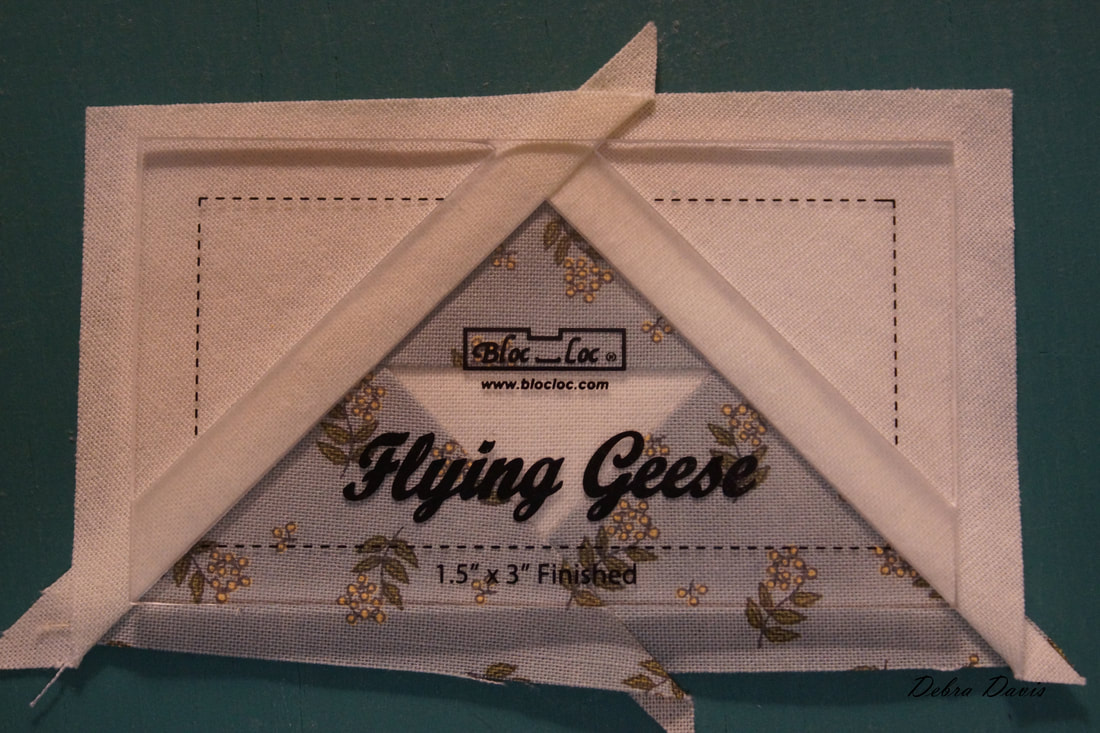 Finally all of the pieces come together and I am ready to sew the block together. I pressed the top and bottom rows towards the outer triangle squares and the middle row pressed towards the center. 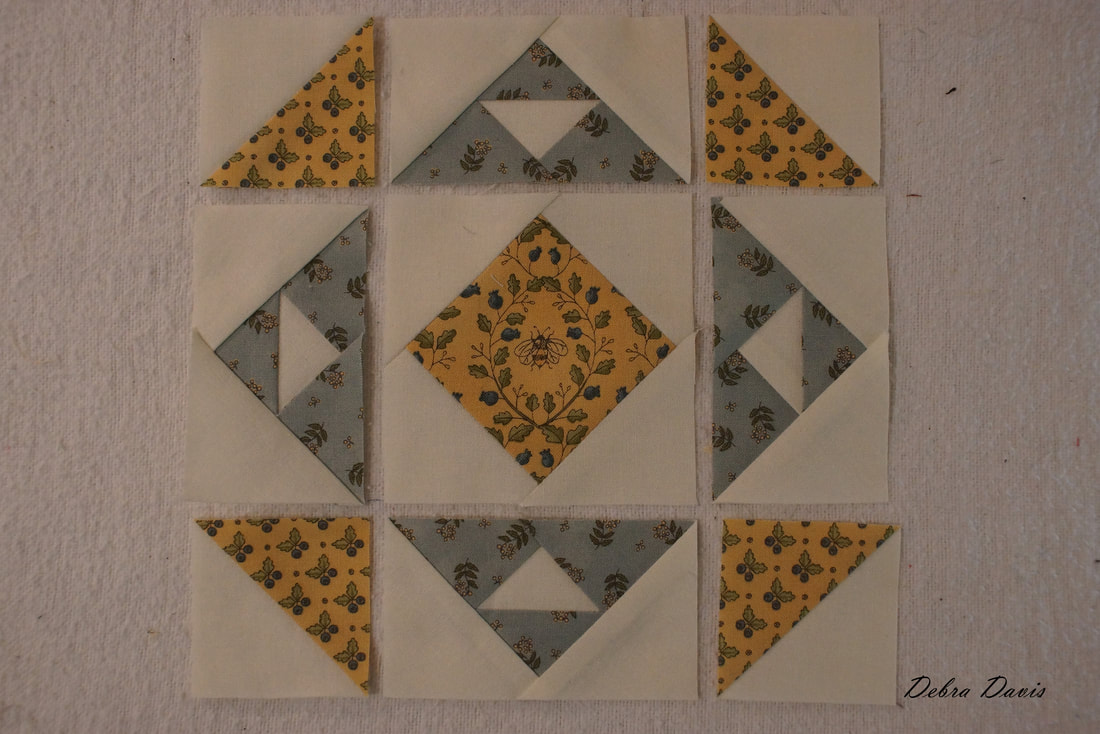 Almost forgot to reset my stitch length back to the one I like for piecing. As mjuch as I do not like to pin, I still will pin my seams where they meet. They tend to lock in place on their own when pressed in opposite directions but I really want to make sure everything stays in place.
A challenging but very pretty block- I am glad I made the effort! 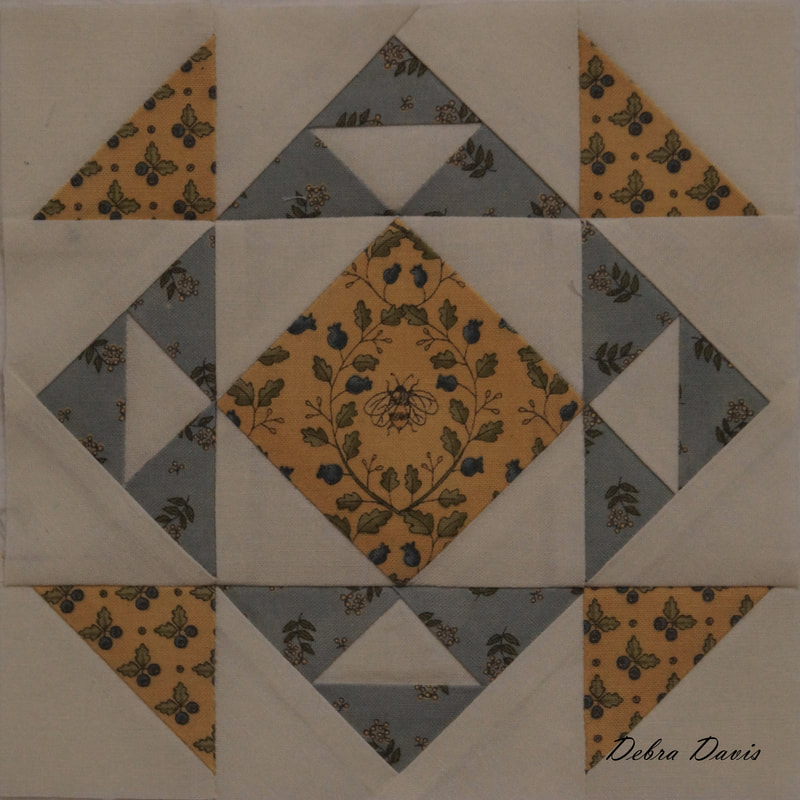 A new block is out today and I sure hope I have time for it tomorrow.
Let me know if you give the paper piecing a try-it really is my new friend. I tried to be as clear about each step as I could, but if you have any questions about my process please feel free to comment or contact me. Until next time... Happy Quilting! Debra
Genie
11/11/2017 06:15:43 pm
This is the first time for me doing the paper piecing and find your instructions invaluable ! I need the measurements of the corner squares for this block( which look to me to be 2inches square) is that correct? And the flying geese measurement at 1.5 x 3? Or. 2 x 3.5 unfinished ? And the center square 3 inches square? Thank you. I couldn't do this without your tutitorials!
Debra
11/21/2017 11:07:57 am
Genie, Sorry to be so slow in answering your questions-I just saw your comment. This may be too late for you, but yes, the corner squares measure 2" x 2"-unfinished size. Comments are closed.
|

Welcome to the site of Debra Davis-a woman who loves the Lord and loves to quilt.
My other blog where I share about my walk of faith:
Sitting at His Feet 
|


 RSS Feed