|
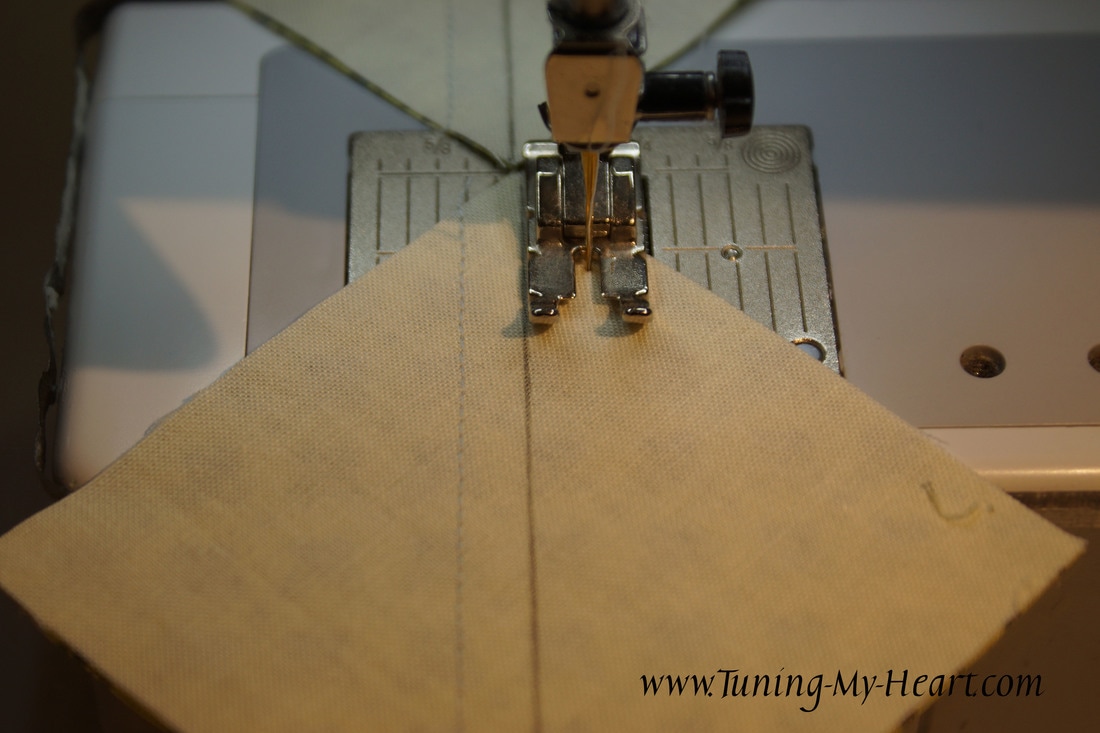
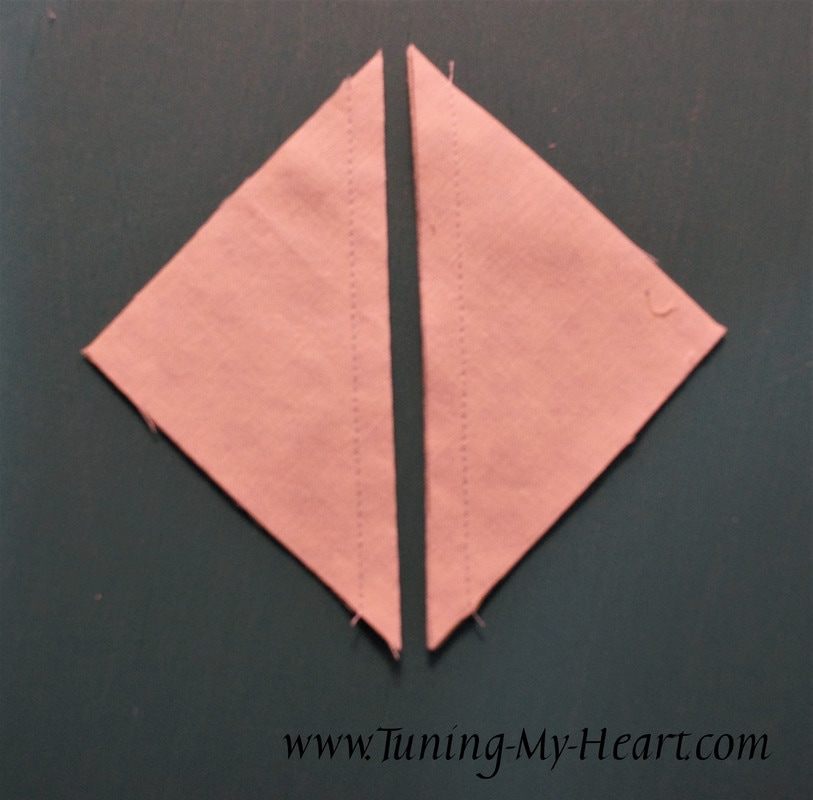
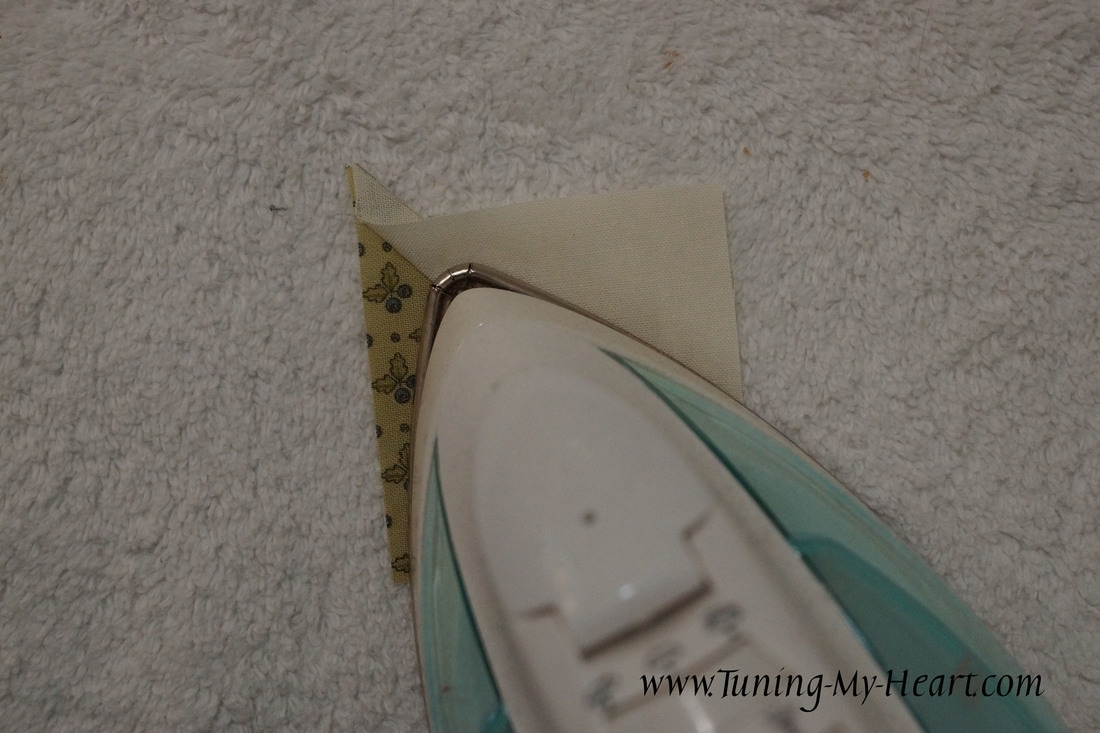
This week Jo Morton has our block. The pattern is available on her blog located here: "Block 15-"T" Block This is a block that has been around for a long time, but I was unable to find the history of it beyond there are a lot of variations for T blocks out there. Some think it came about during the Temperance movement in the USA-but there is no historical evidence to support that idea. I have changed things up a little bit with some of the cutting directions and I am using my favorite method for making the Flying Geese Units. After reading the designers blog posts it looks like I am not alone in which Flying Geese method I prefer. So let's get started. 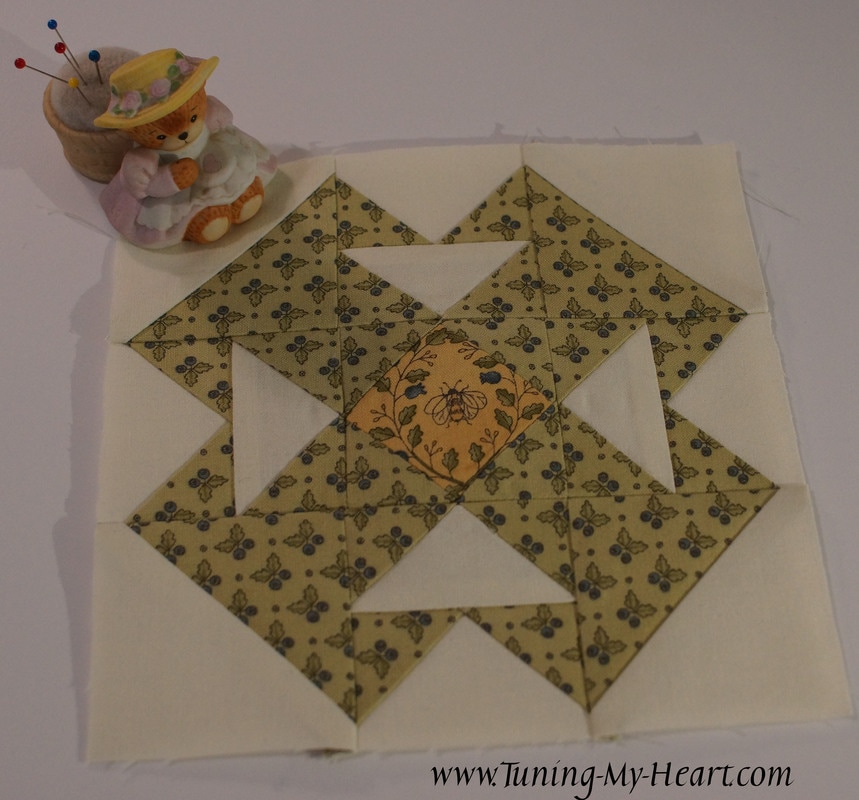 My Cutting Directions: A - (Cut 2) 3 1/4" x 3 1/4" B - (Cut 2) 3 1/4" x 3 1/4" C - (Cut 4) 1 1/2" x 1 1/2" DC - (Cut 8) 2 1/8" x 2 1/8" D - (Cut 2) 3 1/2" x 3 1/2" E - (Cut 1) 2 1/2" x 2 1/2" The directions have us starting with the Half-square Triangle units. I cut my squares 3 1/4" x 3 1/4" and drew a diagonal line on the A squares. 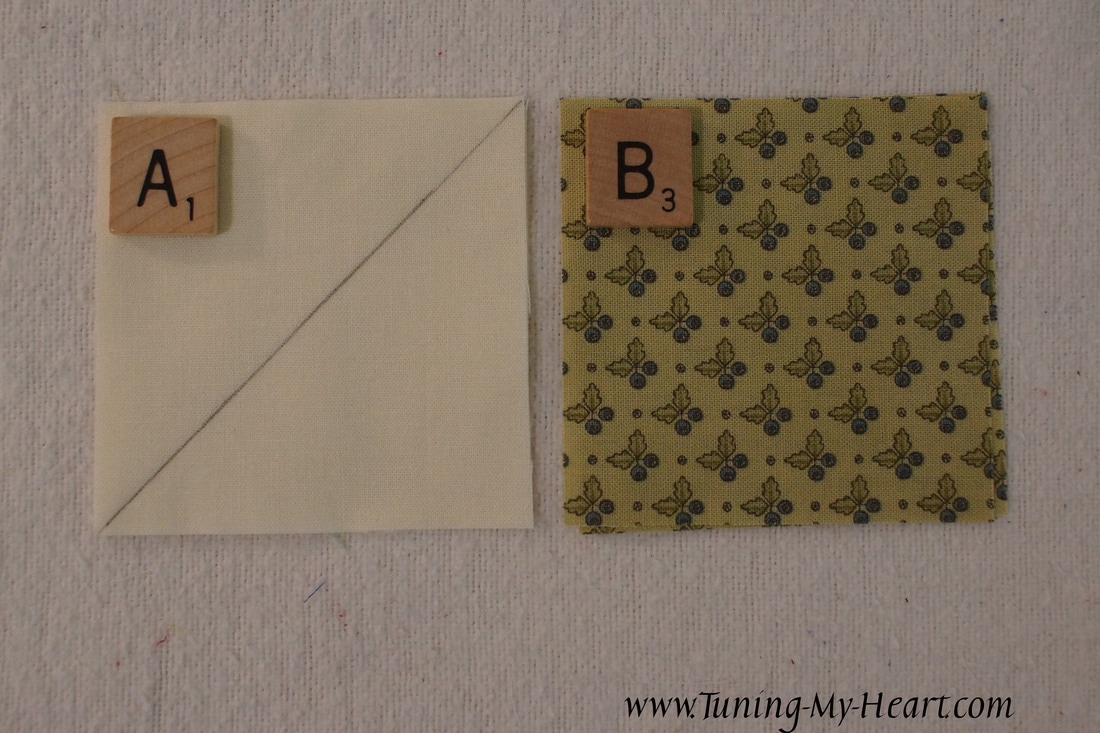 If you have been following along with me this year making these is going to be a breeze. Sew 1/4 inch from each side of the drawn line and then cut apart on that drawn line.
It was recommended that we press these to the light side -trust me you will survive and even thank me for it later. These units get trimmed to 2 1/2".
We will leave these lovelies here for now and move on to the next step. 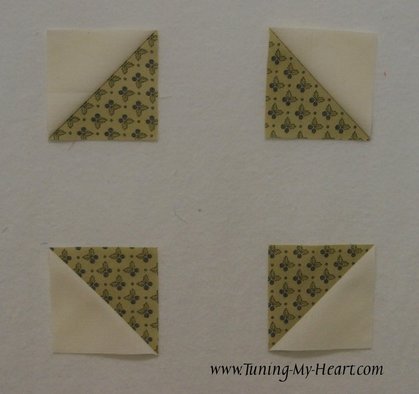 I cut 2 D squares 3 1/2 inches and 8 DC squares 2 1/8"-you will not find the DC squares in Jo Morton's cutting directions, I am replacing some of the C's with these for this method of making the Flying Geese units. It is called the no waste method, but since I make mine oversize and trim there is some waste-I just like how quickly they go together and that I can cut out a lot fewer pieces to get the same number of Flying Geese. 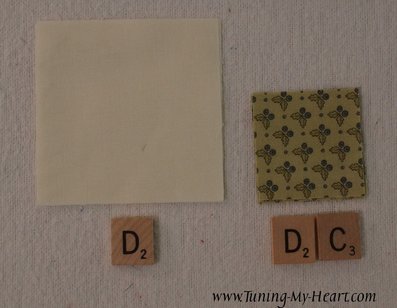 To start lay two of the DC squares right sides together with a D square. 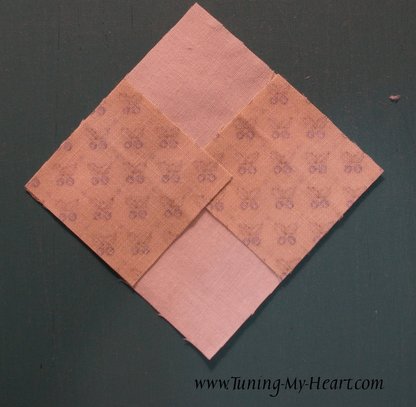 Draw a diagonal line through both of the DC squares. 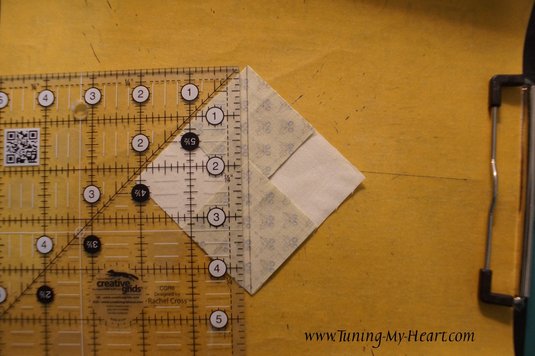 Just like with the Half-square Triangles we sew 1/4 inch from both sides of the drawn line. 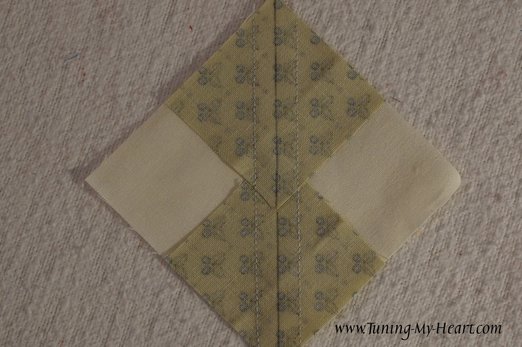 They look rather funny at this point when pressed open. 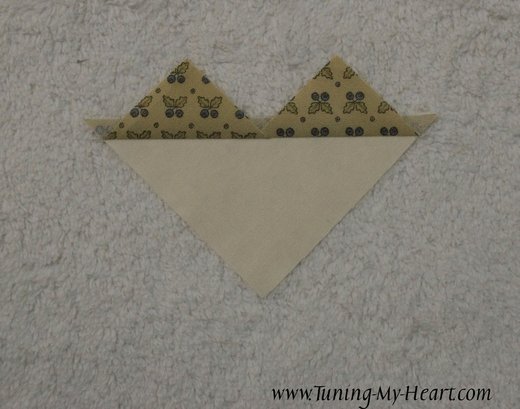 Now lay a DC square on this unit and draw a diagonal line. 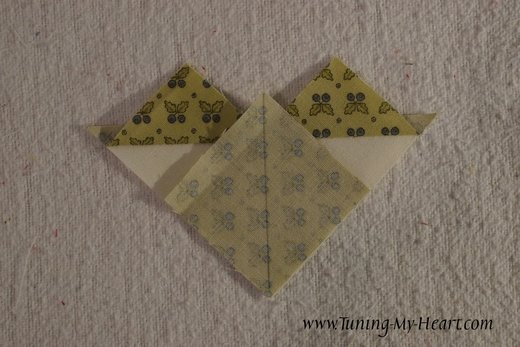 Sew 1/4 inch away on each side of the drawn line.
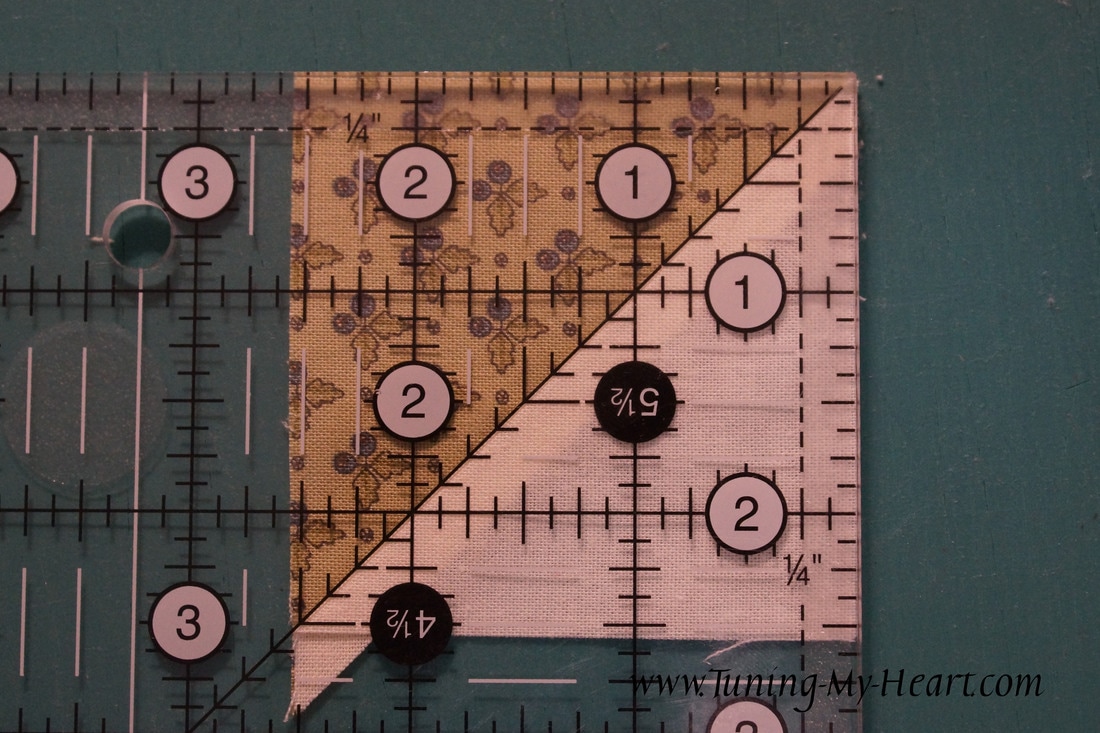
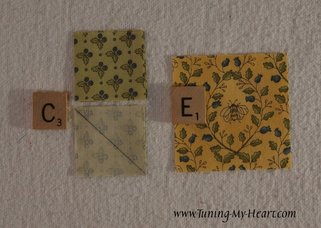
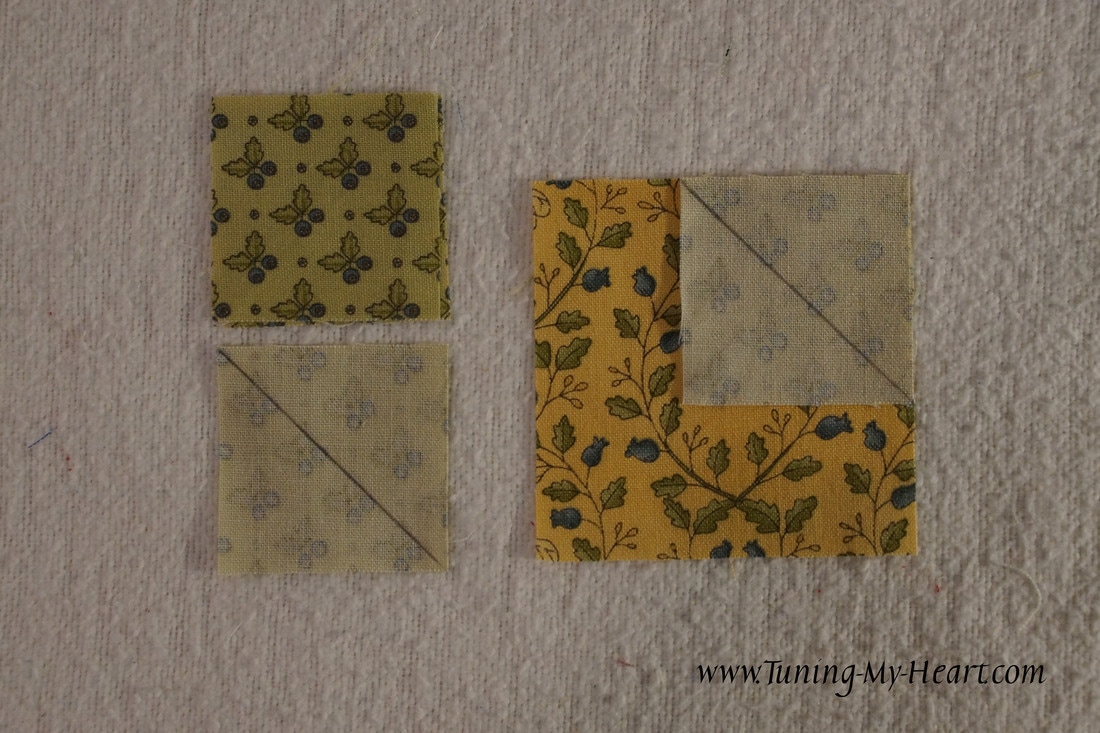
Cut apart on the drawn line and press open. 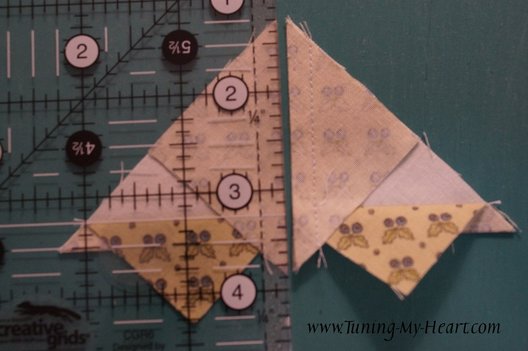 Sweet! 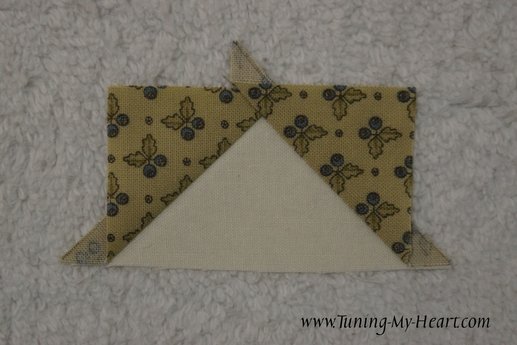 I have a Bloc Loc ruler for cutting Flying Geese which I love, but I am going to show you how to use a regular ruler to trim these to size. (I love, love, love, the rulers by Creative Grids for their no slip grip!) We want to trim these units to 1 1/2" x 2 1/2". Line up the diagonal line along the seam and the 1 1/4 inch mark at the point of the triangle. Trim the first two sides. 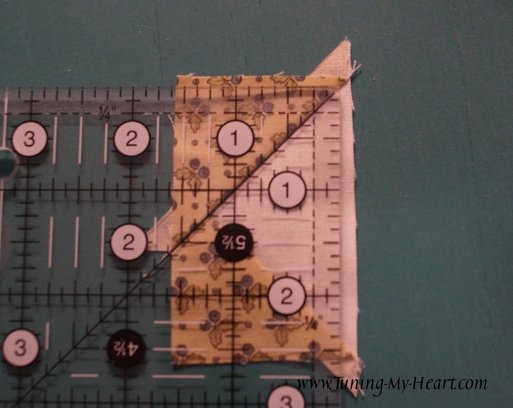 Rotate the block and line up the cut edges with the 1 1/2" and 2 1/2" marks on the ruler. Make sure that you have 1/4 inch beyond the point of the triangle and trim the next two sides. 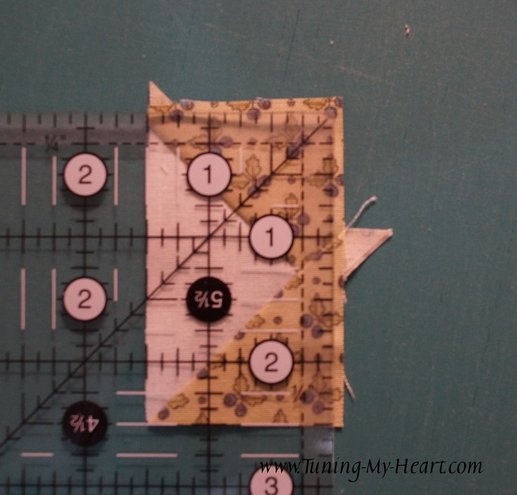 Sew the Flying Geese units together in pairs. Press seams towards bottom unit. These should now be 2 1/2" squares. 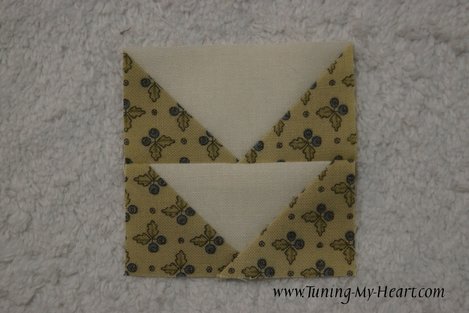 These are added to the Half-square triangles from step 1 and we can move on to making the center unit. 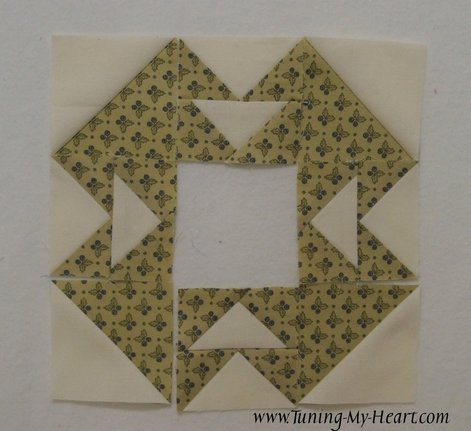 Draw a diagonal line on each of the C squares with a line that will not show through the fabric to the other side. I used a mechanical pencil. Place a C square in the corner of the E square.
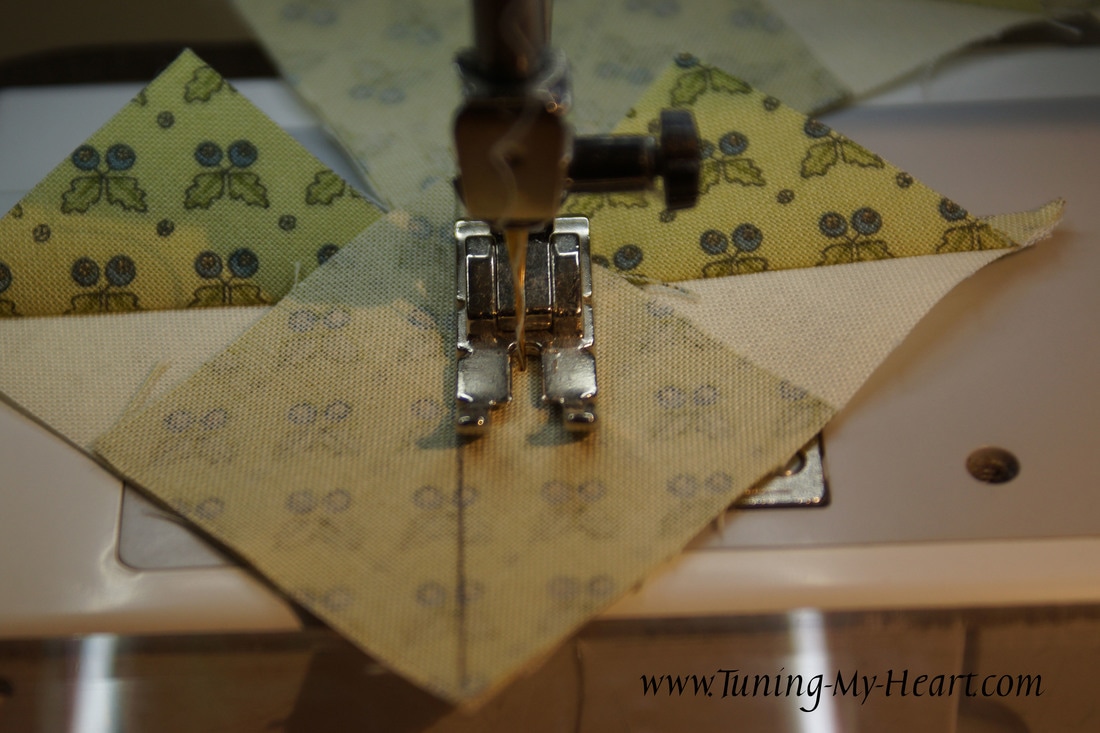
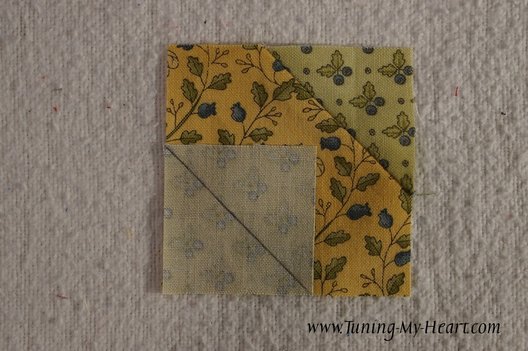
Sew along the line. I line up my needle just to the outside of the line, not directly on it. 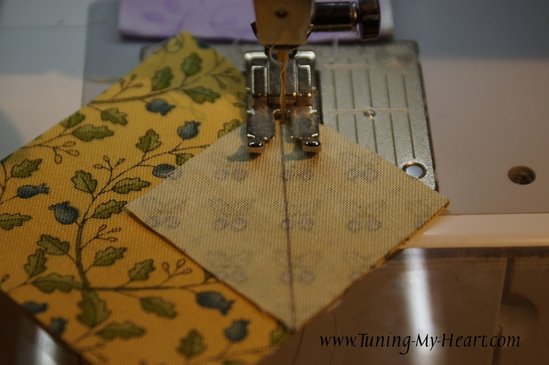 Do a check to make sure the triangle covers up the square underneath. 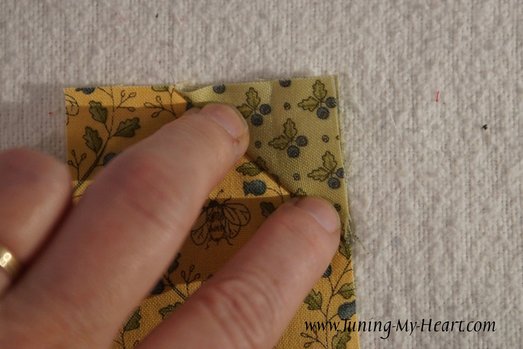 Trim 1/4 inch from the seam line. Press towards the C square. 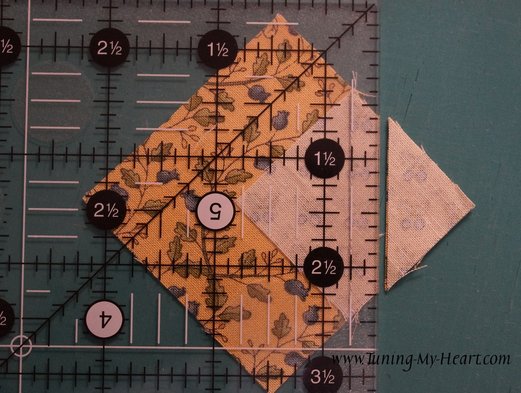 Add the next C square to the opposite corner and sew in the same manner. Then do the same with the remaining C squares.
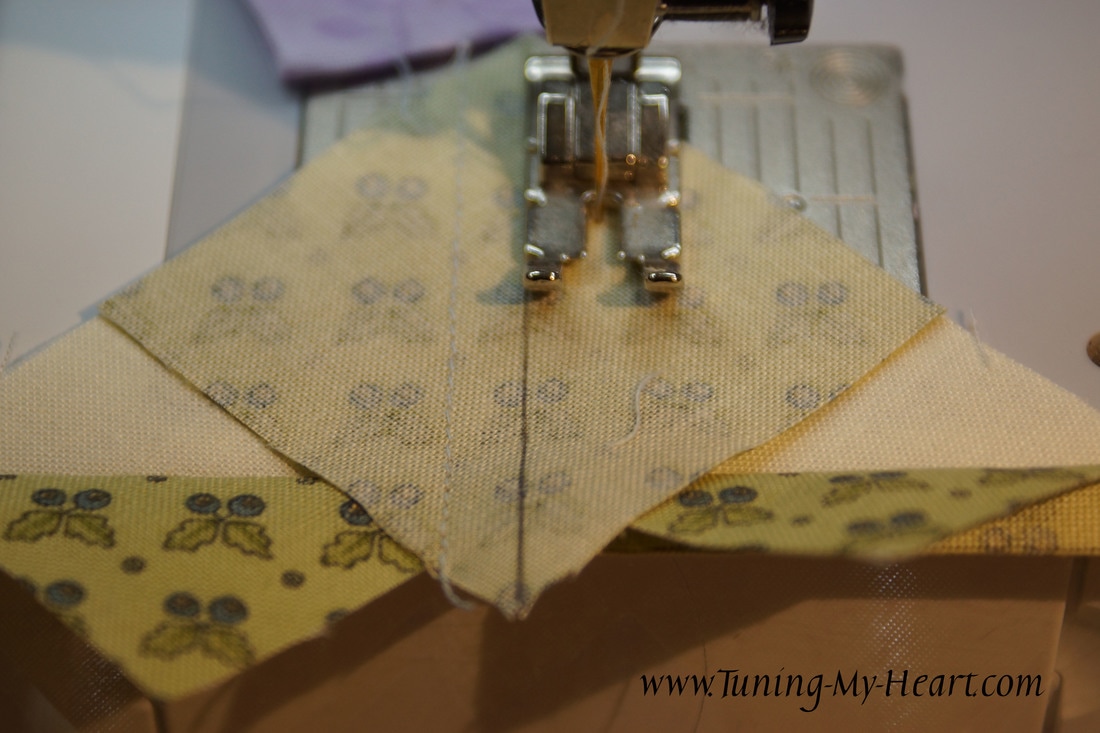
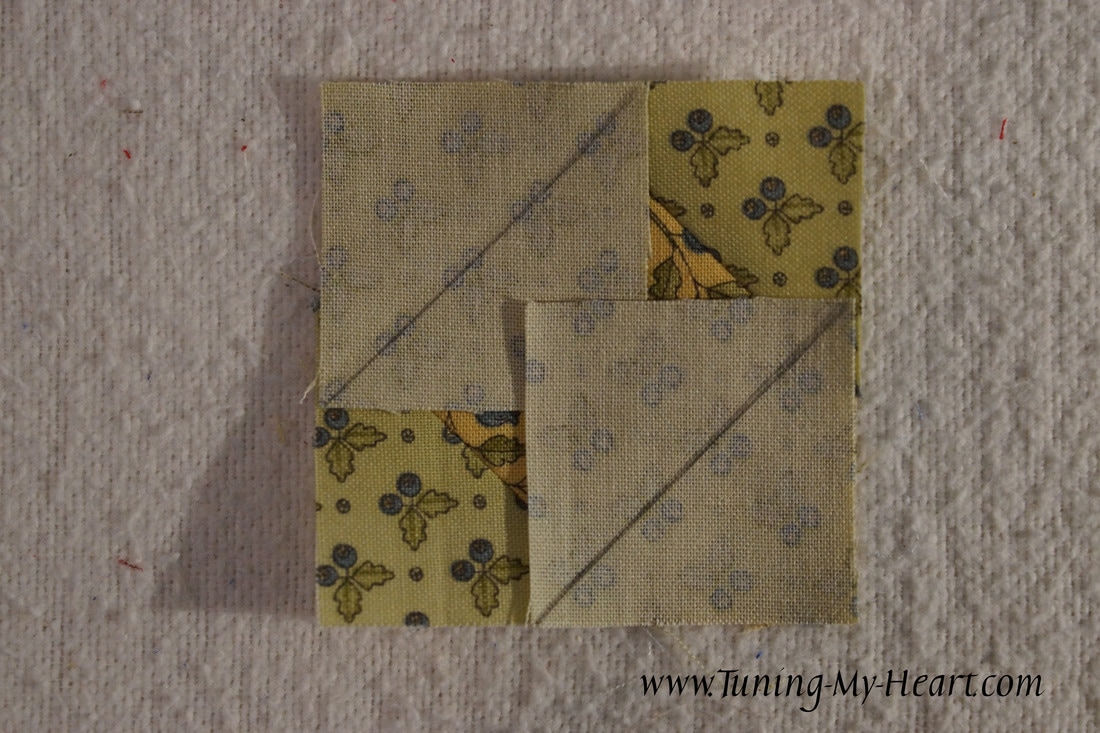
A tip if your triangle does not completely cover the E square underneath is to trim away just the C square leaving the fabric underneath visible when you press the triangle open. This works if you are just a wee bit off-not more than an 1/8 inch though as that would not give you enough fabric in your seam allowance to keep the triangle from holding. 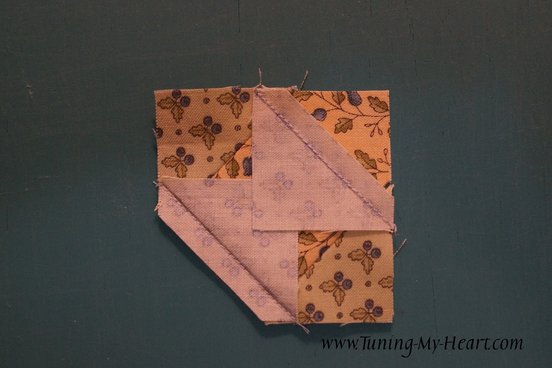 Add this unit to the others and stitch the rows together. You will now be able to appreciate why we pressed those Half-square Triangles to the light side: the diagonal seams nest together nicely as we sew them together with the Flying Geese units. I pressed the center seams open as there was a lot of bulk there. The top and bottom rows I pressed to the outside (towards the Half-square Triangles.) Sew slowly over those bulky seams! 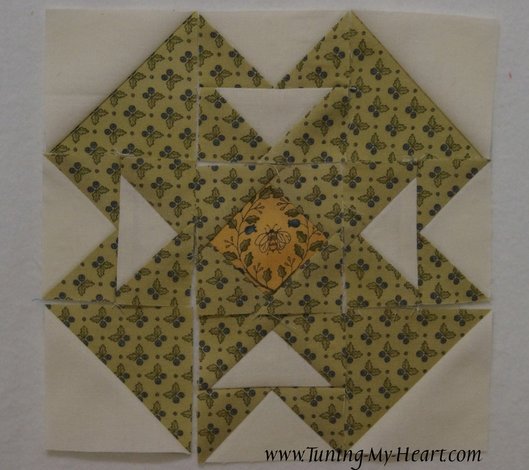 Stitch the rows together using a pin to match the seams. Our T block is complete! 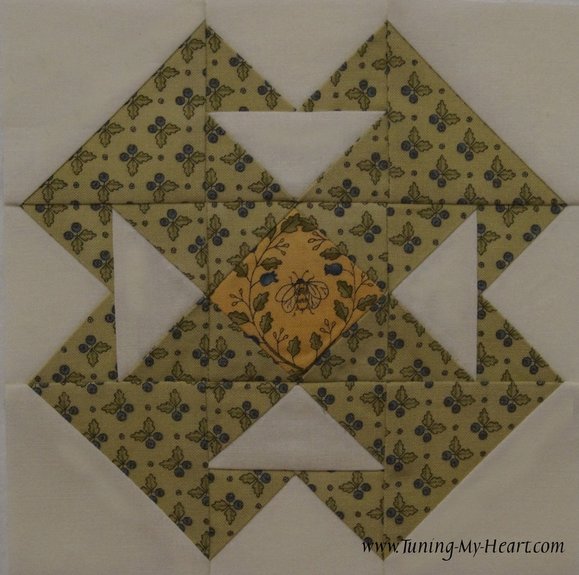 My design wall is looking good with all of the blocks we have made so far. 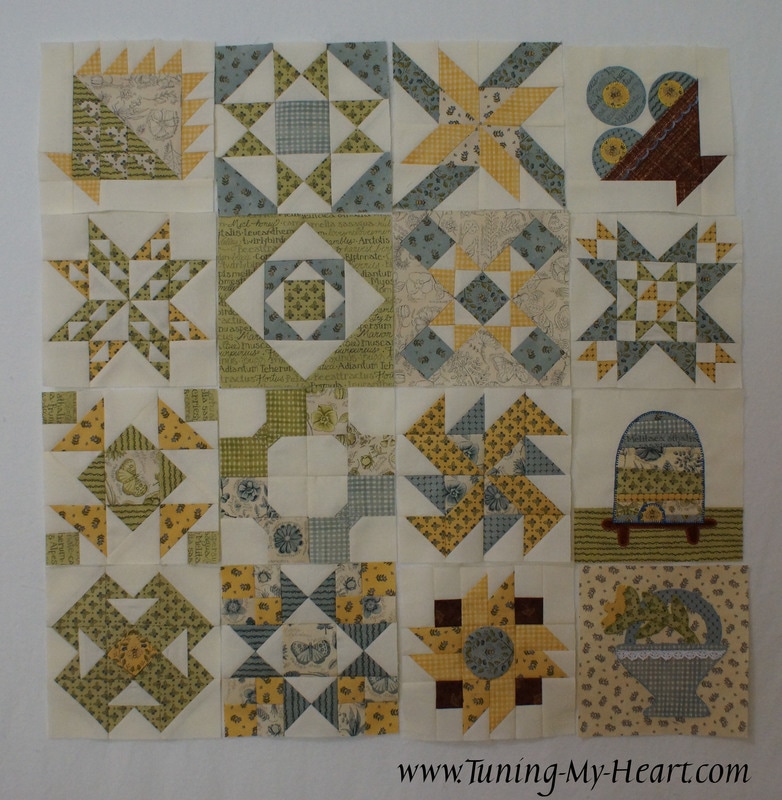 I hope you have fun with the T Block this week! I have really enjoyed seeing the photos you send of your finished blocks-feel free to share them on my Facebook Page TuningMyHeart too! I am trying something new...a pdf version of my tutorial. Click here for PDF. I will be taking some family time next week which means no quilting for me; but I will be back with Block 16 after that. Until then... Happy Quilting! 
Sarah
6/16/2017 11:02:55 am
Just love the blocks with the super clear instructions
Debra
6/17/2017 08:08:38 am
I am so glad, Sarah!
Kay U McAllister
6/22/2017 04:51:26 am
I am computer illiterate! Is there a way to print off this as a PDF without having to copy and paste?
Debra
6/28/2017 09:25:14 pm
Hello Kay, Comments are closed.
|

Welcome to the site of Debra Davis-a woman who loves the Lord and loves to quilt.
My other blog where I share about my walk of faith:
Sitting at His Feet 
|


 RSS Feed