|
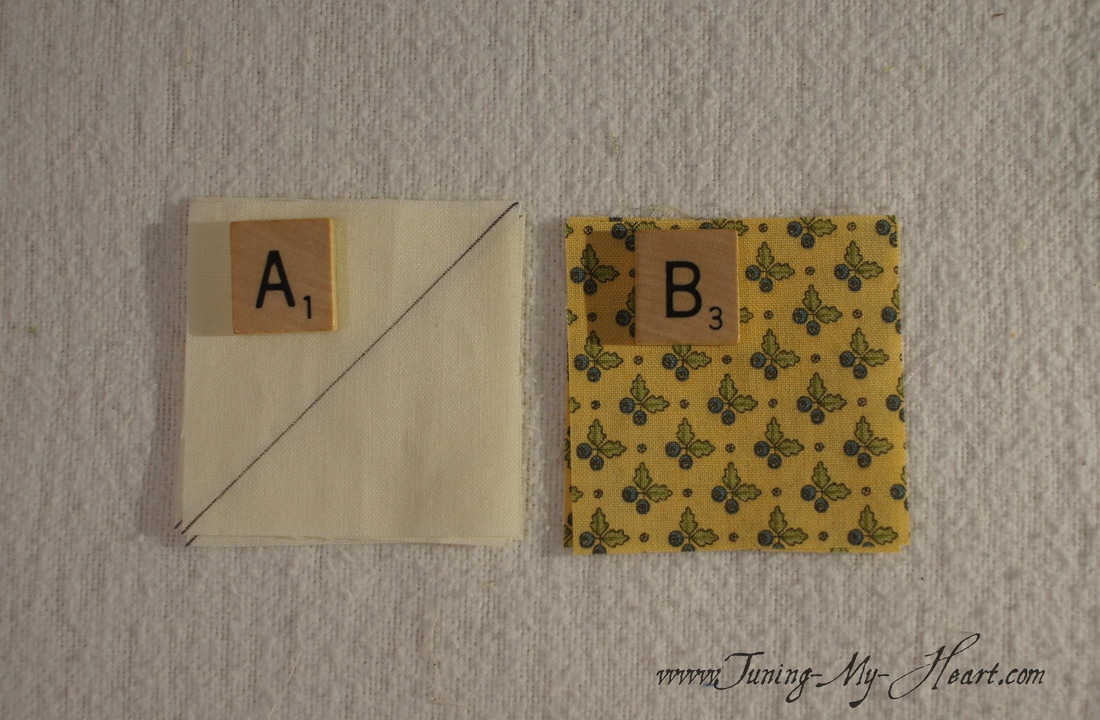
It's Wednesday and that means another block for the Blockheads. This week's block was designed by Carrie Nelson (click on her name to go to her blog post) and the pattern can be found here: http://unitednotions.com/Block12CN_Puzzled.pdf If you survived Lisa's block last week, this one will seem like a breeze. I did make one change to the cutting directions as I prefer to have a little extra for trimming; so my A, B, and C squares have all been cut to 2 ¾ inches. 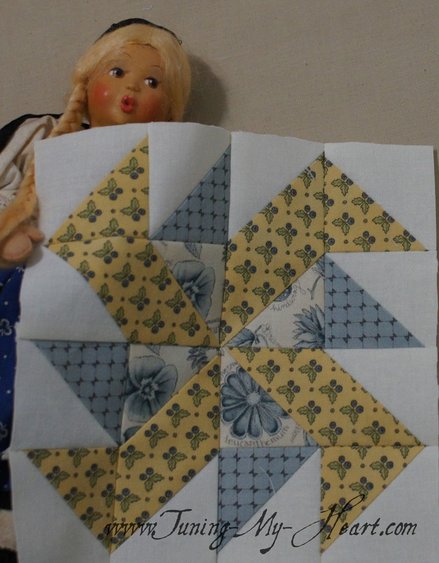 I am starting with fabrics that have been starched. First I draw a diagonal line down the center of all four A squares.  I am starting with the A and B squares, but since the remaining A squares are joined in the same way to the C squares I am going to do them all at the same time.
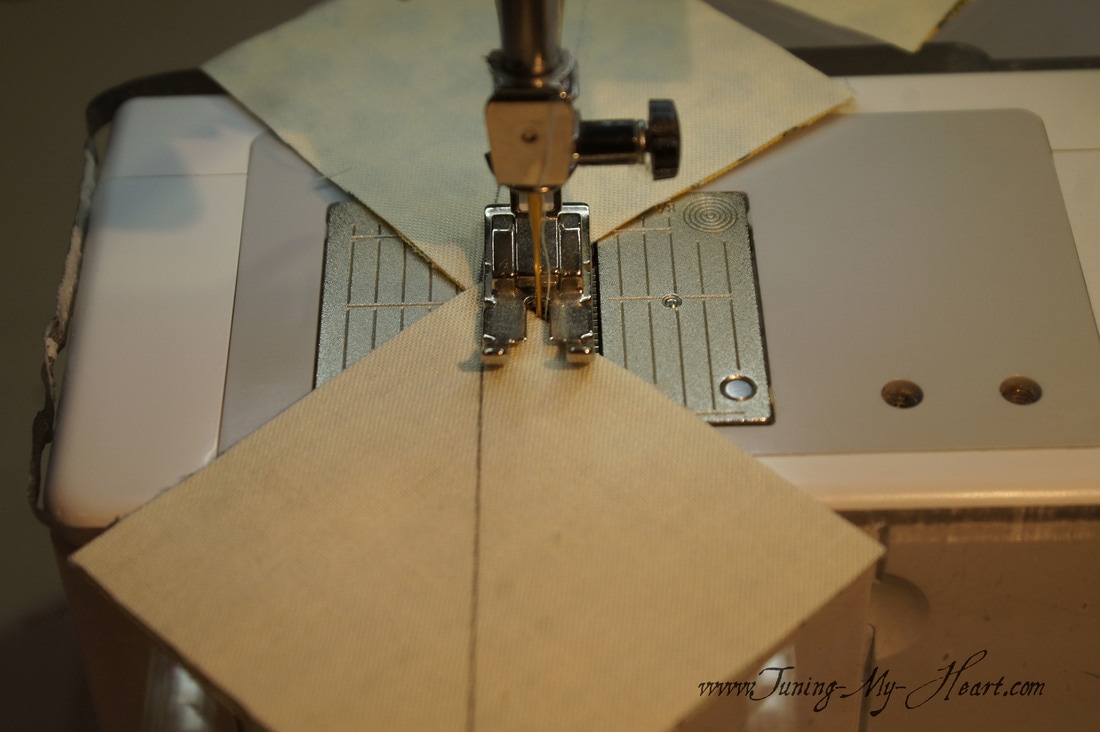
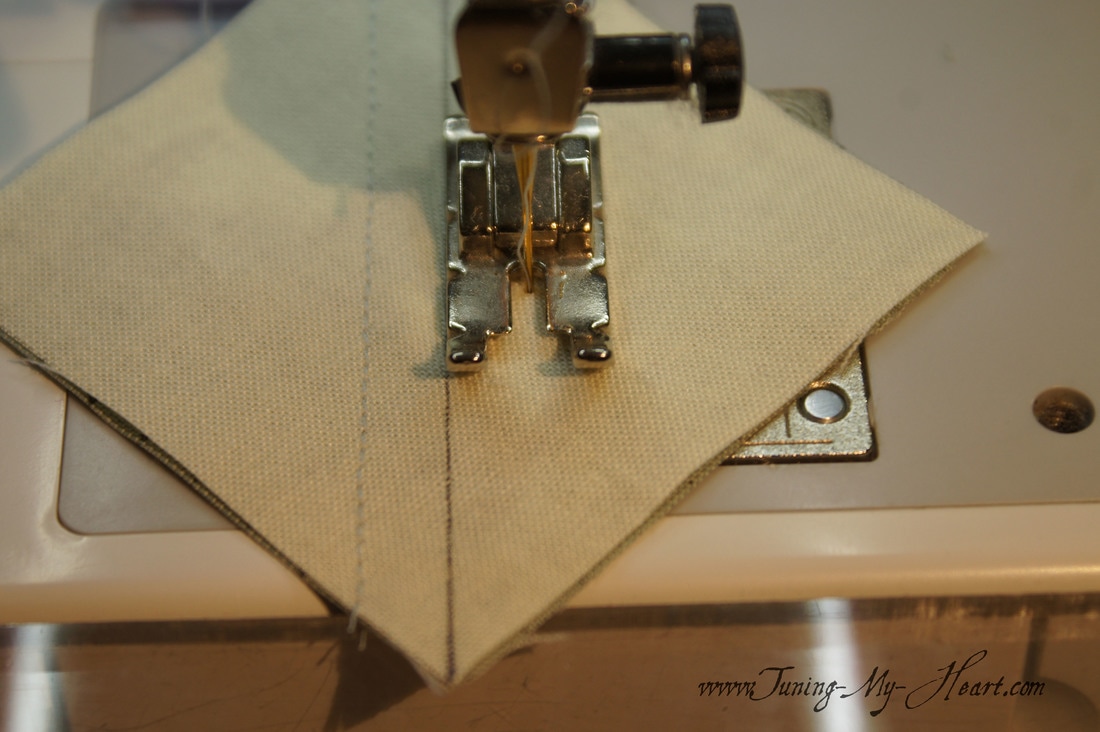
With right sides together I sew 1/4 inch from each side of the drawn line, chain piecing as I go.
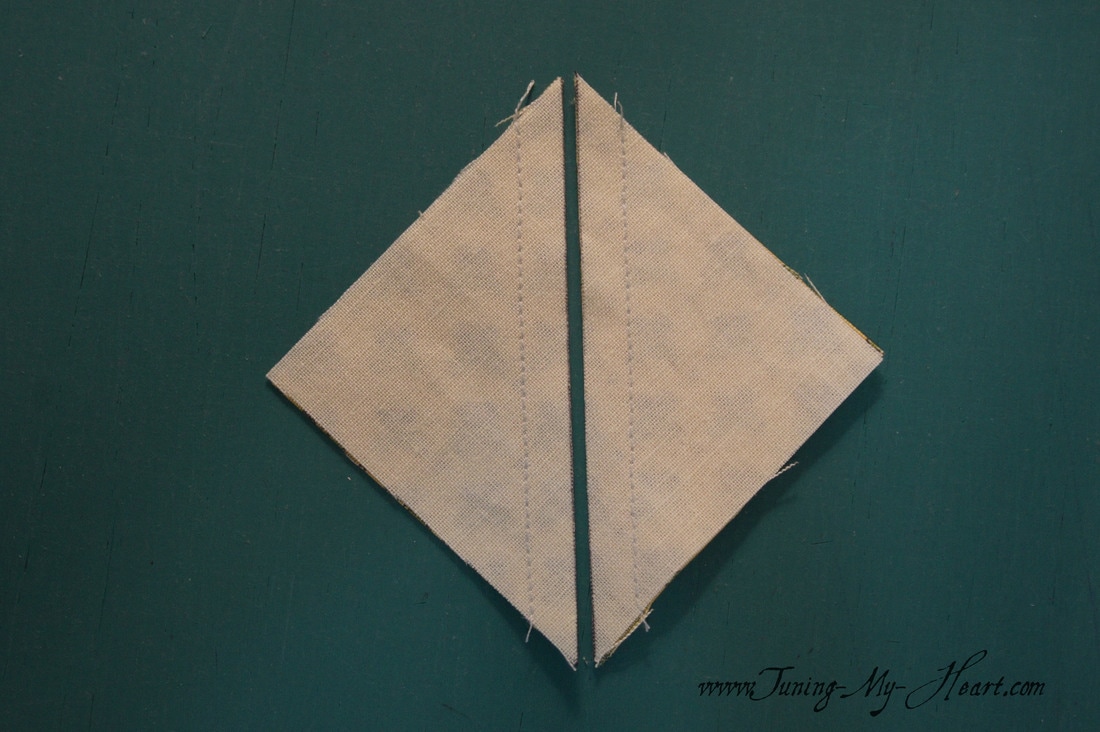
These units are now cut apart on the drawn line and pressed towards the dark side.
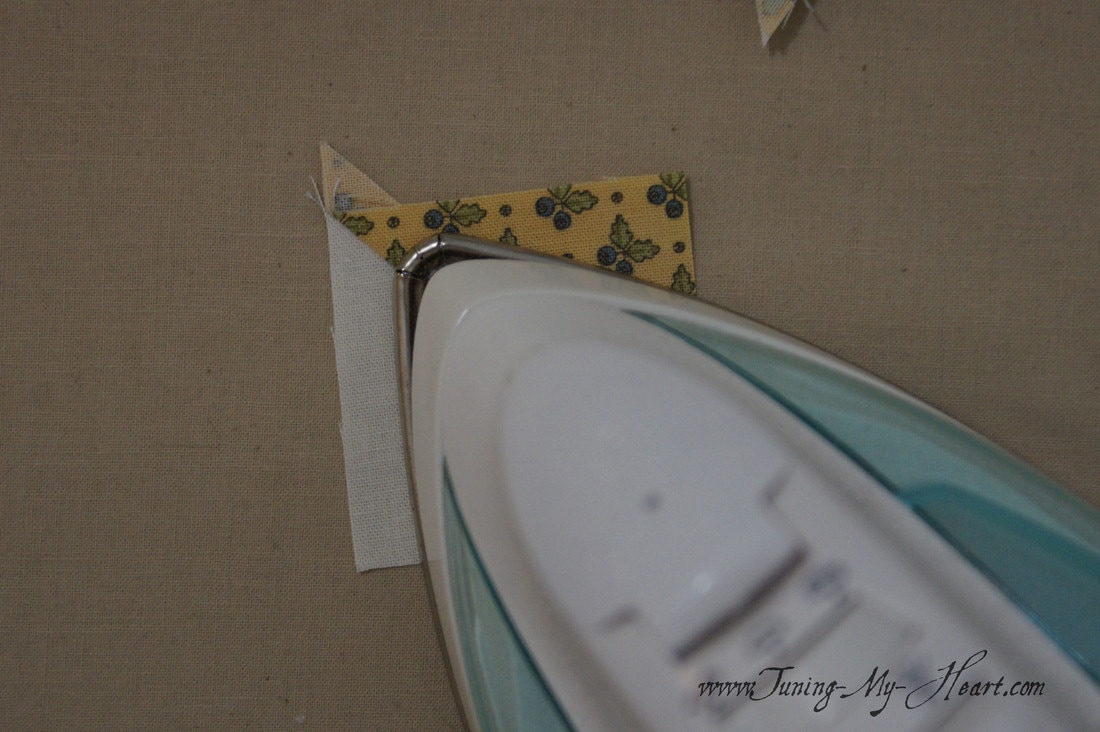
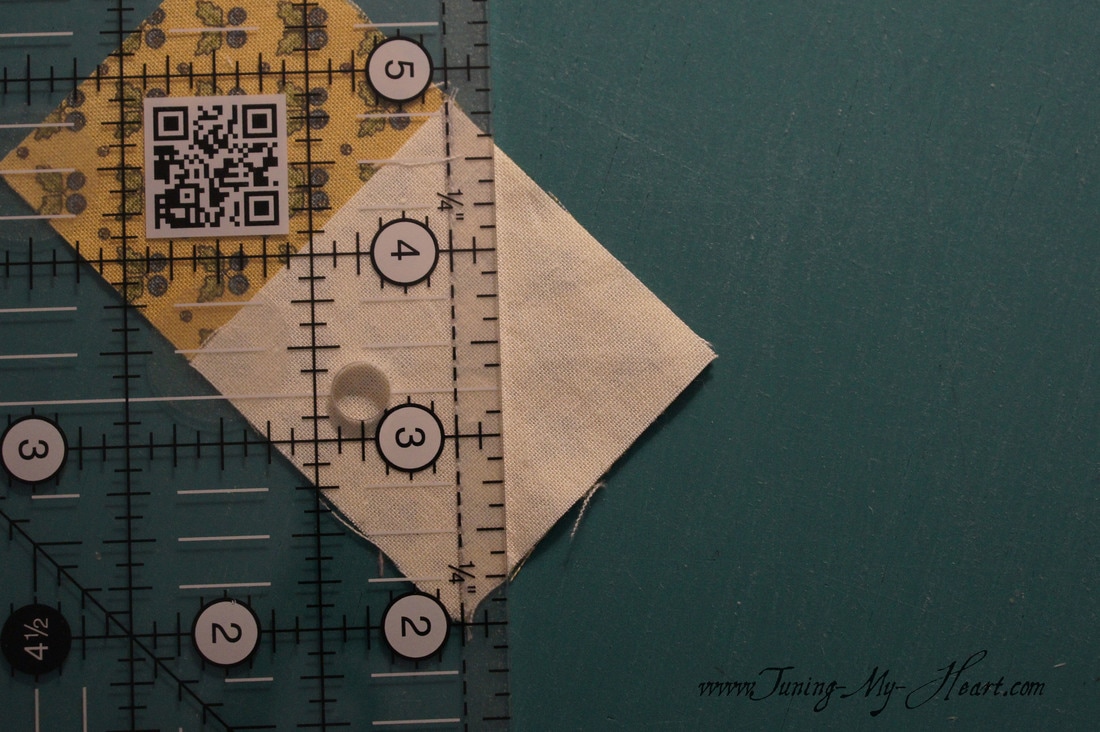
They need to be trimmed to 2" squares-making sure to line up the diagonal line on my ruler with the seam line. 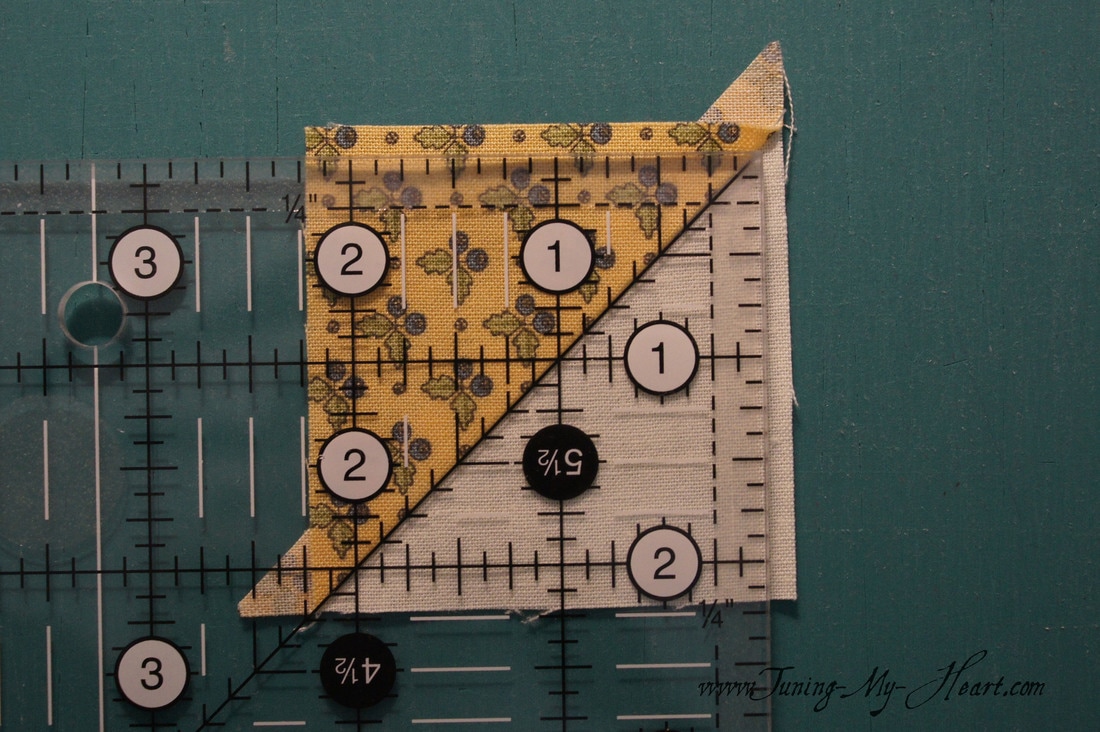 Now I will join the A/B units to the A/C units. 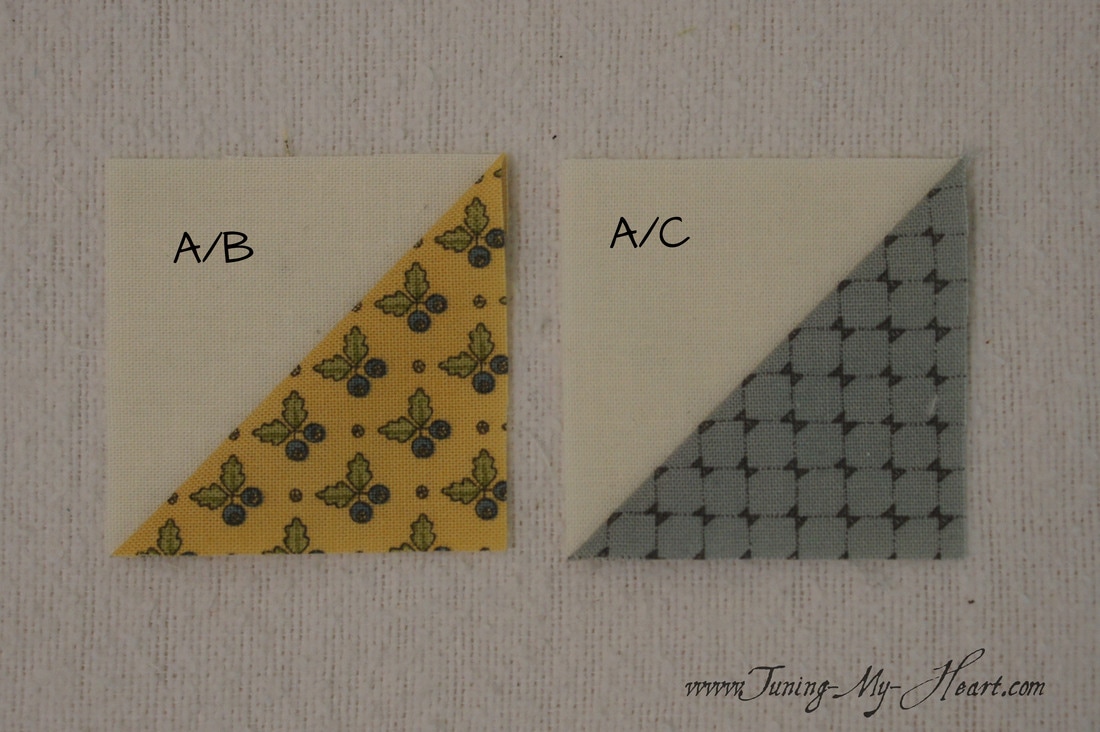 These should now measure 2" x 3½." 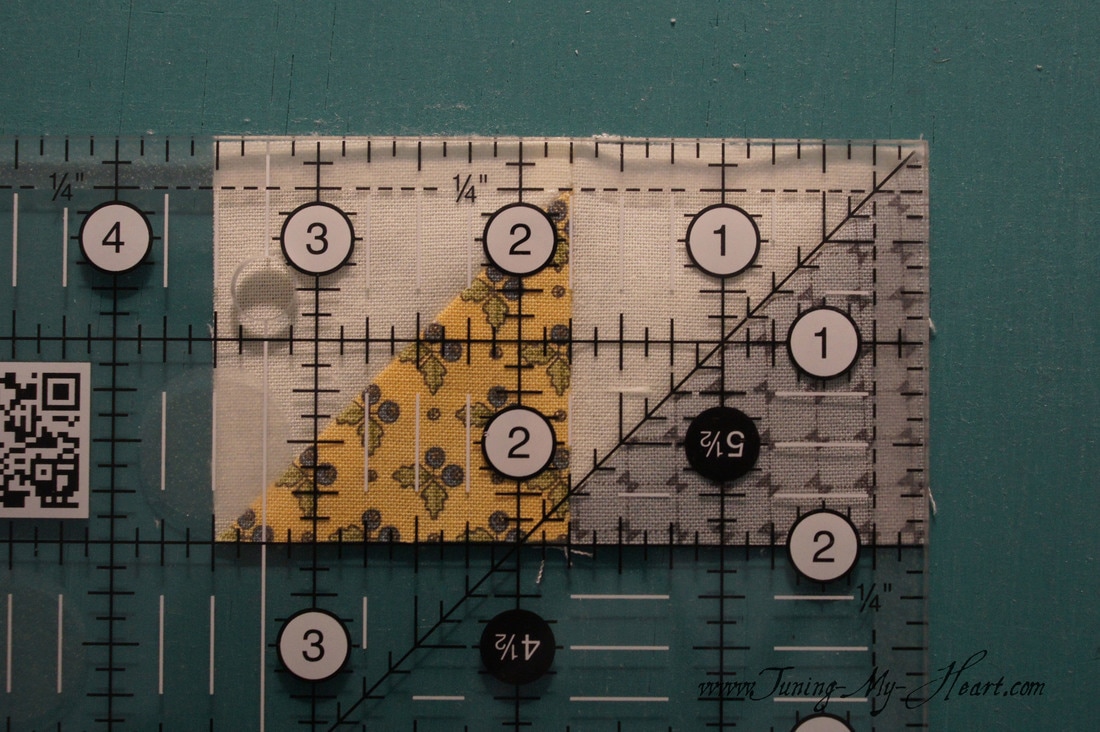 Setting those aside for now, I go to work on the E rectangles. I have drawn a diagonal line on my D squares using a pencil. I want to use something to draw this line that will not show through the fabric. This gets placed on top of the E rectangle, making sure the diagonal line is running in the correct direction. 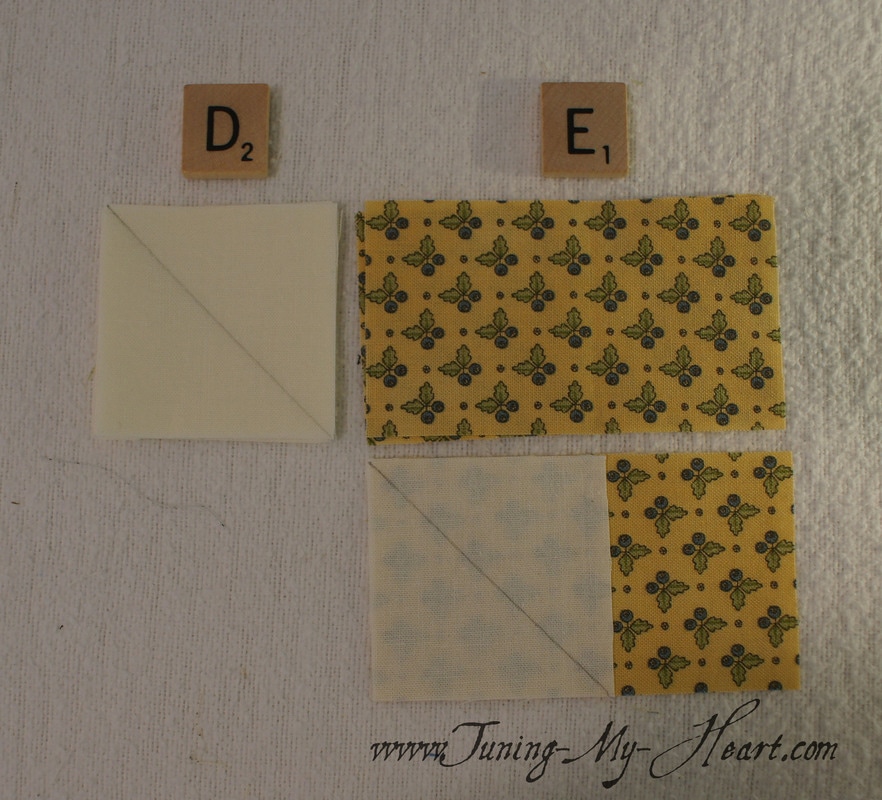 I sew them together with my needle falling just to the outside of the drawn line. I have found that if I sew right on the line my units come out too small, but if I land just a needle width away it comes out fine. 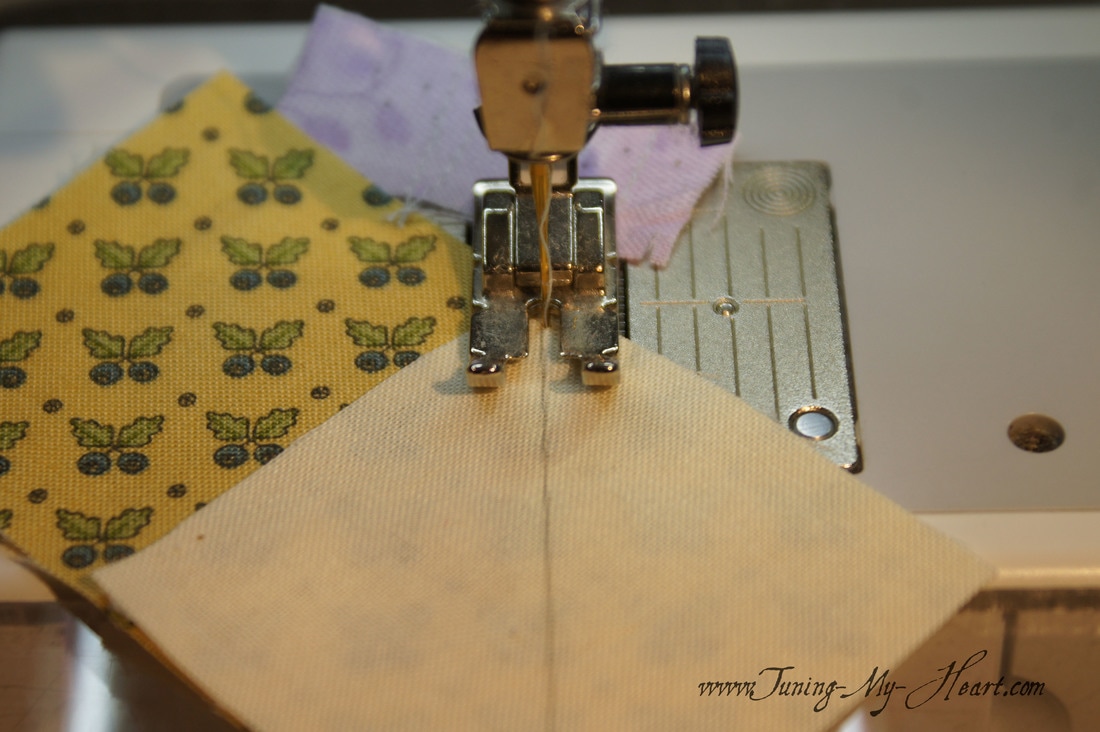 A quick check to make sure that when I open up that triangle it completely covers the fabric underneath. 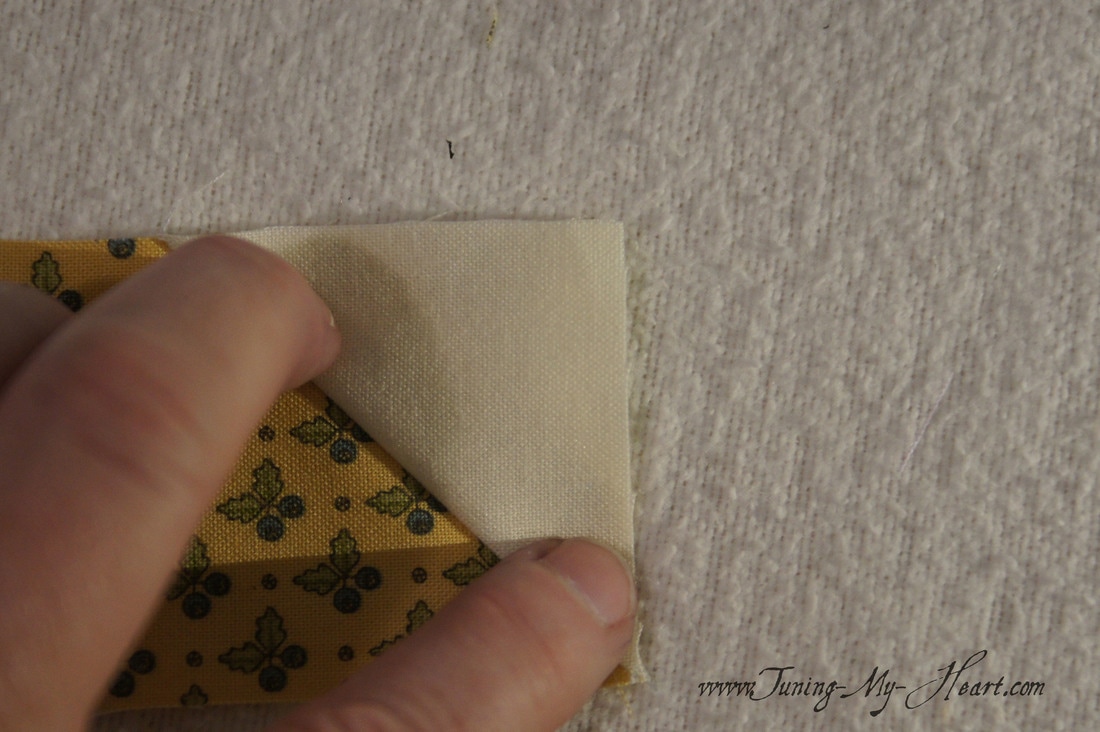 Now I can trim away the extra by placing the 1/4 inch mark on my ruler on the seam line. After trimming press the unit towards the E rectangle. (The little triangles left over are perfect for making Betsy Chutchian's Mini which you can see on her blog linked here.)
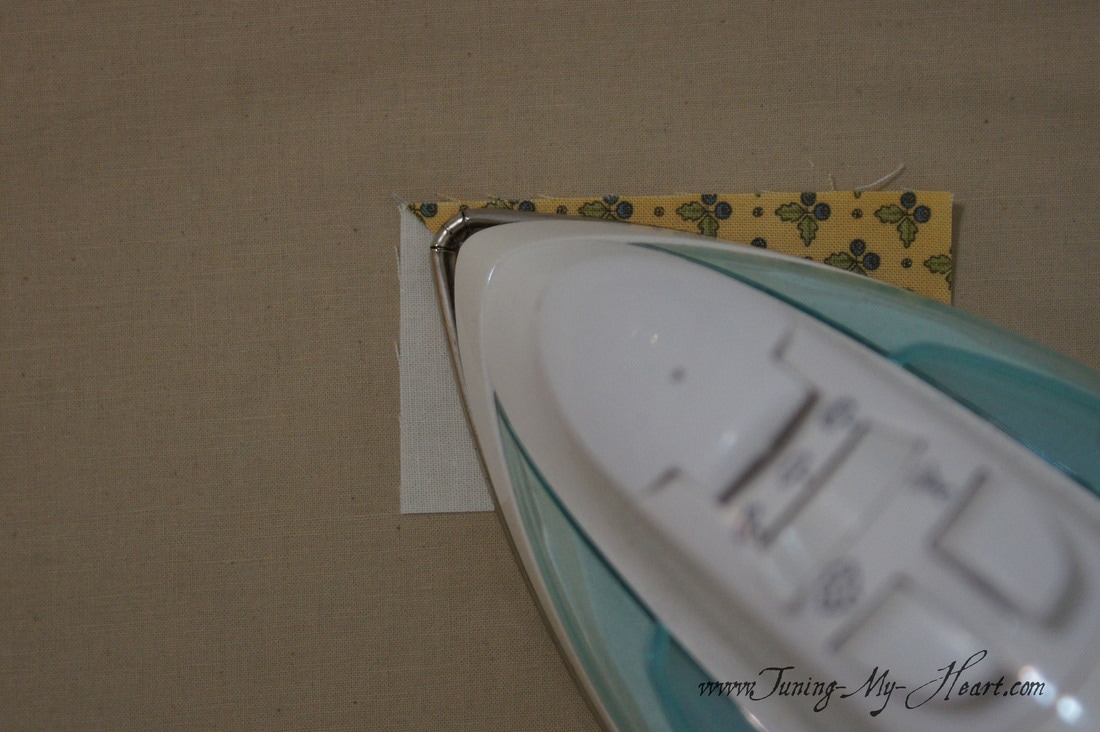
Next, I just do the same thing on the other side using the F squares. Again making sure I have the diagonal line going in the right direction. 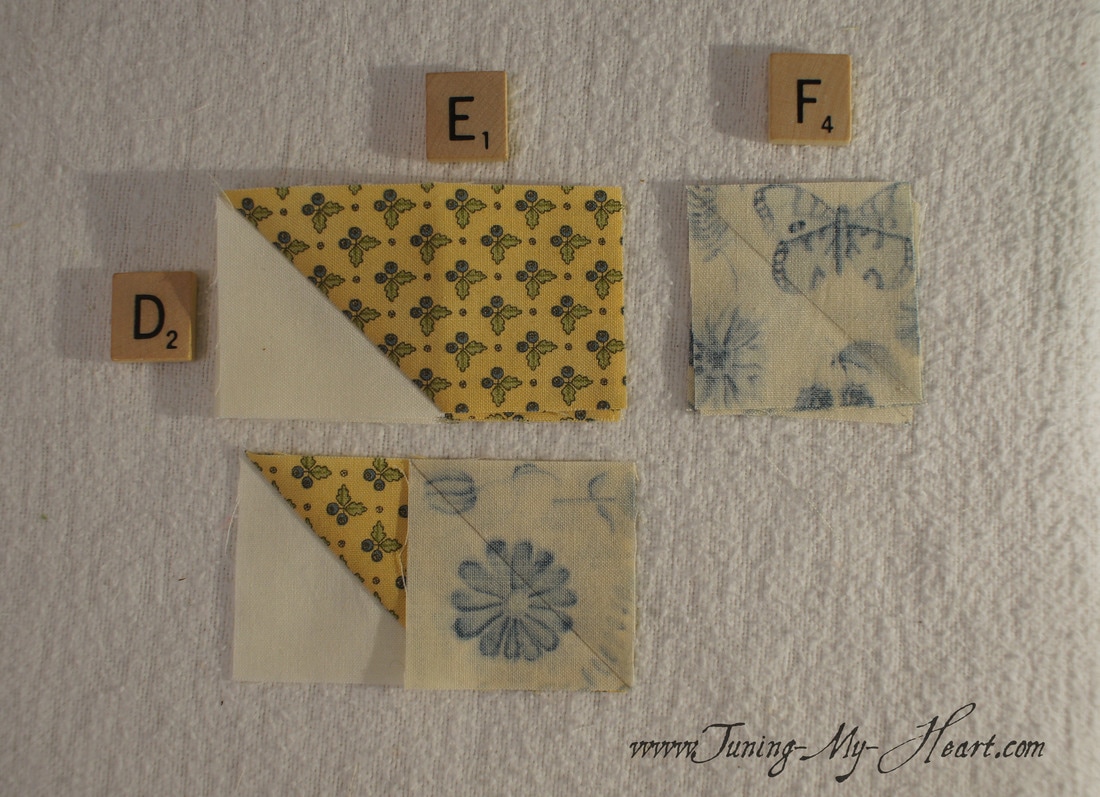 Sewing just to the outside of the pencil line... 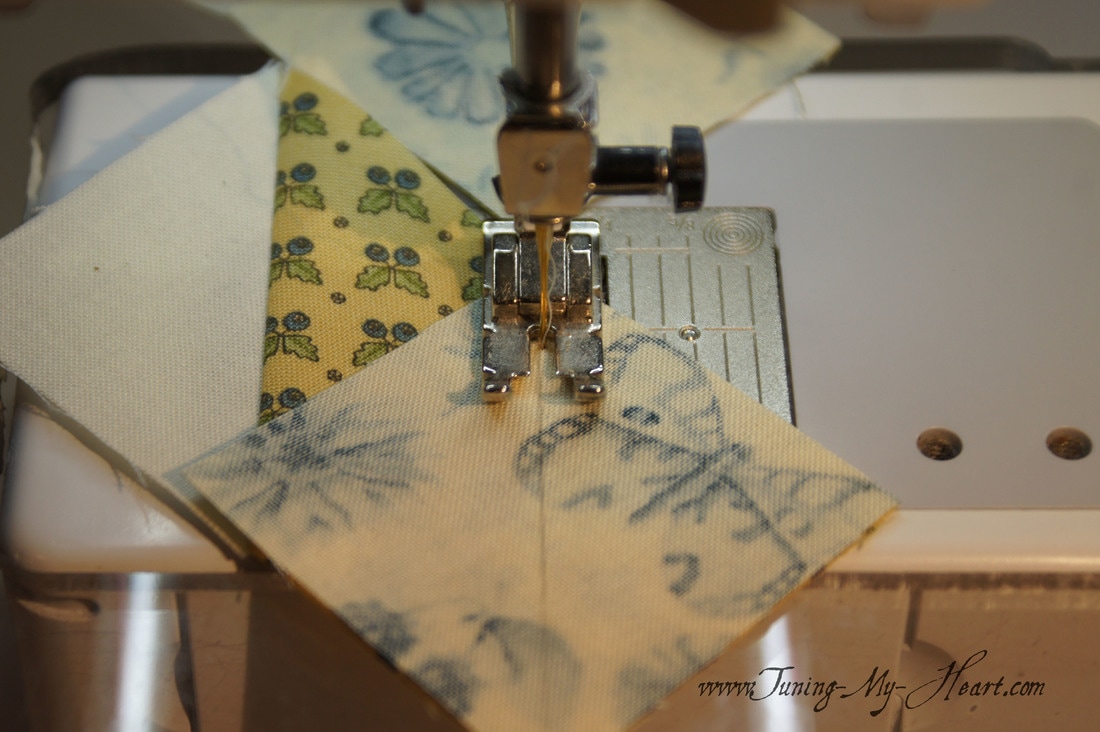 These get trimmed in the same way as before and the unit should measure 2" x 3½." 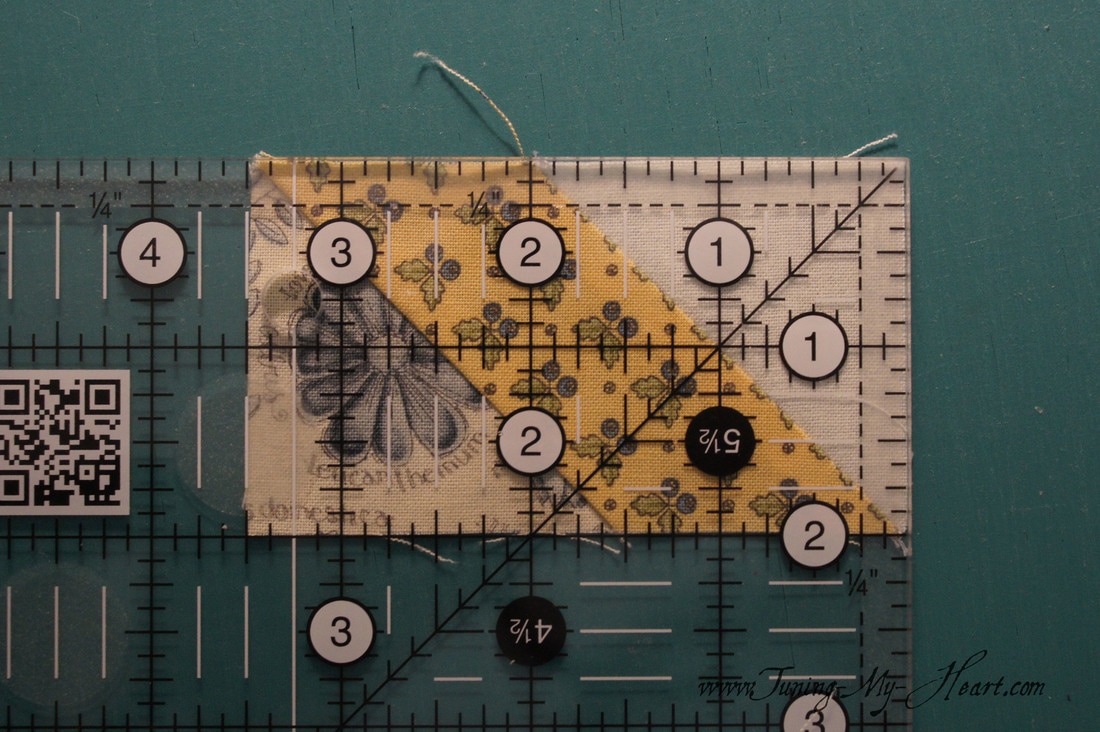 Puzzled. I love the name- as this is one block that needs to be laid out carefully. 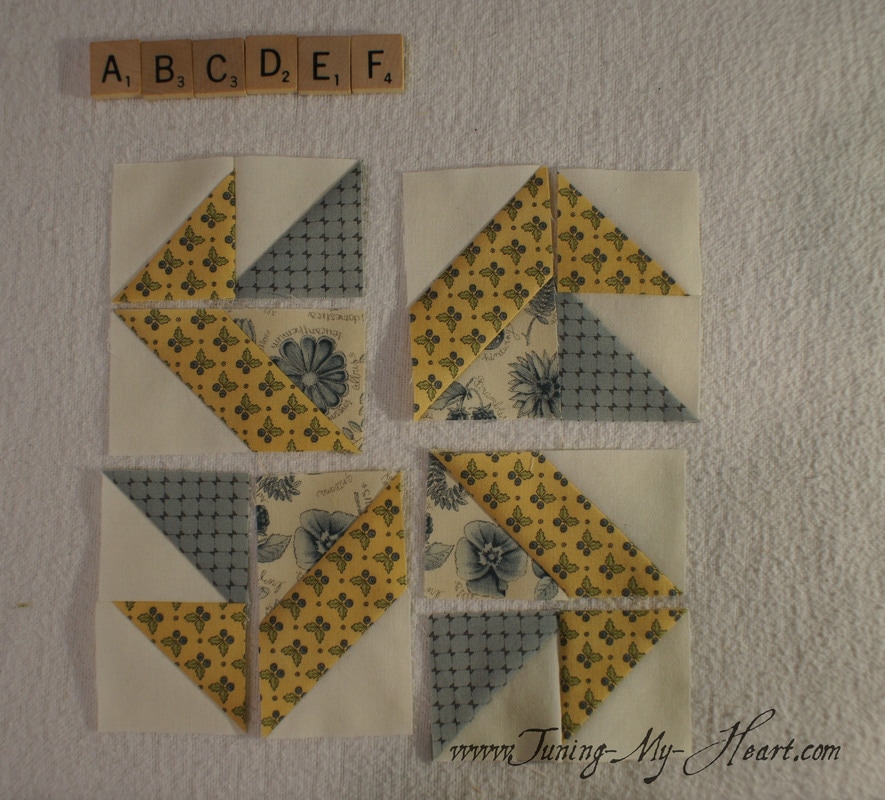 A little trial and error led me to discover that if I sew these units together with the E unit on top everything fell into place much better. Those two diagonals at the bottom sitting on top of each other pushed things out of whack if I started with them at the top. I used the tip of my seam ripper (as my stiletto is still missing in action) to hold those two diagonal seams together, helping to feed them under the needle as they got close. Tip: Sew very slowly! I pressed these seams open rather than to one side, something I usually try to avoid. 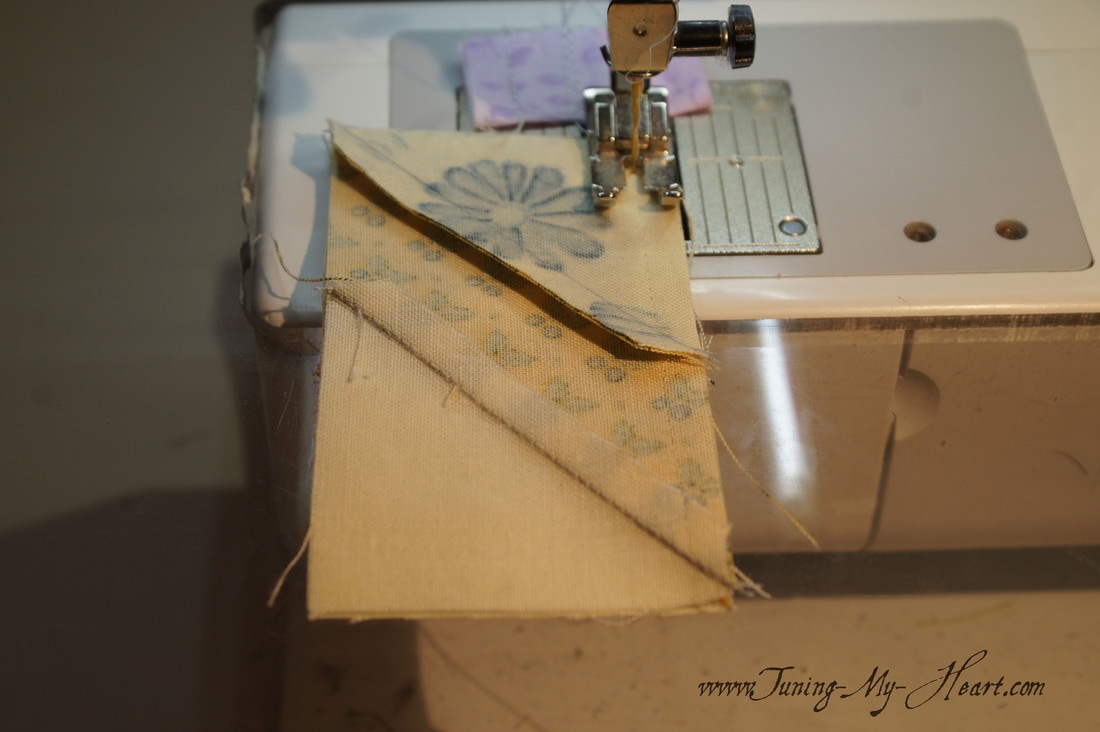 Laying my units out to make sure I have them the way they should be before proceeding. I pressed the resulting two units in opposite directions so that I can lock the seams together. 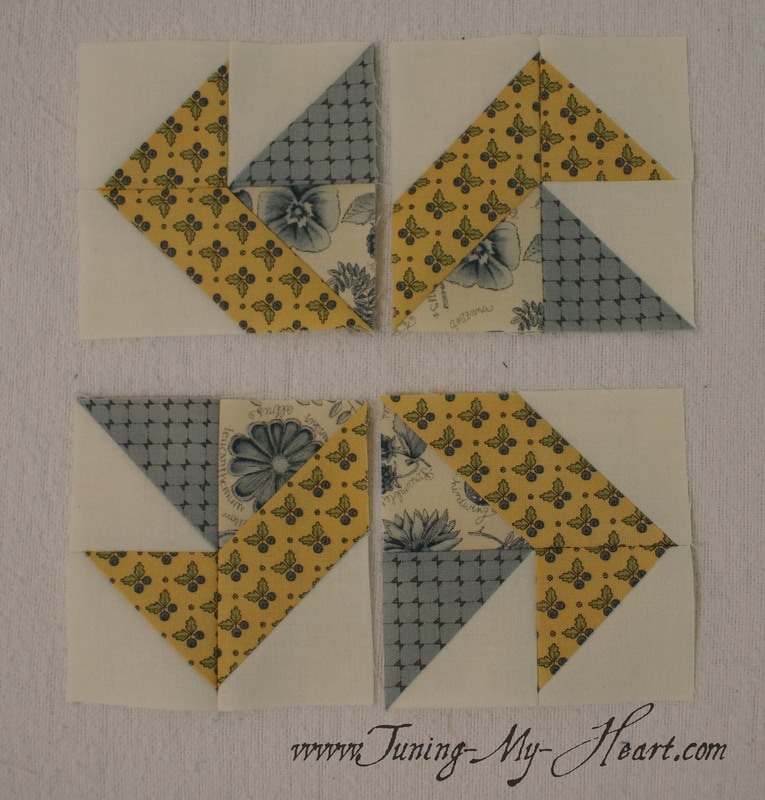 At this point they look like a pair of legs going for a walk. I placed a pin at the seam and then sewed them together. 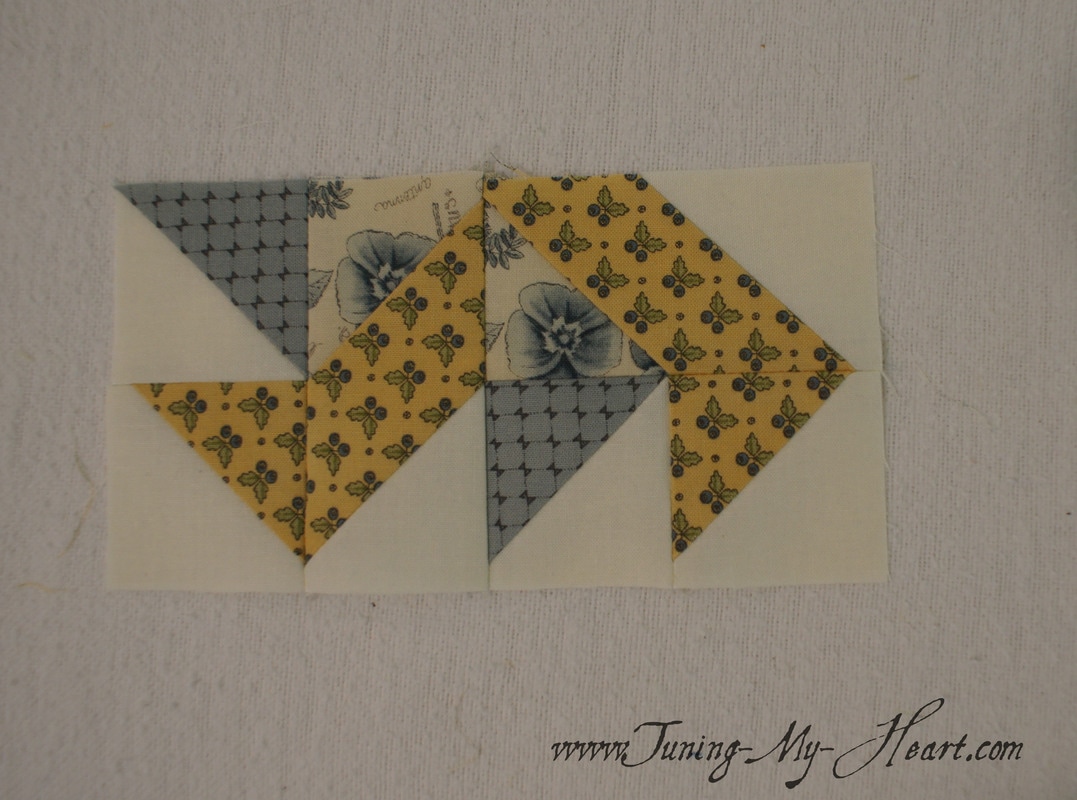 Here is the back of my block. The final seam I fanned open-with each side falling in the opposite direction. 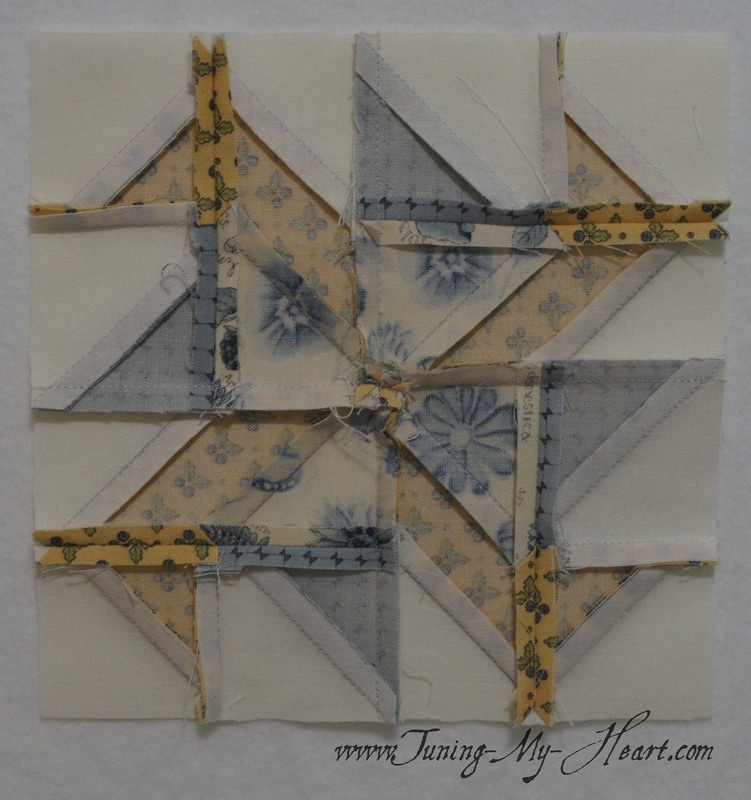 This was fun! 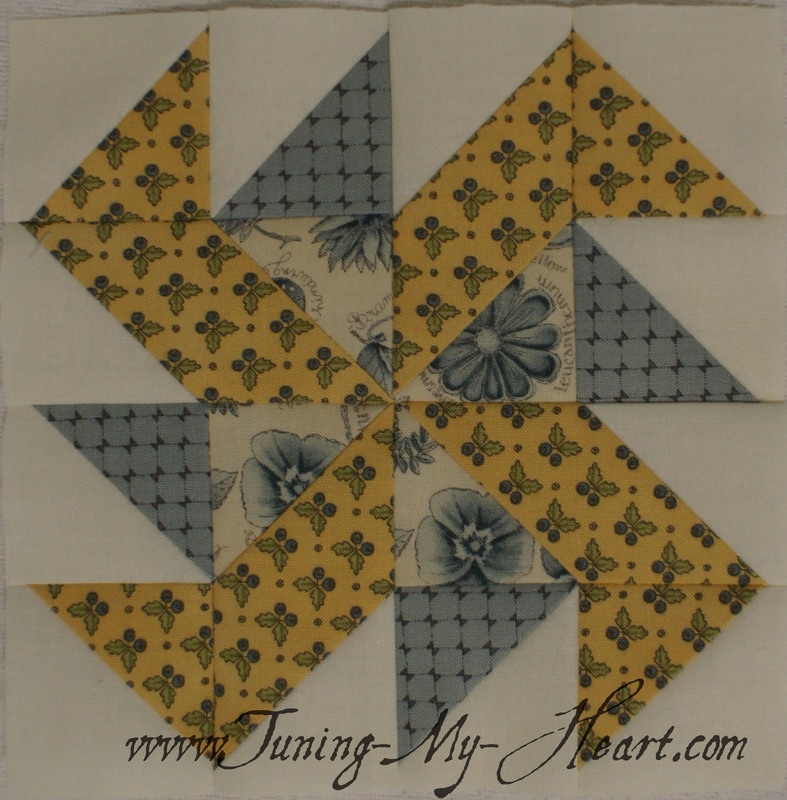 I have enjoyed hearing from so many of you about how you are doing with your blocks. Thank you for sharing your struggles and successes-I am delighted to be on this journey with you! Until next week... Happy Quilting!!! 
Alycia Maurer
5/24/2017 05:44:47 pm
Thank you, again, for a splendid tutorial! I am a little behind on my blocks because of grad school. But I am bookmarking your tutorials!
Debra
5/24/2017 09:49:29 pm
Thanks again, Alycia. Hopefully when you can fit them in they will be a nice rest from your studies.
Giuseppina
5/24/2017 10:15:55 pm
Grazie infinite , spiegazione uno è impeccabile...
Debra
5/25/2017 09:16:09 am
Grazie, Giuseppina!
Kay
5/25/2017 04:31:59 am
I keep your blog handy as I'm making each block. I really like having each section's dimensions as you finish it. Thanks so much for doing this for us!
Debra
5/25/2017 09:16:49 am
You are most welcome, Kay.
Susan Conley
5/25/2017 05:11:58 am
Thank you so very much for your instructions. I fallowed your instructions last week & my block turned out good. I've been quilting for, about 11/2 years, so I'm new to quilting. I have learned so much from doing these little blocks. Thanks for helping me learn.
Debra
5/25/2017 09:18:25 am
That is wonderful, Susan! This "old," seasoned quilter learns a lot from these challenges too.
Cathy
5/25/2017 05:41:03 pm
Thanks so much for all your tips,very helpful. Didn't start this block yet, but with your tutorial I will.
Debra
5/26/2017 10:36:34 pm
You are very welcome, Cathy. It was a fun block to do I hope you enjoy it too.
Linda Zeider
5/29/2017 06:51:45 am
I see a Bloc-Lock ruler in your future. They are the greatest ruler yet.
Debra
5/29/2017 09:46:36 am
I actually have one Linda, it has just been hiding somewhere since our move. The Creative Grids rulers work just as well with their no slip grip. Comments are closed.
|

Welcome to the site of Debra Davis-a woman who loves the Lord and loves to quilt.
My other blog where I share about my walk of faith:
Sitting at His Feet 
|


 RSS Feed