Block 2-Raspberry Cheesecake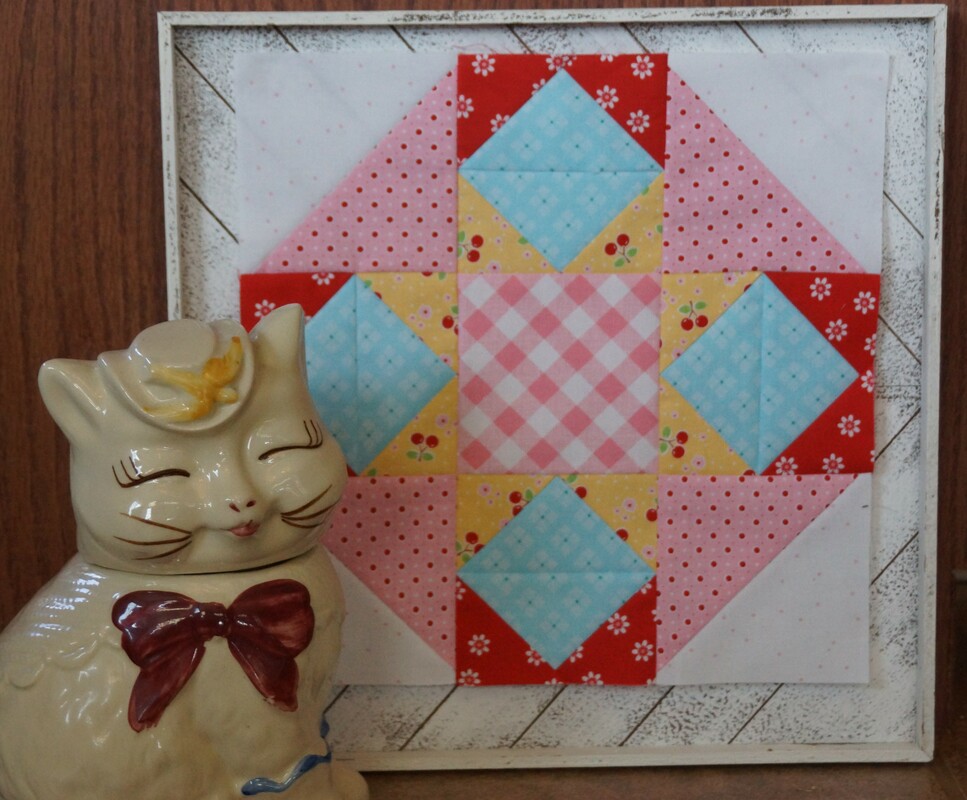 This month's block goes together pretty quickly with some easy piecing techniques. I love the No-waste method for making Flying Geese, though the name is a misnomer as I do end up with some waste since I tend to make my pieces oversize and then trim them. The true wonder of this technique is that you get four Flying Geese out of it so it really saves time. To begin, I lay two of the smaller squares on the large one and draw a diagonal line down the middle. Whenever I need to mark lines on my fabric I place it on a clipboard that has a piece of very fine sandpaper attached to it; this keeps the fabric from slipping as I mark it. 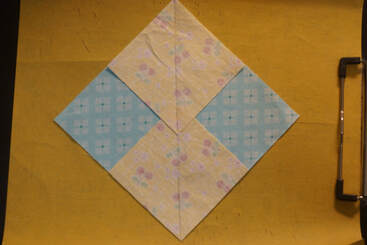 With my fabric marked, I sew 1/4 inch from each side of my drawn line. I like to use a stitch length of 2.4, just slightly shorter than my machine's normal setting. As I sew these I keep the top square pointed away from my needle, by doing so the fabric does not bunch up as I sew it. 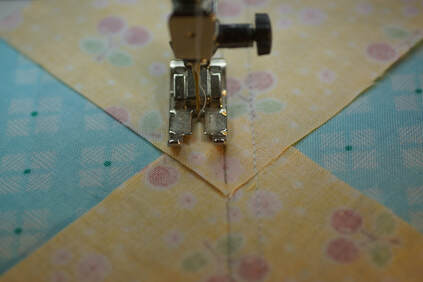 Once sewn, I cut apart on the drawn line and press towards the smaller triangles. I always press with a dry iron, I have found that my iron lasts longer if I just don't put any water in it. Remember that you want to press your pieces, not iron them. When you iron you move the iron back and forth over the item, when you press you set the iron in place, lifting and setting it so that you do not distort your seams with a back and forth motion.
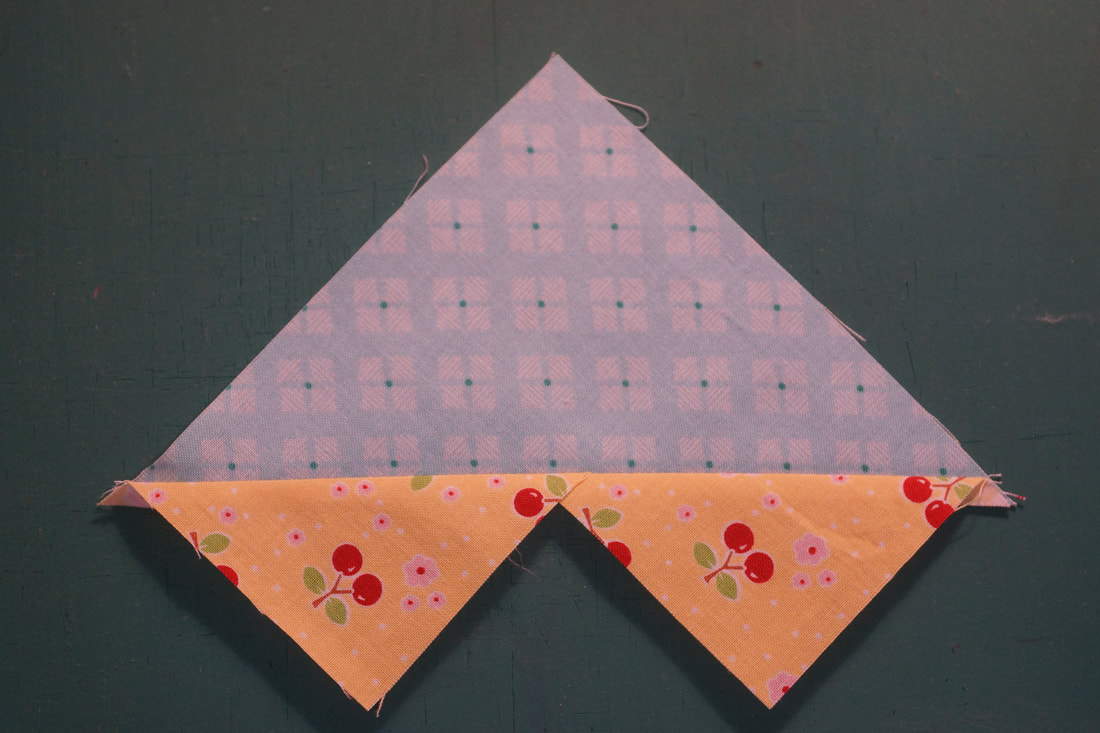
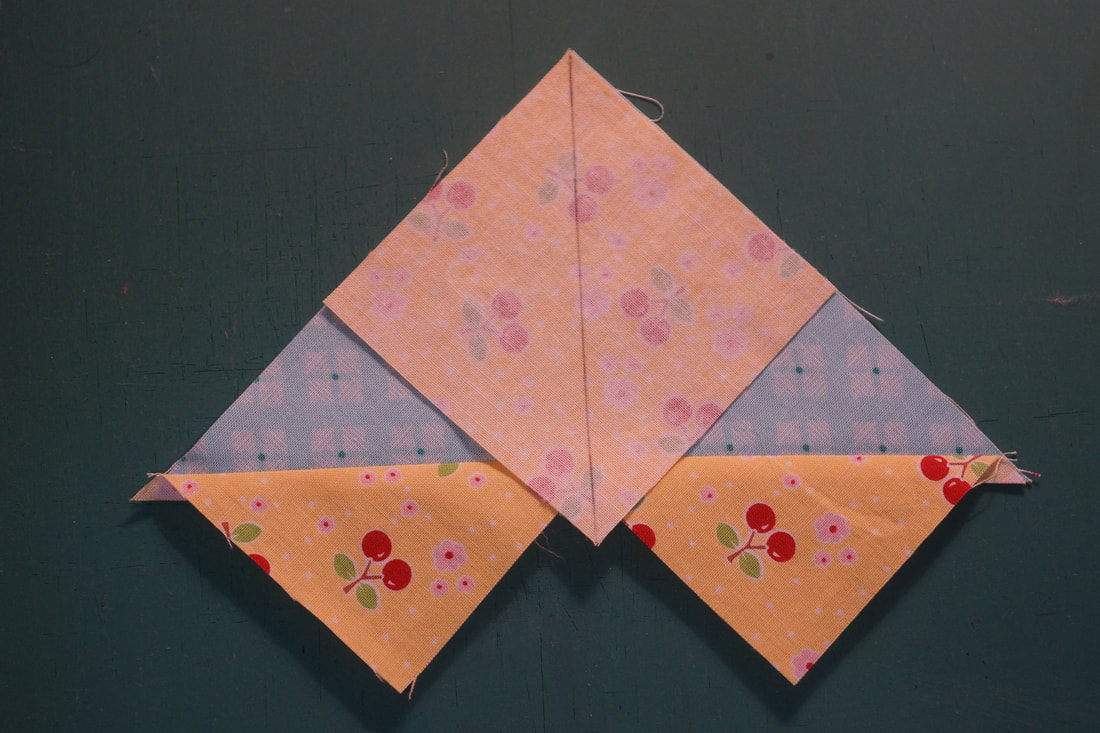
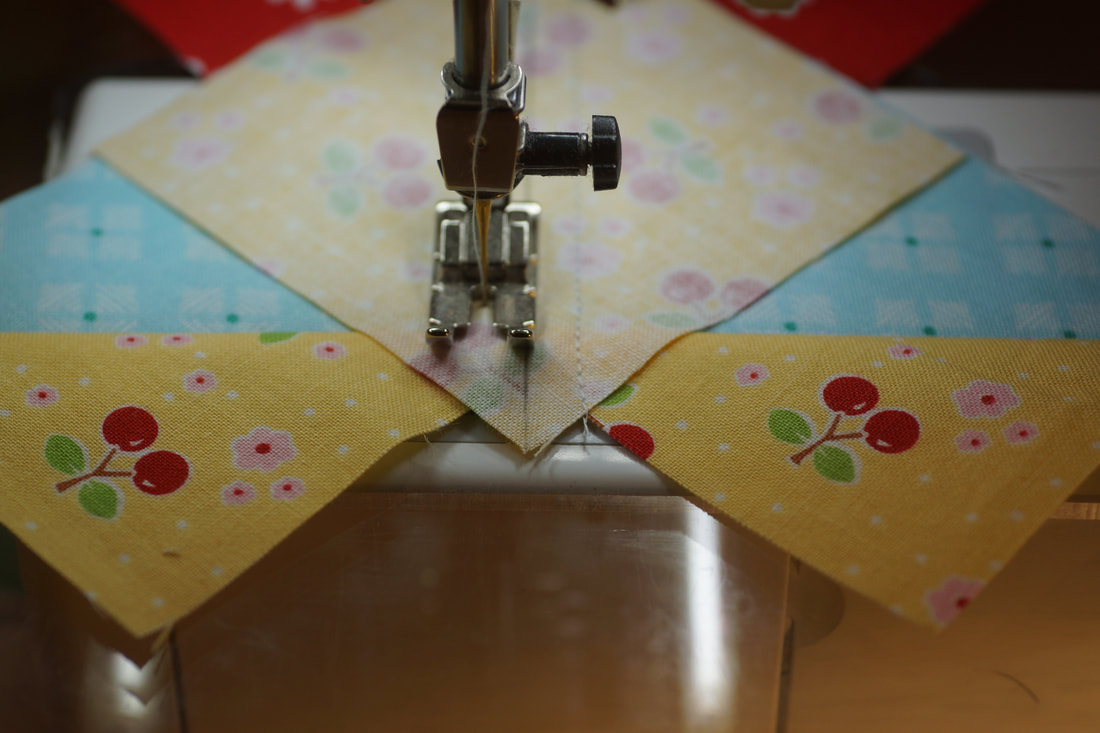
Now I place the remaining small squares on top as shown and have drawn my diagonal line down the middle. Once again I sew 1/4 inch from each side of the drawn line.
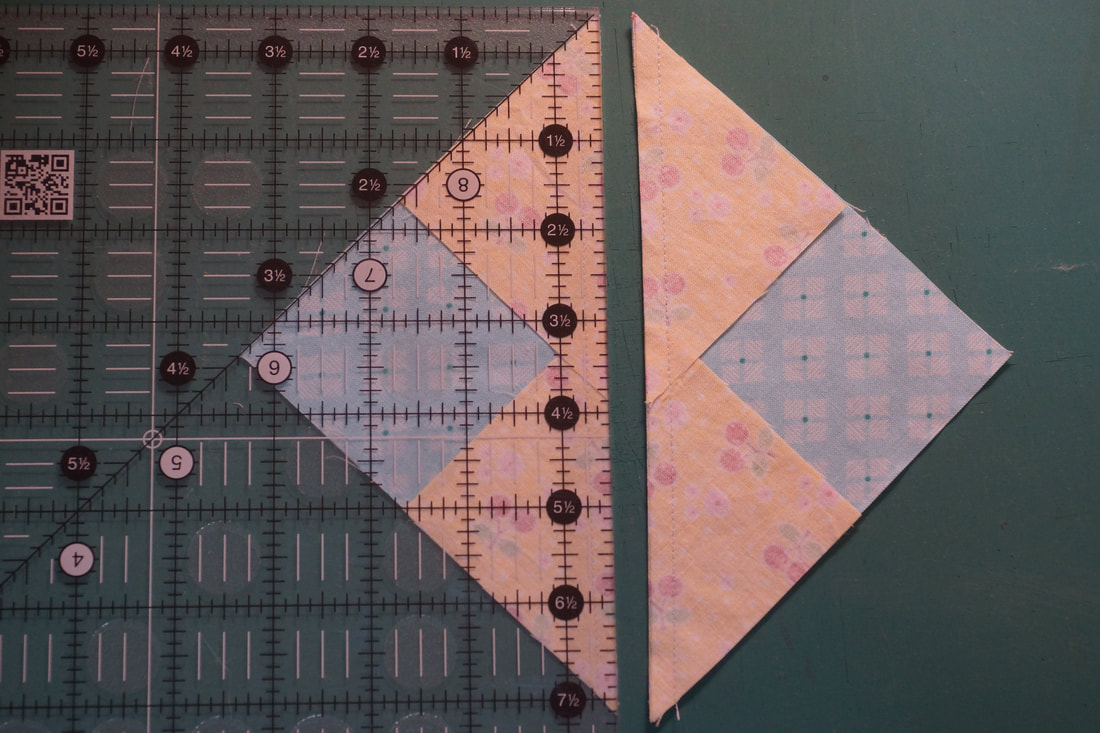
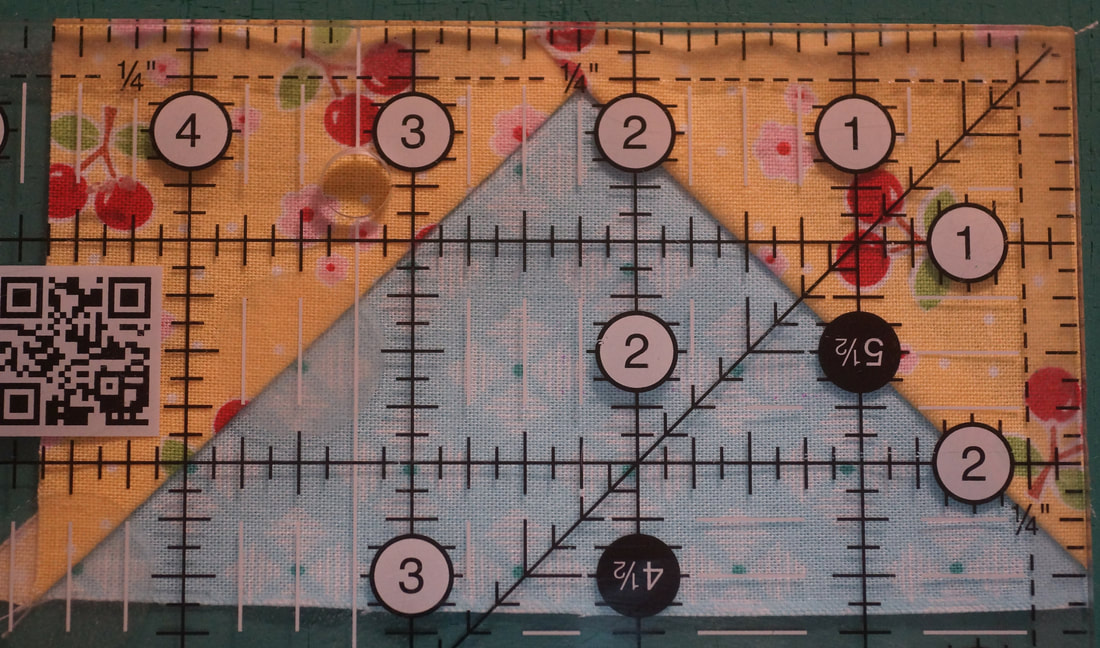
I cut these apart on the drawn line and press towards the small triangles. And just like that I have four Flying Geese. 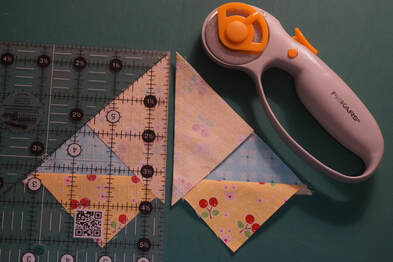 I really, really like Bloc Loc rulers for trimming Flying Geese. The notches in the ruler "lock" into place on the seam and I get a perfectly measured and square unit after trimming. 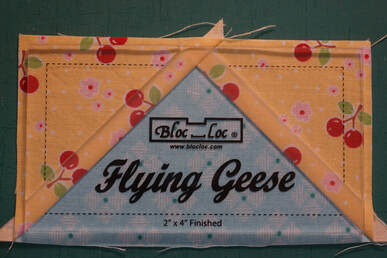 The draw back to these rulers is the cost, as you have to get the specific size ruler for the size you want to use in your quilt. I do tend to use the same sizes over and over so I get a lot of use out of them. Another nice alternative is the Ultimate Flying Geese Ruler by Creative Grids. I have this ruler also and have found it to work quite well. With it's multiple sizes it is a good investment. Creative Grid rulers have a surface on the back that helps to keep the rulers from slipping as much which I love. You do have to watch carefully to make sure you line everything up correctly with this one, but the results are very good. 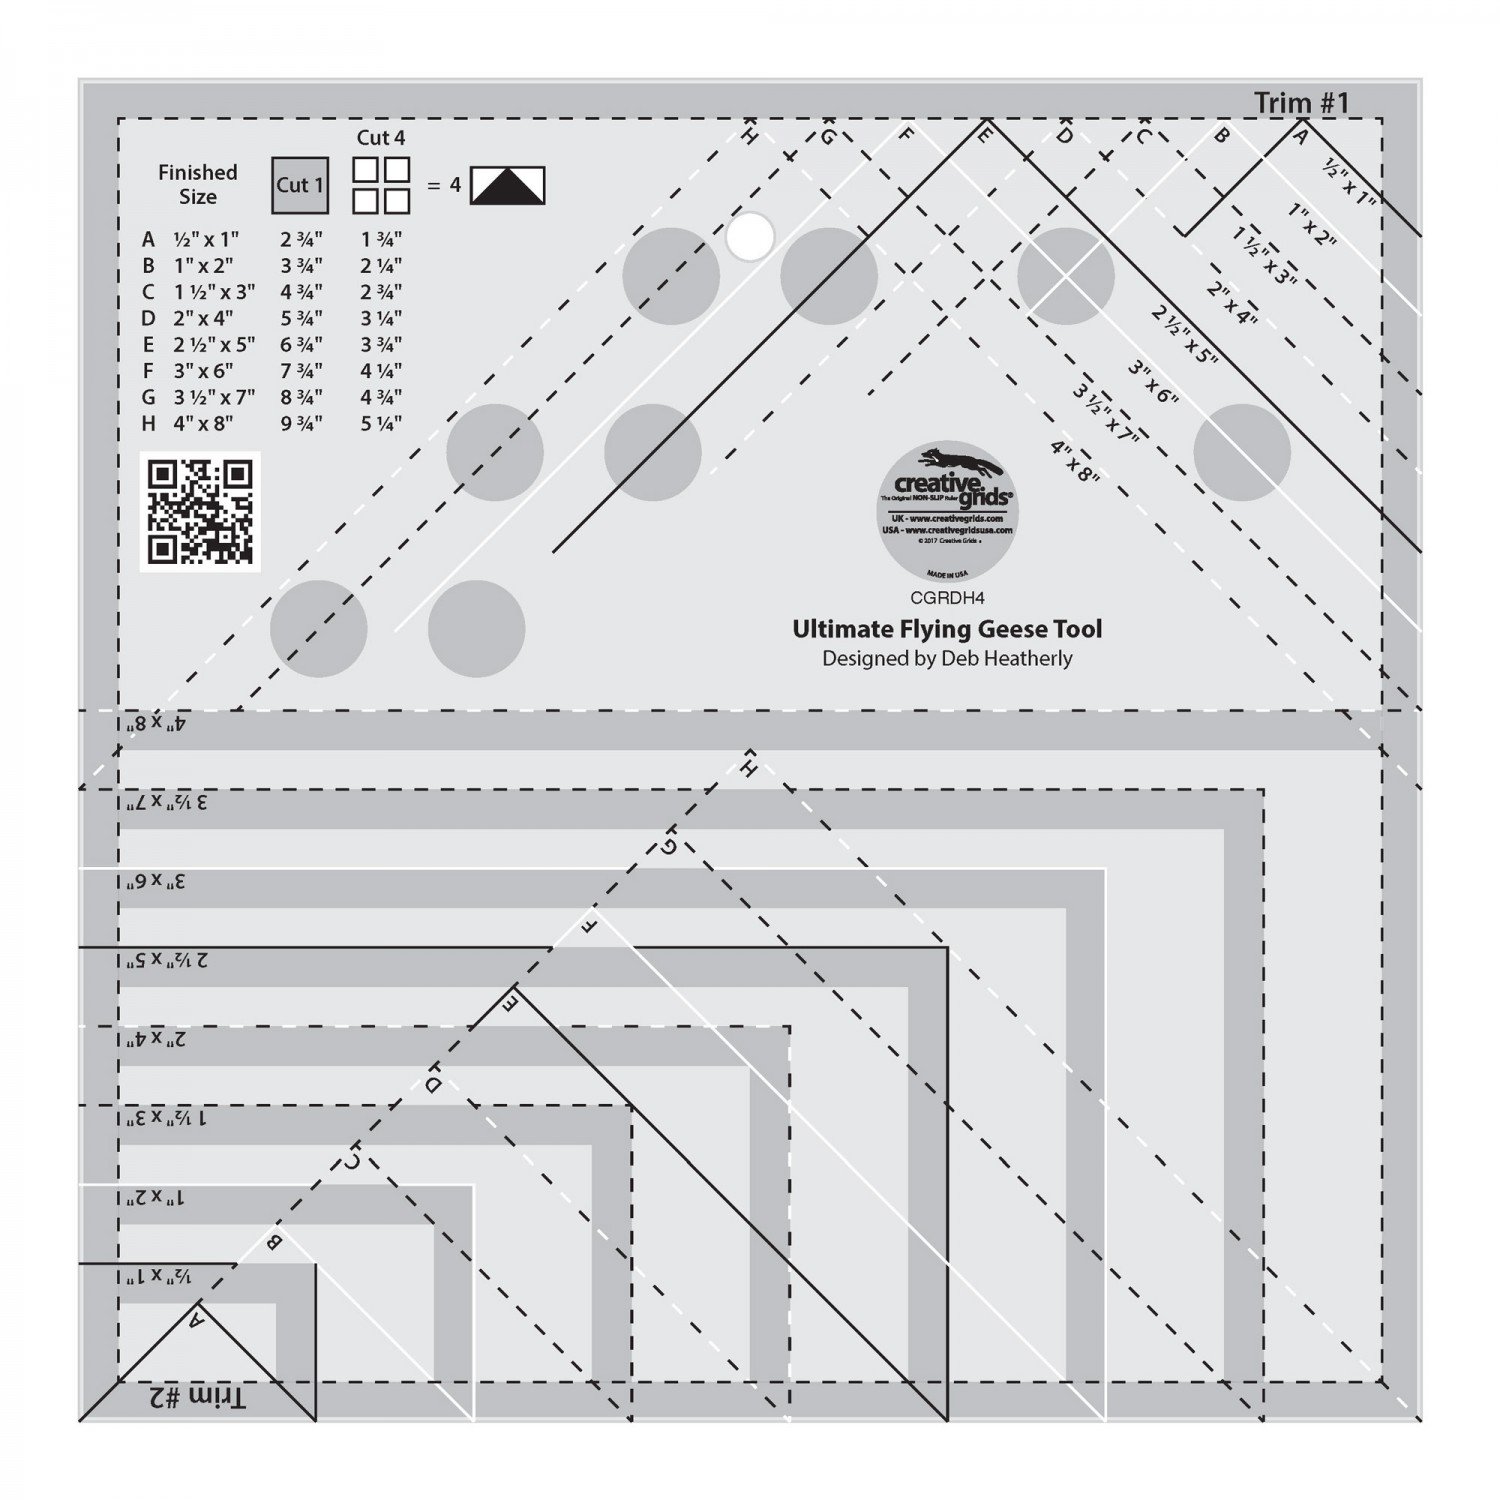 I do give instructions for how to cut these with a regular ruler as well. Again, my preferred ruler for this method is also made by Creative Grids. One of their small square rulers works well. I made a tutorial for this process to go along with mhy We Can Build A Snowman BOM and that video may be helpful to you as well.
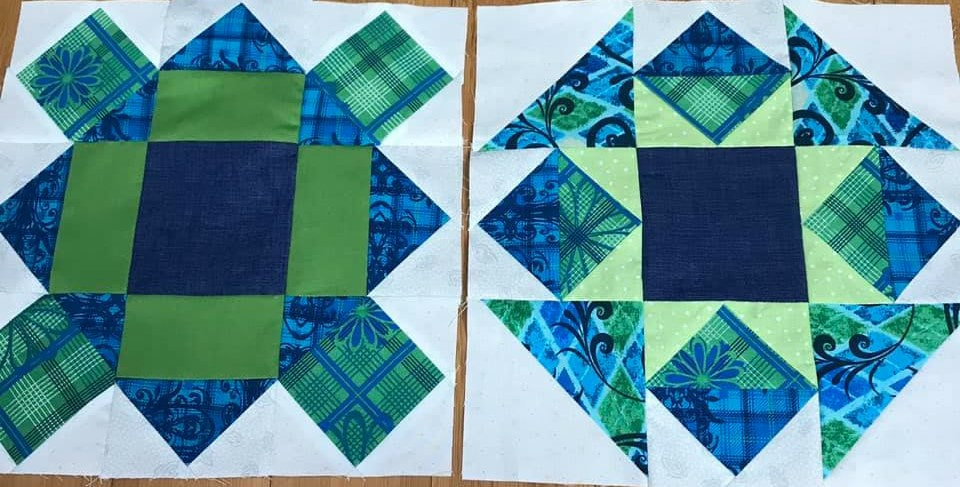
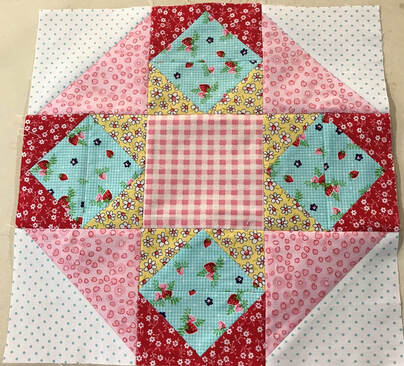
Now that we have all of the Flying Geese made and trimmed it is time to join them together. 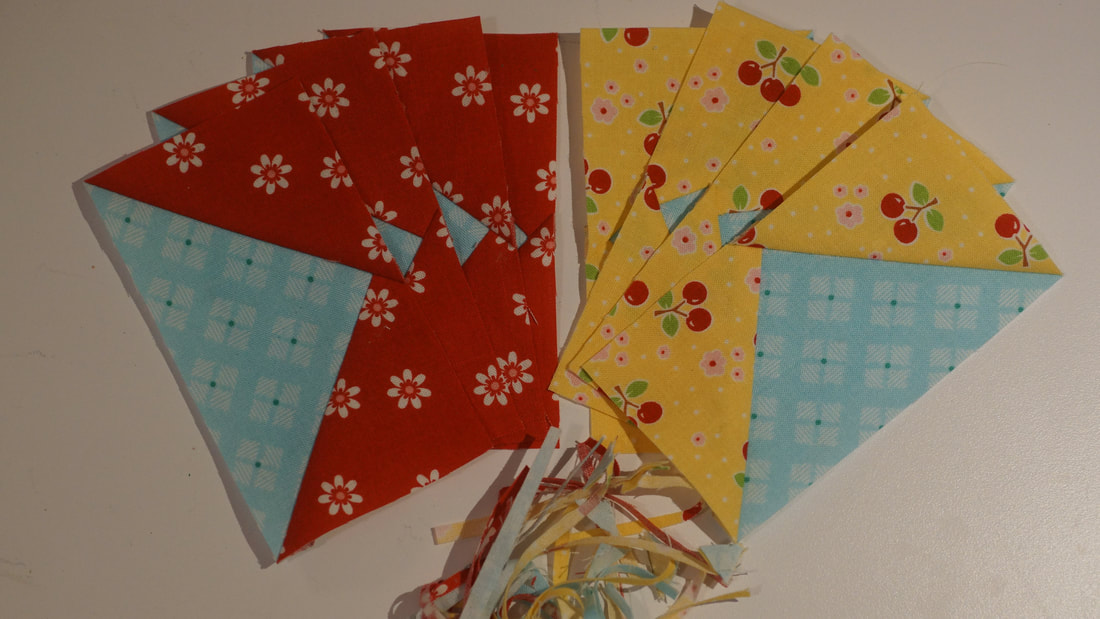 I have discovered that putting a small dab of glue along the edge I need to join helps to hold these in place. I use a washable glue pen for this and just put a couple of spots of glue along the edge, especially at the corners where my diagonal seams will meet. 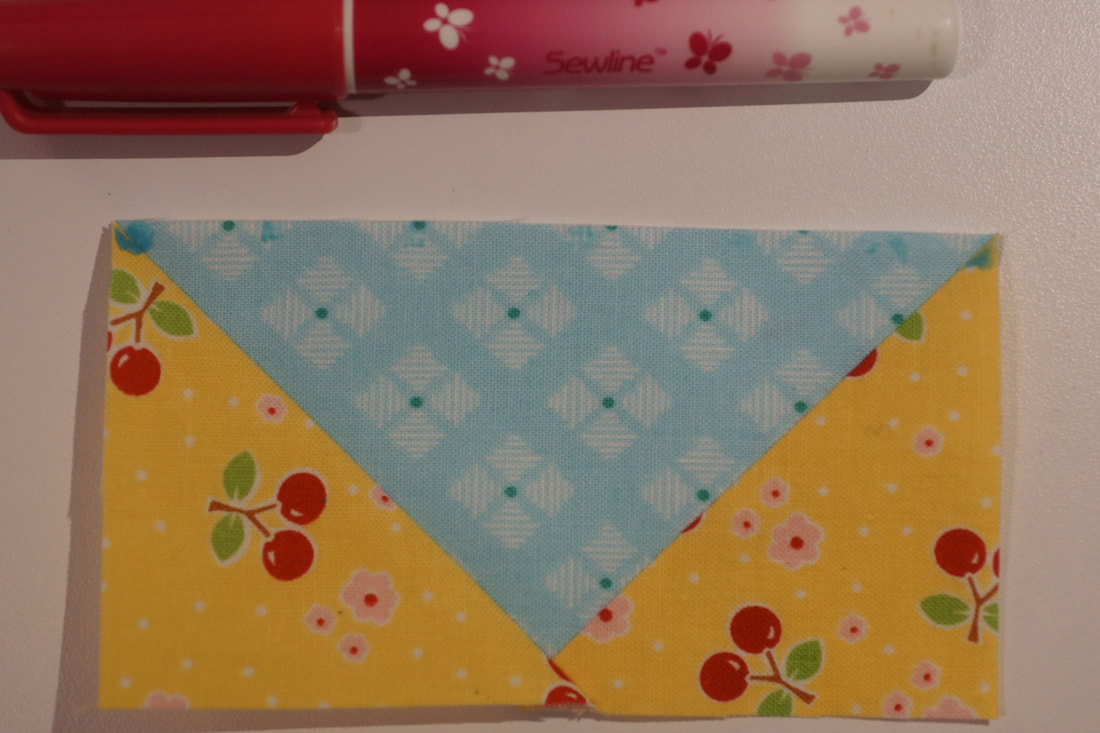 I did add a pin to one side as I noticed that seam was going to be facing away from the needle as I sewed and a pin will also help to keep it from shifting. Notice that for this I have pinned differntly than my usual method. This is completely optional; I just like the added security to keep those seams lined up properly. 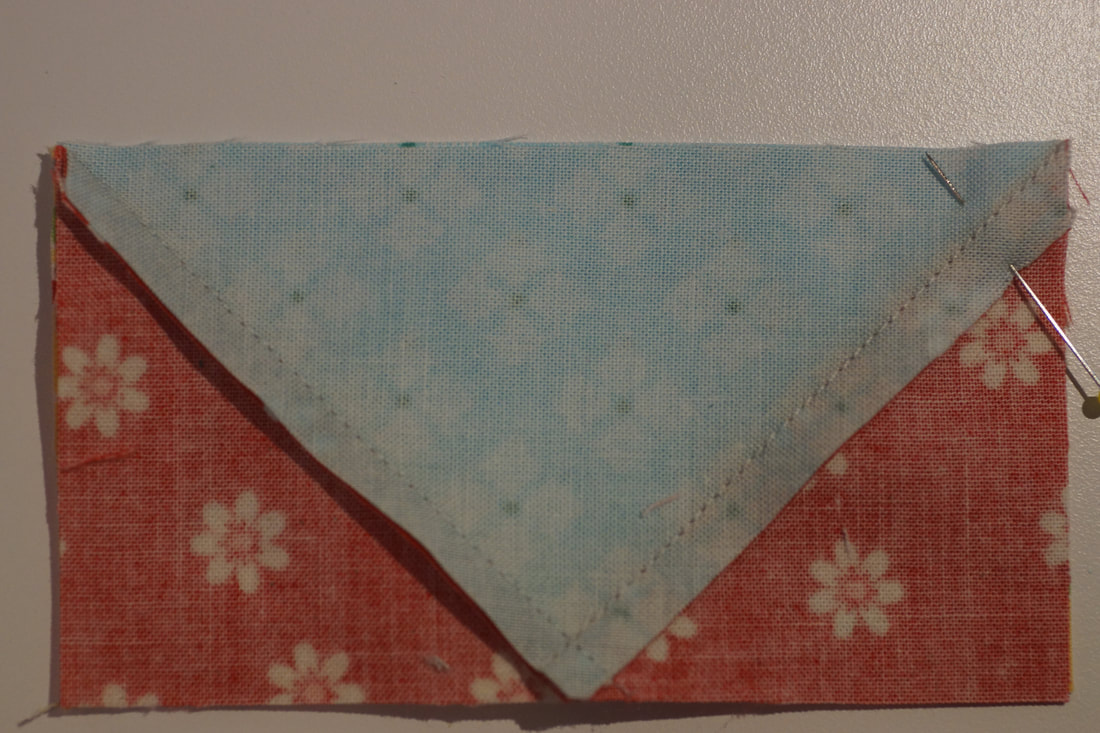 As I sew the Flying Geese units together I am going to watch the point in the middle. I want my needle to stay to the right of it-my goal is to land on it to achieve a perfect point. If my needle lands to the left of it that is how I end up with points that have been cut off in my final block. If all went well with my trimming than my 1/4" seam will allow my needle to land in just the right place. Still, I slow down as I come to this point and keep a close eye on my needle to help ensure that it lands right where I want it. Slowing down is sometimes the key to this process. 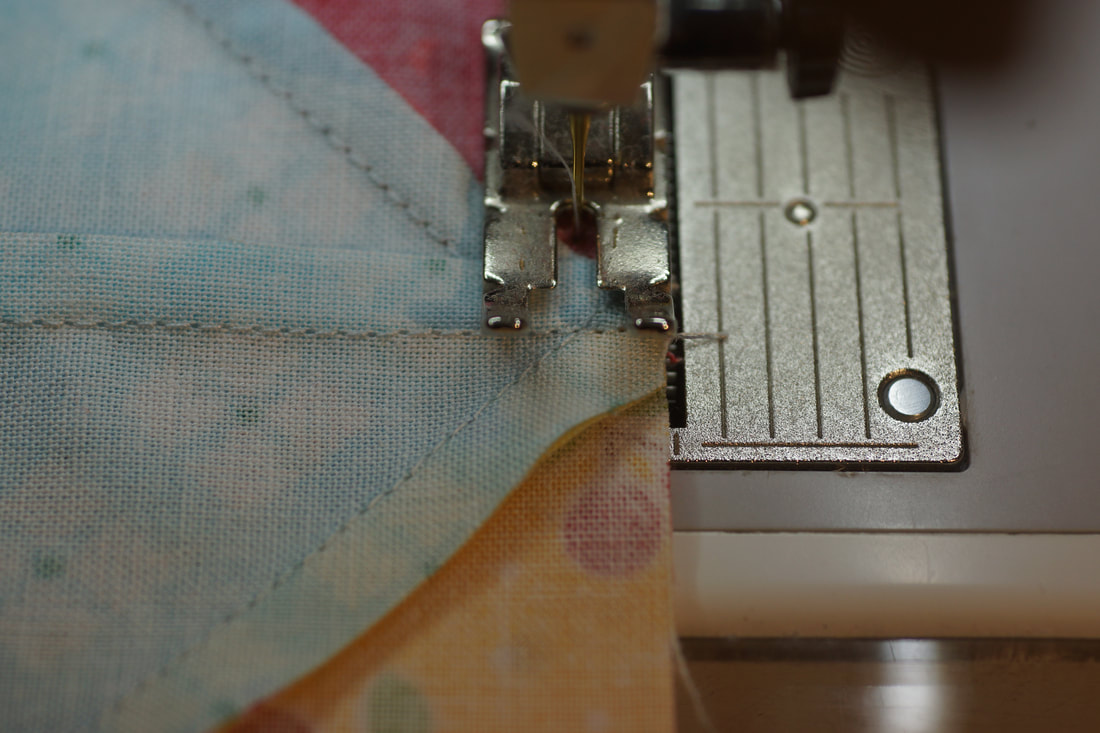 I just love how this block came out. I also love seeing your finished blocks so feel free to share in an email or on my Facebook page. My Facebook Sew Along page is like an ongoing quilt guild meeting with lots of love and encouragement and it gives me a chance to get to know all of you which is a real blessing for me. To get the pattern for this month's block click HERE. 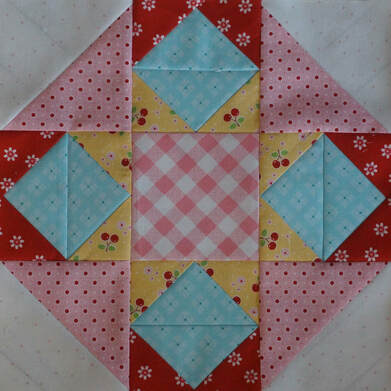 Here is a look at what my pattern testers did with their blocks...
 Jeanet's first two blocks together. I hope to close each of the posts for this BOM with a recipe. I found a couple that I just might have to try. The first one is on the King Arthur Flour website-I pretty much have loved all of their recipes.  But this second one adds chocolate to the mix-I just don't see how one could go wrong! I found it on I Am Baker's blog-this site is not at all good for my weight loss goals, LOL. Click on the photos for the recipes.  Have fun and Happy Quilting!  Comments are closed.
|

Welcome to the site of Debra Davis-a woman who loves the Lord and loves to quilt.
My other blog where I share about my walk of faith:
Sitting at His Feet 
|


 RSS Feed