 I have to start this post by thanking you all for your notes of encouragement these past several weeks as life took it turns and I needed some down-time. Today happens to be the first day of summer vacation for us. For us that simply means my husband has finished teaching for the school year and our schedule is free for the most part. It is a blessing to be able to share these days with him! I have decided to handle Row 5 a little differently. You will be making it along with me in the next couple of blog posts. The written pattern instructions will come later, so for those collecting the pattern, no need to worry, but for those that are ready for the next row in our quilt let's get started. For this row we are going to need to make several hourglass blocks; 24 to be exact. So I want to share with you a couple of quick methods for making several at a time. For my Christmas themed version I chose three main fabrics and one background fabric. To make the hourglass blocks using what is called the Magic 8 Method you will need to cut 7 1/2" x 7 1/2" squares: three from your main fabric(s) and three from your background fabric. If you have not yet tried using starch for piecing I recommend it for this method, while it is not necessary I love the crispness achieved by treating my fabric with starch before cutting to size and it really can make a difference in your accuracy if that is something you struggle with. I made the switch to Mary Ellen's Best Press a couple of years ago after using the Faultless spray starch, mainly for the issue with bugs if your fabric does not get washed for a while. I purchase it in the large refill size and just keep a spray bottle filled and handy by my pressing area which helps keep the cost down. One tip for using starch: I place a bath towel on top of my ironing board and spray my fabrics on the towel, then press them on the towel as well. That way all of the over-spray is on the towel which I can just toss in the wash on wash day and I do not get a build up of starch on my ironing board cover. Another benefit of the towel is that it gives you much the same benefit of a wool pressing mat when you are piecing-just another tool that aids in accuracy when pressing. So, now that I have my squares cut, I need to draw diagonal lines on the wrong sides of the background fabric squares. Then place those right sides together with the main fabric squares.  Sew 1/4 inch from both sides of the diagonal lines. 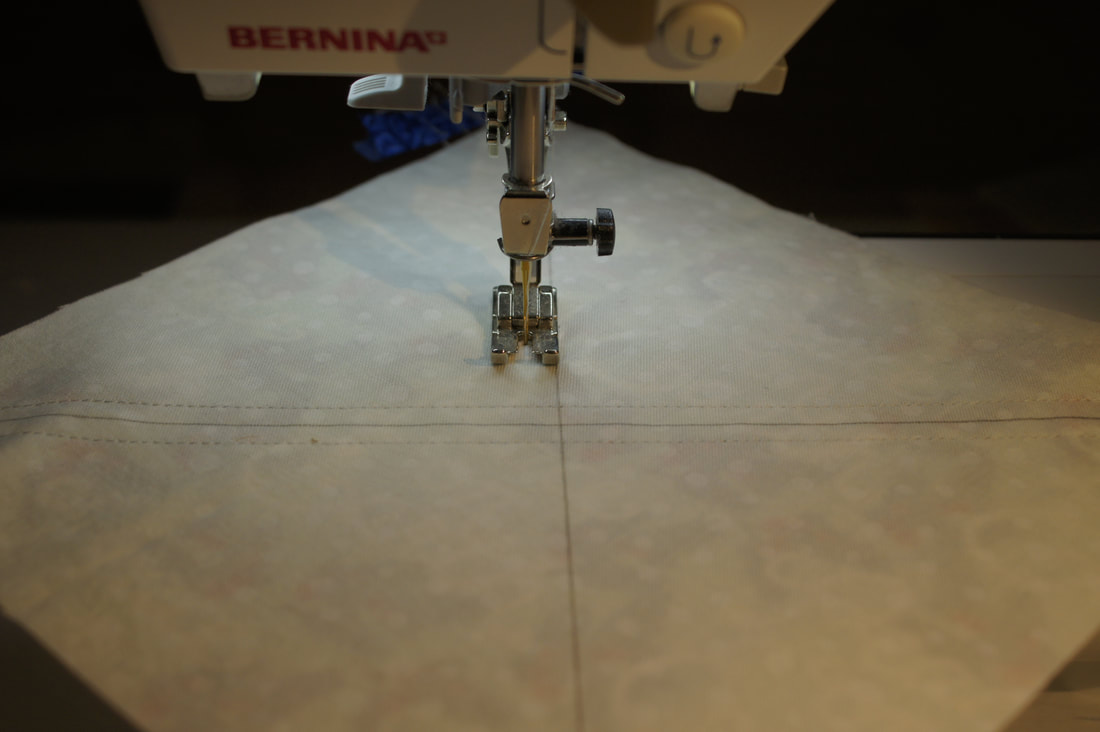 Now here is where it gets a little interesting. We do not start by cutting those diagonals. Instead, line up the 3 3/4" mark on your ruler with one edge of your square. You do not need to worry about being precise here. If you are not perfectly aligned with the middle of the square where everything intersects it is okay. You just need to be close, not perfect-isn't that a relief. Do not separate anything at this point. 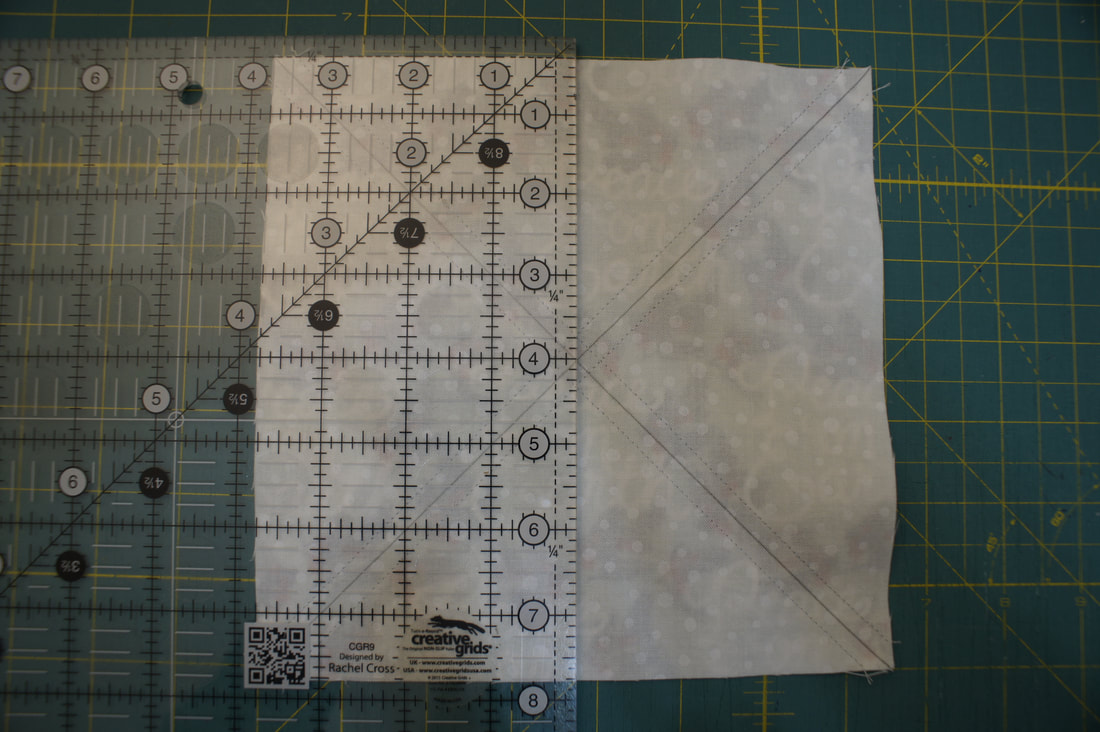 Pick up your ruler and move it to the bottom of the fabric square. Using the 3 3/4" mark on your ruler again, cut across the middle of the square. Once, again do not move any of the cut pieces, we have a couple more cuts to make. (I have one of those rotating cutting mats, but it was not necessary to have for this to work out well.) 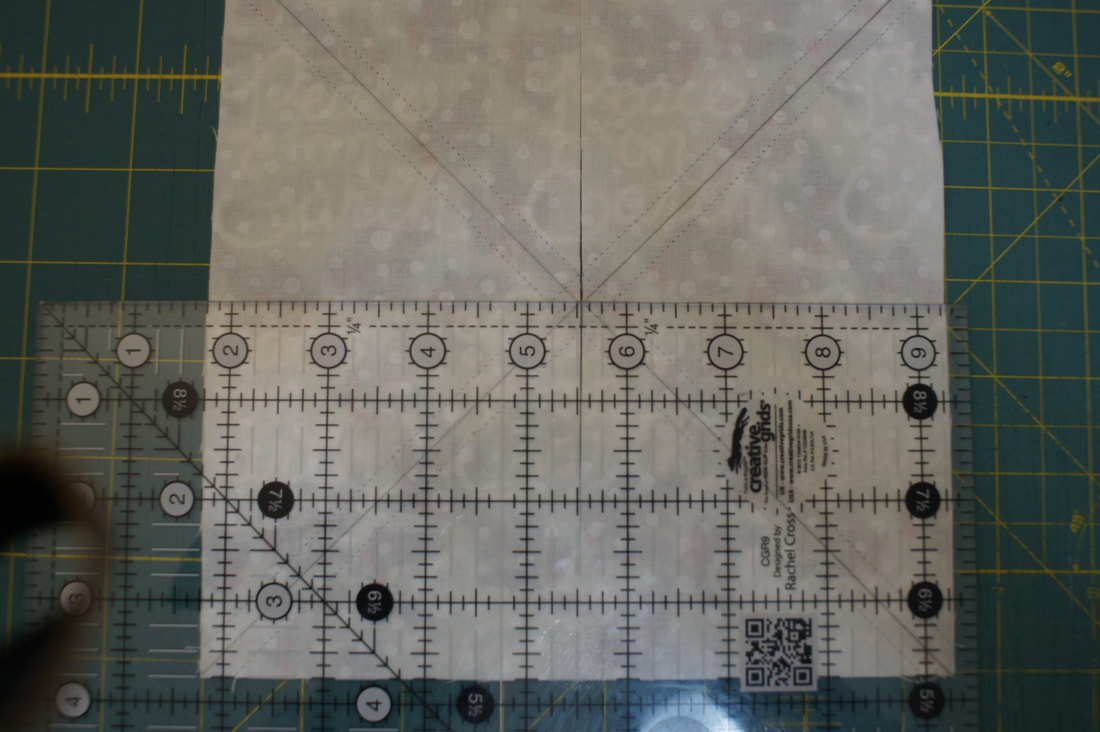 Now we cut on the two diagonal lines that we drew. 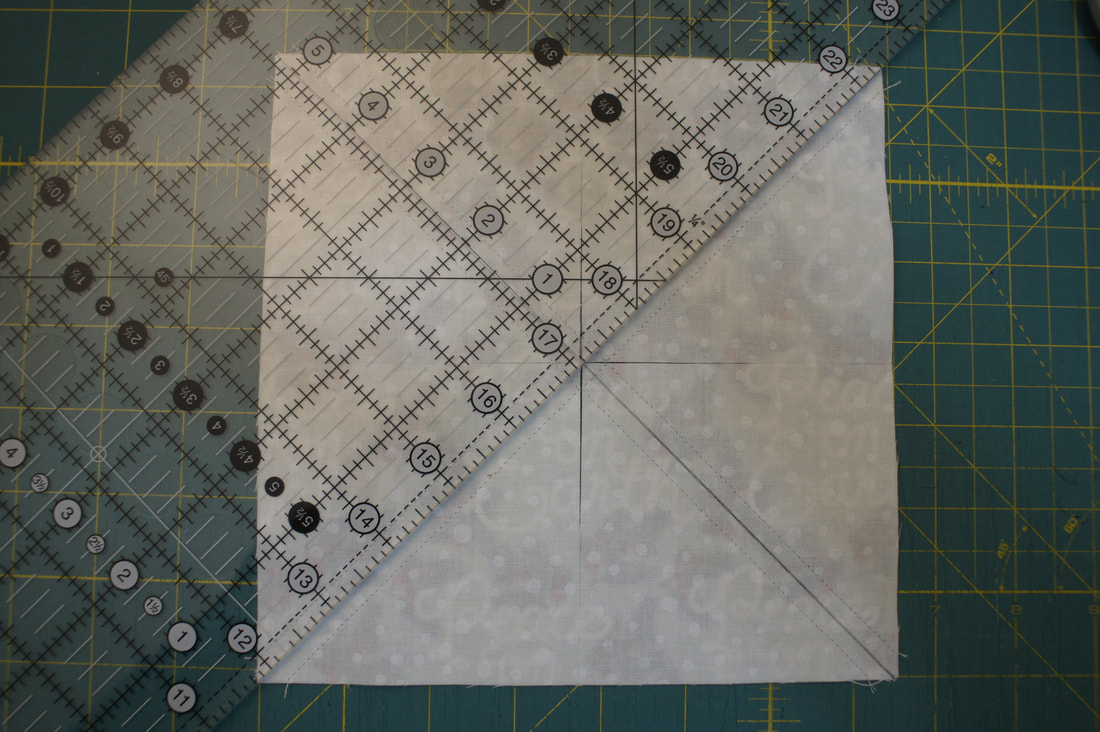 And we end up with eight half-square triangles ready to be pressed. Press to the dark side! 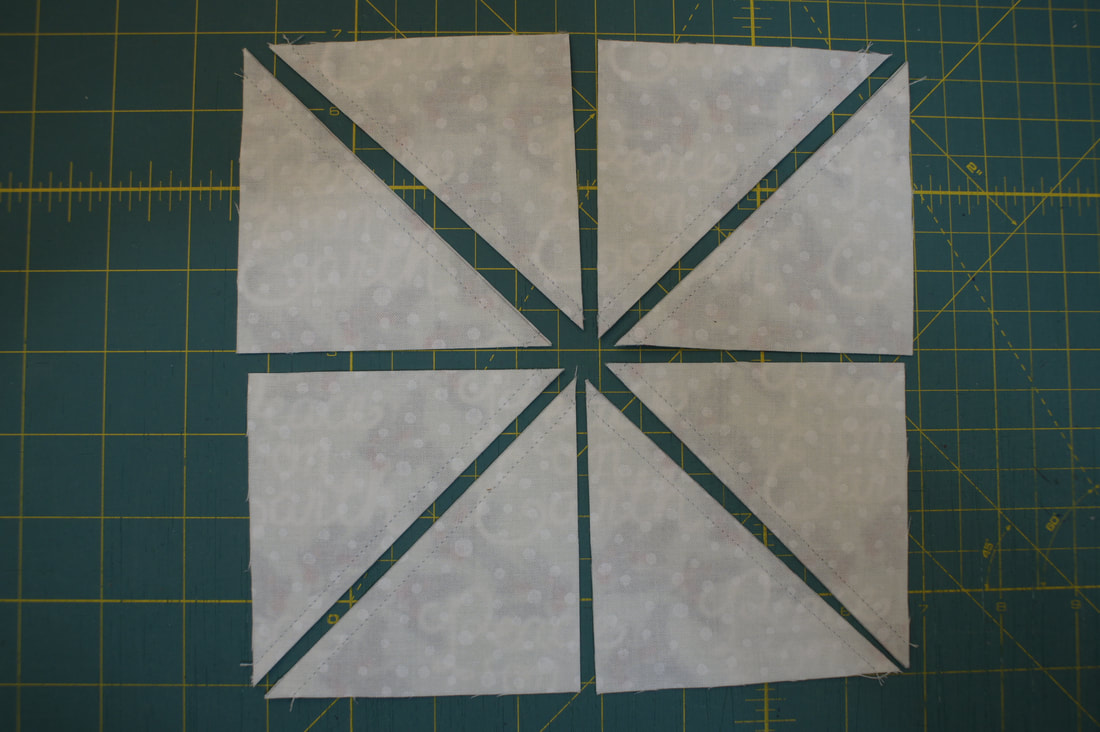 Once the half-square triangles (HST) are pressed we are going to place two of them right-sides together, with the main fabrics on opposite sides from each other. The seams will nest nicely together. Draw a diagonal line down the middle of the top HST.
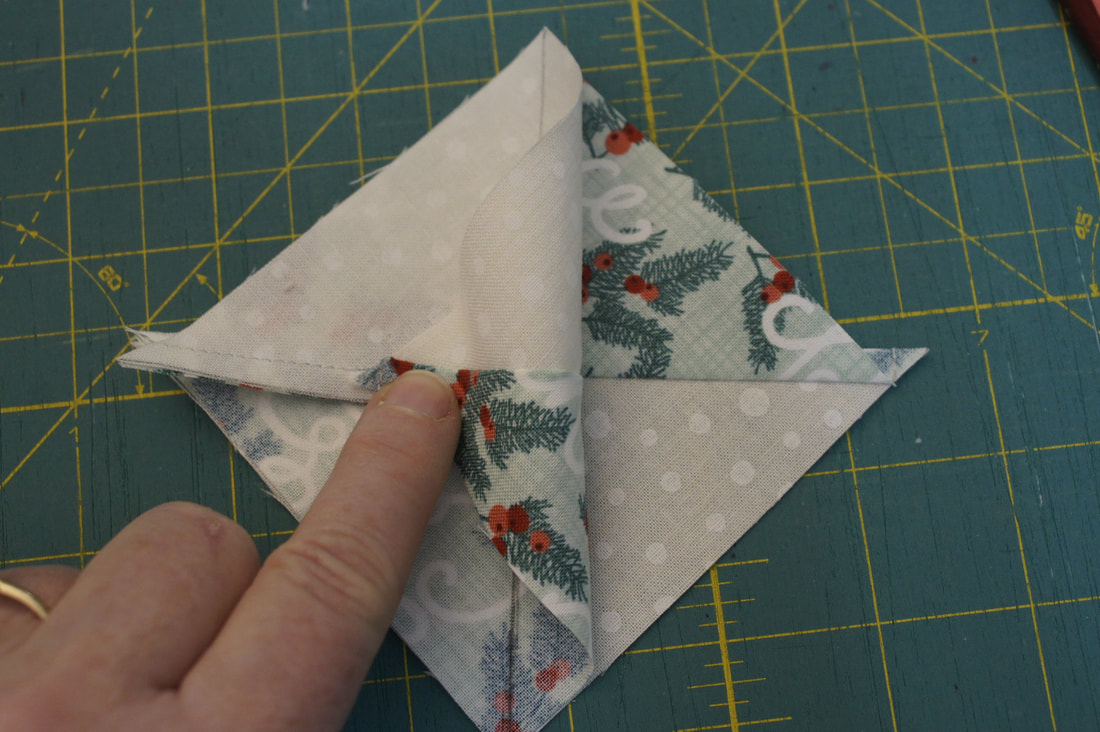
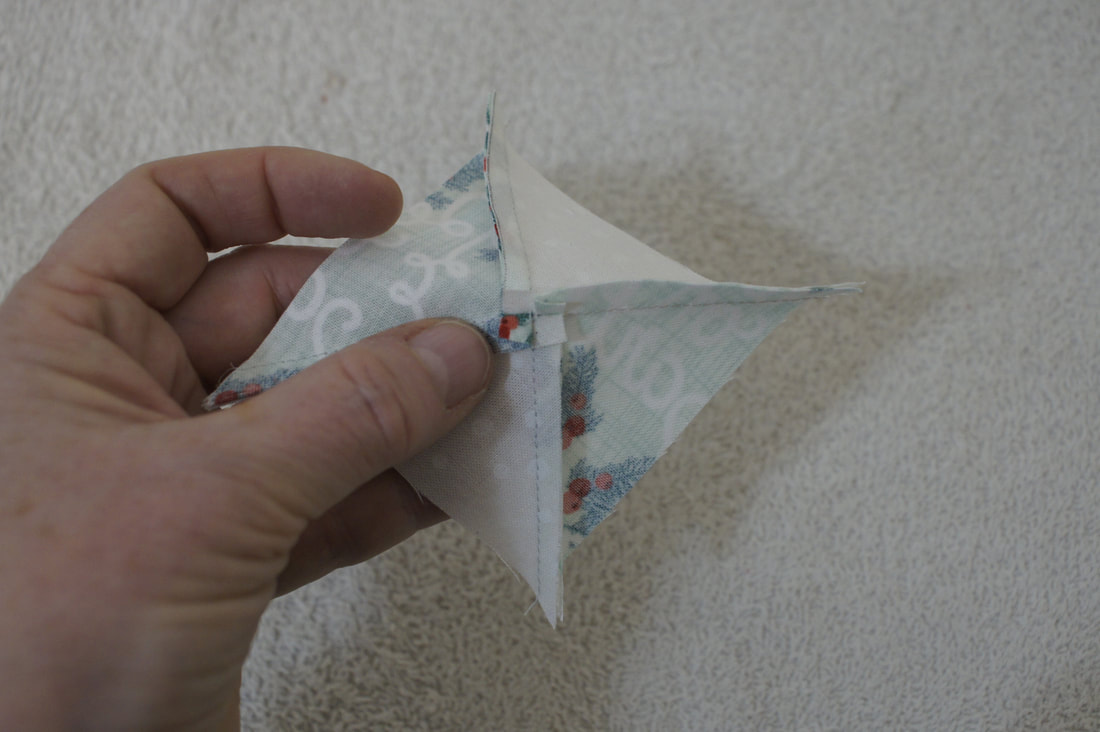
Sew 1/4" from each side of the drawn line. 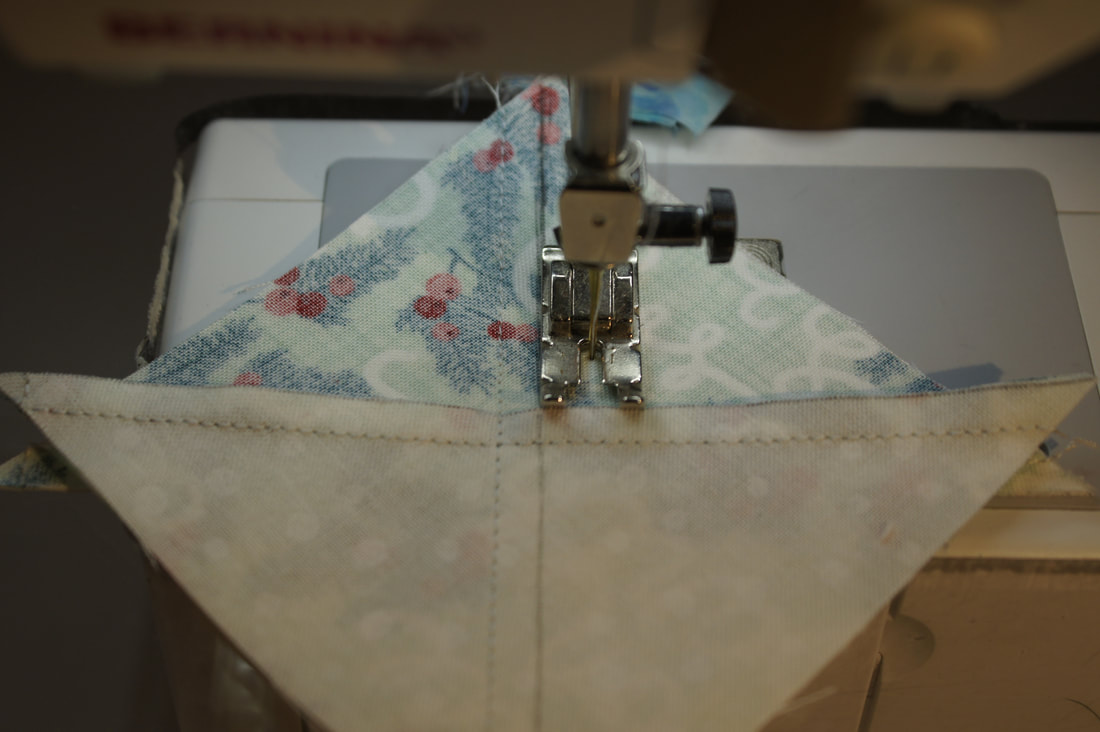 Cut apart on the dawn line. I like to fan the seams on these to get them to lay perfectly flat, but you can press to one side if you prefer.
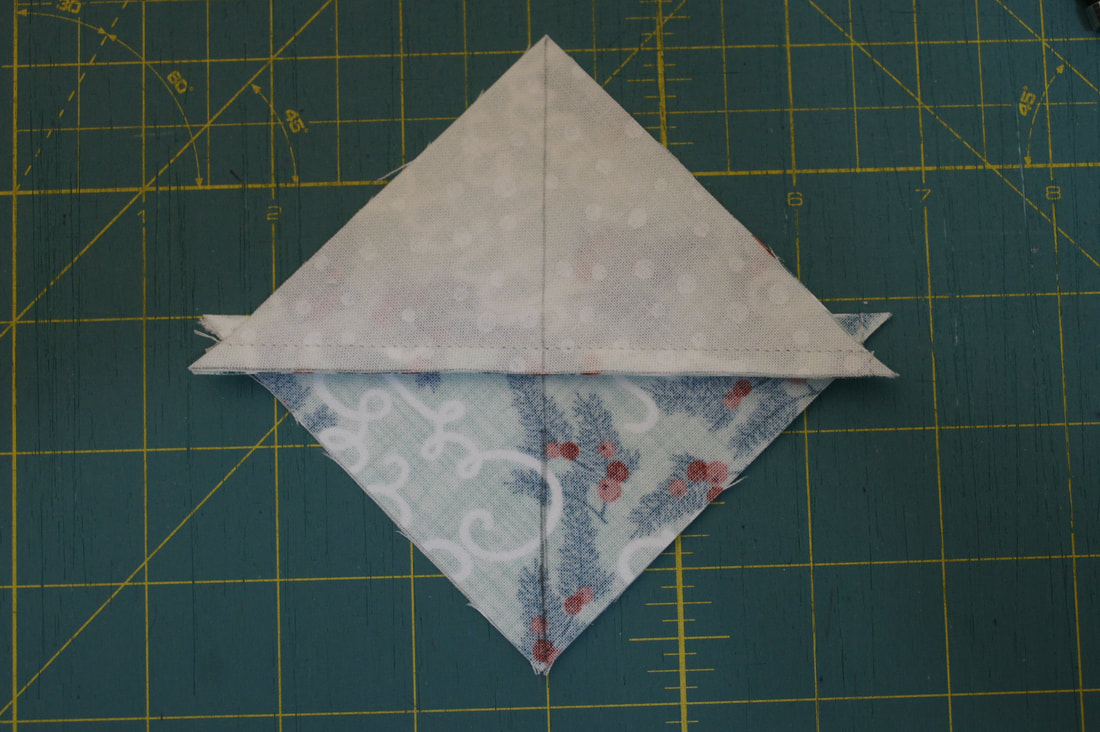
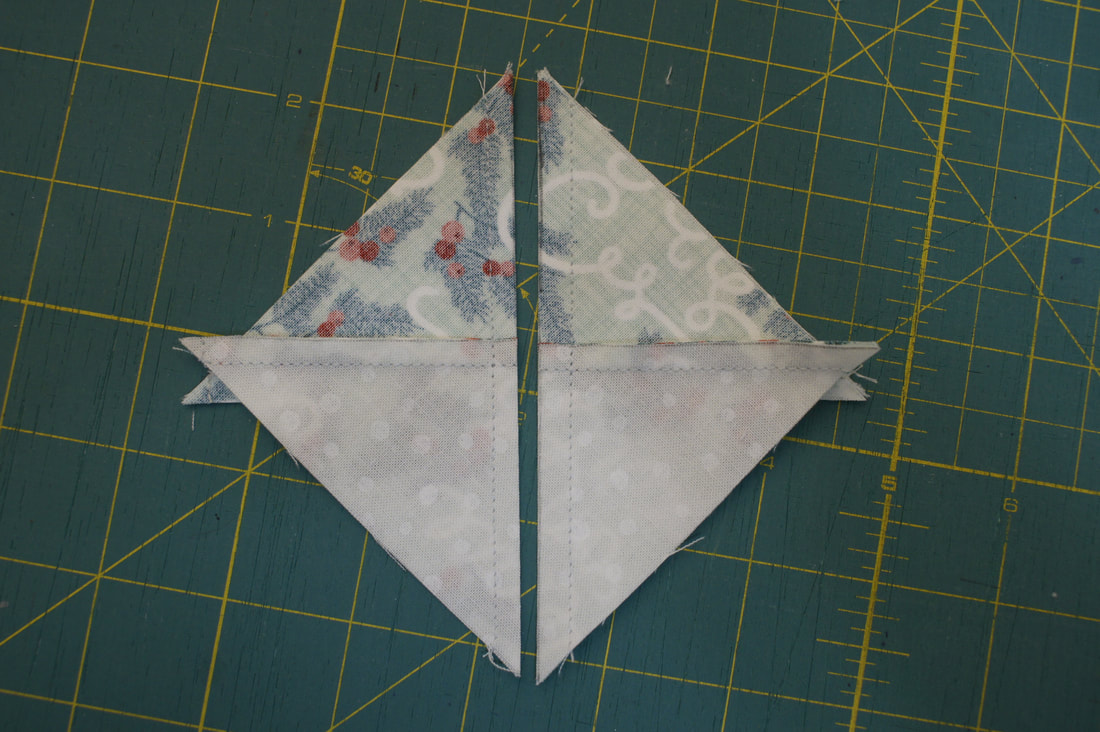
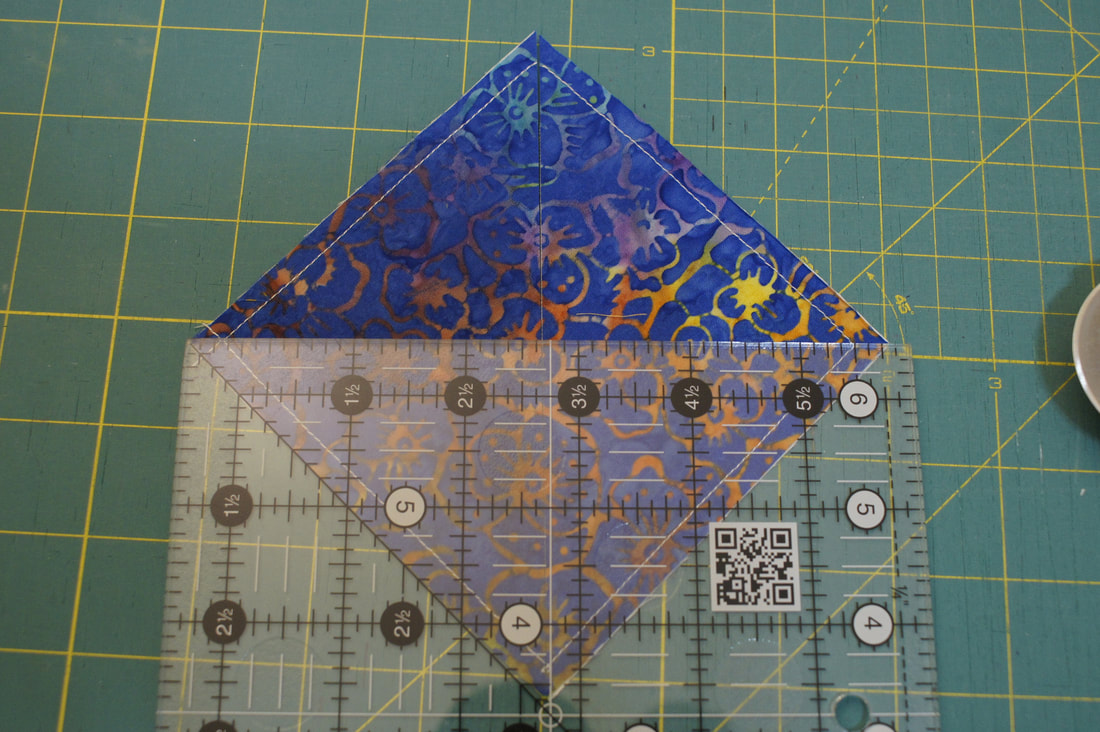
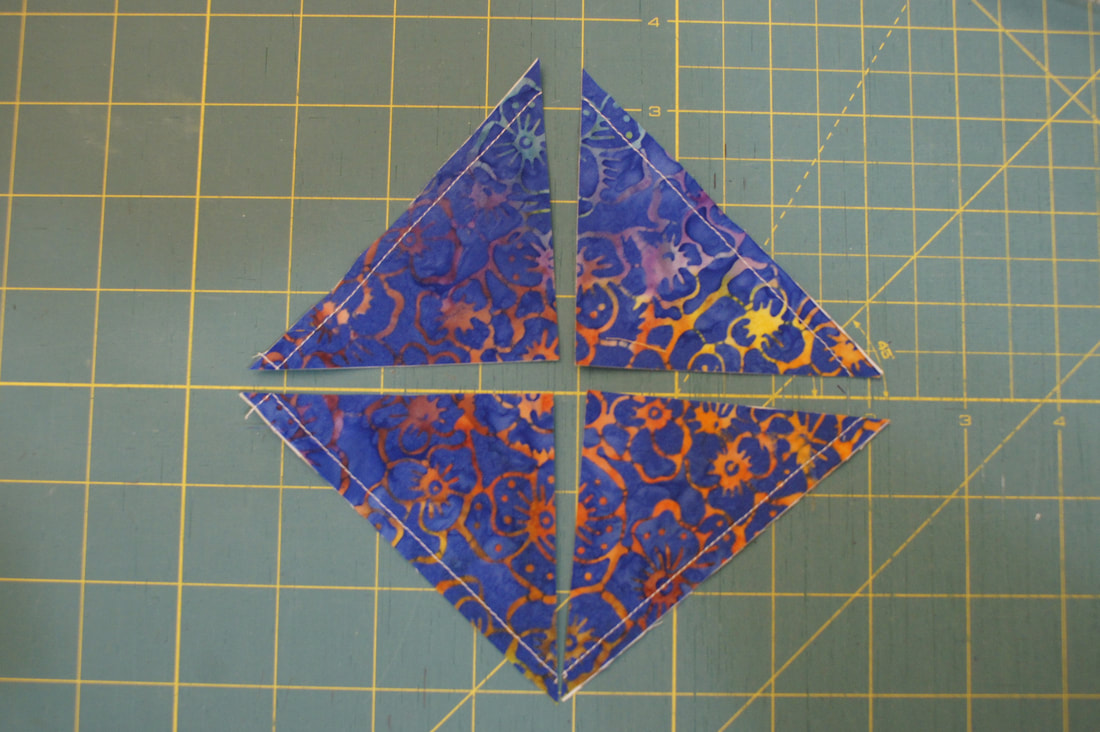
Here you can see how the fanned seam looks on the back of my hourglass unit. I am still pressing on the towel. 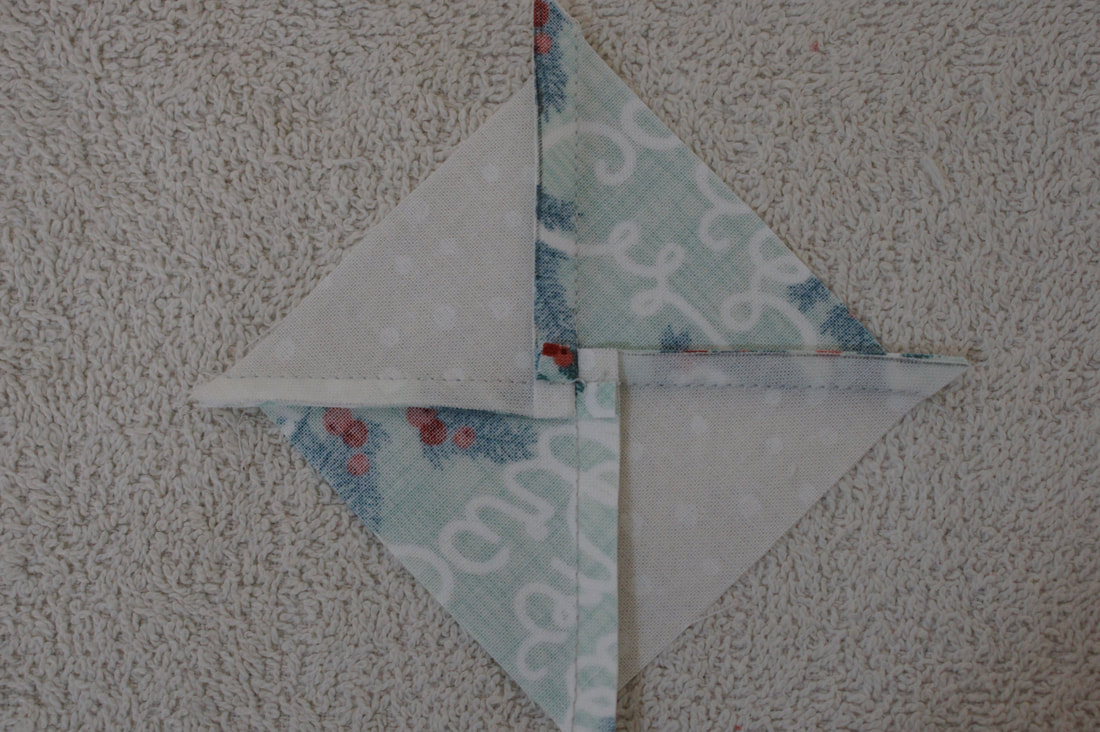 The Hourglass units are now ready to be trimmed. We will be trimming these to 2 1/2" x 2 1/2". Begin by laying the diagonal line of your ruler right along one of the diagonal seam lines. You want to place the 1 1/4" mark of your ruler right at the center where the seams intersect. This ensures that after trimming the center point of your block is right in the middle. Trim off the first two sides of your block. 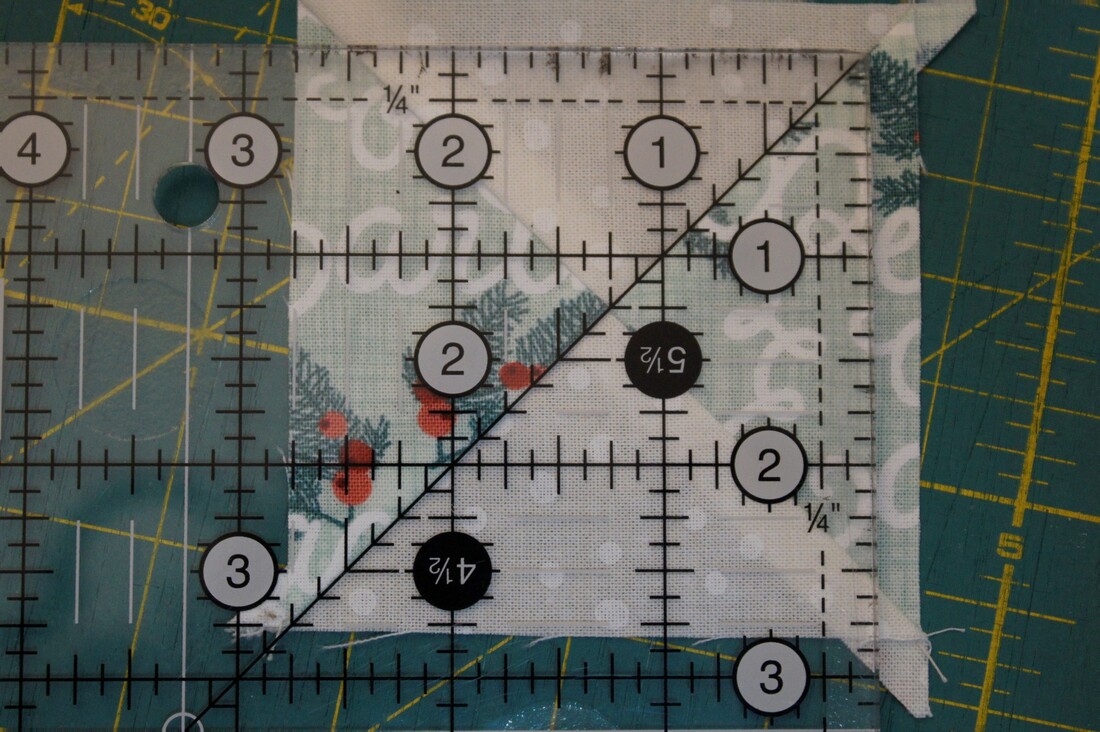 For the final trim, rotate your block and place the diagonal line of your ruler on that seam line. This time you want to be sure the trimmed edges of your block are lined up with the 2 1/2" marks of your ruler. As you can see my 1 1/4" mark falls in the center as well, perfect. Trim the remaining sides and the Hourglass block is ready for our row. 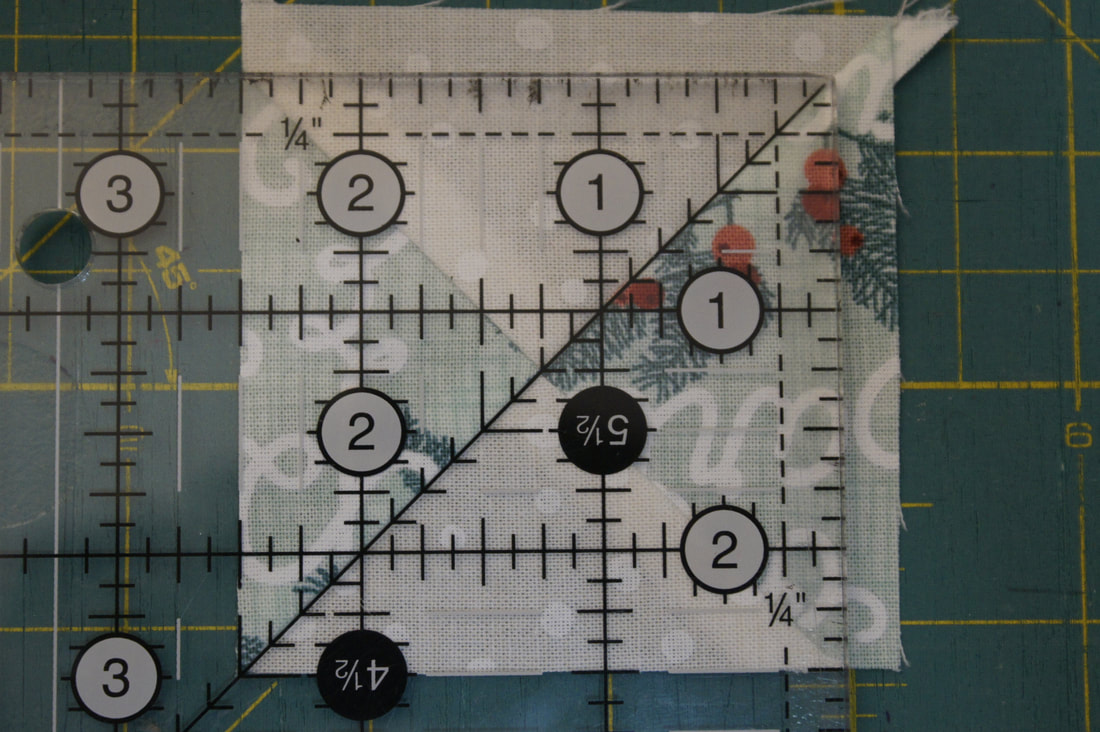 The second method is for making four Hourglass units at a time. I am using this method with my Batik version of the quilt as I wanted more variety of fabric for this row For this method I chose 6main fabrics and an assortment of background fabrics. I need to cut my squares 5" x 5". So I ended up with 12 squares from my main fabrics and 6 from my background fabrics. For this method I just place a main and background fabric right sides together and sew all around the outside edge with a 1/4" seam allowance. 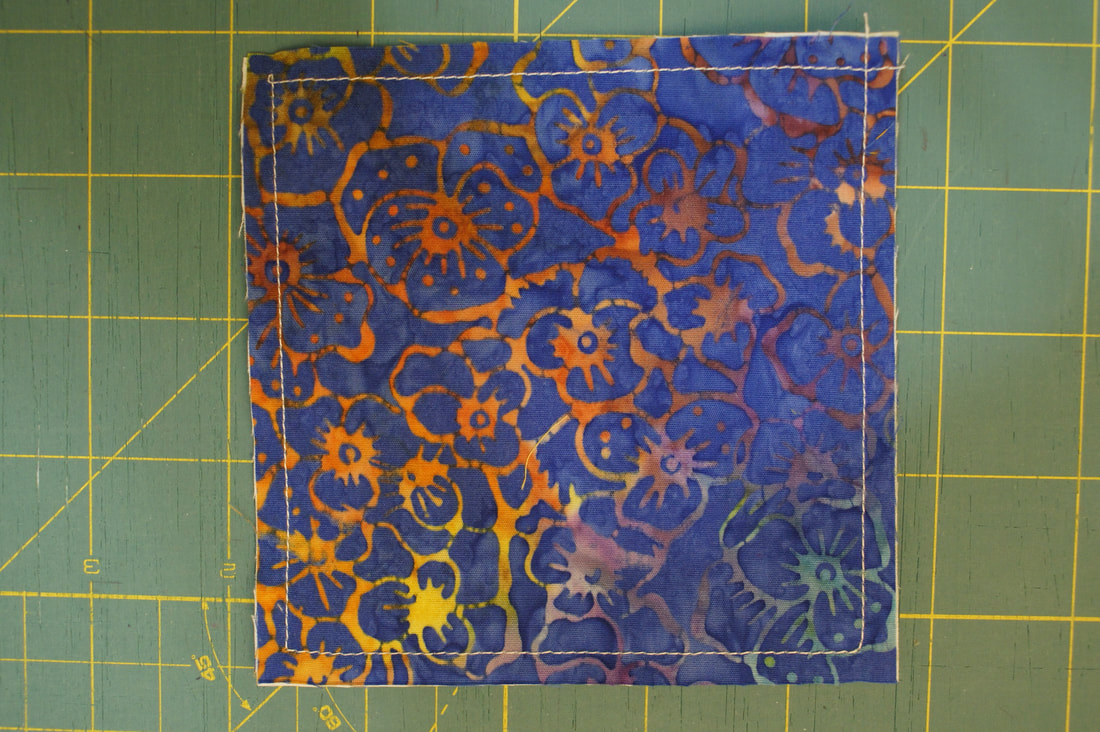 Then I use my ruler to cut apart on the diagonals. 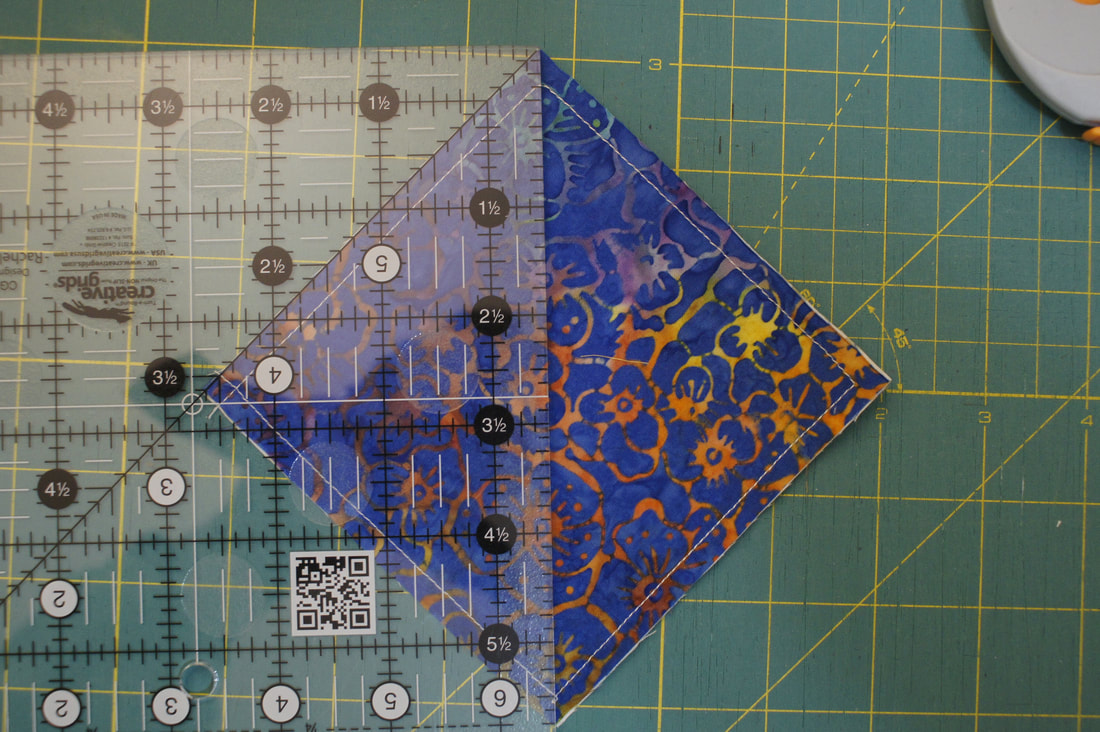 The trick here again, is to not move your fabric until you have finished making the two diagonal cuts.
The rest of this method is just like what I did with the Magic 8 Method. Each square will give you two completed Hourglass units to use in making the row.  In order to give you an idea of what we are doing with this row, I am sharing a couple of photos to show how I play with fabric choices at this point. I am trying to decide whether I want to stick with fabrics that blend with what I already have as background or whether to introduce one of my gray prints into the mix. I want these fabric squares to be the same fabric so that the hourglass units stand out in this row. 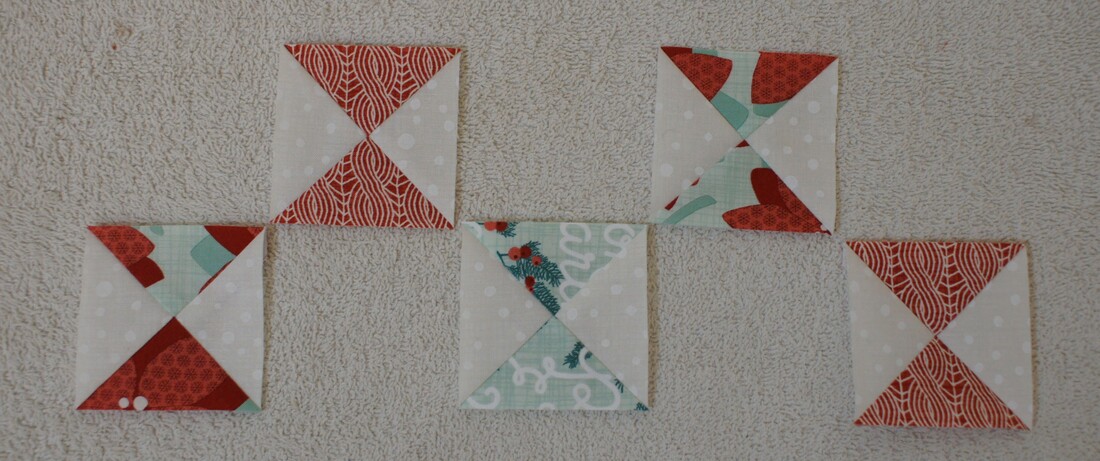 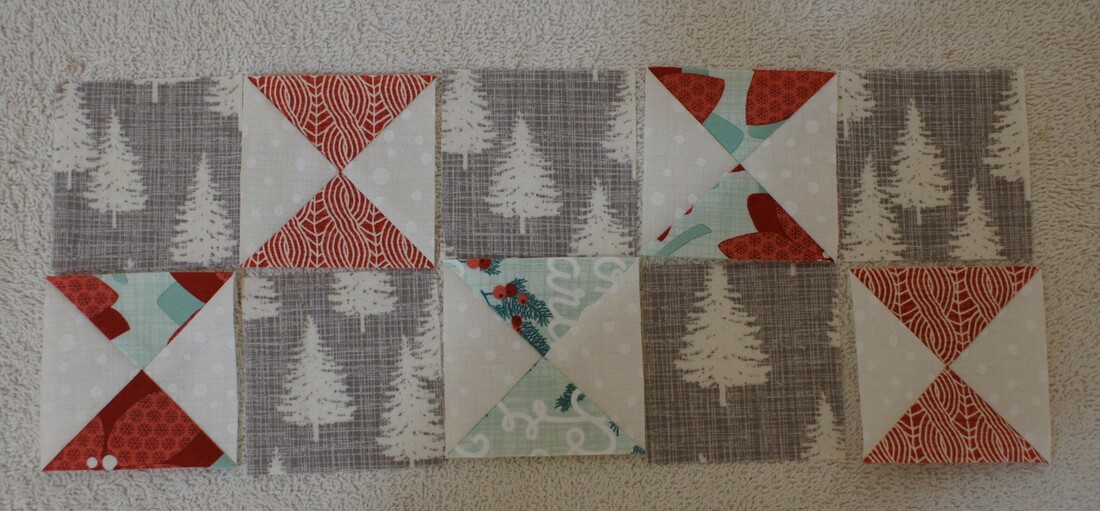 I look forward to seeing your hourglass blocks popping up on my Facebook Sew Along page. I will be back with the rest of the row on Friday. (Note: Due to health issues with my husband I did not get Part 2 done. If you have questions I can answer please contact me and I will be happy to help.) Until then, Happy Quilting!! Debra 
Pat Daniels
6/14/2021 02:02:43 pm
Somehow I missed Row 4. How can I get it ? Thanks, Pat
Debra
6/14/2021 04:14:09 pm
Hi Pat,
Dixie McAdam
6/18/2021 10:20:16 am
Debra - Thanks so much for supplying the link to Row 4. Now have the info needed. Comments are closed.
|

Welcome to the site of Debra Davis-a woman who loves the Lord and loves to quilt.
My other blog where I share about my walk of faith:
Sitting at His Feet 
|


 RSS Feed