
I am going to start you off with a couple of hints about this month's block that we will use to make row 3 in our quilt. One of my favorite views in Oregon is this view of the Three Sisters mountains, whose original names were Faith, Hope and Charity. The names were changed to North Sister, Middle Sister and South Sister at some point and that is how I have known them my whole life. You can see this gorgeous view on your way to the town of Sisters, Oregon which is a favorite destination for quilters. One for the quilt shop located there, and but also for the annual outdoor quilt show held in July. You certainly want to wear a pair of good walking shoes if you attend this amazing show as the quilts are displayed all over town. You can enjoy a video tour below and see how the town prepares for this one day event.
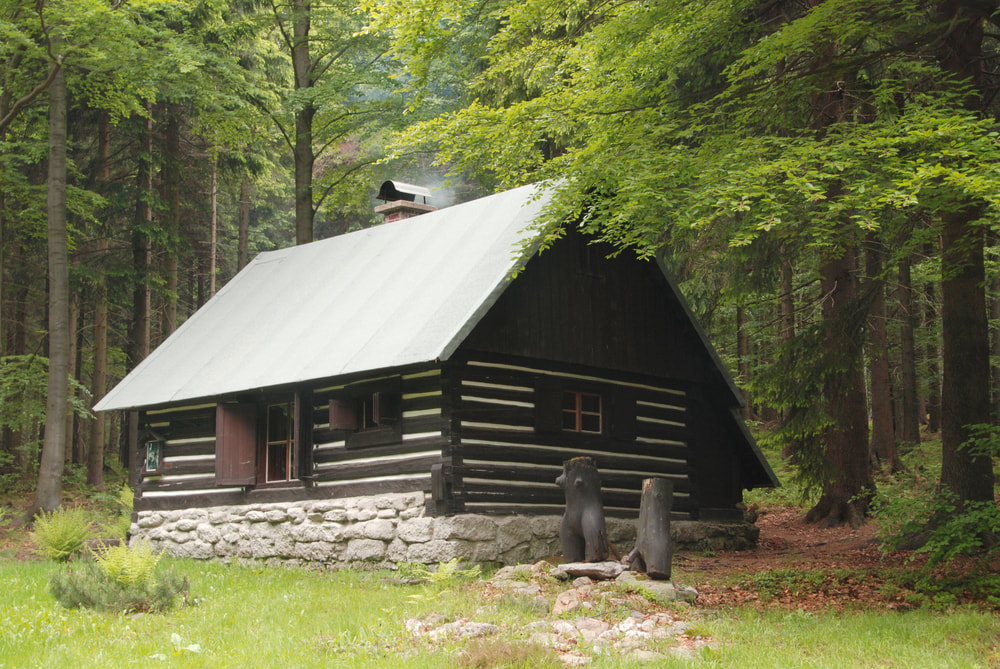
My second hint will probably really give it away... A cabin in the woods has been one of my dreams since I was a child. I don't know if it will ever become reality, but the dream is alive and well in me.
Which leads me to this month's block-the Log Cabin. My very first pieced quilt was a Log Cabin quilt. In fact my second and third quilts were also Log Cabin quilts and I have made a few more over the years as well. It is a great block to work on accuracy in piecing and I have a few tips for you before you begin.
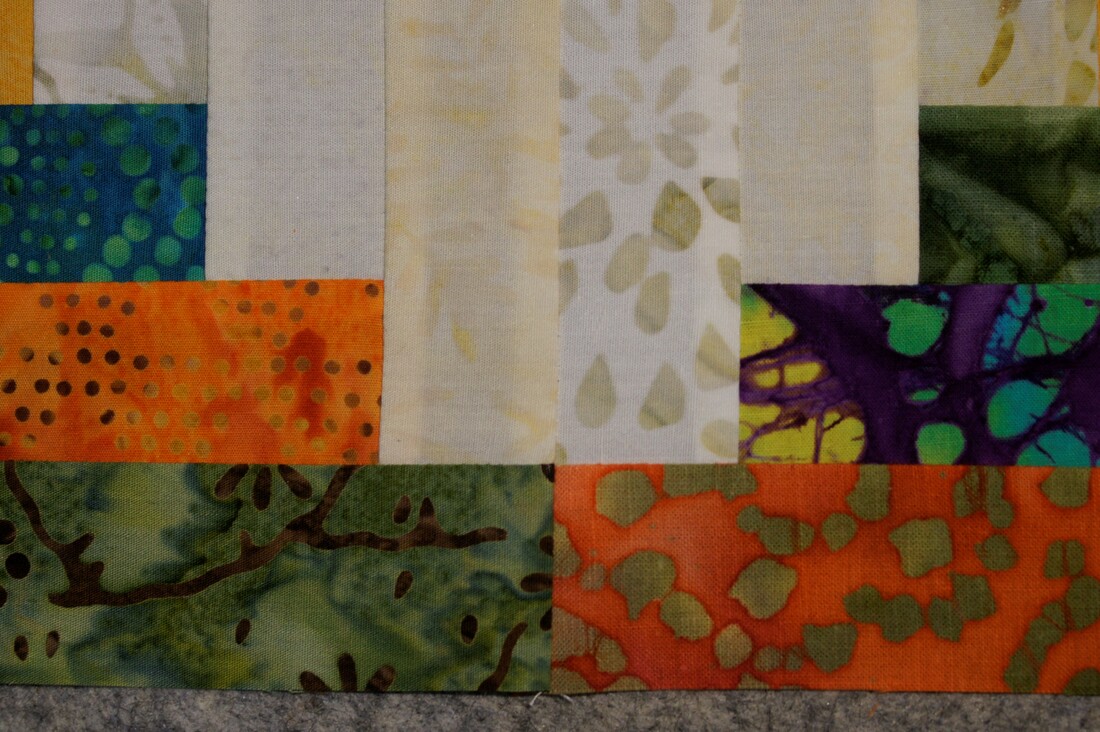
Since we are working with some narrow pieces it can be a great benefit to starch your fabric. Starching the fabric can really help in how crisp your seams are and thus the accuracy of your block. It is best to starch before you cut out your pieces in case they shrink from the starching process. I have used both Faultless Spray Starch and Mary Ellen's Best Press with good results. Do keep in mind that you do not want to store fabric that has been starched as it can attract bugs. This is a great time to make use of strip piecing techniques. The method for putting this block together is quite different from the one I originally learned back in the day and I feel leads to a squarer finished block. It is important that you cut your pieces to the exact length given in the directions to get good results. When I first learned strip piecing I would just push the next pieces into place and let the machine feed them up to the needle. This can result in some crooked beginning stitches so instead... 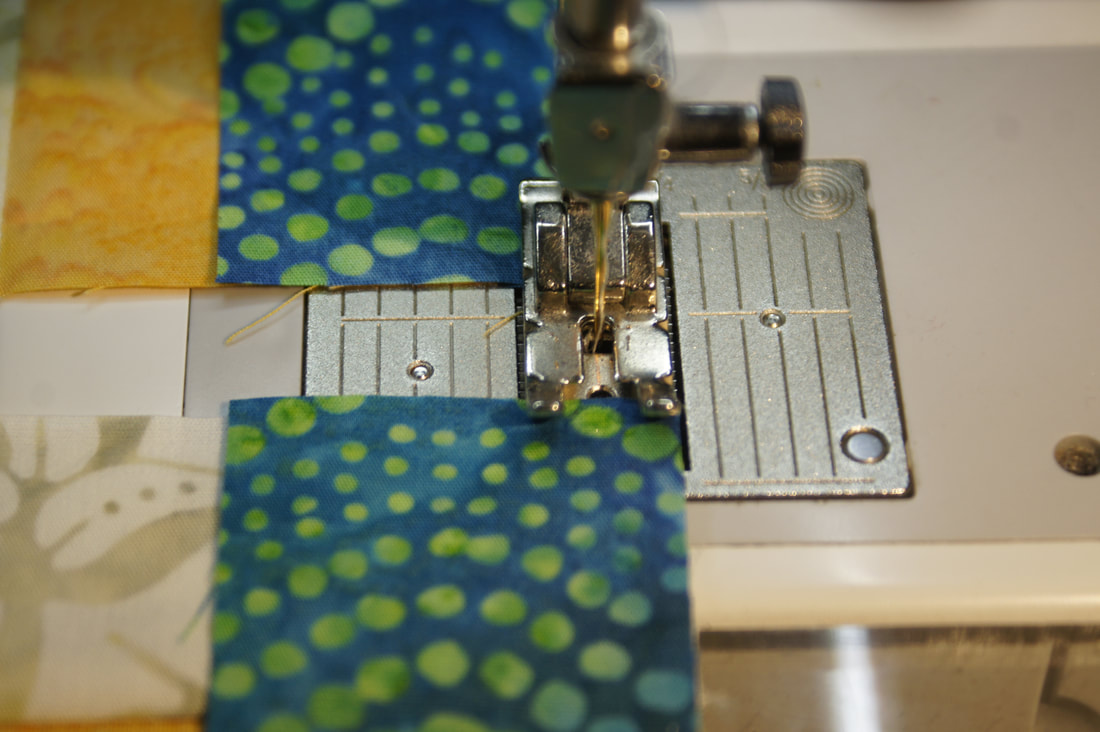
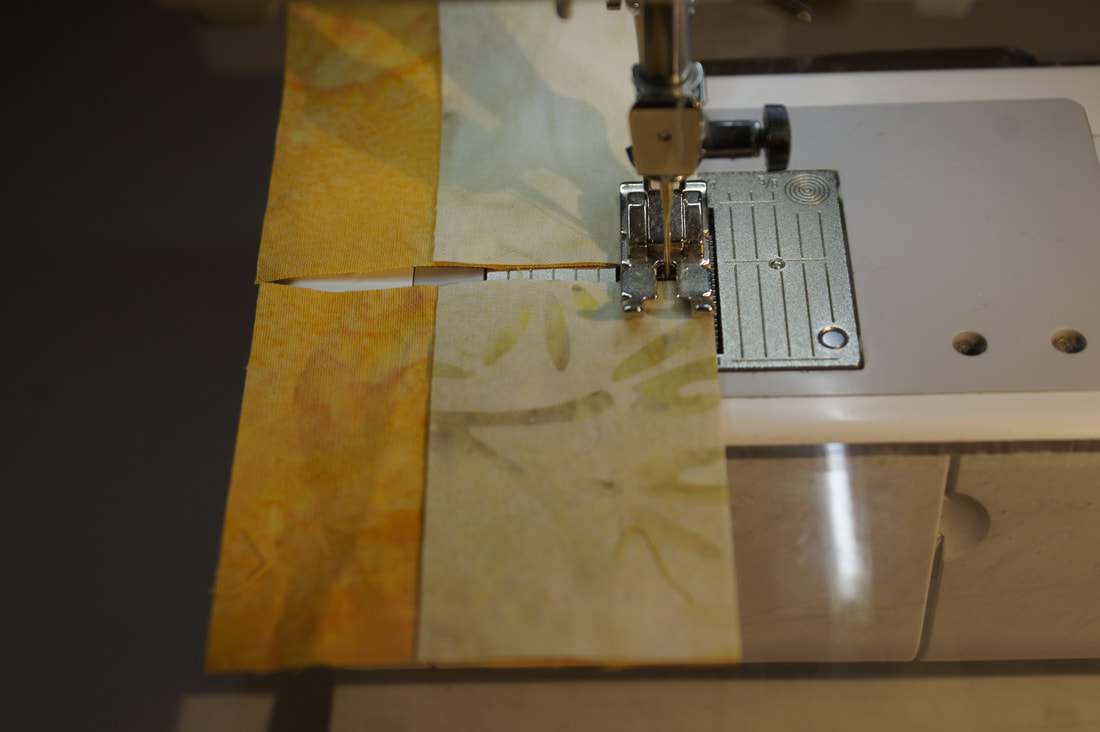
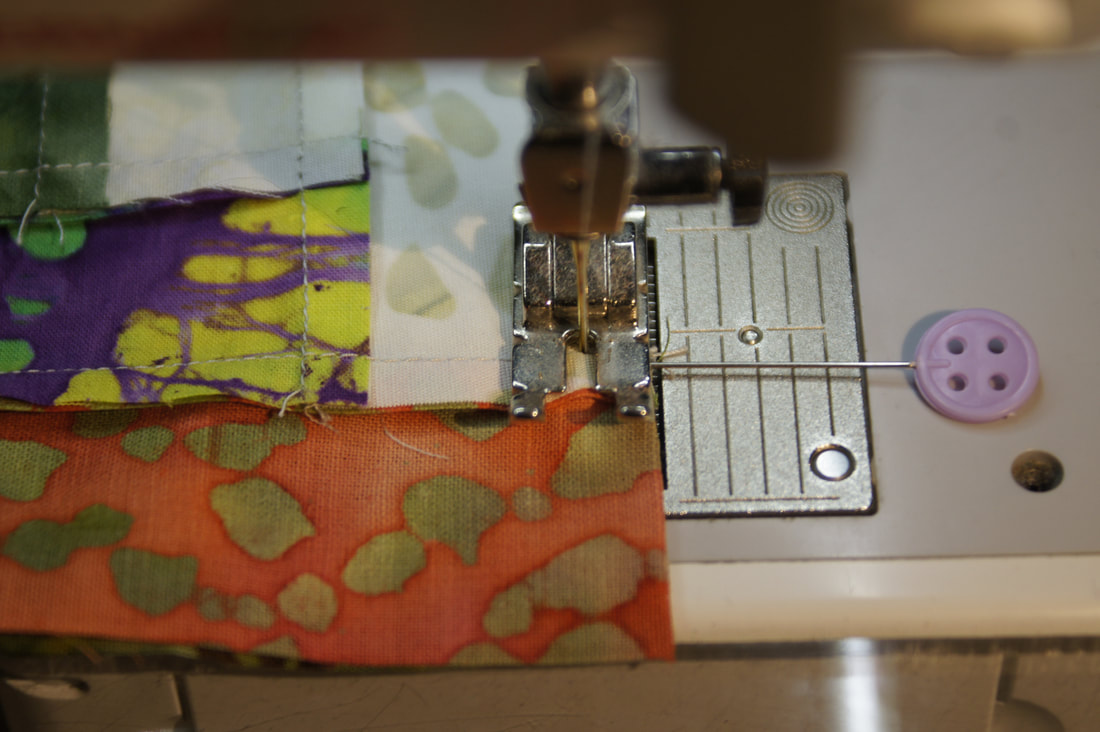
take the time to lift your presser foot and place the next pieces right up against the needle. Make sure you have the fabric lined up with your seam guide. Everything should look nice and square, even with the horizontal guidelines on your machine plate.
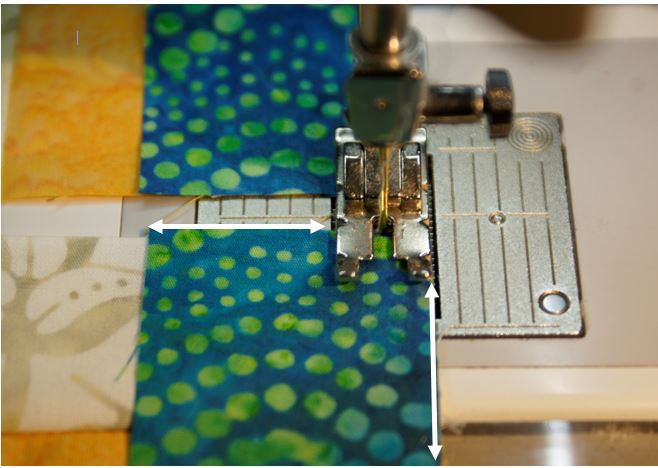
As you sew, continue to watch both of those things, the vertical and horizontal alignment. When you sew off the end it is easy to swerve slightly to one side or the other and you want to keep sewing in a perfectly straight line. It may help to slow down as you approach the end of your pieces just to make sure you keep that straight line going. I use the marks on my presser foot to keep the horizontal alignment squared up. Since I can no longer see the vertical seam guide, the side of my presser foot helps here as well. (This is why I highly recommend a quarter inch presser foot).
As you can see, the horizontal mark on my machine's throat plate is still square with the pieces of fabric I have just sewn. So many times it is just these little things that can have a big impact on the finished look of our blocks.

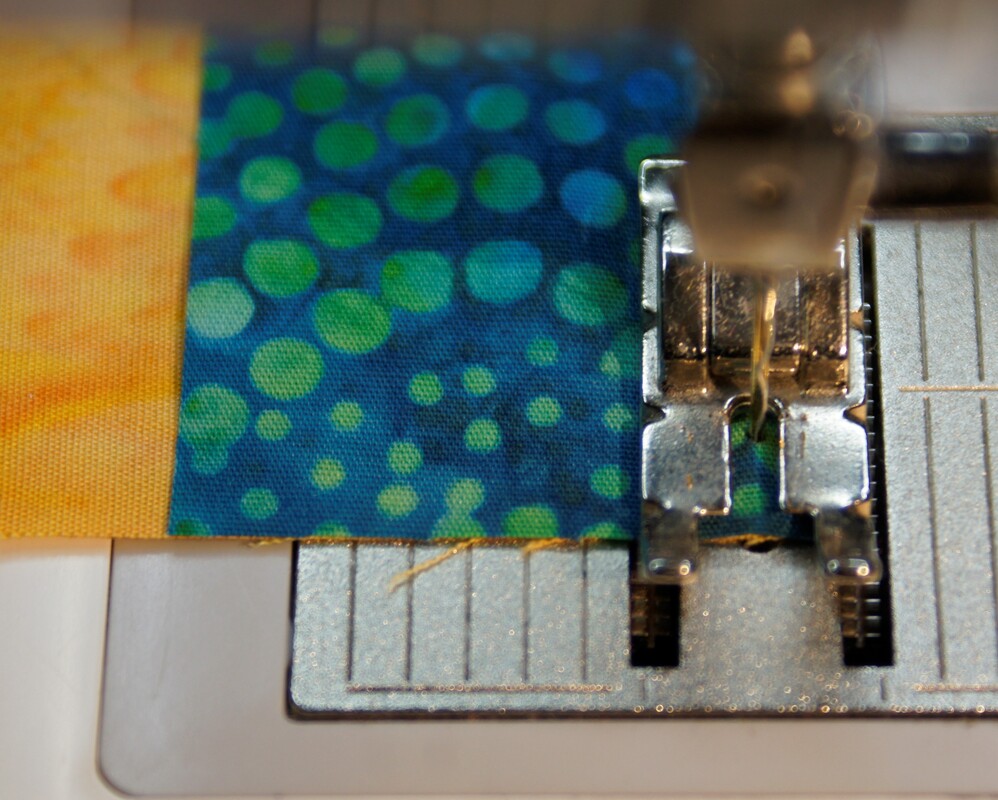
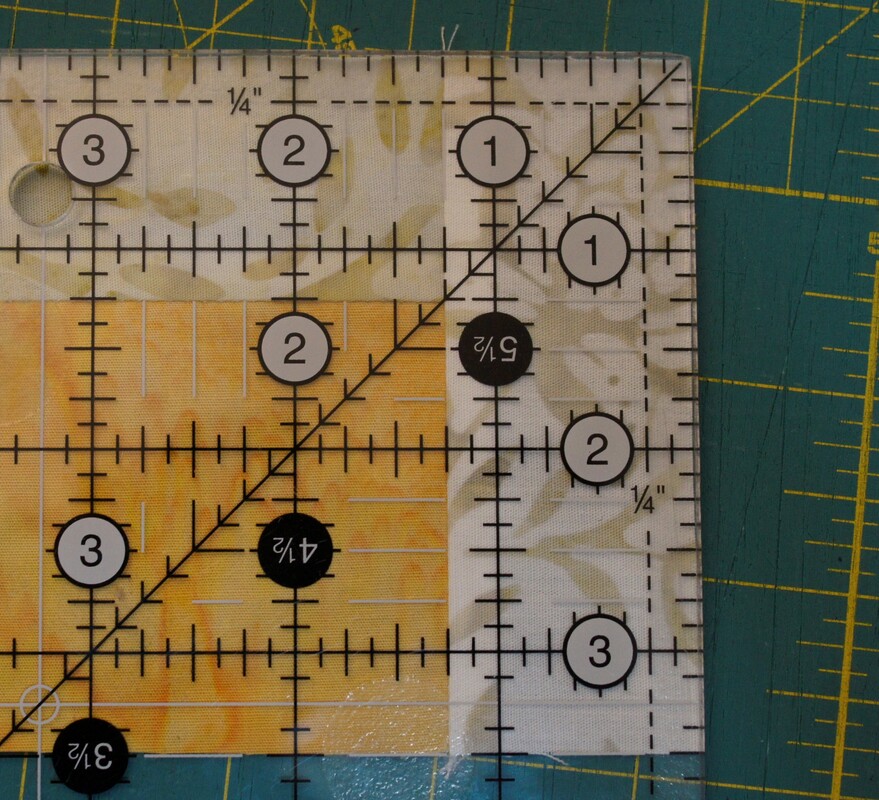
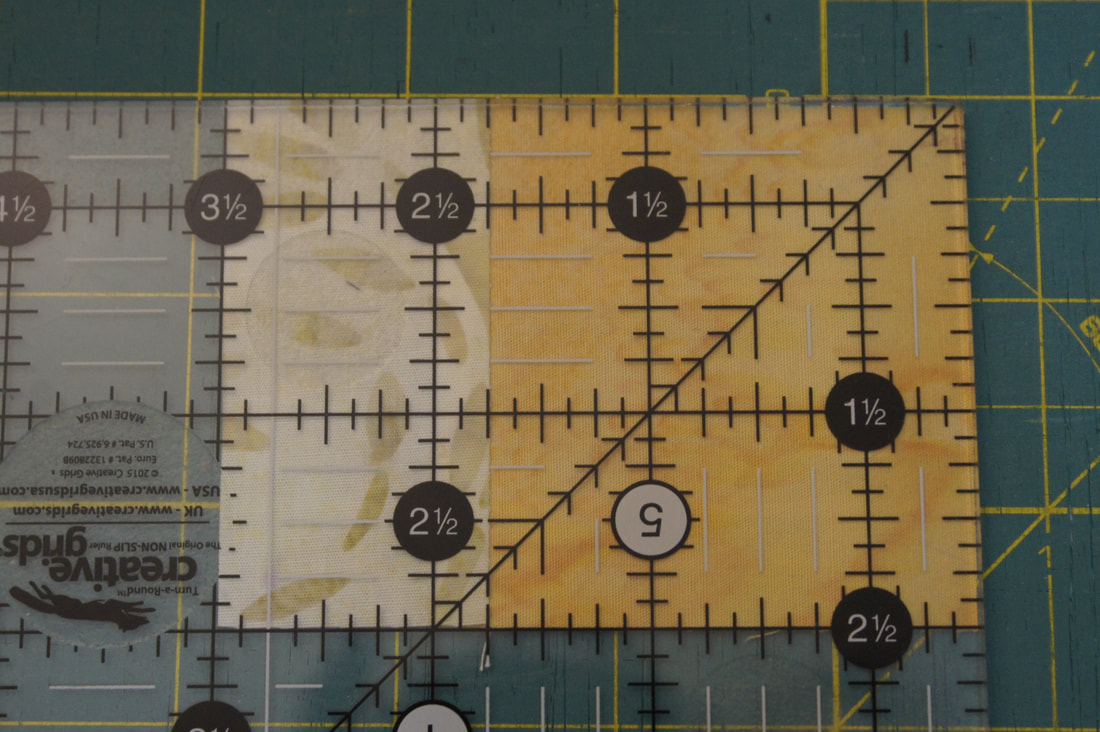
My second tip is to check your measurements at each step, at least until you are confident that your seam allowance is resulting in blocks that measure the correct size with each addition. As you add each "log" they should measure 1 1/4" across. If you need to trim, trim the side of the new log to get the measurement required. Knowing that the new pieces will always be 1 1/4" wide will help you see if you need to make adjustments to your seam allowance, either by moving your needle to the left or right or adjusting the seam guide you use to sew 1/4" seams.
Another tip for success with this block is to make sure you keep sewing the new piece in a clockwise direction on your block. So here I start by joining A and B together.
After pressing I check my measurements which are provided in the pattern.
The I add the next piece.

And the next...
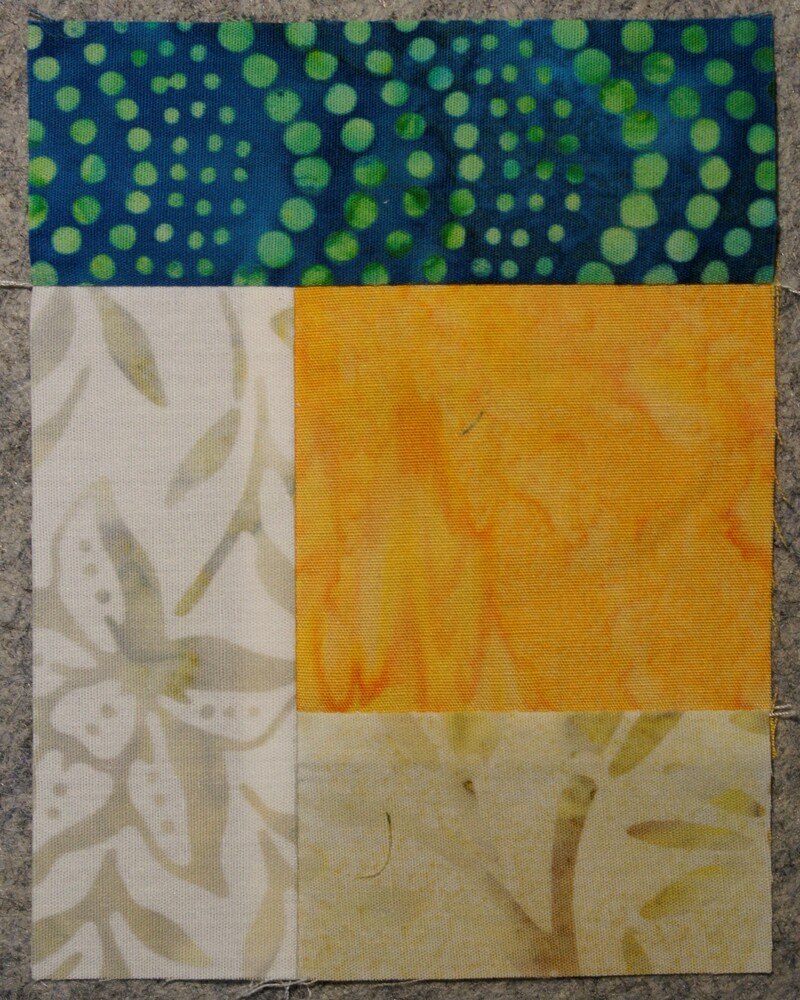
and the next.
It is actually pretty easy to add the next piece in the wrong order as it will fit on all four sides of the block. I like to stack my blocks making sure they are all facing the same direction; with the side I need to add the new "log" to laid out and ready to go by my machine. (I neglected to take a photo to show you so I hope this makes sense.)
Sometimes I actually use my finger and work my way around the block, pointing to each log as I go, making sure that I am laying each new log onto the side that continues the clockwise rotation. Here I have added the next round of "logs" to my block.
I started out by telling you about the Three Sisters. One of the cool things about the Log Cabin block is how many ways they can be put together. For my row, I set them in a way that makes me think about those three mountains. You can play with your blocks to see how you would like them to look. For another setting idea be sure and see Susie's version below.
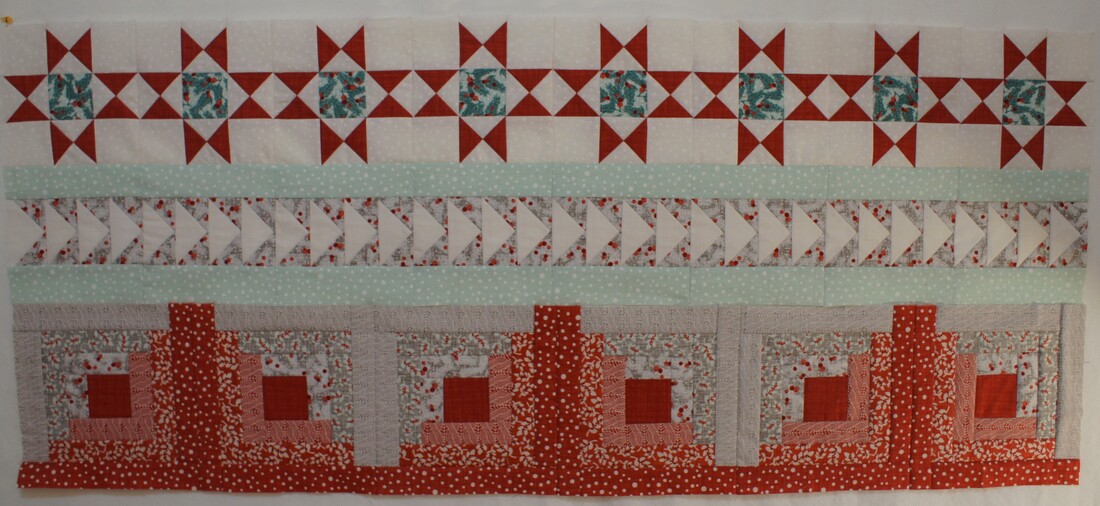
This is the row for my Christmas version of the quilt. I used a traditional red center to represent the hearth of the home, being warmed by the fire in the log cabin. 
I do have a tip for joining the blocks together. Most of the time there are absolutely no seams to match-isn't that wonderful! But a couple of times we do have seams to match and because of the way they are pressed-in the same direction, this adds a little tricky bit. Here is how I handle it.
I flip up the top seam and "lock" the seams together then place a pin to hold those seams in position. 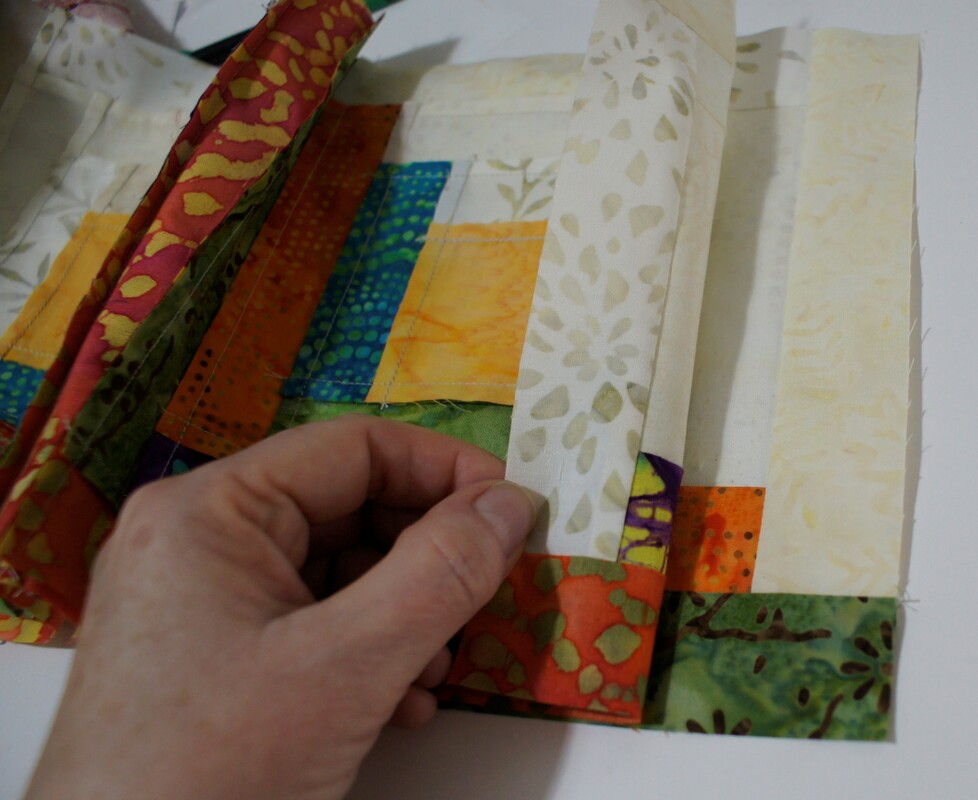
The seams we need to deal with at the bottom of the blocks.
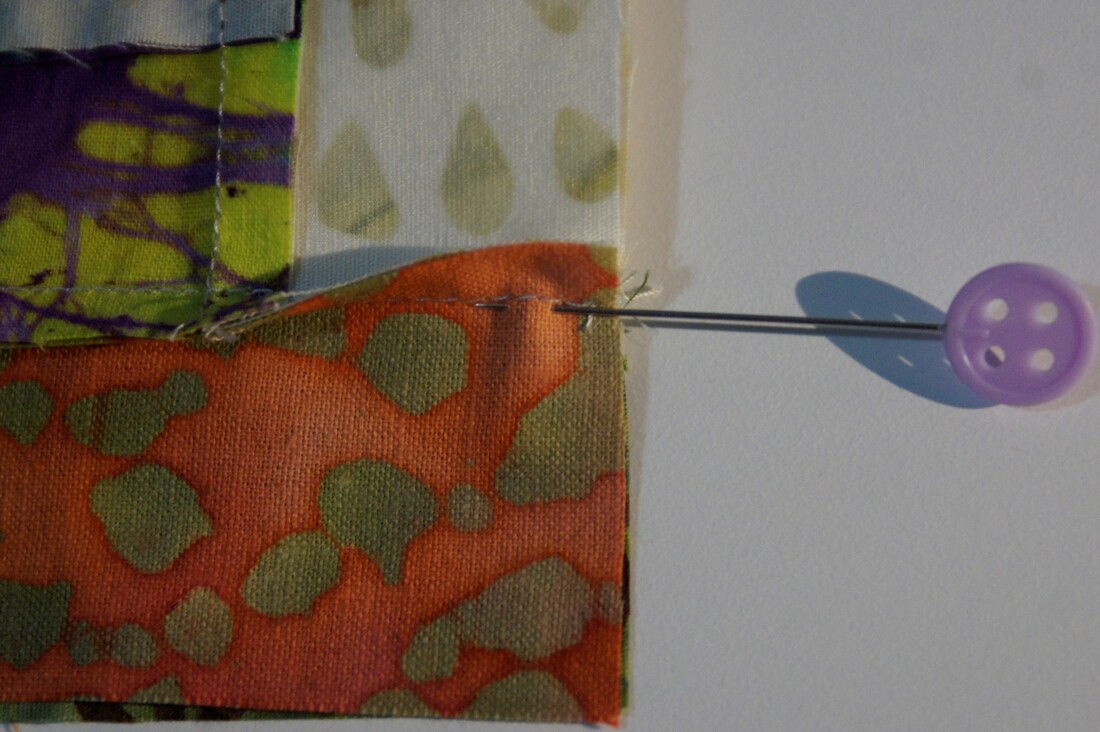
My pin in place.
When I get down to that seam I flipped up-I did not press it up, but simply used my fingers to lift it up while I matched the seams-I flip it down over the pin. 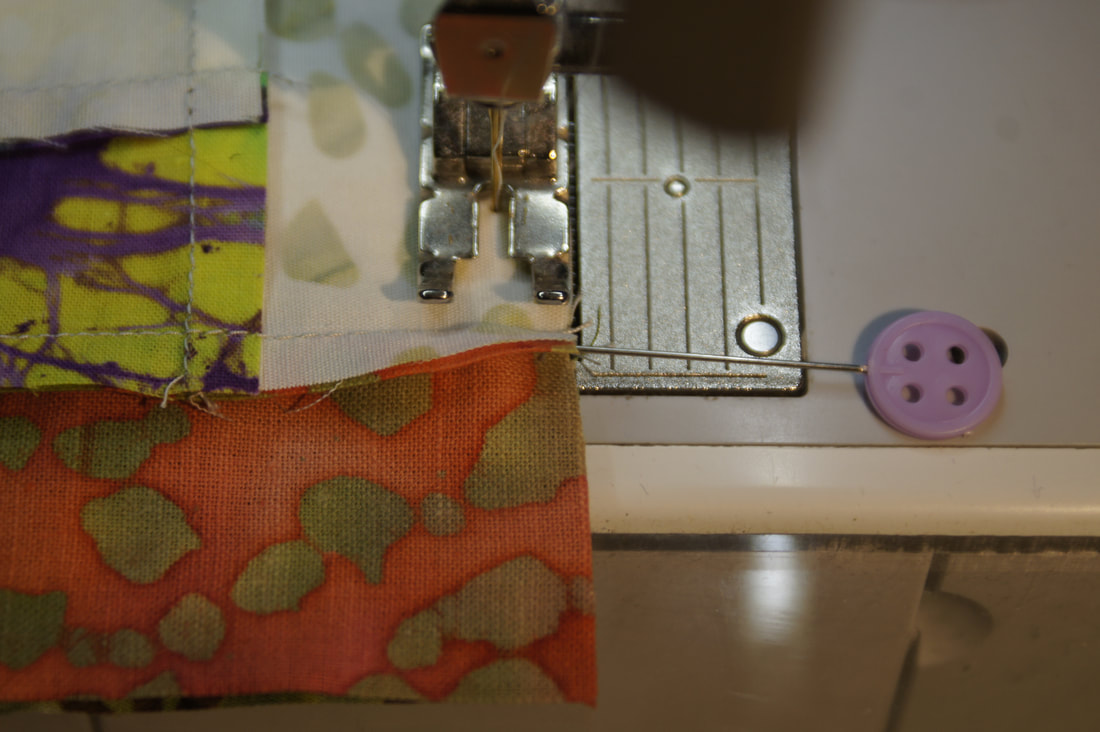
The I proceed to sew, stopping with my needle down, as close to the pin as I can get. With my needle down, I slip the pin out and finish sewing.
This gave me some very nice matching seams and the pressing on the back did not need to be changed at all.
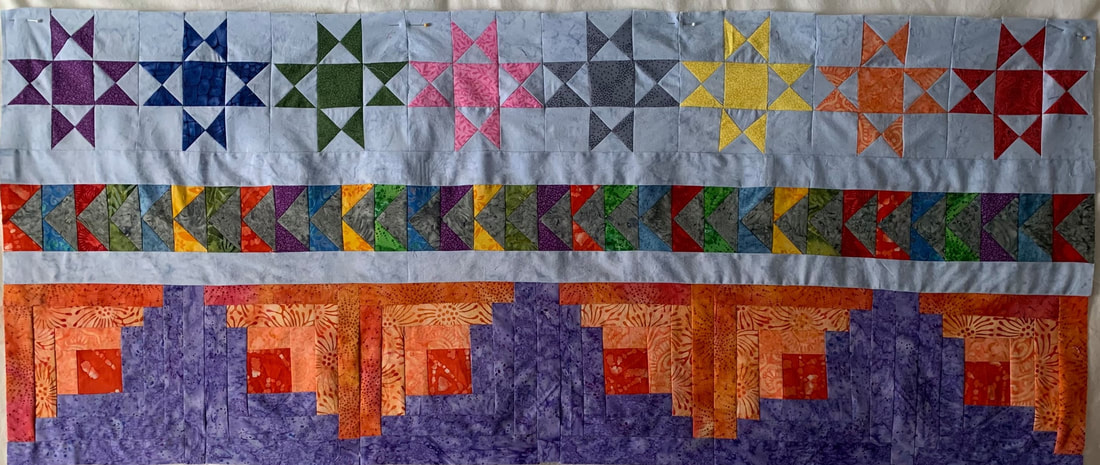
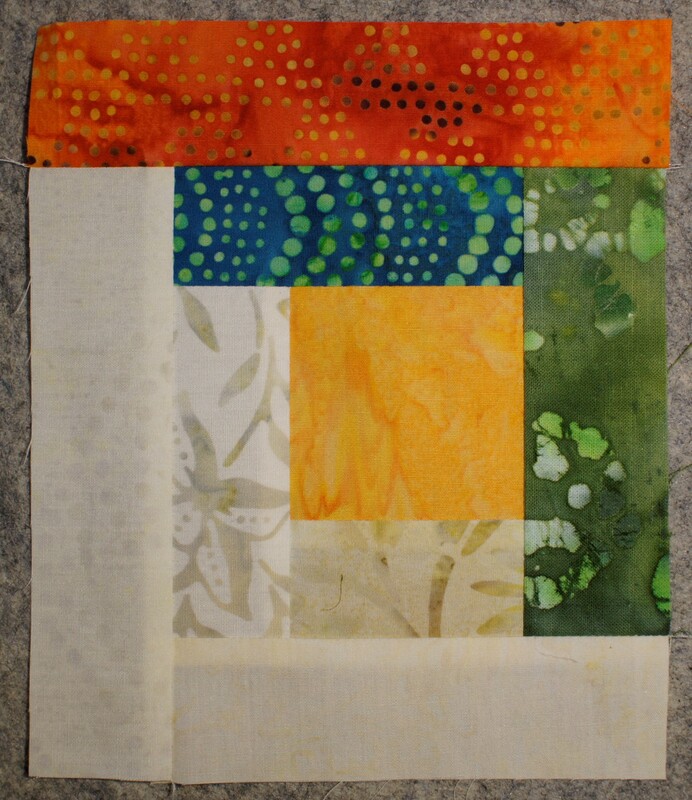
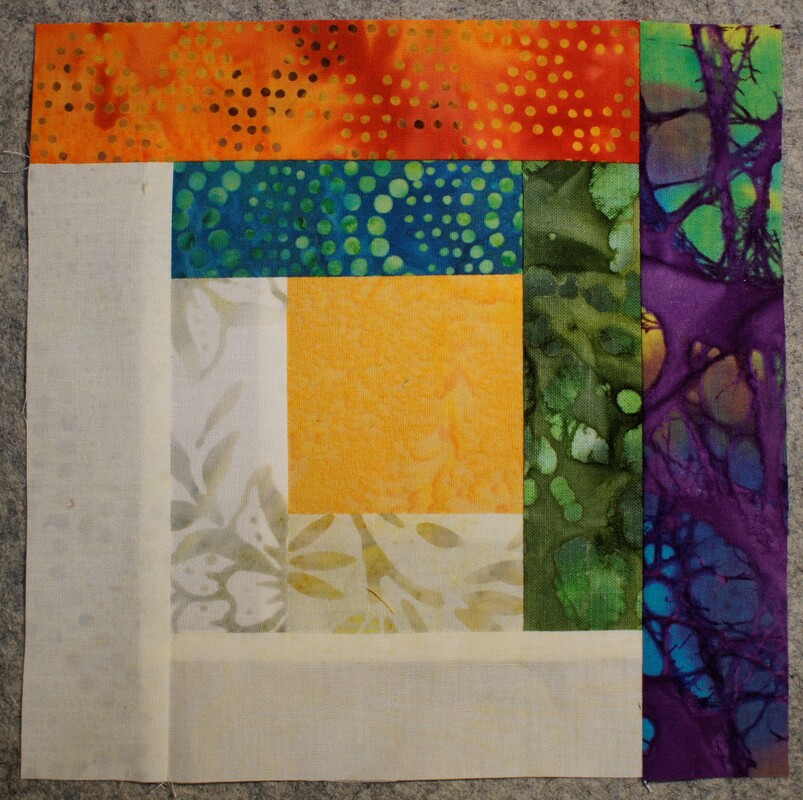
And this is how my Batik version came out.
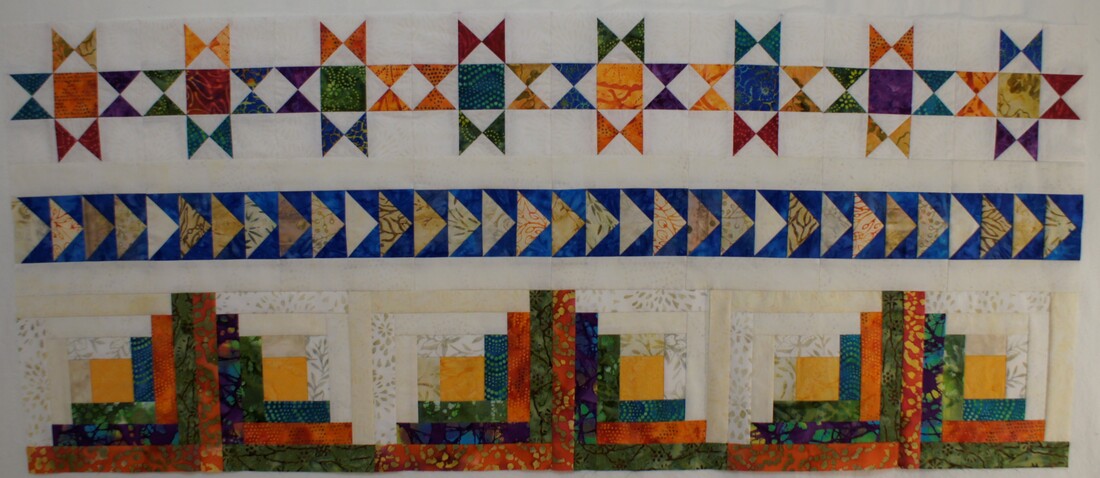
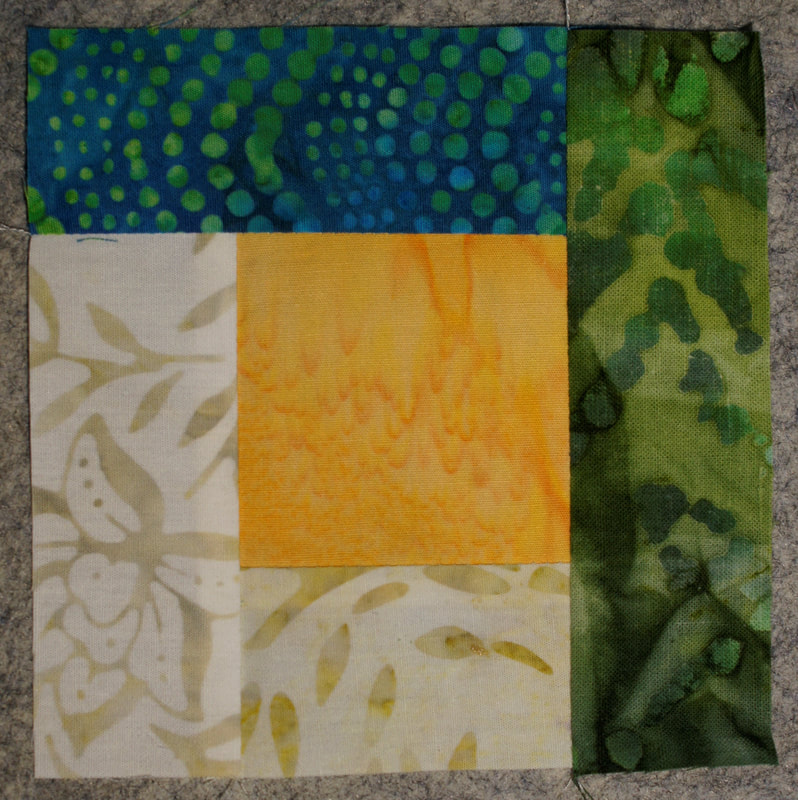
And a close-up. For this version I chose yellow for my center to represent the light in the cabin window shining out as a welcome to all.
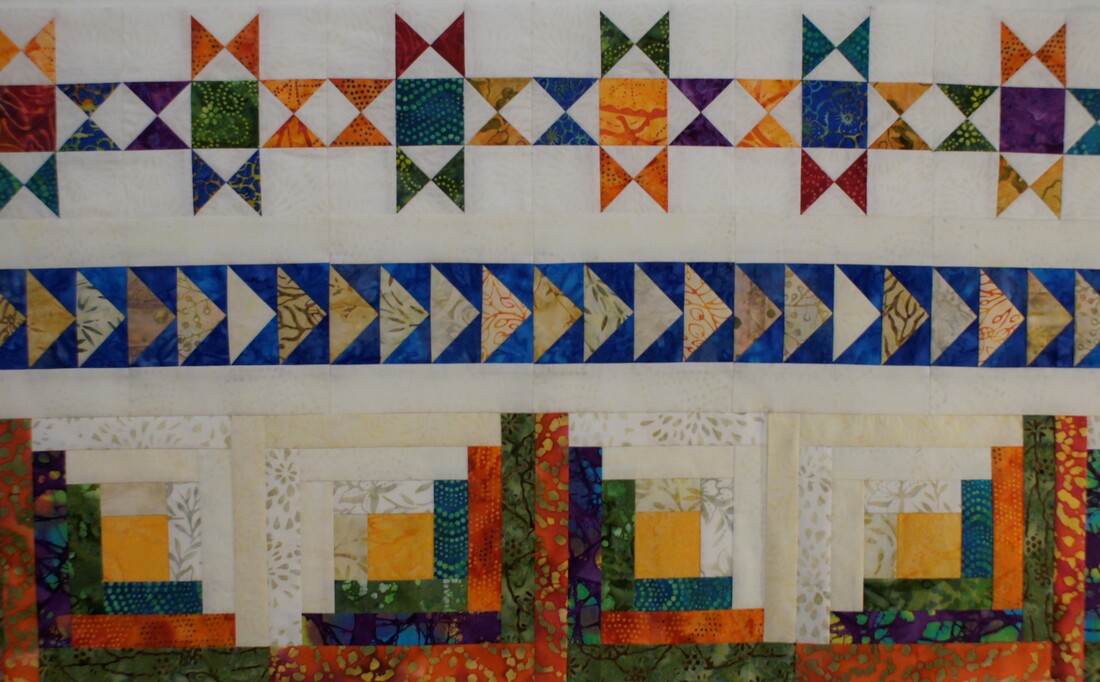
Here is how my Christmas version looks now too.
As always I have had some pattern testers working on this row with me. I love sharing with you what they have made as they inspire me, and I hope you as well, with other ways to play with fabric and colors for this quilt.
Deanna's rows.
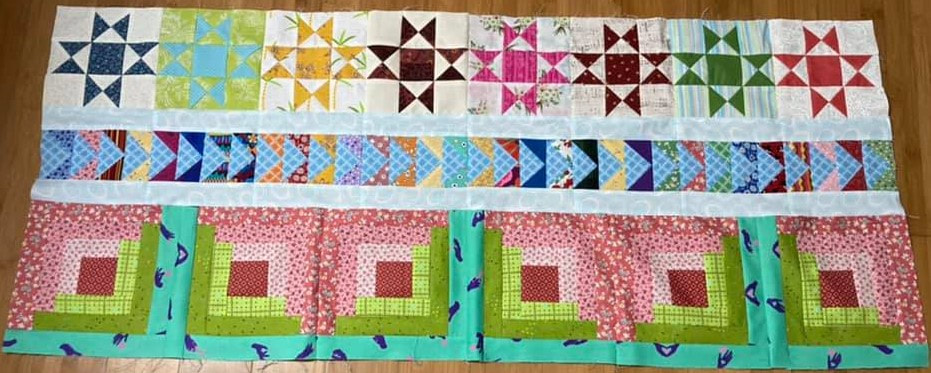
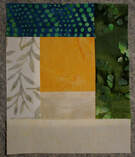
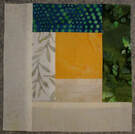
Jeanet's rows, who is choosing bright colors to use for a baby quilt.
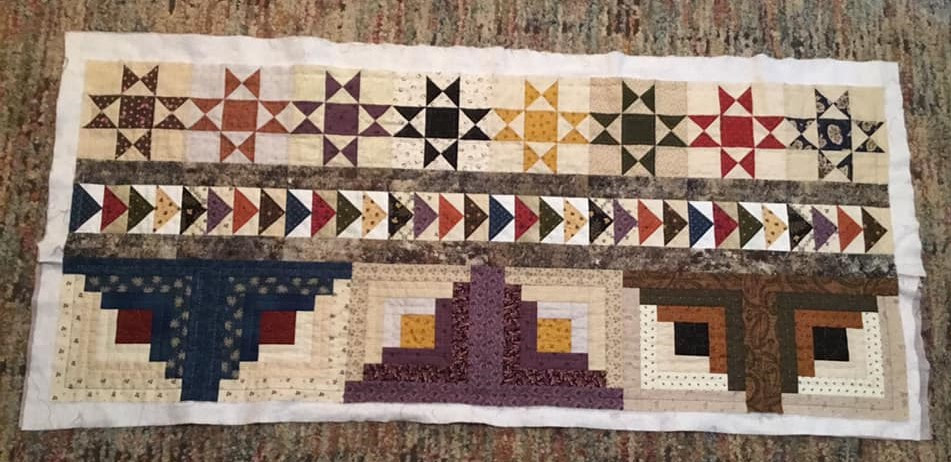
Susie's rows, who us trying Quilt as You Go (QAYG) for the first time.
Susie has been sharing her process with me and I hope to share what she is learning about Quilt as You Go later this month.
Everything you need to make this row can be found in this month's pattern which you can download from my shop for free during the remainder of this project. Click on the link below to get the patterns for this Quilt Along.
Before I go I just have to share that Susie's quilt is Nellie approved. 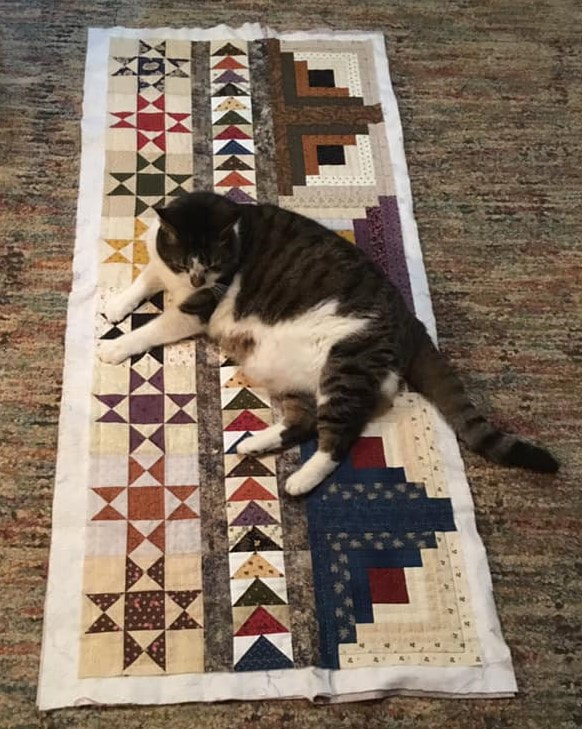
I hope you find joy in your own quilting journey this month.
Happy Quilting! Debra
Kathy
3/15/2021 09:03:35 am
i haven’t been able to begin this quilt yet, Debra, but I love how it looks and will download each design with plans to get to it one day. Thank you for such a beautiful design and great instructions.
Debra
3/15/2021 12:09:51 pm
I am glad you like it, Kathy. Enjoy your time wherever your journey takes you!
Patti
3/15/2021 11:47:51 am
Thank for your great tips and pattern! And I liked how you chose yellow to represent a welcoming light.
Debra
3/15/2021 12:11:19 pm
Thanks, Patti. I had never considered a yellow center before and I really like it too-both the meaning behind it and how it looks in the blocks.
Carol Otter
3/29/2021 10:01:53 pm
Thank you so much! I am loving it.
Susan
4/28/2021 04:46:01 pm
I hope all is well with you. It isn't like you to disappear. Comments are closed.
|

Welcome to the site of Debra Davis-a woman who loves the Lord and loves to quilt.
My other blog where I share about my walk of faith:
Sitting at His Feet 
|


 RSS Feed