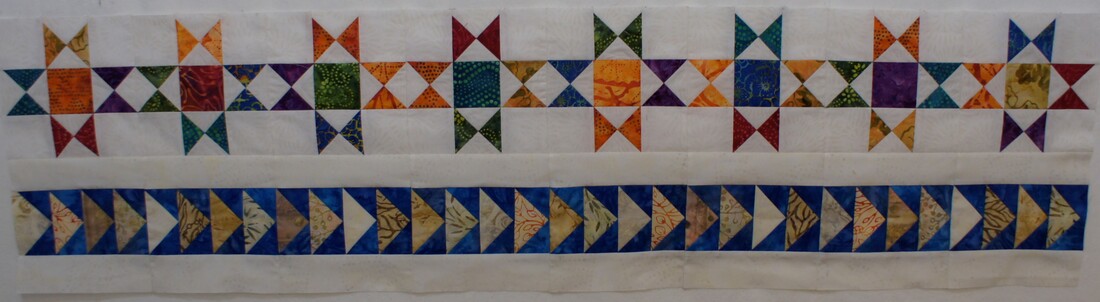
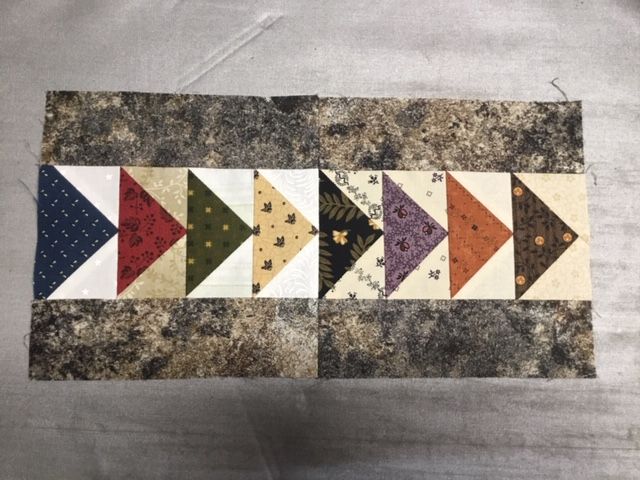
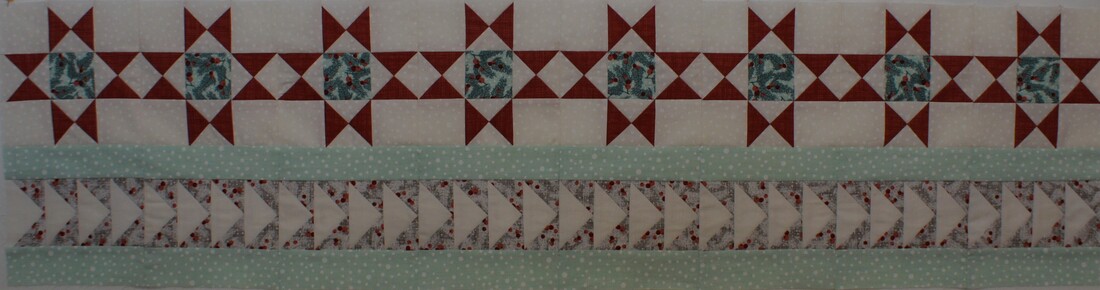
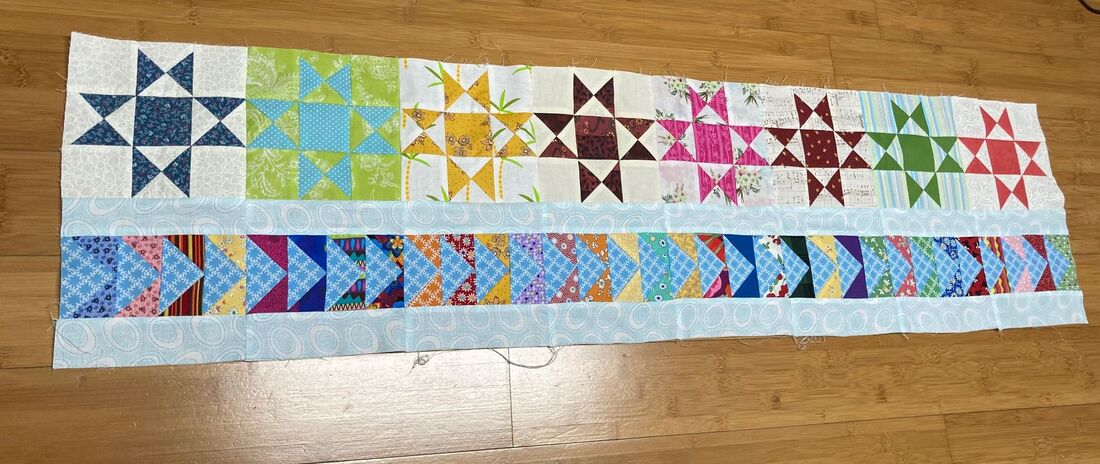
Rows 1 and 2 of my Batik version
For this month's row we will be working with Flying Geese. This is another skill that is valuable for the quilt making process. Flying Geese can be used on their own and also work well in many other blocks as well. They key for working with them and getting sharp points is to learn how to trim them accurately. I will share several methods for achieving that in the following tutorial so bear with me while I cover those. The link to download this month's pattern can be found at the end of this post. You will need this to complete the row.
Before we get started I want to share a couple of overall tips. First, if you have not discovered the wonders of starching your fabric now is a good time to give it a try. I starch before cutting my pieces out. I have used Faultless spray starch as well as Best Press and both give good results. My second tip, is when it comes to pressing, another thing that has improved my piecing is to use a wool pressing mat. However before investing in that I simply laid a large towel on top of my ironing surface. (One that had some plushness to it.) The difference this made it getting pieces to lay flat you will just have to see for yourself. All of these things work in combination to improve the accuracy of our piecing and the look of our final quilt. Now let me show you how I like to make Flying Geese.
No-waste Method for Making the Flying Geese units.
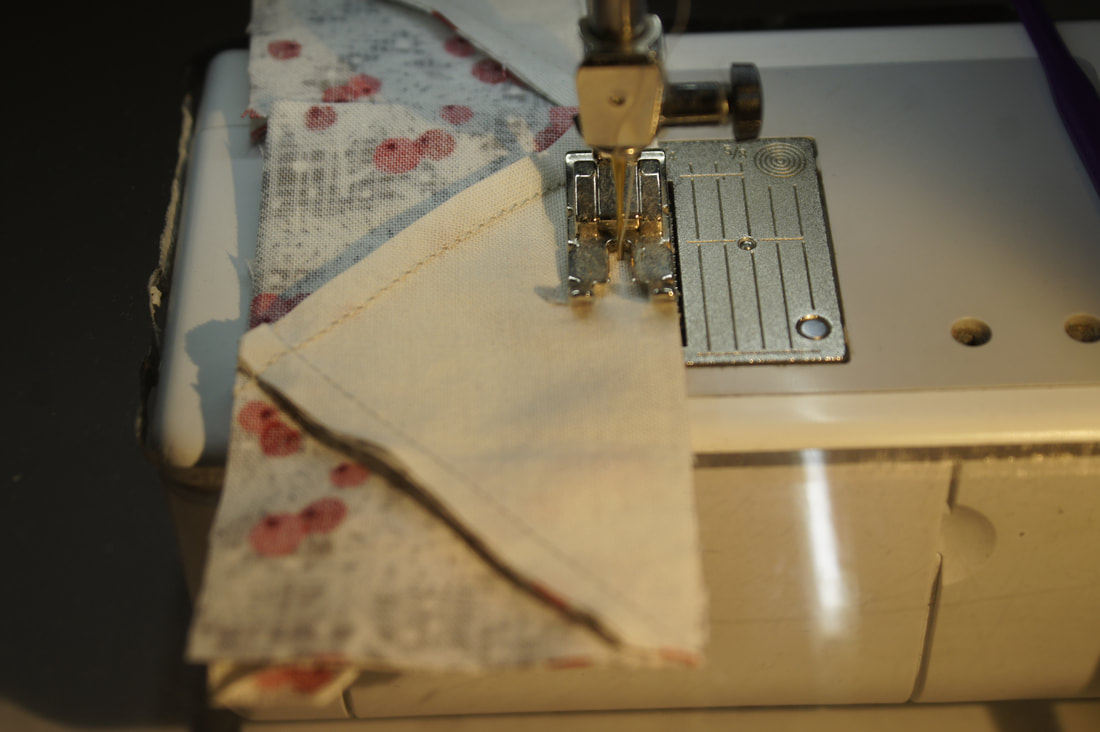
The first thing we will do is add two of the small squares to the larger squares. As you sew it works best to face those squares so that they point away from your needle as you sew. With a 1/4 inch presser foot I am able to use both sides of the presser foot as a guide which comes in handy for being able to do this.
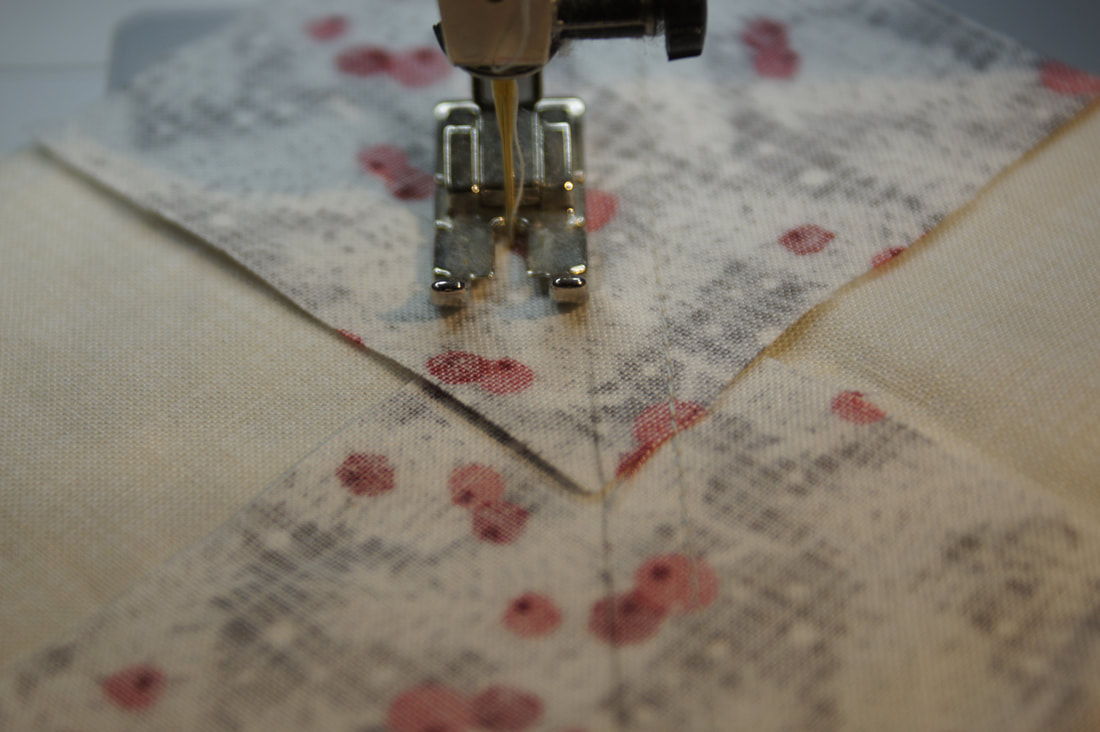
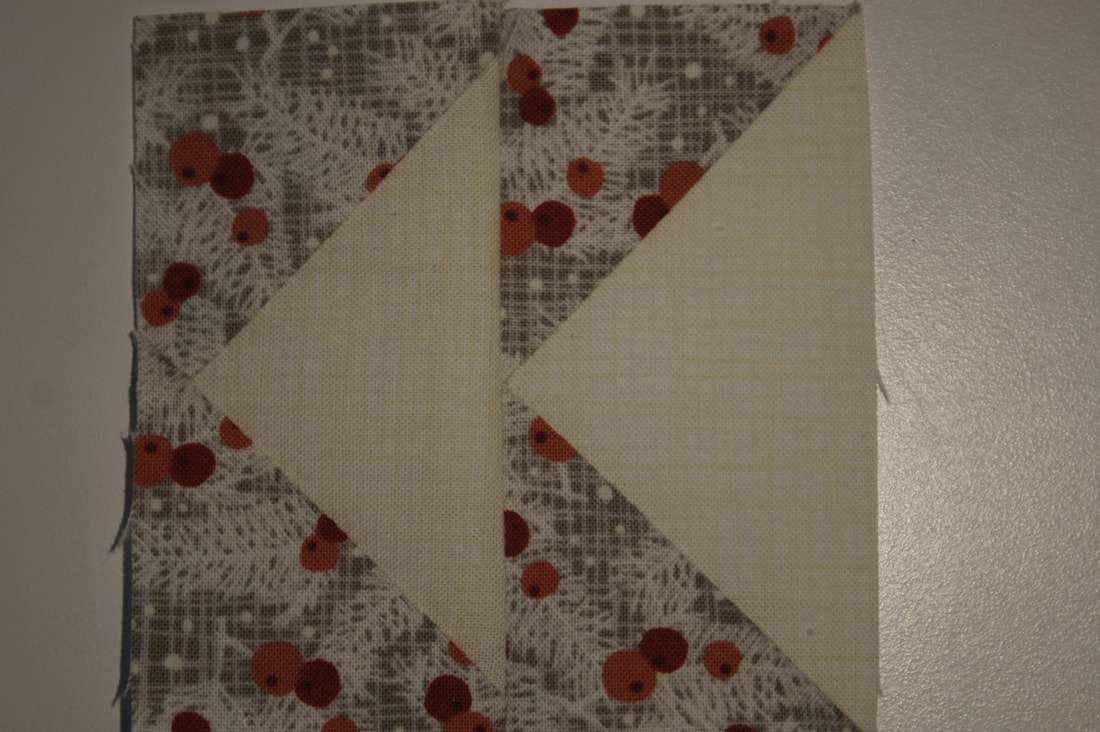
Once we cut apart, press and trim, that first step we add the remaining small squares to the units and sew 1/4 inch from our drawn line in the same manner. If this is your first time using this method it looks pretty strange at this point but the results are great and really speed the process of making Flying Geese units.

After the units are cut apart and pressed all that is left is to trim them to size. I mention in my pattern that I have a favorite ruler for this. There are lots of options, but I will start by sharing why I love the Bloc_Loc rulers for trimming Flying Geese. The have a channel that "locks" into place on the seam and this helps to keep the ruler from slipping while you trim. It also means that I know I will have 1/4" of seam allowance above the center point of my Flying Geese as this seam allowance is built into the ruler. This is vital to getting sharp points in our finished projects.
All I do is lay the Bloc_Loc ruler in place and trim the right side and top. 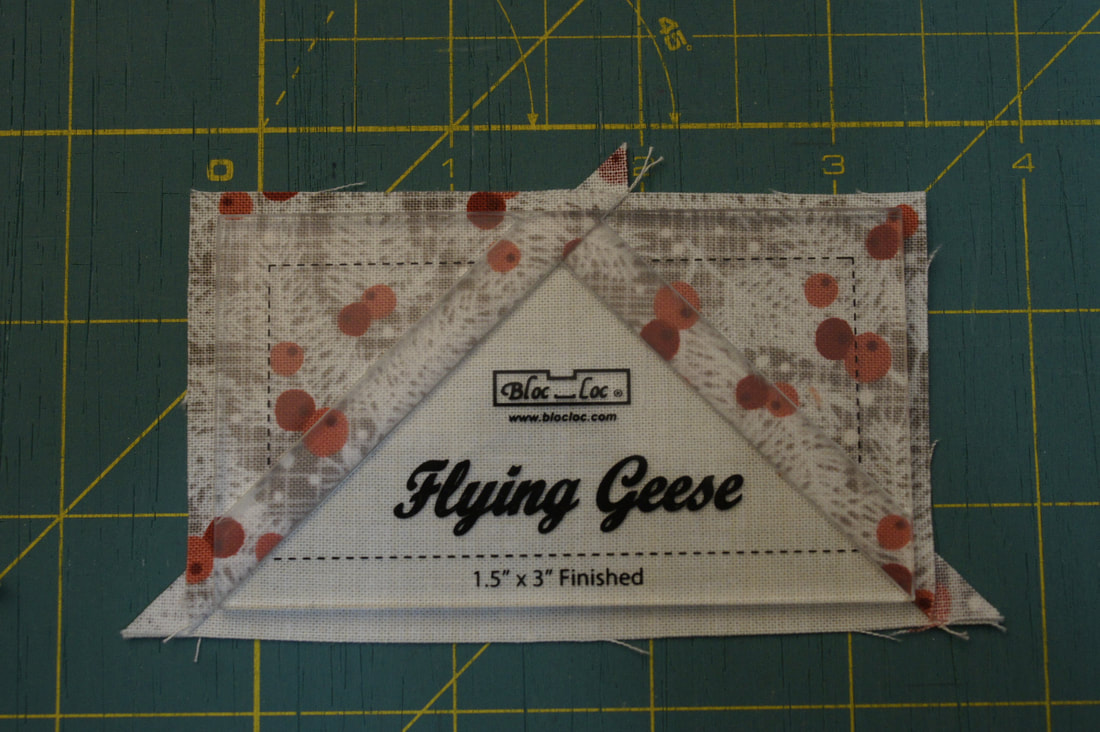
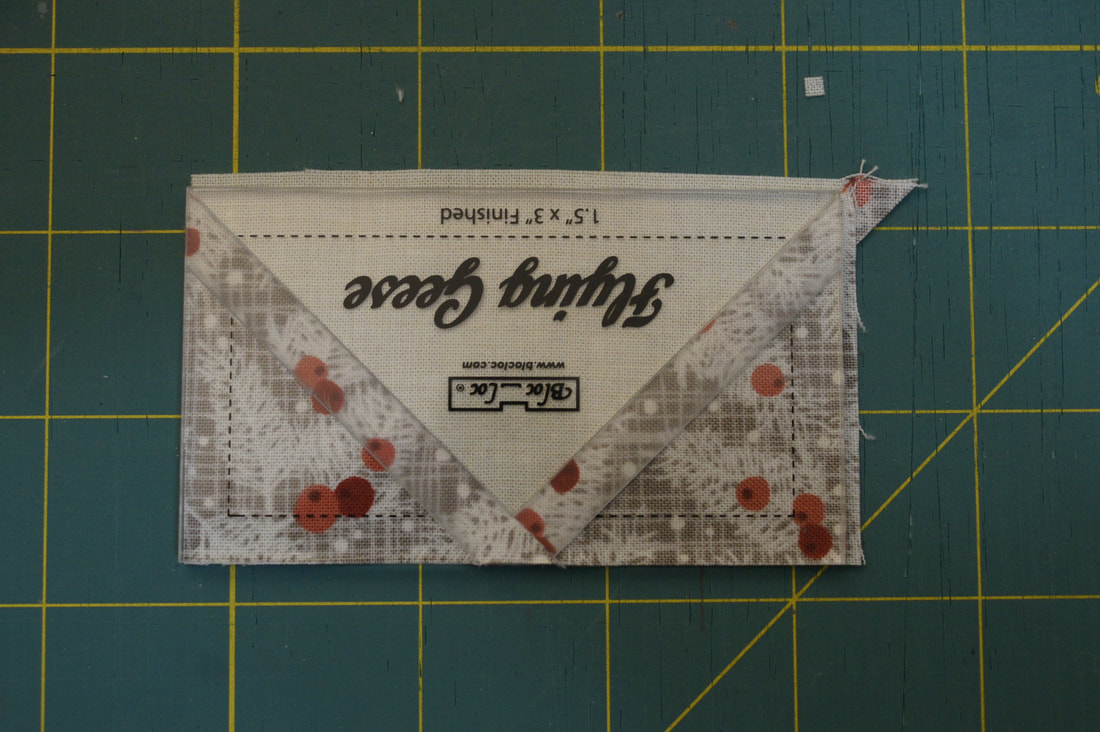
Then rotate it and trim the remaining two sides. This is the most expensive of the rulers for trimming Flying Geese but I have found my investment in them several years ago to be well worth it.
I really want to give you some options here as I do not want to insist that you purchase a specific product to make my quilts. Another ruler I have used was designed by Creative Grids. I love Creative Grids rulers as they have the ability to grip the fabric and so the problems of slipping on the fabric while trimming is almost completely eliminated.
With this ruler you are able to cut several sizes of Flying Geese, making this a much more budget friendly choice. The first step is to position the ruler using the guidelines for the triangle of the trimmed size of your unit... in this case 1 1/2" x 3". The ruler is clearly marked for "Trim #1". 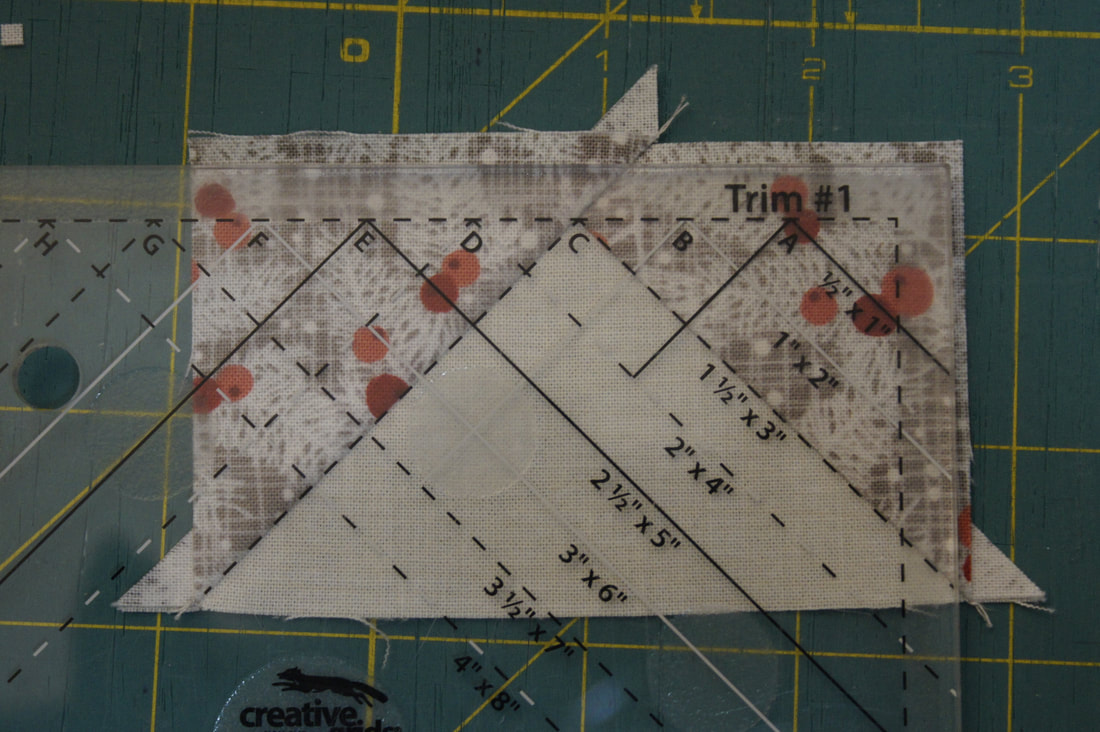
Next you rotate the Flying Geese unit and the ruler so that you have the markings for "Trim #2" showing and line up the trimmed edges with the size you need. Once again markings for the triangle lay on your seams. I have found this ruler to be good at giving me that 1/4" seam allowance above the point of the triangle to be good as well. It just takes a little more effort to make sure you have things lined up correctly, but it does work quite well. I have found that even though these rulers are designed to "grip" the fabric you do have to apply some force to keep it from slipping while you trim. 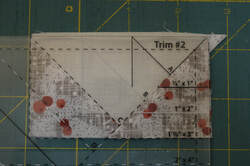
Before I show you how to trim these using a regular ruler I want to share the ruler one of my pattern testers prefers to use. I have not tried this one, but Susie was kind enough to provide photos of her process using Deb Tucker's Wing Clipper ruler. This is another one that will allow you to trim several sizes of Flying Geese with one ruler. Bear in mind with this ruler that you will use the guidelines for the trimmed size of your Flying Geese rather than the finished size as the previous rulers have used.
Susie starts by lining up the X at the top of the ruler with the size she needs, in this case 1 1/2" and then makes her first cuts. 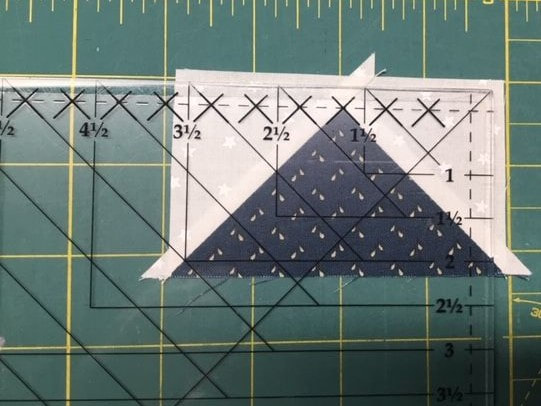
She then rotates everything and lines up the ruler with the trimmed edges of her unit for the size needed. Note too that there are diagonal lines that match up with the seams as well. I watched Deb Tucker's video and she actually starts with this part of the ruler for her first trim and then used the side with the X for her second trim. Either way will work as you can see.
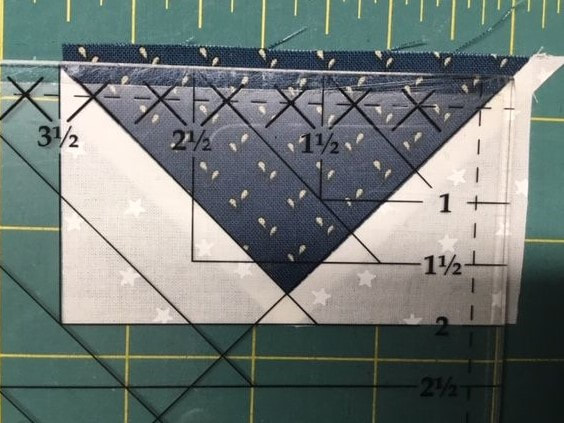
Again, the wonderful thing about these rulers is how you end up with the perfect seam allowance needed to achieve those sharp points. And look at Susie's points!
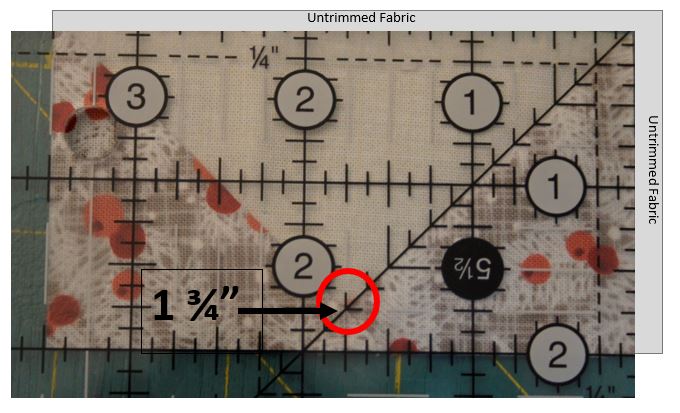
Now, if you need to trim these with a regular ruler I want to give you that guidance as well. You don't need to spend money on a new ruler, but you do need to take care when you trim your Flying Geese to size. In order to trim these so that you have the proper seam allowance you will need a trimmed size of 2" x 3 1/2". To begin lay the diagonal line of your ruler on the seam of the Flying Geese. (I got so excited about trimming my Flying Geese that I forgot to save one out to show you how to trim them, lol. So just imagine that the gray is the untrimmed fabric and that there really is 1/4 inch of ruler above the dashed line on the top and side.) We also need to know the center measurement, which in this case is 1 3/4". That mark goes right at the tip of the triangle. I have circled it for you. This is vital for getting those sharp points.
Rotate the unit and this time simply line up the trimmed edges with the ruler lines for the size you need to trim to. In this case the 3 1/2" inch and 2" lines as indicated by the arrows. Trim away the extra.

As you can see, this method is a little more fiddly, but with care you can still get great results. (At the end of this post you will find links for each ruler used in this tutorial.)
Now on to finishing our row for this month...
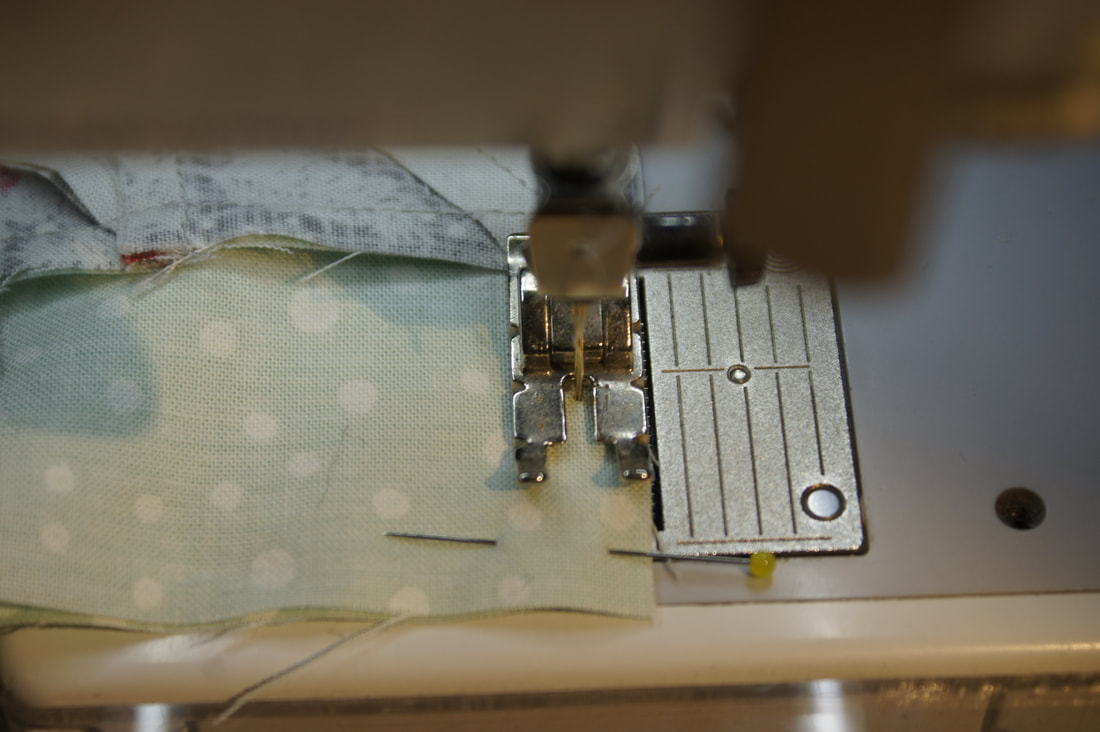
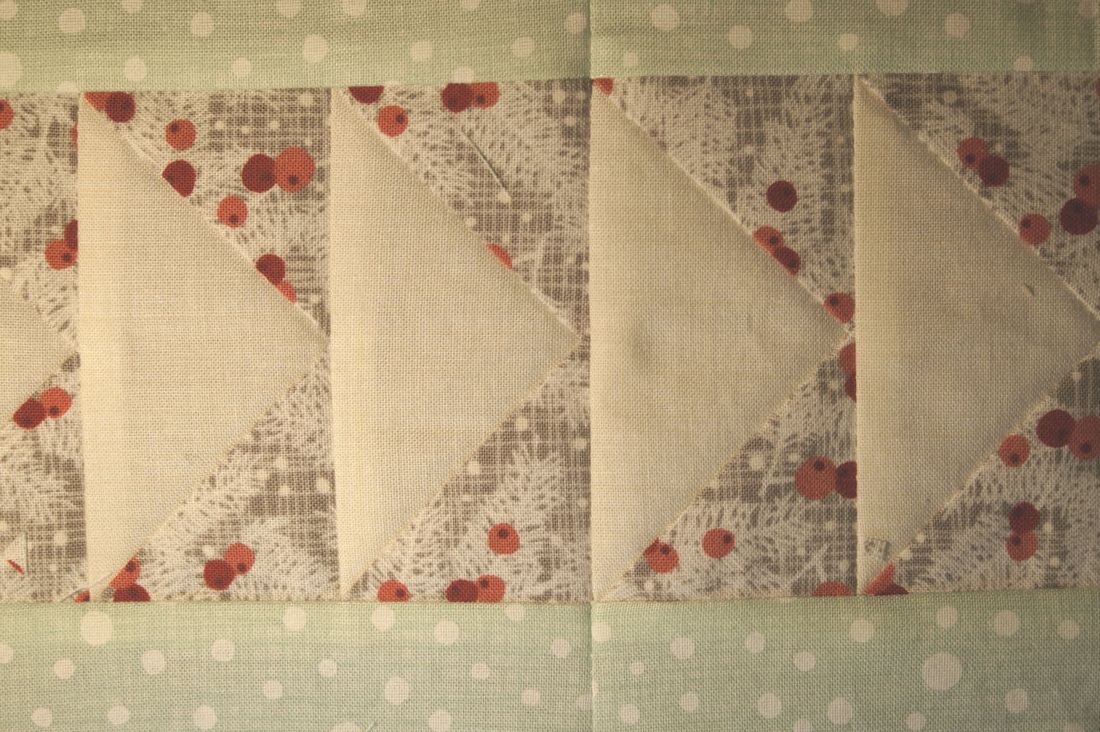
To make the block we need to join four Flying Geese units together. I found it worked best to sew with the bulky seam of the point on the bottom. We often try to rush this process, but whenever bulky seams are involved I have found that by slowing way down as I sew over them that I get a much straighter seam over the bulky section. I have more control and the piece is less likely to shift out of position than if I sew with a faster speed.
You can see my results here. I have kept my points on the Flying Geese nice and sharp by both being careful with my trimming and my piecing.
Follow the pattern instructions for completing the blocks used in this row.
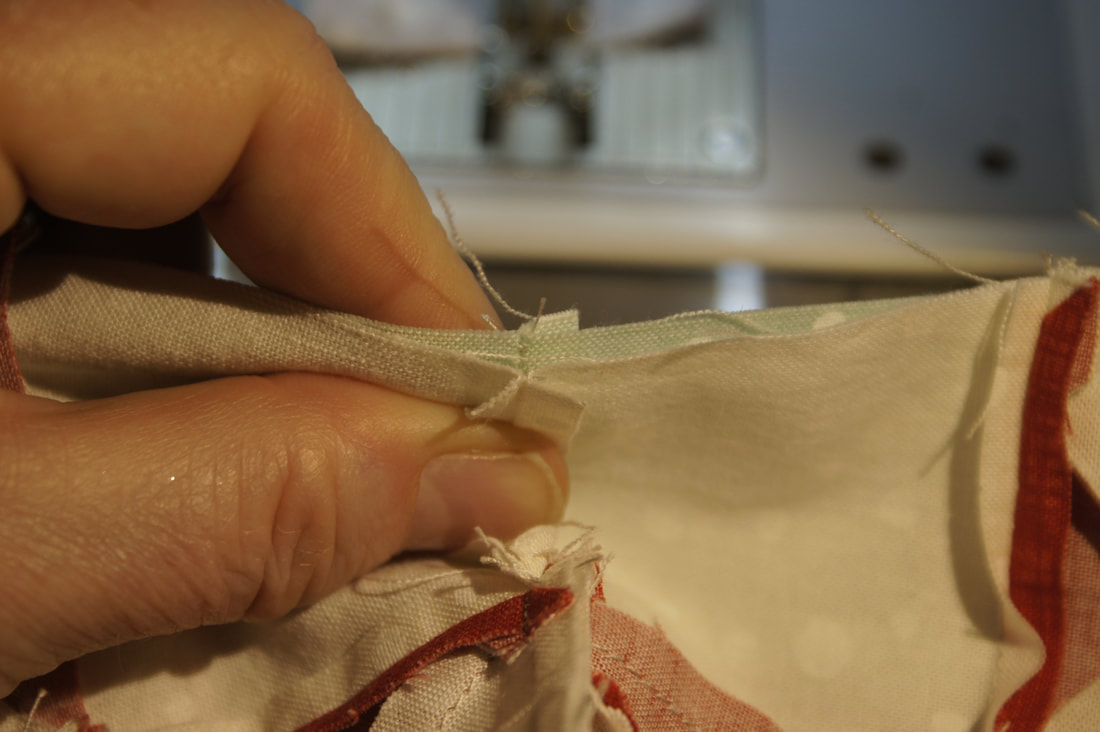
When it comes time to join those blocks together I have a few tips to share with you. Joining seams that are pressed in the same direction can be tricky. But with the bulk of the Flying Geese seams I really did like the look if I pressed them away from the border strips. So here is how I solved the problem of matching those seams. I flipped the seam on the back piece down so that the two seams would lock together and placed a pin to hold them. 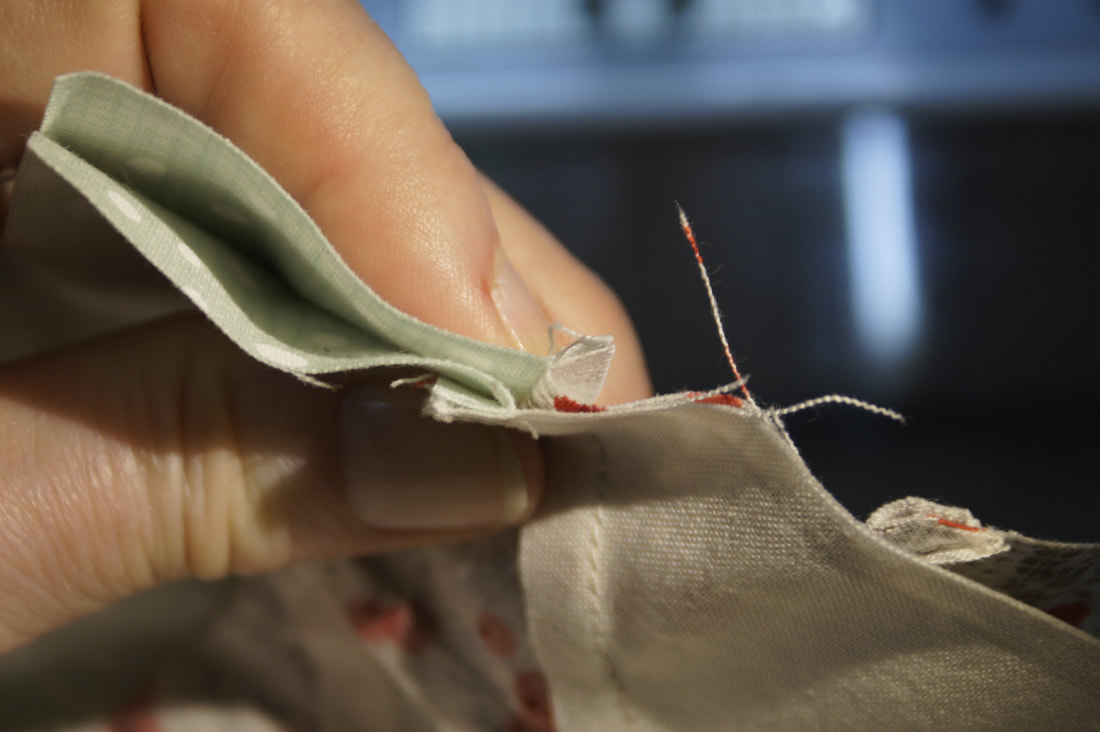
I did not place a pin on the next seam as I found simply pinning the bottom edges of the two blocks was all I needed. Though you could use the same pinning process on that second seam as well.
That left me with a seam that looked like this.
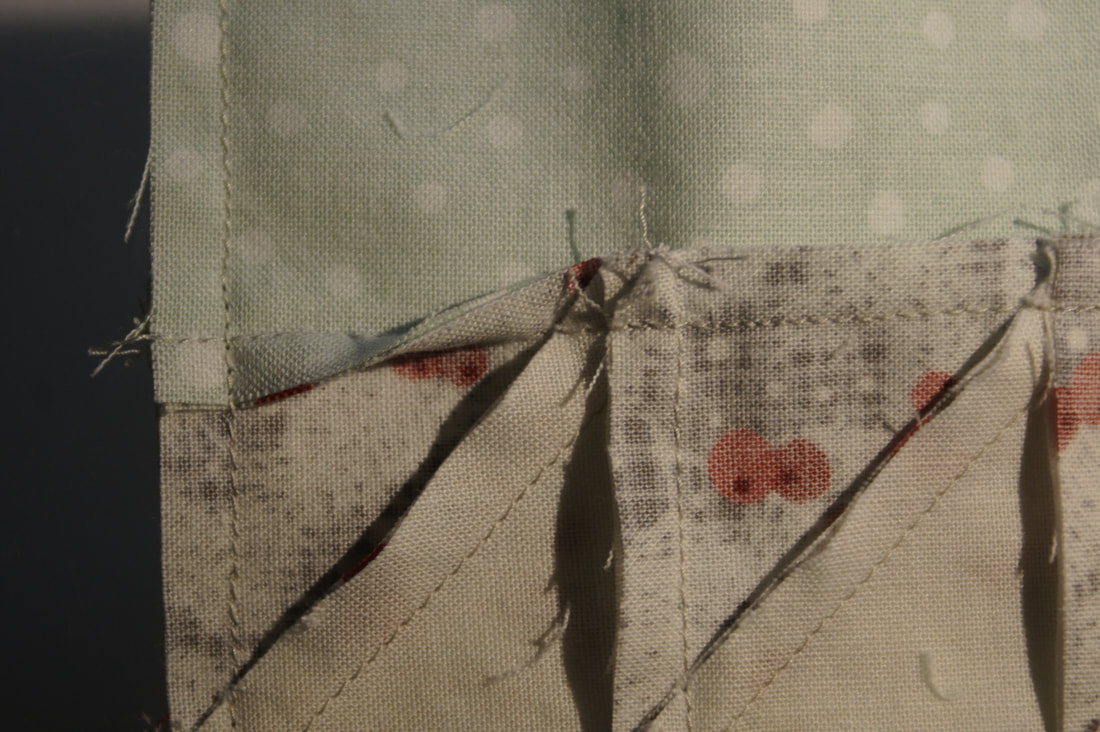
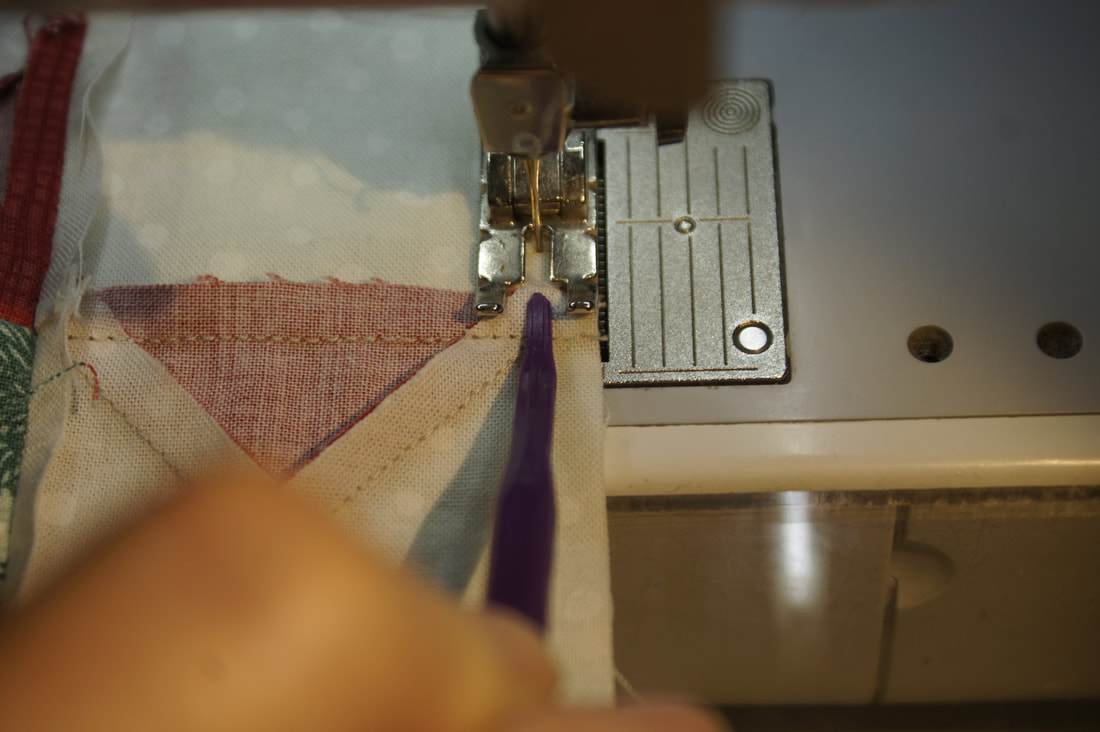
I then employed a little technique from my seamstress training and clipped that seam, being careful not to clip the stitches.
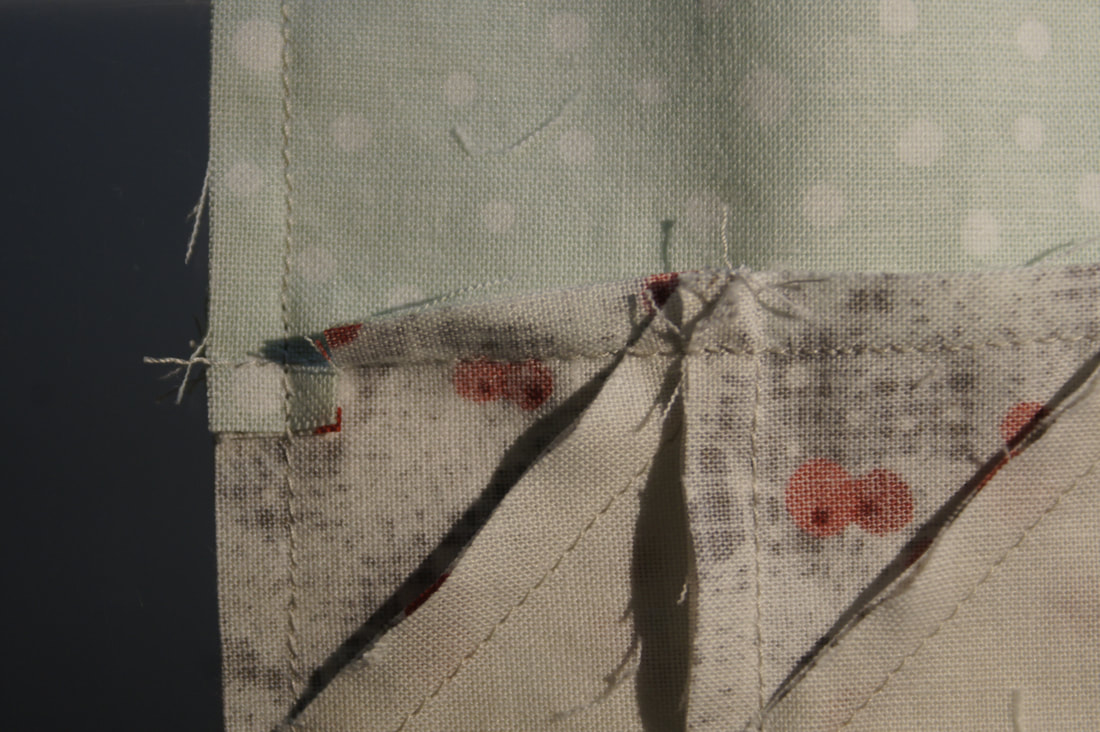
Everything then laid beautifully when I pressed them. You can also see how well those border seams lined up.
Once all the blocks have been joined to make the row it is time to join this row with last month's row. Since I have pressed the seams open on Row 1 I was able to lock those seams into place with Row 2. I used pins to hold the seams together.
Sometimes those seams that are facing up towards your needle can give you a wee bit of trouble. I stiletto can help encourage those seams to lay down in place as you sew. Again, slowing down over bulky seams is key here.
My first two rows are done!
For more inspiration look at what some of my pattern testers did this month.
Jeanet's
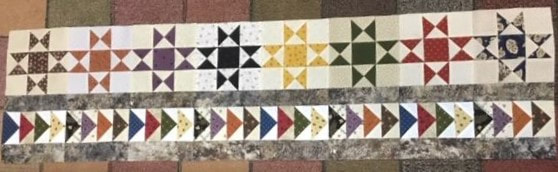
Susie's
Click the button below to get the pdf pattern for this month's row.
The following are affiliate links for the rulers I mentioned in my tutorial. I do get a small commission if you purchase through the links I provide which helps me out.
Bloc_Loc ruler. This is for a set of the two rulers I use most often which includes the 1.5" x 3" inch used in this tutorial. It is a much better deal than buying them individually.
The Creative Grids Flying Geese Ruler
Deb Tucker's Wing Clipper
Creative Grids Basic Ruler (the one I use most for all of my blocks)
I hope you enjoy this month's block. I do my best to not have any issues either on my blog or in my patterns, but as always if you have any problems please feel free to contact me. I am always happy to help! Contact Me
Happy Quilting!

Nancy Paris
2/16/2021 09:15:37 am
Thank you so much for your generosity .
KJ
2/16/2021 03:08:37 pm
Thank you for such great patterns and detailed tips. 2/16/2021 04:34:33 pm
Though I make them a different way, I love FG blocks and use them a lot. This is a super row.
Connie
2/17/2021 04:52:20 pm
Thank you for the next part to this wonderful pattern, and especially for the tips in its construction! Very helpful!
Susan
2/17/2021 05:58:32 pm
Thank you for the pattern and detailed instructions. Comments are closed.
|

Welcome to the site of Debra Davis-a woman who loves the Lord and loves to quilt.
My other blog where I share about my walk of faith:
Sitting at His Feet 
|


 RSS Feed