
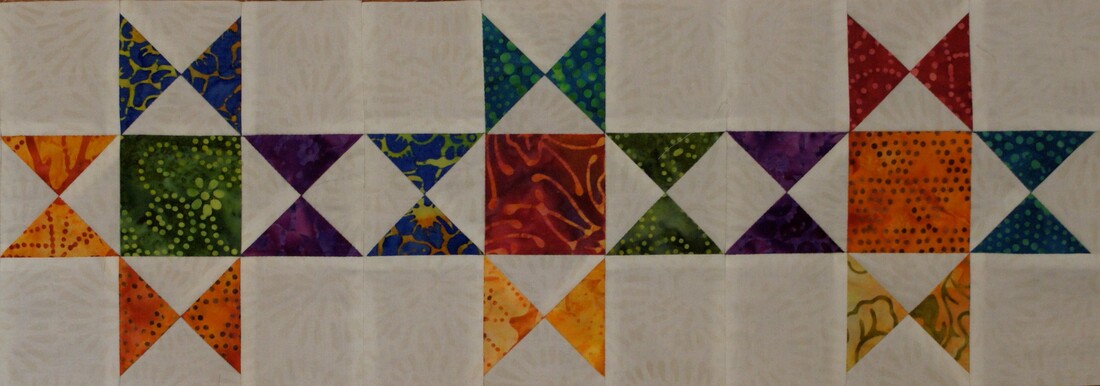
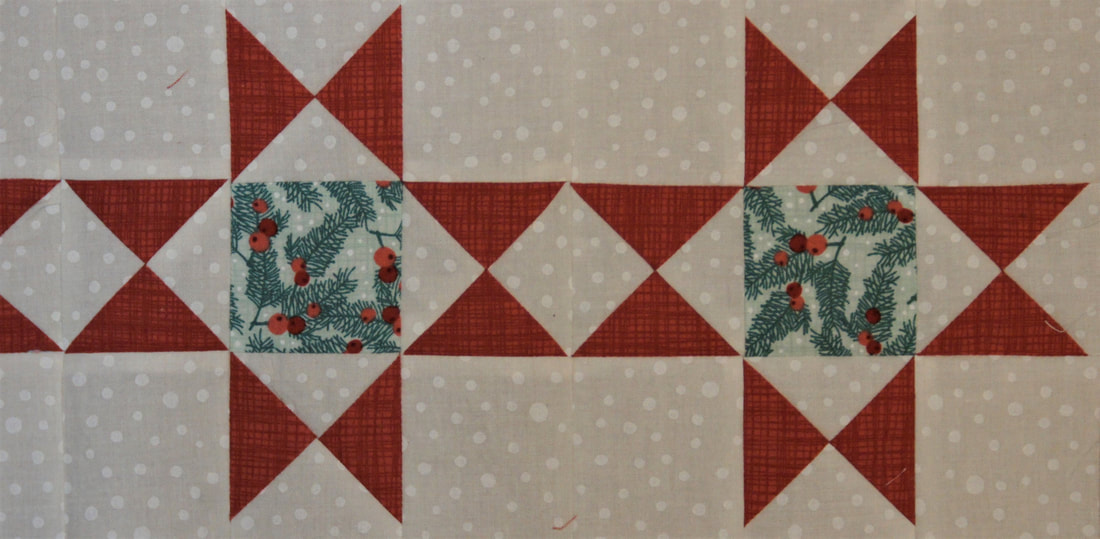
Welcome to the first month of this year's BOM. Our first block is one that may be familiar to you. Ohio Star. I made two versions of the first row in our quilt. One that just is full of the colors of the rainbow with my batik scraps. And the other with a Christmas theme using some fabric from my stash. This quilt is mainly going to be red and white with hints of green and grey thrown in.
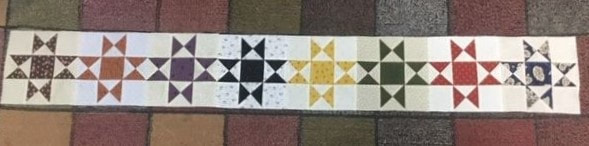
For my rainbow version I used eight different fabrics plus the background fabric and cut out the pieces to make one star from each, then mixed everything up after putting the hourglass units together. 
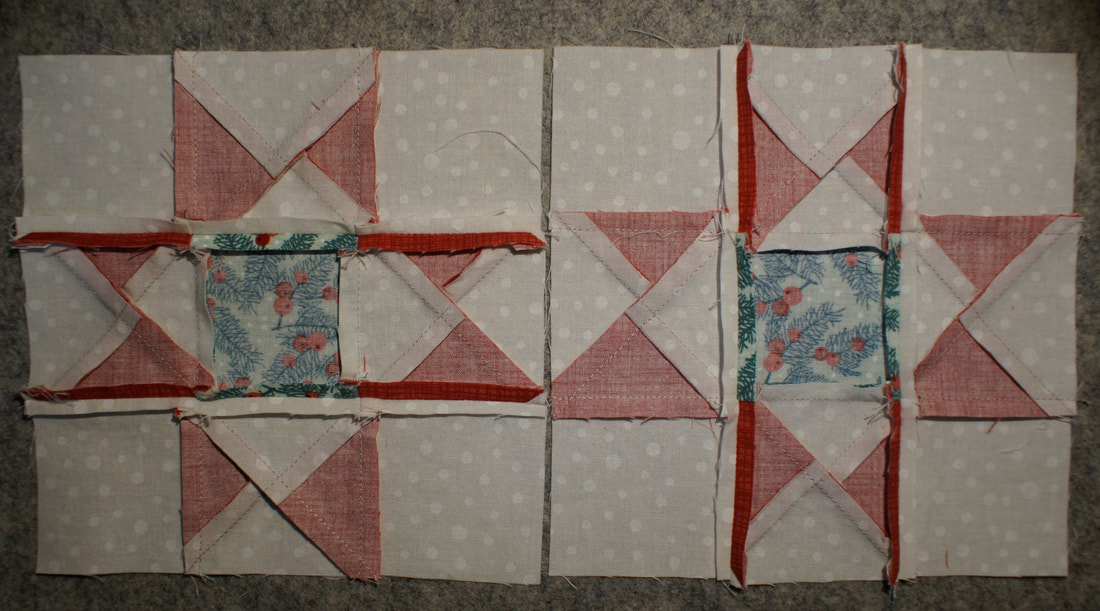
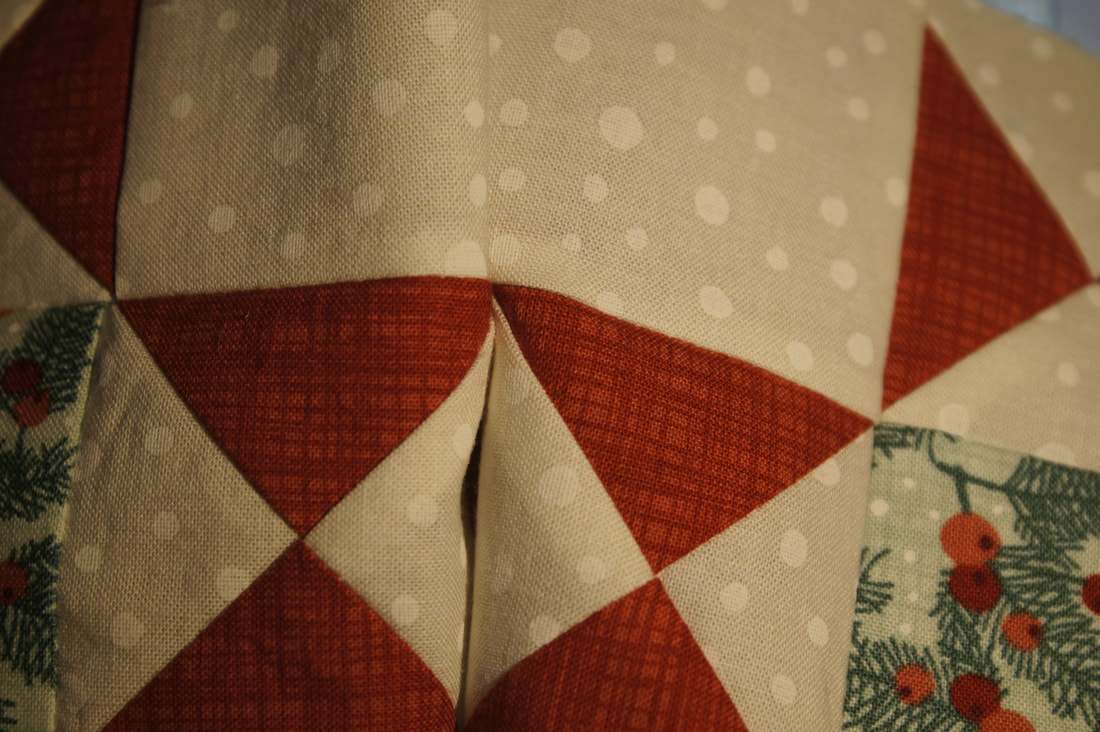
And my Christmas themed version.

Whenever I begin a new quilt series I like to review some of the basics that will help us all be successful with our piecing. With a number of identical pieces to sew this is a good time to make use of Chain Piecing. This is my process for sewing the Half-square Triangles:
When I add subsequent pieces to be sewn I lift my presser foot and place them so that they butt right up to the needle. (I always so with my needle in the down position so that when I stop sewing my needle is down as shown in the photo.) I have lined up the edge of my 1/4 inch presser foot with the drawn line as well. 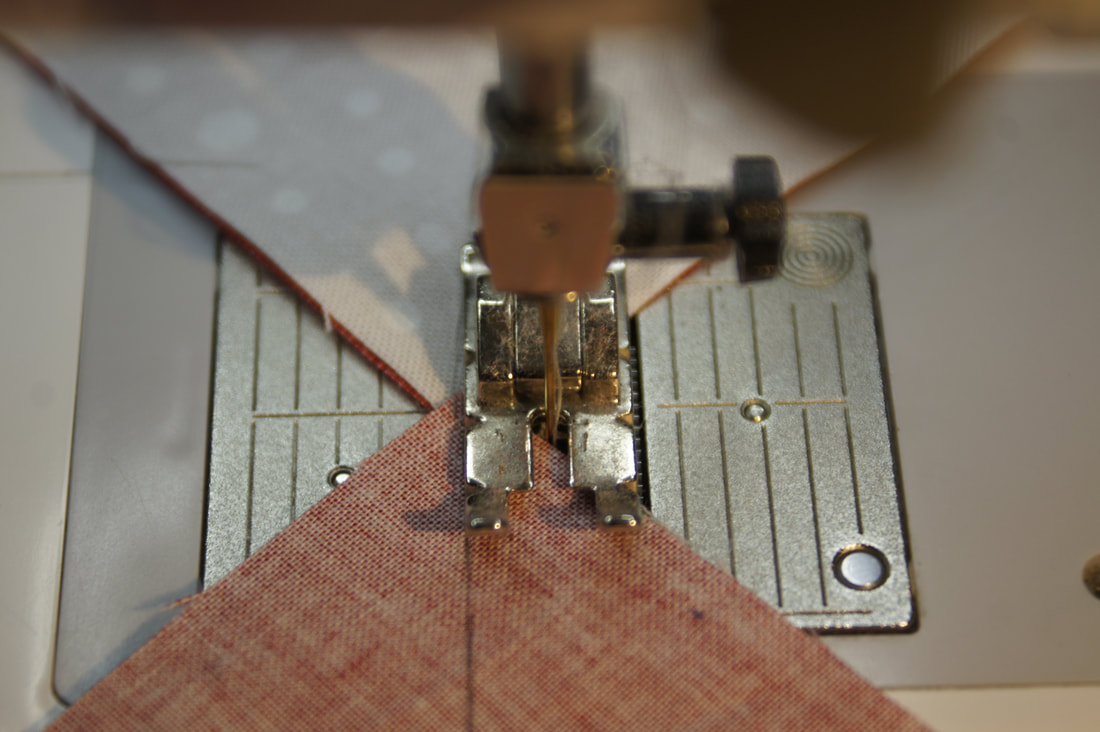
With these Half-square Triangles I place them so that the seam is facing up-towards the needle-which gives just a little help in pushing those two seams together.
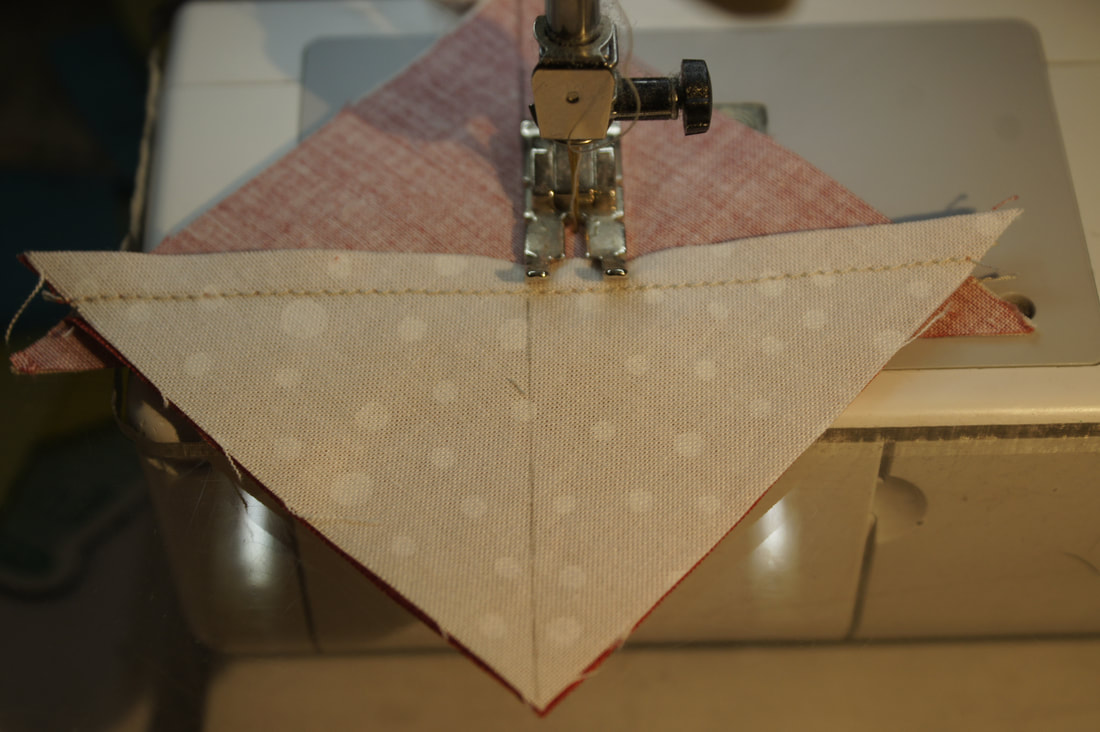
When I have finished sewing all of the pieces I use an "ender", in this case just a scrap of fabric.
That "ender" then becomes my "leader" when I begin sewing the next step.
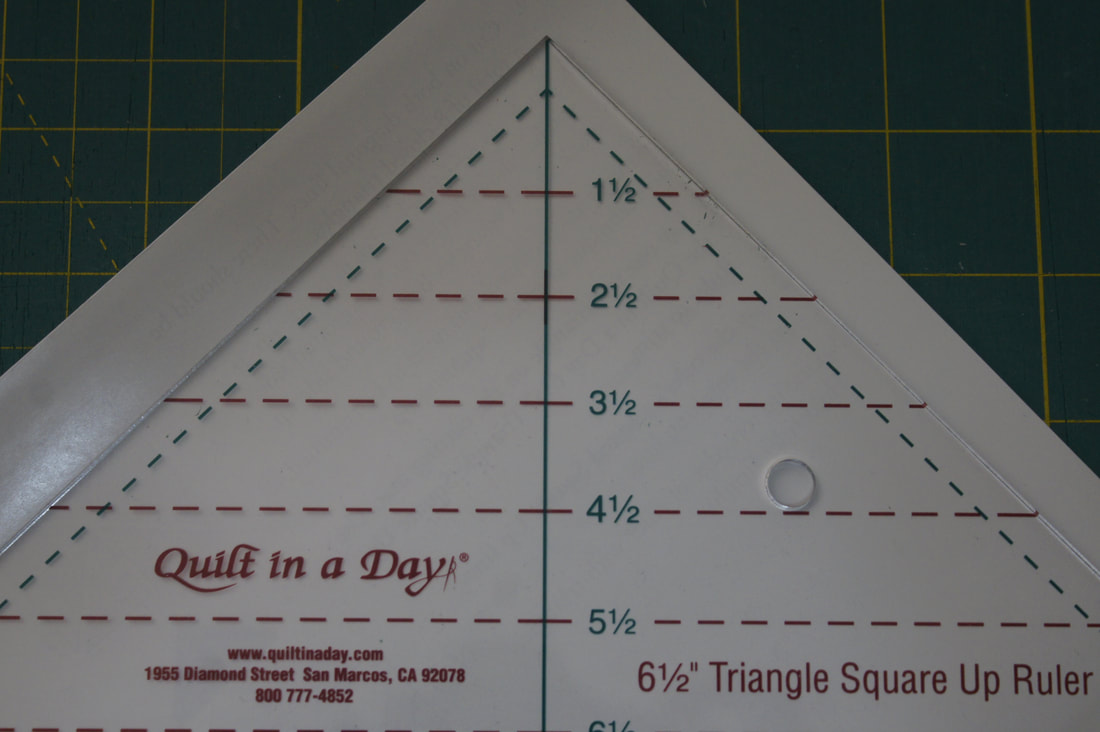
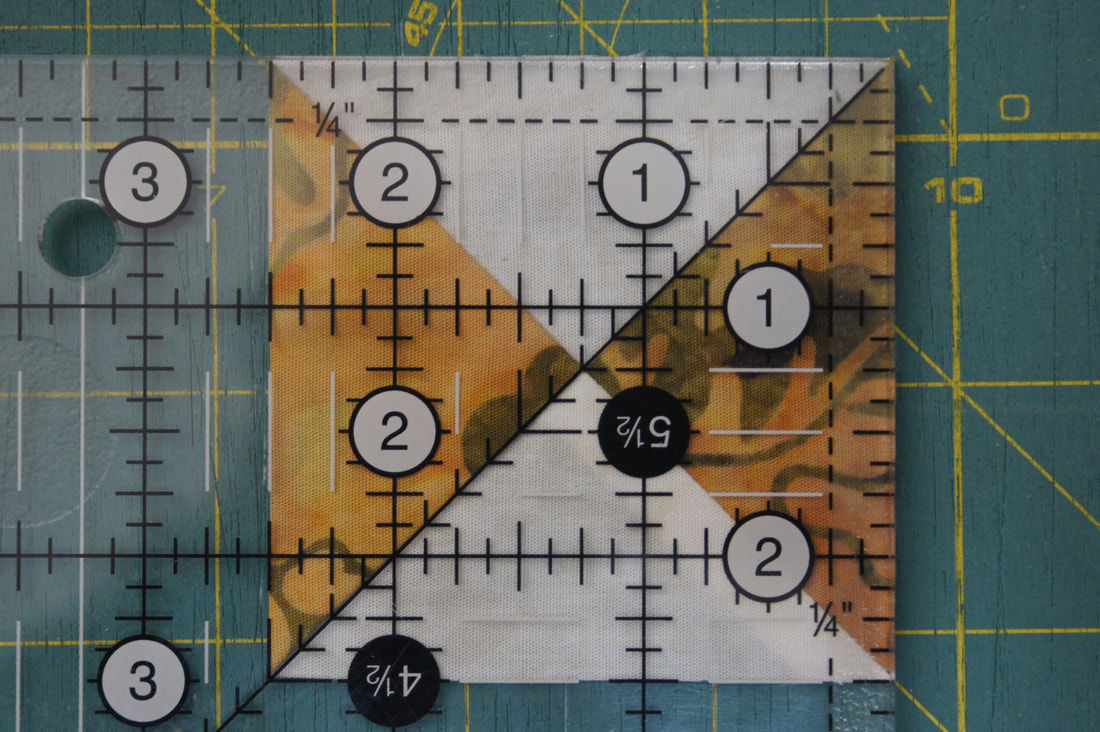
For this month's row of Ohio Stars we will be making Hourglass units to create the stars. I ordered a new ruler to try for these that was recommended by another quilting friend. All I can say is, where has this ruler been all my life. Aside from being simply the best ruler for this purpose it also is reasonably priced. So let me introduce you to the Quilt in a Day Triangle Square Up Ruler. I have zoomed in on the ruler here so you can see the lines and markings. One side has the markings for working with unfinished 1/2 inch sizes and the other side is for working with whole inch sizes.
In this case, for my hourglass units, I want the trimmed size to be 2 1/2" so I place the 2 1/2" red line on one seam and the green line along the other seam. Now I trim just like I normally would.
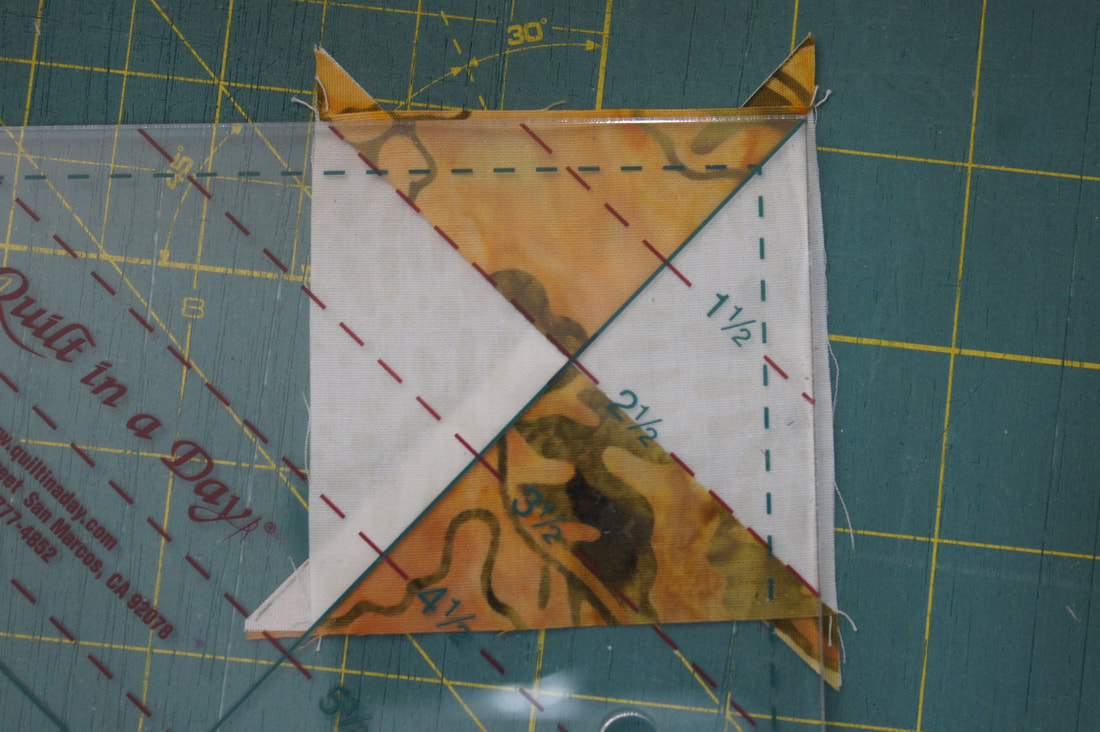
Next, I simply rotate my hourglass unit, realign the lines on my ruler and finish trimming.
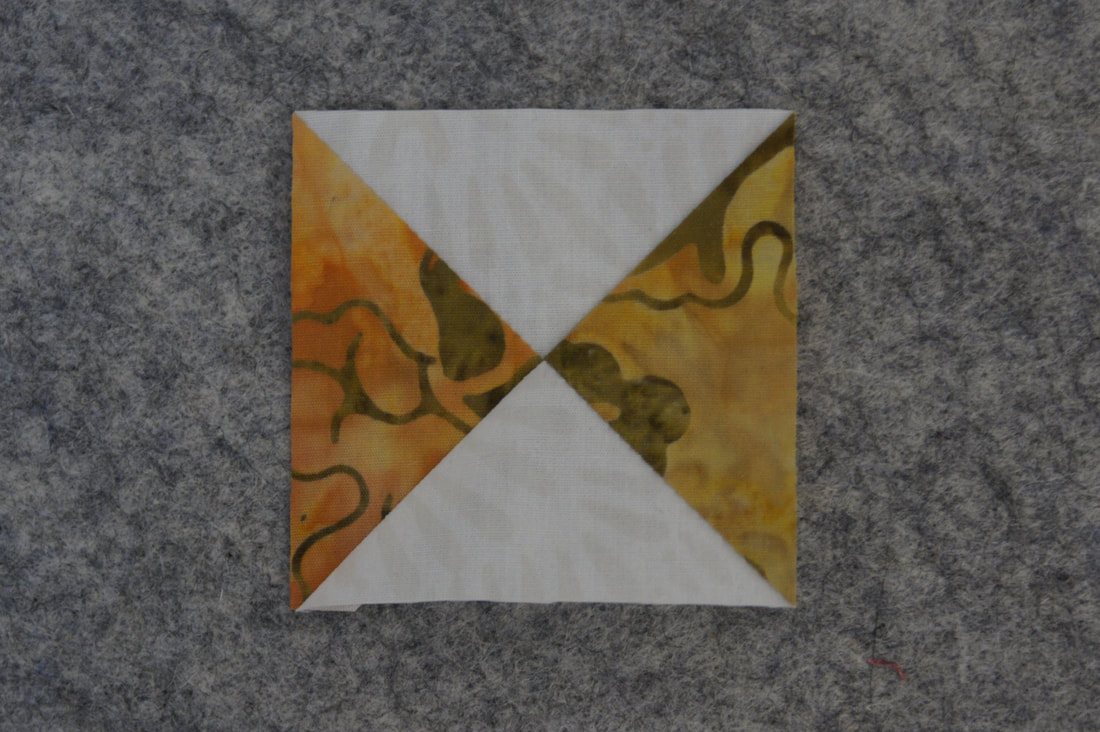
And look at that perfect Hourglass unit with the nice sharp points in the corners.
This is so much easier than trying to get things lined up with a regular ruler. But for those who need that information you need to lay the diagonal line of your ruler on the seamline, placing the 1 1/4" mark at the center.
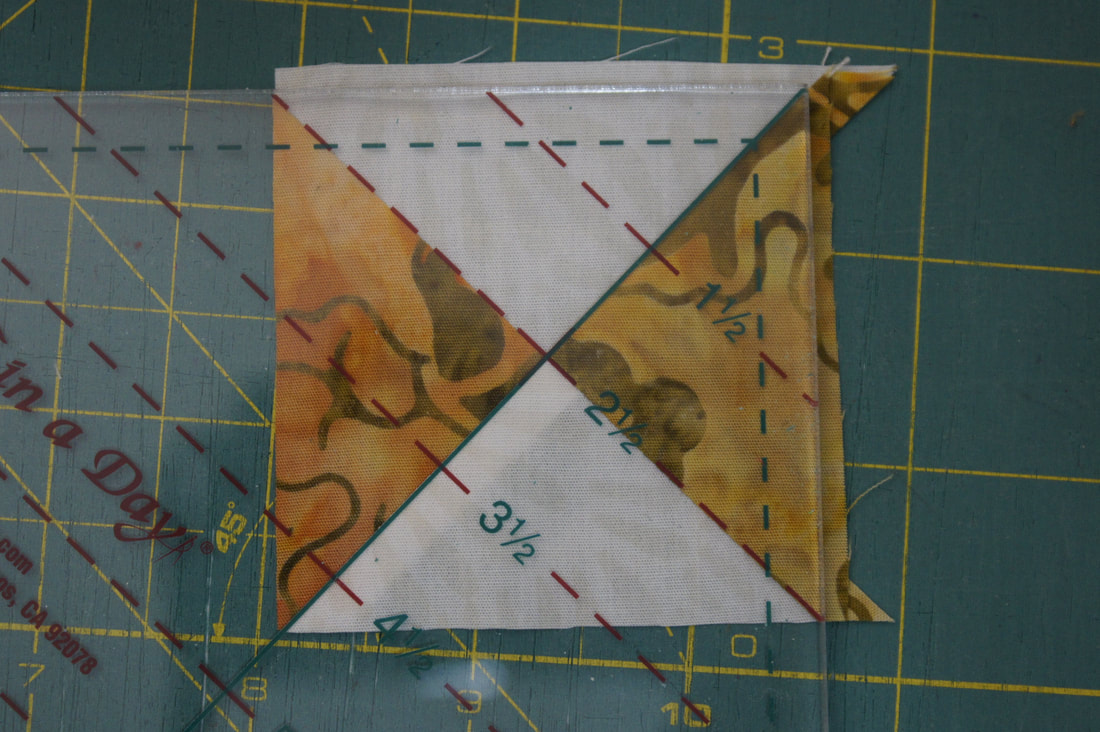
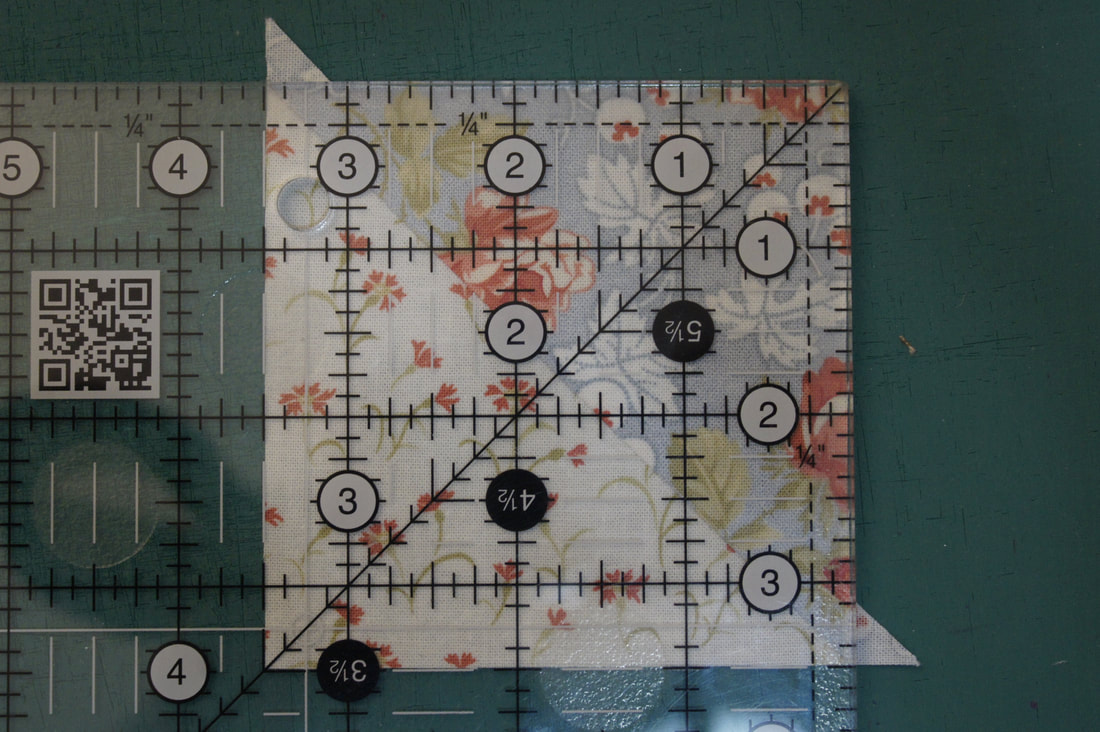
Now, for the other nifty thing this little ruler can do: It makes trimming Half-square Triangles a snap. Before you press them open, simply lay the ruler on top so that the trimmed measurement line is on the stitching. In this case I want to trim my units to 3 1/2" so that line is right on top of the stitching. Then I just trim both sides.

I will have these little triangles to trim away, but as you can see I have a perfectly trimmed HST ready for sewing.
If you decide to purchase the Triangle Square Up Ruler I would like to encourage you to use the affiliate link I provide below. As an Amazon Associate I earn from qualifying purchases, which helps support my efforts on your behalf. I believe this is a win-win for each of us. You get a fabulous ruler and I get a little support. As you know, I only share products that I truly think are wonderful and at a price of around $15.00 I think this ruler is one of those rare bargains.
Now back to tips for making this block. I found it best to press open the seams, as indicated in the pattern, when joining the rows that make up the block. Then when I go to join the blocks into the row I can actually nest the seams a bit by turning the blocks as shown below. Even though the one seam is pressed open, there is enough of a ridge to lock the two seams into place just as if they were pressed in opposing directions.
Here you can see how the seams nest together.
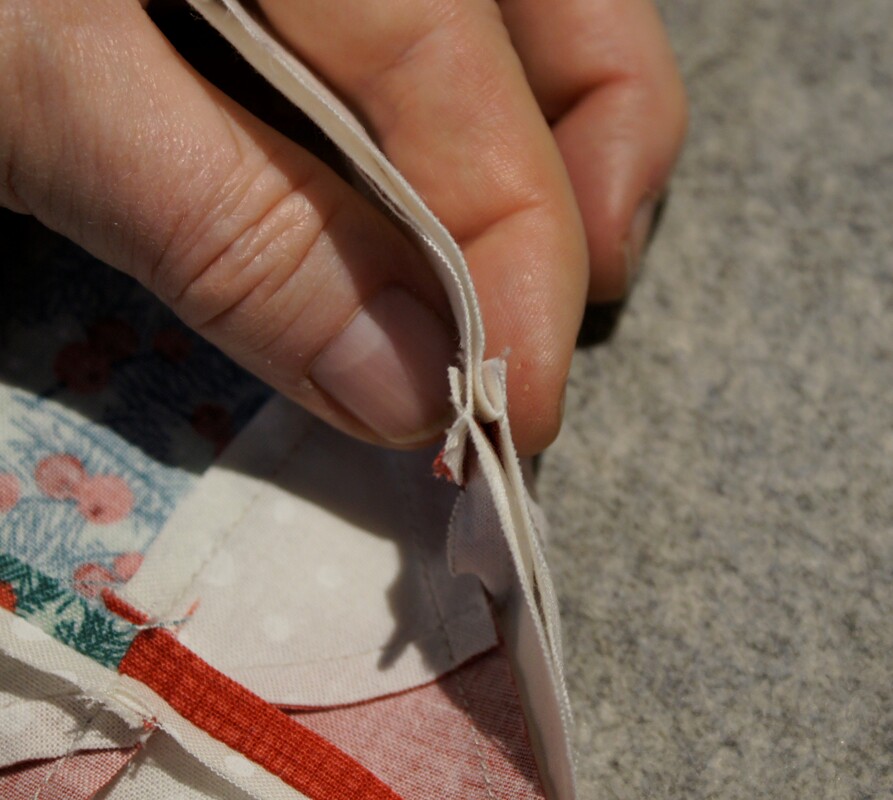
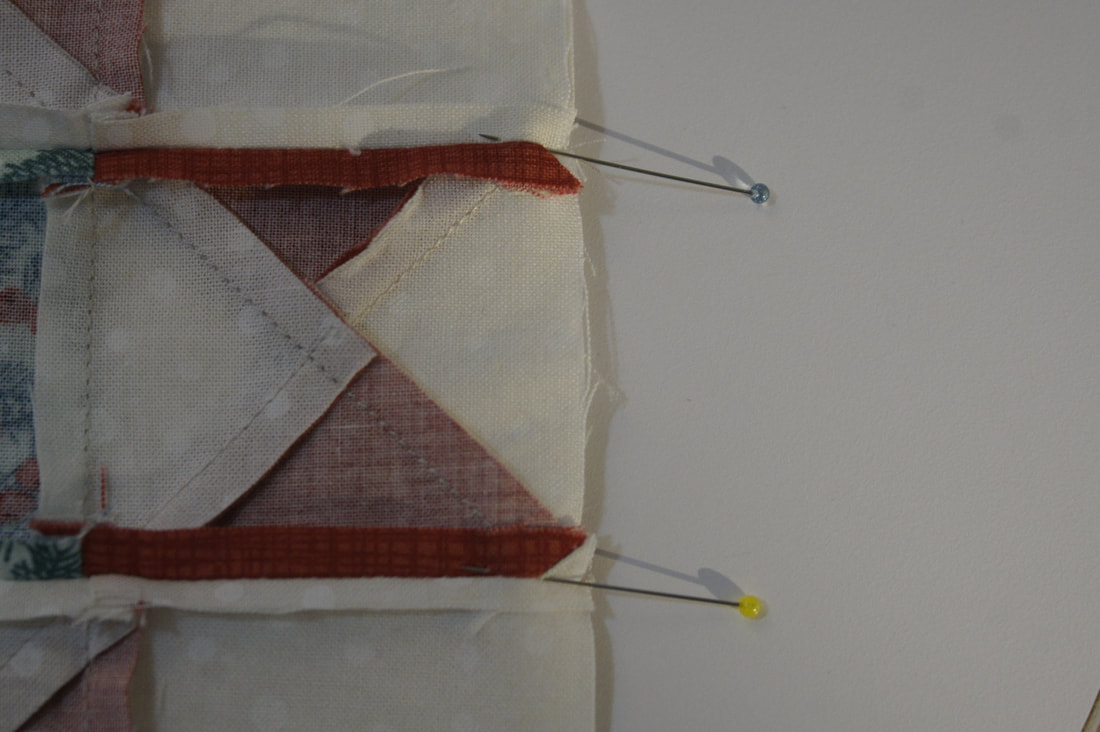
I checked the alignment before pinning in place.
Then just pinned right at the seam, with my pin going through the point on both sides (front and back) All is ready to be sewn together now.
My pattern testers had fun making their blocks as well. Susie chose to make eight different stars for her row.
Jeanet wrote that she will be using several different backgrounds for each of her blocks to accent a variety of dark prints. I am looking forward to seeing how they all come together.
To get a copy of the pdf pattern just click on the photo below to download it from my shop.

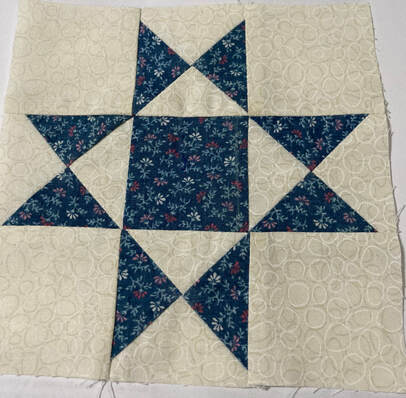
I will close with up-close looks at my Ohio Star blocks.
Thanks for joining me on this joyful journey. Be sure and join me and many other quilters on my Sew Along group page on Facebook to share your finished row. I LOVE to see what you all make with my patterns.
Happy Quilting 
Diane Beesmer
1/15/2021 09:41:54 am
Is the first block not out today, I try to down load it and all I get is the fabric requirements Thank you for all you do
Debra
1/15/2021 10:14:40 am
Sorry about that Diane, the issue has been fixed and you should be able to get the pattern as well now.
Kathy Hansell
1/15/2021 10:11:27 am
For some reason I am no longer receiving your emails (last one was Dec 5). I miss you! Please add me back!!
Debra
1/15/2021 10:16:47 am
Hi Kathy, that would be because I had not posted anything since then. Glad to be missed! I am back now after a much needed Christmas break so you should start getting emails again, but I will double check to make sure you are on the list.
Kathy Hansell
1/15/2021 10:20:58 am
Thank you so much!!
Diane Beesmer
1/15/2021 12:52:59 pm
Thank you for e-mail with the row, I should have no trouble with the hour glass blocks, we did a lot in the Passing of the Days blocks there was a lot of hourglass in those blocks. Take care Diane
Debra
1/15/2021 04:53:44 pm
Yes, there were a few of those hourglass blocks in that. Enjoy this new series!
Sally
1/16/2021 08:08:50 am
I can not copy the pattern
Debra
1/16/2021 06:33:30 pm
Sally, did you download the pattern? If not you can find it here: https://payhip.com/b/lLqx
JanC
1/16/2021 09:10:48 am
Excited to start this Sew-along! Somehow I missed the final size of the quilt and also how many months it will involve. Thanks ‘sew’ much!
Debra
1/16/2021 06:32:31 pm
Glad to have you sewing with me, Jan. You can find my introduction to the quilt here: https://www.tuning-my-heart.com/blog/introducing-the-2021-bom
Carol Stephenson
1/16/2021 04:55:57 pm
Your directions are confusing. At one point you talk about 2 1/2 inch measure and then you say to trim blocks to 3 1/2. What size is the finished block supposed to be? What size fabric did you start with?
Debra
1/16/2021 06:29:21 pm
Carol, did you download a copy of the directions. My guess is you are confusing what I was showing about two different things in my blog post with the directions for making the block that you get with the pdf pattern. It is free and can be found here: https://payhip.com/b/lLqx Comments are closed.
|

Welcome to the site of Debra Davis-a woman who loves the Lord and loves to quilt.
My other blog where I share about my walk of faith:
Sitting at His Feet 
|


 RSS Feed