Before we jump into this week's assignment let me congratulate our winners.
Lillie G. has won the collection of Magnifico Threads. Cheryl K. has won the Fat Quarter collection from Northcott. I will be contacting you both by email to get your prizes on the way.
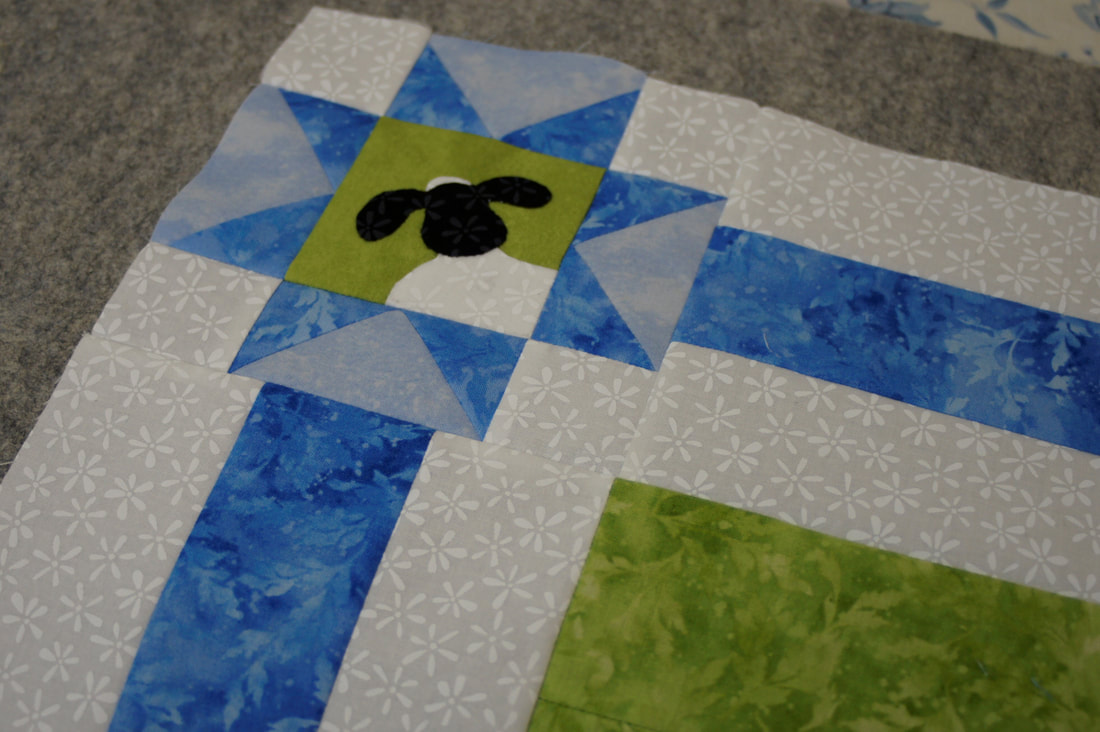
This week we are finishing up the border with the corner sheep that we made last week. My favorite method for making Flying Geese units is called the No-waste Method. Honestly not sure why it is called that because I make mine large and trim them to size, so there is some waste. What I love though is that you get four perfect Flying Geese quickly and accurately. The process can seem a little strange at first, but hang in there it really works.
I know some struggle with the odd measurements such as are called for in making the four smaller squares for the Flying Geese. 5/8" is just one dash line beyond the 1/2" mark. My Creative Grid ruler even has a corner dash mark which helps with accuracy in lining up the proper measurements both ways. 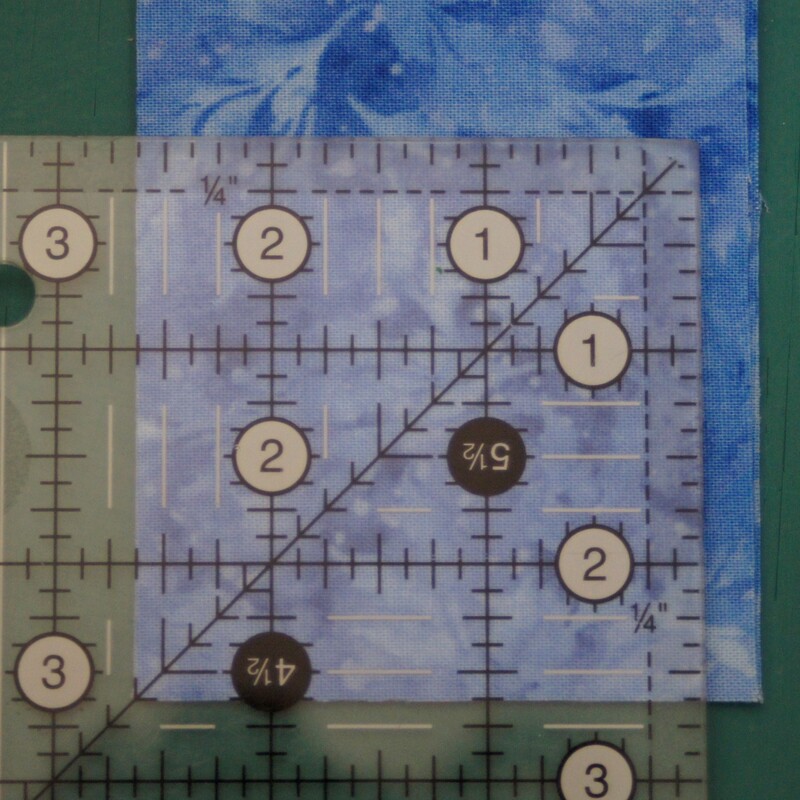
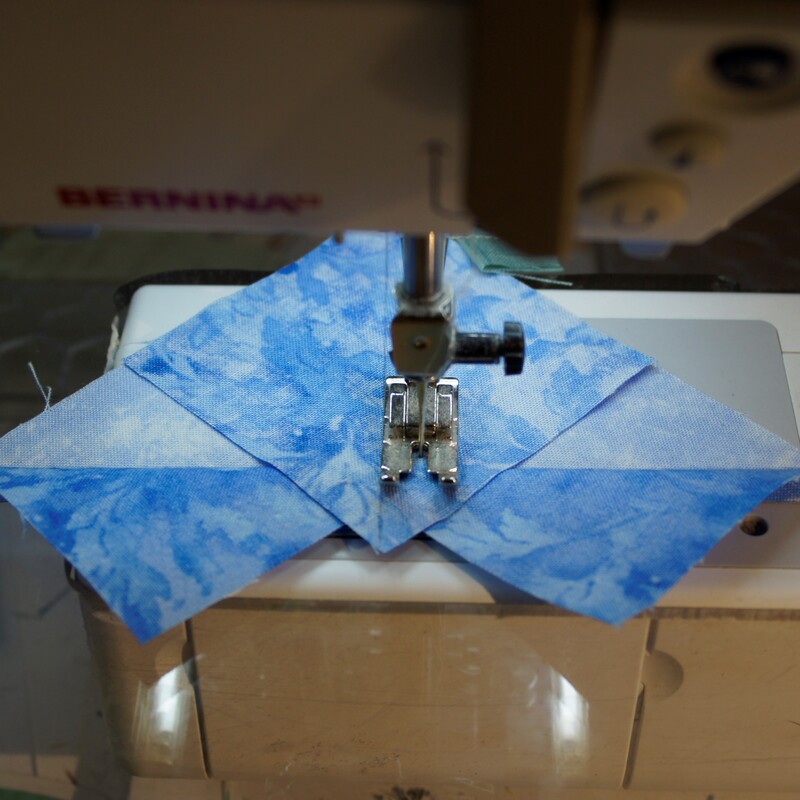
To make the Flying Geese I start by laying two of the small squares on my large square. Next draw a line down the middle to serve as a guide when sewing. At my machine I sew 1/4" from that drawn line. I sew so that the small square that is laying on top of all the others enters my machine first.
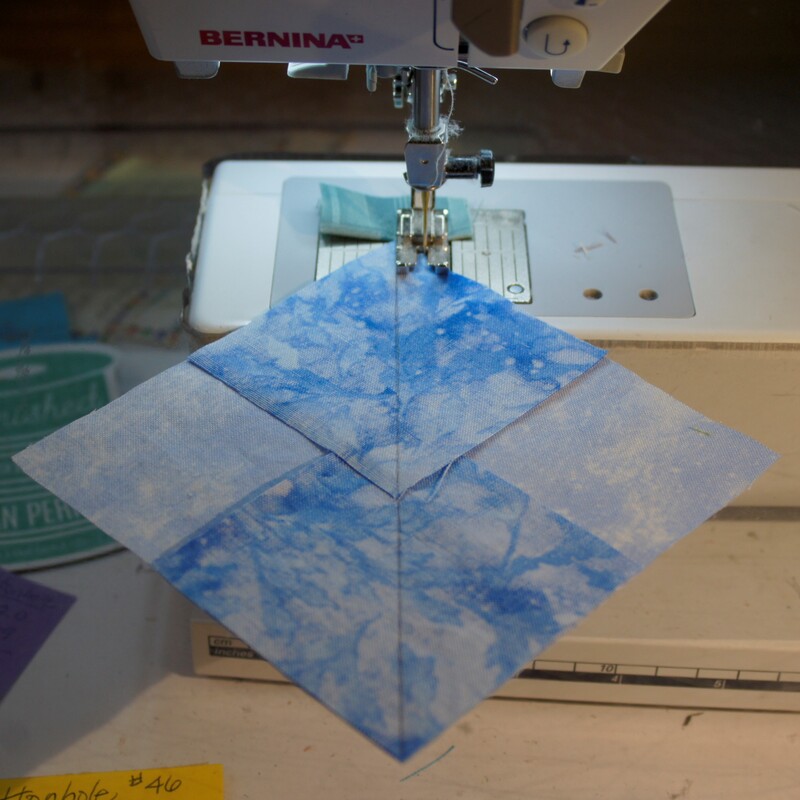
Then I do the same thing on the other side; sewing 1/4" from the line.
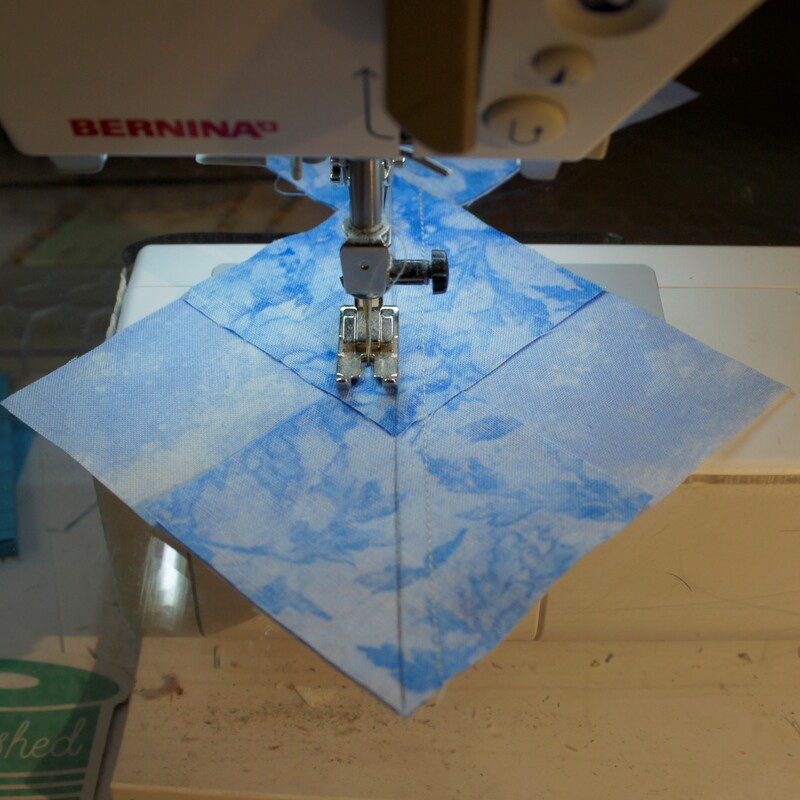
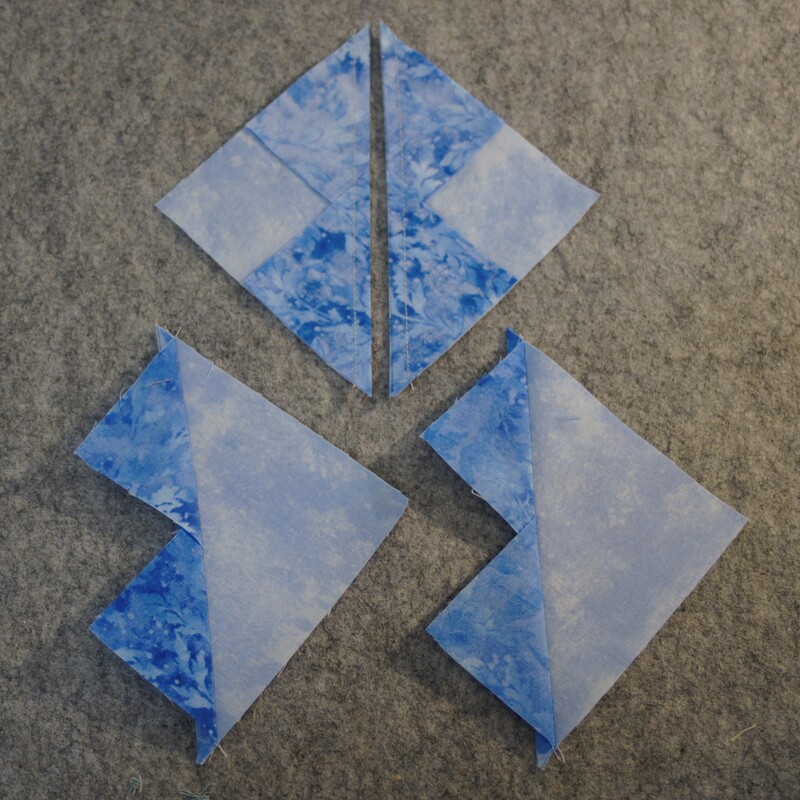
Now I cut apart on the line I drew and press towards the small triangles. It looks pretty odd at this point but the neat trick is coming next.
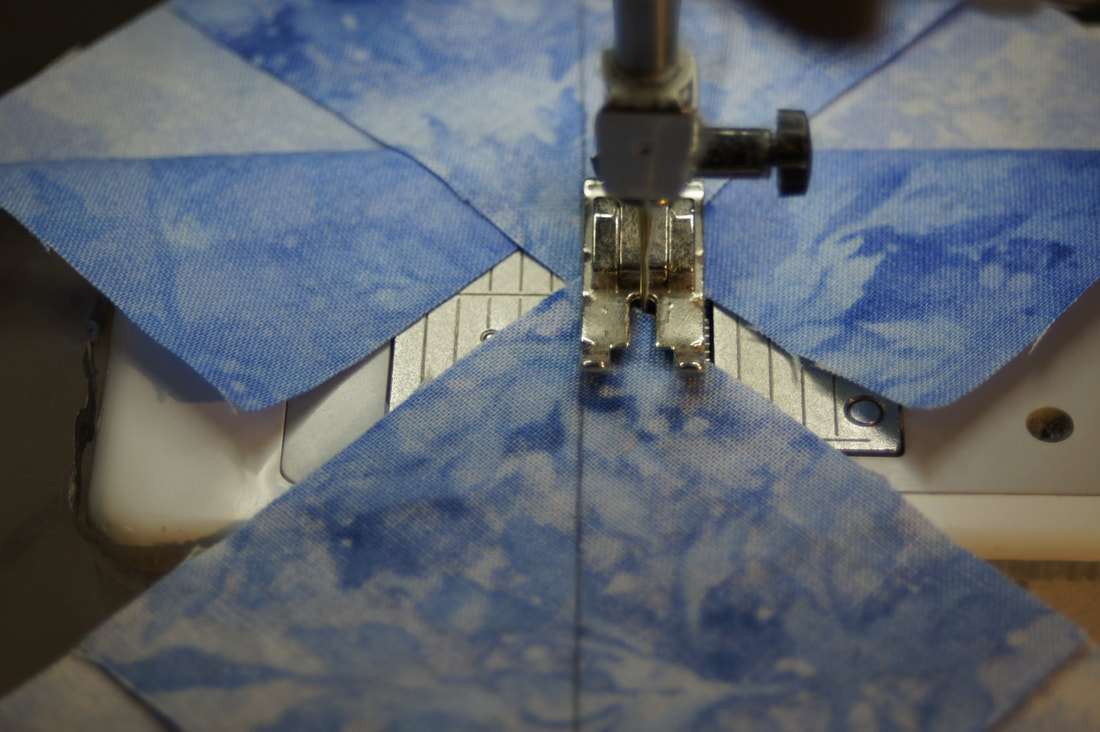
I have drawn a line down the middle of the remainging small squares and place them on top of the pressed units as shown below. Then just repeat the process of sewing 1/4" on both sides of the drawn line.
A tip when piecing: I usually sew with my needle in the down position. Whenever I add a new unit to be sewn I lift my presser foot and place the fabric right up against my needle. Lower the presser foot and continue sewing. I also chain-piece these. I have found that if I place my fabric right up against my needle in this manner I get a straight start to my seam and eliminates those odd times when thread can bunch up at the beginning and make a mess of things.
Cut these apart on the drawn line and press towards the small triangles. Voila! Four Flying Geese.

We do need to trim these to size now.
My favorite rulers by far for this process are the Bloc-Loc rulers. They have a groove that locks into place on the seam and I do not have to calculate how to lay my ruler for trimming. And because that indentation "locks" into the seam the ruler stays in place while trimming. The 1.5" x 3" is perfect for our needs in this pattern as the seam allowance is built in to the ruler. 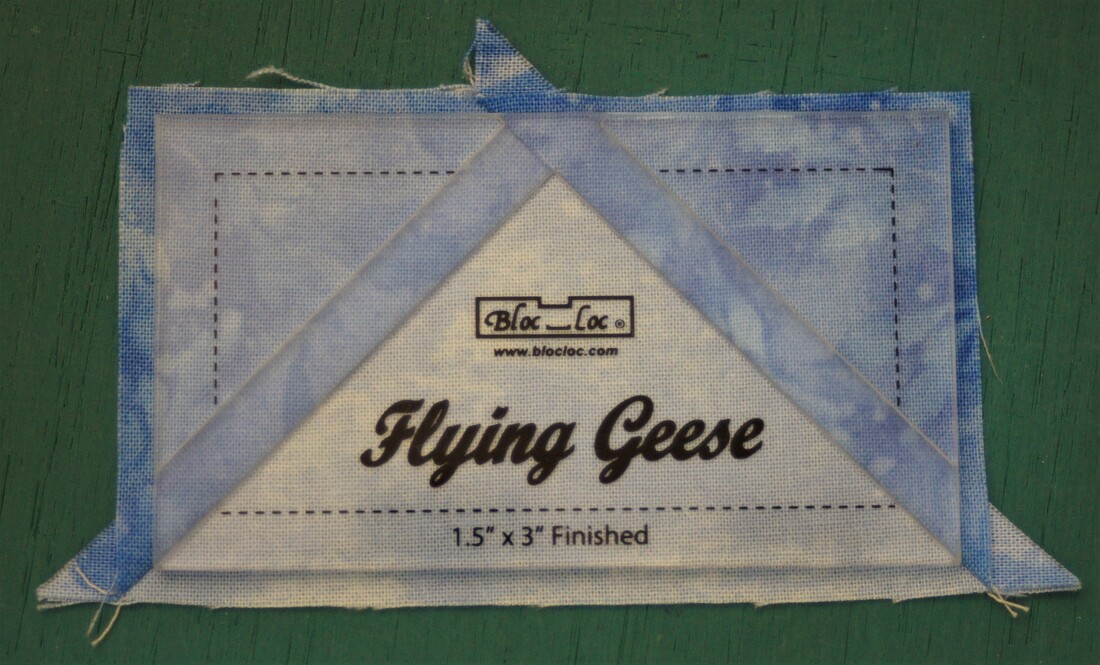
But what if you do not have one of these handy rulers? How do we trim these to get perfect 2-1/2" x 3" Flying Geese units? Let me take the math out of it for you.
1) Your ruler has a diagonal line on it; lay this along the seam line.
2) Our midpoint is 1-3/4" (1-3/4 + 1-3/4 = 3-1/2) Line this up with the tip of the Flying Geese unit. At this tip you want to move the ruler so that 1/4" inch of blue extends beyond that point. This is the seam allowance needed to save your point when you sew it in place later. 3) Line up the 3-1/2" line so that it lays along the other diagonal seam right where the two fabrics come to a point. 4) Make sure everything is lined up as shown, then trim the right side and the top. 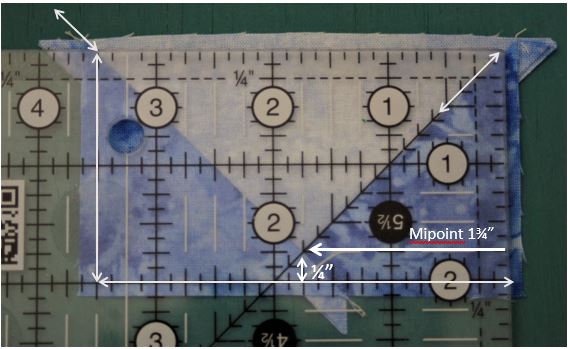
The second trim is easy. Rotate the Flying Geese unit. Lay your ruler so that the
3-1/2" line and the 2" line lay right along the trimmed edges from the previous step. The just trim the remaining two sides. 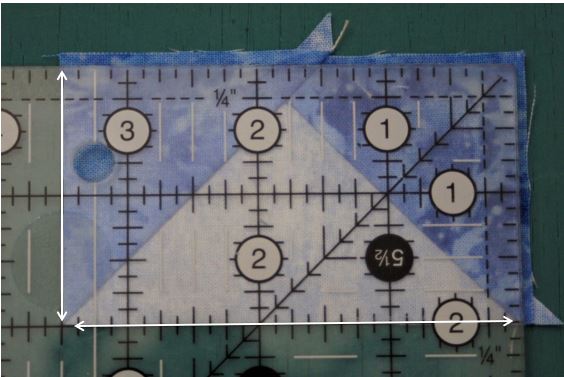
And there you have it; a perfectly trimmed Flying Geese unit.
The Flying Geese get used to make the stars that go in the corners of our border.
Be sure and watch which way the sheep are facing as you add the star blocks to the borders strips. 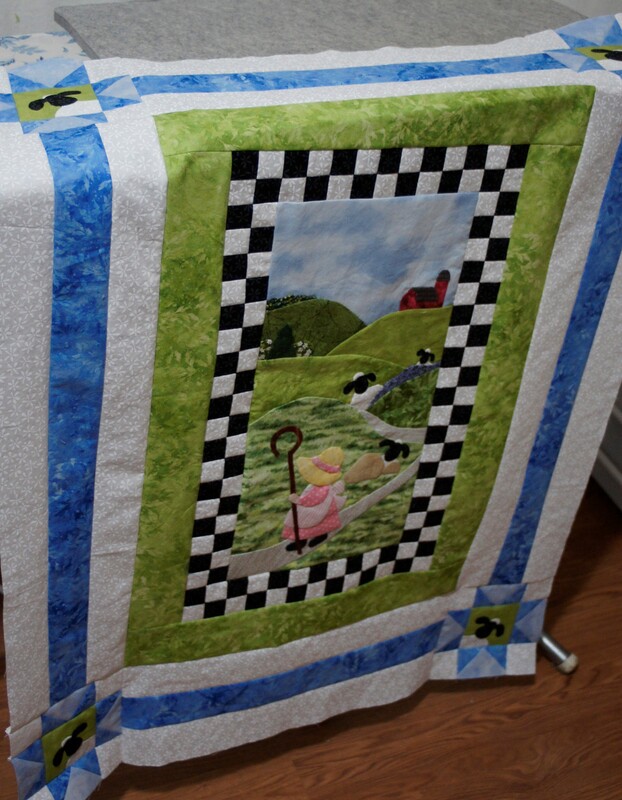
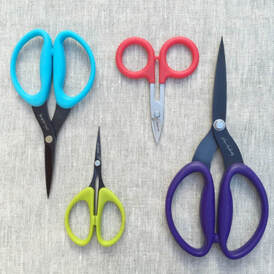
This week's Giveaway is for a pair of Karen Kay Buckley's Perfect Scissors. These are my absolute favorite scissors. These scissors are sharp right to the tip with their microserated edges. They cut like a dream. I also am thrilled with the large space for fingers and the soft, somewhat flexible plastic that the handles are made of. I have more than one size in my studio and just do not use anything else. Karen will be sending a pair to one lucky winner. Remember to qualify for the giveaway you must leave a blog comment.
Entries must be received by midnight January 26th. The winner will be announced on next Friday's Blog post. For Rules and Guidelines click here.
Happy Quilting!

1/17/2020 11:40:54 pm
I am in love with your border. I spent 4 hours today making flying geese with this method and am so pleased with how they have turned out. Now to get caught up with your QAL and I’ll be doing a happy dance! Thanks Debra for all your work putting this together and your wonderful tutorials. 😄 Carol
Debra
1/21/2020 10:28:02 am
Thanks, Carol. I am glad you loved the method for the Flying Geese. 1/17/2020 11:43:47 pm
And my favorite colour is purple. I seem to use it in 2 out of 3 quilts!
Debra
1/21/2020 10:28:39 am
Funny how that works.
Donna Cutting
1/18/2020 03:46:40 am
I am always drawn to blues, and I save all my blue scraps for an upcoming blue scrap quilt.
Debra
1/21/2020 10:30:07 am
I use a lot of blues as well, partly because it is the only color my husband can actually see.
Cheryl Keown
1/18/2020 07:41:52 am
I am always drawn to Civil War fabrics. Another great giveaway.
Debra
1/21/2020 10:31:01 am
Ooh, those are the colors that first drew me in too.
Christine
1/18/2020 09:03:38 am
Thank you for sharing your method of making flying geese. I haven’t started the Bo-peep quilt but it’s in my “I want to make” list, it’s adorable.
Debra
1/21/2020 10:31:53 am
Always my pleasure to share with other quilters!
Renee G
1/18/2020 09:23:03 am
I love all shades of purple. Love your project.
Debra
1/21/2020 10:32:44 am
I have a lot of purple in my wardrobe too. Not just my stash.
Sarah Gray
1/18/2020 11:27:00 am
My favourite colour is blue. I also use the bloc loc ruler. It is so nice to finally get flying geese that are not wonky.
Debra
1/21/2020 10:33:28 am
Those rulers are great. I totally agree. 1/19/2020 09:06:16 pm
I am always drawn to cool colors. I really like those borders, and putting the sheep in the stars makes me want, even more, to make a quilt of just sheep blocks!
Debra
1/21/2020 10:34:34 am
I do think you are on to something there, Susan. I just might need to play with that idea some more....
Sharon Aurora
1/21/2020 10:36:06 pm
My color preference seems to change depending on the project I'm working on but I think in general I tend towards light purple or blue.
Debra
1/22/2020 12:44:51 pm
Mine as well, Sharon. Those are two colors that should work very nicely together as well. Comments are closed.
|

Welcome to the site of Debra Davis-a woman who loves the Lord and loves to quilt.
My other blog where I share about my walk of faith:
Sitting at His Feet 
|


 RSS Feed