|
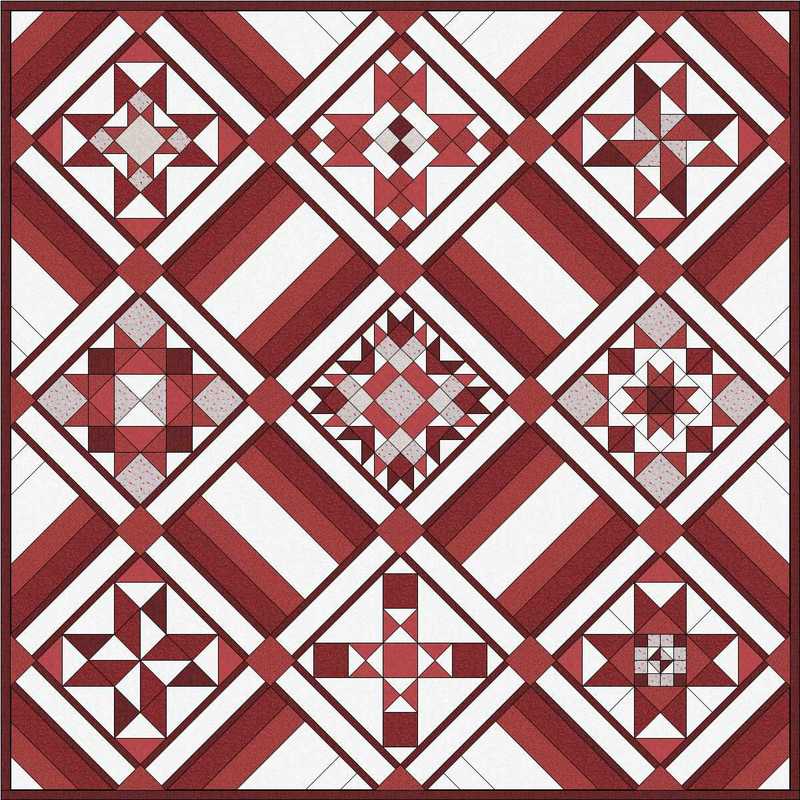
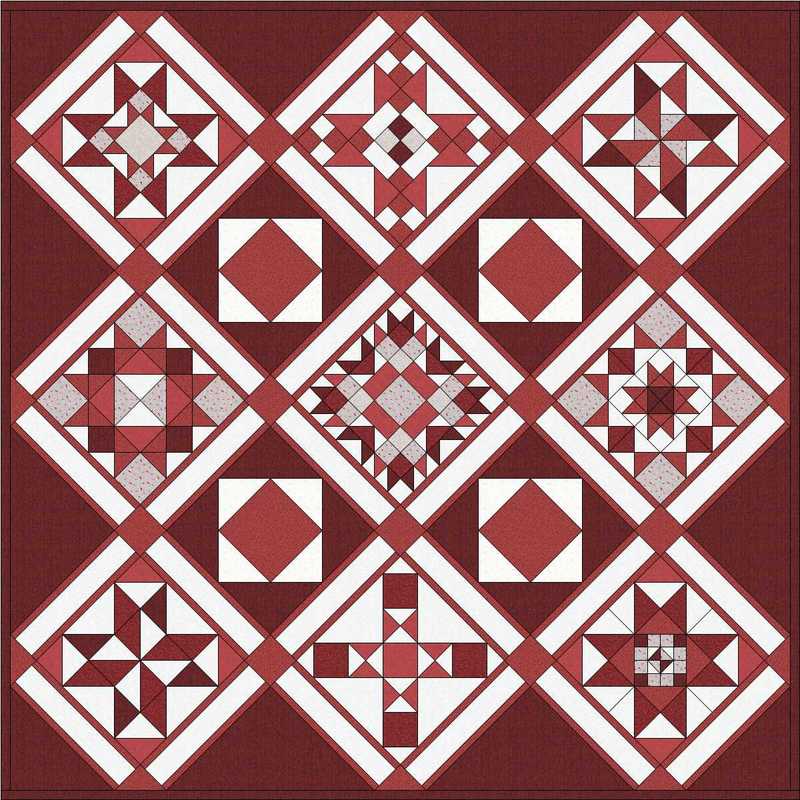
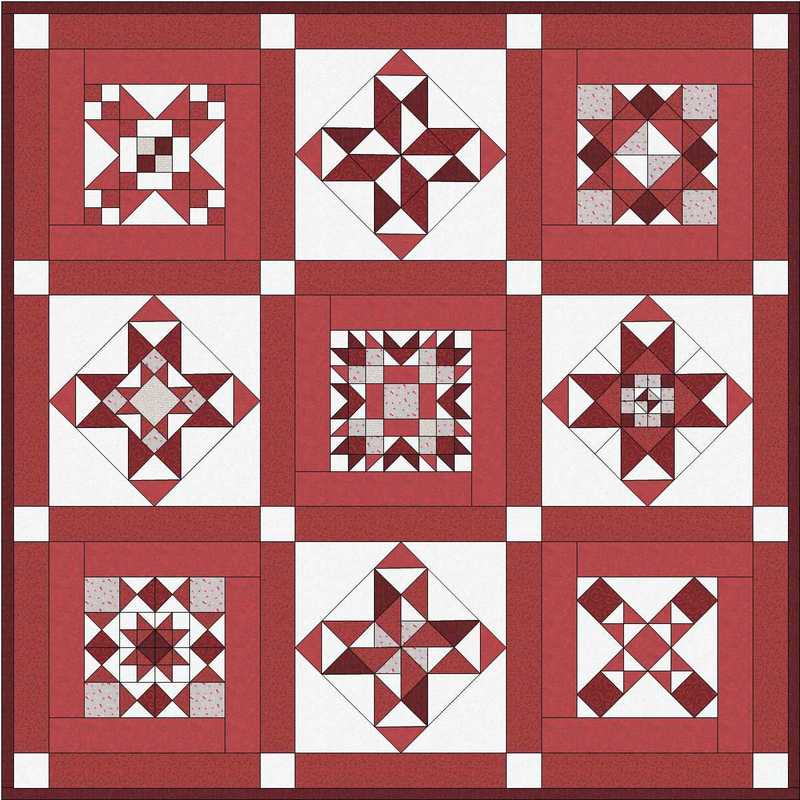
,Every once in a while life takes an unexpected turn-one of those turns happened for me this weekend. While it was bothersome and disappointing to myself and several others, I am pressing on. Sometimes those moments are the motivation we need to stop dreaming and start living. I have been dabbling with designing my own quilts for quite some time, I started to do a little work towards that goal last year but it is time to take the next step. If you have been following along with me you already know that I have a passion for teaching. When it comes to quilting it is my goal when writing tutorials to provide clear enough instructions so that even a newbie can have success with the process. And hopefully those who have been quilting for years might find some tips to improve their own quilts too. It has been a joy to get to know so many through this beautiful craft and get to know the generous hearts of quilters. With that in mind here is a sneak peek at what I am going to be offering. This is a quilt that will focus on making Half-square Triangles and Flying Geese. There are some other elements as well. The majority of the blocks are based on a basic star design with changes in elements and fabric placement that make each unique. There are a couple of more challenging blocks but we will save those for the end. 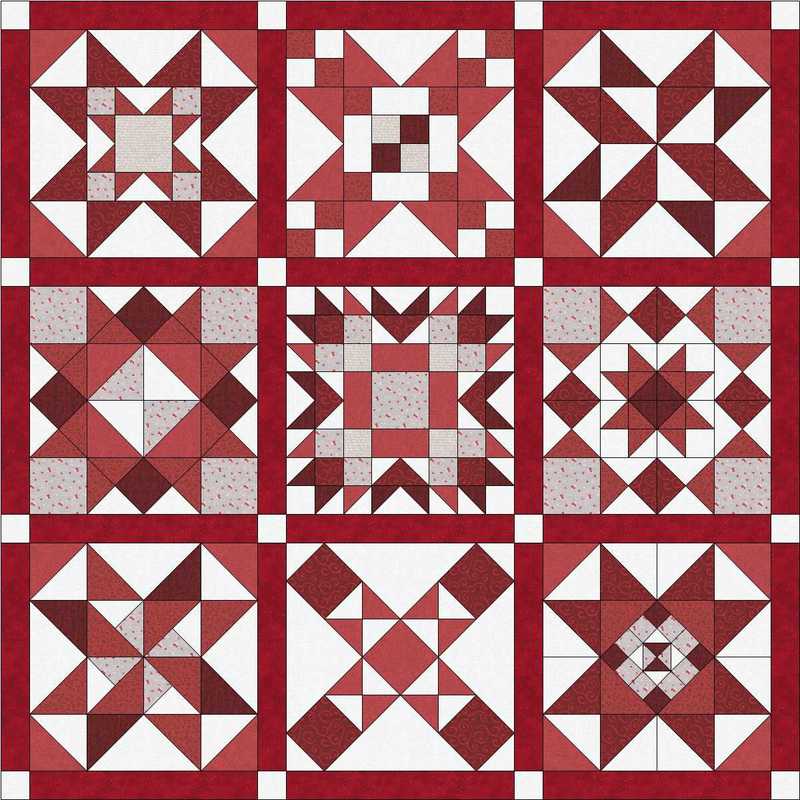 This will be a 9-12 week process as I share one block each week, These will be 16" blocks that I will be making right along with you. As always I will provide my step-by-step tutorials of how I put the blocks together. The patterns will be available as a free download here on my website. Ternhe patt will not have the in-depth detail of my tutorials, but give you just the basics of the block requirements. The main instruction will be the online tutorials. 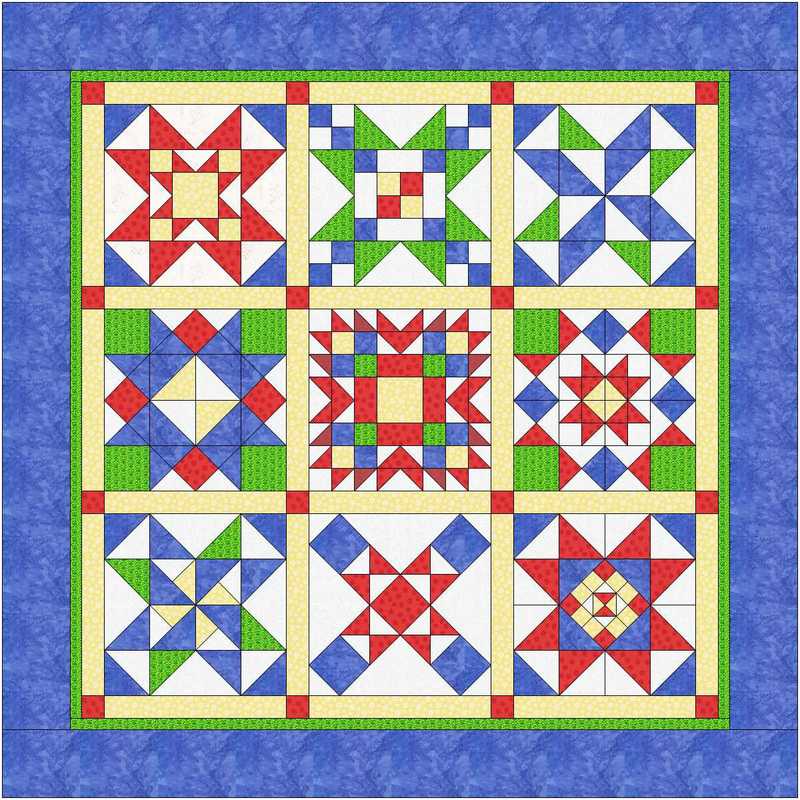 I actually intend on making two of these, the red and white version and a scrappy version with a variety of colors (The photo is just a mock-up-not the actual colors I am using.) I have been playing with several setting ideas, but do not know which I will use just yet so if you have a favorite option do let me know in the comments either here or on my Facebook Page. I am so glad you have been with me on this quilting journey and I hope we can continue on in an atmosphere of kindness, support, and encouragement. In my workd there is no such thing as a dumb question-that is how we learn. In my world things are meant to be shared and celebrated. If that sounds good to you, I invite you to see how this goes-I am sure there will be a learning curve for me as I figure out to best run this. Your input is invaluable to me in this process. Here are three setting ideas that go beyond the basic sashing-which is your favorite?
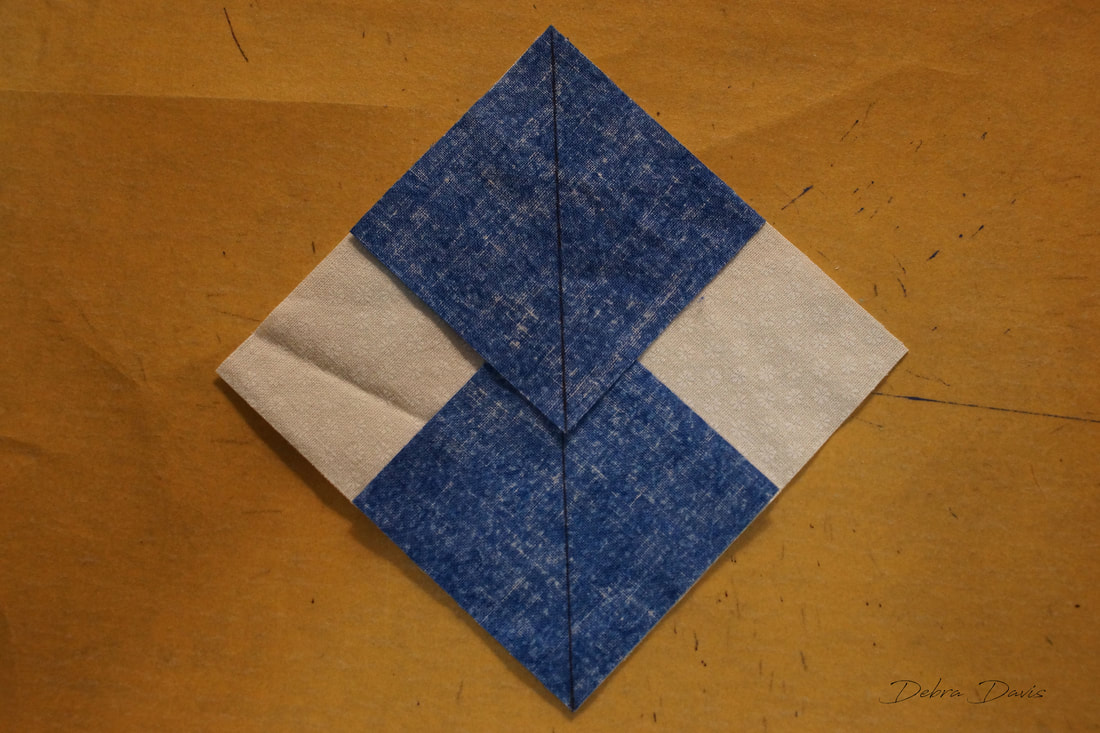
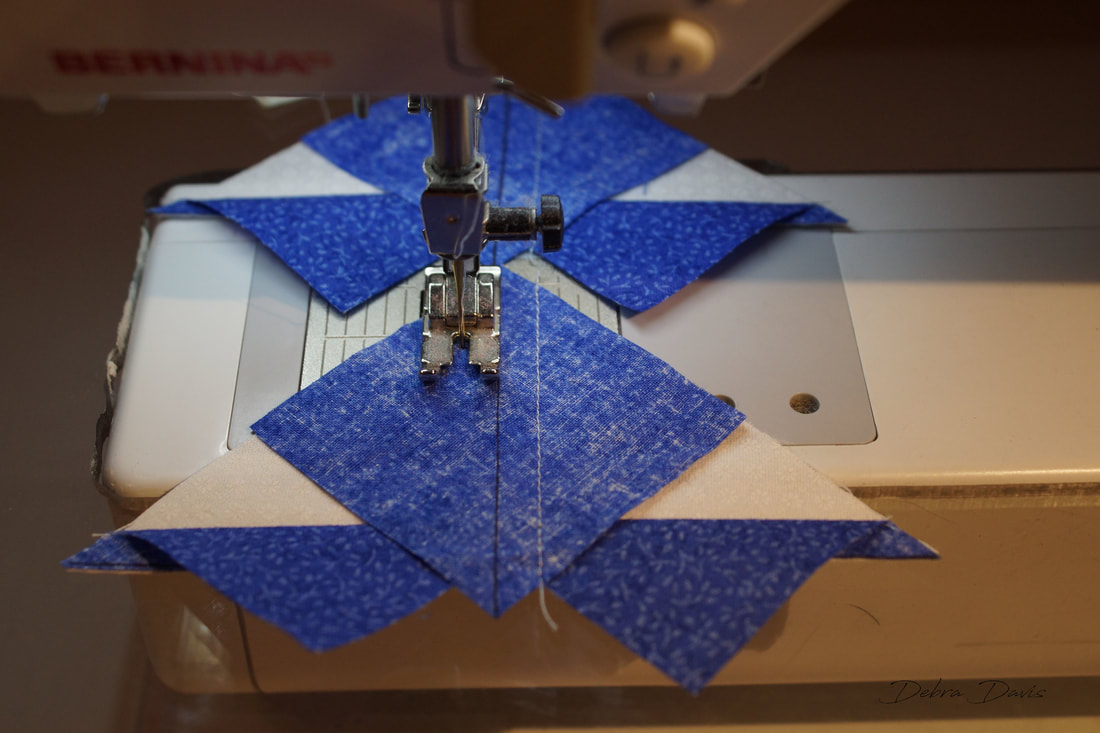
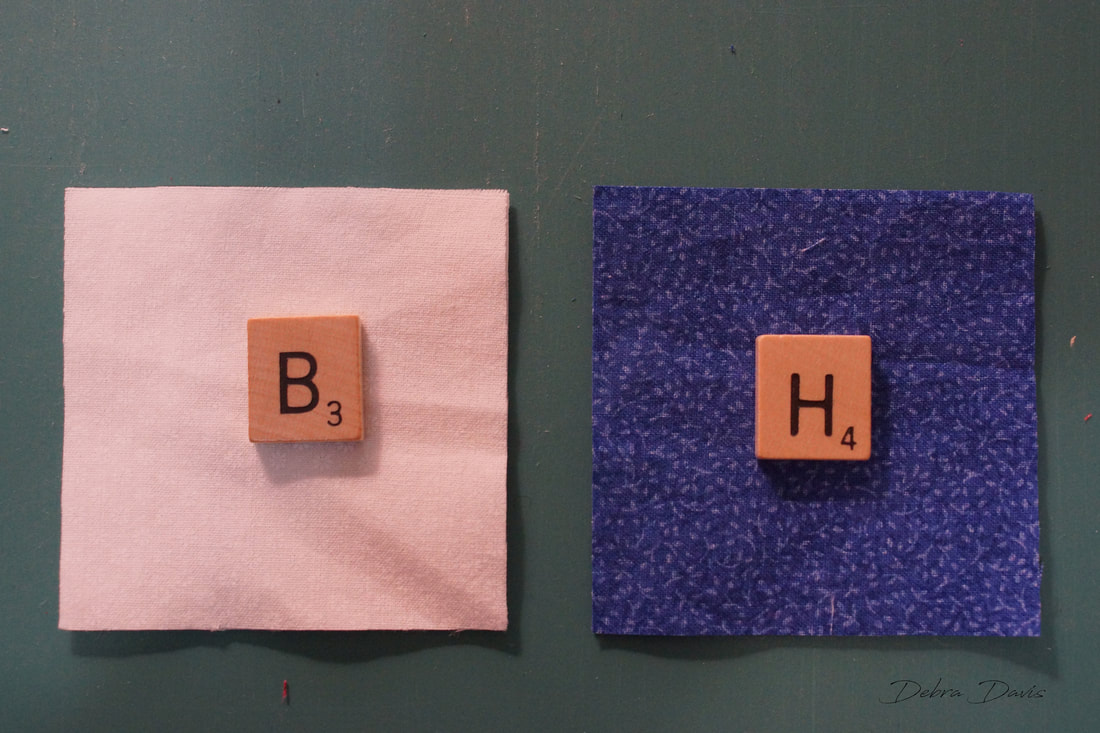
Happy Quilting!  Lisa Bongean has once again provided an alternate block for those who do not want to do the applique blocks. I have to say that I can credit Lisa with losing my fear of working with teeny tiny pieces. This block is no exception as some of the squares finish at 1/2" but what a beautiful block it is when done. You can find Lisa's pattern here. 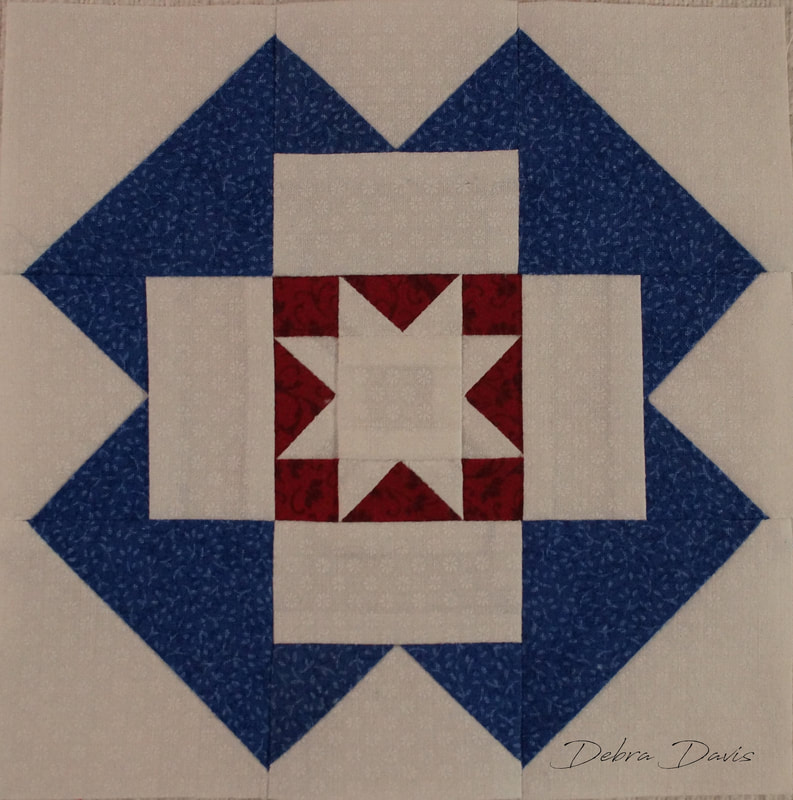 I made a few changes to the cutting directions and did not cut any of the them intro triangles. With these tiny pieces I decided to starch my fabrics before cutting them. Cutting Directions: A-(cut 1) 3 1/2" x 3 1/2" square B-(cut 2) 3 1/8" x 3 1/8" squares C-(cut 4) 1 1/2" x 2 1/2" rectangles D-(cut 4) 1 5/8" x 1 5/8" squares E-(cut 1) 1 1/2" x 1 1/2" square F-(cut 4) 1" x 1" squares G-(cut 1) 2 1/2" x 2 1/2" square H-(cut 2) 3 1/8" x 3 1/8" squares I-(cut 4) 2 518" x 2 1/8" squares 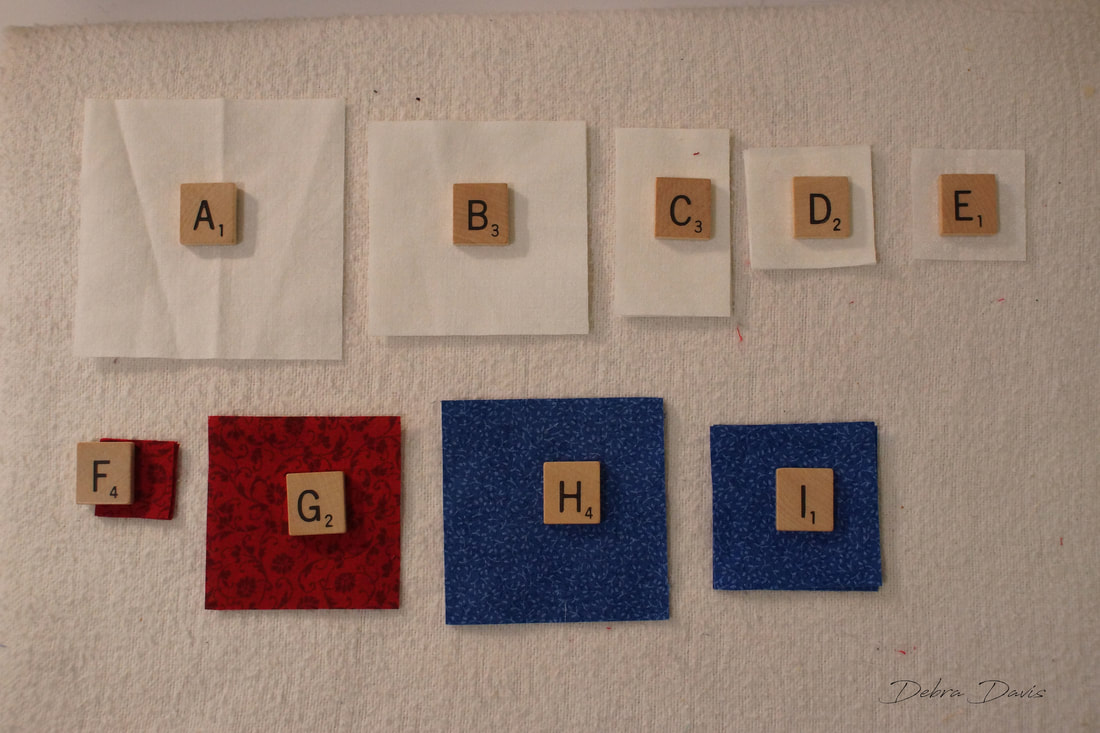 I started with the A and I squares to make the large Flying Geese Units. 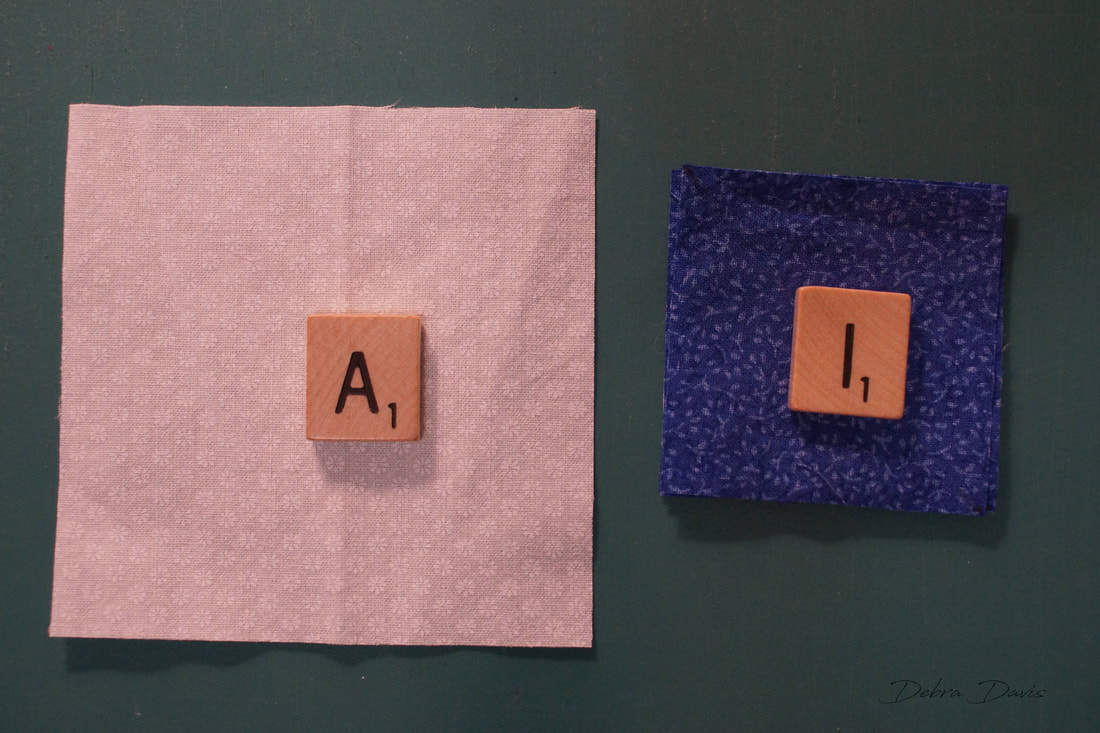 Place 2 I squares right sides together on top of the A square and draw a line down the middle. I used a fine tip Sharpie pen for this. Sew 1/4 inch from each side of the line.
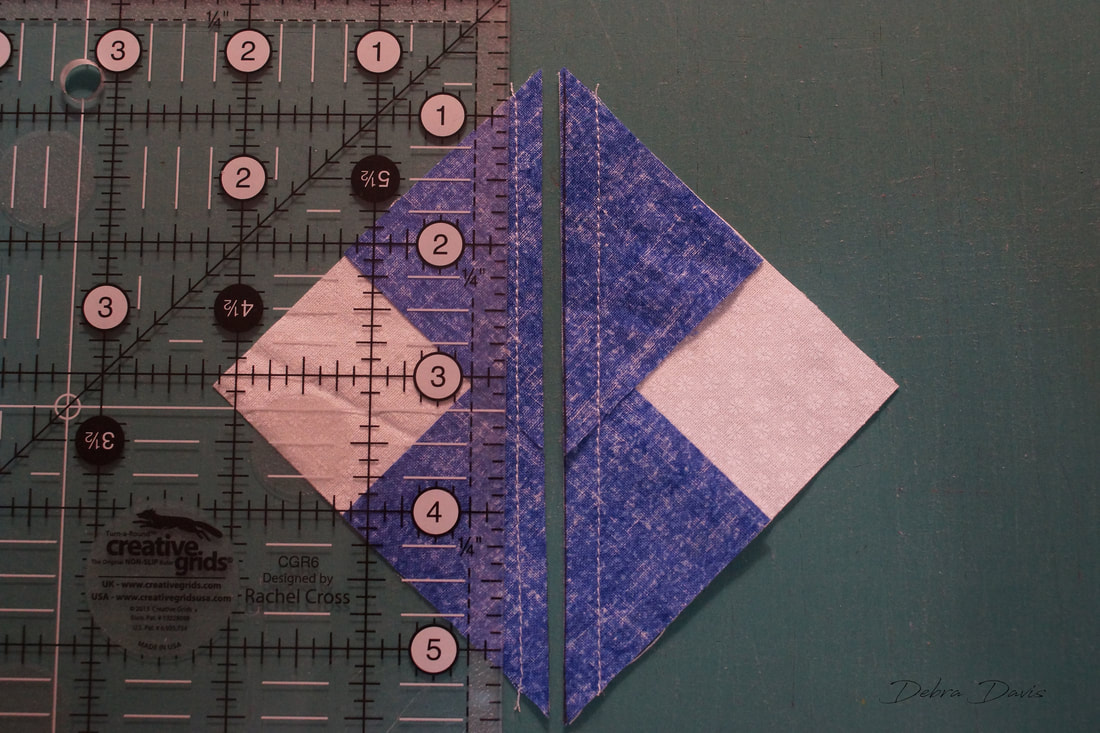
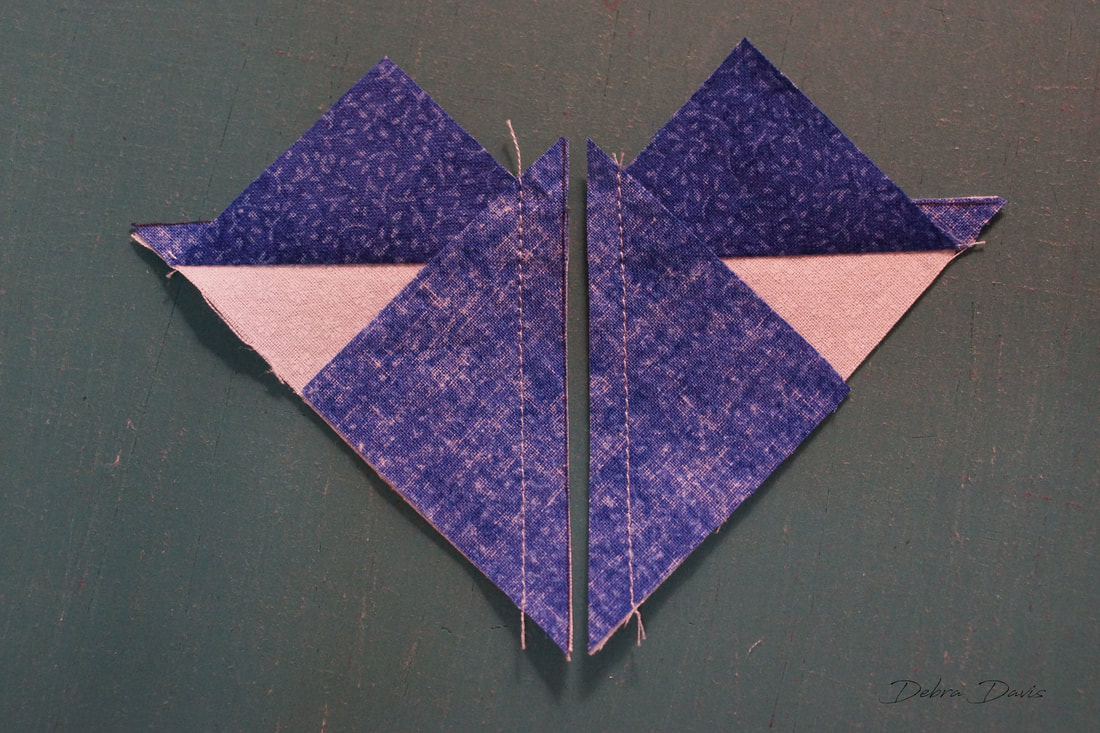
Cut the units apart on the drawn line and press towards the small triangles.
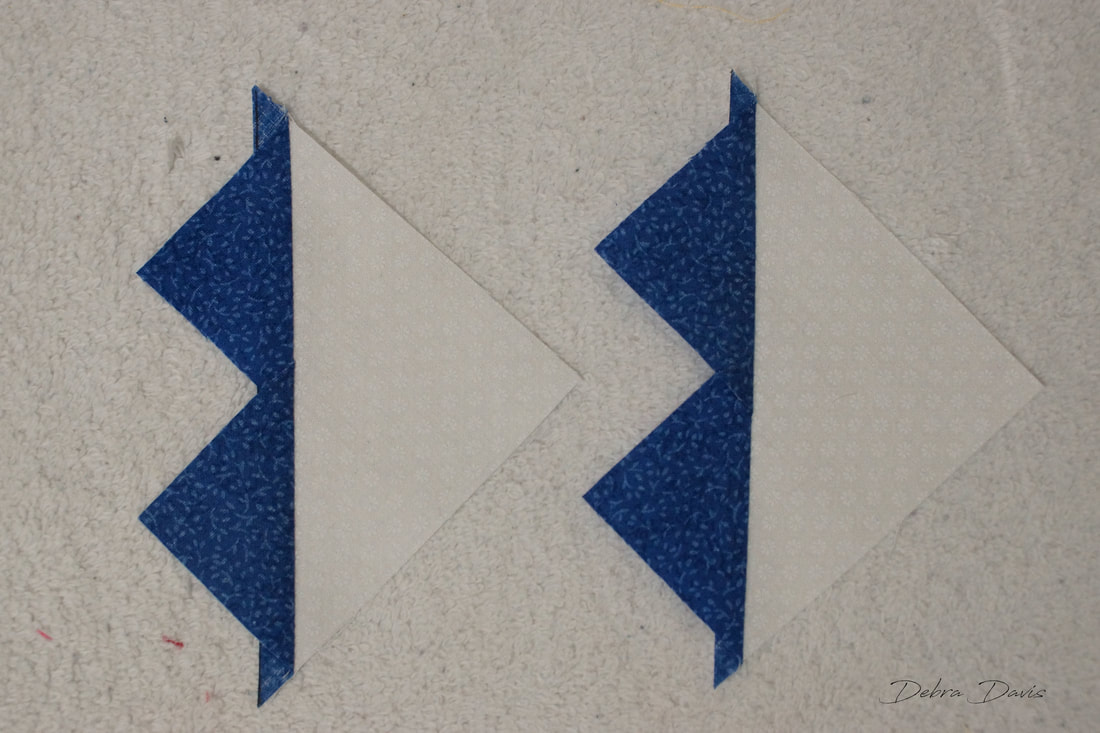
Place the remaining I squares on the units and draw a diagonal line dwon the middle 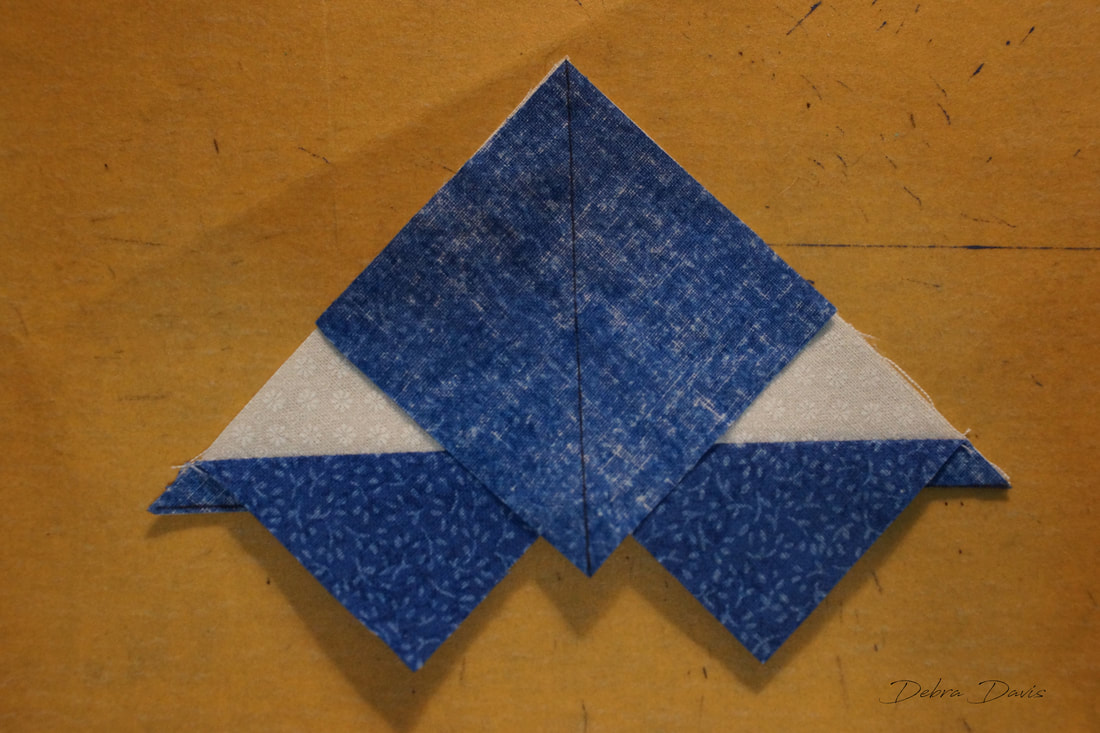 Sew 1/4 inch from each side of the line, cut apart on the the line, and press towards the small triangle.
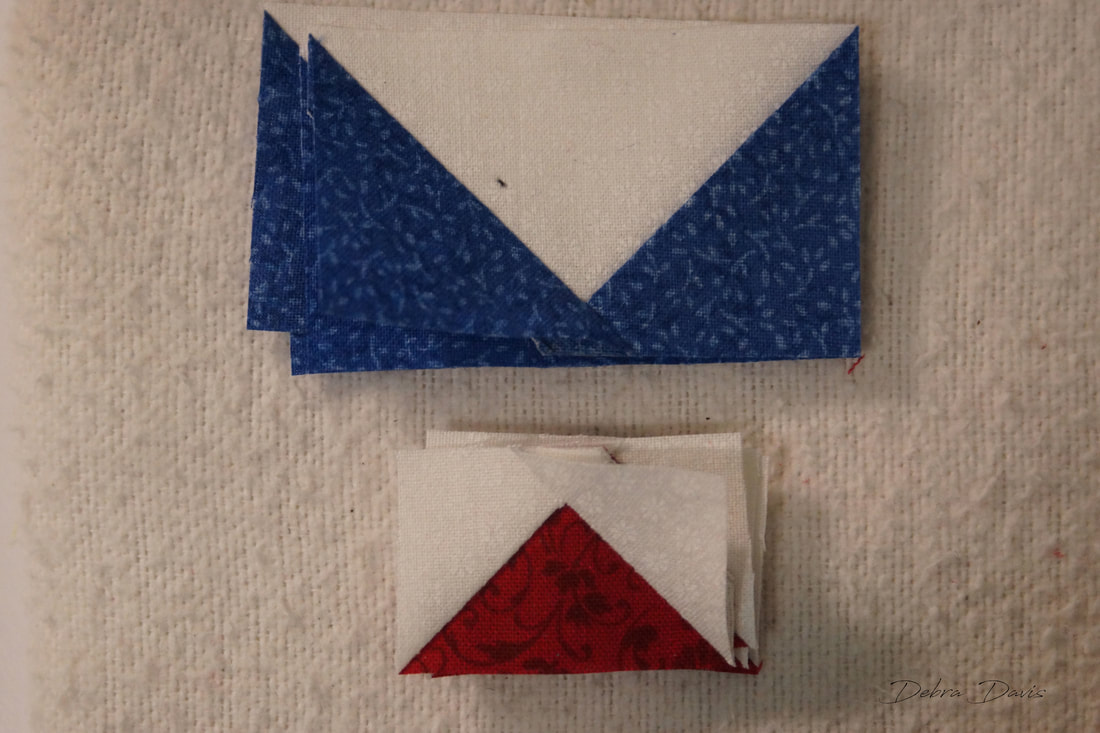
I now have four Flying Geese units that need to be trimmed. I am using Creative Grids "Ultimate Flhying Geese Tool for this. I love that this one ruler does many sizes and is easy to use. It also benefits from the Creative Grids non-slip design. Since they finish at 1" x 2" I find that mark on the ruler and make the first trim. 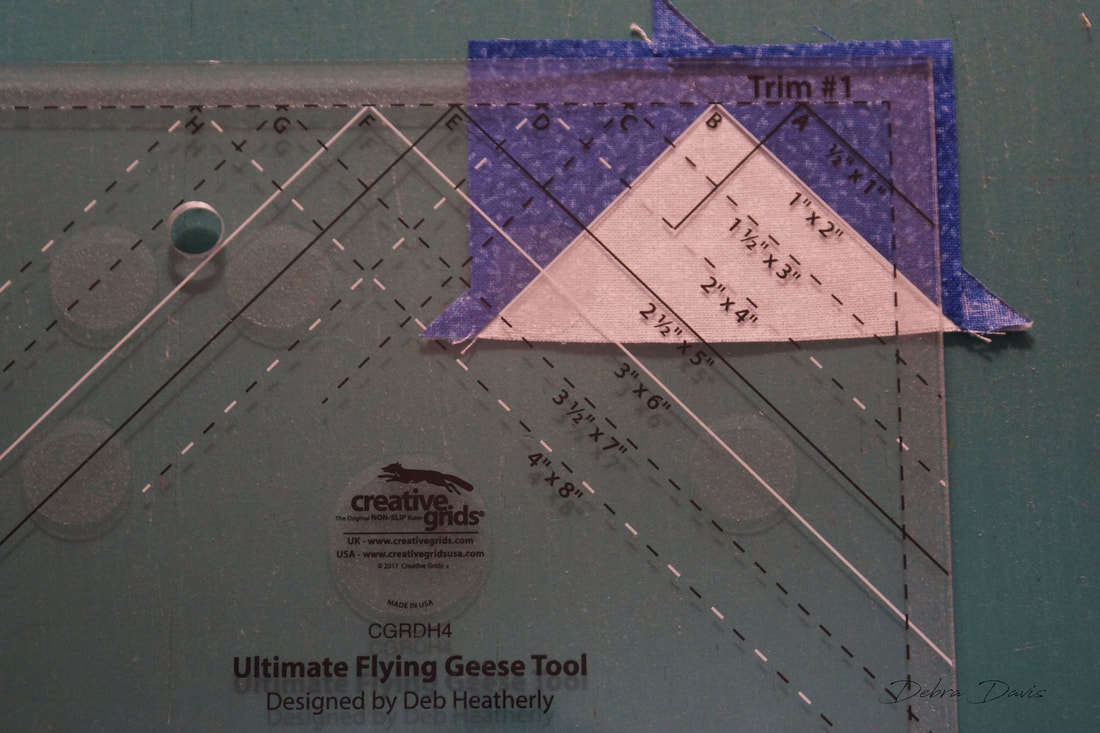 Then just rotate the block and turn the ruler for Trim #2. The Flying Geese now measure 1 1/2" x 2 1/2" 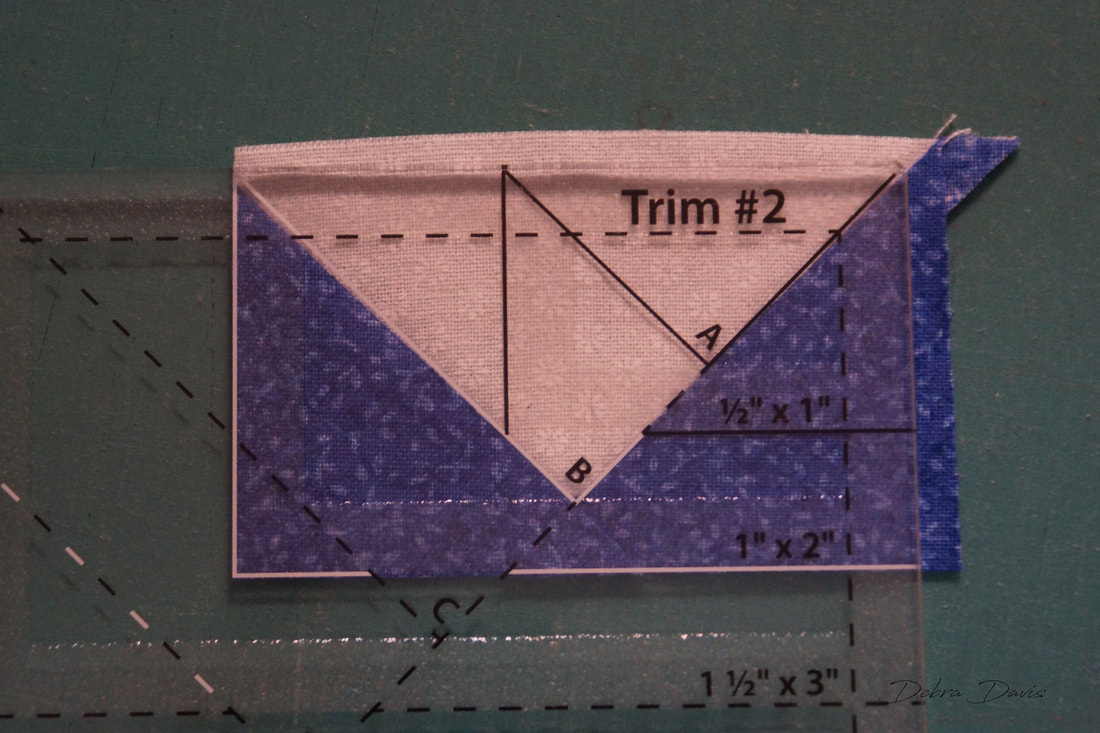 Next I repeat the process with the G and D squares. 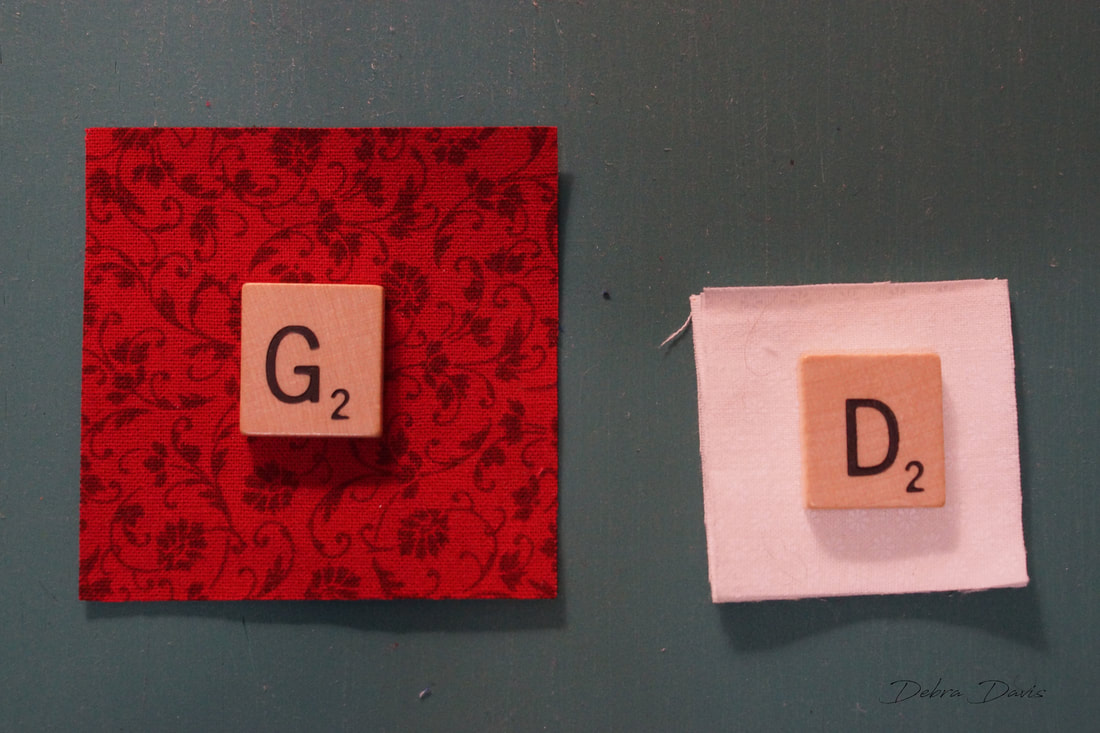 Marked and sewing on each side of the line. 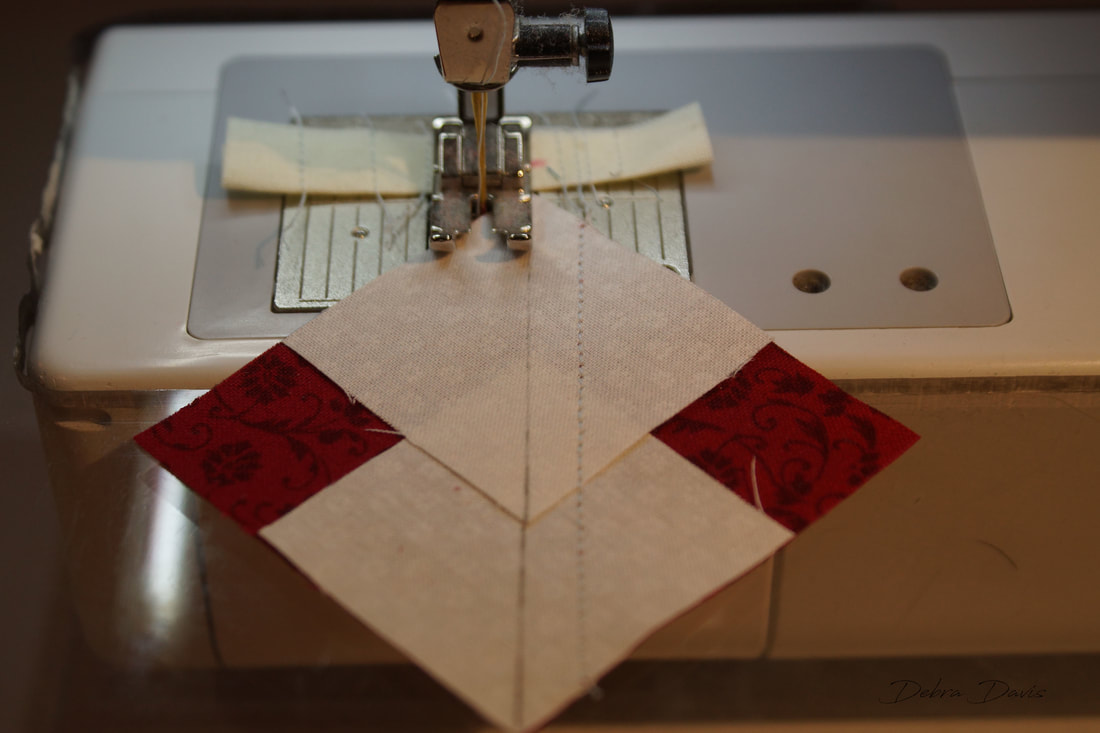 Using the ruler I trim these to 1" x 1 1/2" It is vital when trimming to make sure that there is 1/4 inch left above the point of the triangle. If you do not have 1/4 inch you will most definitely lose those points when you put the block together. -itty bitty Flying Geese!!! 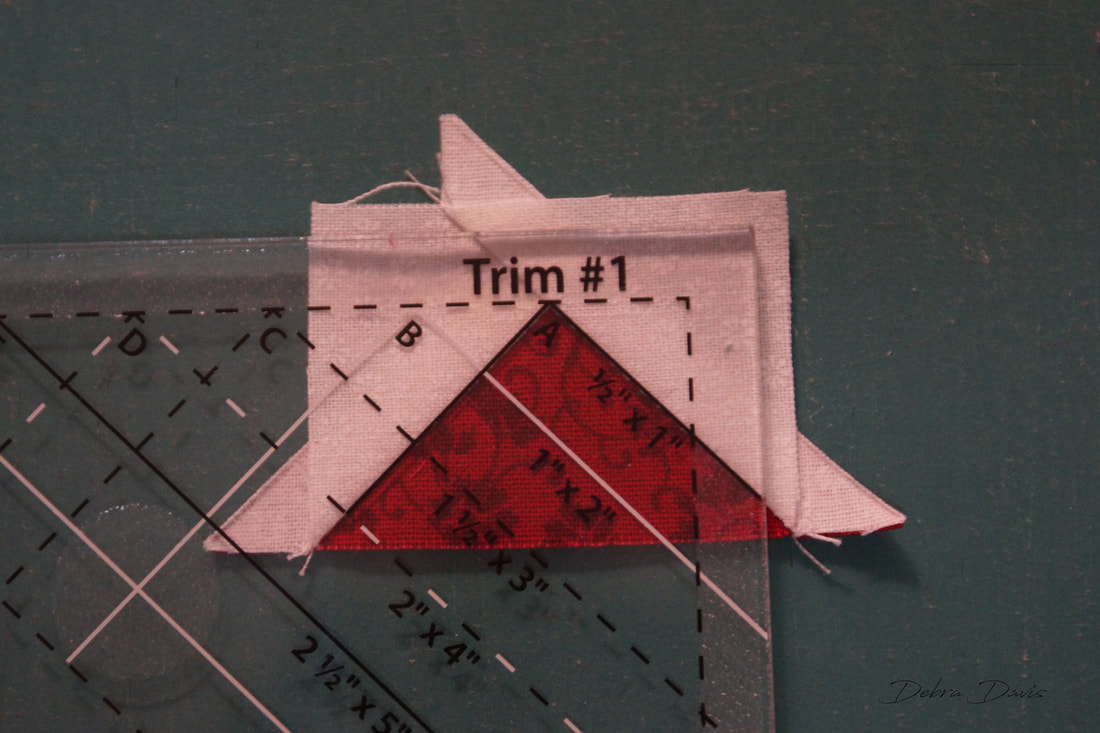 I set the Flying Geese aside and start making Half-square Triangles using the B and H squares.
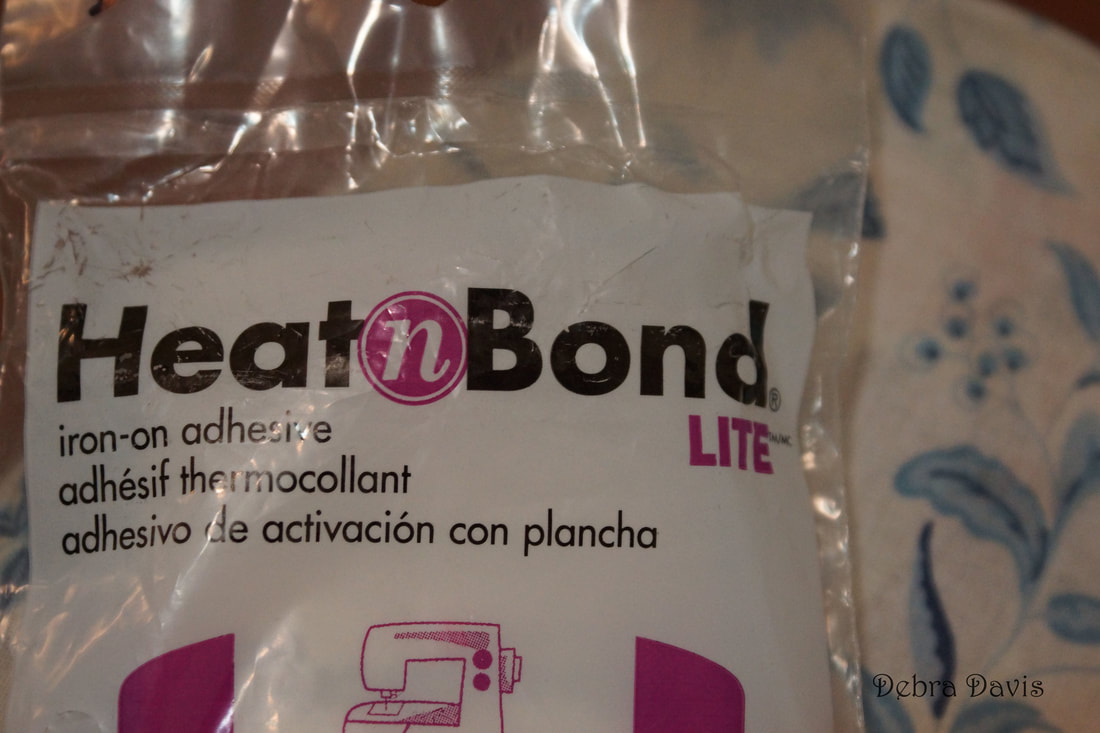
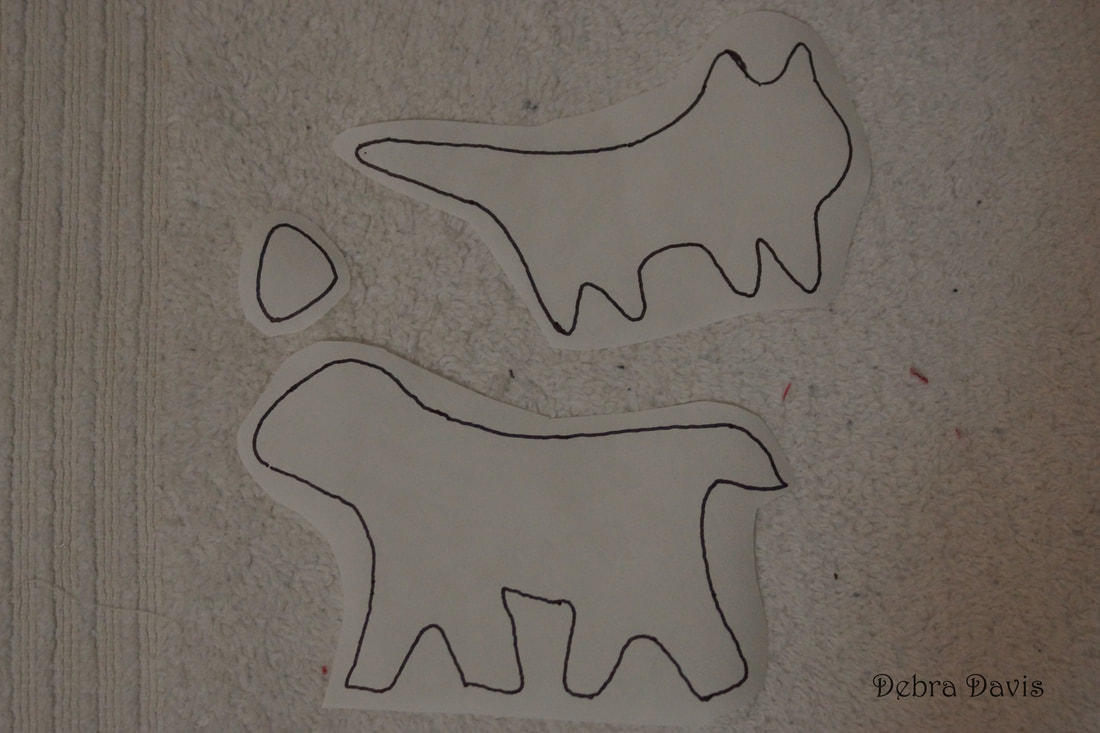
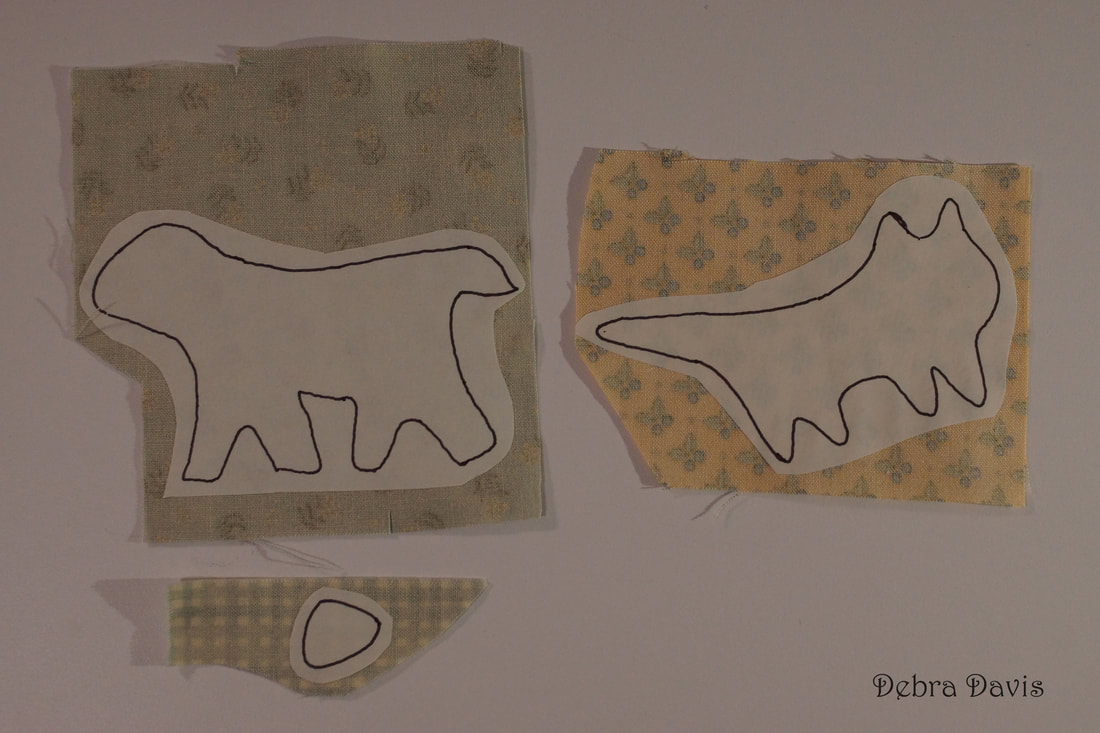
I have drawn a diagonal line on the back of the B squares then place them right sides together on an H square.  Once again I am going to sew 1/4" from each side of the line. 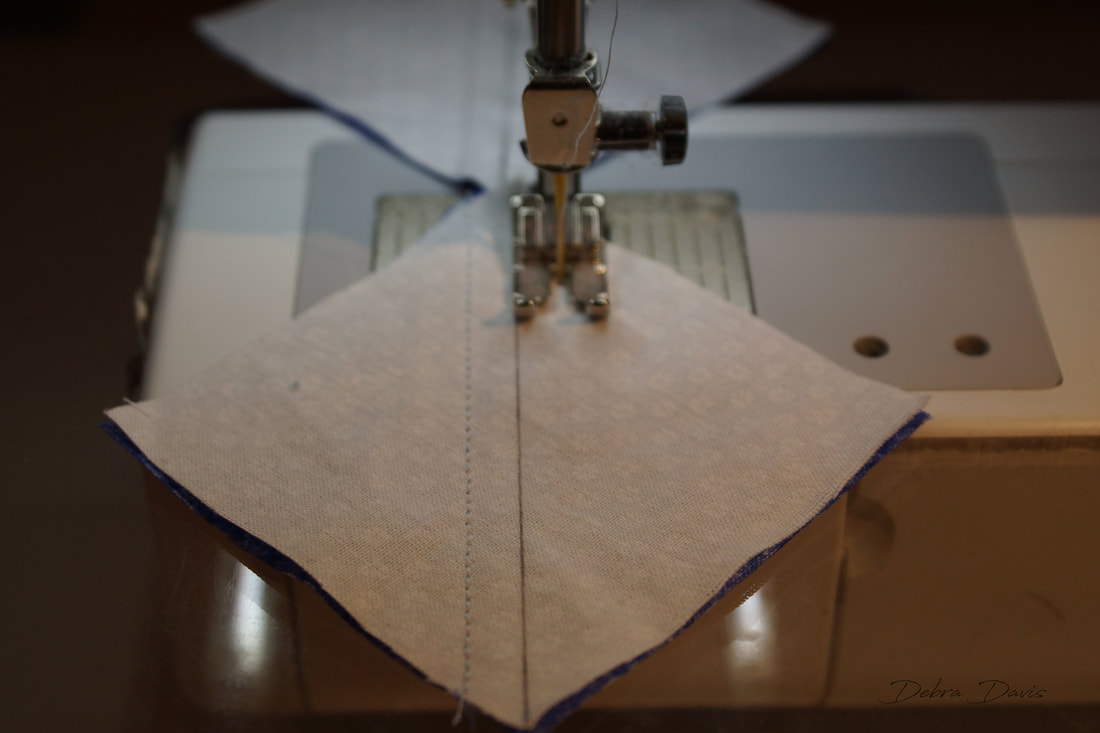 These are cut on the line and pressed towards the dark side. 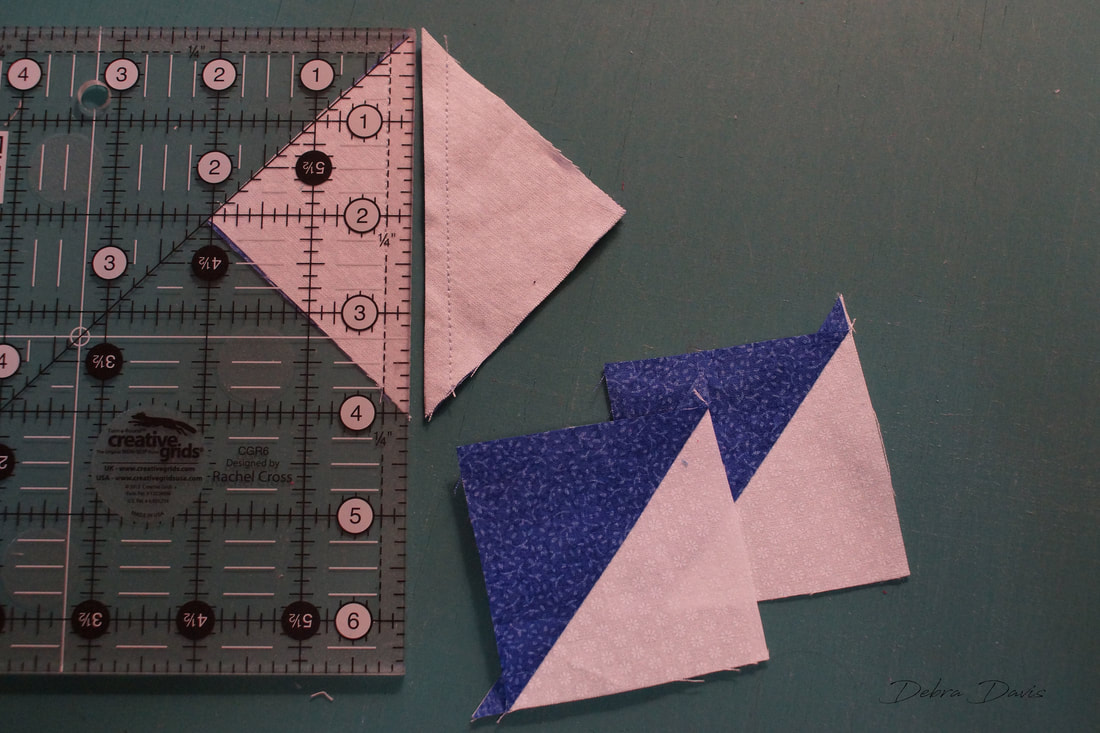 Using my Bloc Loc ruler I trim these to 2 1/2" squares. 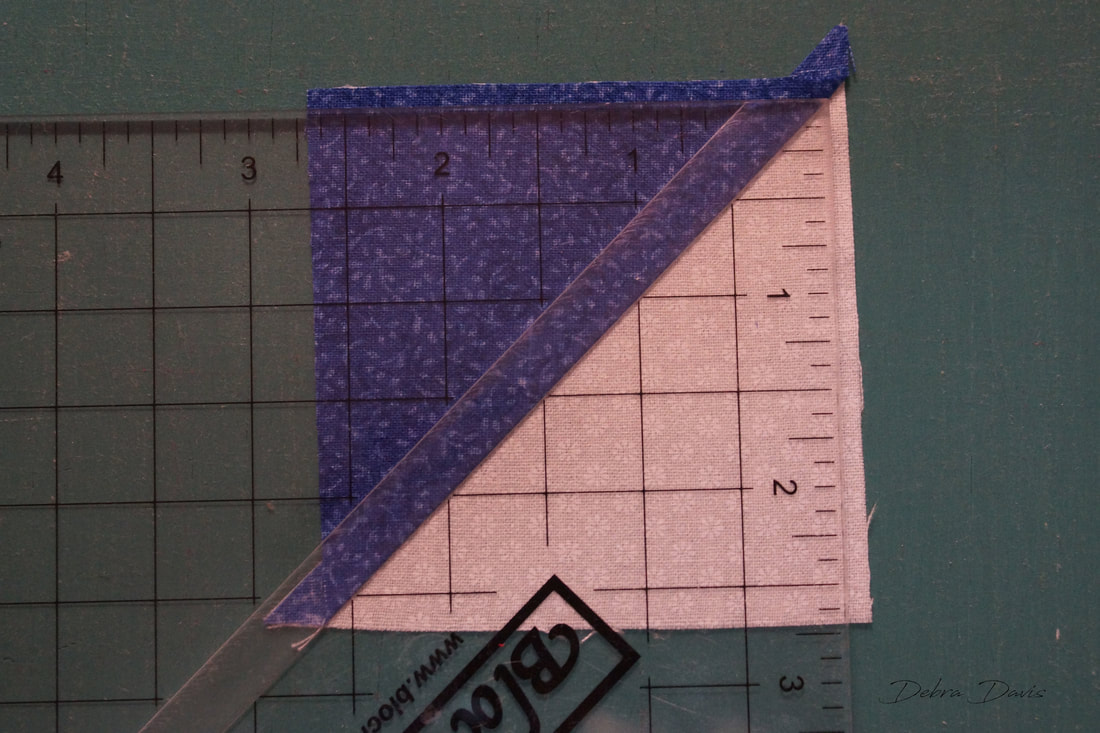 Time to put all of the pieces together. 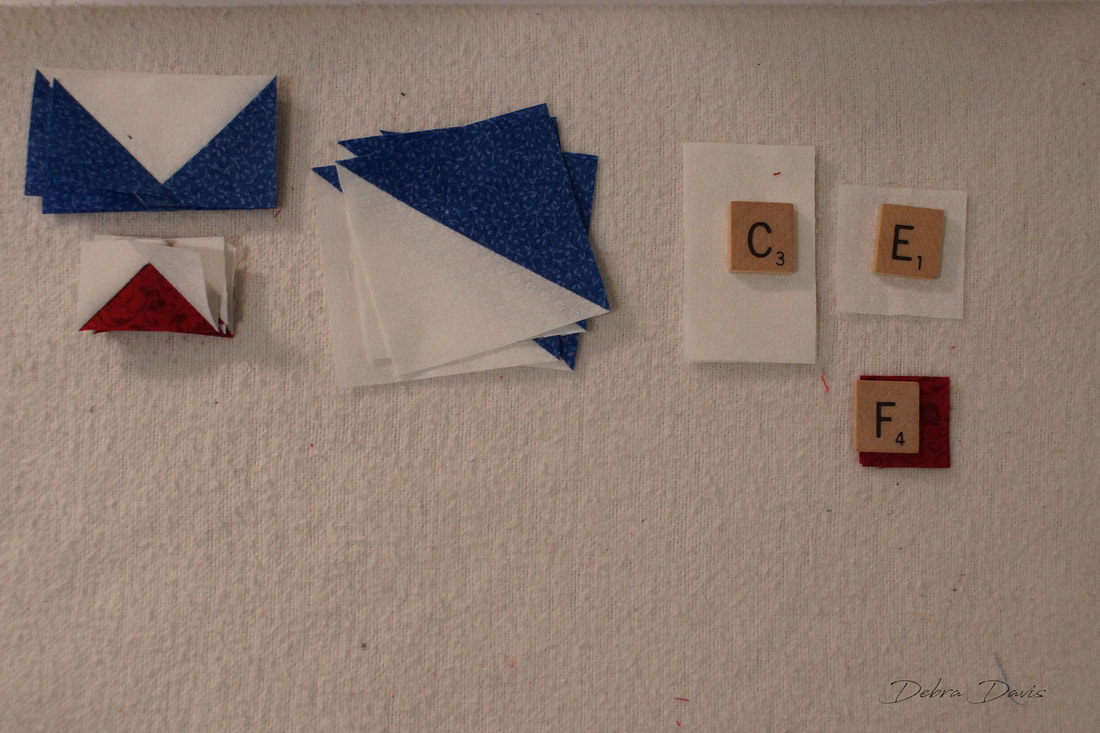 I started with the center square and lay out the small Flying Geese with the F and E squares. 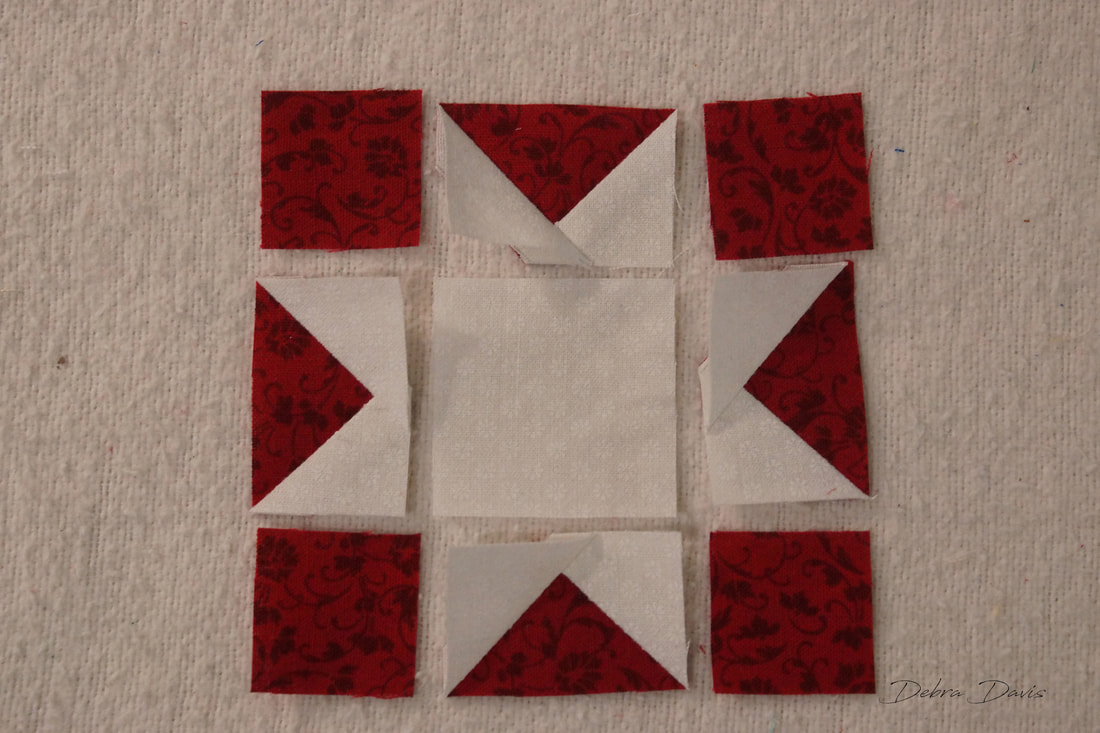 As I sew the rows together I work with the Flying Geese units on top so that I can see that my needle falls right on the intersection of the "X" made by the stitching lines. This will ensure nice crisp points. 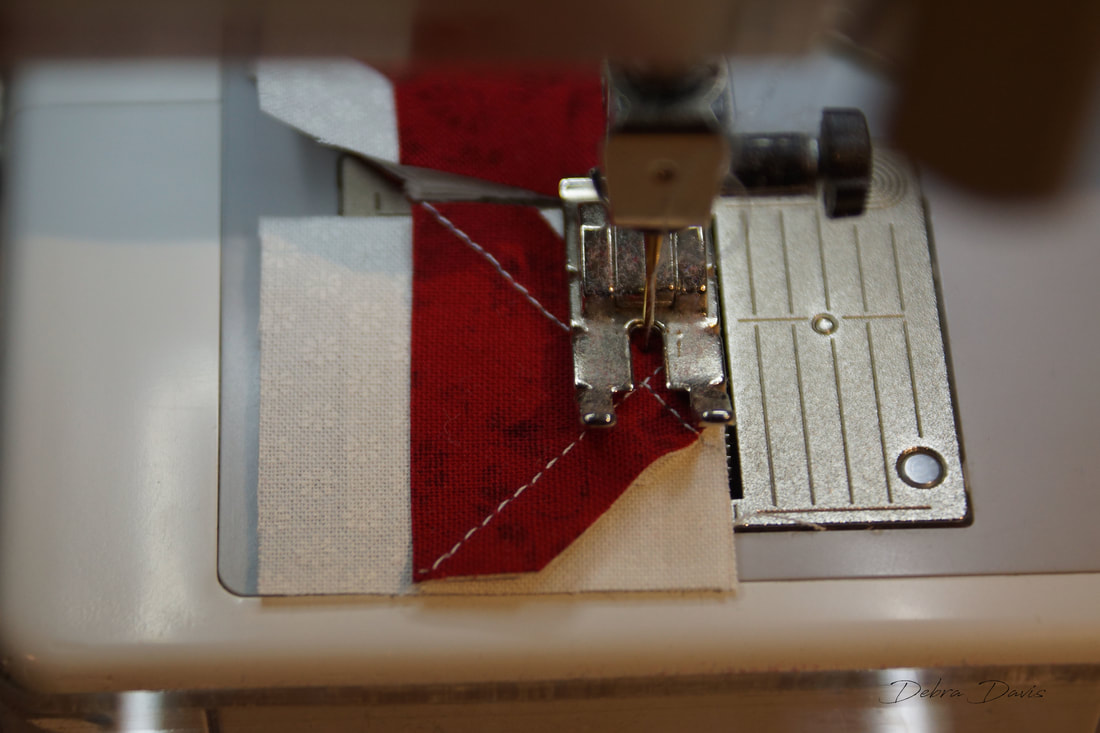 I pressed the top and bottom rows towards the F squares and the middle row towards the E square. After stitching the rows together I now join them to make the center square of the block I did place pins at the intersections where the seams were nested together. 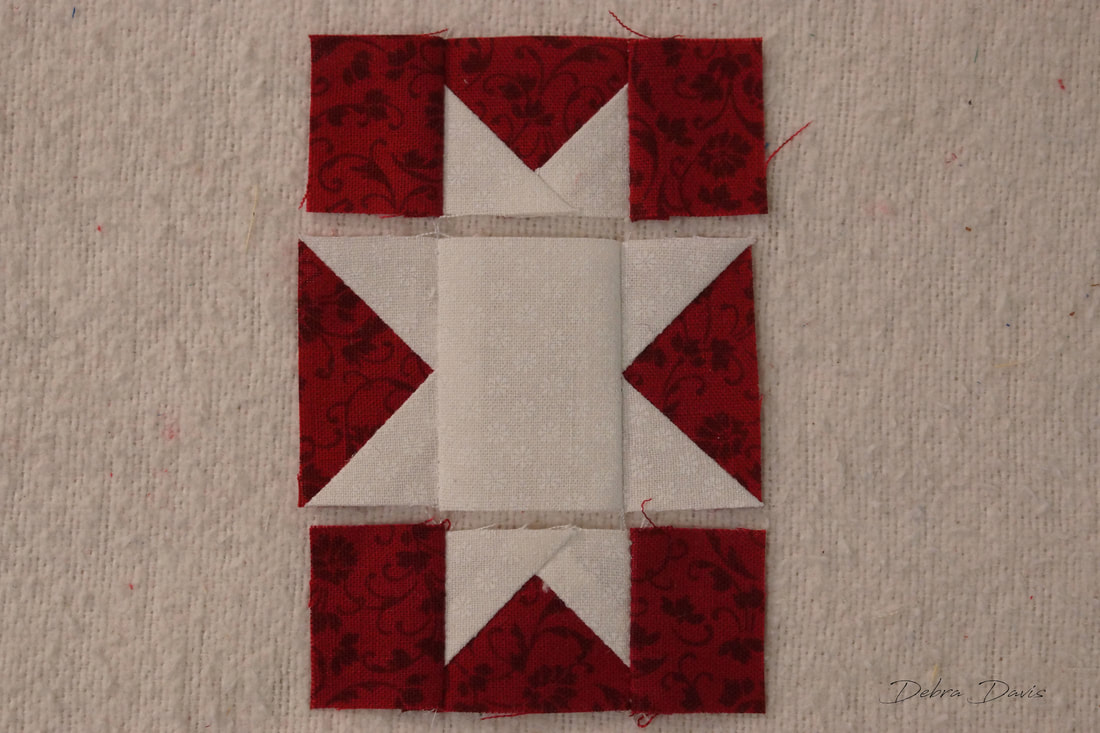 This square should measure 2 1/2" x 2 1/2" now. 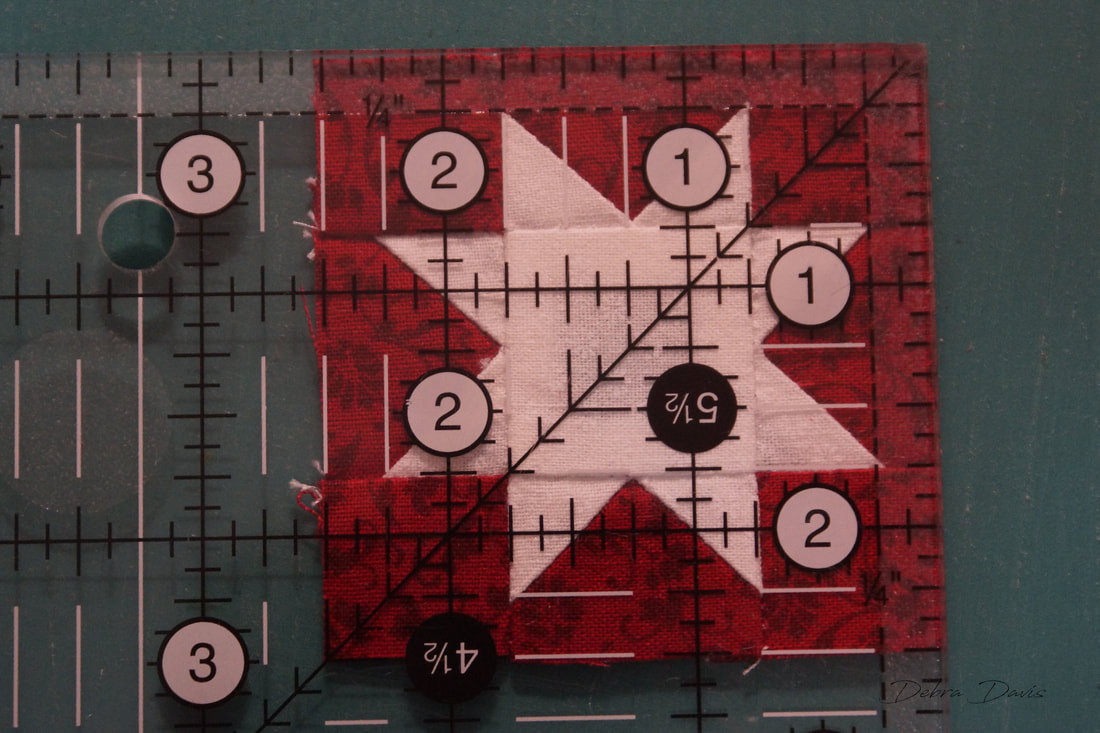 I need to join the large Flying Geese with the C rectangles now. 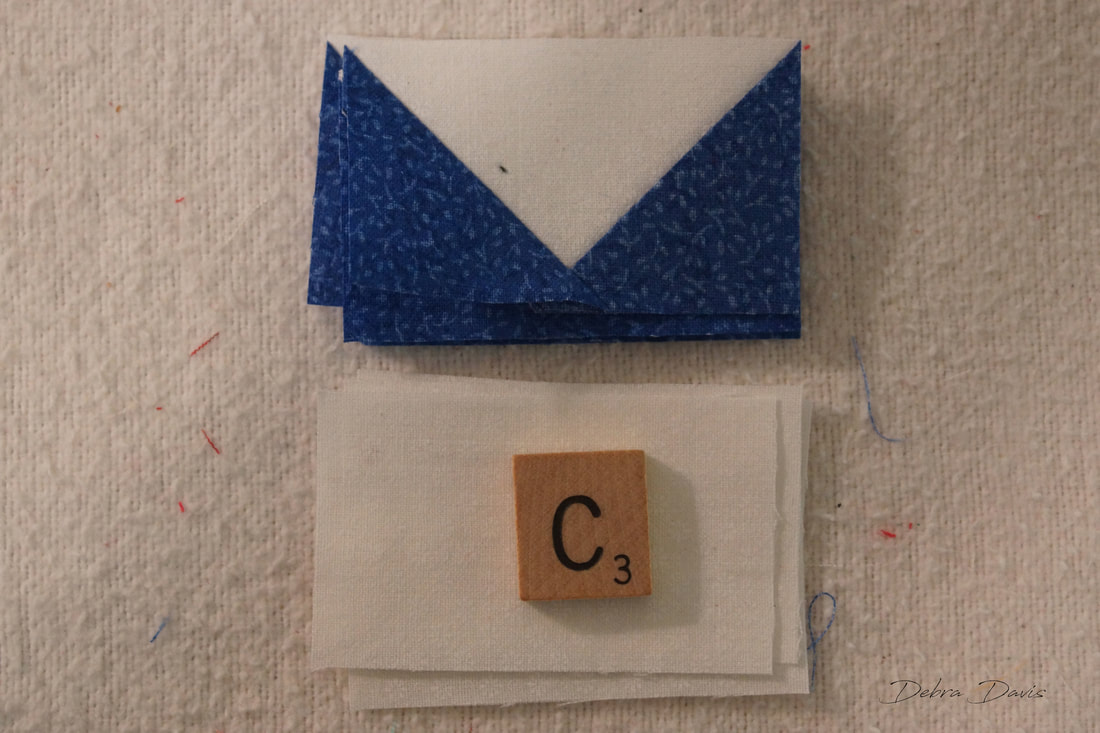 Again, as I sew these I aim for the center of the "X". 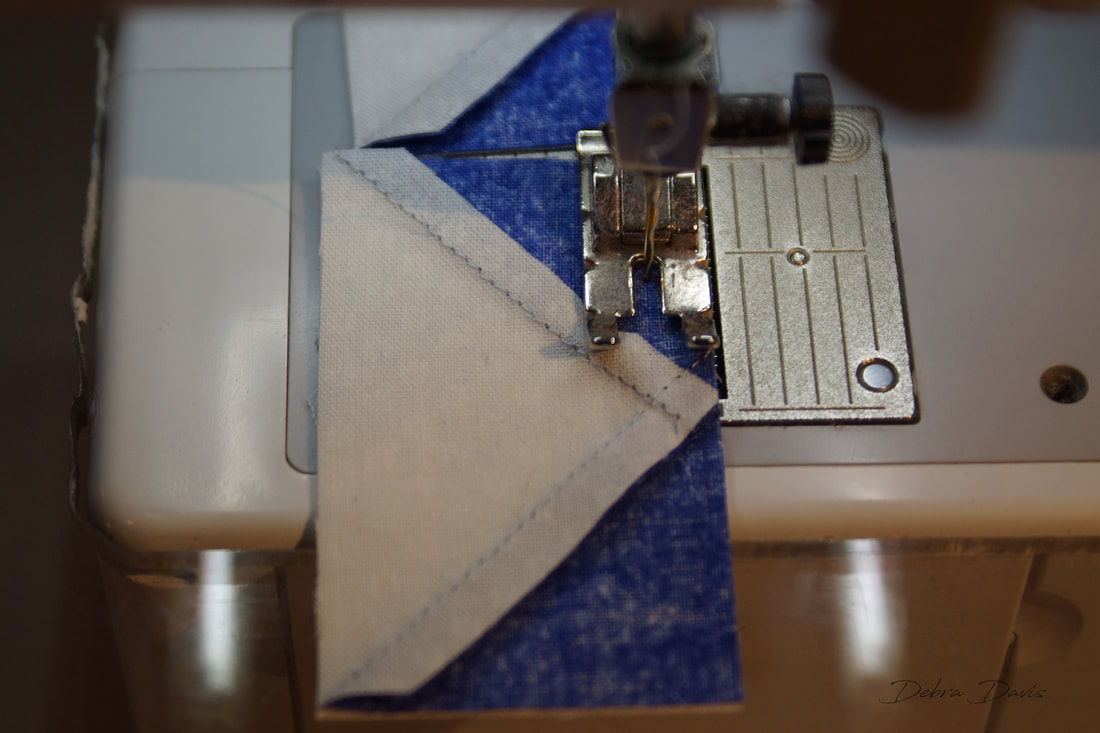 I pressed these towards the C rectangles. 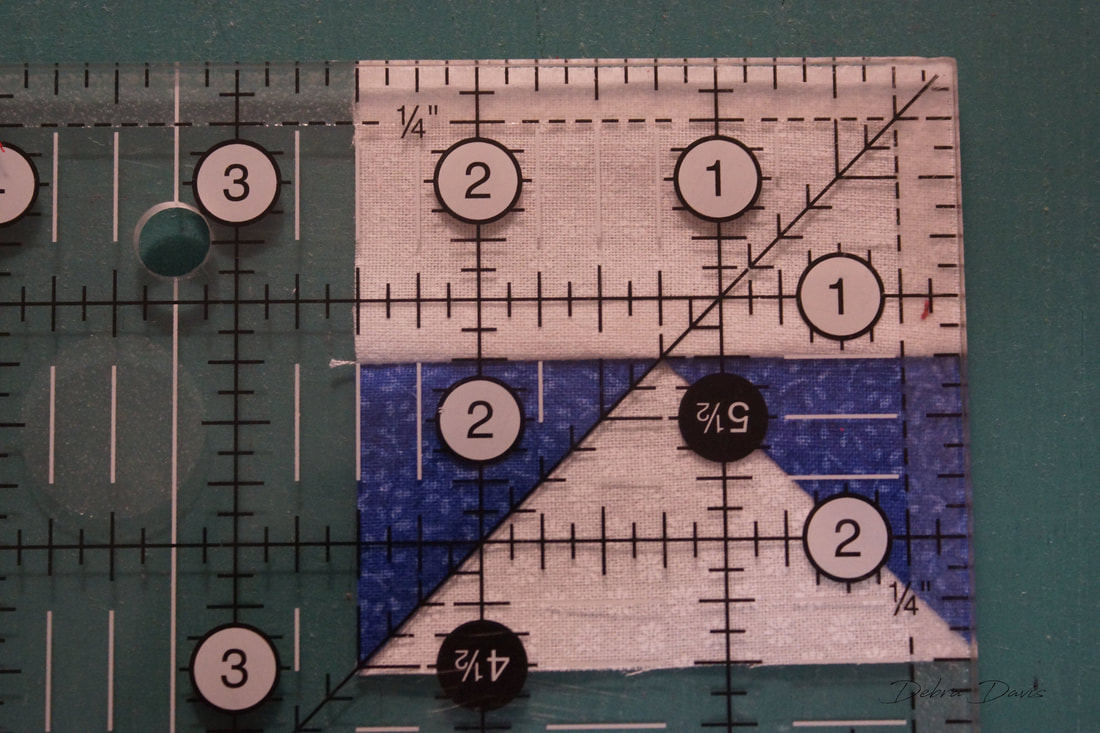 Now to put all of the pieces together. 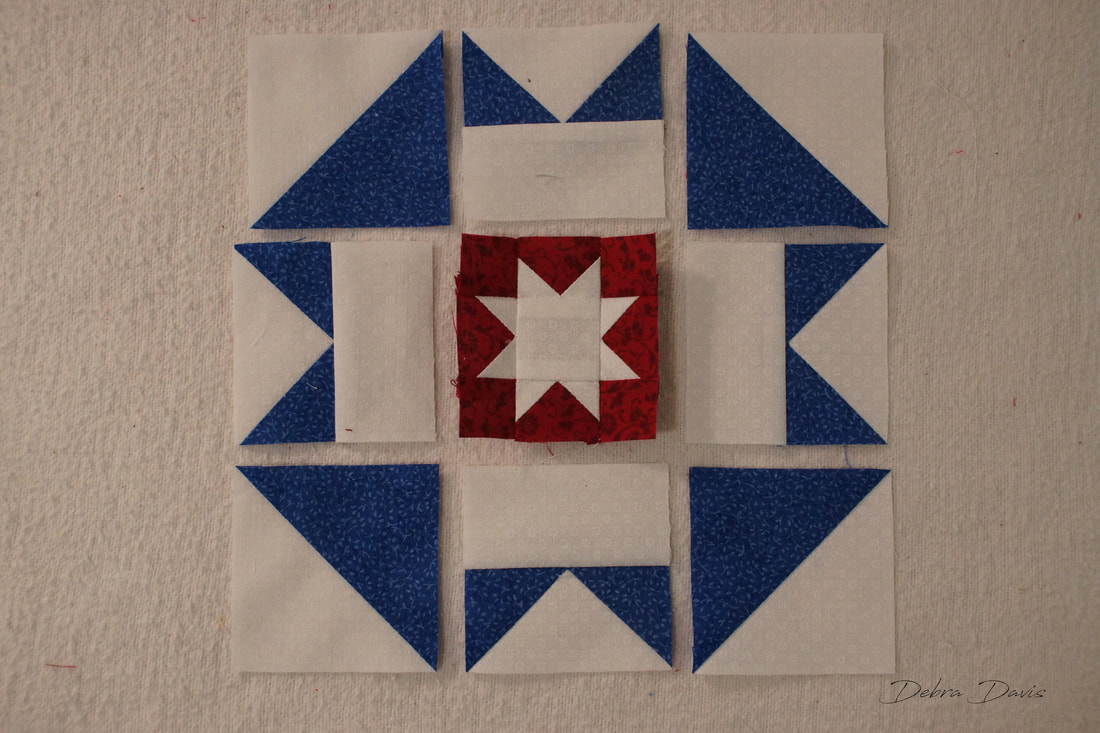 The only tricky parts are making sure my needle crosses at those X intersections again. 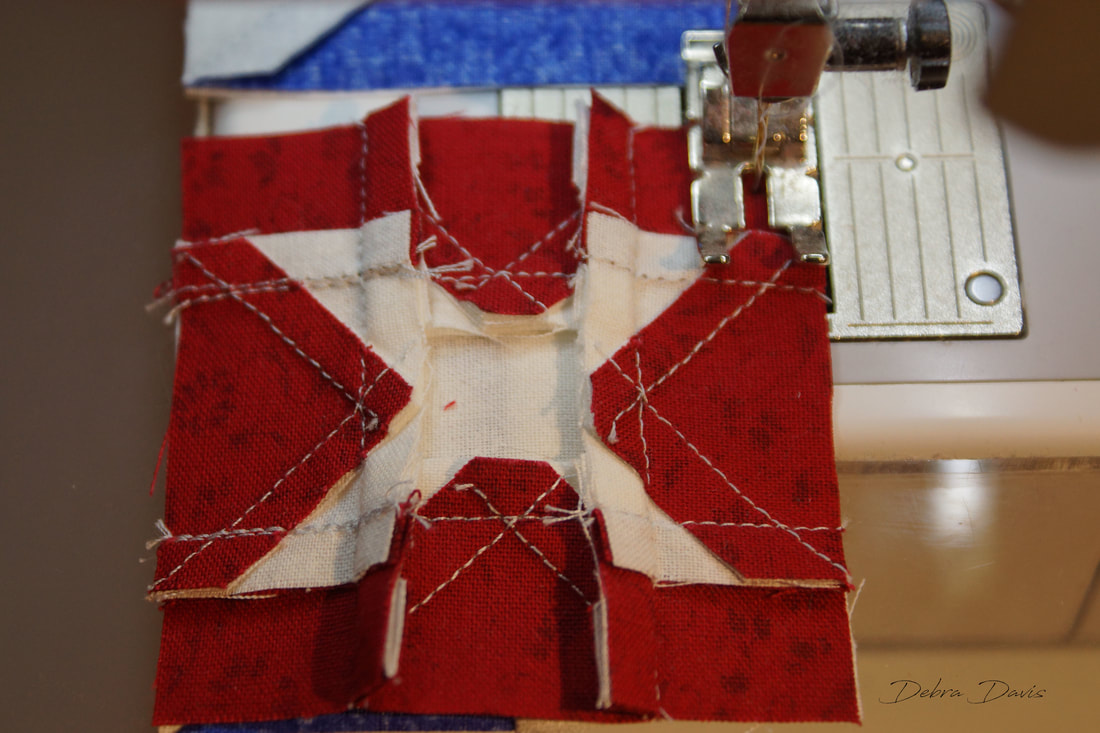 There are diagonal seams meeting in the corners-the best way I have found to deal with these is to sew with the seams faceing away from the needle as this seems to help push them together most of the time. A pin snuck in to hold them can help too. 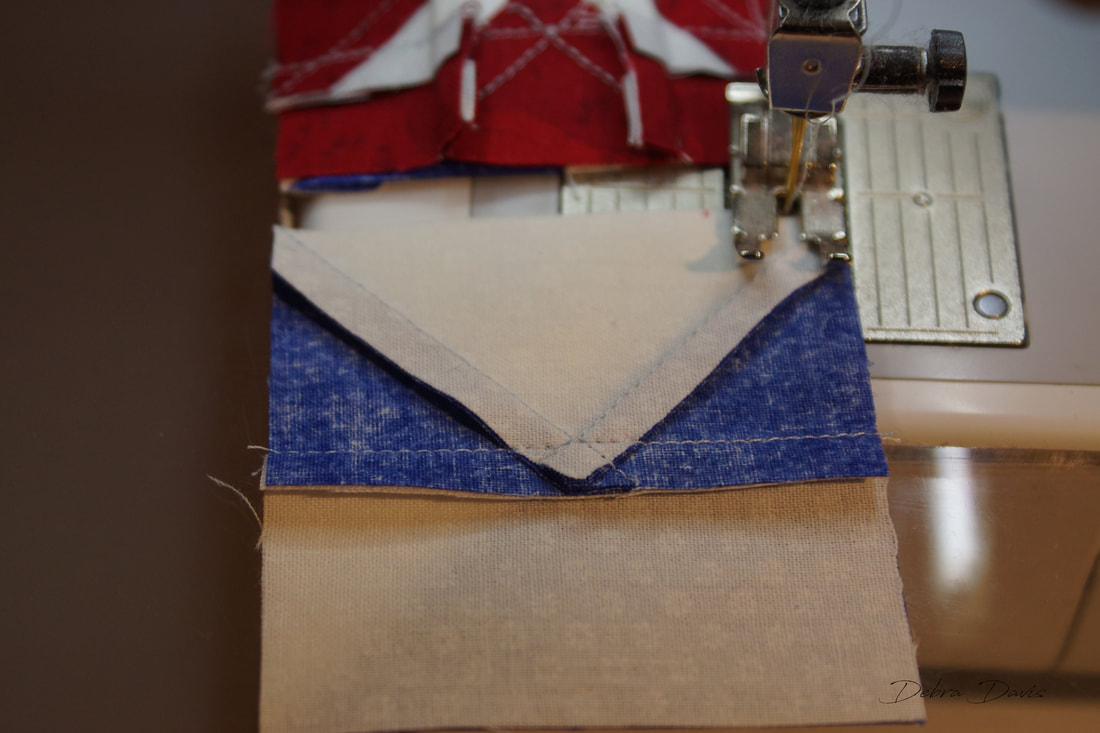 I pressed the top and bottom towards the middle sections and the center row towards the C rectangles. Just a matter of sewing these rows together and I am done. 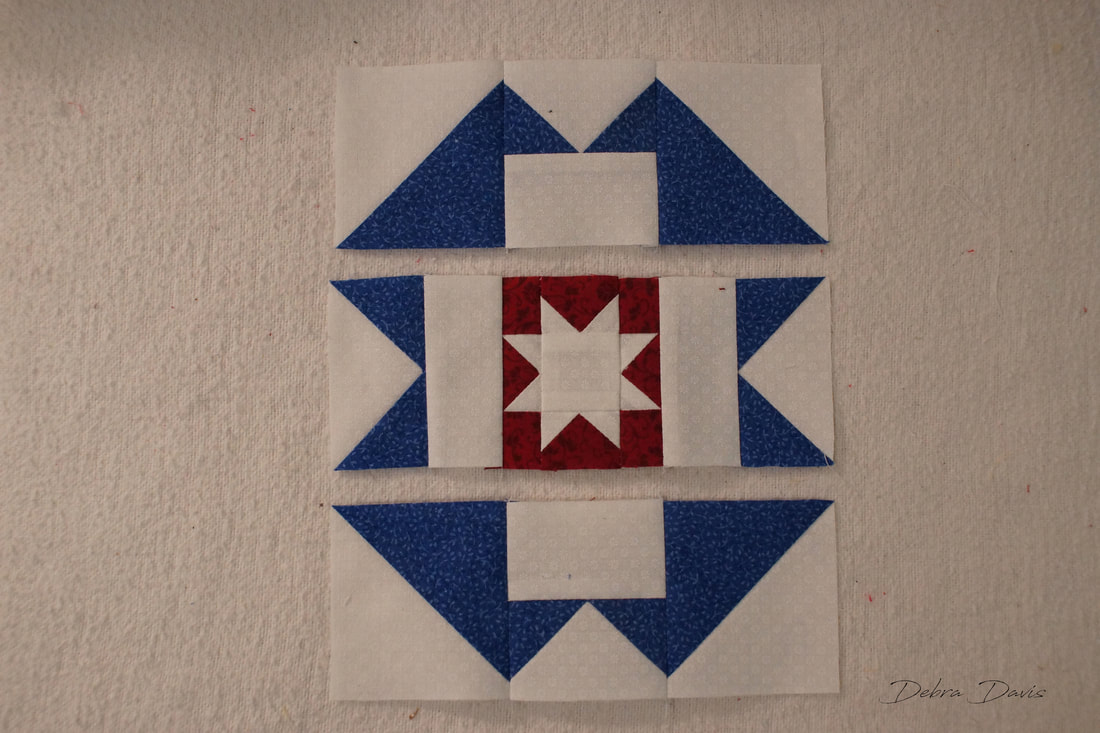 I am very happy with this one-I love it when things fall into place like this.  I have been doing Lisa's alternate block with red, white, and blue scraps. I have a few more to add to my collection and then I am not sure what I am going to do with them. Time will tell. 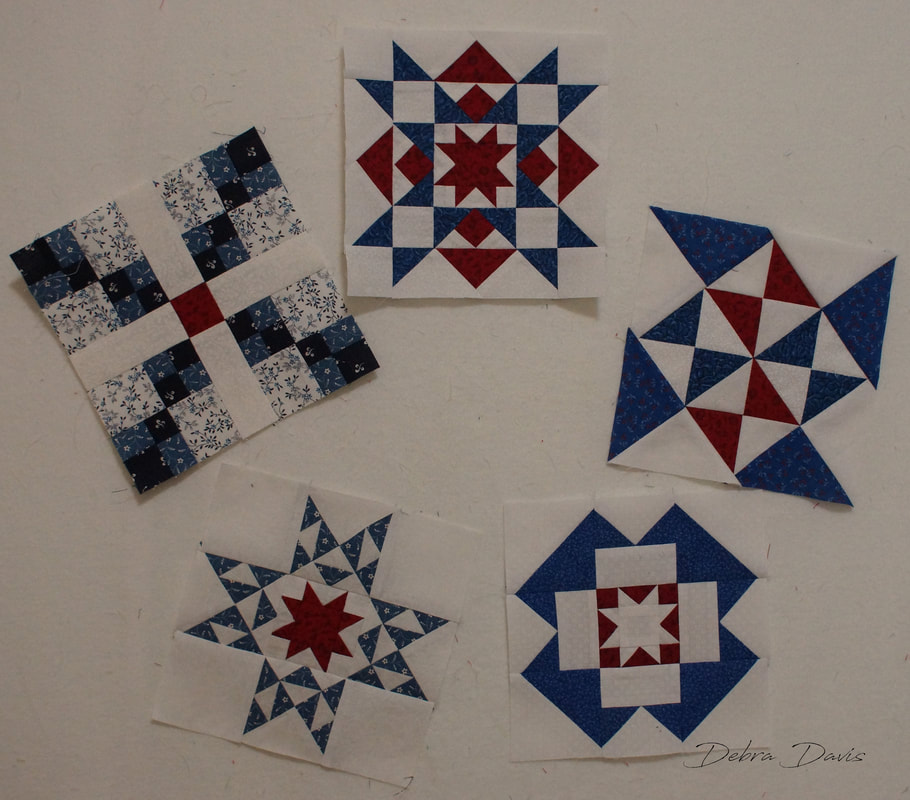 Hard to believe the journey is almost over-two more blocks to go--well two more blocks to be shared by the designers, I still have some to catch up on. Feel free to join me on my Facebook page to keep up with what I am doing-I hope the friendships forged her will continue!! My Facebook Page Until next time... Happy Quilting!!  Somehow I managed to get this block done on the day it came out-that hardly ever happens. This week's block was designed by Jan Patek with her primitive style look. You can find the free pattern on her blog by clicking on this link JanPatek.blogspot.com. I did add some little details to the design and oops-I forgot to reverse the pattern for fusible applique so my block is actually backwards but I decided it really did not matter. I think Miss Goldie the Cat and Blue the Dog will enjoy romping among my other garden blocks.  I have been using the fusible applique method for my applique blocks and stuck with it on this one. I traced the patterns onto my fusible (Heat N Bond Lite is my favorite.) Be sure and reverse the patterns if you want yours to face the right way on the block
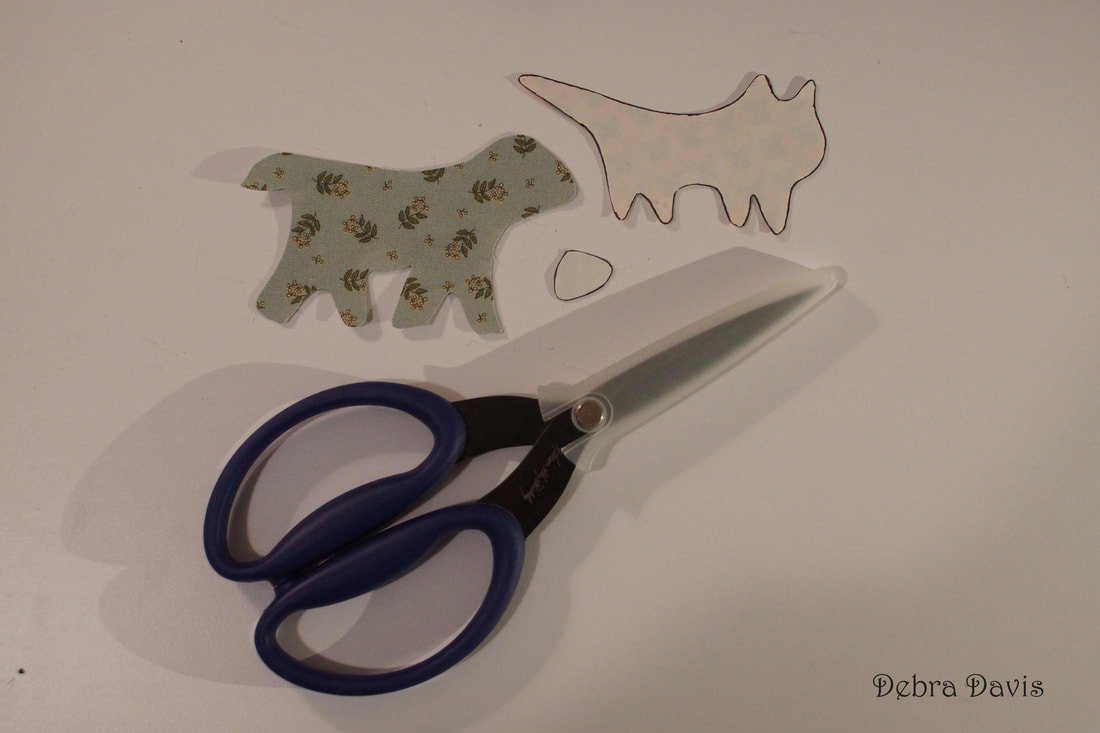
I cut around the patterns leaving a little extra and then fused them to the wrong side of my fabric. The ear for the dog is not part of Jan's pattern-I just drew it on the pattern and then traced onto the fusible. After fusing the pattern to my fabric I cut out on the lines.
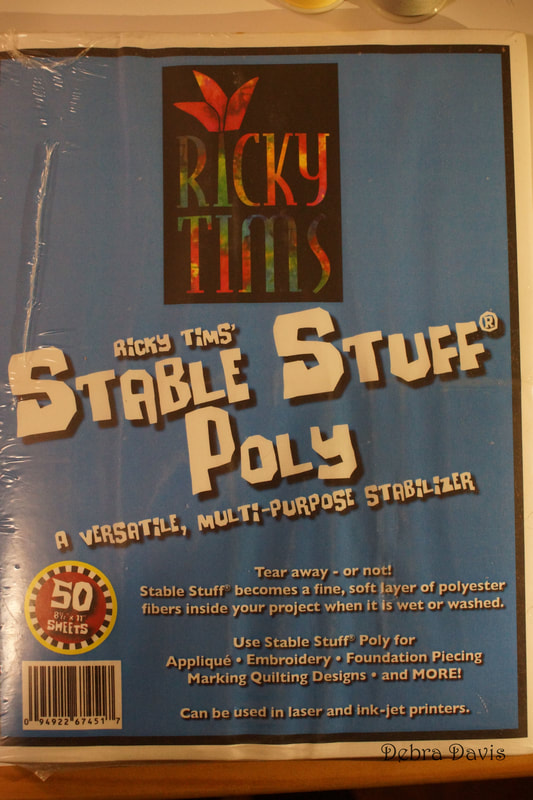
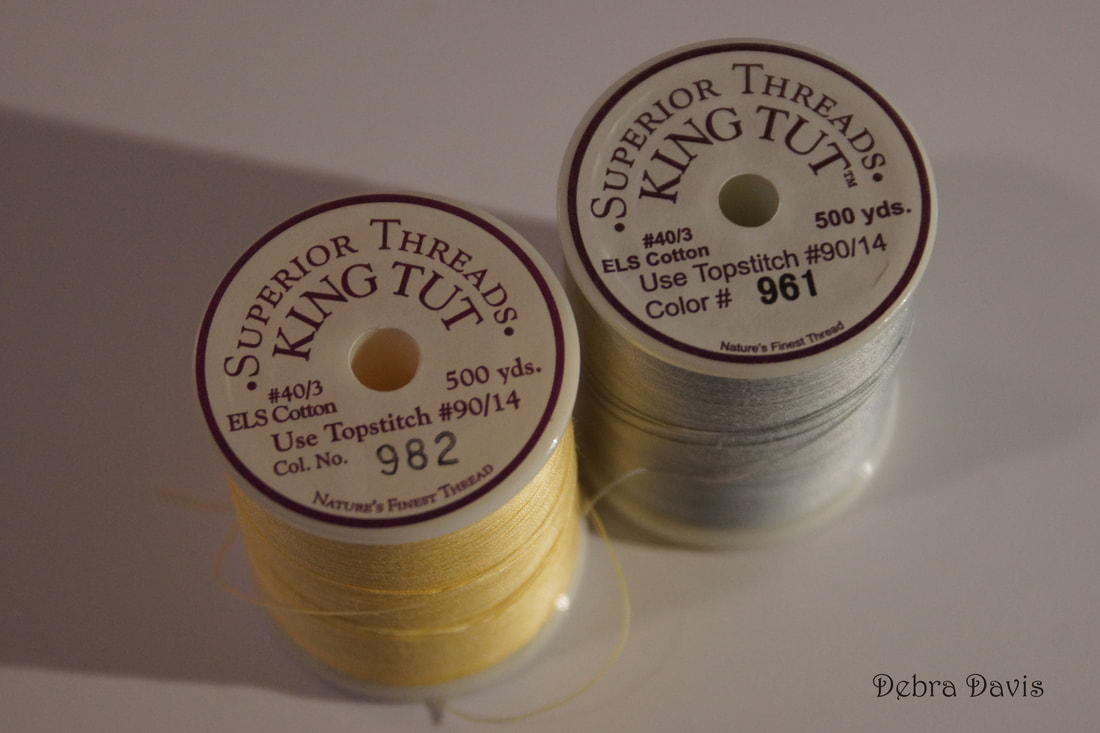
You can place the pattern sheet under the background fabric for guidance in placement if needed. When I was happy with how things looked I fused the cat and dog (complete with ear) onto a 7" x 7" square of background fabric. 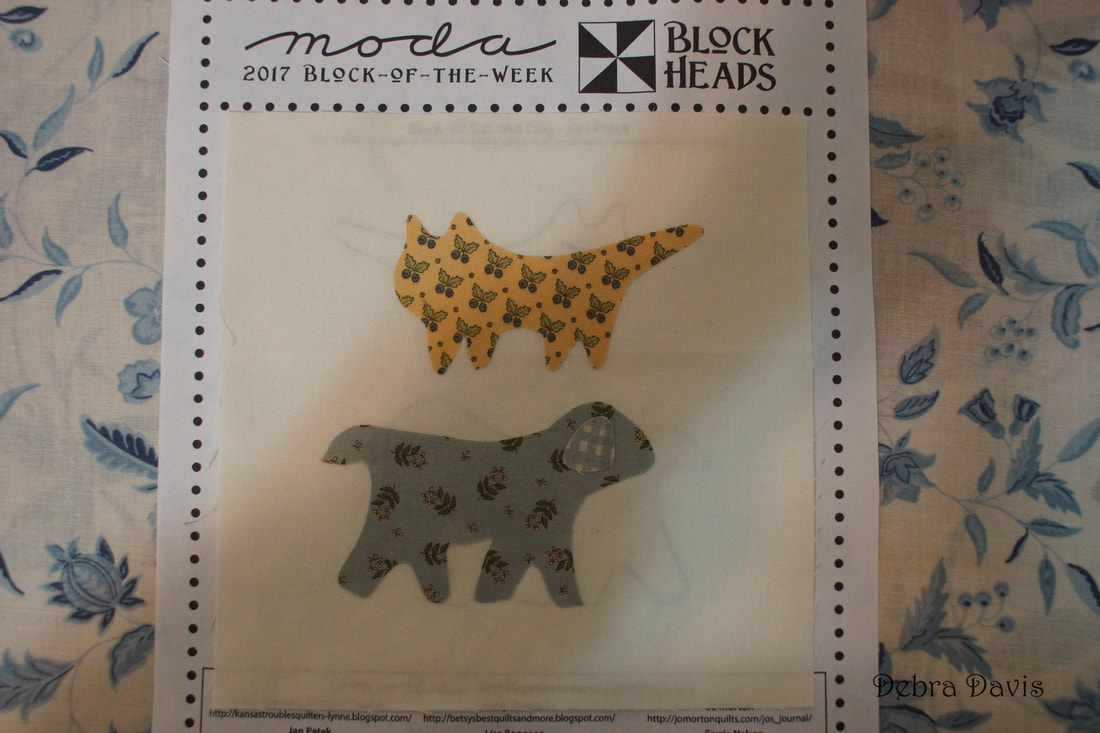 Before starting to sew I always add a piece of stabilizer to the back of my block. The stitches come out much nicer. I have several types and today I grabbed a sheet of Ricky Tims Stable Stuff and pinned it to my block. I pulled out a couple of threads from my ut stash to use.
If you have followed along with me on these blocks then you know I like to start with a straight stitch and always keep my needle in the down position. For the applique I am using a small stitch 1.9 on my machine which is about 14 stitches per inch. I also move my needle over 2 positions to the right. 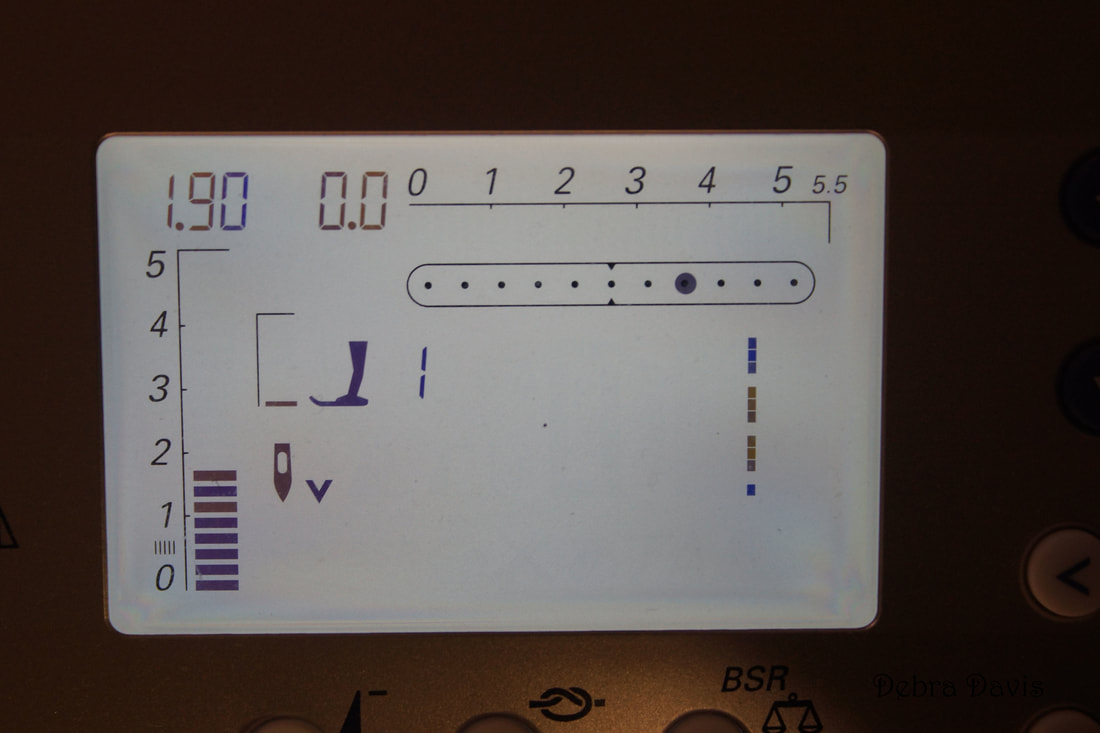 I picked a starting point and began with 5 straight stitches right along the edge of the applique. 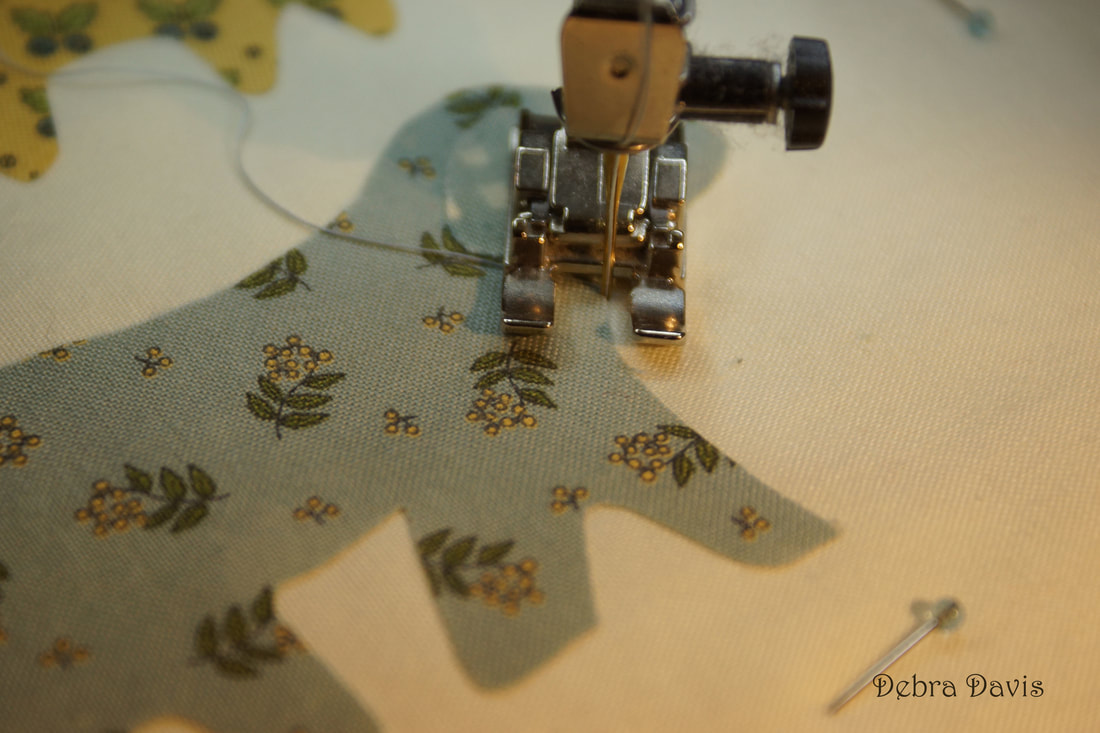 Next I switch to the double buttonhole stitch on my machine. The stitch length is again 1.9 and the width I like is 2.0. My needle is in the down position and is centered rather than moved to the right as in the straight stitch settings. I love that my machine has a memory and I jsut have to press a button to move between these two stitches. 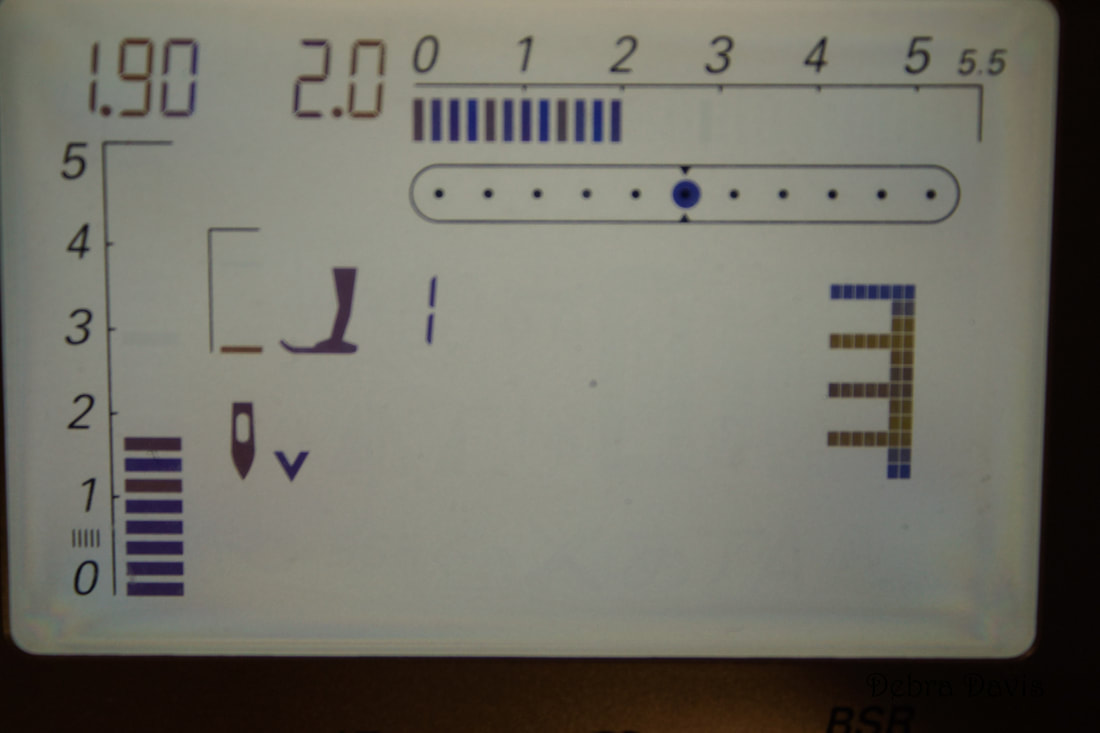 Now I am ready to start the buttonhole stitch. I still want the straight part of the stitch to land right alongside the applique piece. Notice the needle is just beside it not on top of it.  Here you can see the "bite" of my buttonhole stitch. I take my time as I work my way around the applique. 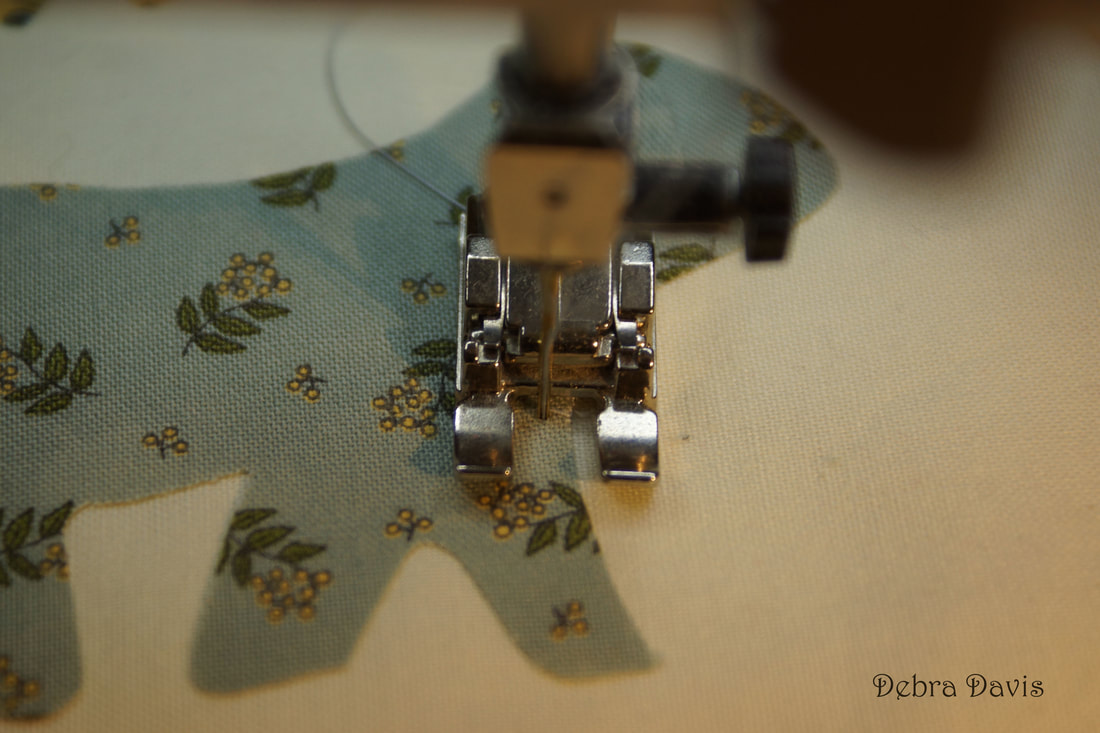 When I come to a turn like this I lift the presser foot, making sure that my needle is still down in the fabric. The pivot and turn. 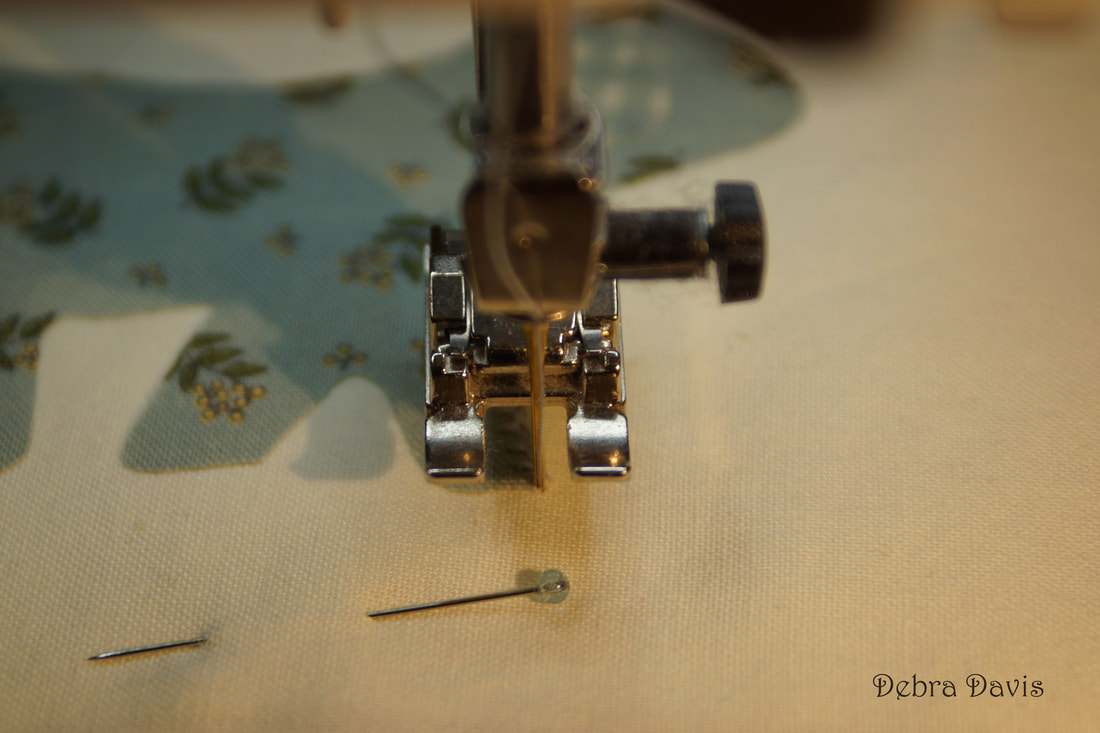 If a turn like this comes on the straight part of the stitch I pivot right before the "bite" part of the stitch. Then when I make the turn the "bite" will go over those same straight stitches I just made. before proceeding across the applique. There are lots of little turns and adjustments to make going around the legs. I just take my time and lift and pivot as needed.  When I get back to the beginning straight stitches I continue the buttonhole stitch right over the top of them. I have already clipped the top and bobbin threads off so they do not become a tangled mess on the back of my work. 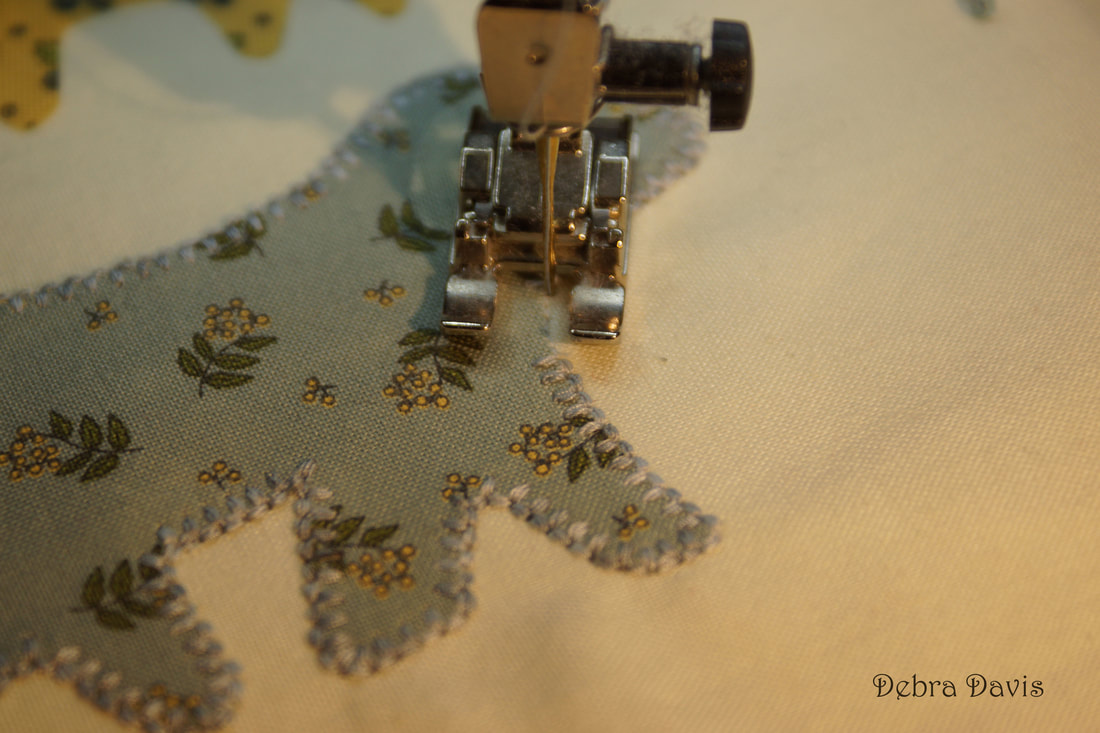 When I get to the start of the buttonhole stitch I switch back to the straight stitch (with the needle 2 positions to the right) and take 5 or six stitches ending with a locking stitch. 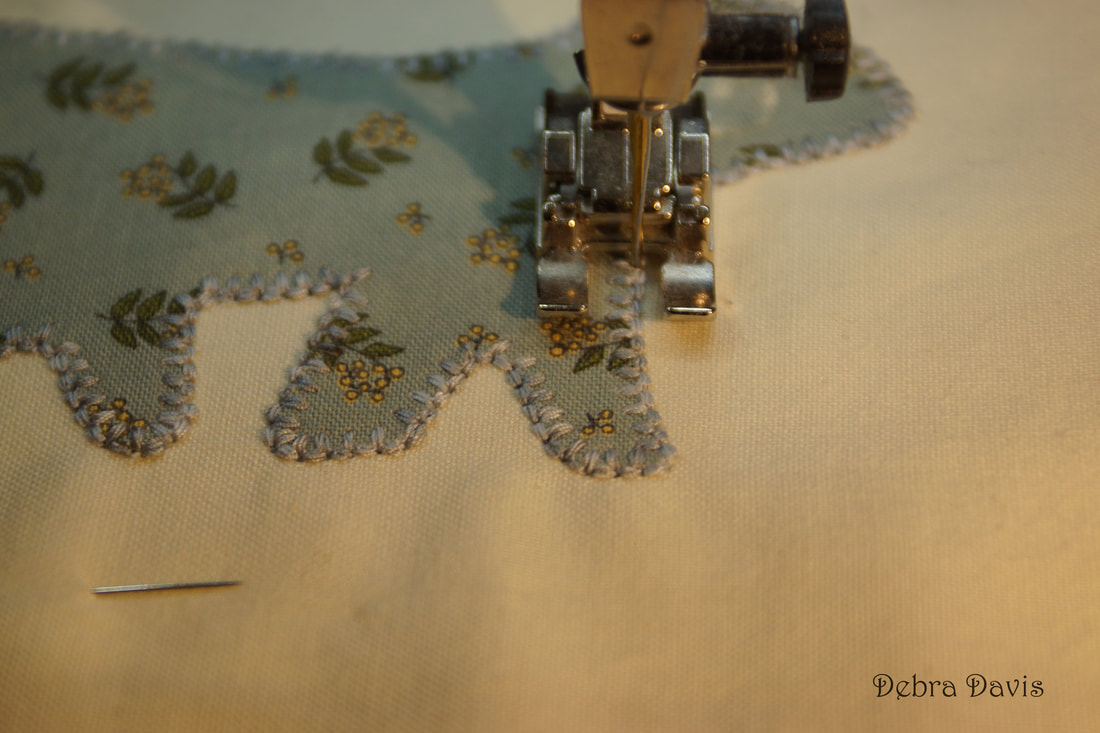 I use the same process to go around the ear. 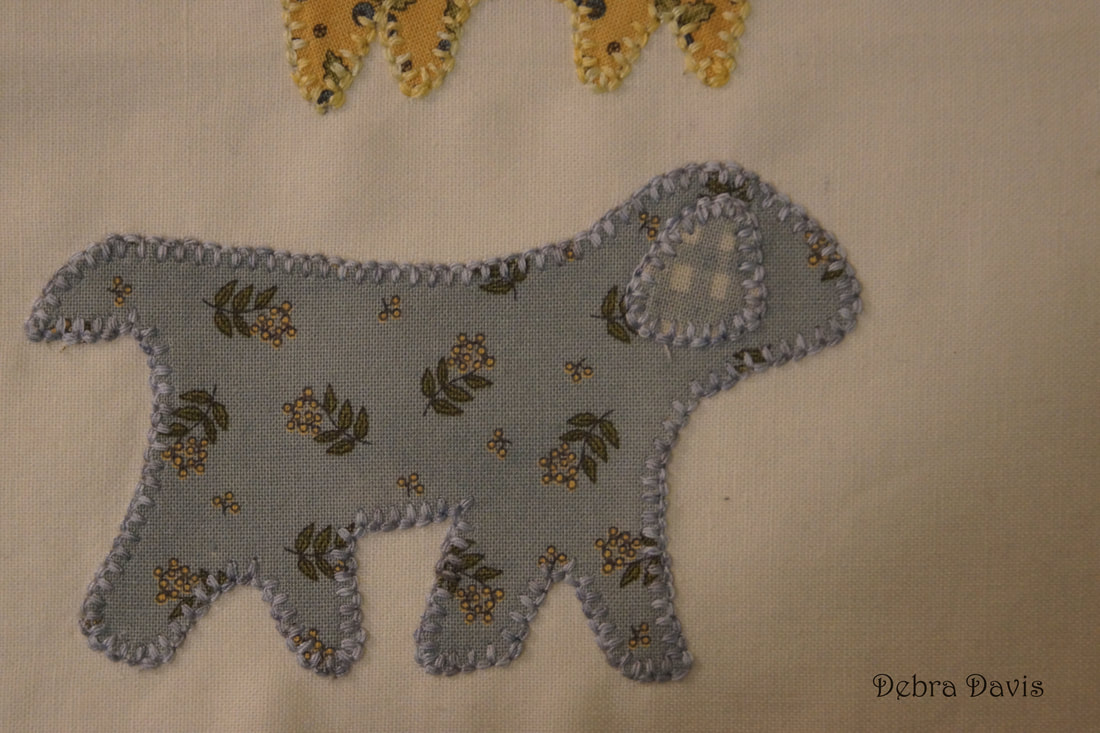 And the cat too. 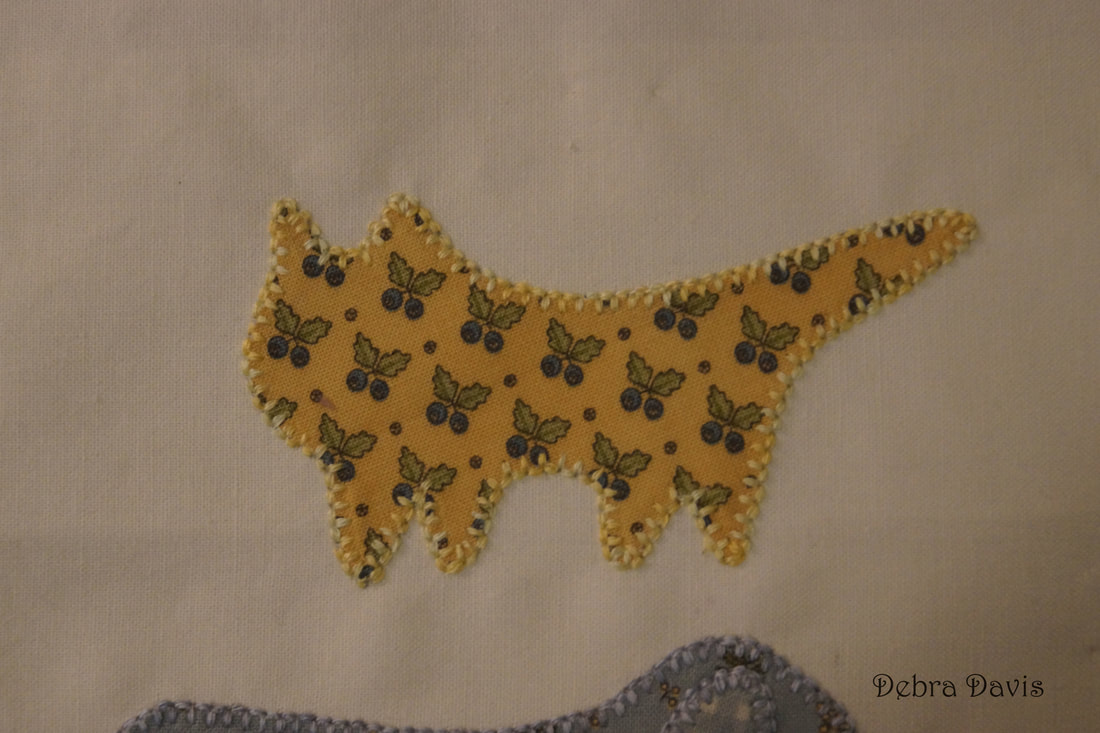 At this point I just felt my two friends needed some features rather than their blank faces. 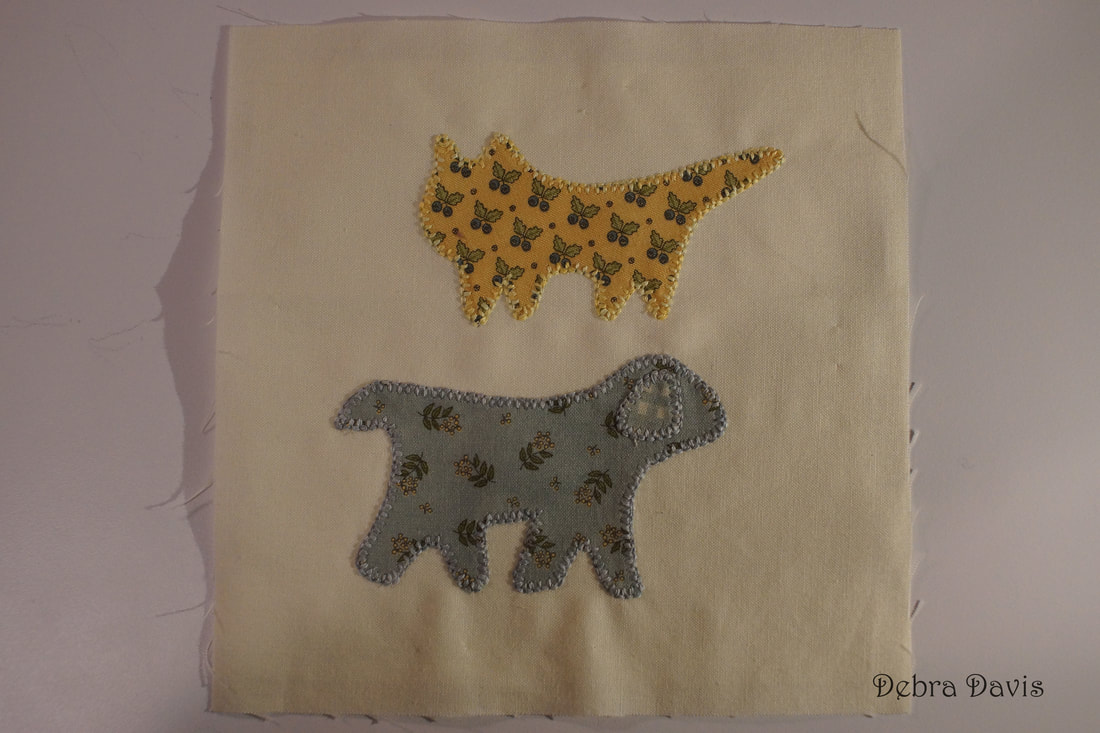 Using a satin stitch I hand embroidered an eye and nose onto the dog using two strands of black DMC floss. 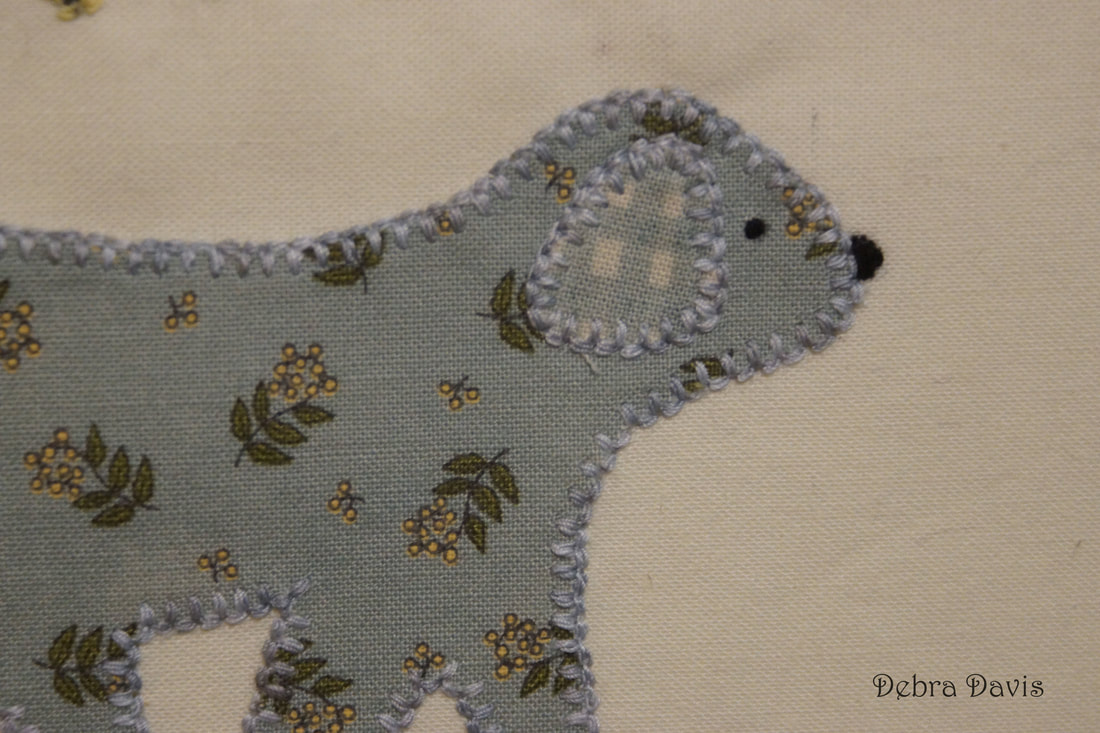 I used one strand of floss and a backstitch for the whiskers on the cat as well as the outline of the nose and her smile. I used two strands of floss to satin stitch a nose and two eyes. The ears are backstitched using two strands of pale pink floss-the same color as the nose. 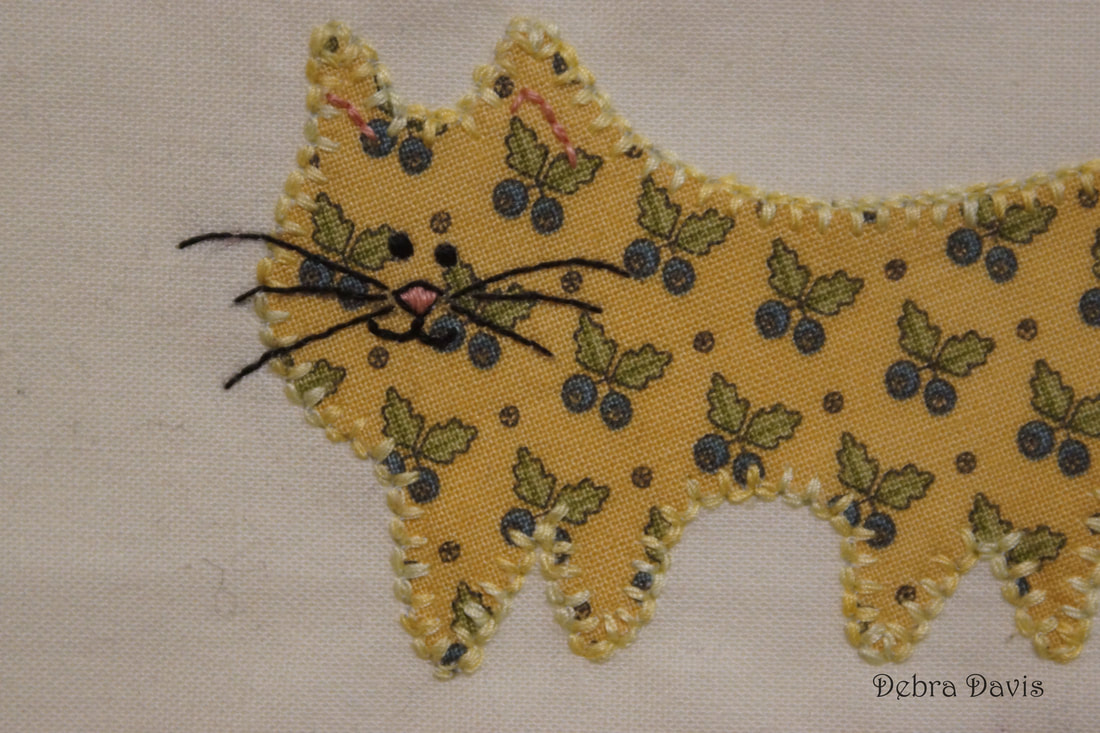 One again here is the finished block. 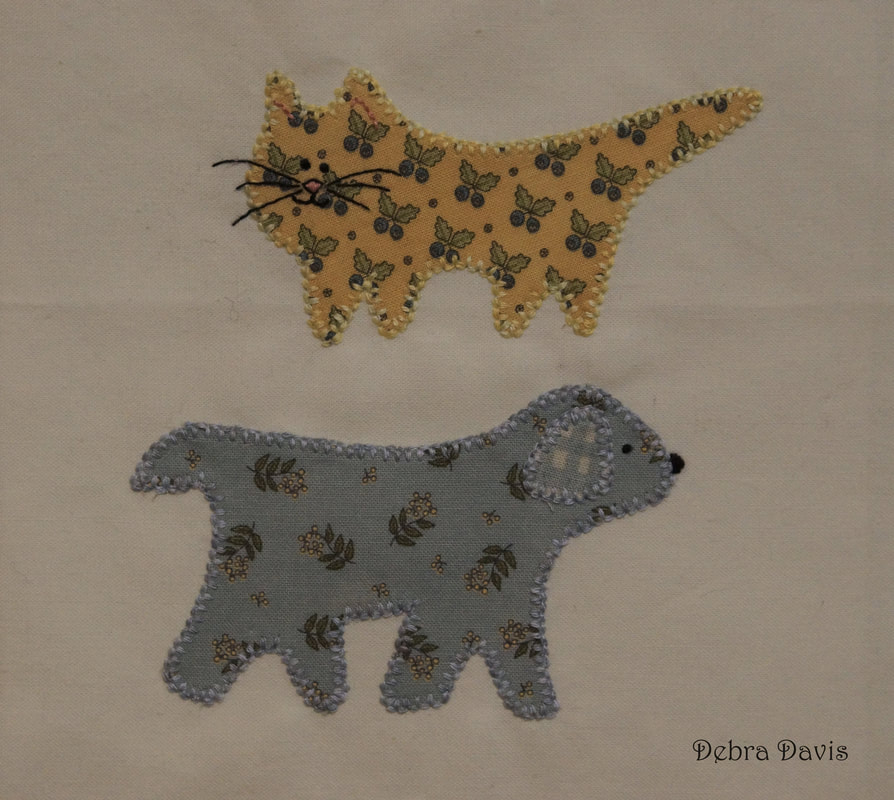 Whatever applique method you use I hope you have fun with this one. I can hardly wait for Block 47-though hope to do some more catching up in the meantime. Happy Quilting!  |

Welcome to the site of Debra Davis-a woman who loves the Lord and loves to quilt.
My other blog where I share about my walk of faith:
Sitting at His Feet 
|


 RSS Feed