|
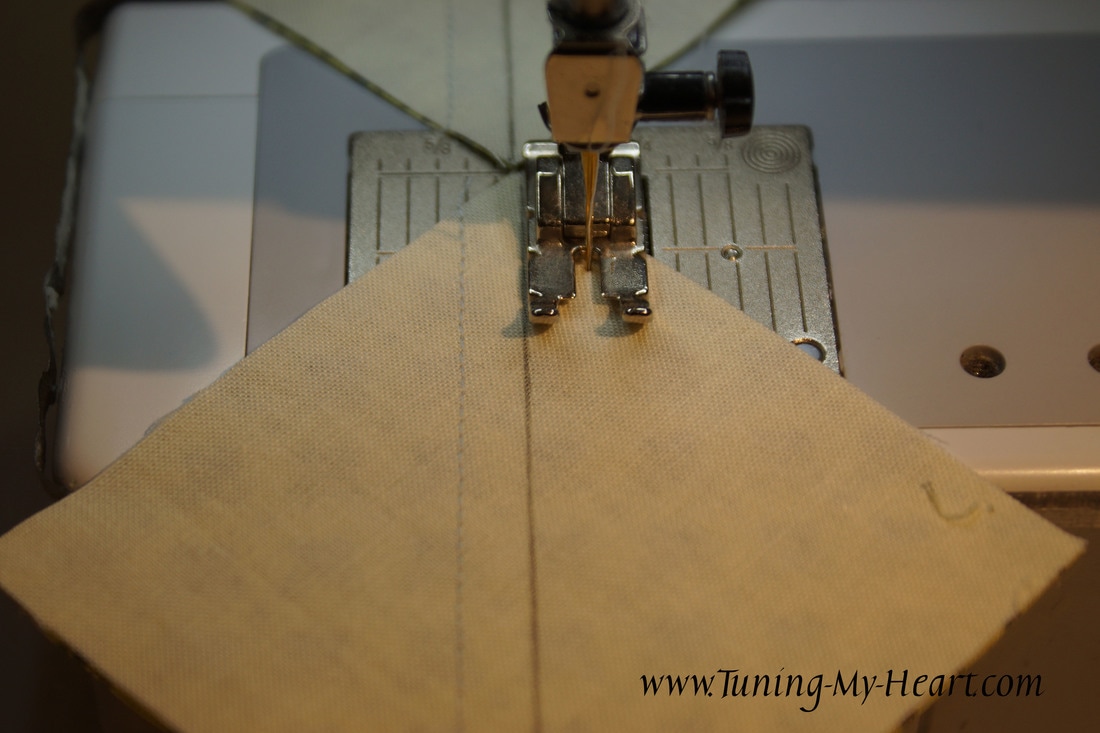
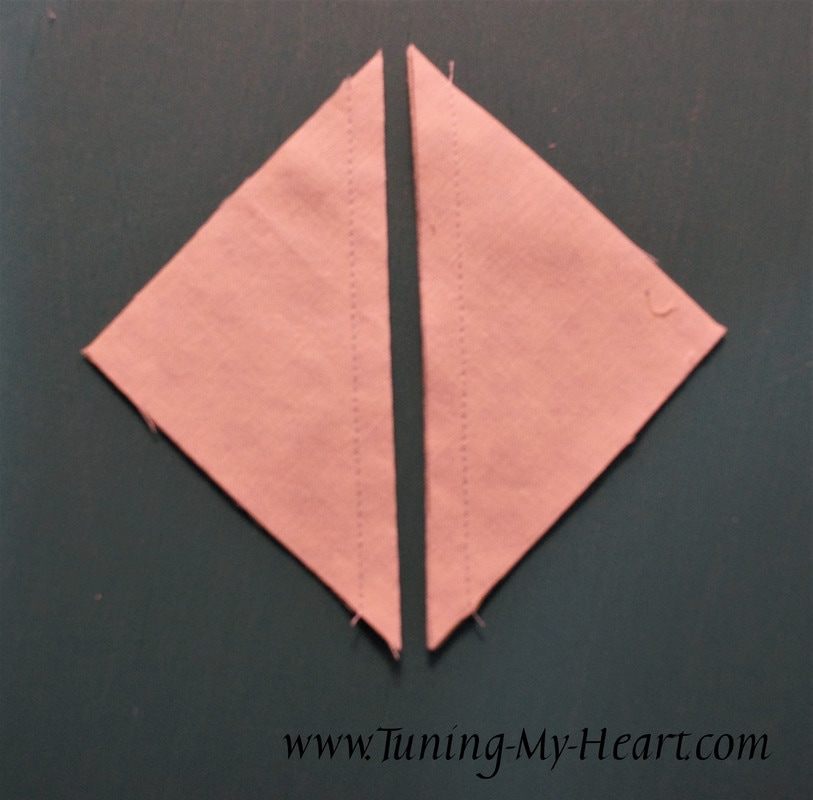
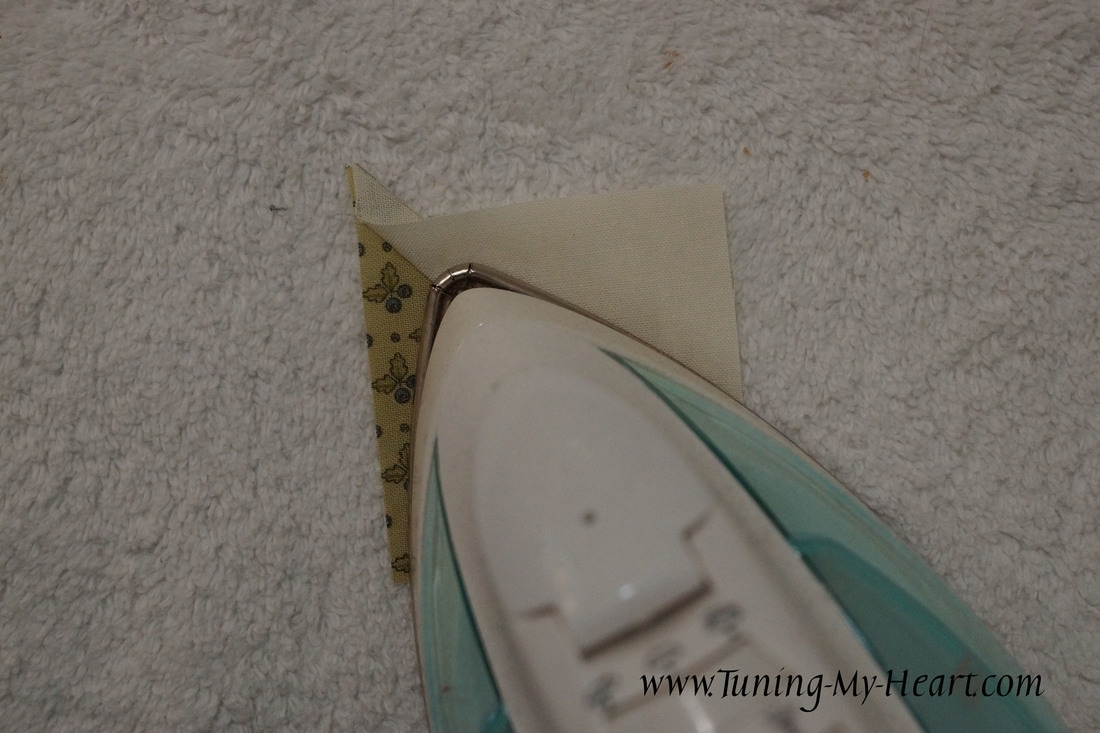
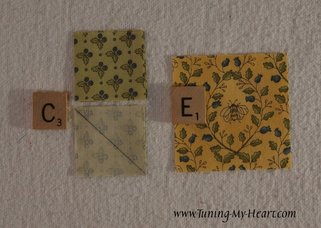
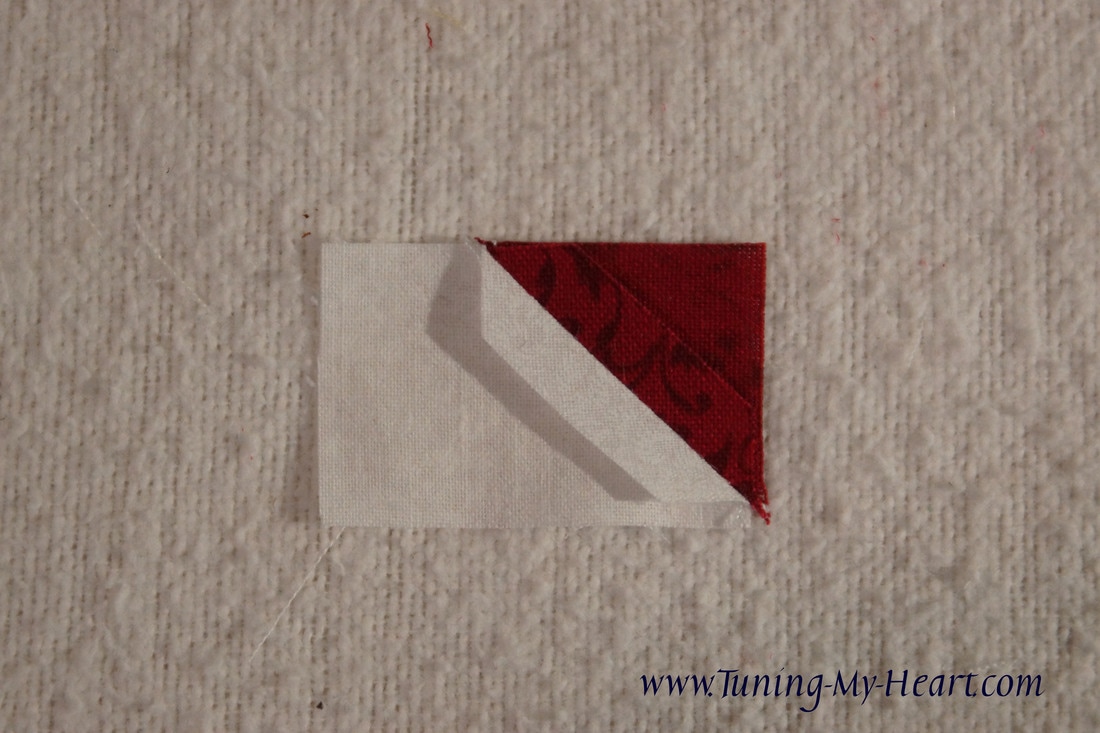
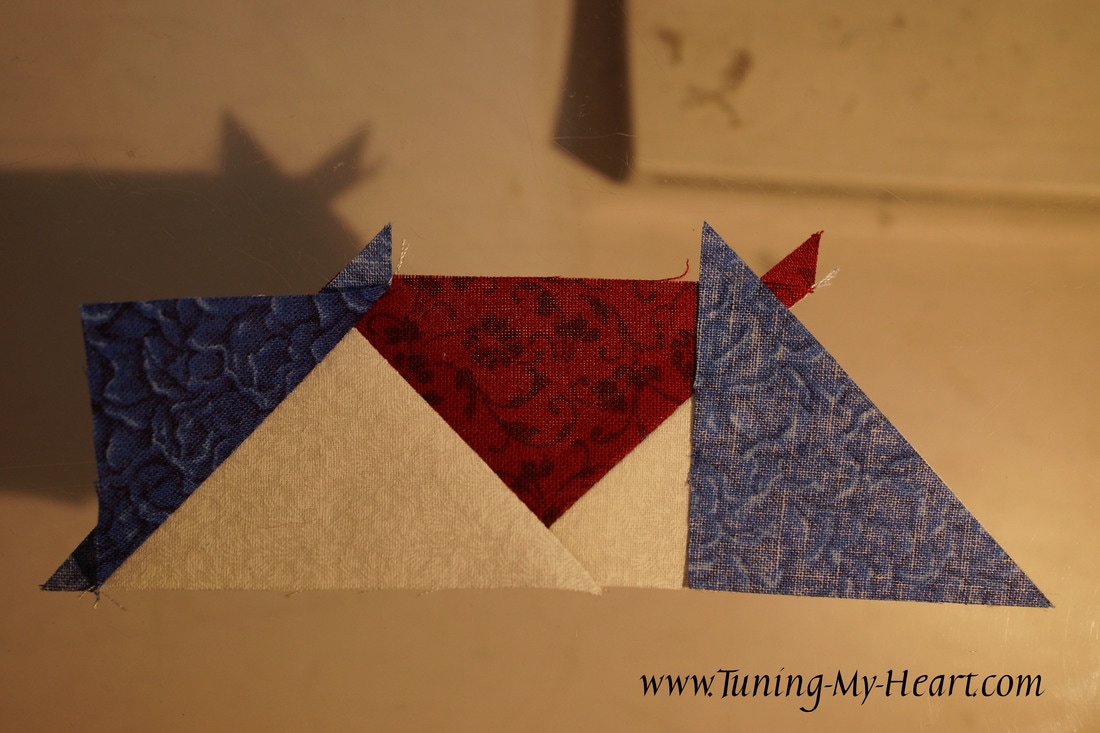
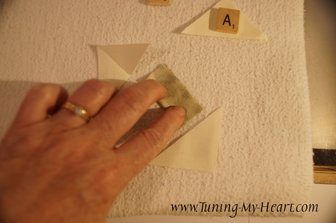
This week Jo Morton has our block. The pattern is available on her blog located here: "Block 15-"T" Block This is a block that has been around for a long time, but I was unable to find the history of it beyond there are a lot of variations for T blocks out there. Some think it came about during the Temperance movement in the USA-but there is no historical evidence to support that idea. I have changed things up a little bit with some of the cutting directions and I am using my favorite method for making the Flying Geese Units. After reading the designers blog posts it looks like I am not alone in which Flying Geese method I prefer. So let's get started. 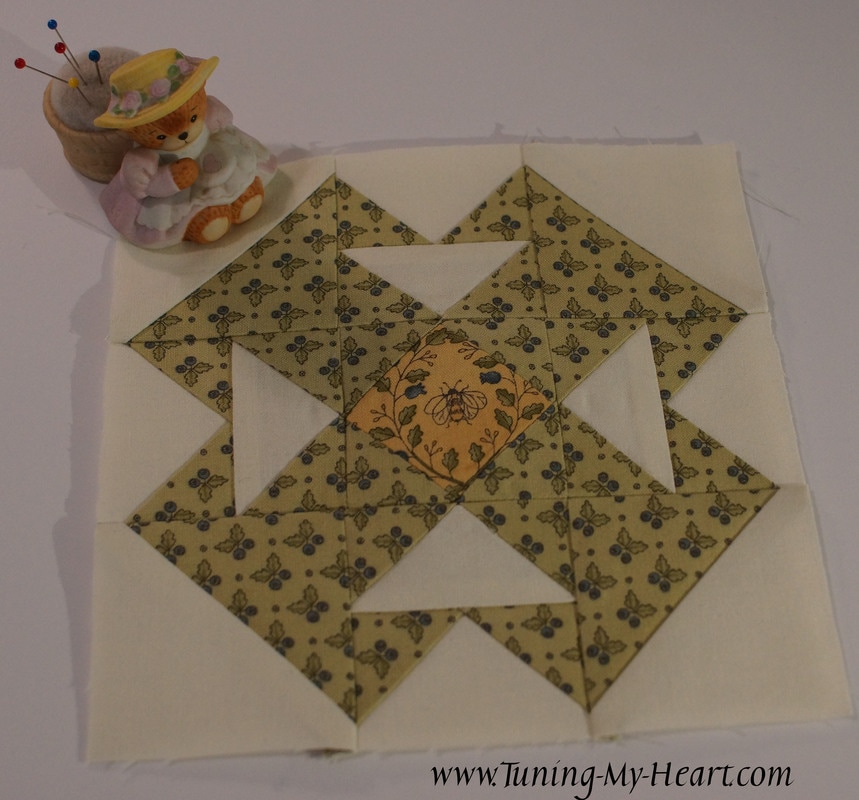 My Cutting Directions: A - (Cut 2) 3 1/4" x 3 1/4" B - (Cut 2) 3 1/4" x 3 1/4" C - (Cut 4) 1 1/2" x 1 1/2" DC - (Cut 8) 2 1/8" x 2 1/8" D - (Cut 2) 3 1/2" x 3 1/2" E - (Cut 1) 2 1/2" x 2 1/2" The directions have us starting with the Half-square Triangle units. I cut my squares 3 1/4" x 3 1/4" and drew a diagonal line on the A squares. 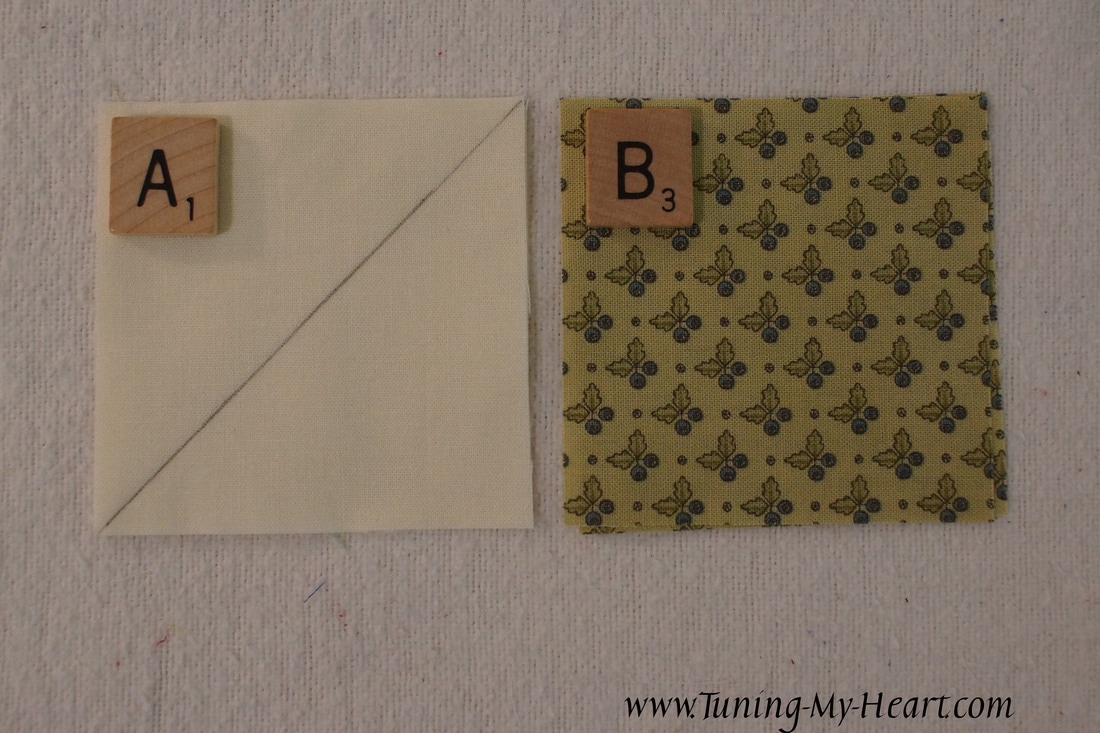 If you have been following along with me this year making these is going to be a breeze. Sew 1/4 inch from each side of the drawn line and then cut apart on that drawn line.
It was recommended that we press these to the light side -trust me you will survive and even thank me for it later. These units get trimmed to 2 1/2".
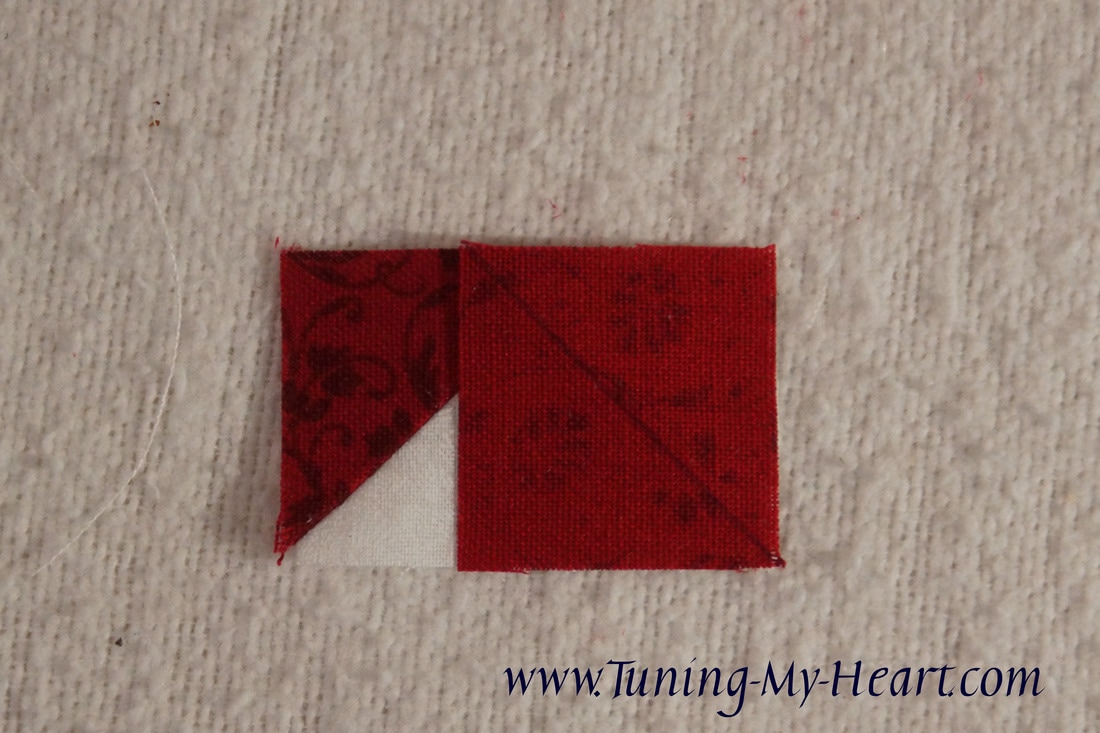
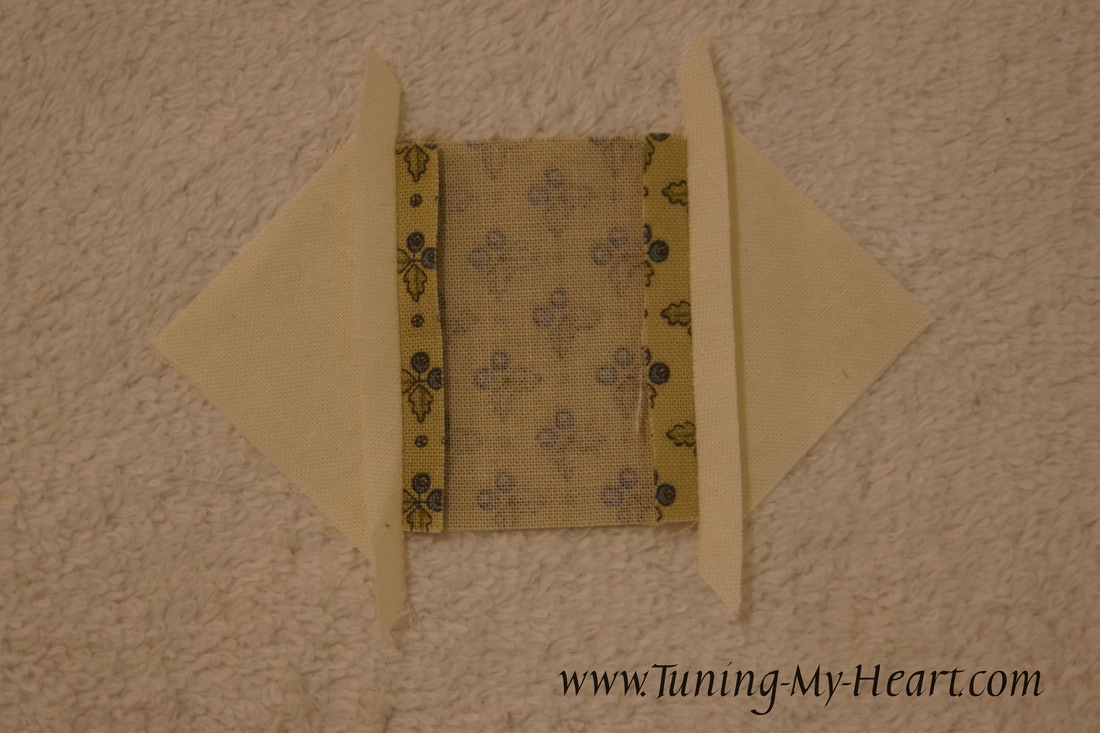
We will leave these lovelies here for now and move on to the next step. 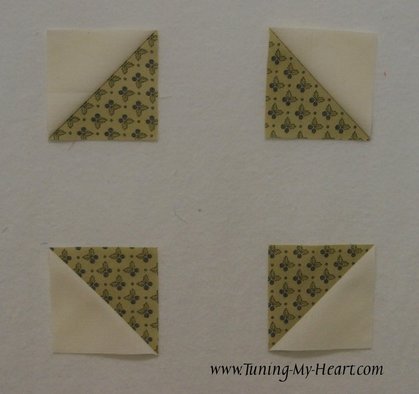 I cut 2 D squares 3 1/2 inches and 8 DC squares 2 1/8"-you will not find the DC squares in Jo Morton's cutting directions, I am replacing some of the C's with these for this method of making the Flying Geese units. It is called the no waste method, but since I make mine oversize and trim there is some waste-I just like how quickly they go together and that I can cut out a lot fewer pieces to get the same number of Flying Geese. 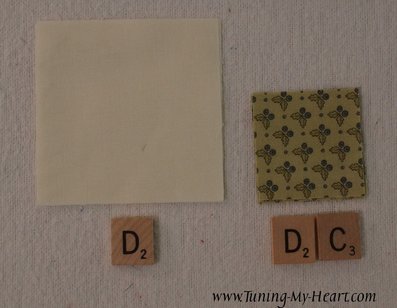 To start lay two of the DC squares right sides together with a D square. 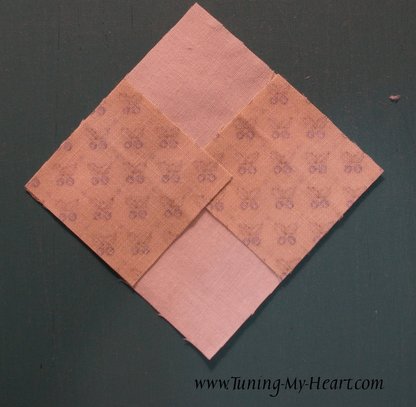 Draw a diagonal line through both of the DC squares. 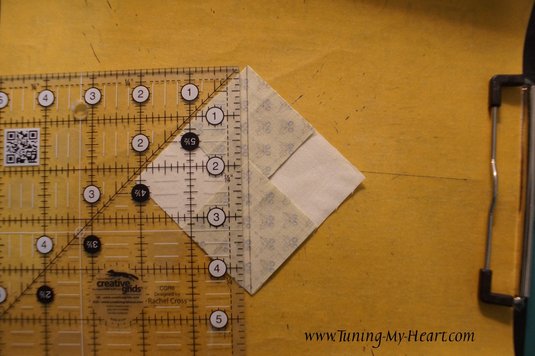 Just like with the Half-square Triangles we sew 1/4 inch from both sides of the drawn line. 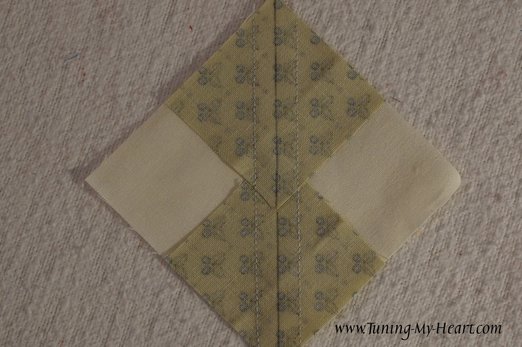 They look rather funny at this point when pressed open. 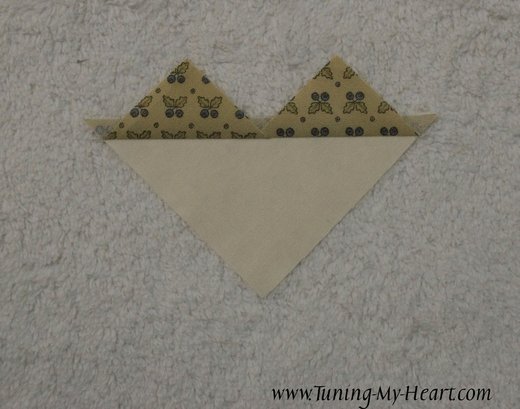 Now lay a DC square on this unit and draw a diagonal line. 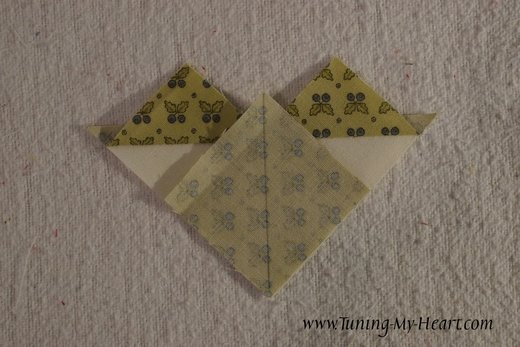 Sew 1/4 inch away on each side of the drawn line.
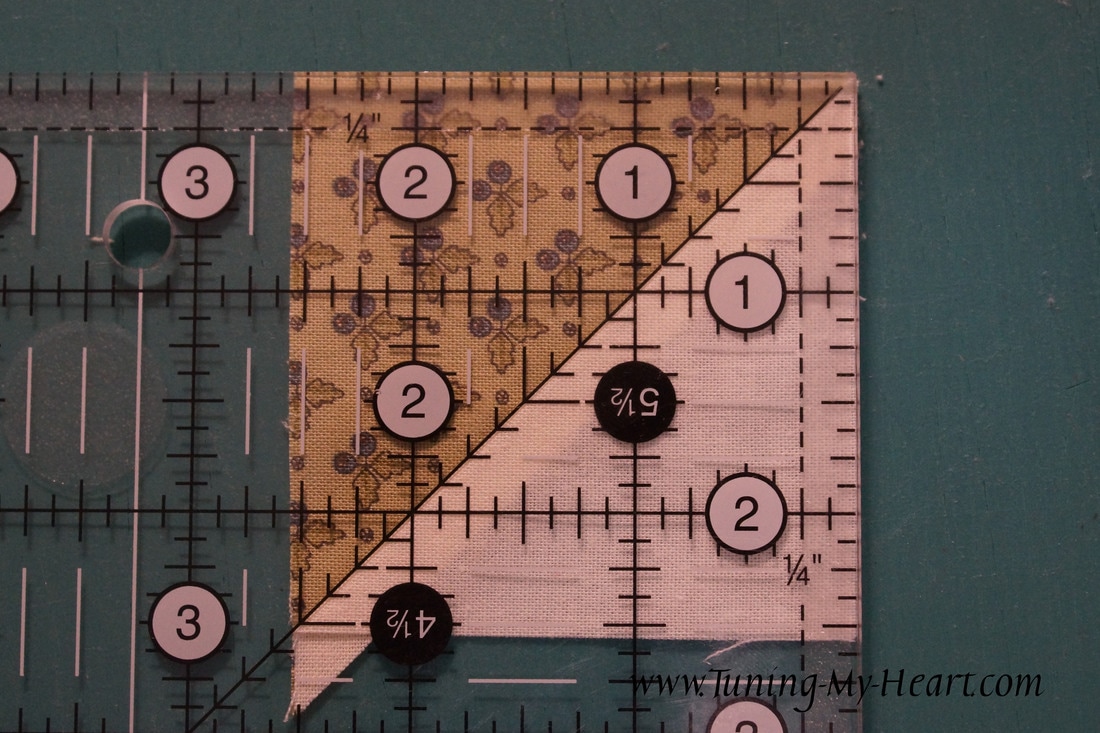
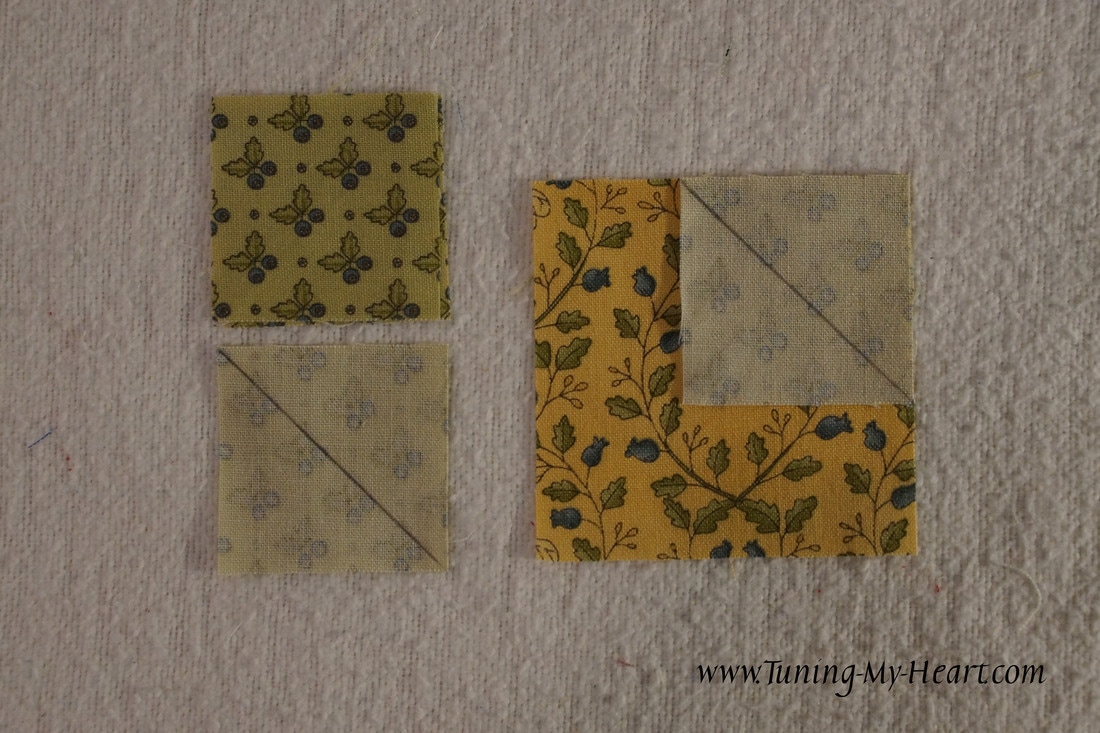
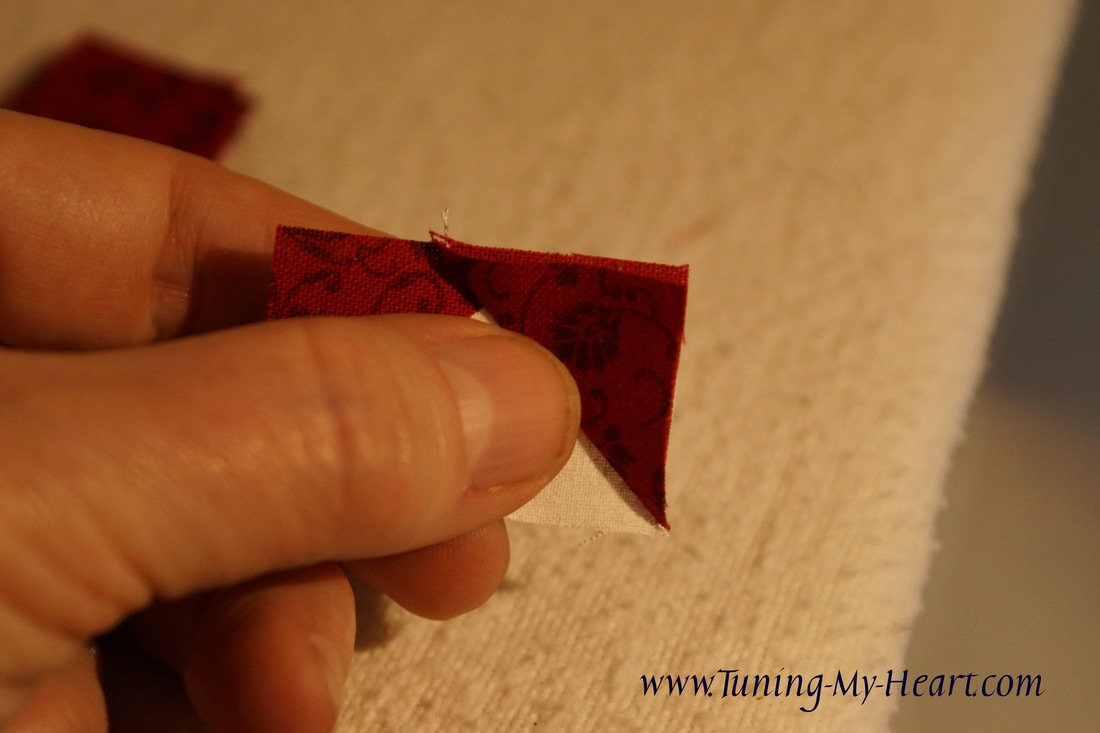
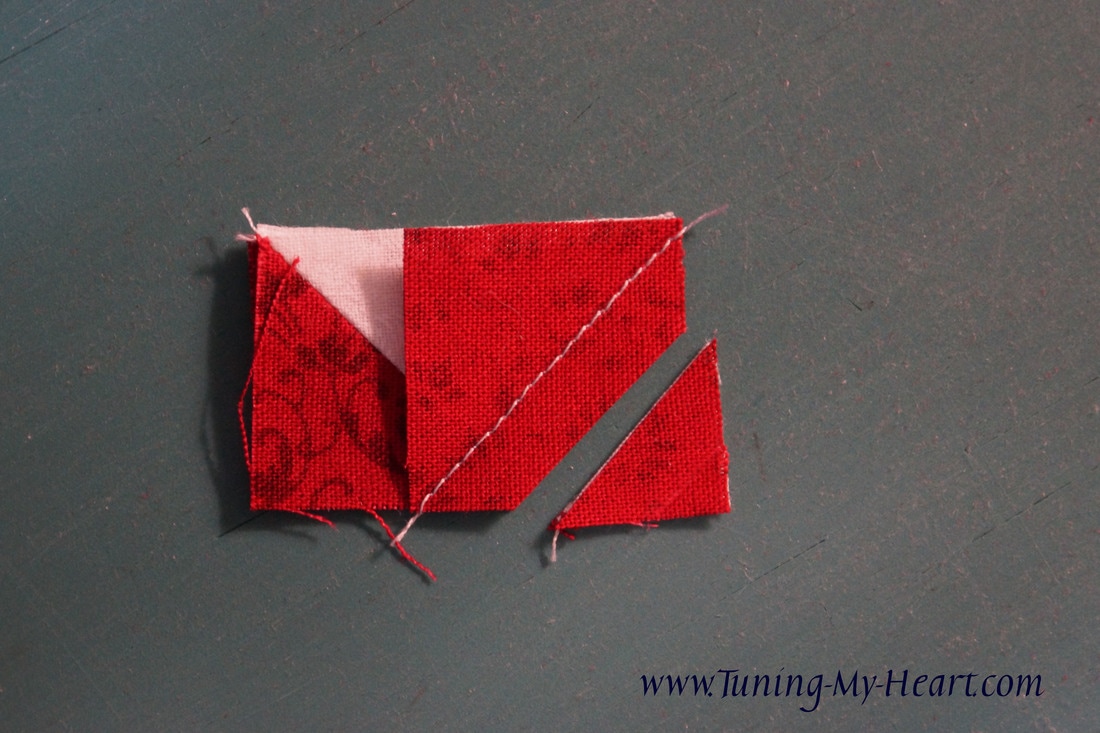
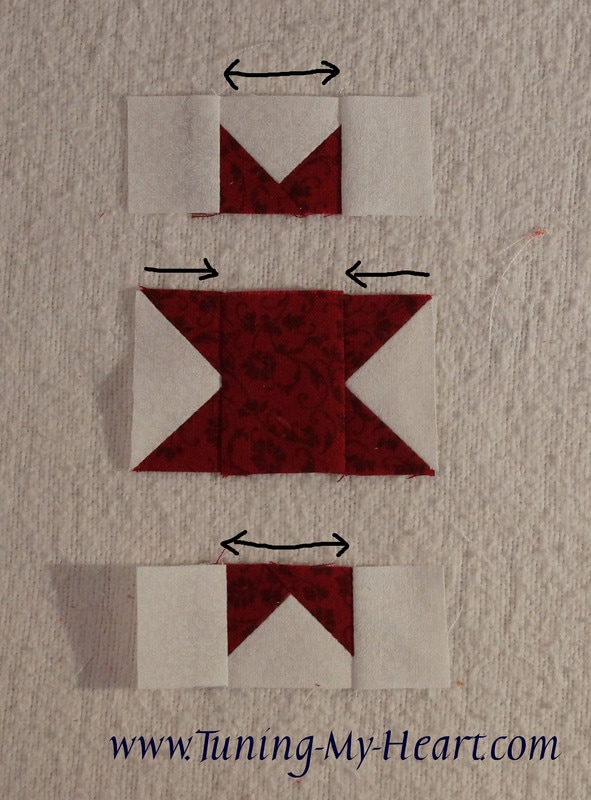
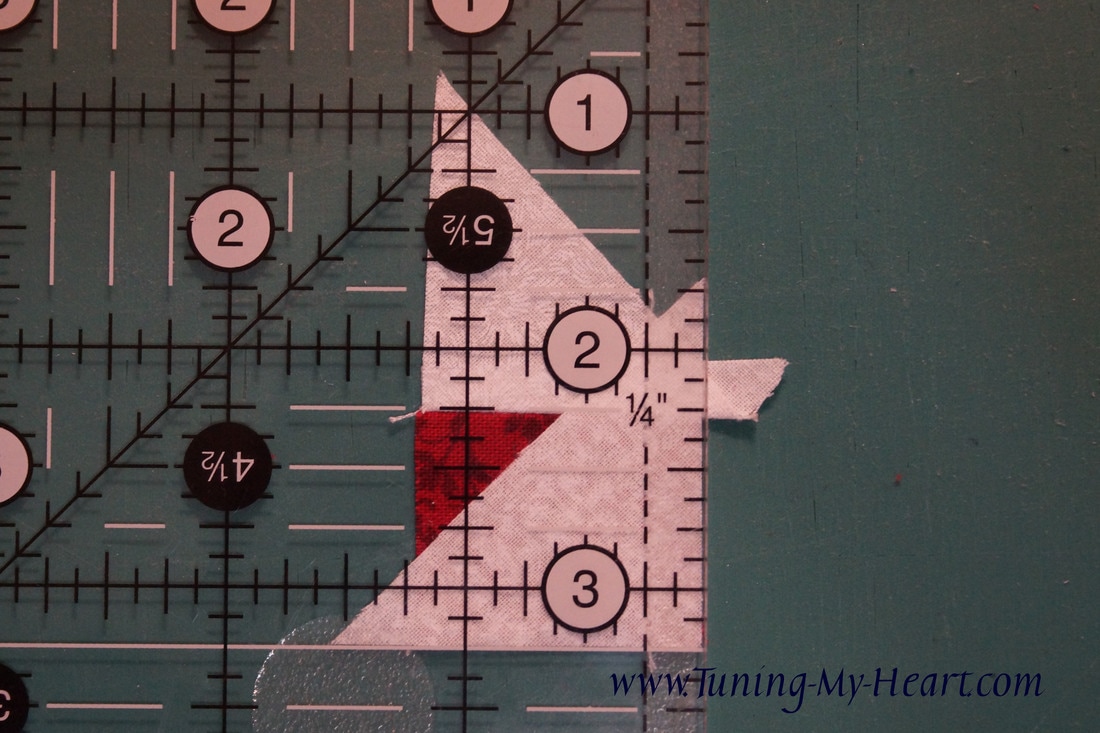
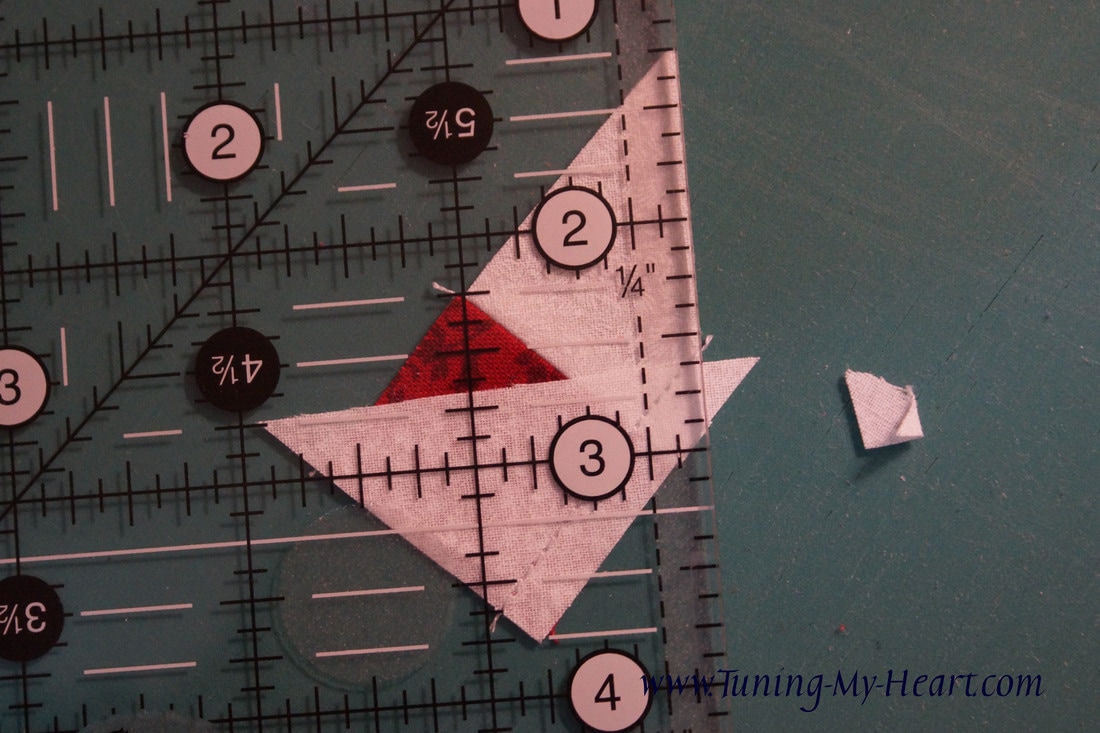
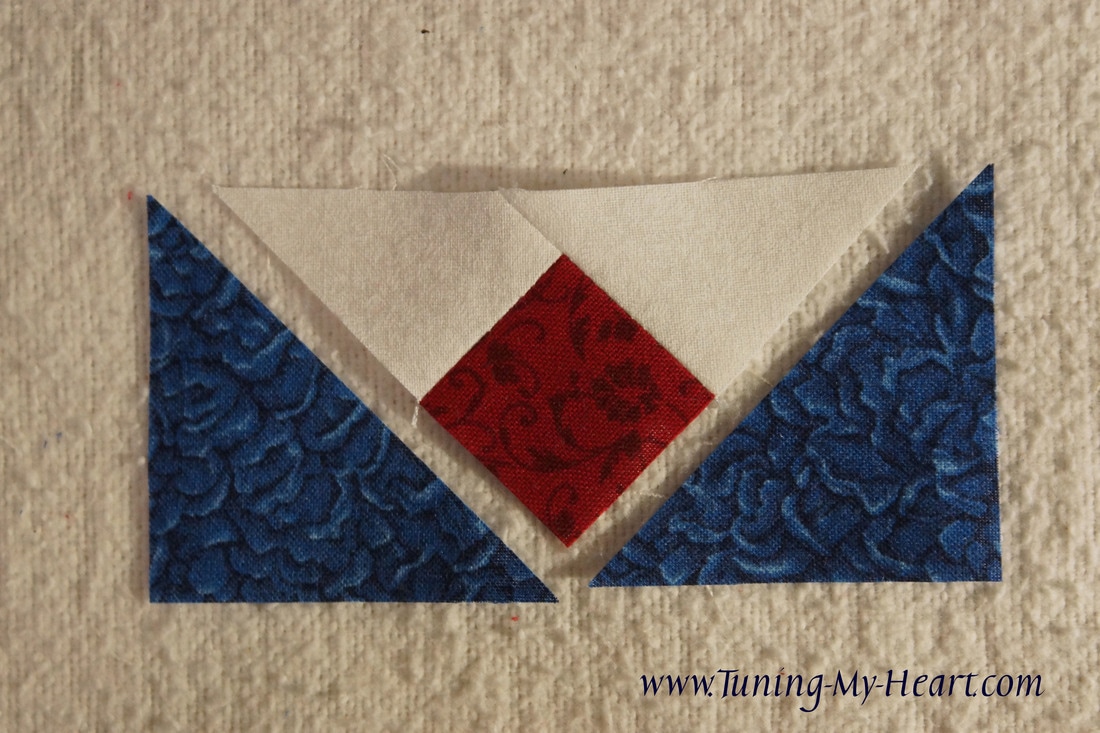
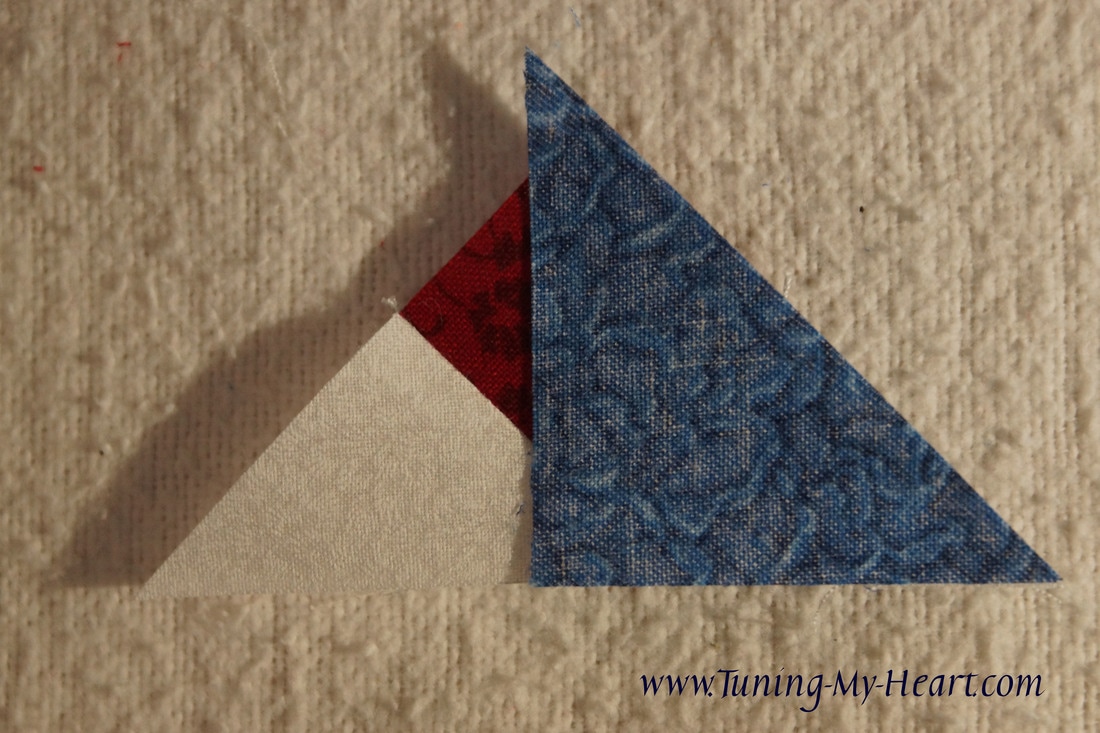
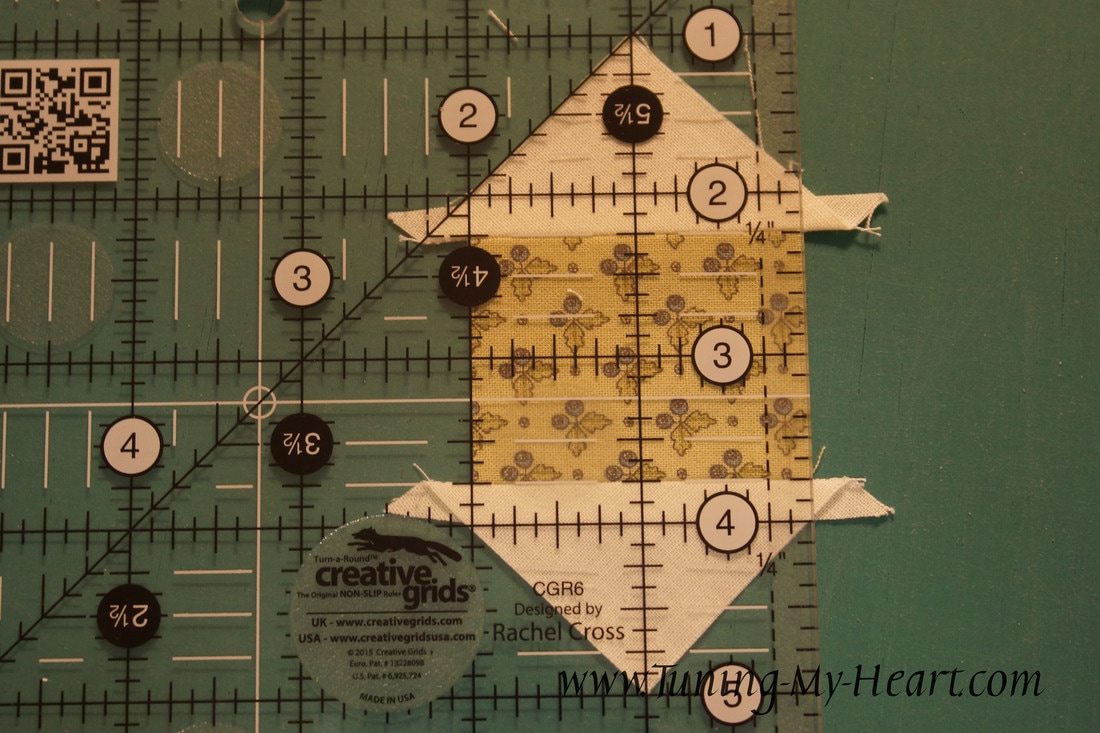
Cut apart on the drawn line and press open. 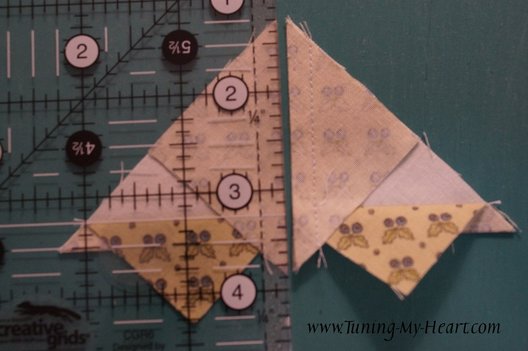 Sweet! 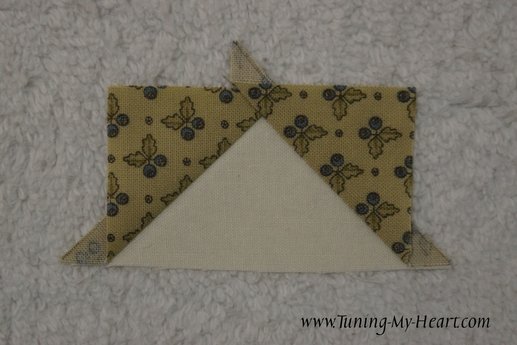 I have a Bloc Loc ruler for cutting Flying Geese which I love, but I am going to show you how to use a regular ruler to trim these to size. (I love, love, love, the rulers by Creative Grids for their no slip grip!) We want to trim these units to 1 1/2" x 2 1/2". Line up the diagonal line along the seam and the 1 1/4 inch mark at the point of the triangle. Trim the first two sides. 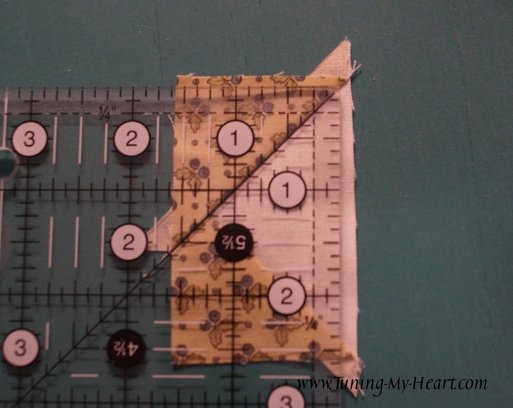 Rotate the block and line up the cut edges with the 1 1/2" and 2 1/2" marks on the ruler. Make sure that you have 1/4 inch beyond the point of the triangle and trim the next two sides. 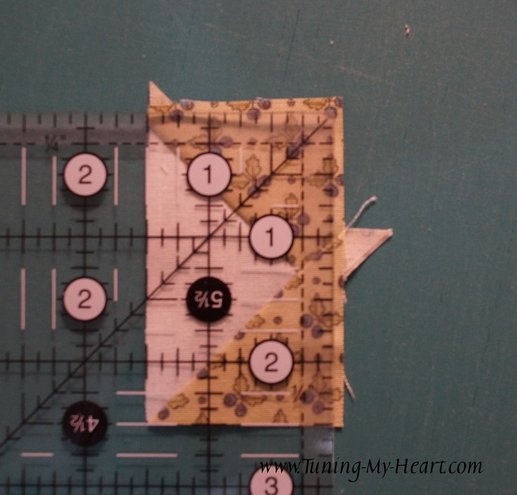 Sew the Flying Geese units together in pairs. Press seams towards bottom unit. These should now be 2 1/2" squares. 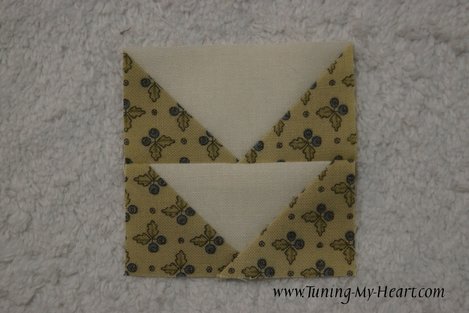 These are added to the Half-square triangles from step 1 and we can move on to making the center unit. 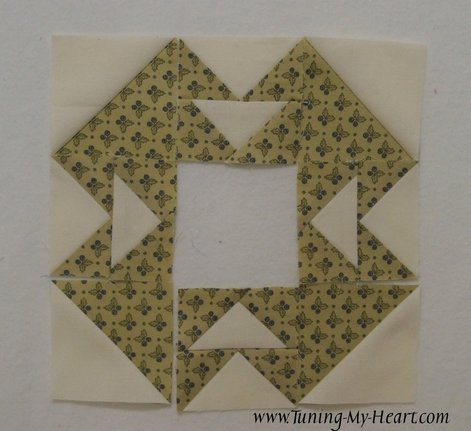 Draw a diagonal line on each of the C squares with a line that will not show through the fabric to the other side. I used a mechanical pencil. Place a C square in the corner of the E square.
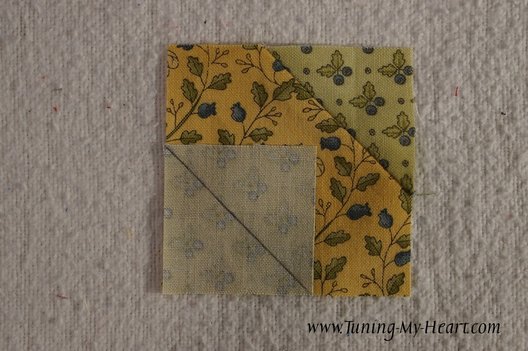
Sew along the line. I line up my needle just to the outside of the line, not directly on it. 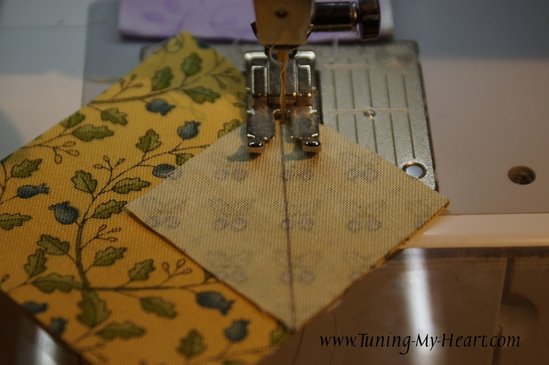 Do a check to make sure the triangle covers up the square underneath. 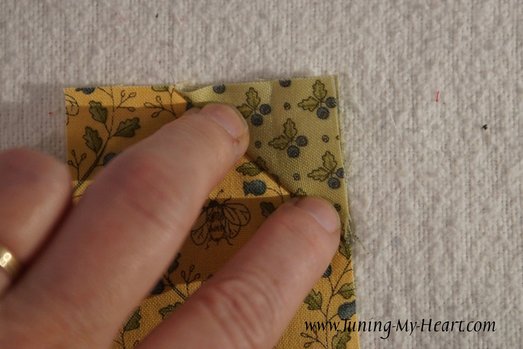 Trim 1/4 inch from the seam line. Press towards the C square. 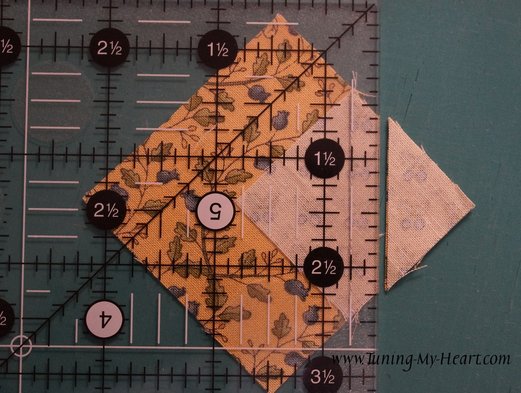 Add the next C square to the opposite corner and sew in the same manner. Then do the same with the remaining C squares.
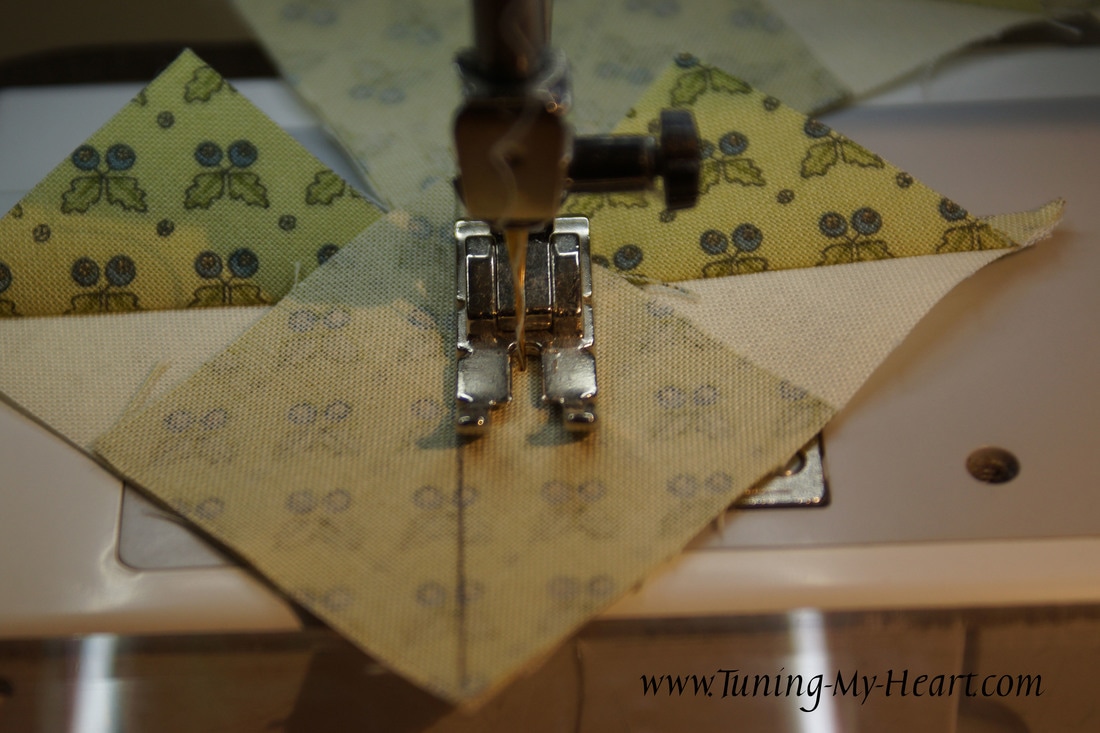
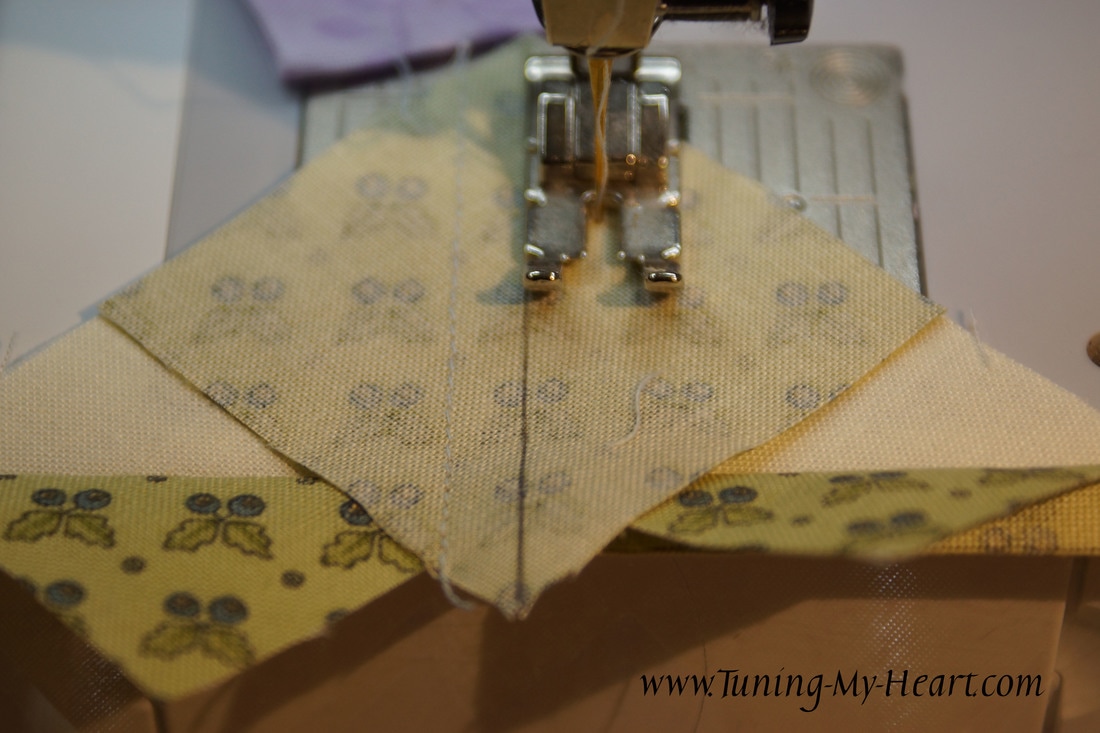
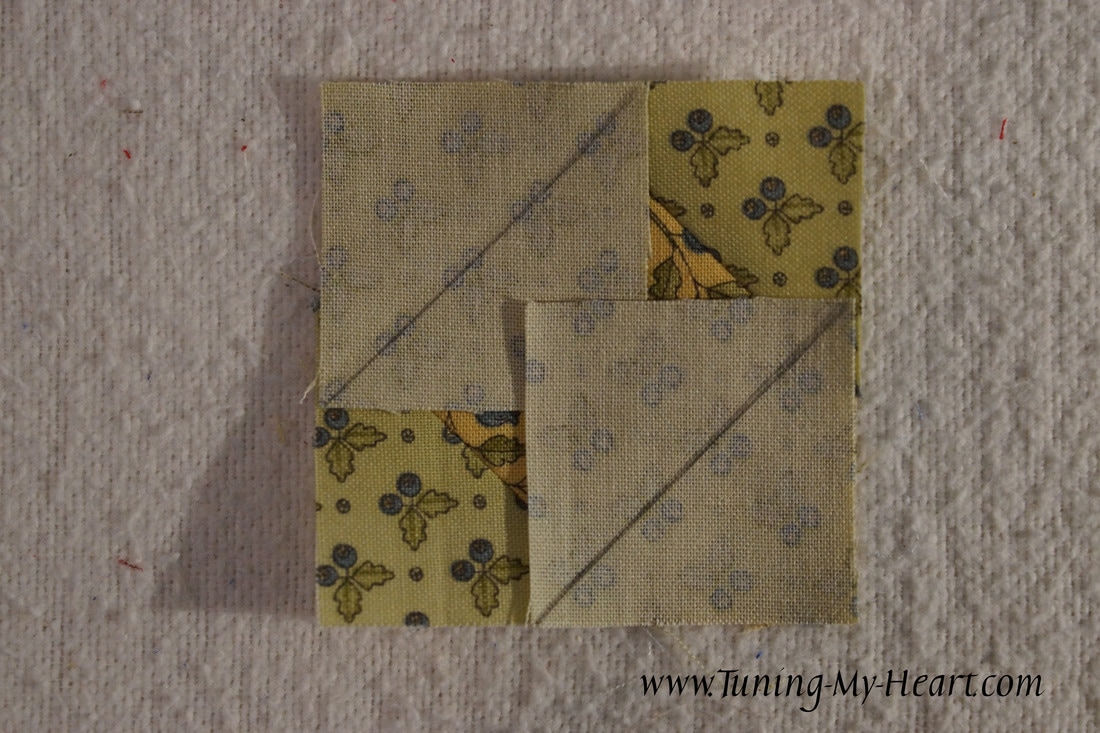
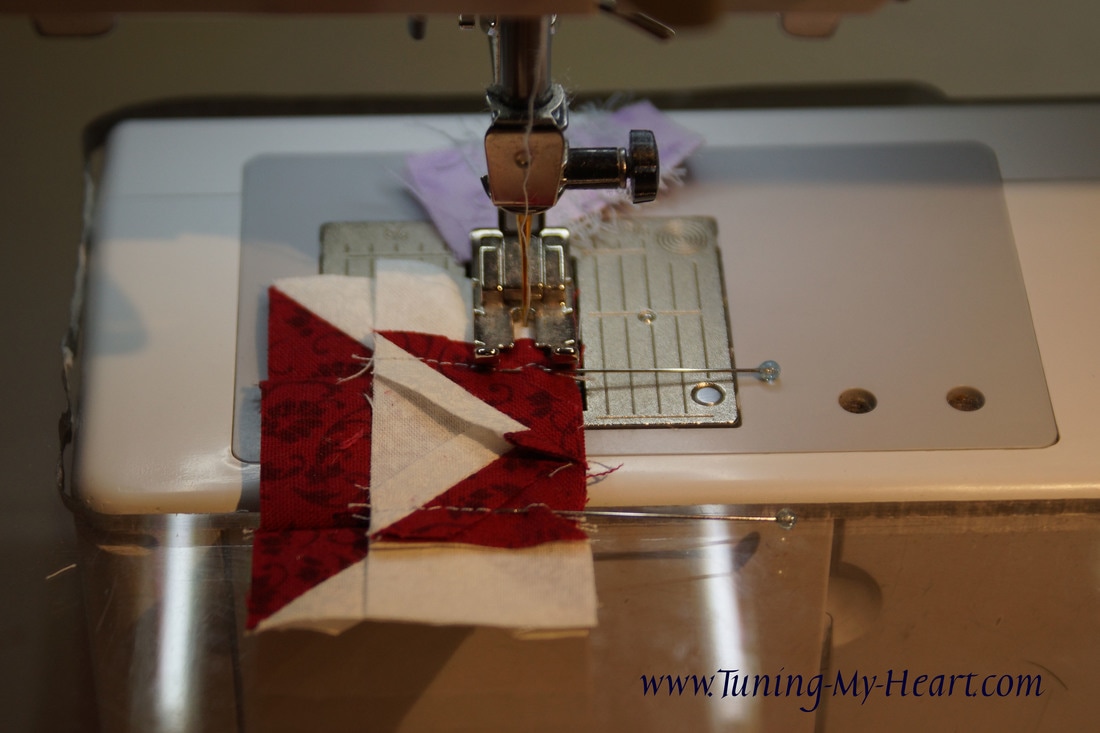
A tip if your triangle does not completely cover the E square underneath is to trim away just the C square leaving the fabric underneath visible when you press the triangle open. This works if you are just a wee bit off-not more than an 1/8 inch though as that would not give you enough fabric in your seam allowance to keep the triangle from holding. 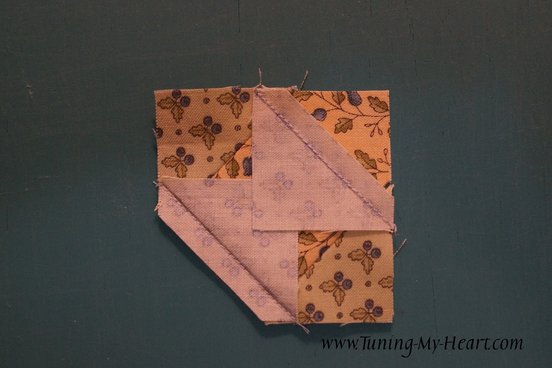 Add this unit to the others and stitch the rows together. You will now be able to appreciate why we pressed those Half-square Triangles to the light side: the diagonal seams nest together nicely as we sew them together with the Flying Geese units. I pressed the center seams open as there was a lot of bulk there. The top and bottom rows I pressed to the outside (towards the Half-square Triangles.) Sew slowly over those bulky seams! 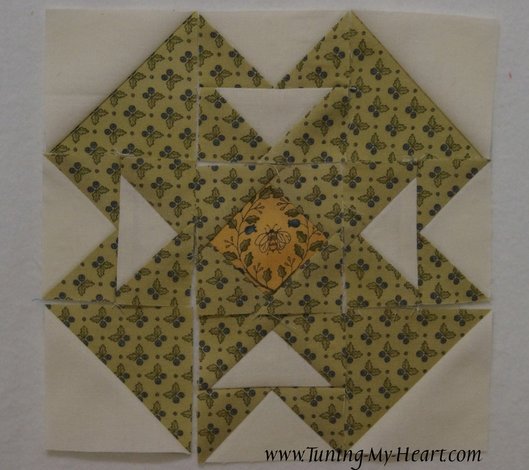 Stitch the rows together using a pin to match the seams. Our T block is complete! 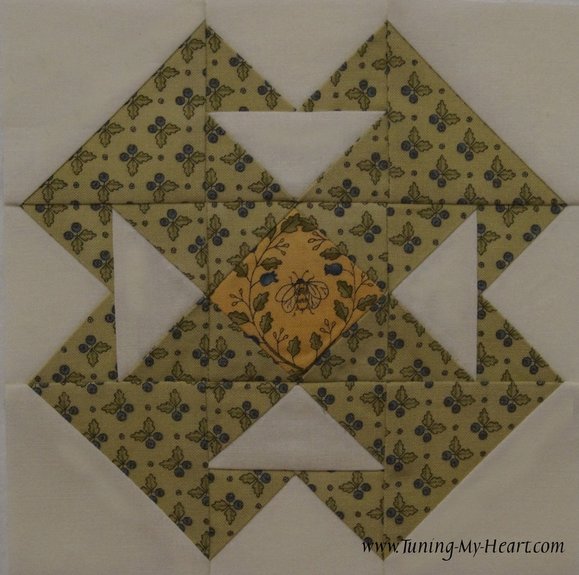 My design wall is looking good with all of the blocks we have made so far. 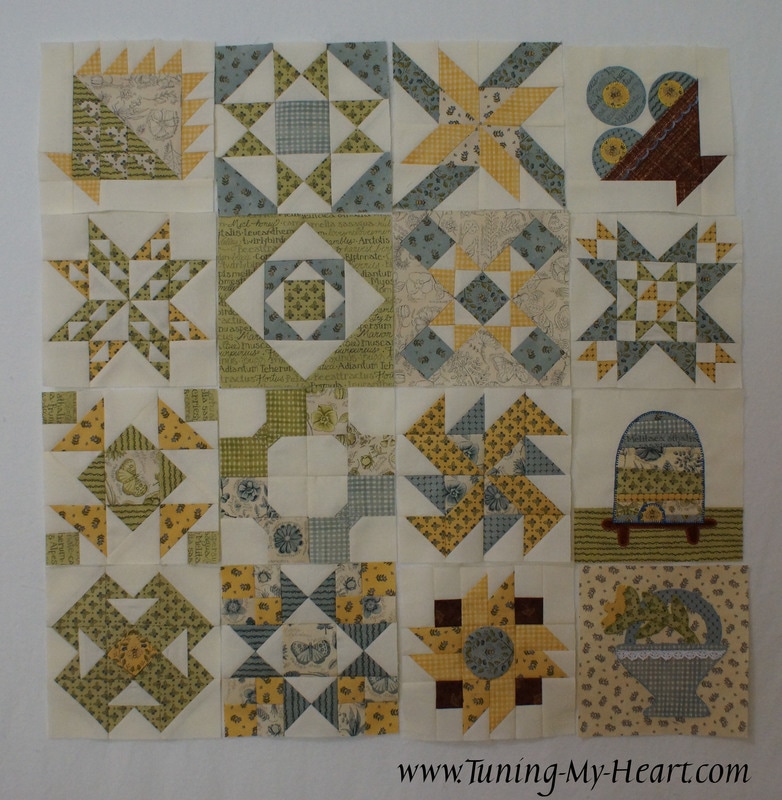 I hope you have fun with the T Block this week! I have really enjoyed seeing the photos you send of your finished blocks-feel free to share them on my Facebook Page TuningMyHeart too! I am trying something new...a pdf version of my tutorial. Click here for PDF. I will be taking some family time next week which means no quilting for me; but I will be back with Block 16 after that. Until then... Happy Quilting!  I had a request to do a tutorial for Lisa Bongean's Alternate for Block 10. It is a challenging block and I did approach it in a slightly different way, but here it is. Her pattern can be found at the bottom of her blog post here: https://lisabongean.com/2017/05/31/moda-blockheads-block-13/  This block has some tiny pieces so I highly recommend that you starch your fabric before cutting and that you take your time and sew s-l-o-w-l-y These tiny pieces also benefit from a smaller stitch length-I am using the 2.1 setting on my machine which is 12 stitches per inch. First I will work with the center star. I decided to simplify this by doing an easy method for making flying geese. This means I changed the cutting directions for the B and D pieces. B-cut 4: 1" x 1½" rectangles D-cut 8: 1" x 1" squares 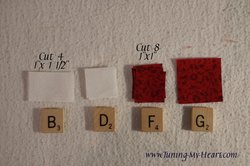 To make the Flying Geese units I drew a diagonal line on the back side of the F squares using a pencil and placed one on top of each B rectangle. 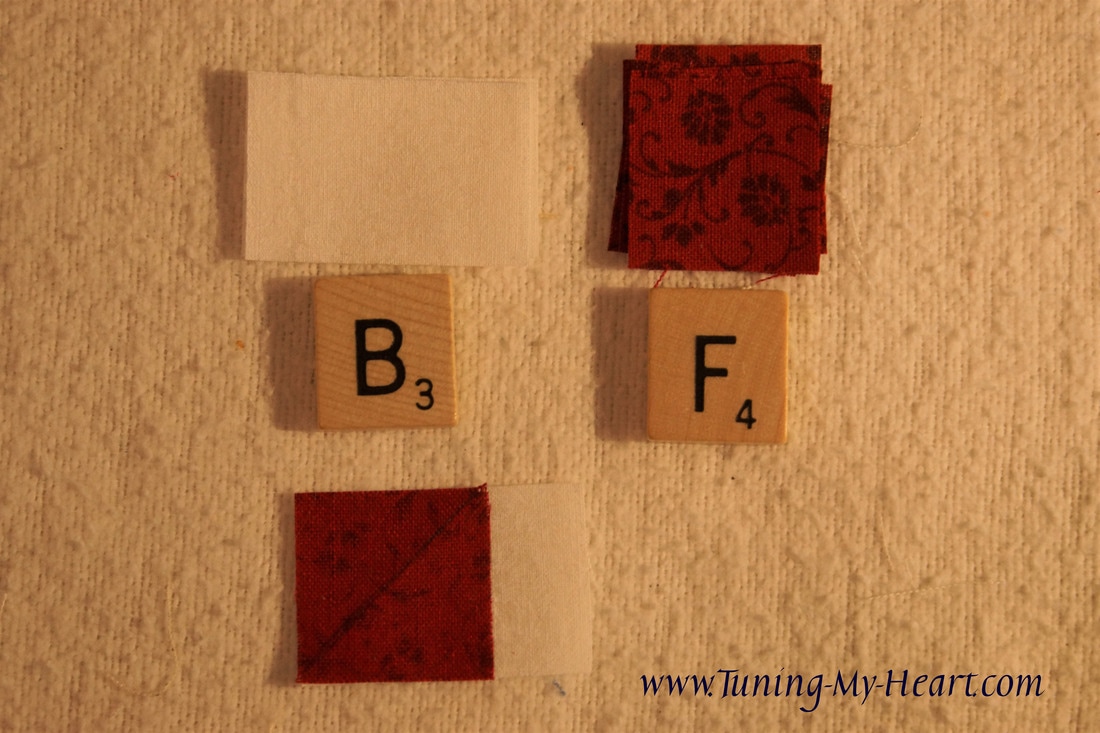 These are tiny pieces so I am sewing very slowly one needle width to the outside of my line. 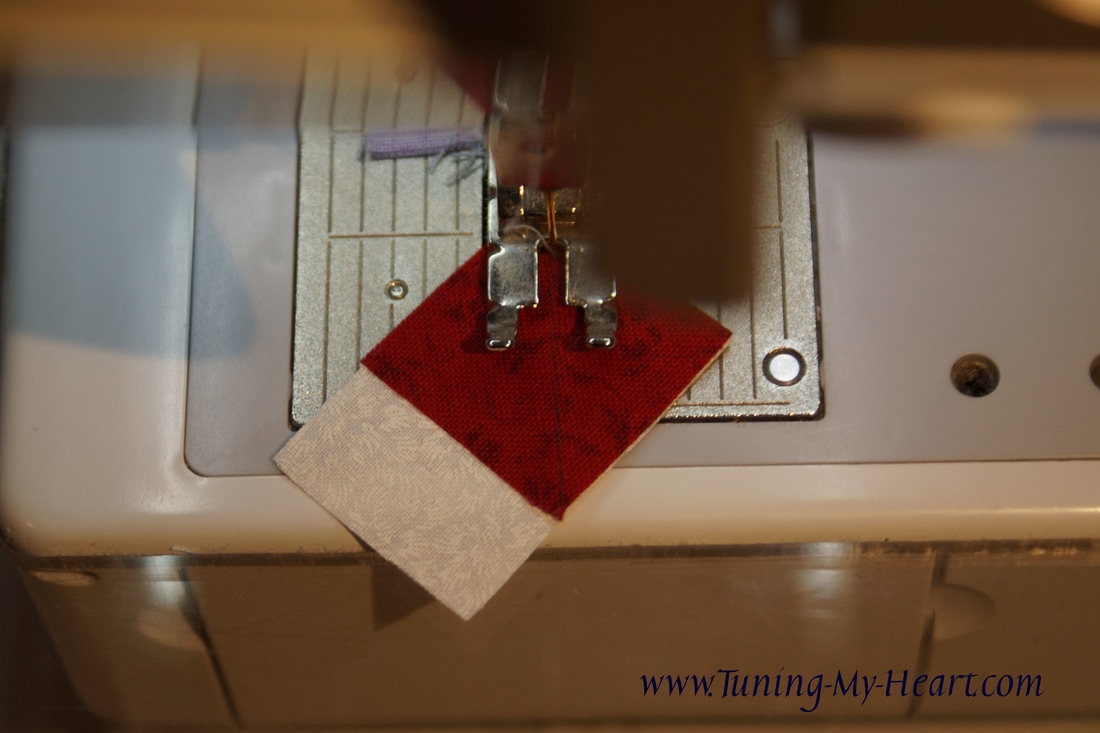 Trim off the excess 1/4 inch from the seam line. Press the seams open rather than to one side. Lay another F square on the opposite side of the unit and sew in the same way as before.
I have learned to check to make sure that my triangle covers up the rectangle underneath before trimming away the excess. Press the seams open.
The Flying Geese units need to measure 1" x 1½." If they need trimming be sure that the diagonal line on your ruler lines up with the diagonal seam and that there is 1/4 inch of seam allowance from the point of the triangle. 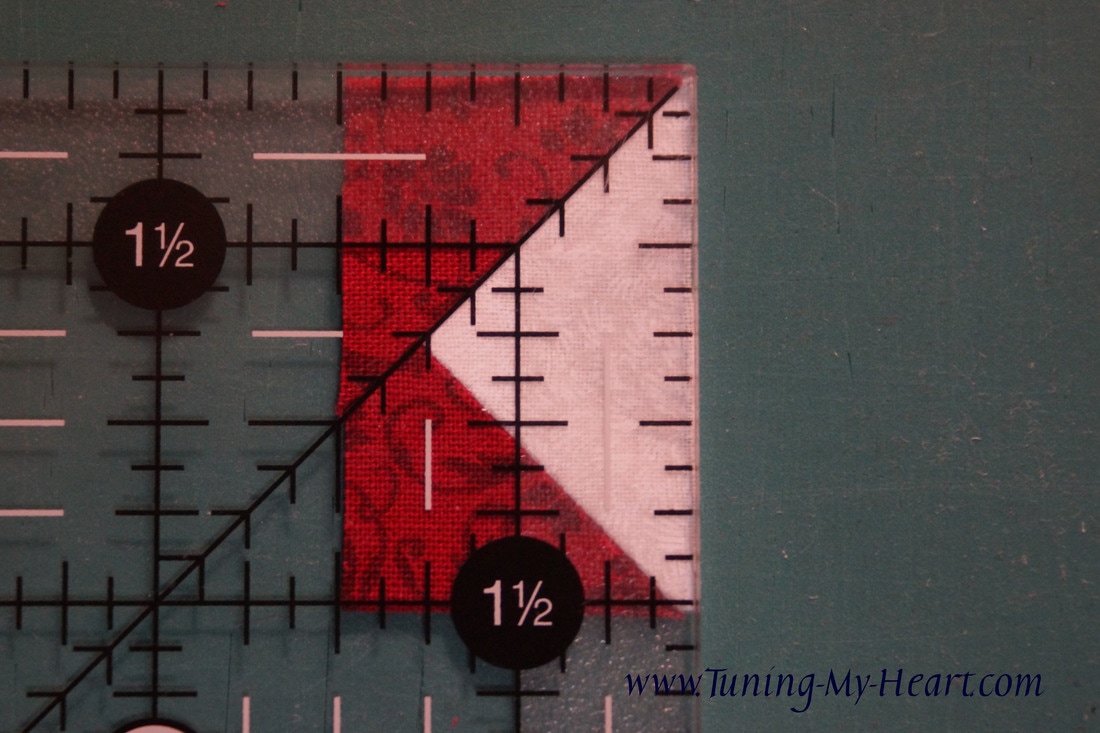 Now I can lay out the pieces to make the center star and stitch the rows together. 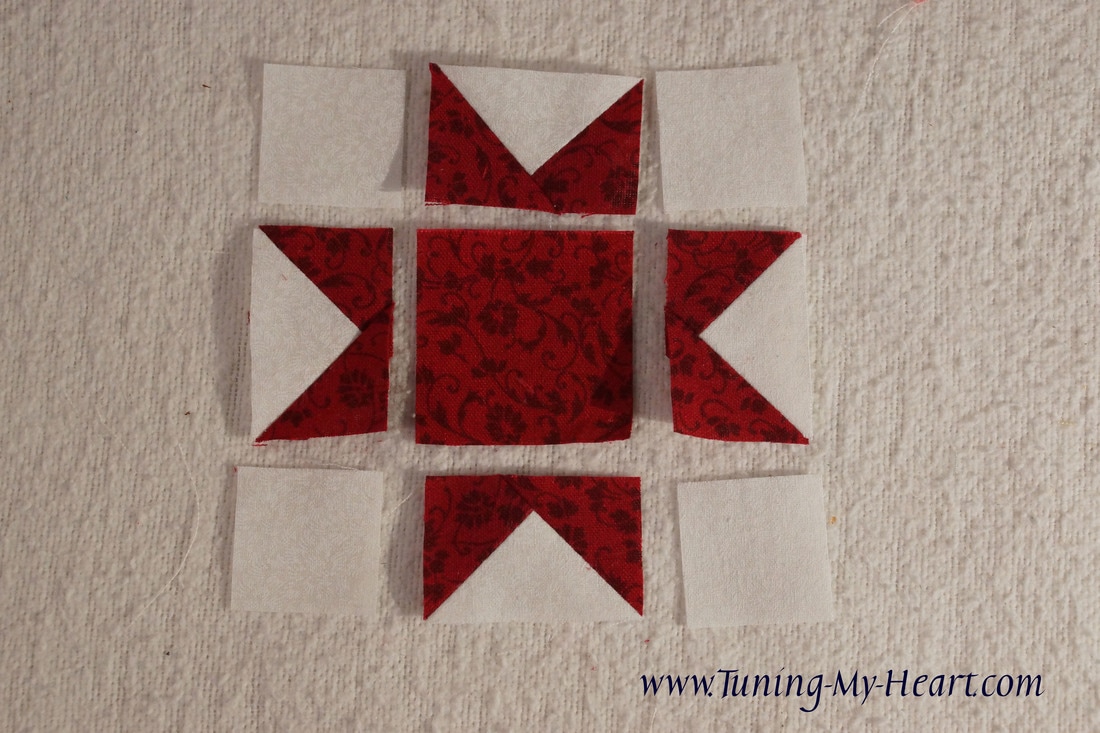 I pressed towards the outside on the top and bottom rows and pressed towards the center on the middle rows. This will allow me match the seams when I sew the rows together and is not creating too much bulk for this tiny star block. I pin at the seams and SLOWLY stitch the rows together.
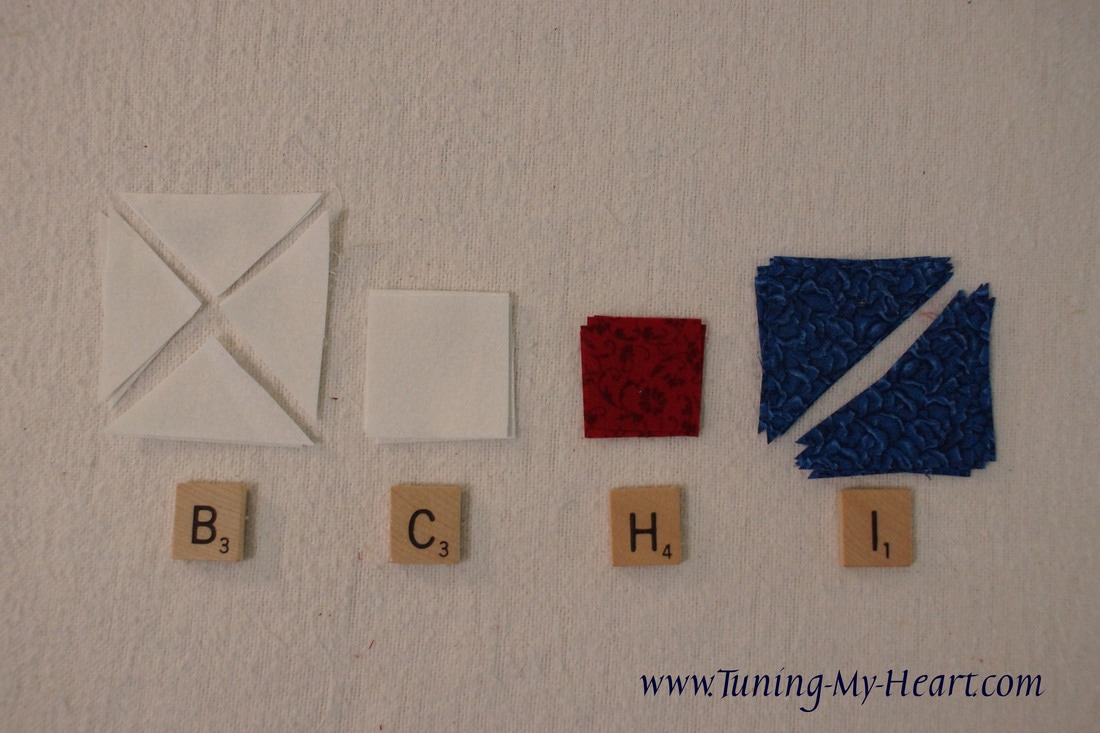
I want my needle to land right at the tip of the white triangle, not on it but just at the tip where the tow fabrics come together. This will help me get those sharp points we all desire. This is also where having an accurate 1/4 inch seam is very important. 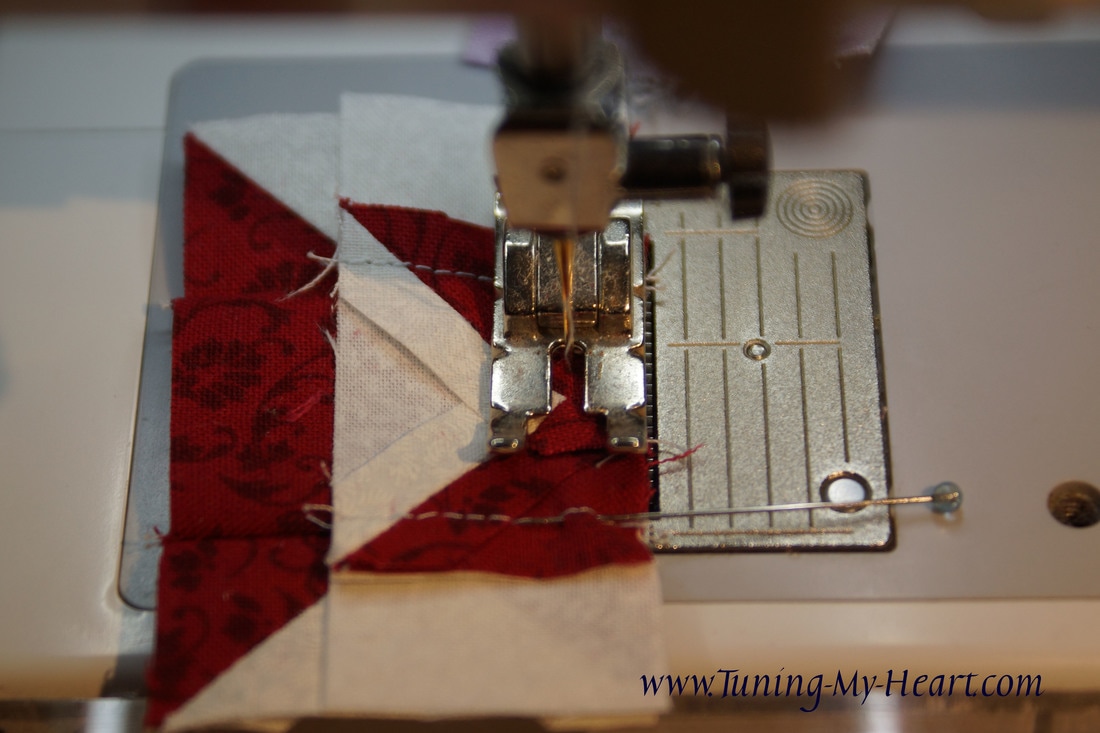 When finished the center star block needs to measure 2½" x 2½." If trimming is needed make sure that you have 1/4 inch from the points of your star for the seam allowance. 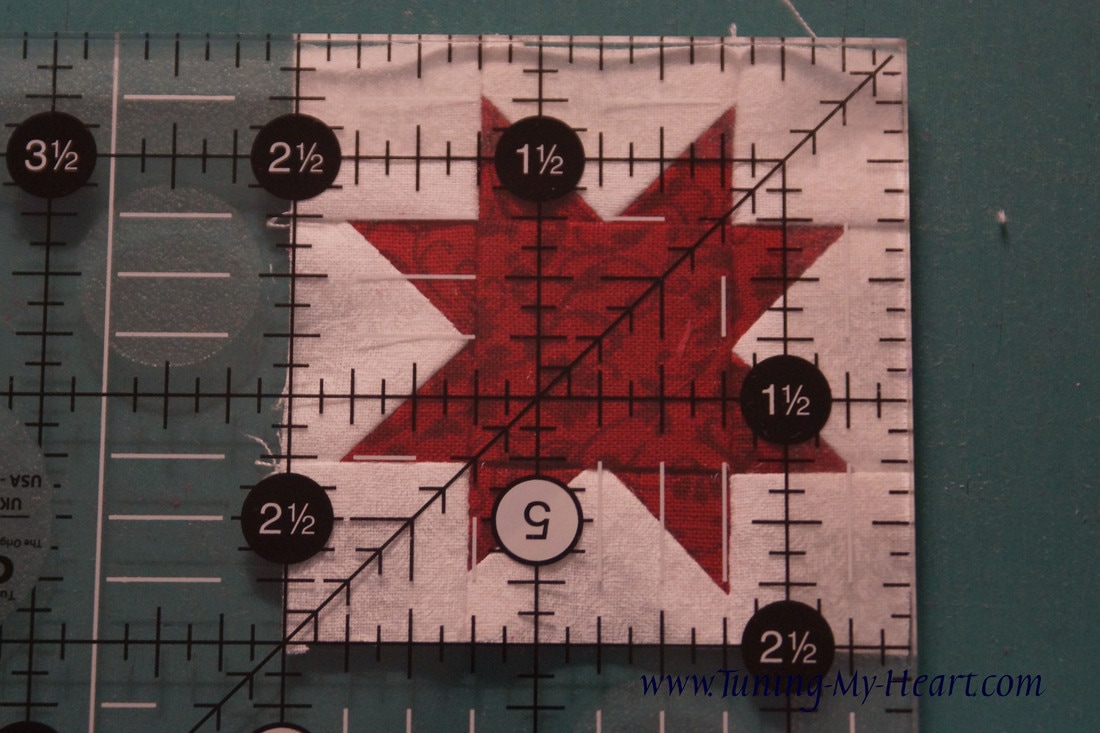 While I am working on the next section I have given the little star a spritz of water and set my hot iron on it for about 10 seconds. (I have a towel underneath my block.) Next I lay one of my larger square rulers on top of it and will keep it there until it cools completely. This is a little trick that helps blocks to lay flatter. 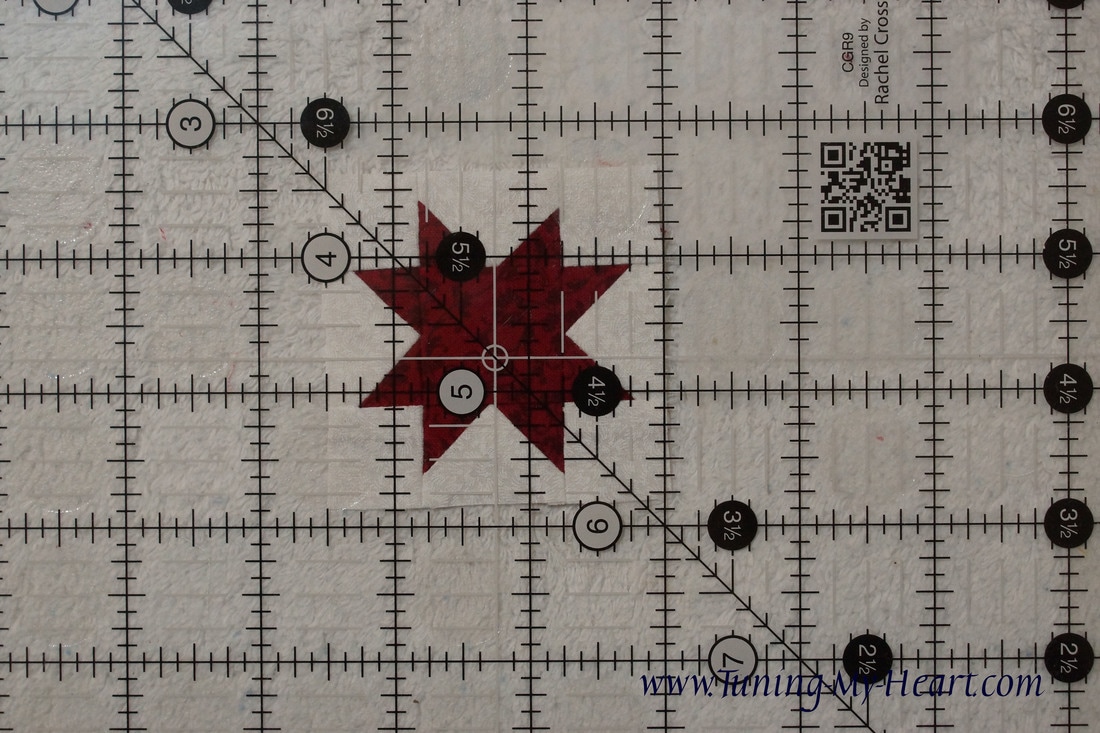 Okay, on to cutting the pieces for the next part. Do not be intimidated by the directions for cutting the H squares. 1 3/16" is right in the middle of the 1/8" and 1/4" marks on your ruler. I am posting photos of how this looks with both my Itty Bitty Eights ruler and my regular ruler. The Itty BItty Eights does have a little dash line that indicates the middle which is nice, 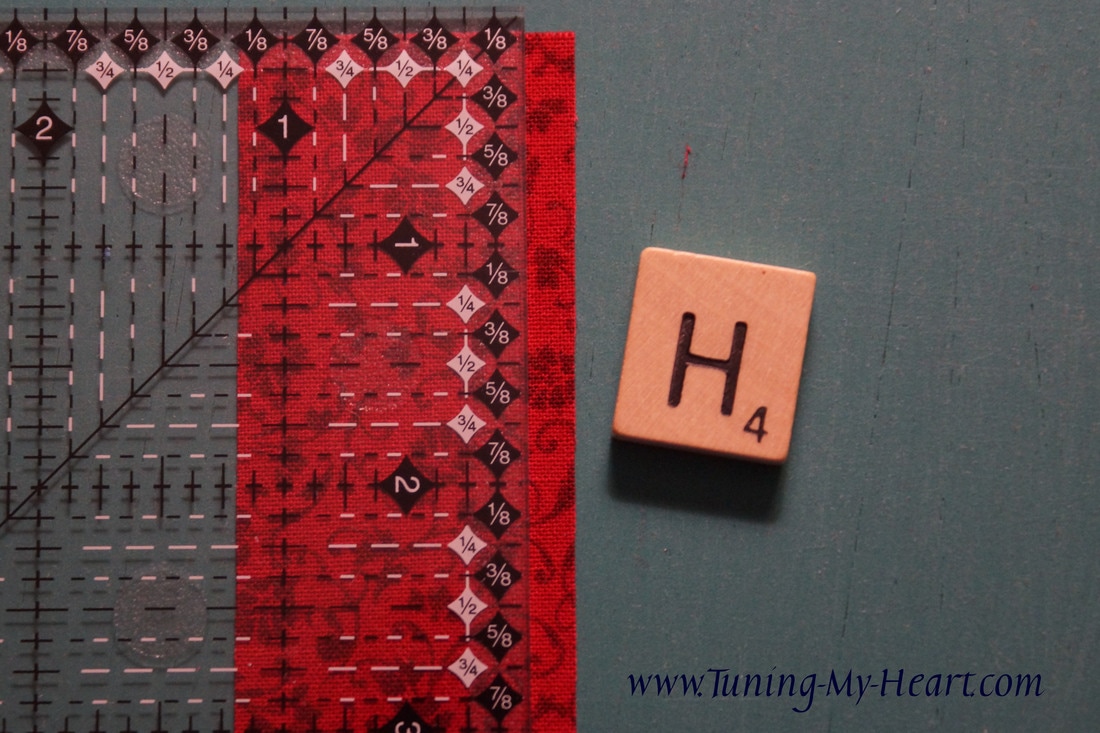 And a regular ruler works well too. 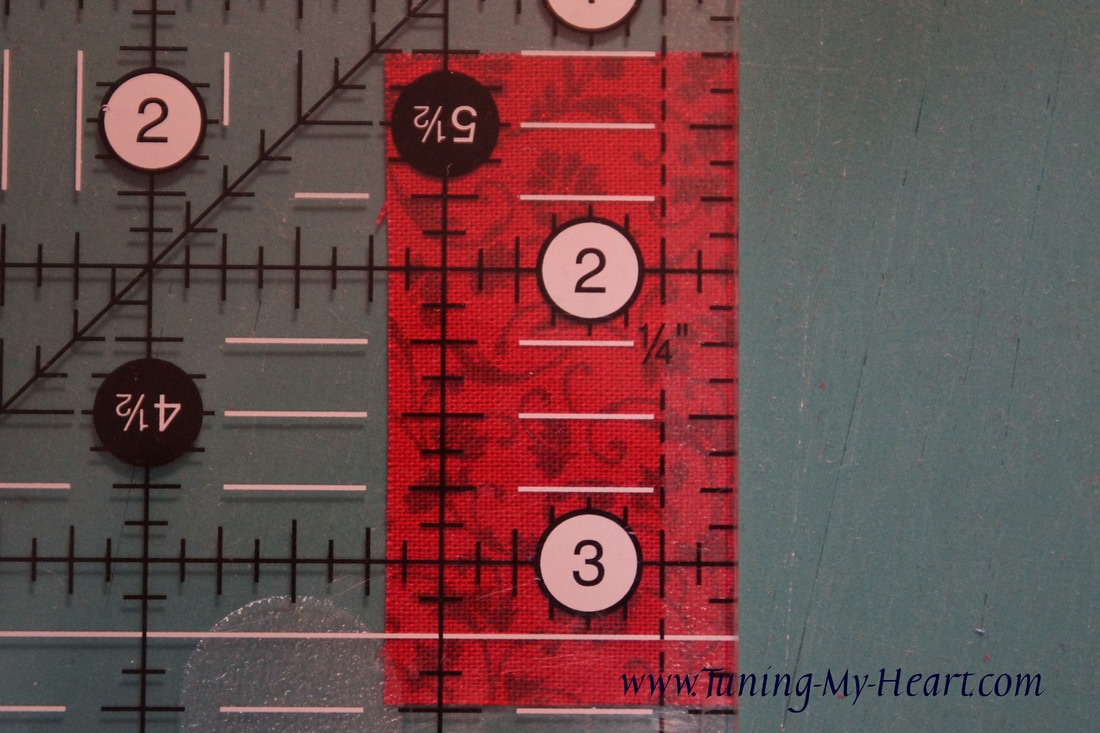 These are the pieces needed for the next round. Everything is cut according to Lisa's directions here and will go together like this.
To begin line up one of the B triangles on the H square matching the edges as shown. The corners of the triangle will stick out a bit and that is okay.  I have flipped the H square on top to sew. Press the seams open. 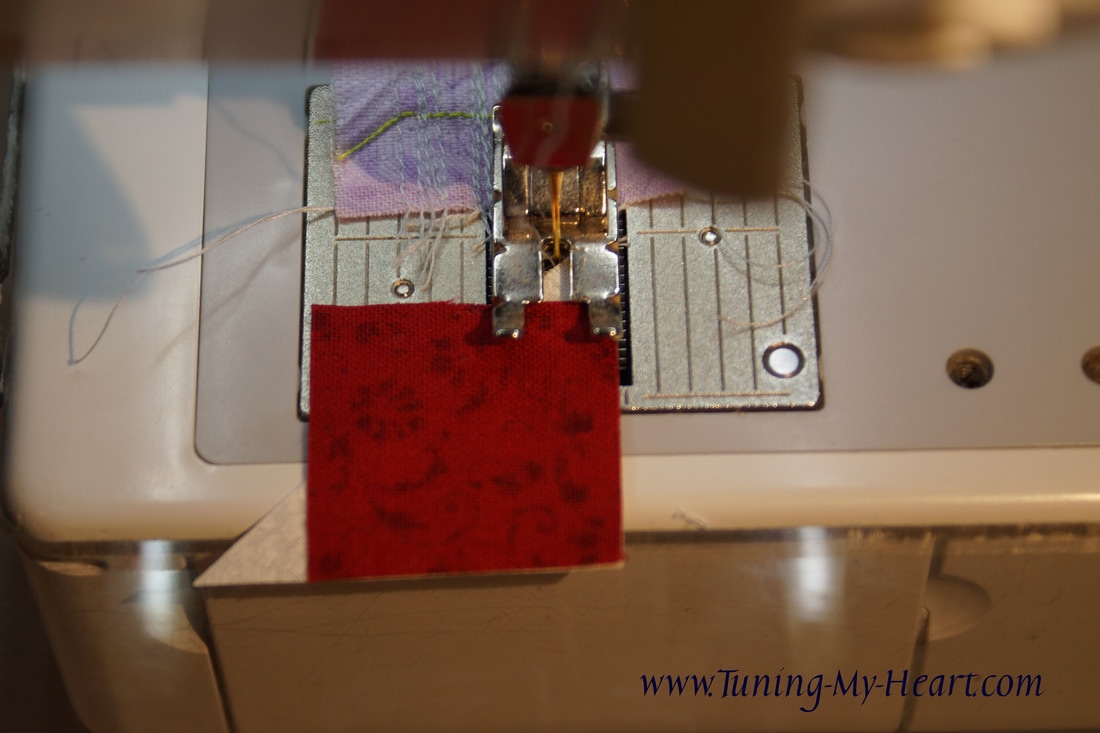 I should have trimmed that little tail off first before adding the next triangle to the H square. Oh well. Align the edges of the triangle and square 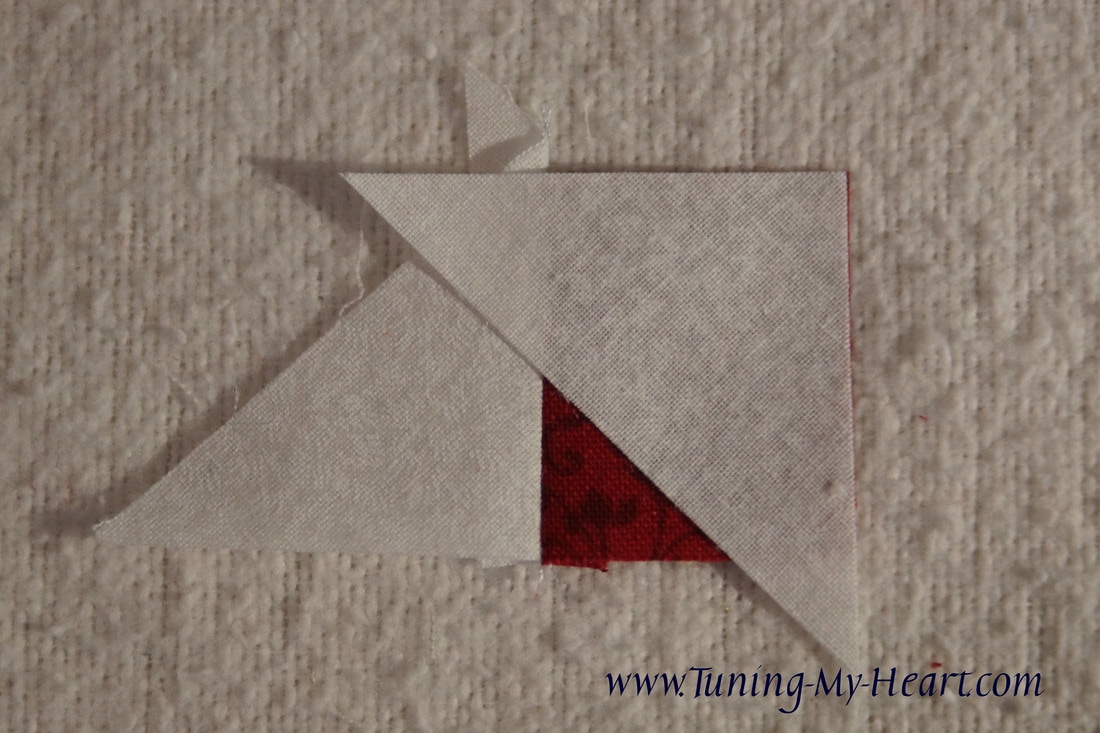 Sorry for the fuzzy photo...line up the needle in the notch that the two triangles make and sew along the edge, 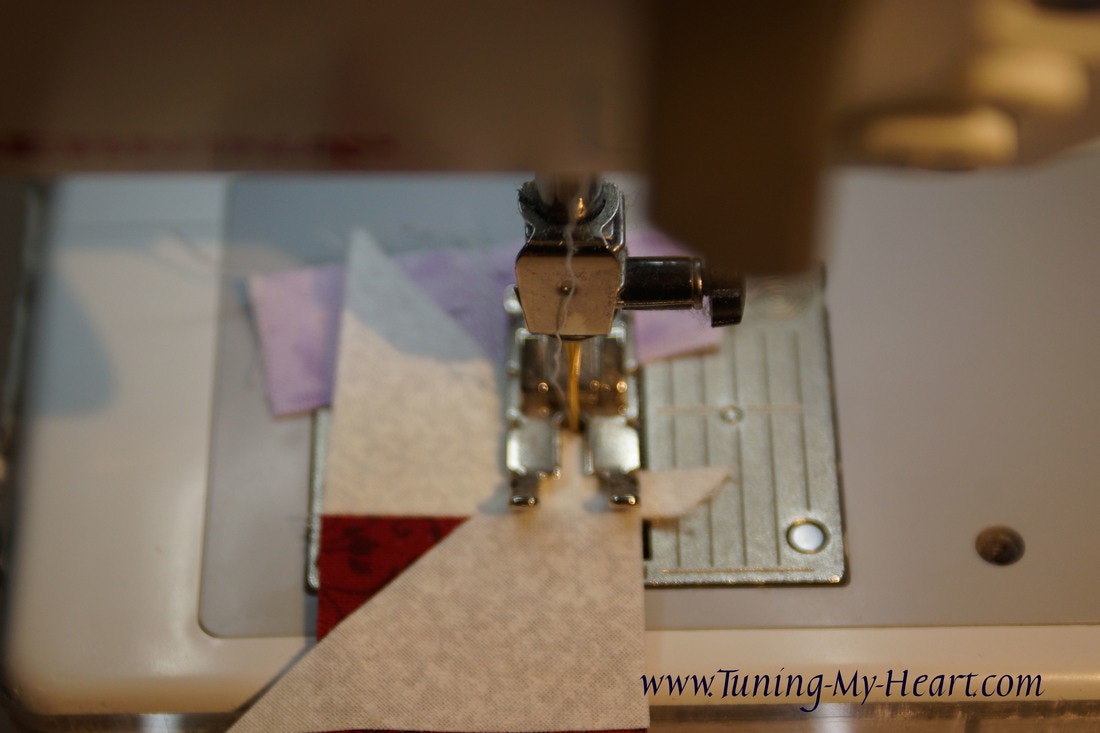 Trim the extra bits off and press the seams open.
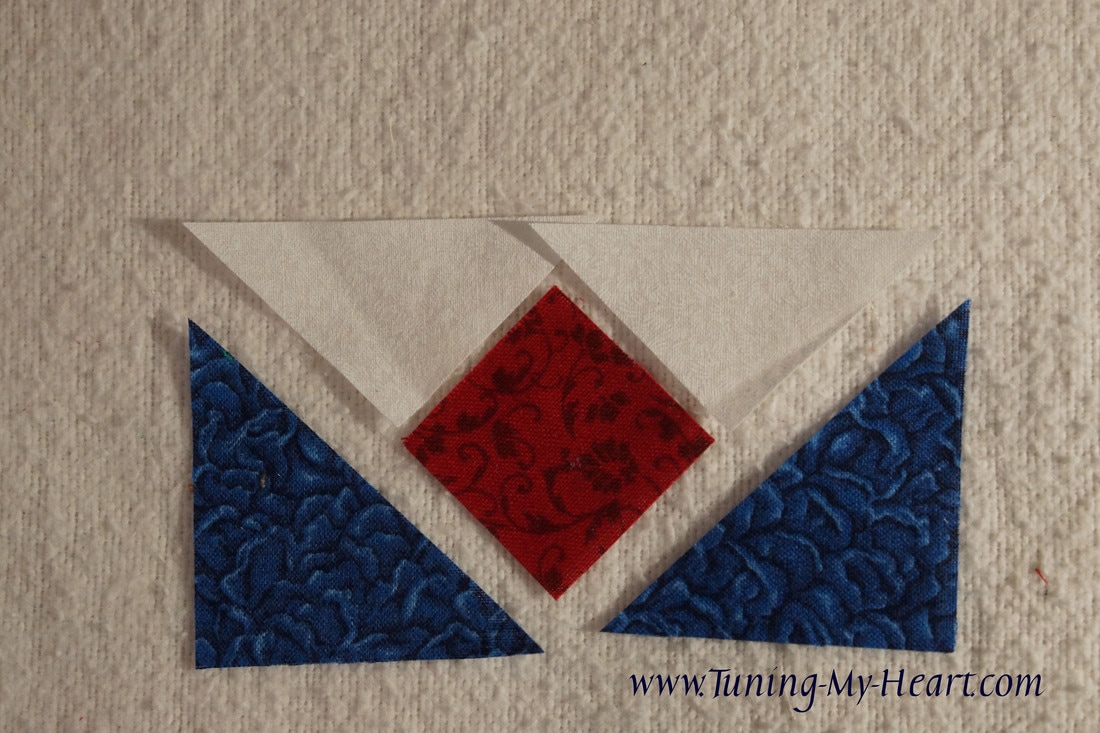
Now I can add the two blue triangles to the unit. LIne the first one up as shown.
This time we are sewing on the bias of that triangle which is very stretchy. Just go slow- do not pull on it and it will be fine. 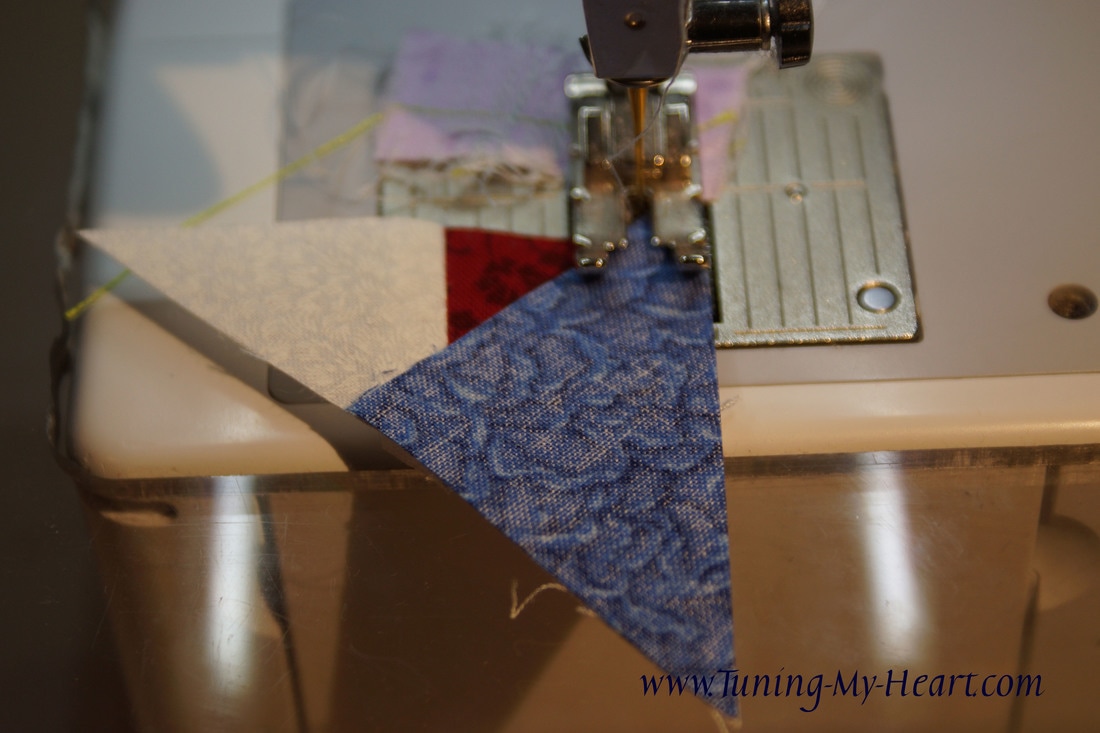 Press open and trim off the extra along this edge. 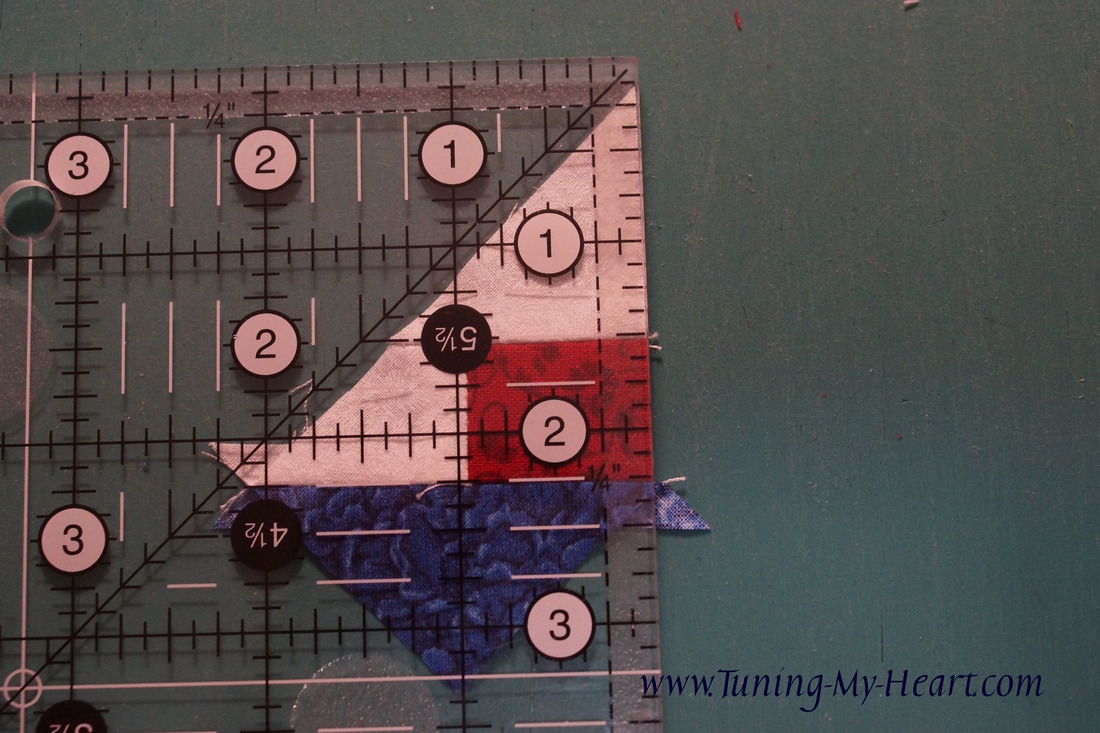 Line up the second triangle on the other side as shown, matching the edges of the diagonal and one straight side. 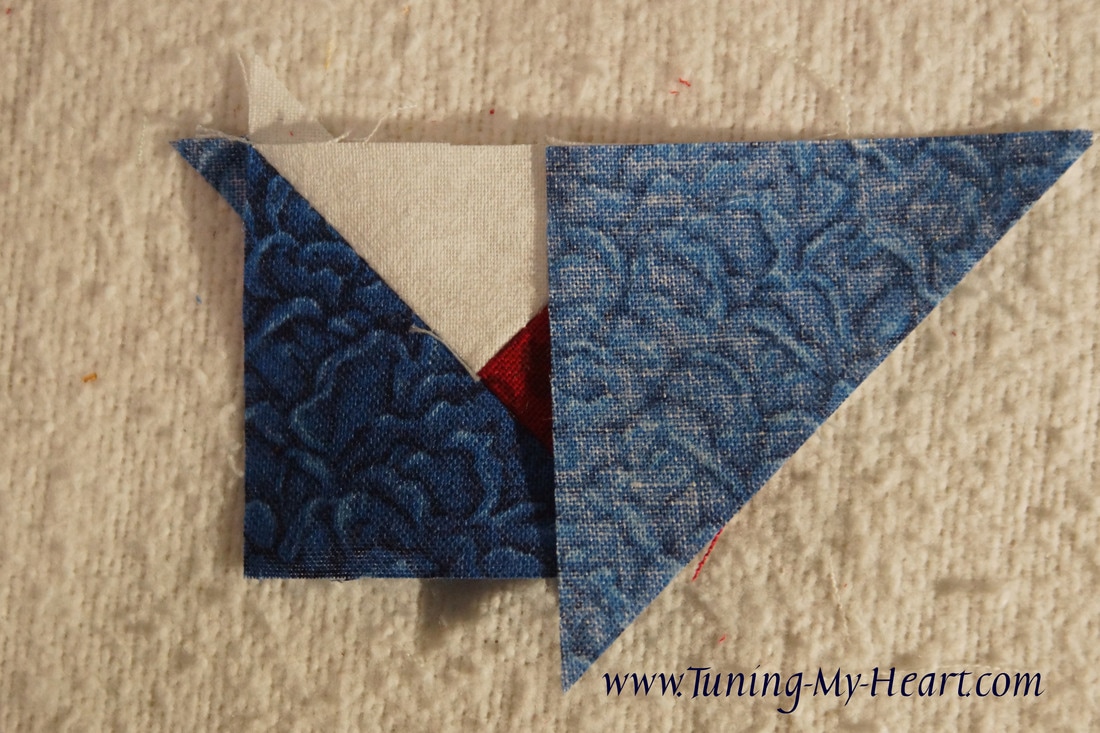 Go slow! Another sign of a good 1/4 inch seam is that my needle will land right on the notch where the two triangles meet. Press this seam open. 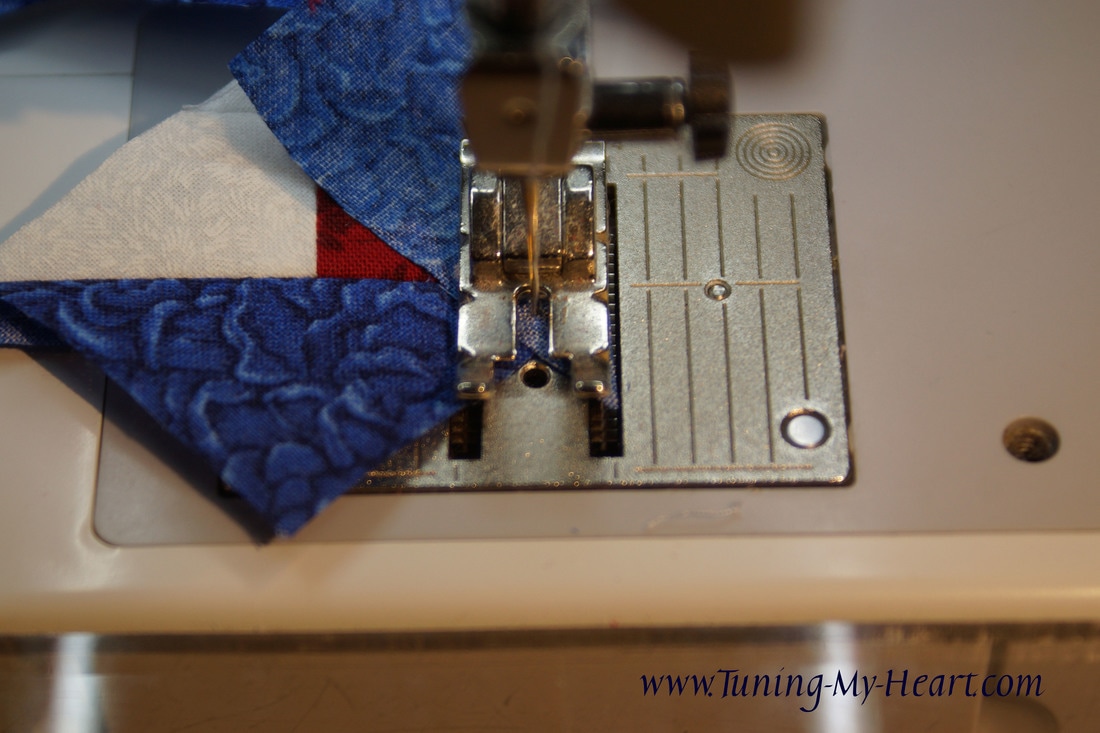 These units should measure 1½ x 2½." I they need trimming make sure that the 1¼" mark on the ruler falls at the points of the red square and you have 1/4 inch of seam allowance on both sides of it. 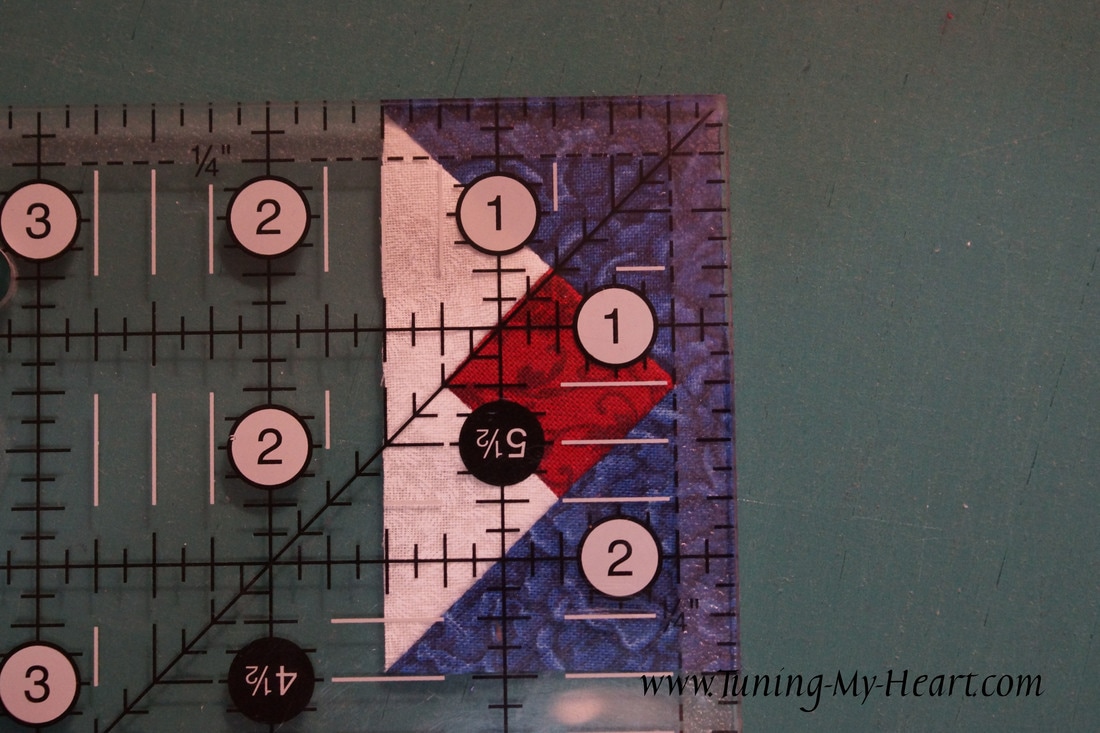 Now these units are ready to be added to the center star. Once again, I am pressing the seams on the top and bottom row towards the outside and the middle towards the center star. 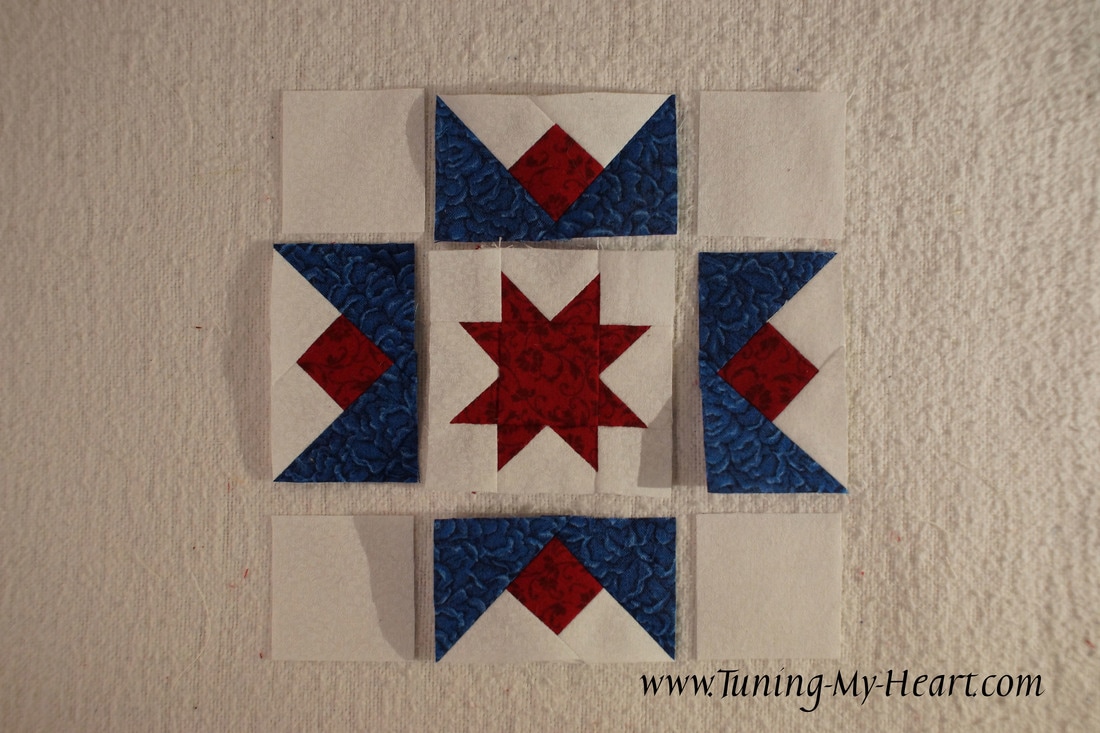 After sewing the rows together I pressed these seams open. 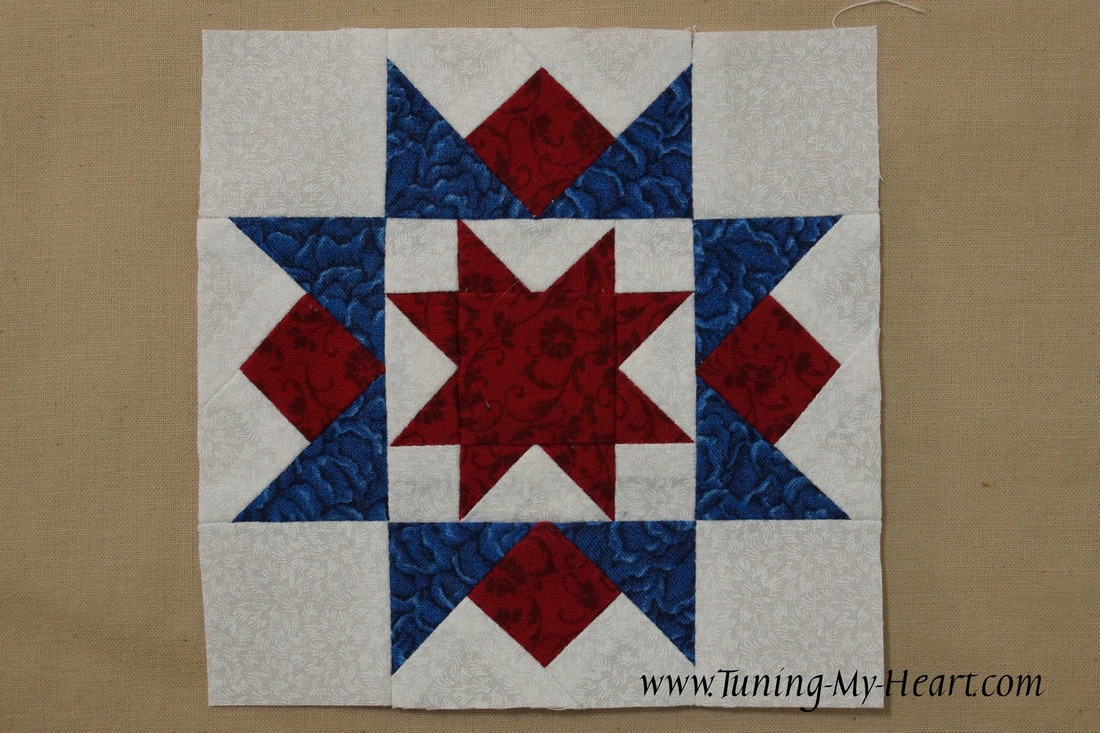 Now I can make the final units. 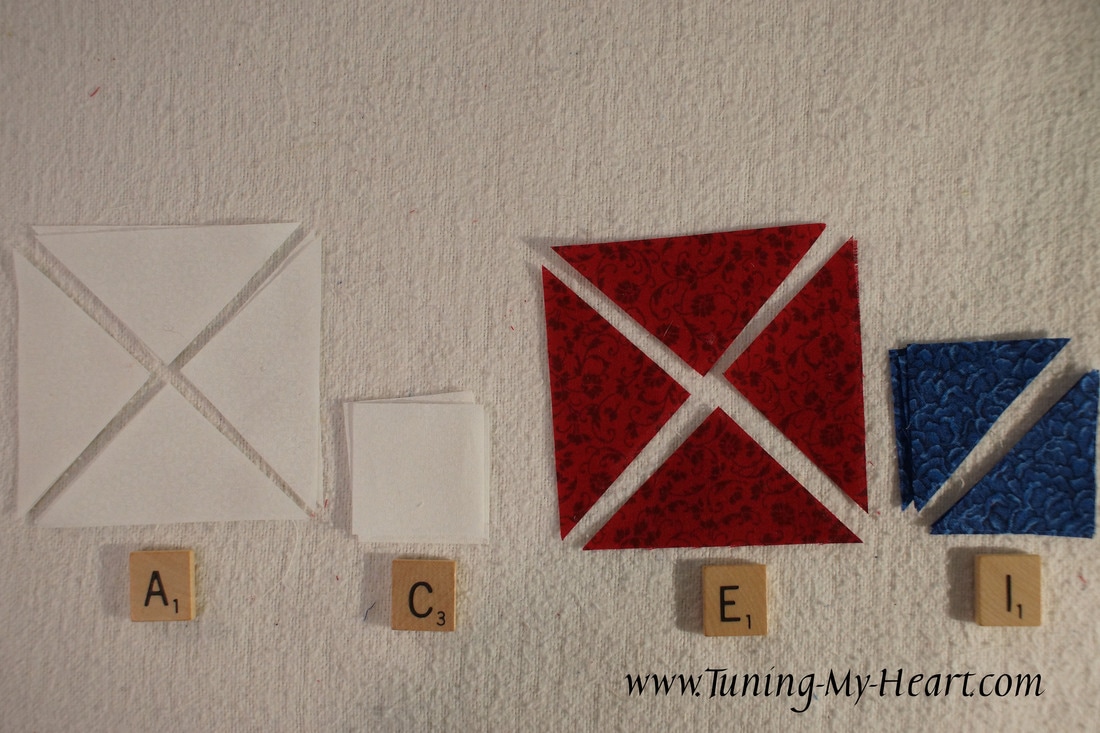 Sewing these triangles together is the trickiest part of this block. 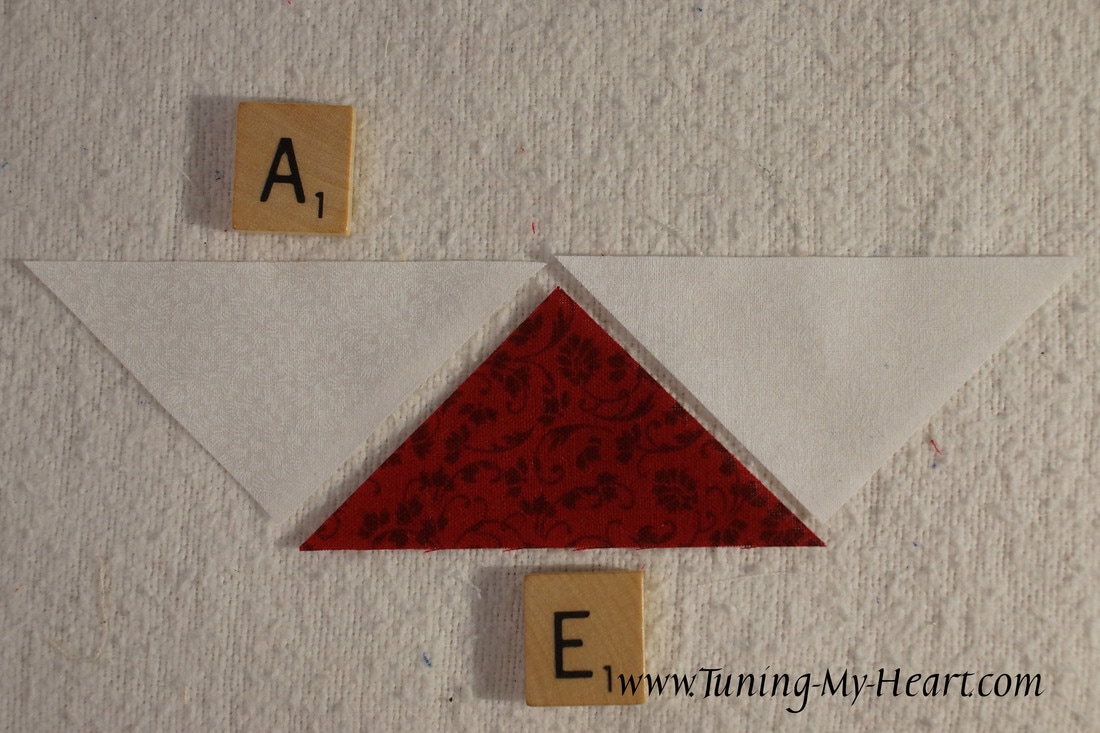 I lay the first two triangles so that the white one extends 3/8 of an inch beyond the red one. That may seem odd, but is the easiest way to get the correct size for this unit. 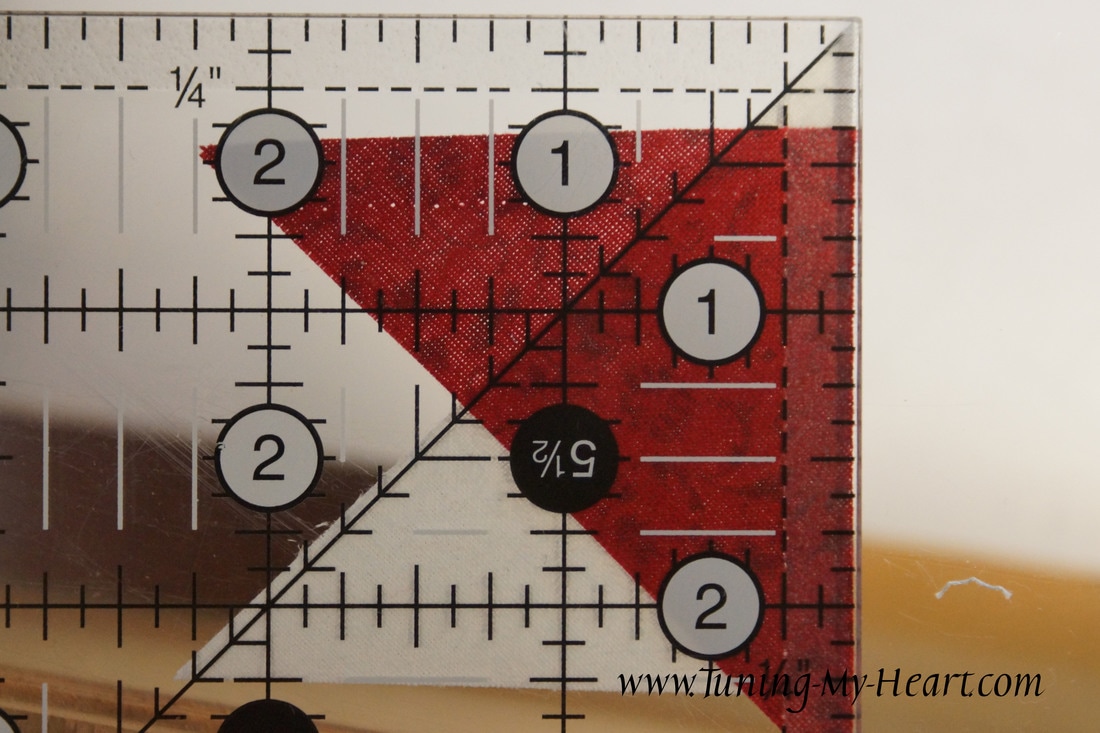 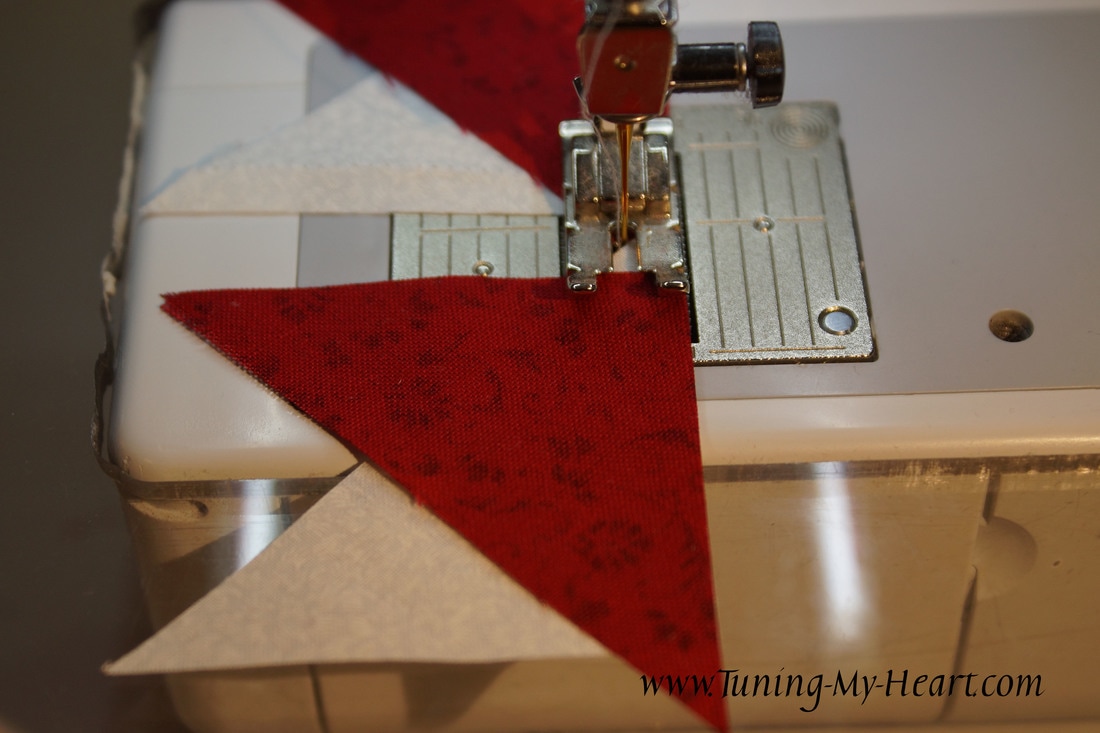 Press the seam open and then lay the next triangle on top, making sure it extends 1/3 of an inch beyond the block. 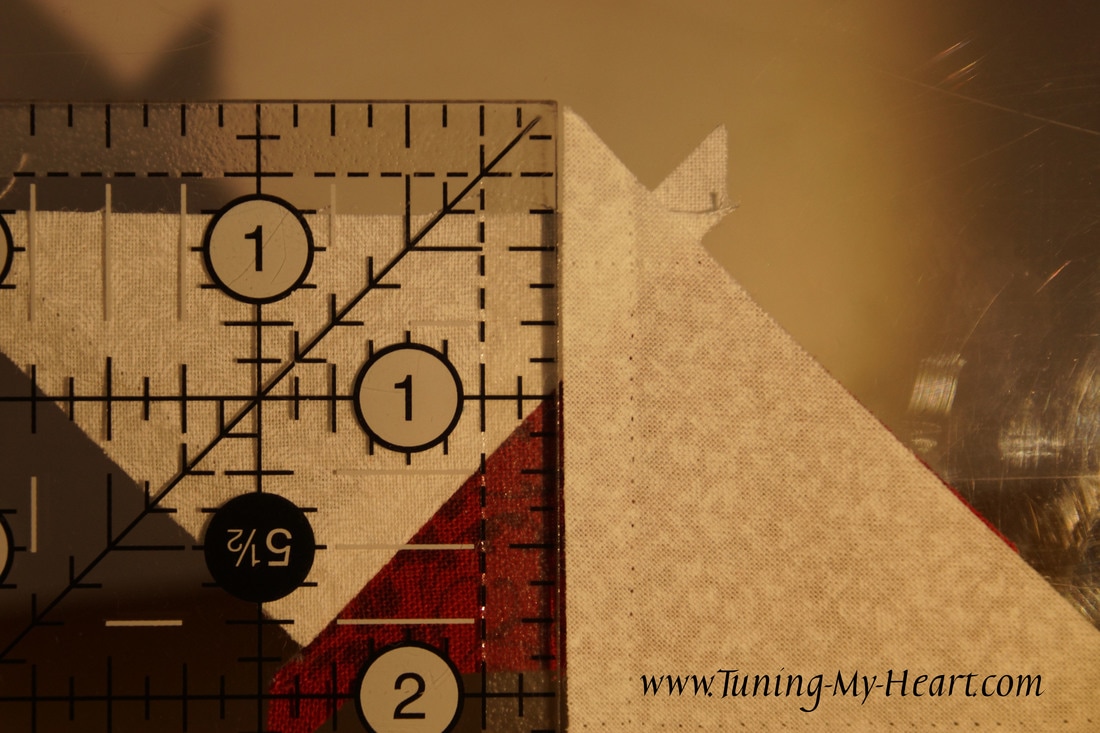 Sew a 1/4 inch seam and press the seam open. 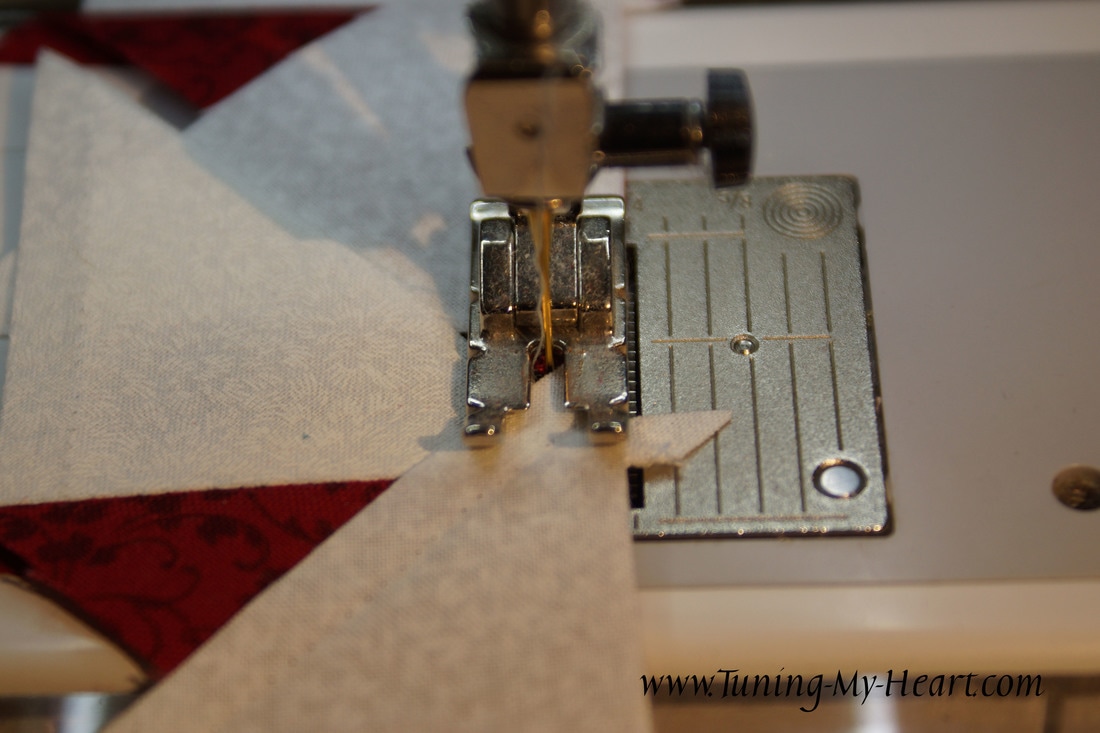 I am checking my measurement here before proceeding to make sure I have 1/4 inch above the tip of the red triangle for a seam allowance. 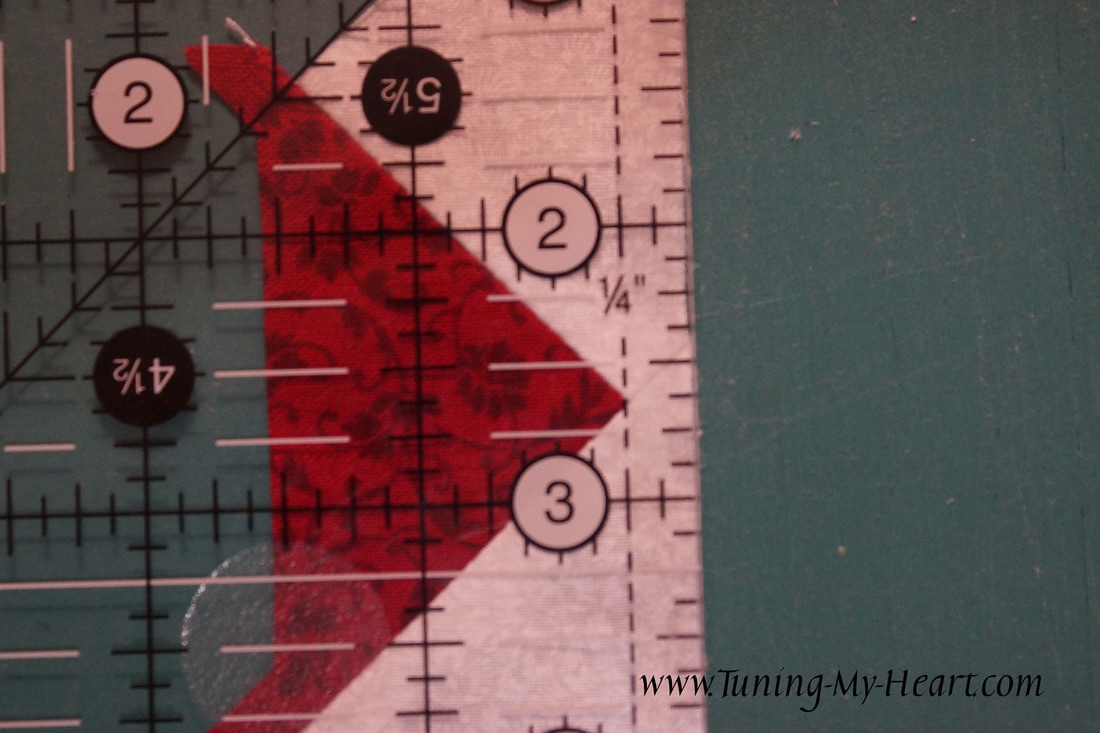 To add the blue triangles line up the diagonal and straight edge of the unit and triangle piece, matching the upper corner points. 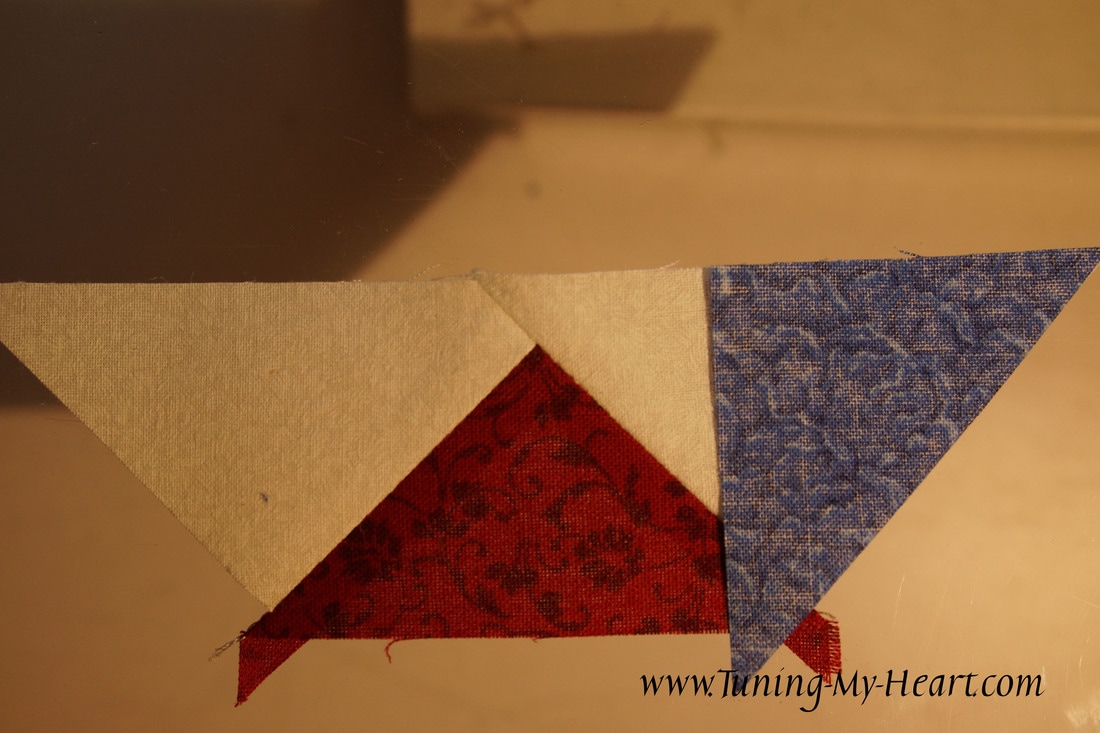 Stitch and press open towards the blue triangle. 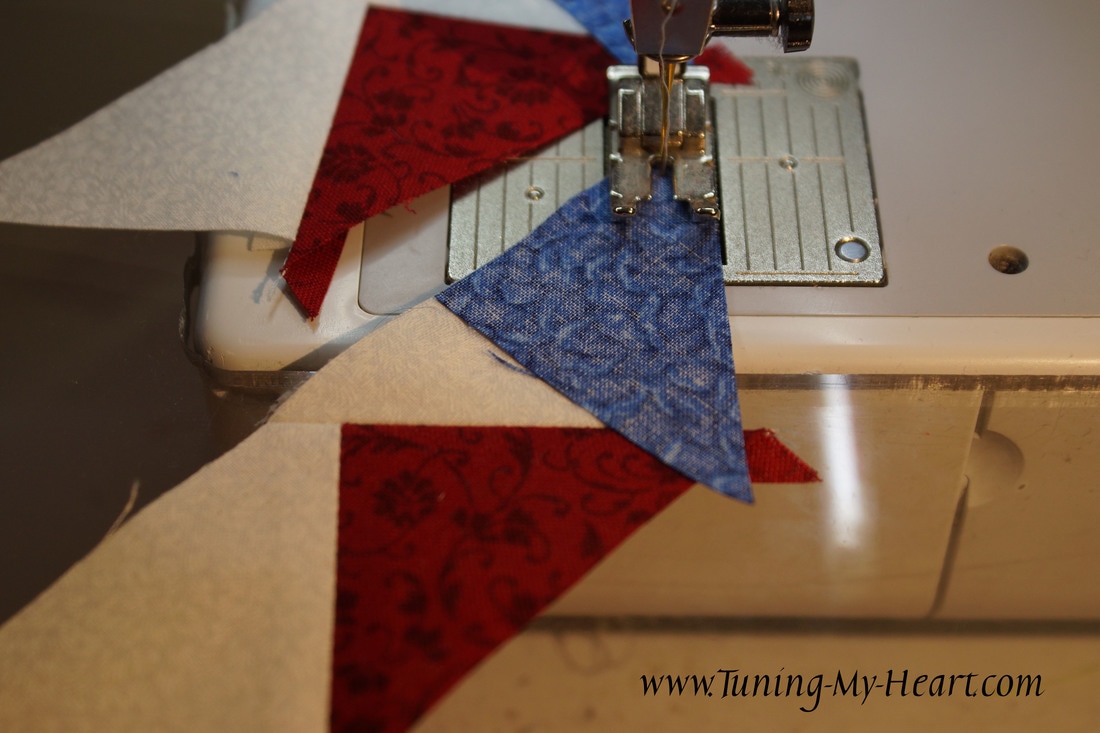 Add the second triangle in the same way.
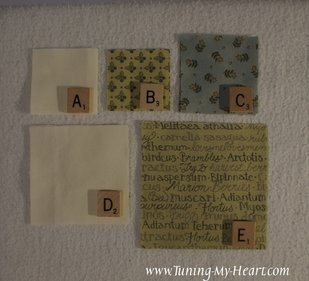
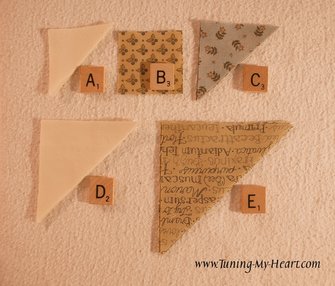
These units should measure 1½" x 4½." Notice that the tip of the red square is 1/4 inch from the edge and the two points of the white triangles are also 1/4 inch from the other edge. Trim. 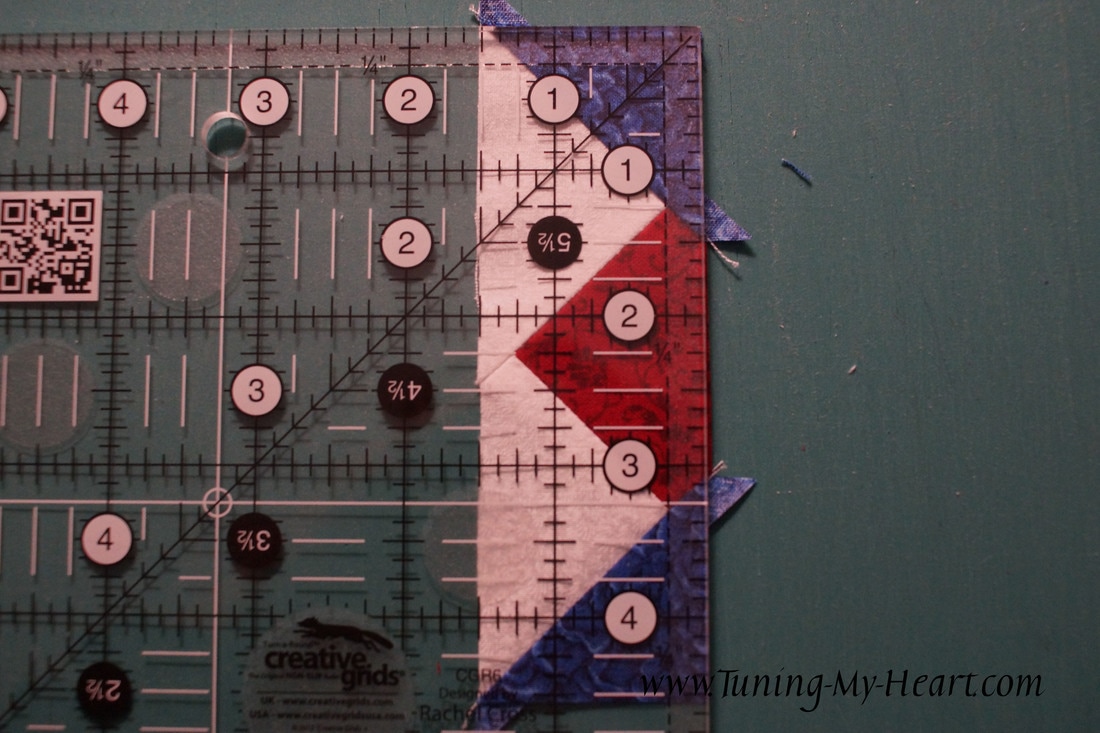 These units are ready to be added to the rest of the block now. Join the rows first. 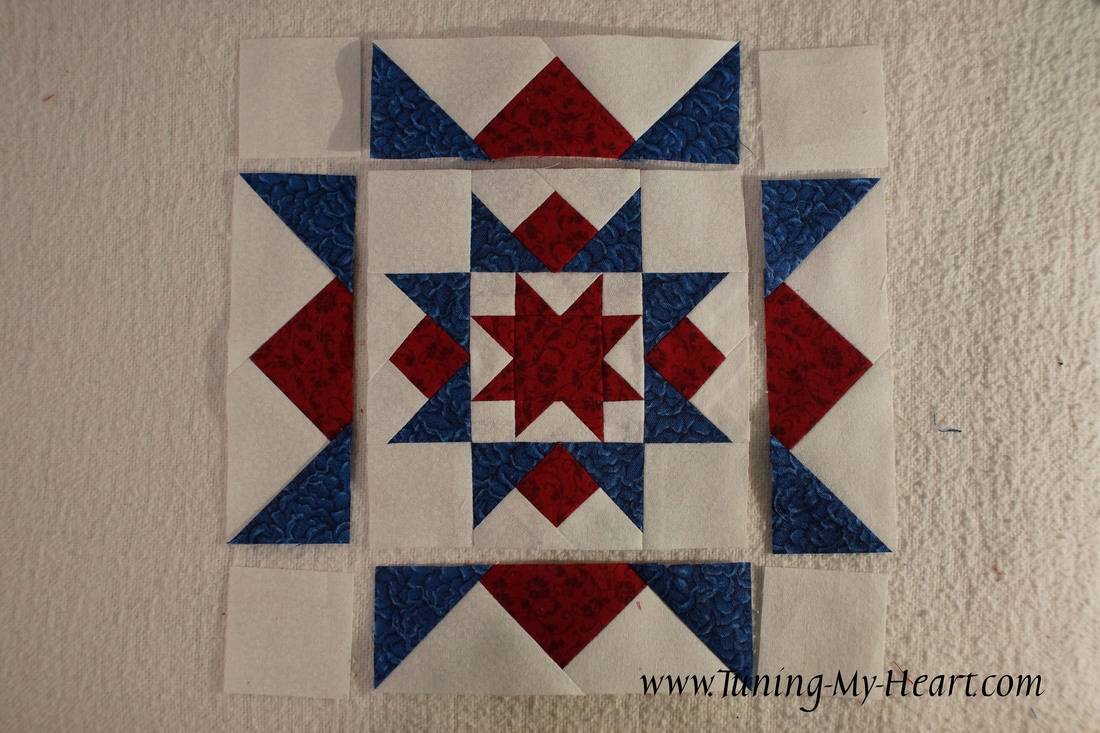 The top and bottom rows are pressed towards the C square. With all of the seams in the middle row I decided it was best to fan this seam open for pressing. 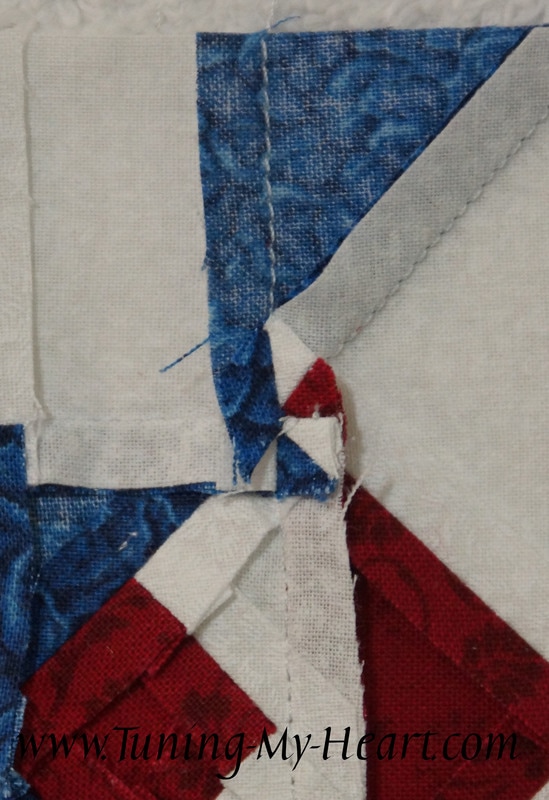 Join the rows together, pinning where the seams join. And It is finished. Whew! 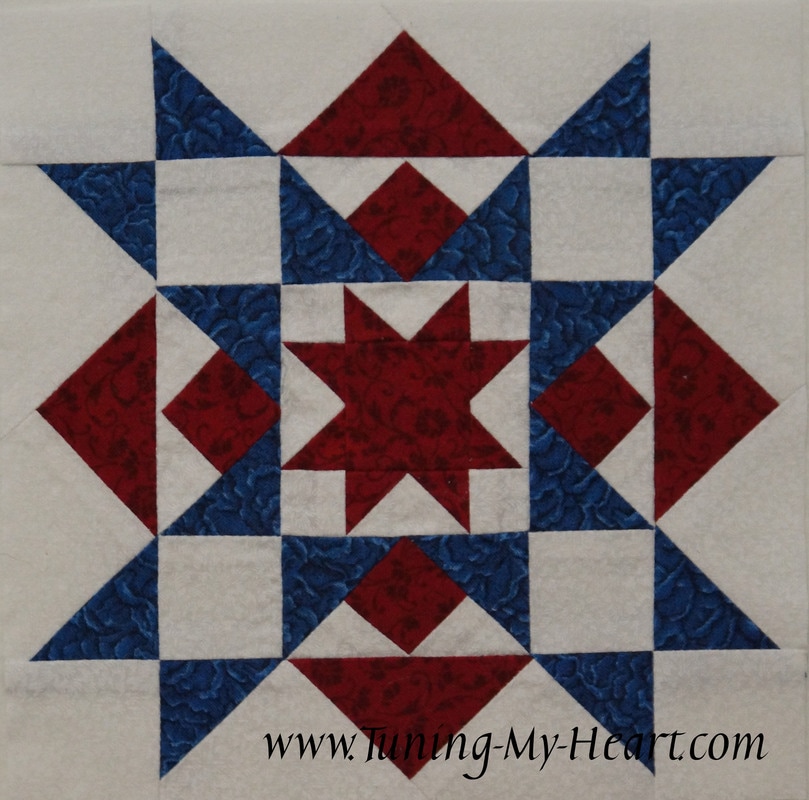 This was certainly a challenging block but I am glad I decided to give it a try. Happy Quilting!  This week's block comes to us from Betsy Chutchian. You can download the PDF pattern at: betsysbestquiltsandmore.blogspot.com/2017/06/ Square in a Square goes together rather quickly, but there are some tricks to it. I thought Betsy did a great job of walking us through it in her post-especially since she did all of the math for us and cut the pieces oversize so they could be trimmed down. The hardest part for me was to figure out which of the fabrics in my Moda Garden Notes collection to use! 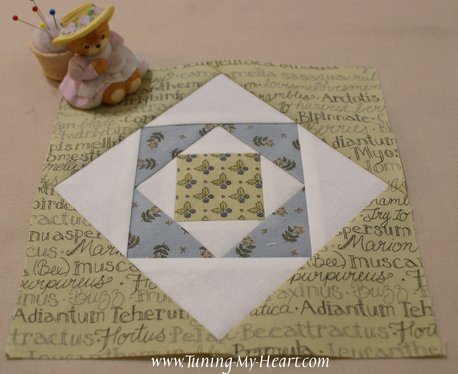 As usual, I started with fabric that had been starched before cutting the pieces. The A, C, D, and E squares need to be cut in half on the diagonal.
To begin, two A triangles are placed on opposite sides of the B square. 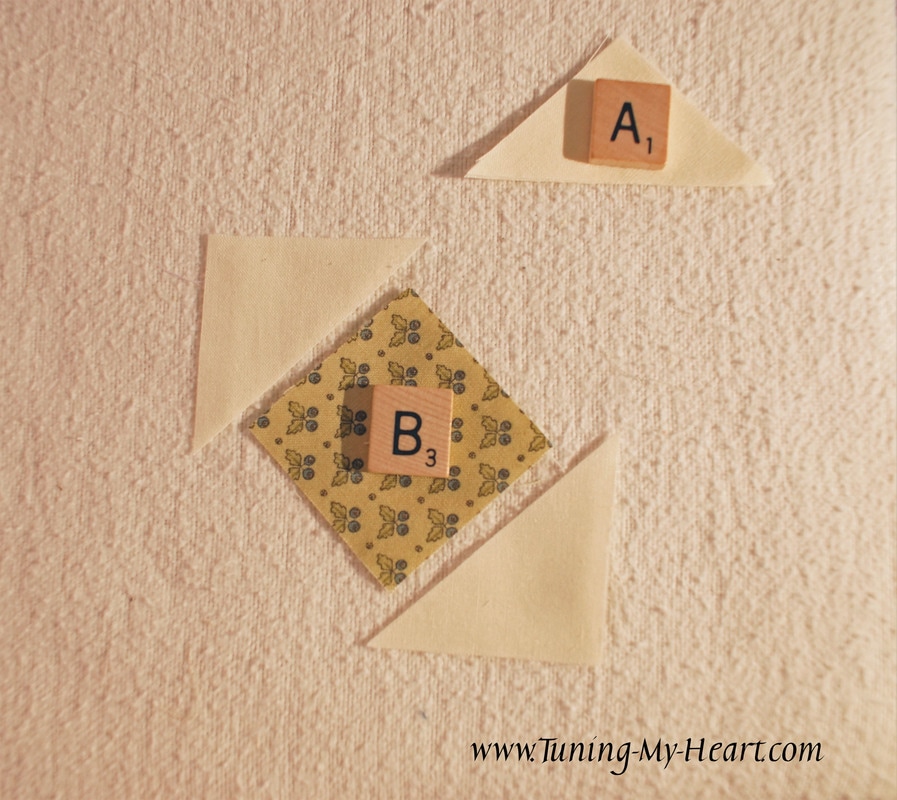 I need to know where the middle is on both the square and the triangles so I fold them in half. The square is folded with right sides together and the triangles are folded with wrong sides together and gently finger pressed. This allows the triangles to lay nicely on top of the crease in the square so that they are centered.
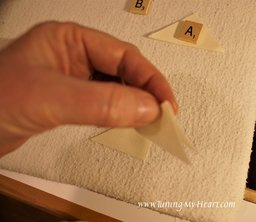
Once I have the triangle centered on the square I put a pin in near where I will be sewing to hold the center-point in place. I am pinning differently than my norm here as I am going to leave this pin in place as I sew the seam. 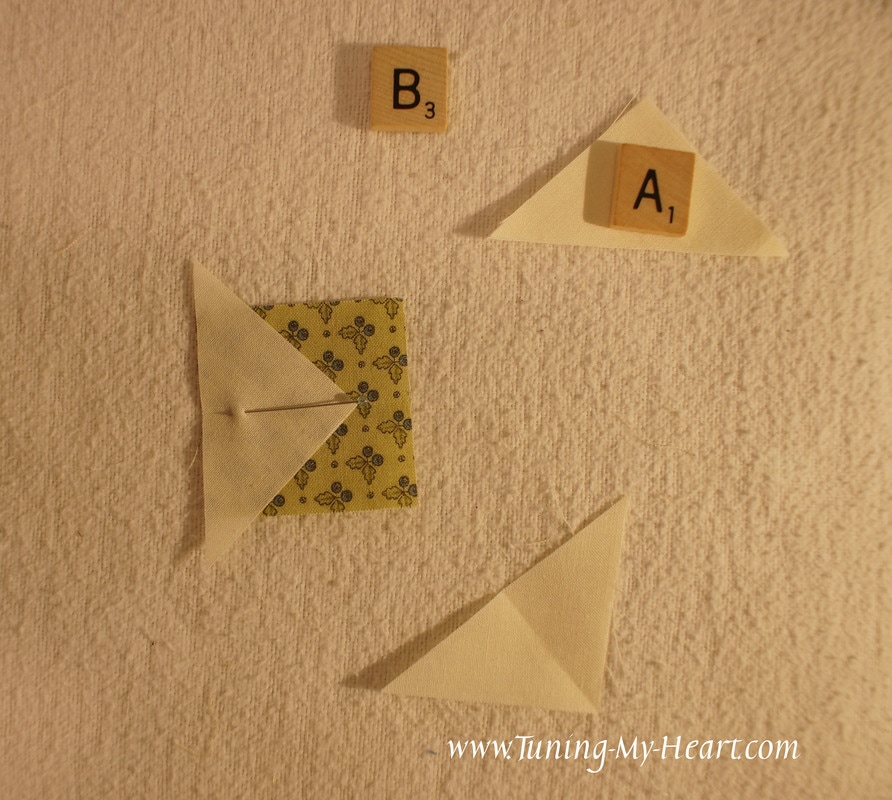 I have sewn one side and now do the opposite side. You can see again how I have placed my pin so that the needle will not actually hit it as I sew. 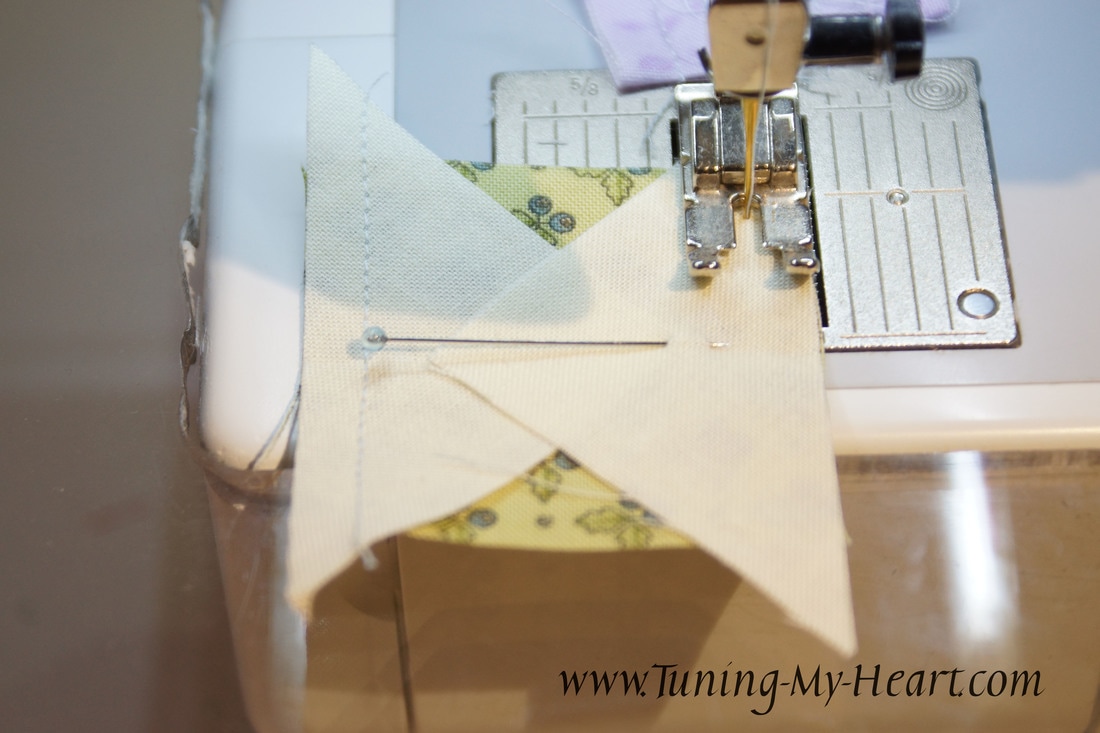 It was suggested that we press these seams open so I have done so here. I am also using a towel on top of my pressing table as suggested by Betsy in her post last week. A trick she uses to get her seams to lay flat and when it needs washing after using starch you can just toss it in the wash. After pressing there are some little extra bits that need to be trimmed. I lined up my ruler so the marks ran along the seam and the edge to keep things square.
To prepare for the adding the triangles to the remaining sides I fold the square in half, matching the seams and finger press the crease in. 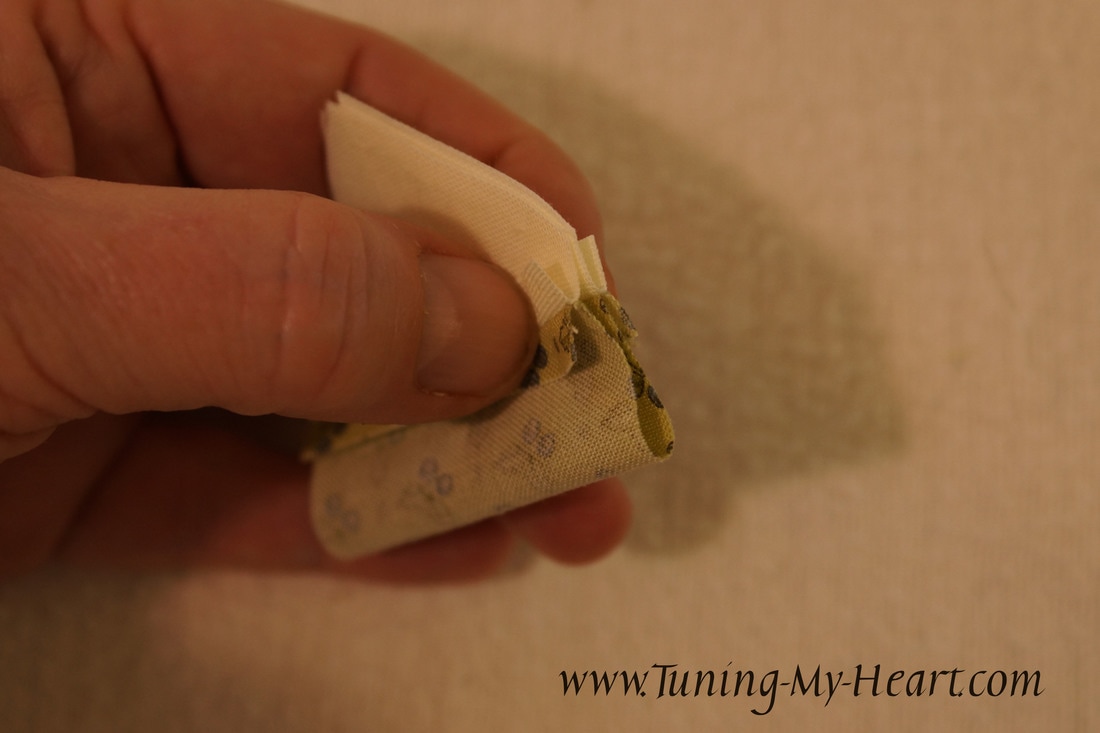 Now I proceed just like before with the two remaining triangles. Notice I am starting with my needle down right in the notch where the two triangles meet. 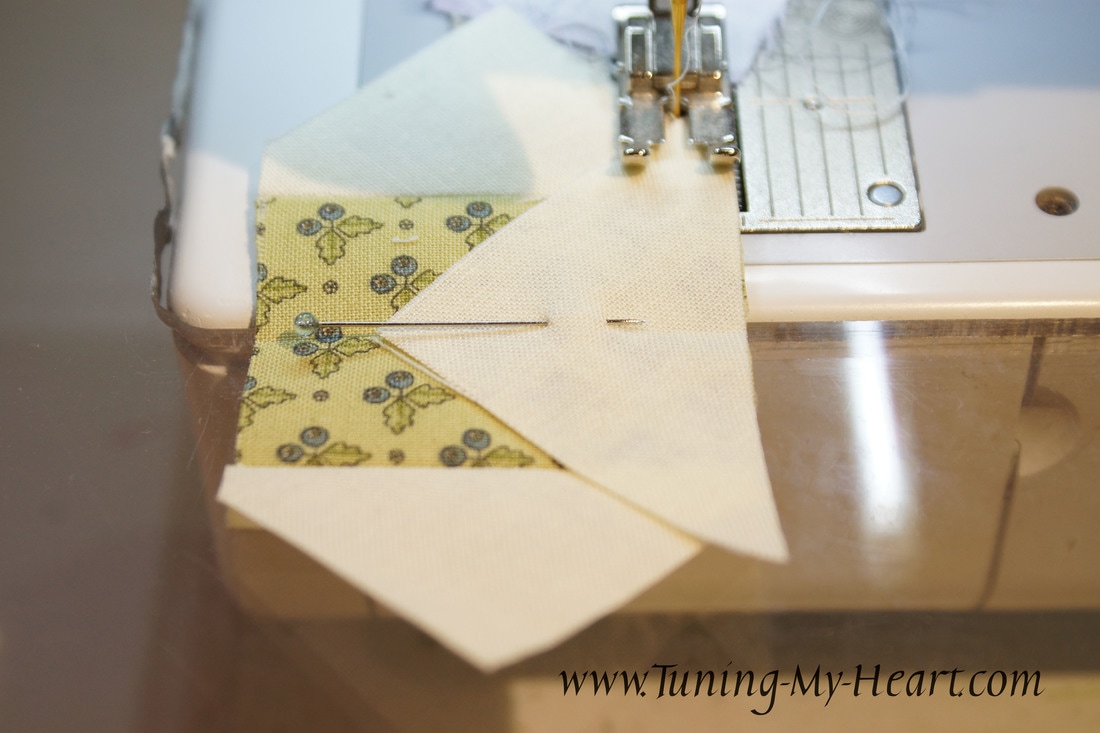 This unit needs to measure 2 5/8" square. I need to make sure that I have a quarter inch beyond each of the points of the green square. According to Betsy the middle of the unit will be just a "skoosh" over 1¼". It looks like it is pretty much in the middle of the 1/4 mark and the 3/8 mark on my ruler. I am also lining up the diagonal line on my ruler with the corners before trimming away the excess. 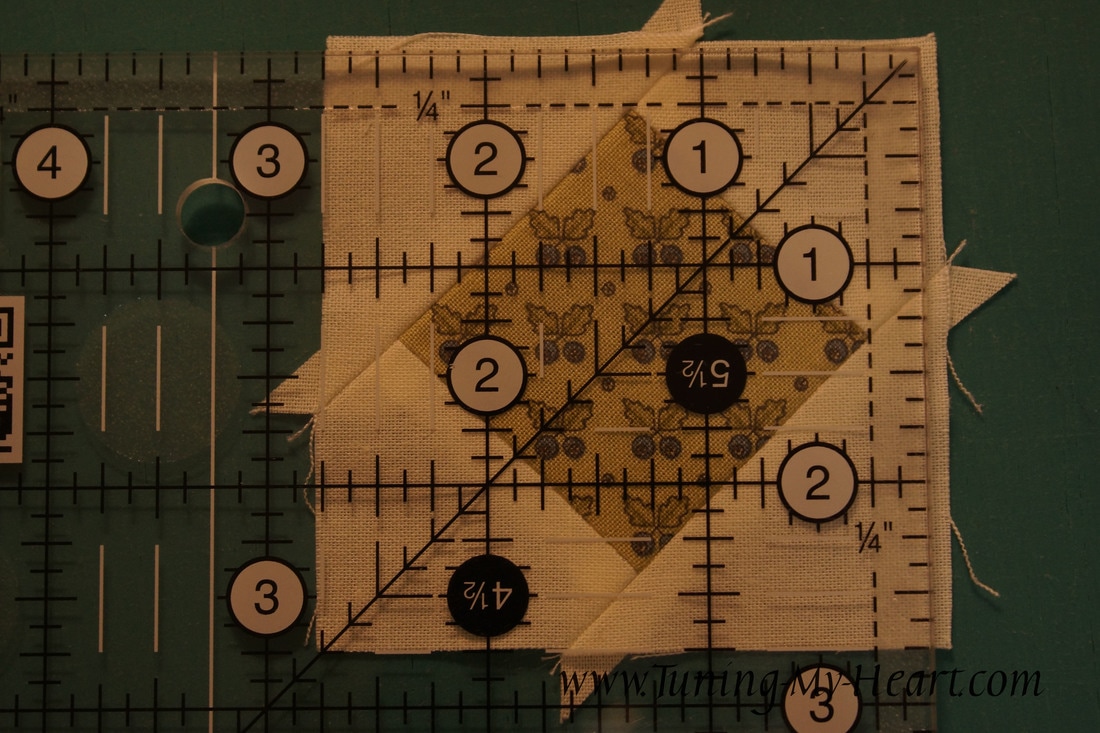 Using the same process I add the next four triangles to my square. I found that rather than pressing my seams open at this point I started pressing towards the triangle I just added. There was so much bulk if I tried to open them up like I did on the first ones. 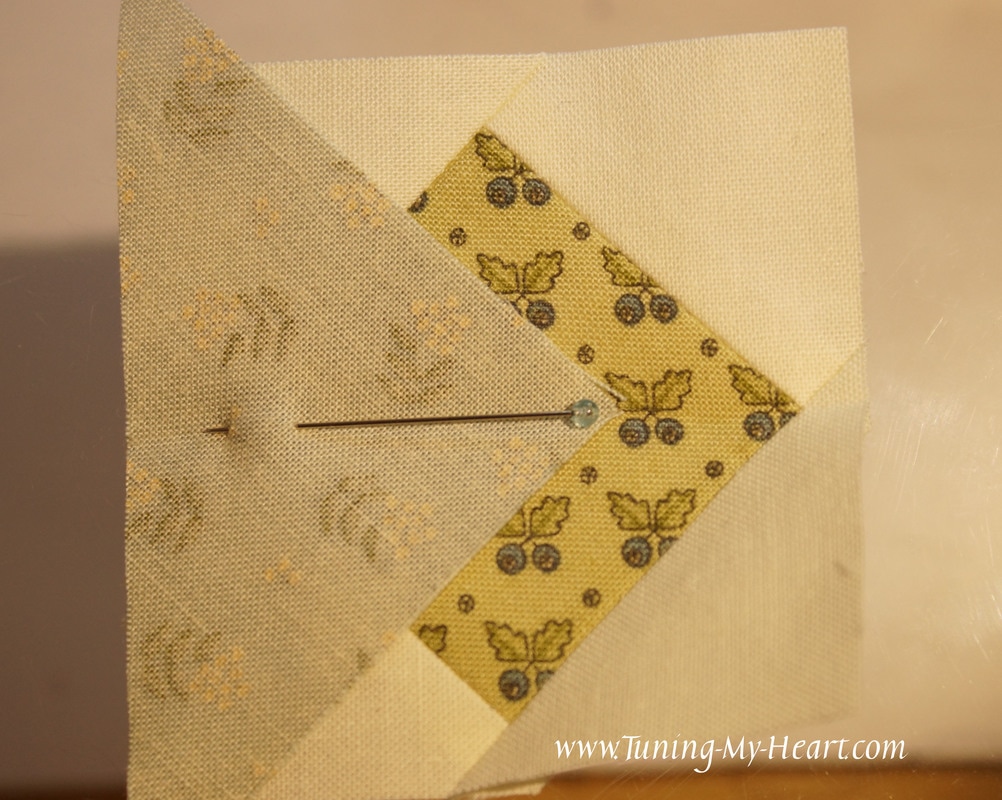 Now the unit gets trimmed to 3 ½" square. I am again making sure that I have a quarter inch beyond the points of the square and that these points are lined up with the 1 3/4 inch mark on my ruler. I also make sure that the diagonal line is running from corner to corner of the inner green square. It is a lot to pay attention to but important for a nice square block. 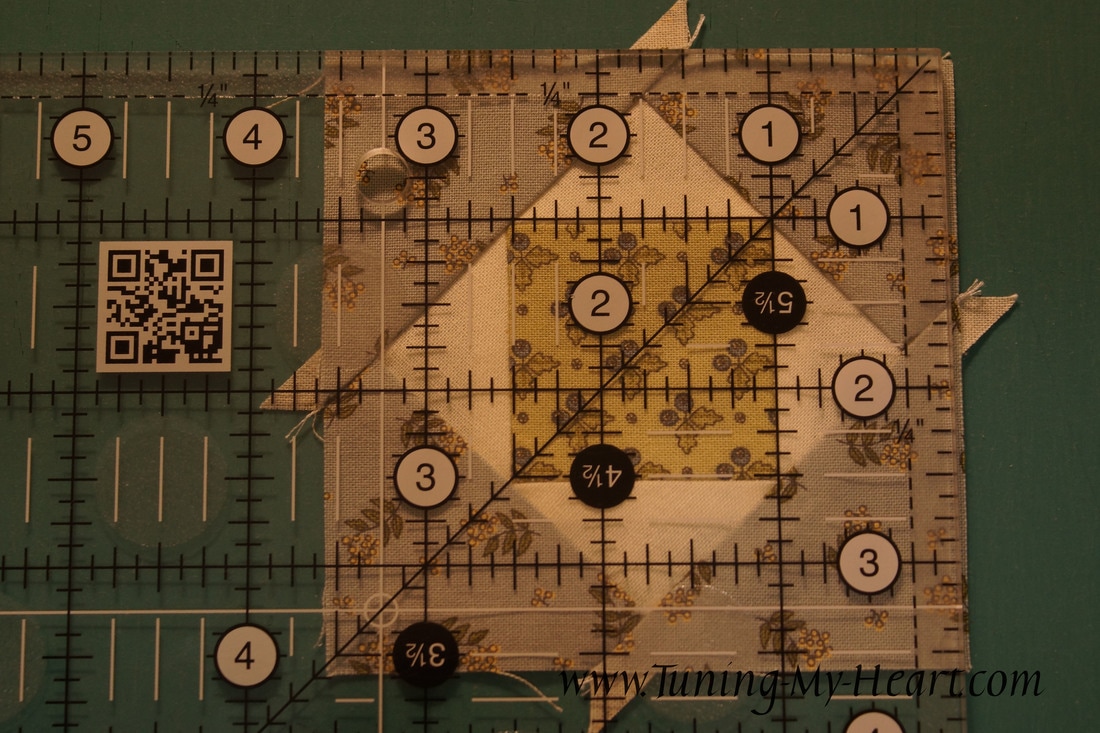 On to the next cream colored triangles. 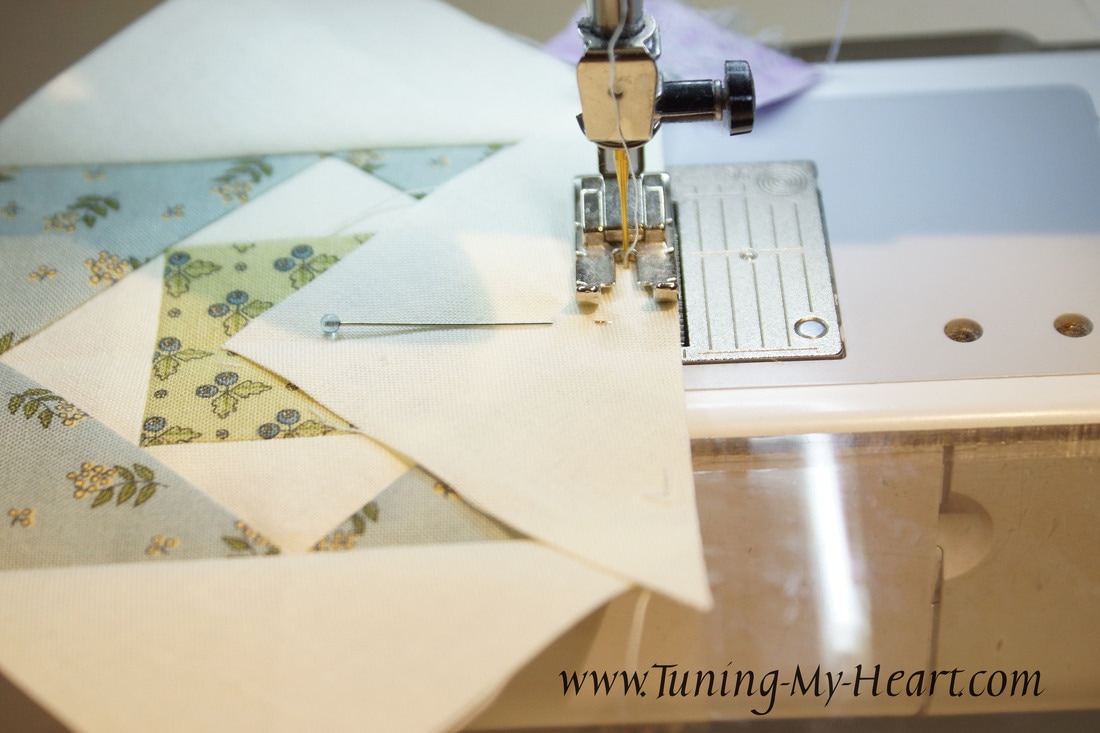 I pulled out my itty bitty eights ruler to trim the unit to 4 3/4" square. Half of 4 3/4 is 2 3/8 so I want those marks on my points. Once I check my diagonal line and quarter inch seam allowance I then trim off the excess. 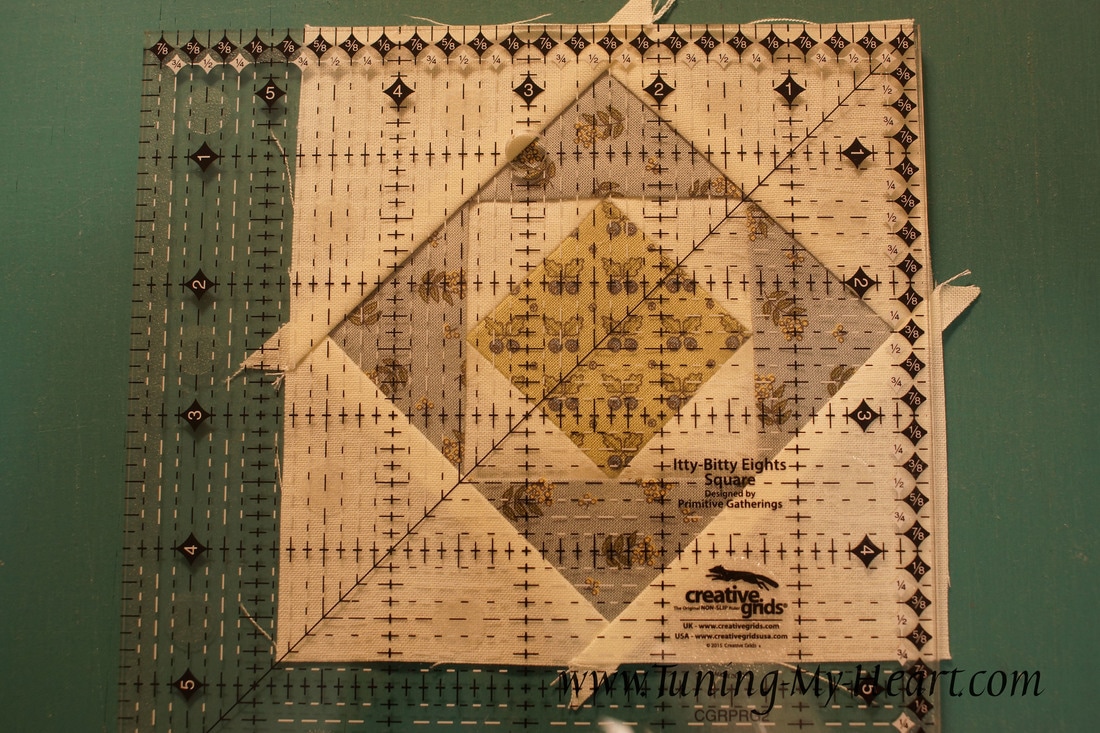 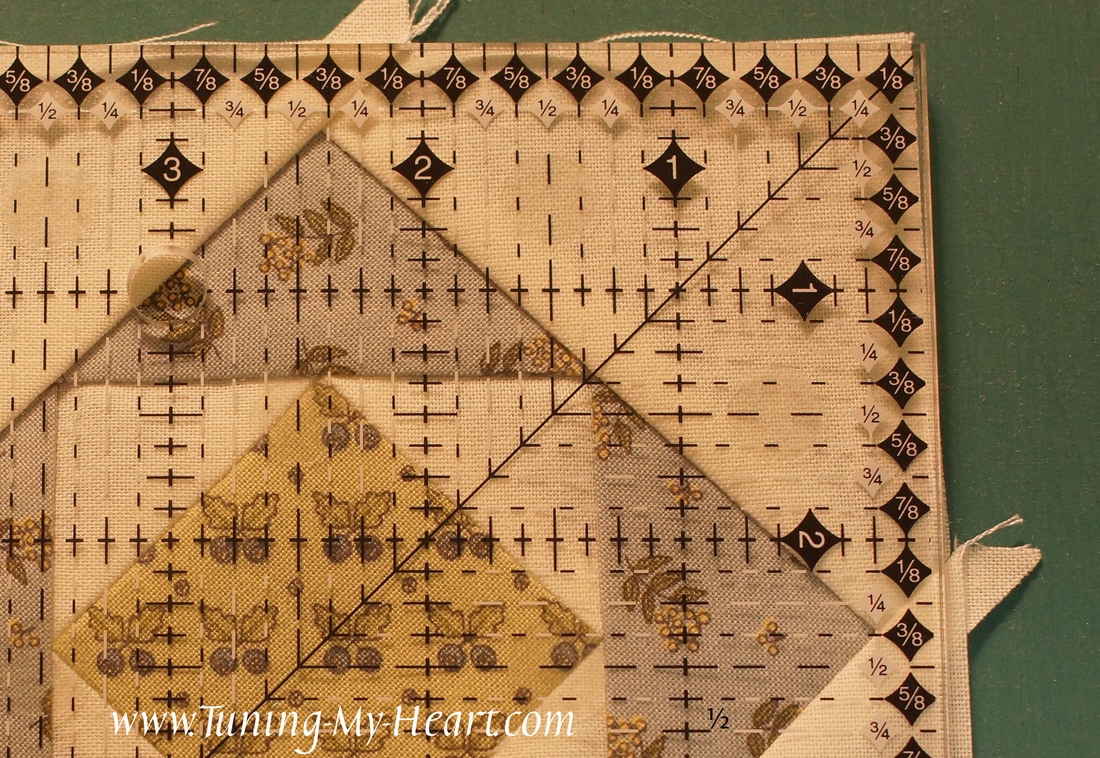 After adding the final four triangles I once again trim to the correct size. Lining up everything as before, I make sure my points are on the 3 1/4 inch lines and trim the block to 6 1/2 inches. 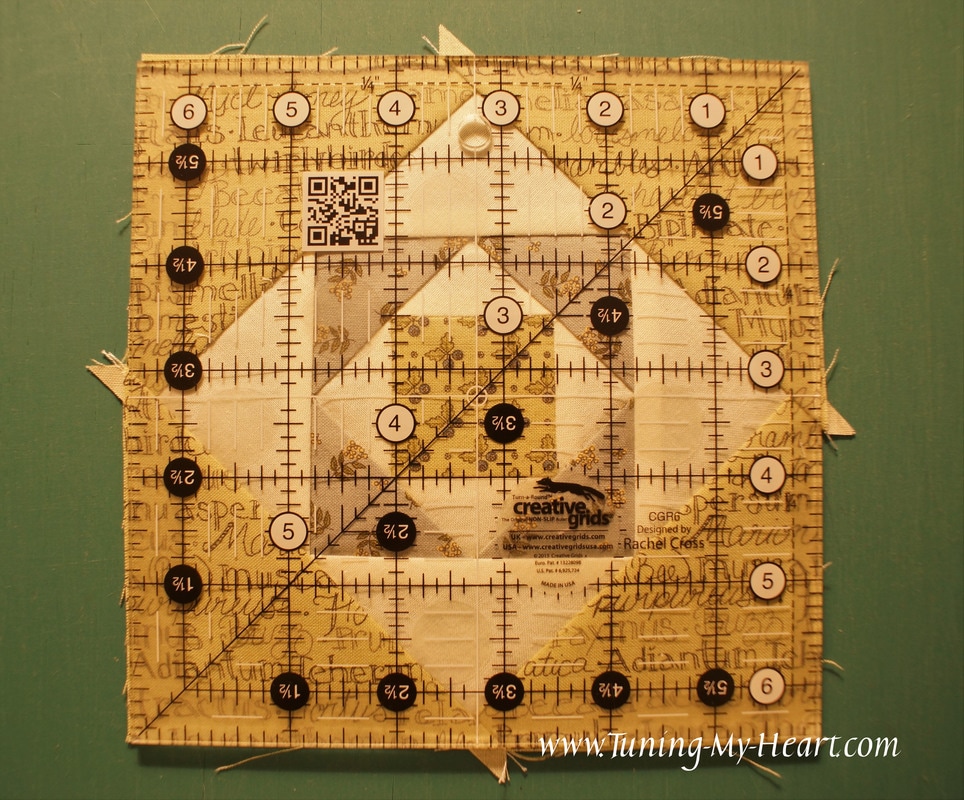 That was fun! 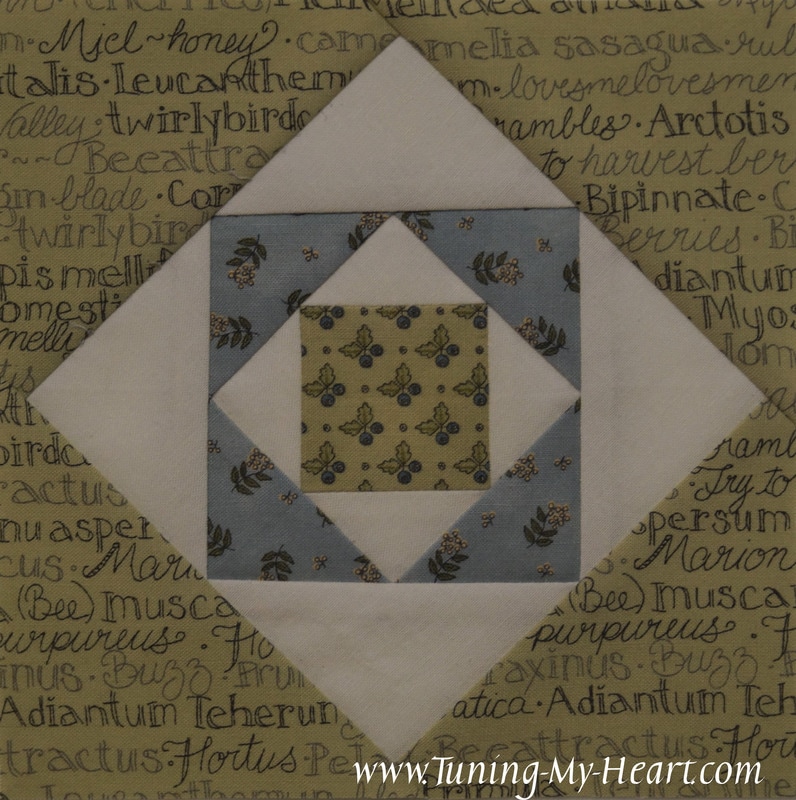 Until next week... Happy Quilting!!  |

Welcome to the site of Debra Davis-a woman who loves the Lord and loves to quilt.
My other blog where I share about my walk of faith:
Sitting at His Feet 
|


 RSS Feed