|
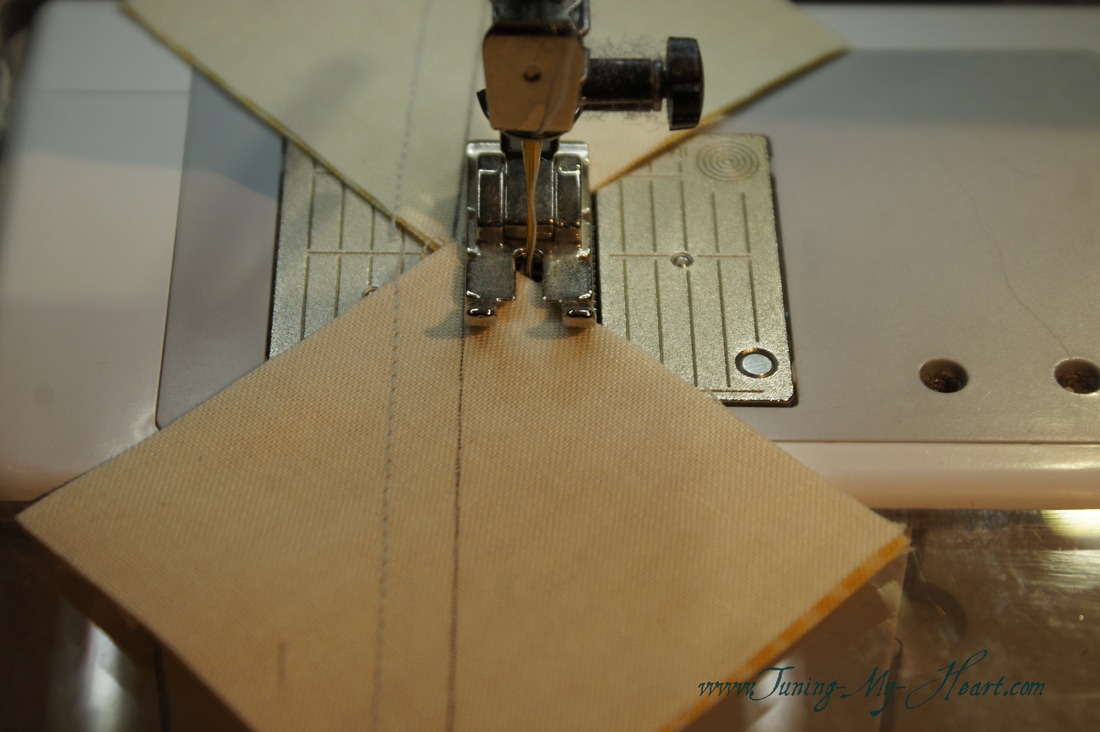
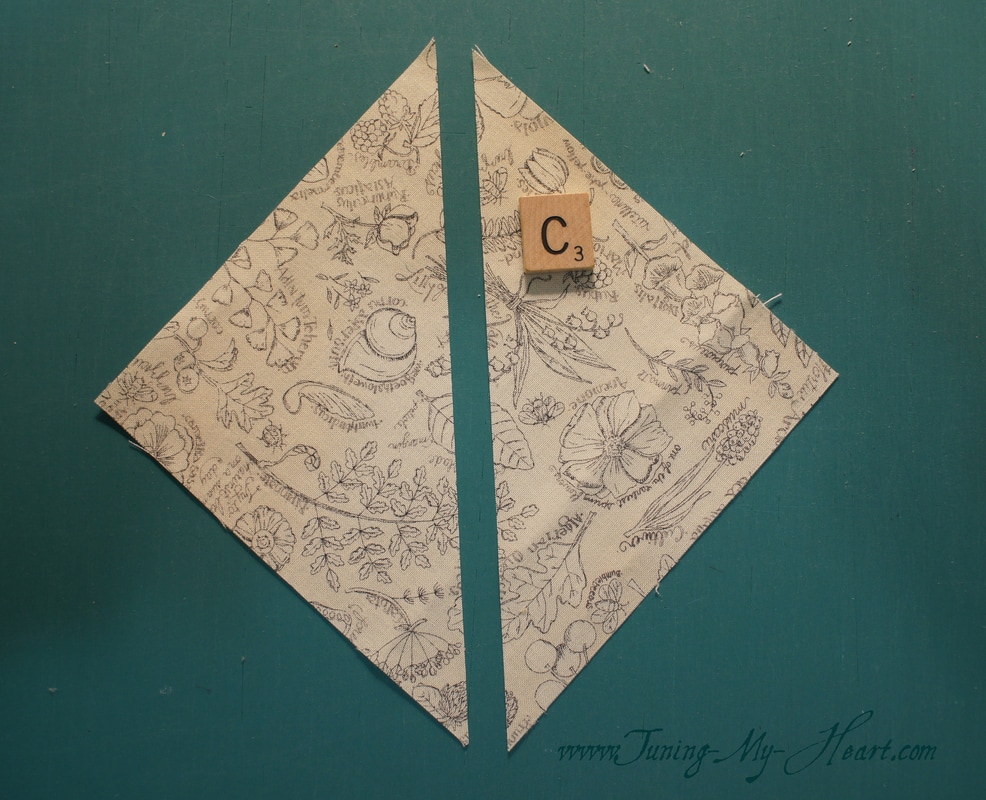
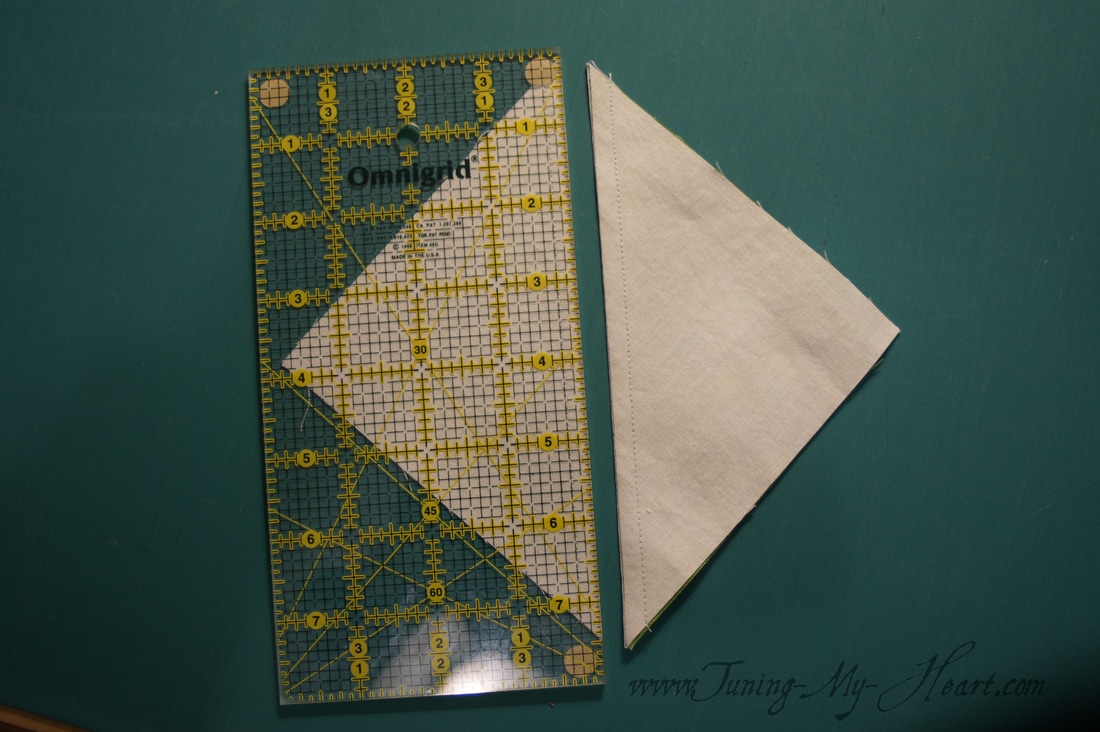
The Basket of Triangles block was designed by Betsy Chutchian and you can find the free pattern by clicking on this link: https://bearcreekquiltingcompany.storage.googleapis.com/uploads/2017/04/26/files/Block8BC_BasketOfTriangles.pdf There are a lot of Half Square Triangles (HST) in this block, and if you have been following me as I make the National Quilter's Circle 9-Week challenge quilt you will know that was all about Half Square Triangles. I have become the queen of HSTs. I find I am more accurate overall when I can trim an oversized unit to the correct size so that is the method I will be using here.  That means that I have made some changes to the cutting instructions. A-(8) squares 2-1/4" x 2-1/4" B-(10) squares 2-1/4" x 2-1/4" -cut (2) B squares in half diagonally C-(1) square 5-1/4" x 5 1/4" Everything else is the same. In order to get my handle and base a different color I cut 5 squares of my plain background and 3 of the blueberry print for the A squares. I cut 5 squares of the green and 5 of the yellow for my B squares. A Word about Starch: I starch my fabric. It has made a huge difference in how well things go together, especially when sewing these smaller pieces together. I use the cheap can of heavy starch, lay out my pieces after they are cut, spray them, let them dry, and then press with my iron. 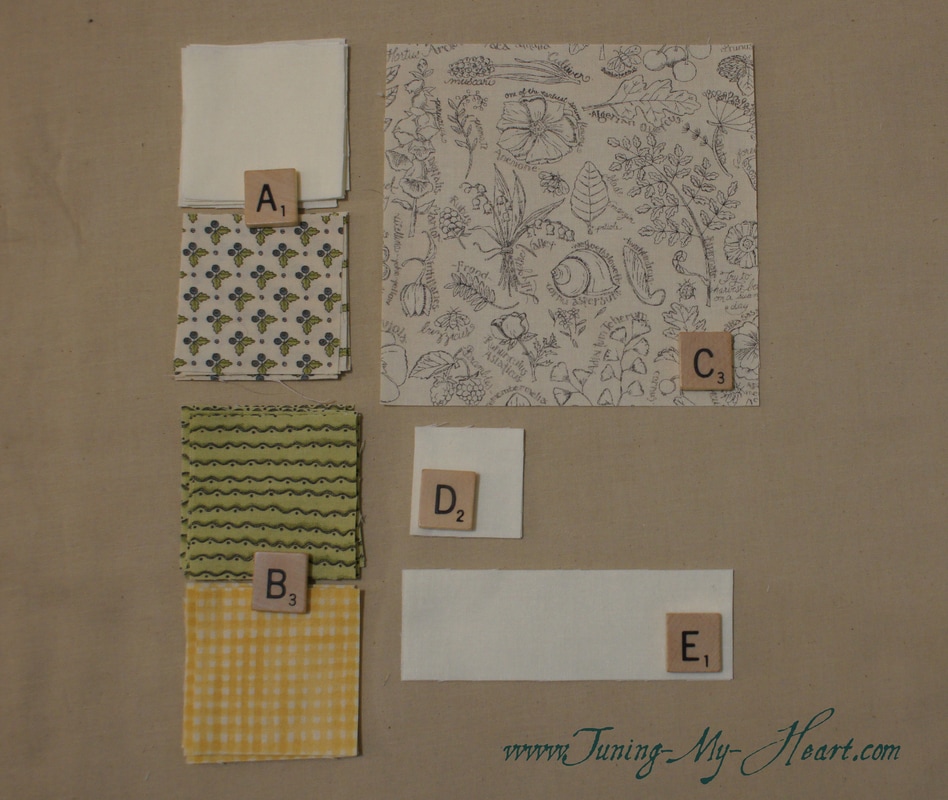 The first thing I did was draw a diagonal on the back of my A squares. Since this line will not show in the finished unit I like to use an ultra fine tip Sharpie. The very fine sandpaper underneath keeps the fabric from moving as I draw my line. 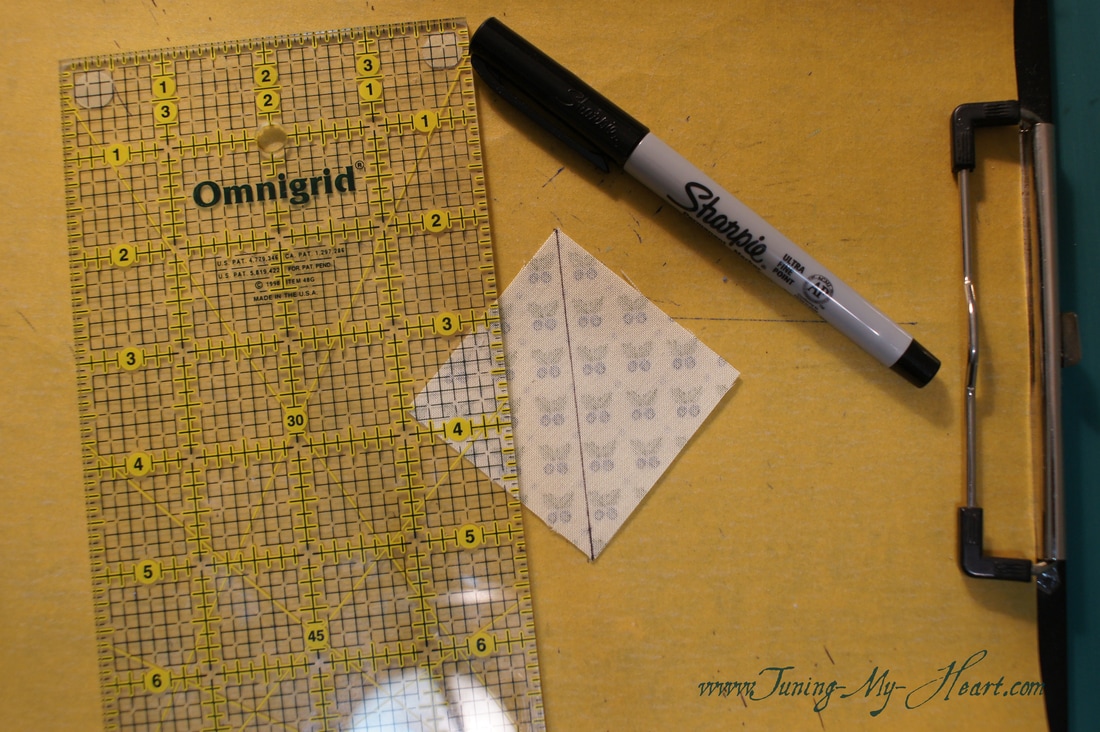 Now I can sew the A and B units together making sure I have the correct background fabric (A) to go with the B squares. 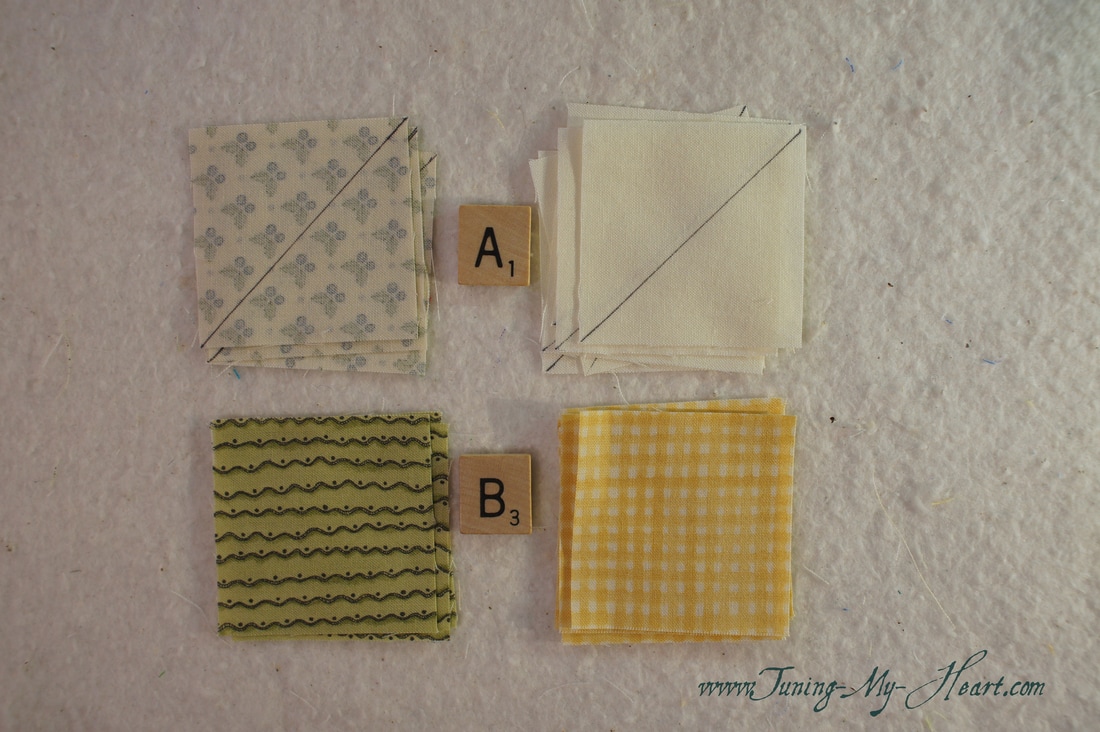 To make the HST units I will sew 1/4 inch from both sides of the drawn line. Chain-piecing these units is very handy, When you come to the end of one, just line up the next one and continue sewing. I prefer a smaller stitch length when piecing and have my needle in the down position. My stitch length is 2.1 or 12 stitches per inch.
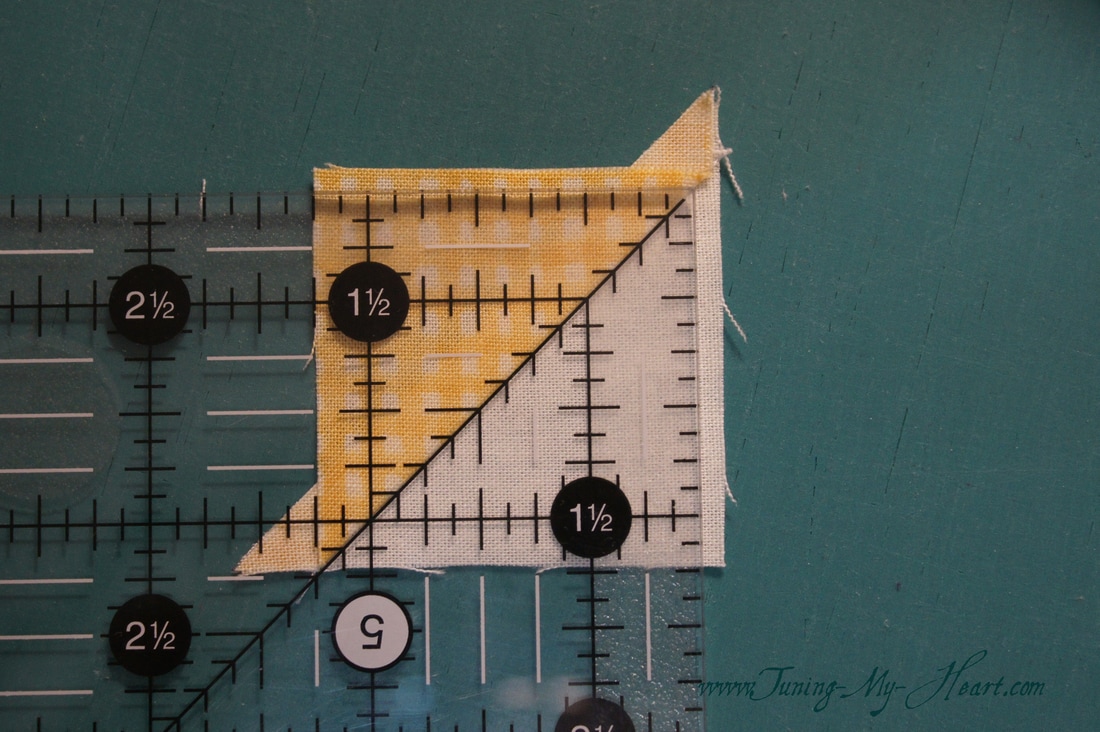
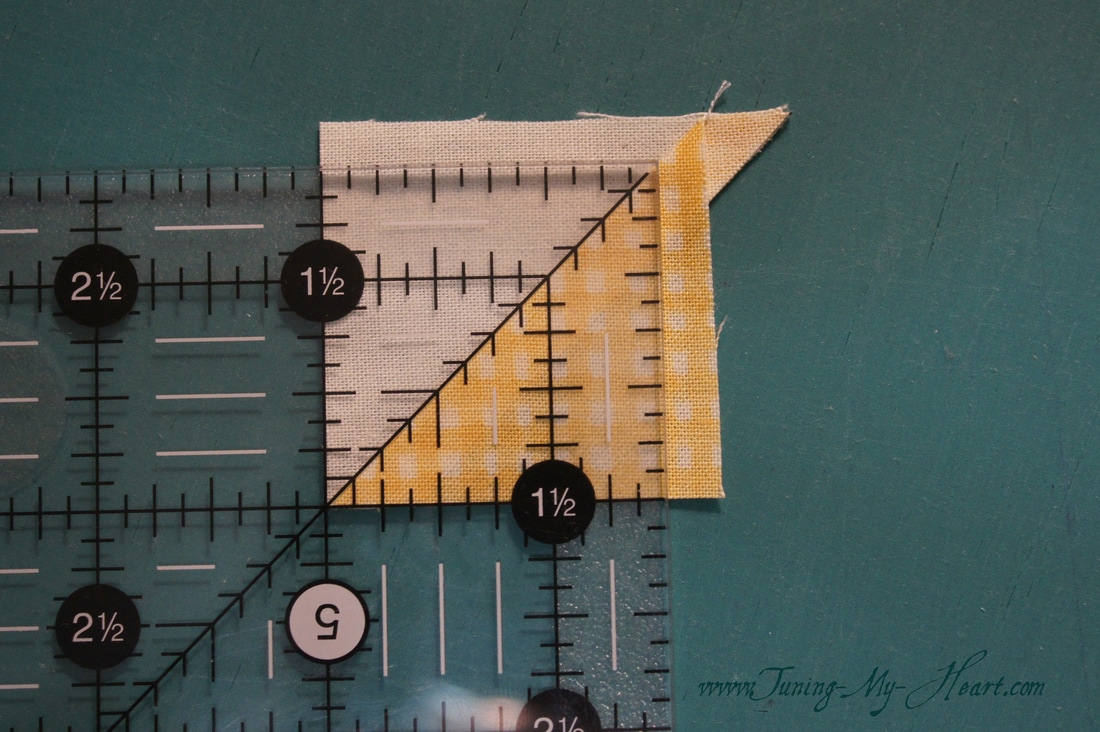
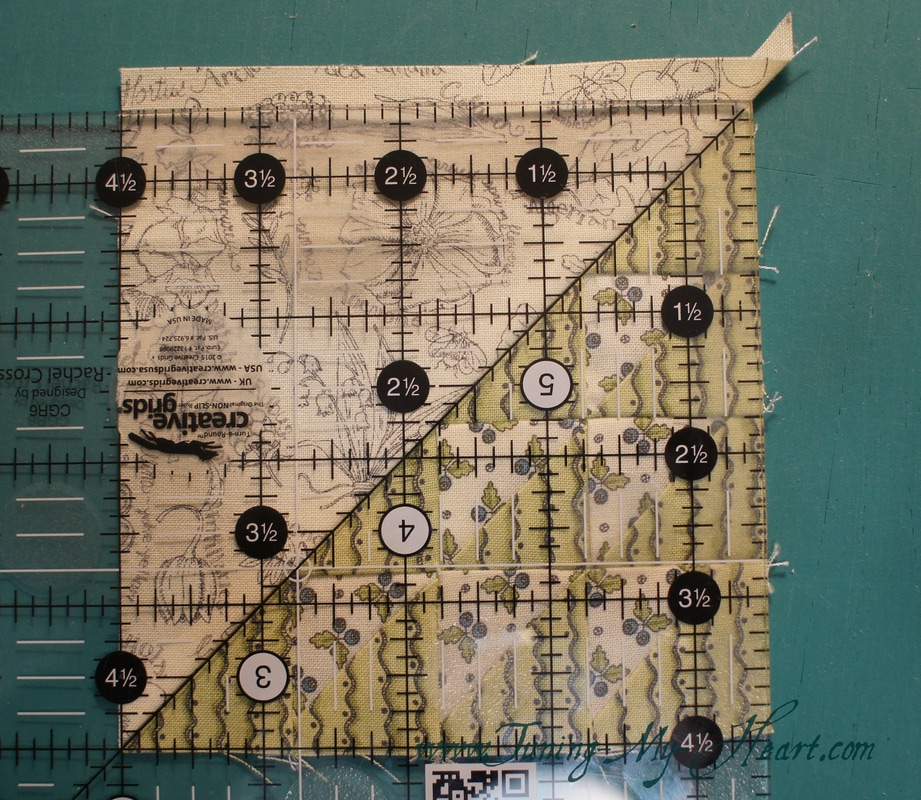
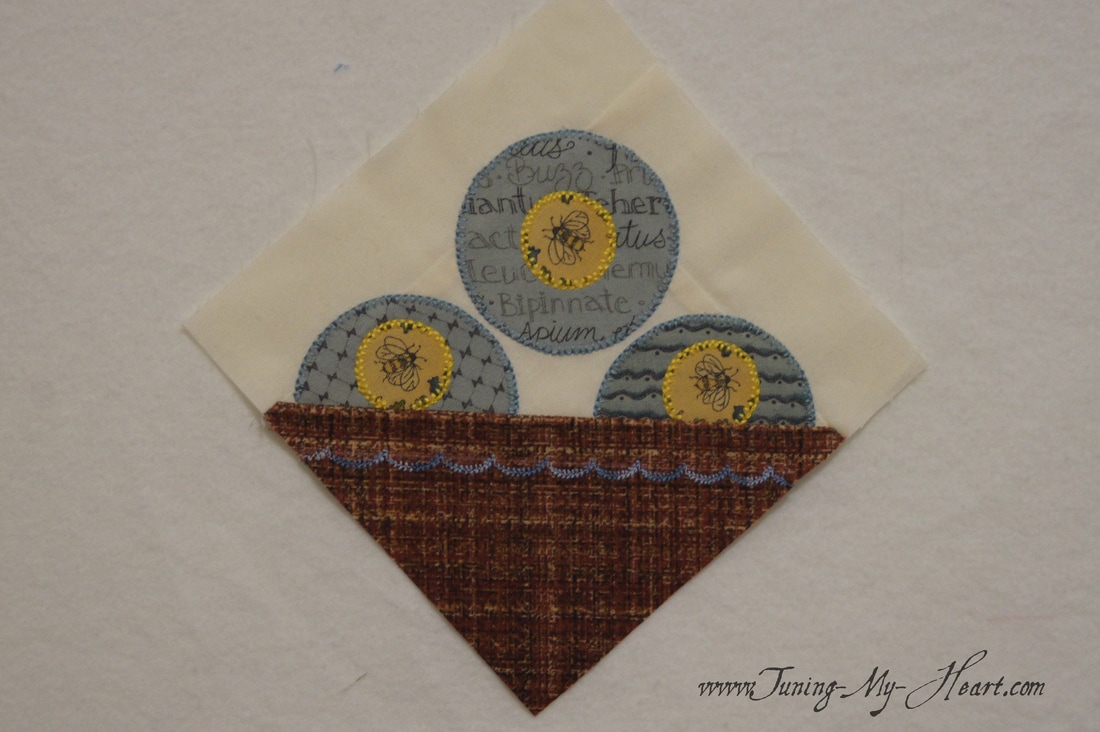
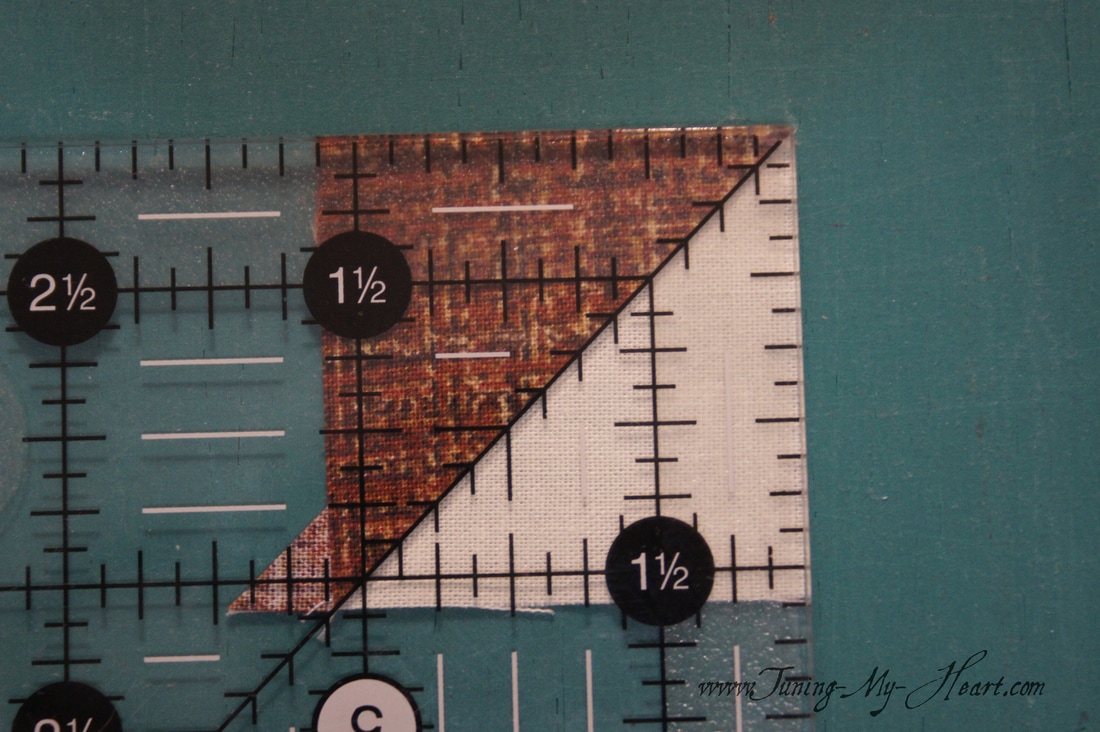
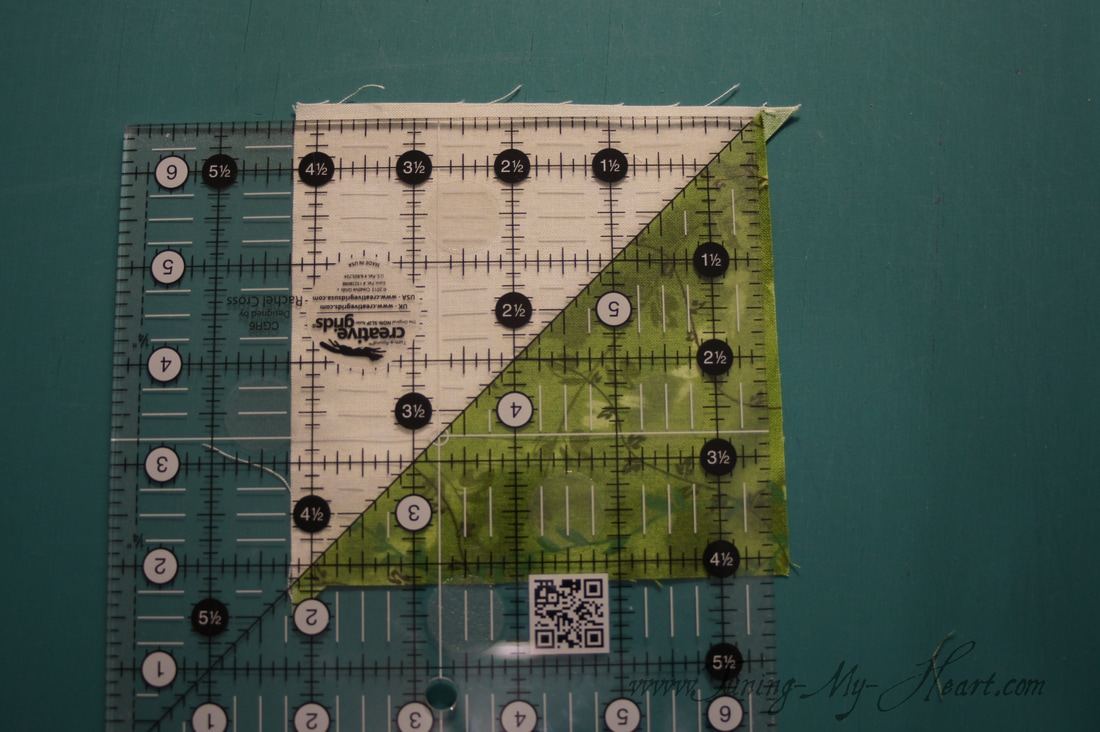
Once all of my A/B units are sewn I cut them apart on the drawn line. 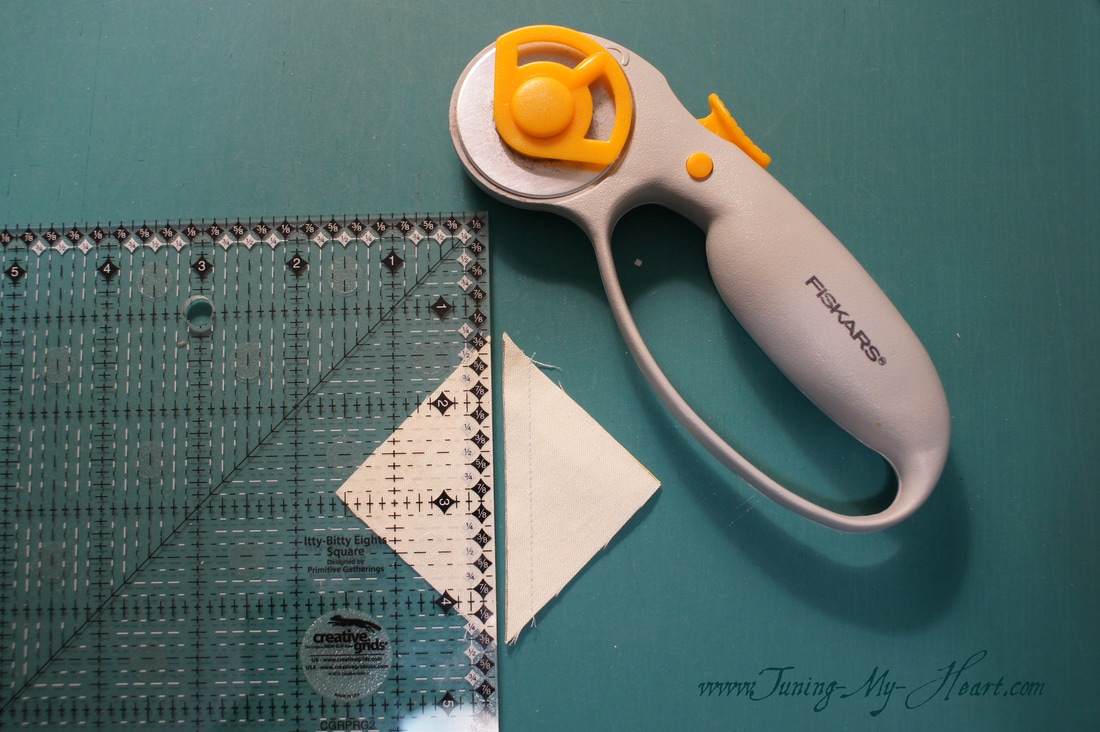 After pressing the A/B units open-pressing towards the dark side I can trim them to size. For this block I need to trim them to 1-1/2 inches. It is important to place the diagonal line of the ruler right on the seam of the two triangles. When that is lined up I trim away the first two sides and then rotate the unit and place the diagonal ruler mark back on the seam. The 1-1/2 inch marks on my ruler need to line up with the cut edges of the A/B unit. When trimmed I have the perfect size needed for Block 8.
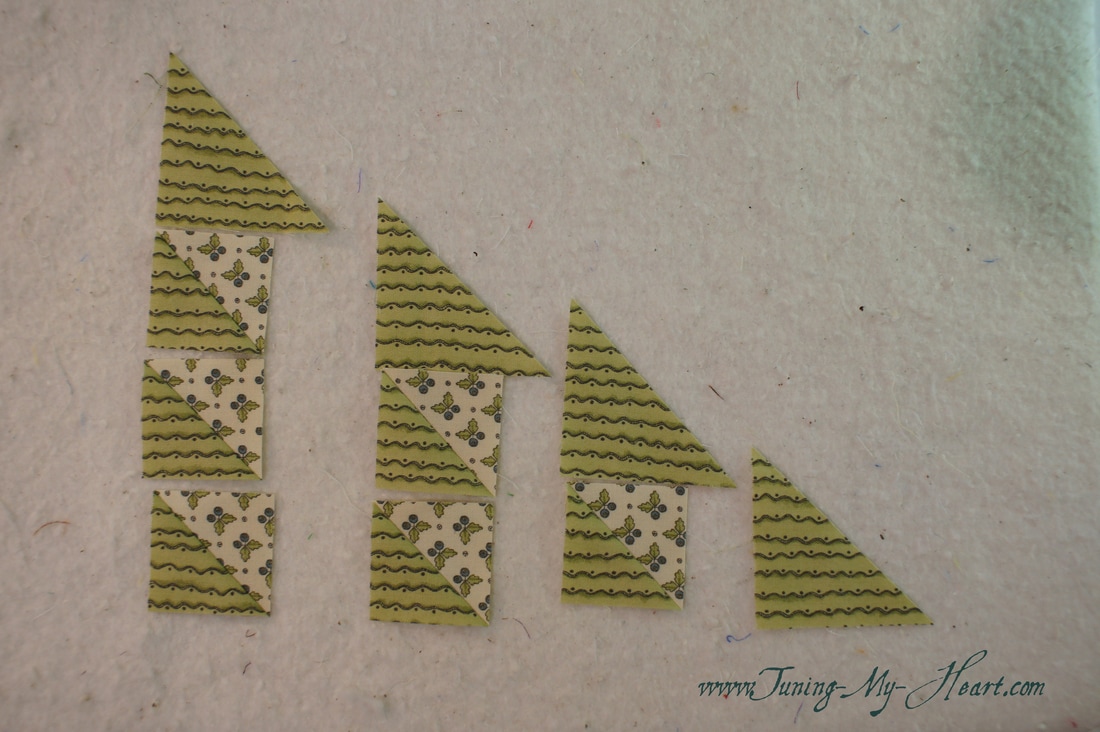
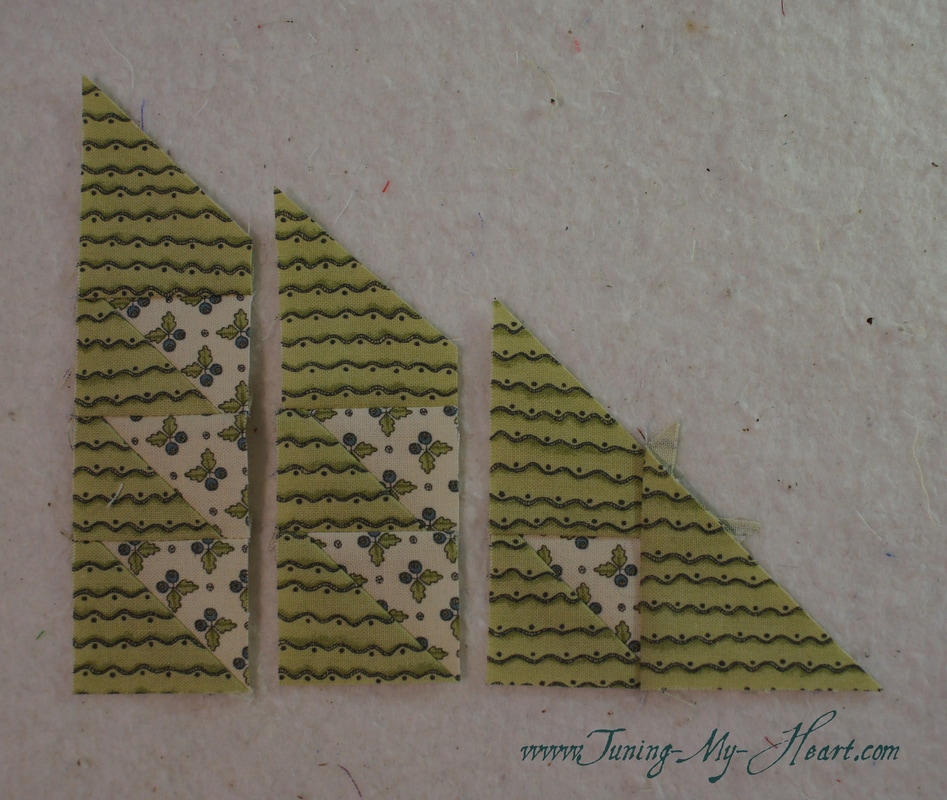
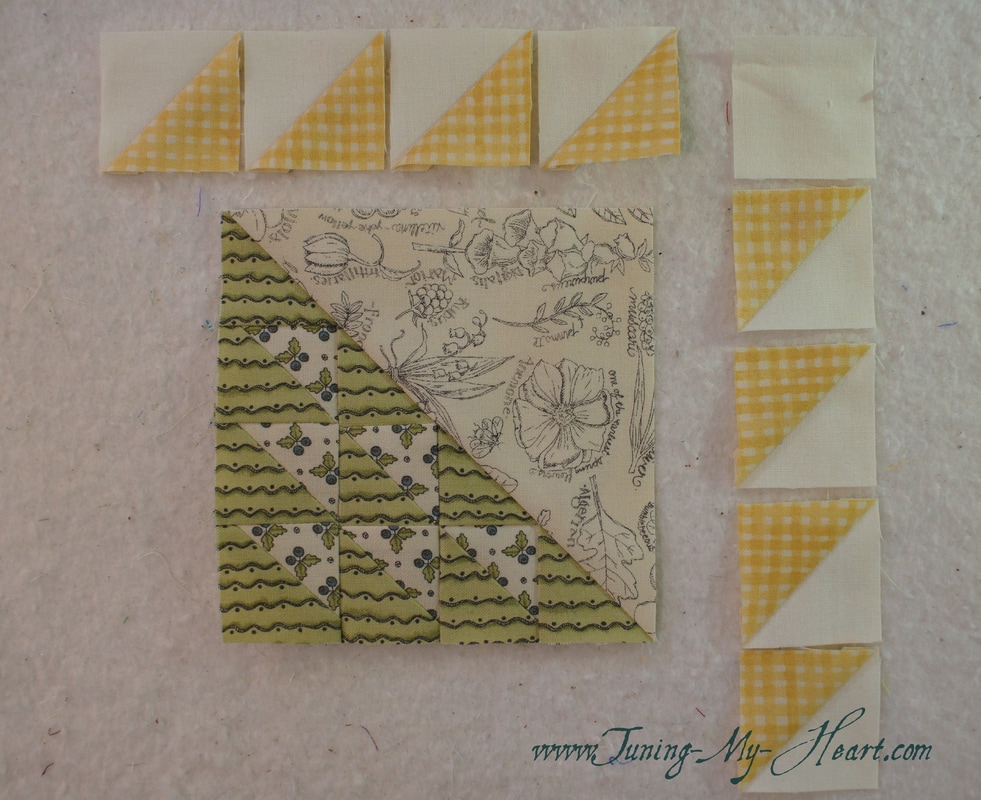
Before putting the basket together, I need to cut the last two B squares in half. I have everything laid out the way it needs to go. When I did this I realized I must prefer to work on the vertical as Betsy pieced hers horizontally-it really makes no difference. When it comes to pressing these I press in opposite directions. The first row was pressed toward the top, the second row pressed towards the bottom, and the third row pressed towards the top. When it comes time to sew these rows together to make the basket having the seams go in opposite directions will help to line everything up.
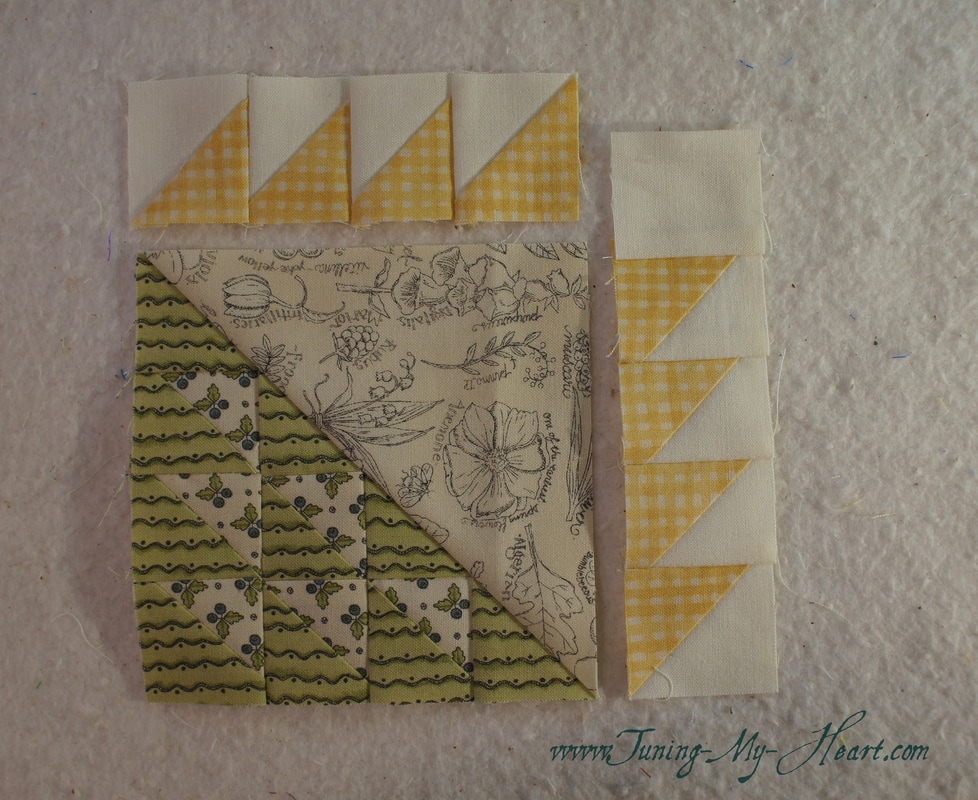
To add the triangles to the tops of my rows I just need to align the straight edges.
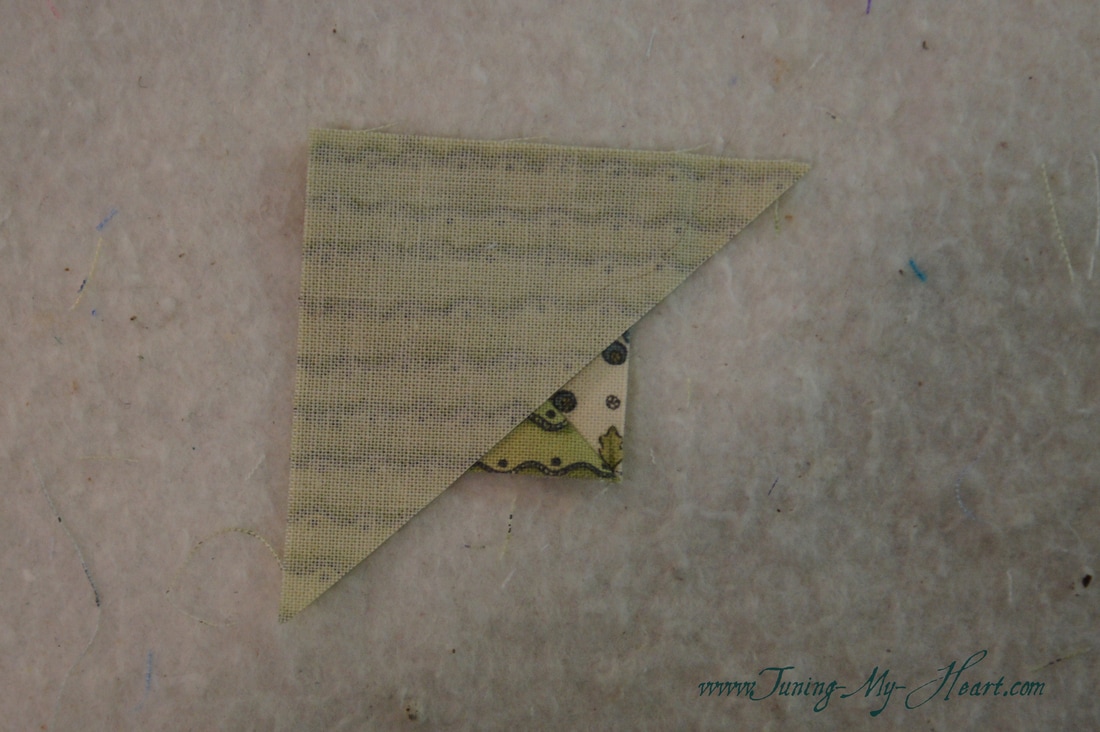
With my rows sewn together I trim off the little extra bits. These will now line up nicely.
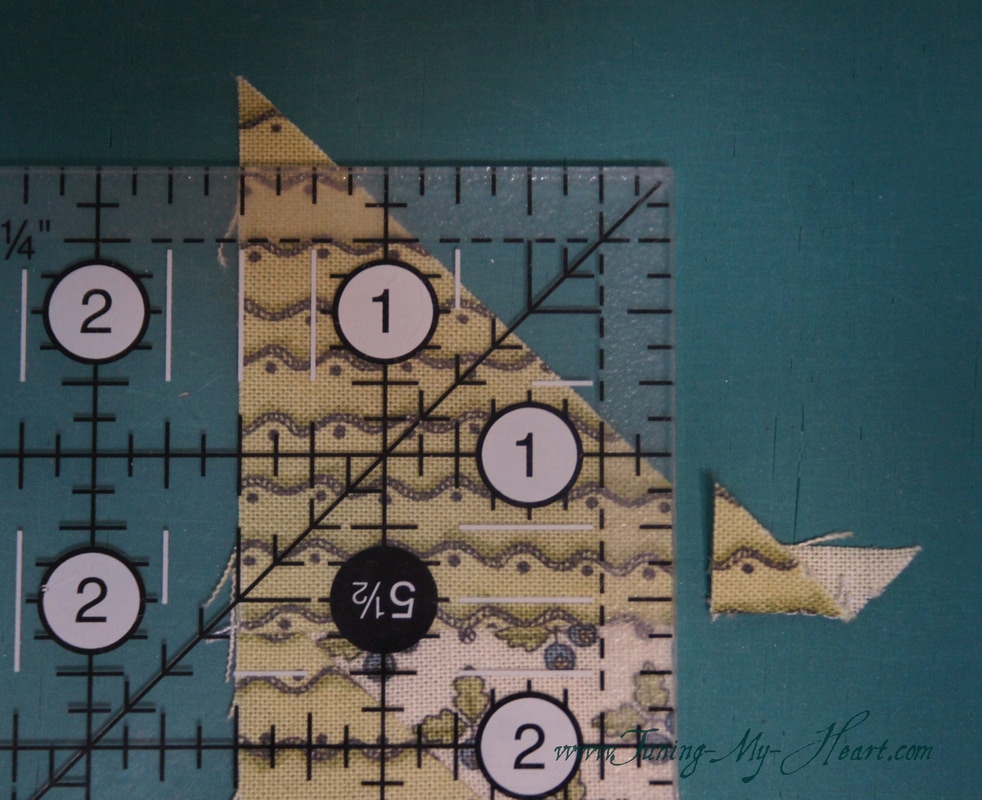
I am a pinner. Where the seam come together I place a pin. Having pressed the seams in opposite directions they will nest together very nicely and pretty much lock in place. Still, I have had them move on occasion so I pin. As I approach the pin I slow down to go over the seam. I sew until my needle comes right up to the pin then take my pin out (My needle in the down position) and continue sewing. I also focus on the needle landing right at the intersection of the previous stitch lines if they are visible. 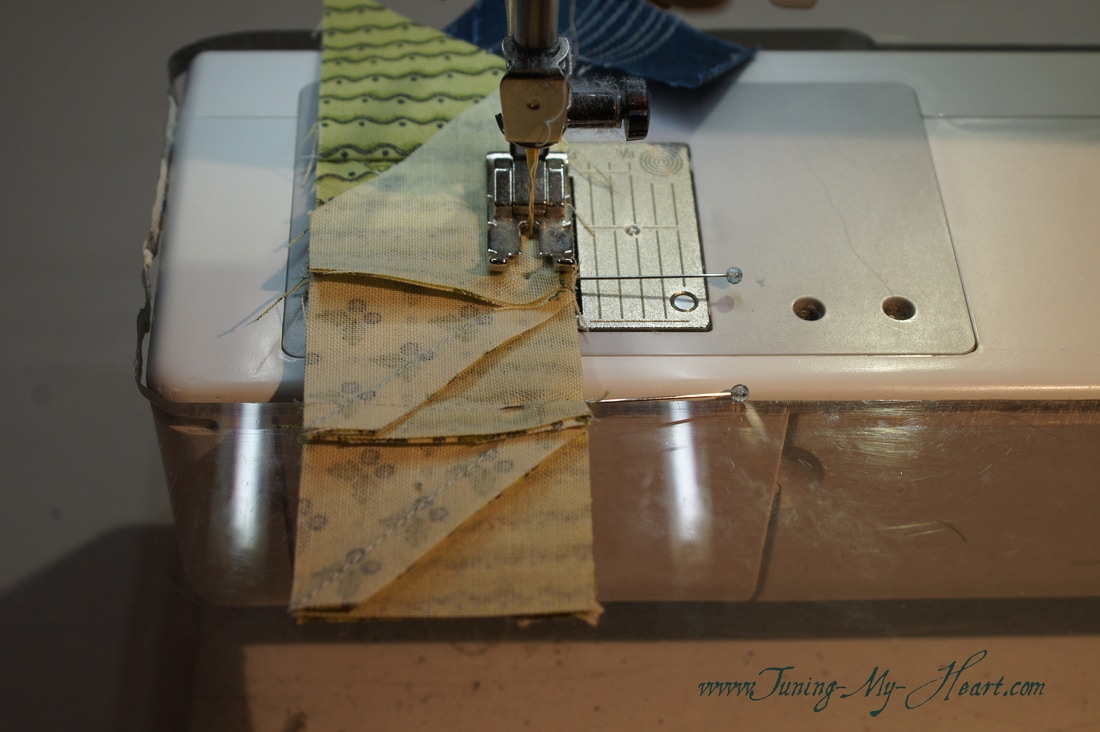 There can be a lot of bulk in these seams so I like to fan them out. In this case you can see how the middle section is not laying nicely-I can solve that by taking a little snip on one side of that seam, being careful not to clip into the stitching. 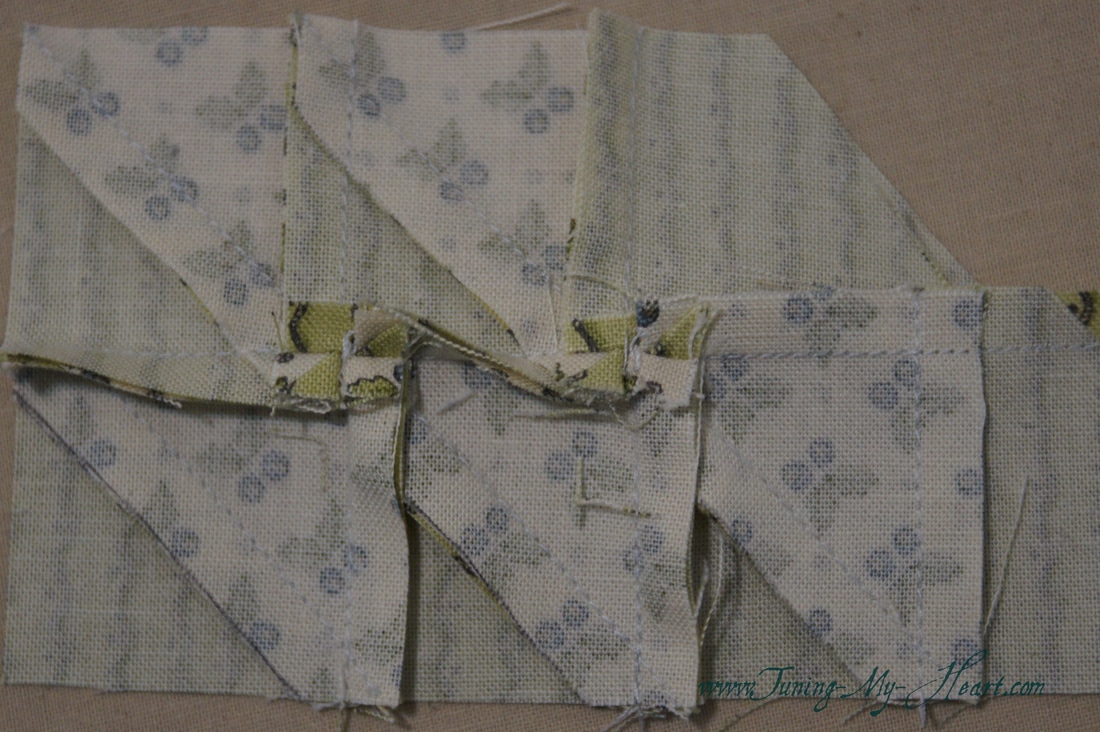 I am happy with it now. 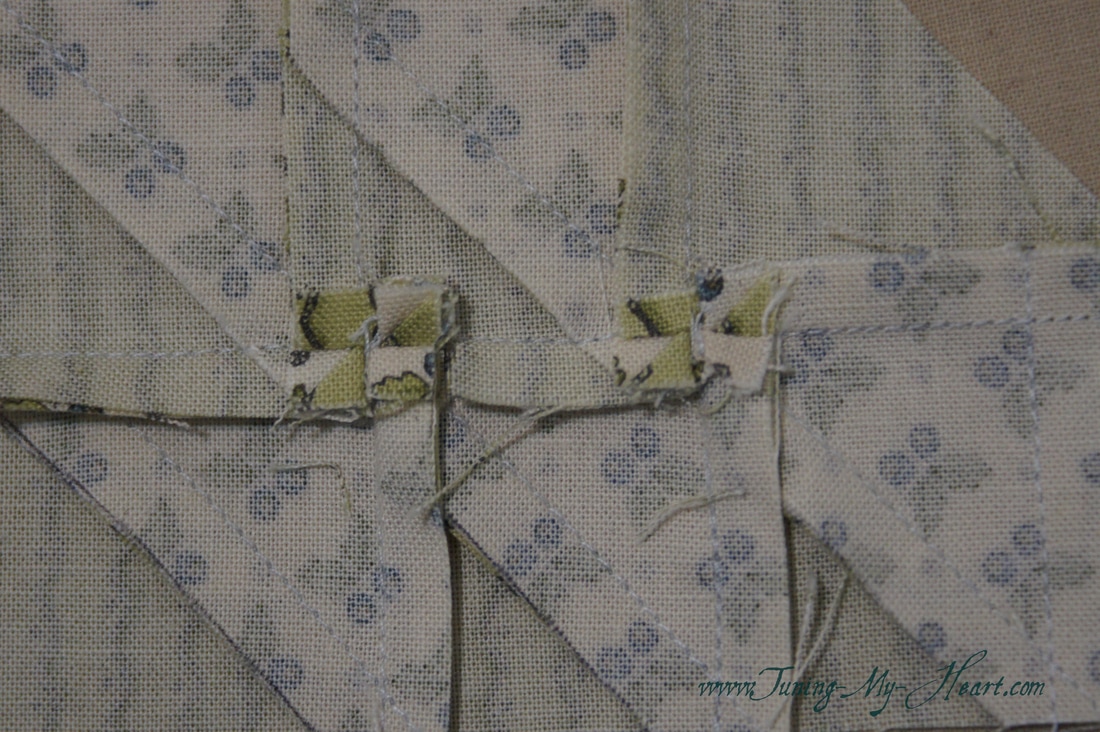 Because my triangles were larger than called for in the pattern I need to trim this edge of my basket. To do this I lay my ruler with the 1/4 inch mark right where the triangles intersect-right where the point is and trim off the extra. 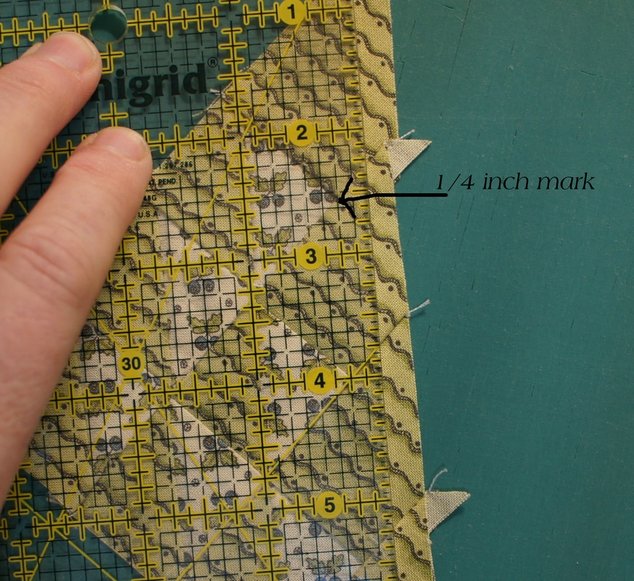 Time to cut my C square in half. This is now ready to attach to my basket unit. Because I have made the C square larger I need to trim the block to 4 1/2 inches after it is sewn in place. Once again, I make sure the diagonal line on my ruler lines up with the seam line.
I like to lay out my pieces to make sure I have them going in the right direction. Now I can sew the basket handle units together. I pressed these towards the direction they naturally wanted to go.
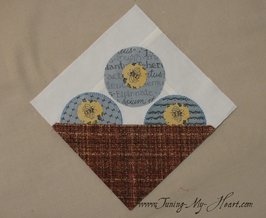
I am starting to get excited now! The final two units are ready to be sewn together. 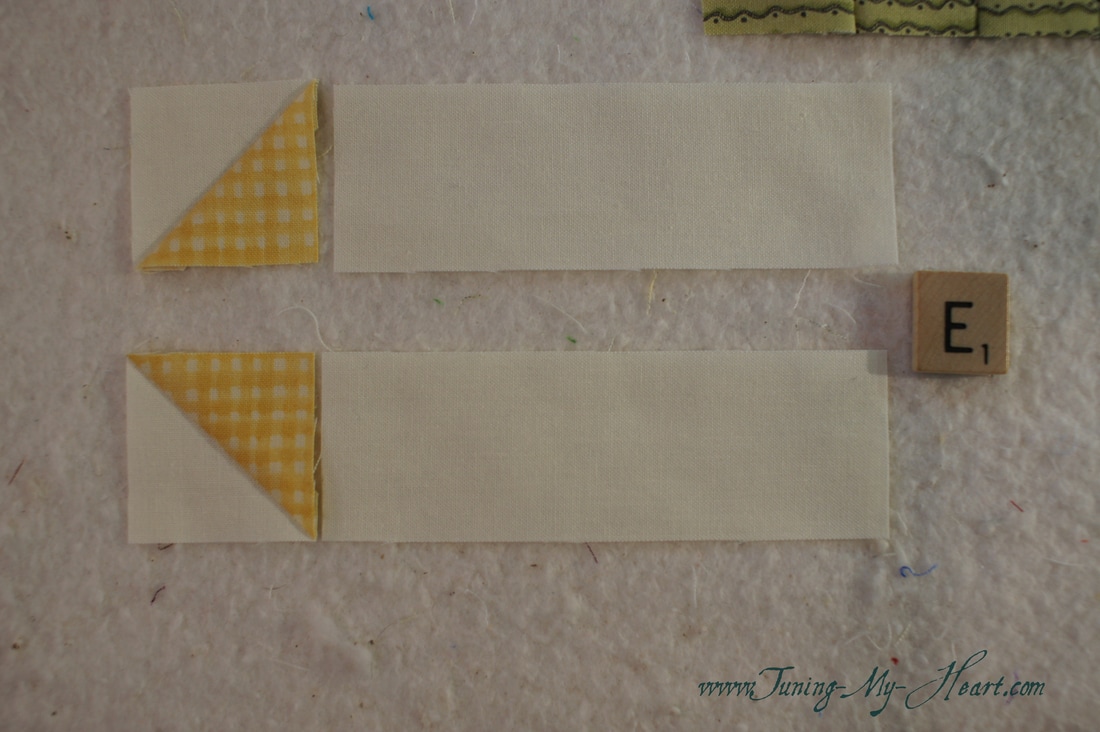 Everything is in place! 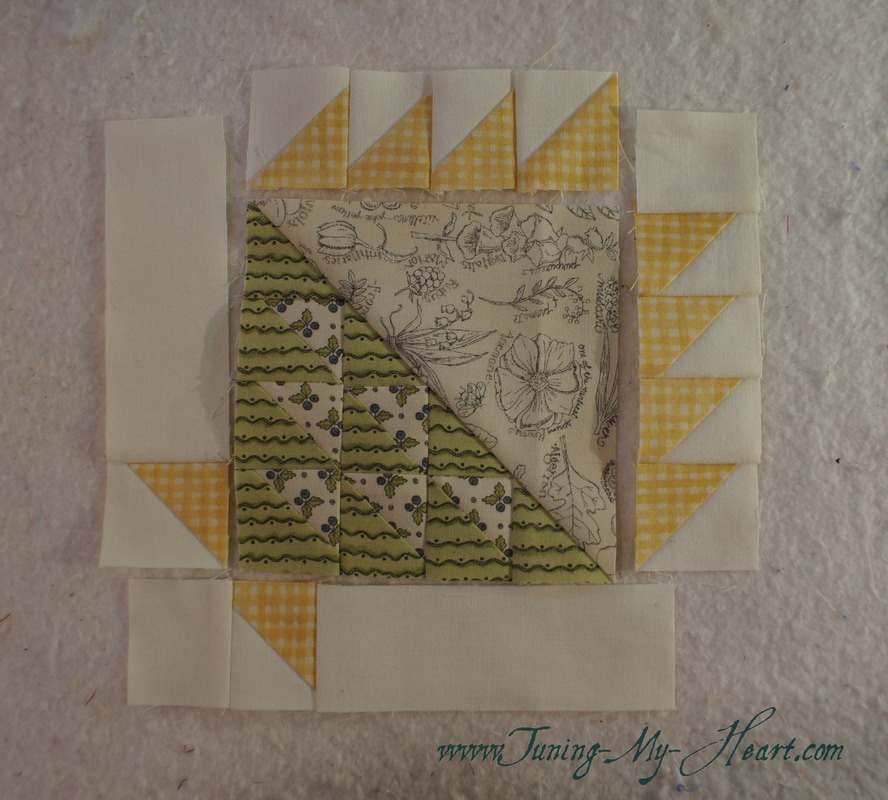 I start by stitching the basket handles in place (Unit # 2 and #3 in the directions) When I come to these intersections I slow way down and aim my needle for that point of the triangle where the previous seams come together. 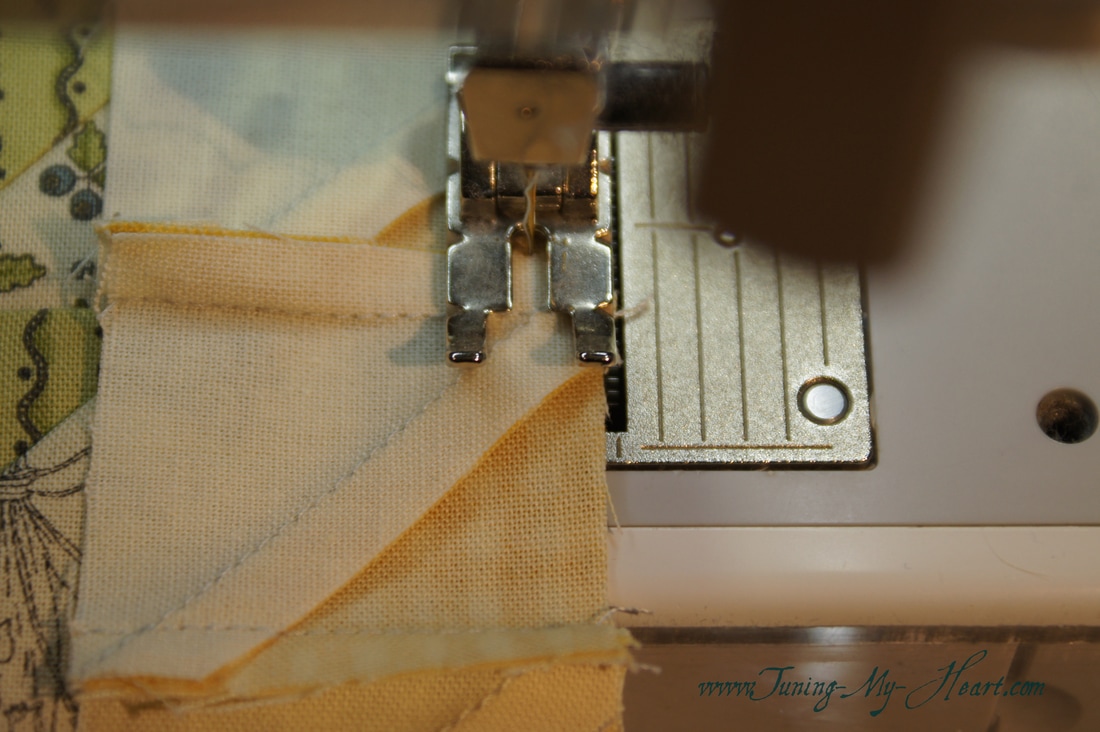 I really do not like pressing towards a unit that has a lot of seams so I have pressed towards the big triangle. 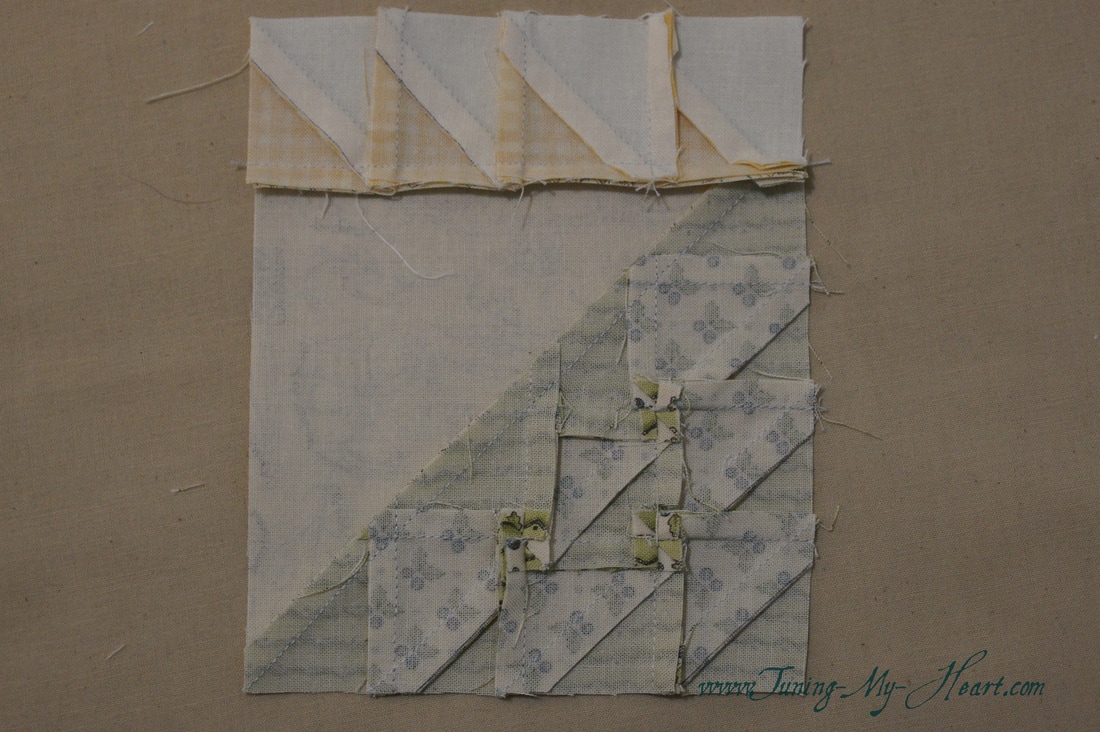 The basket handles are on. Time to add the last two units. 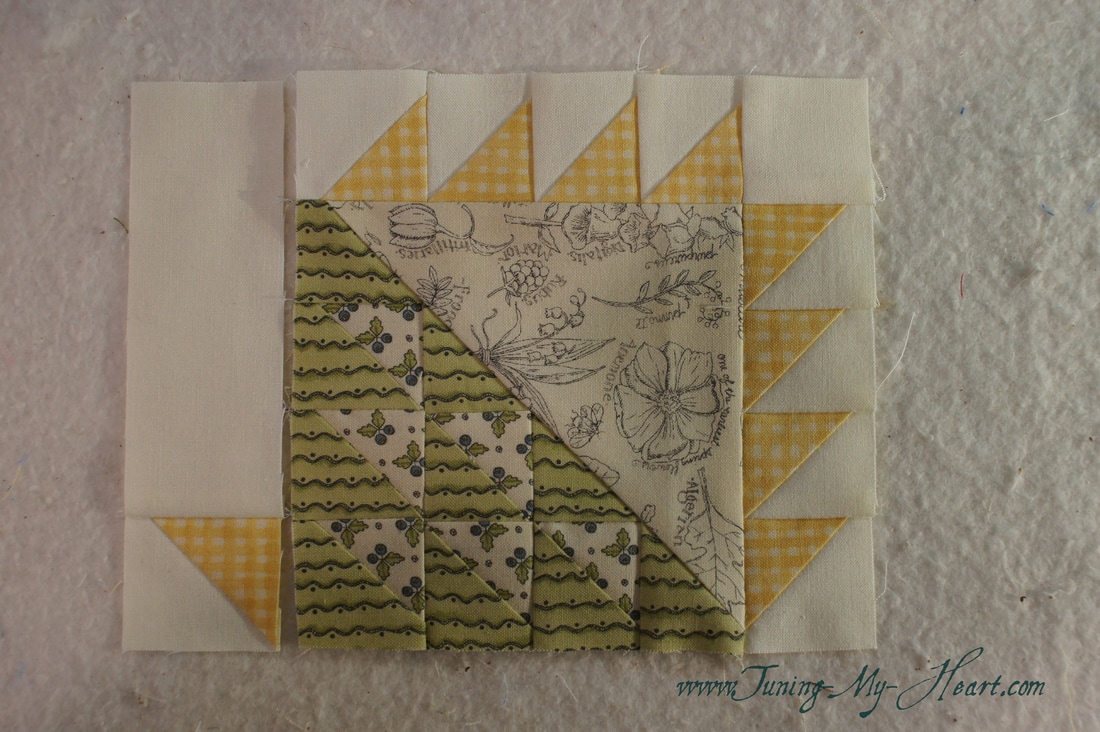 I am pretty pleased with how it came out. 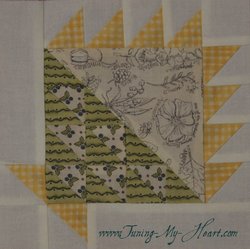 And it now joins my other blocks...  I hope you have fun making your own Basket of Triangles. Until next time... Happy Quilting!  I was able to get back into my quilt studio today for the first time in several days as it doubles as the guest room. What fun to get to make Penny Basket designed by Lynne Hagmeier of Kansas Troubles Quilters. There are a few challenges with this block and I approached a couple of things in my own way. Overall I am happy with how it came out. If you would like the pattern it can be downloaded by clicking on this link: Penny Basket 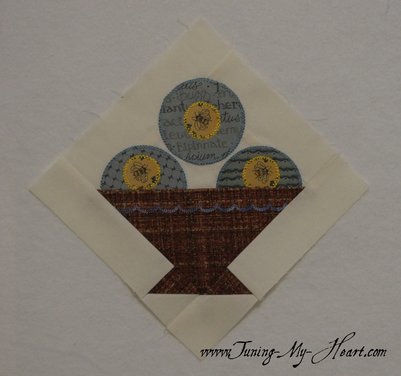 To begin I pulled out my Perfect Circle sets and found matches for the two circle sizes in the pattern 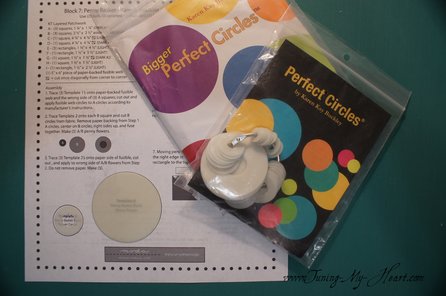 I used the circles to trace onto a paper-backed fusible. Leaving a little extra I cut out the circles. (My favorite fusible for machine applique is Heat N Bond lite, but there are many options out there. Be sure to follow the directions from the manufacturer for best results. 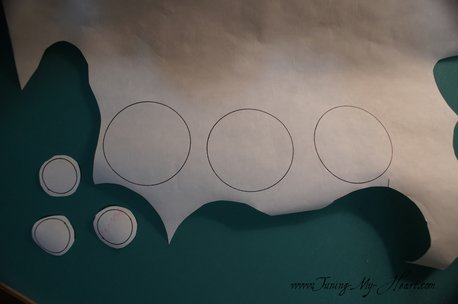 The fusible has been pressed onto the wrong side of my fabric and then I can cut out on the lines. The directions did not have you do the B circles like this, but I think it is easier than trying to fit the cut out fusible circle onto the cut out fabric circle. 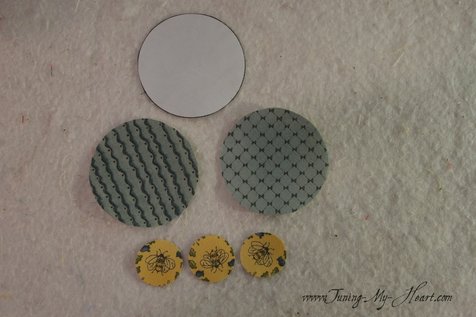 I left the paper backing on the large circles for this step then peeled the paper off of the smaller circles and pressed them into place. I did not want to loose my little bee centers to the basket so folded the large circle in half to figure out where I would put the small circles. 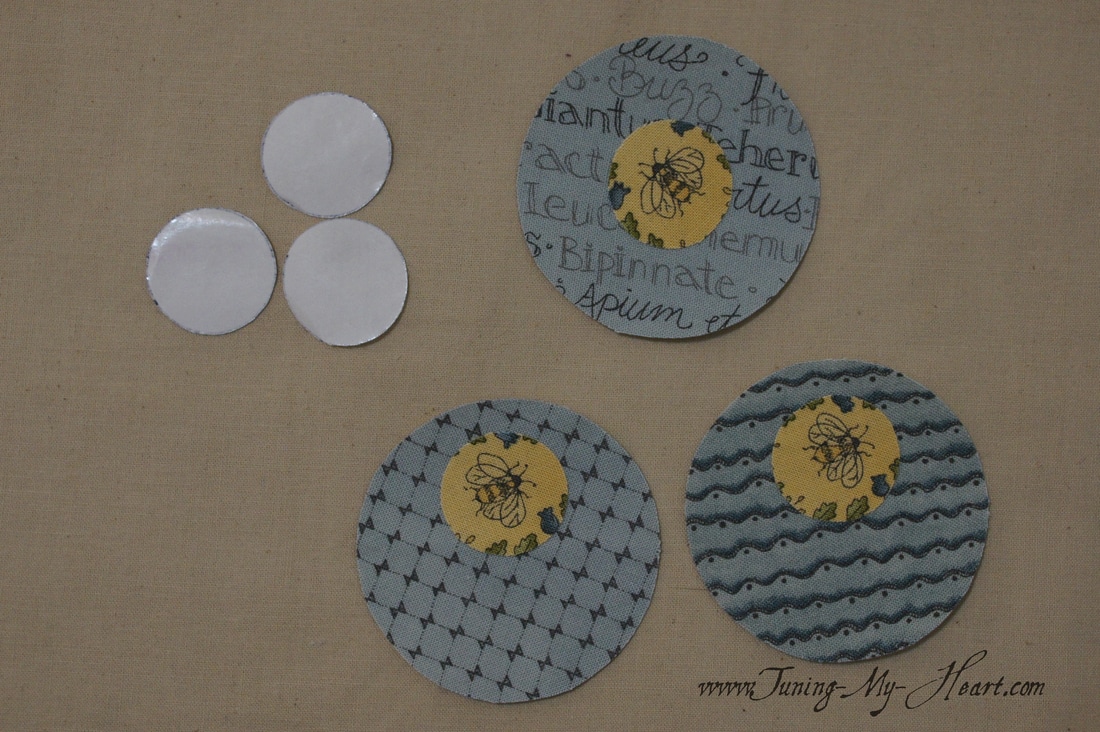 Once again I folded the two circles that will be sewn into the basket and measured 1/4 inch from the fold and cut off the bottom of the circle with my rotary cutter. 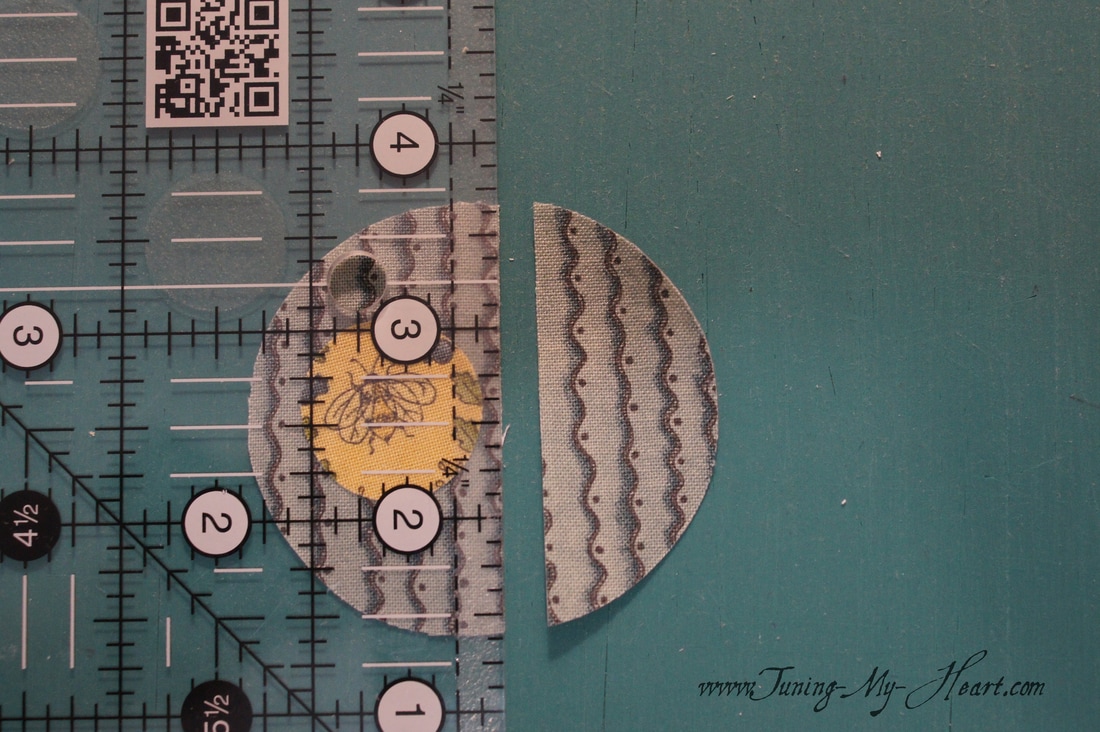 And here we have them... 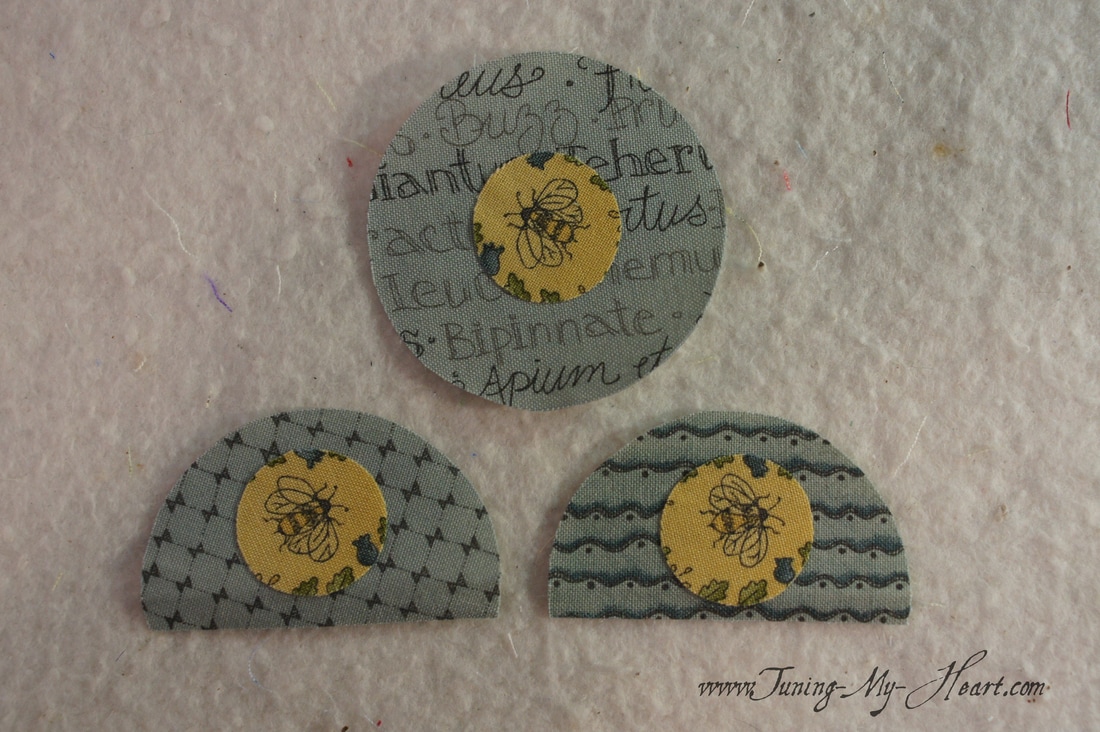 Now I need to prepare the large triangles that will make up the basket. This is my C square being cut in half for the top. 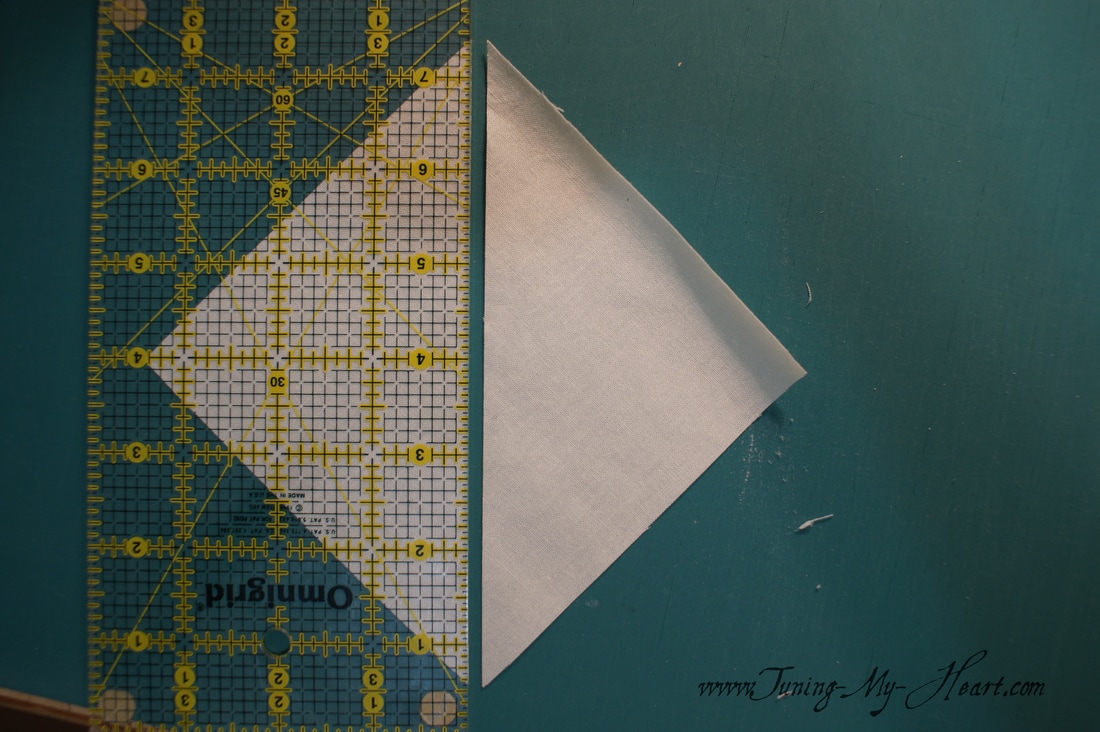 The directions say to align the edges and leave 3/4" inch exposed on the ends... this is how I did that. 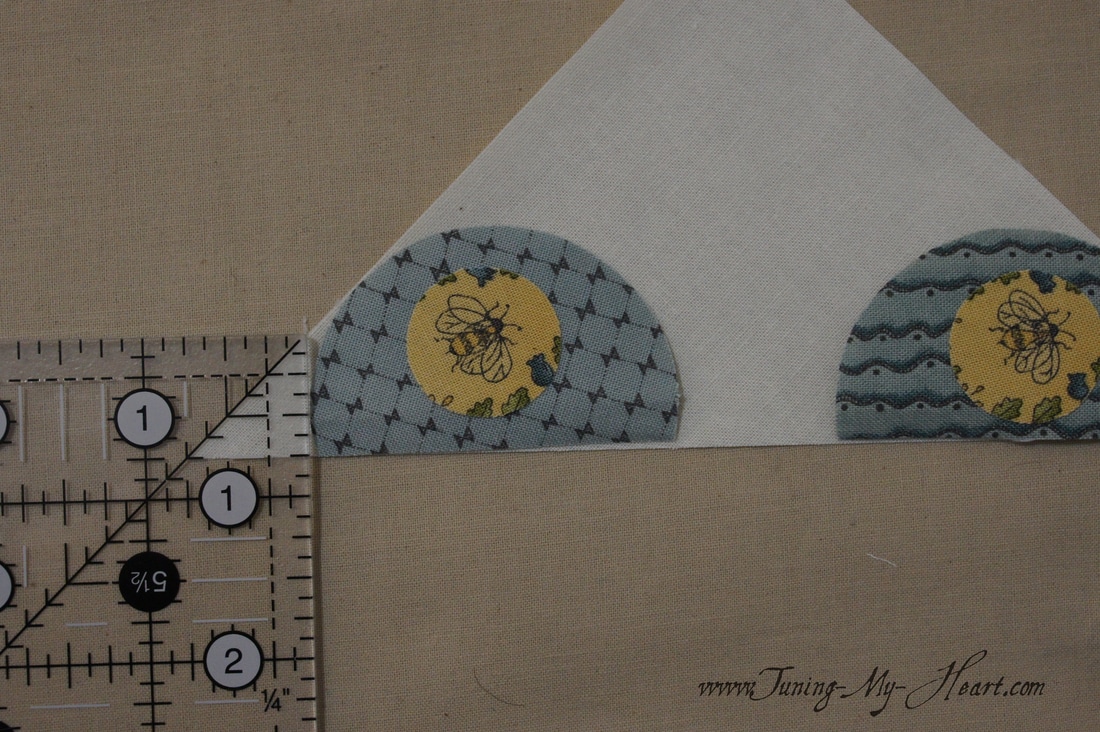 A little tricky part here. I am only pressing along the seam line so that the remainder of the circles will not be attached yet. Again, follow the manufacturer's directions for your fusible. 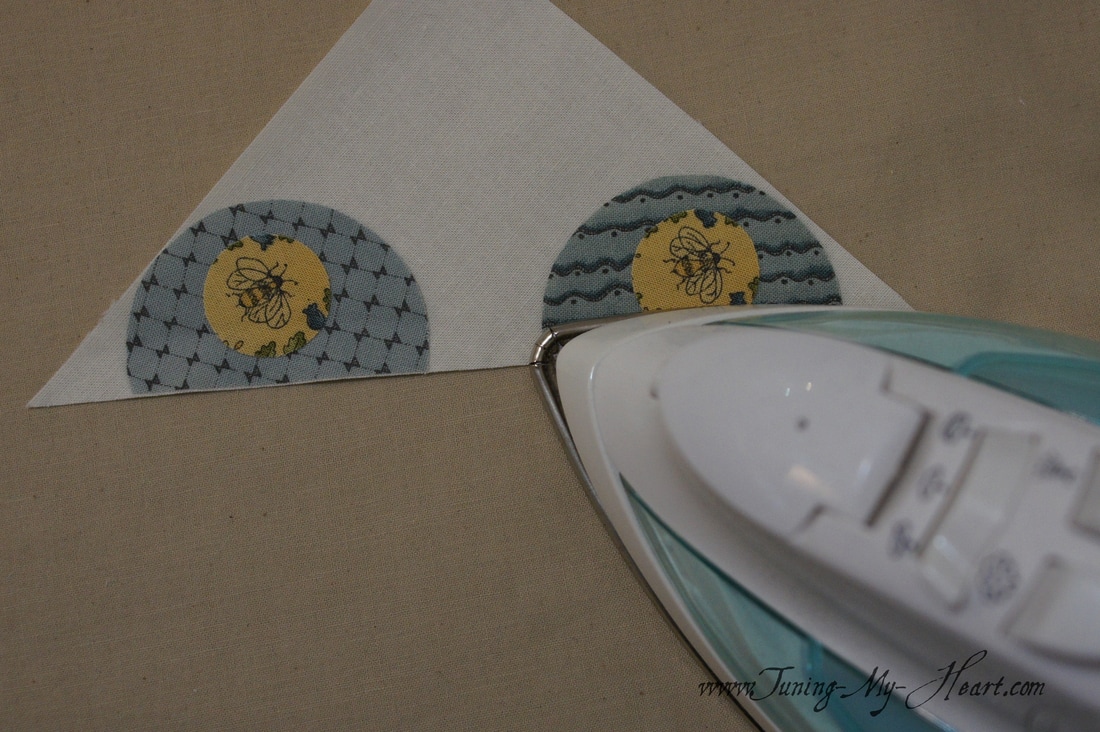 With right sides together I am sewing the C and D triangles together. 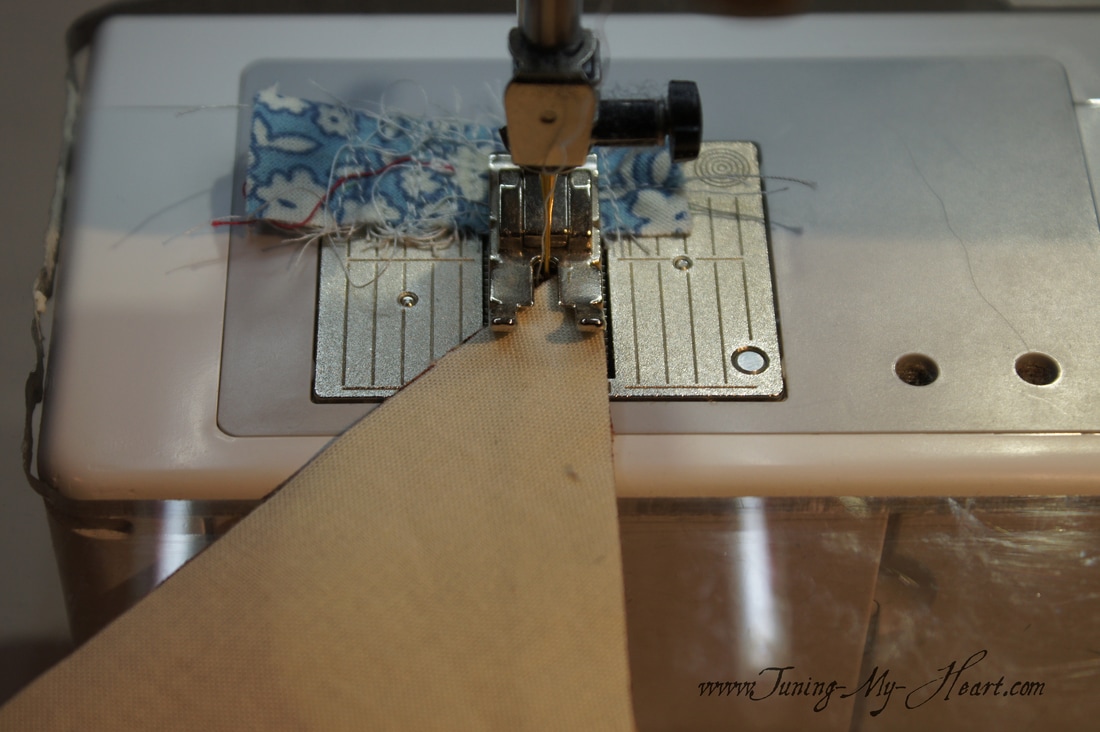 Once, again I need to be careful when I press this open. I still need the circles to be free from the backing-unattached for now. 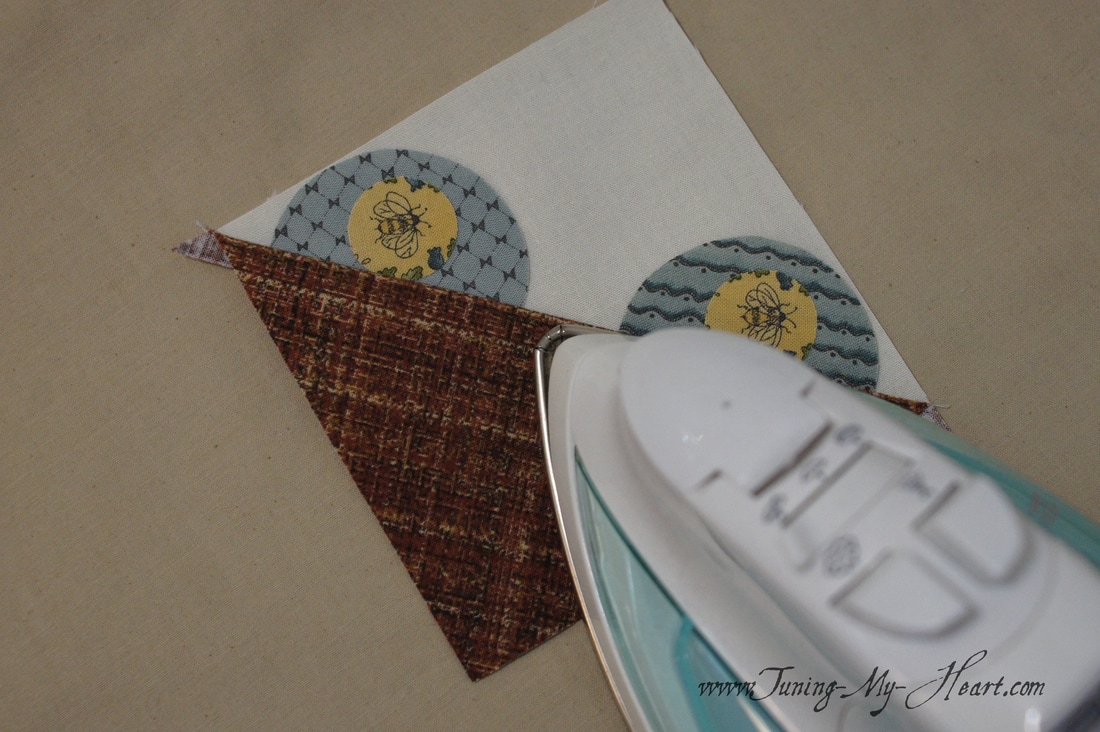 At this point my square needs to measure 4-1/2 inches with the diagonal line running right down the middle. 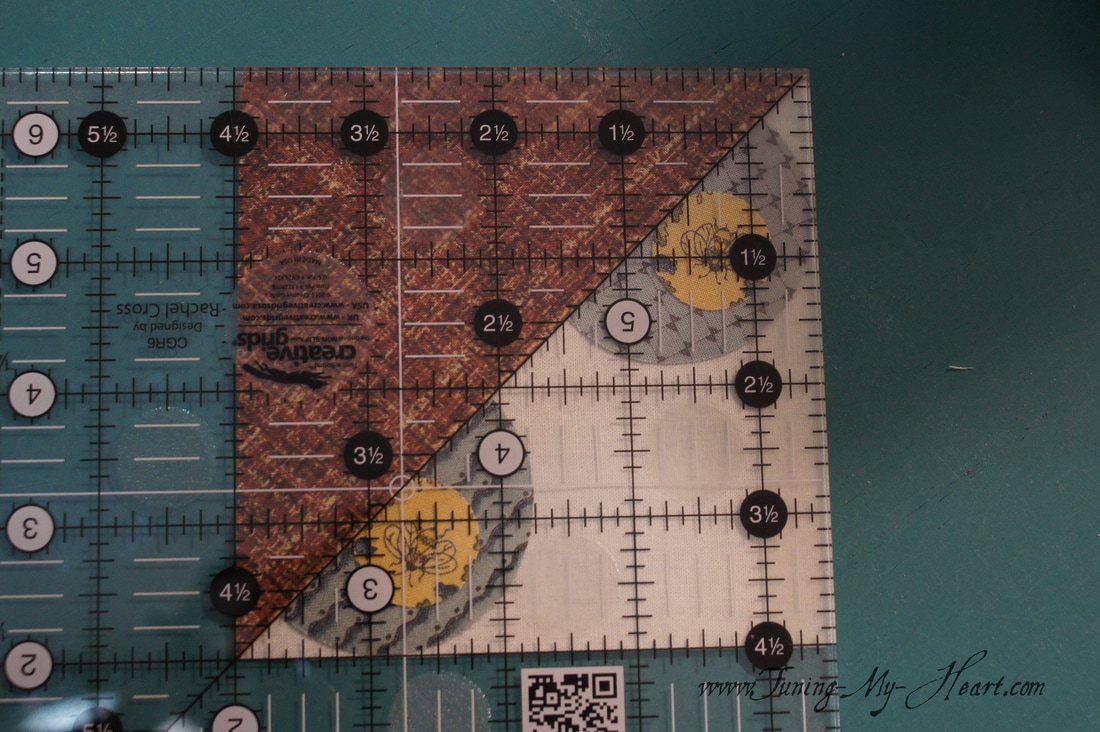 This is where the ability to move those circles out of the way will come in handy. 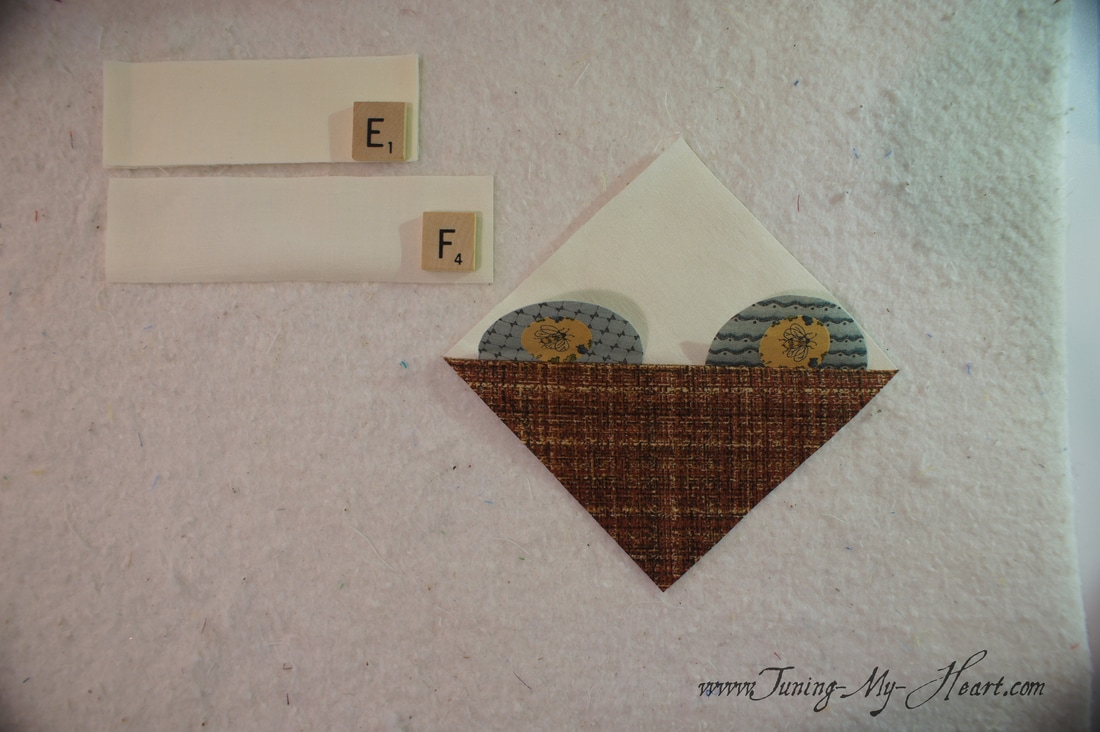 First I attach one E rectangle. Notice that I made sure the circle is lifted as I sew this seam.  A little tricky to press this seam but I want to avoid touching that fusible. 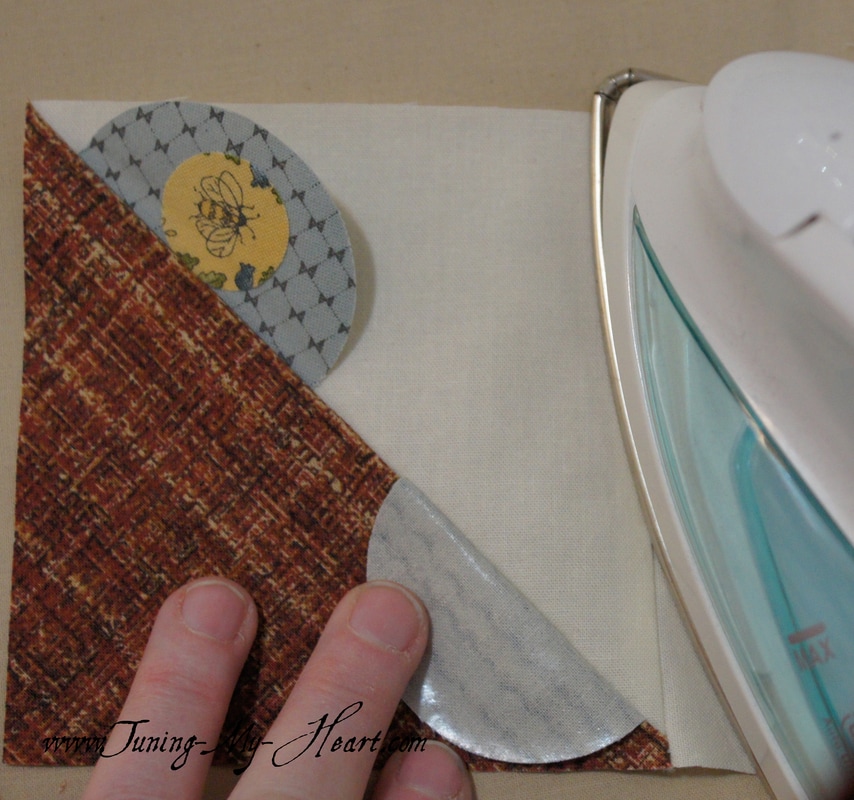 Repeat this process to attach the F rectangle to the next side. After carefully pressing the seam I can now fuse the two circles into place. My measurement is now 5-1/2 inches. 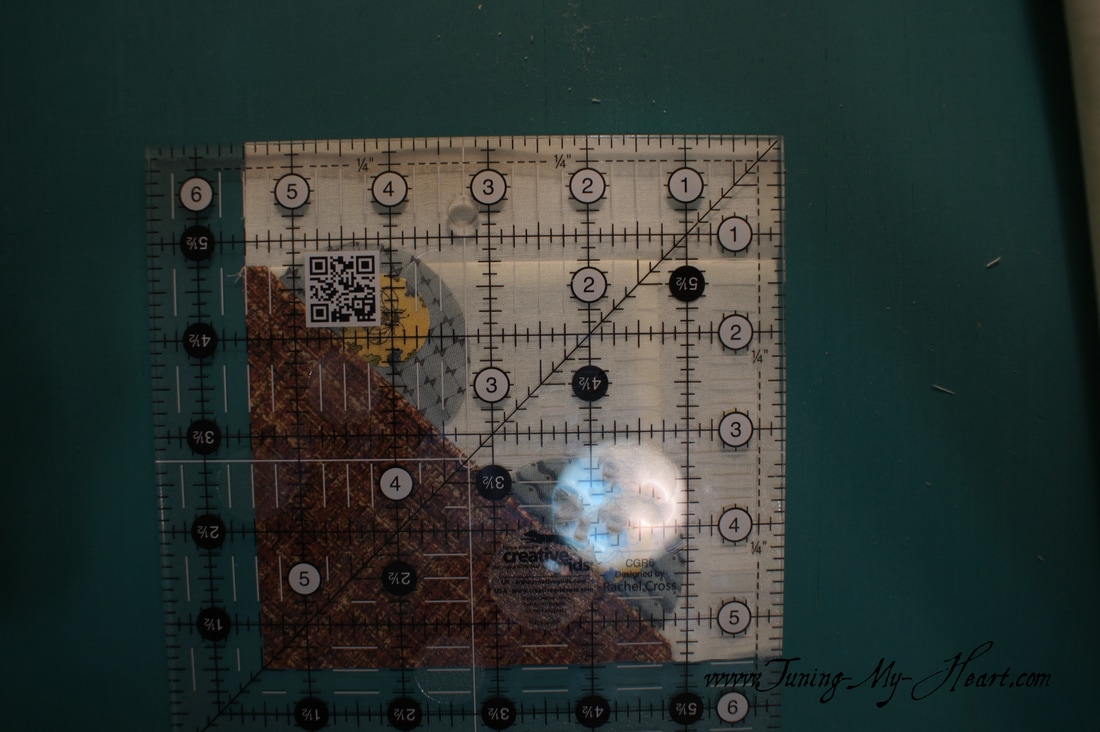 In preparation for the machine applique I attach a piece of stabilizer to the back. 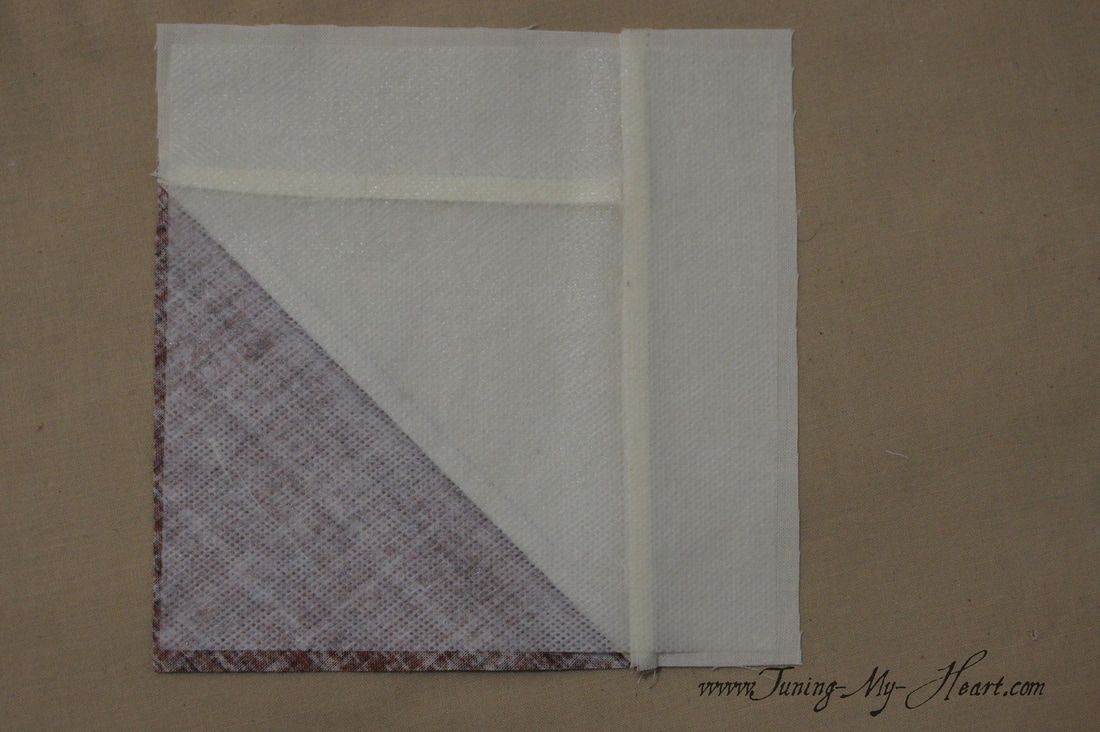 I love how the buttonhole stitch looks for applique. I have set my machine for a narrow width and short stitch length. (On my machine the settings are 2.0 width, 1.9 length) Before I begin my buttonhole stitch I do 5-6 straight stitches along the edge towards the place I want to begin the buttonhole stitch. (Stitch length is also 1.9) 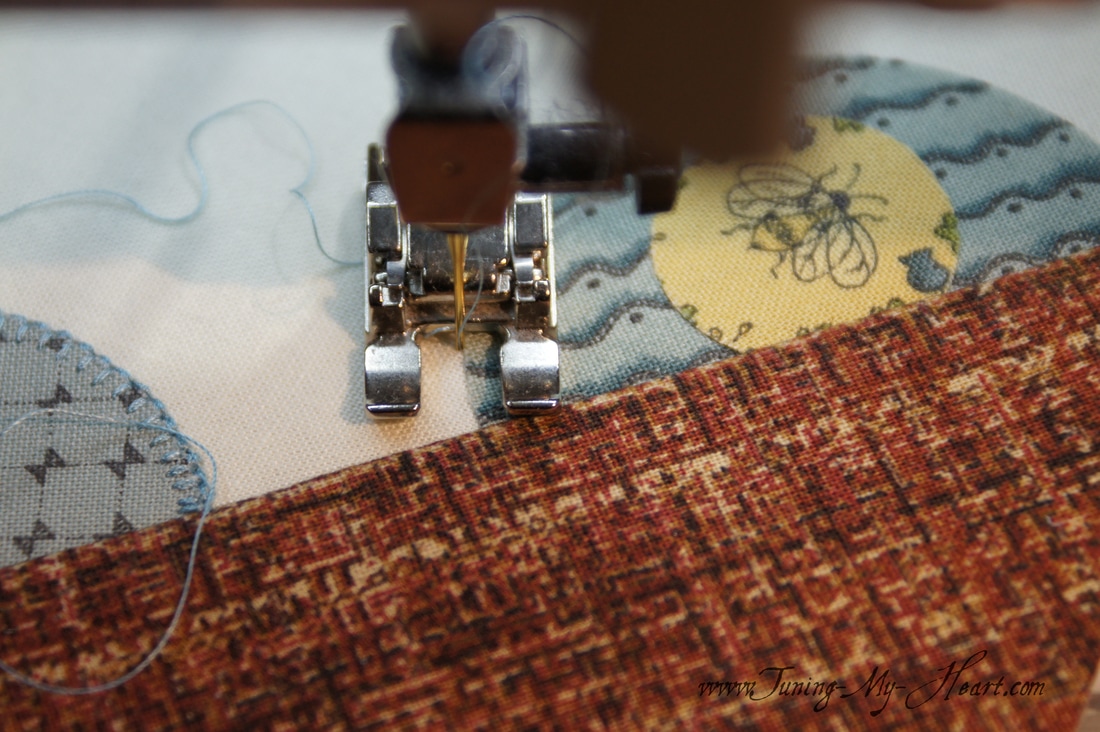 You can see my straight stitches here. With my needle in the down position I pivot the material around to begin my buttonhole stitch. It will go right back over those straight stitches locking everything into place. ( I left my threadtail in here just to make it easier for you to see the stitches, I will cut it before I stitch over it. 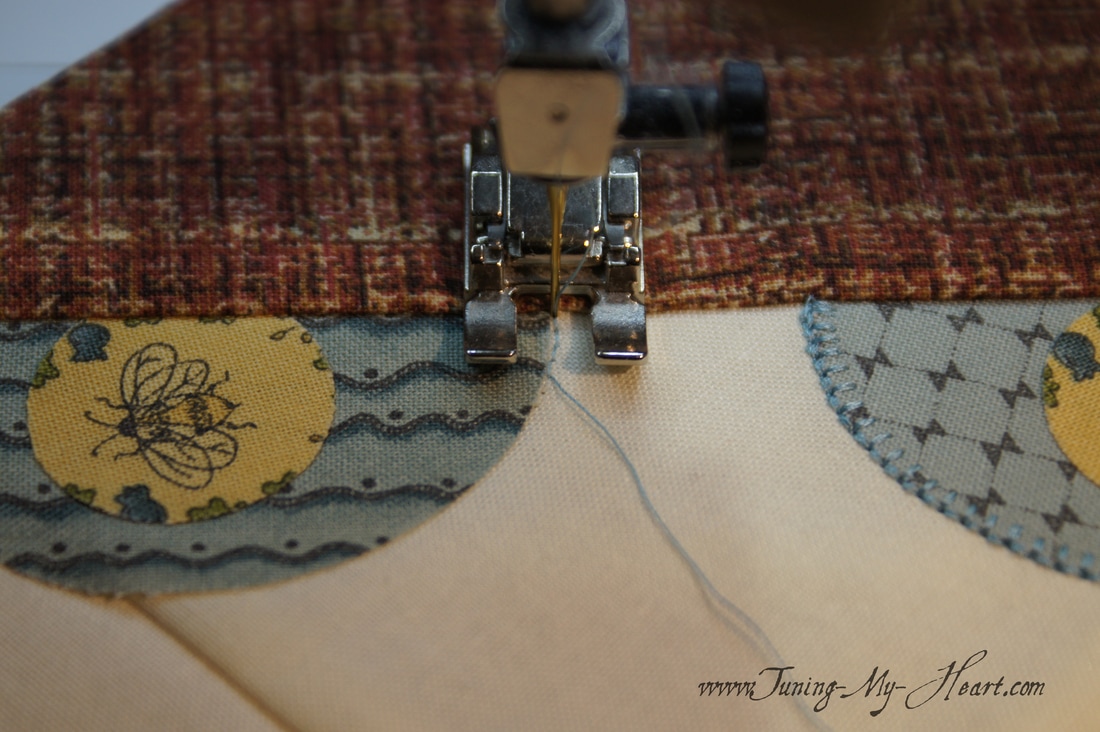 I want the needle to fall right along the edge of the applique during the straight part of the buttonhole stitch. Whenever I need to adjust the fabric, as one does to go around a circle, I make sure the needle is in the down position before repositioning my work. 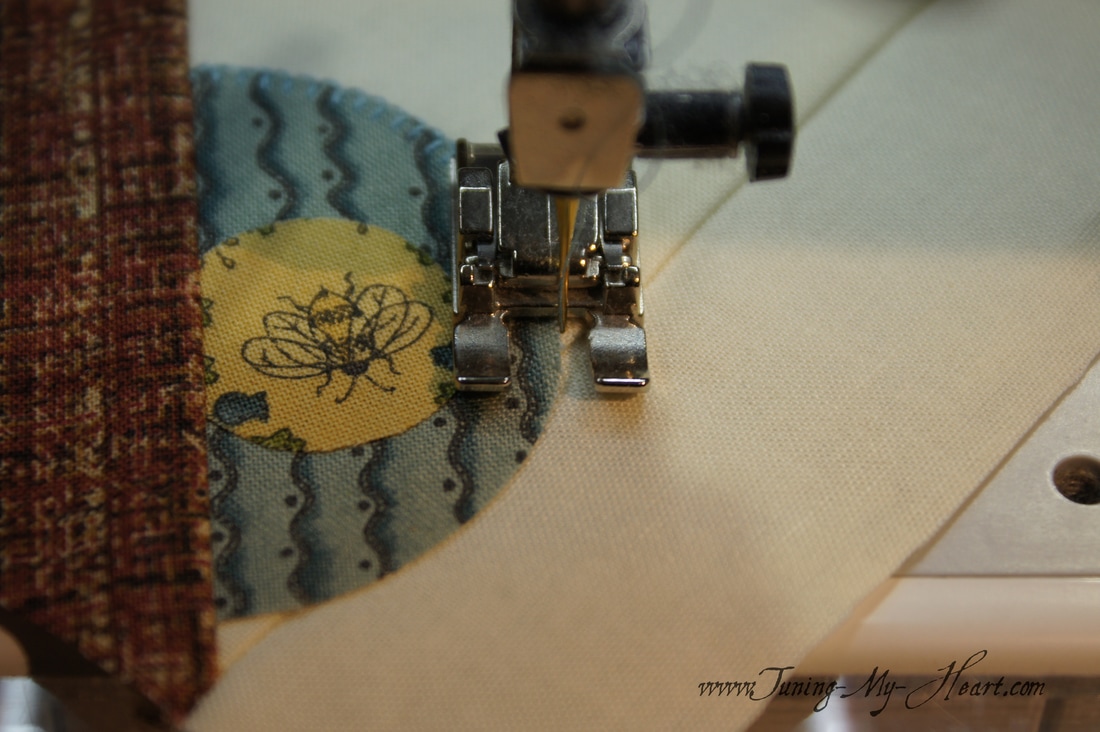 Having made it to the top of the basket I turn my piece around and switch back to the straight stitch to finish off with 5-6 stitches and a lock stitch. Since the stitch length on my buttonhole and straight stitch are the same the new stitches will lay right on top of the previous ones. 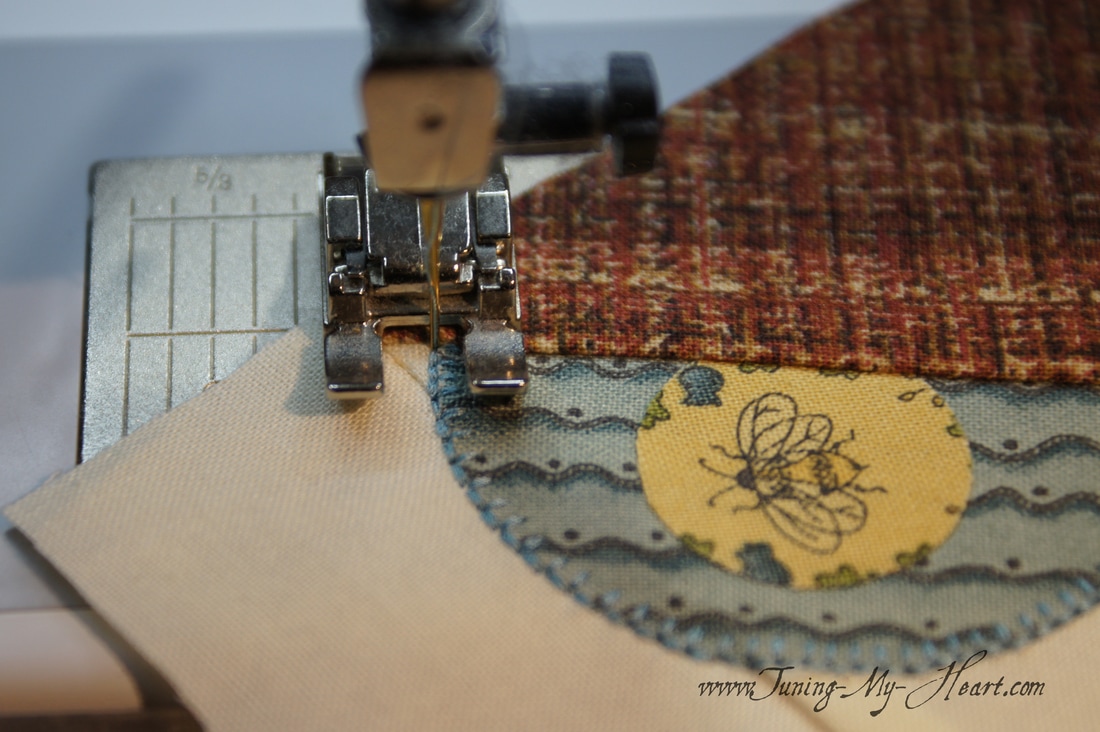 I have now fused the top circle into place and will stitch around it in a similar manner. With the bulk I decided to move this one up a little higher on the basket so as not to overlap the other flowers. I start with a few straight stitches along the edge. Then switch over to the buttonhole stitch and work my way around the circle. I will continue right over those first straight stitches I made. 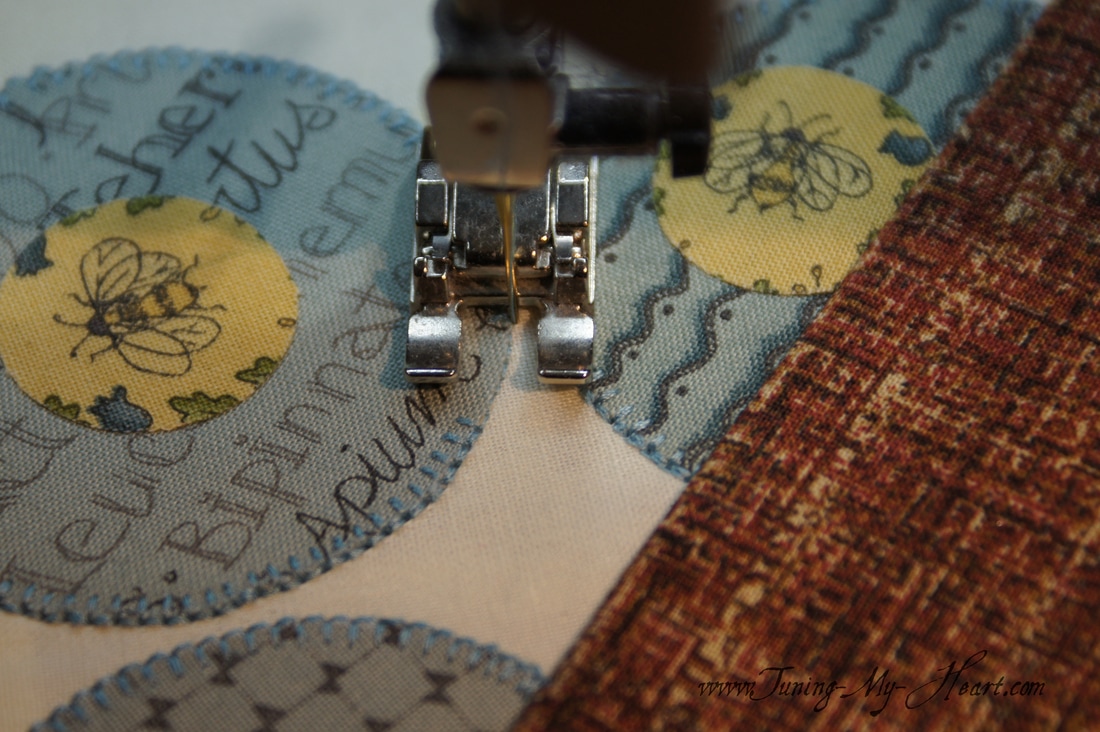 When I reach the beginning of the buttonhole stitch I switch back to the straight stitch and finish off as before.  All the little middle circles are done in the same way. I decided to add a little decorative stitch to the top of the basket at this time too.
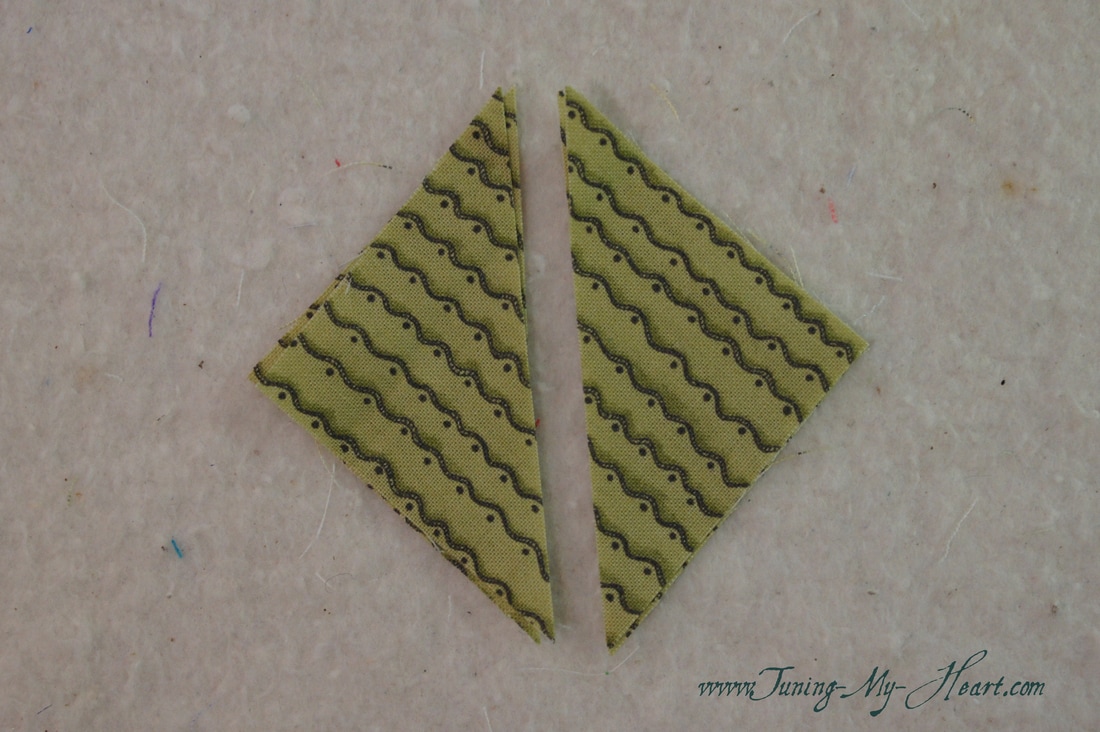
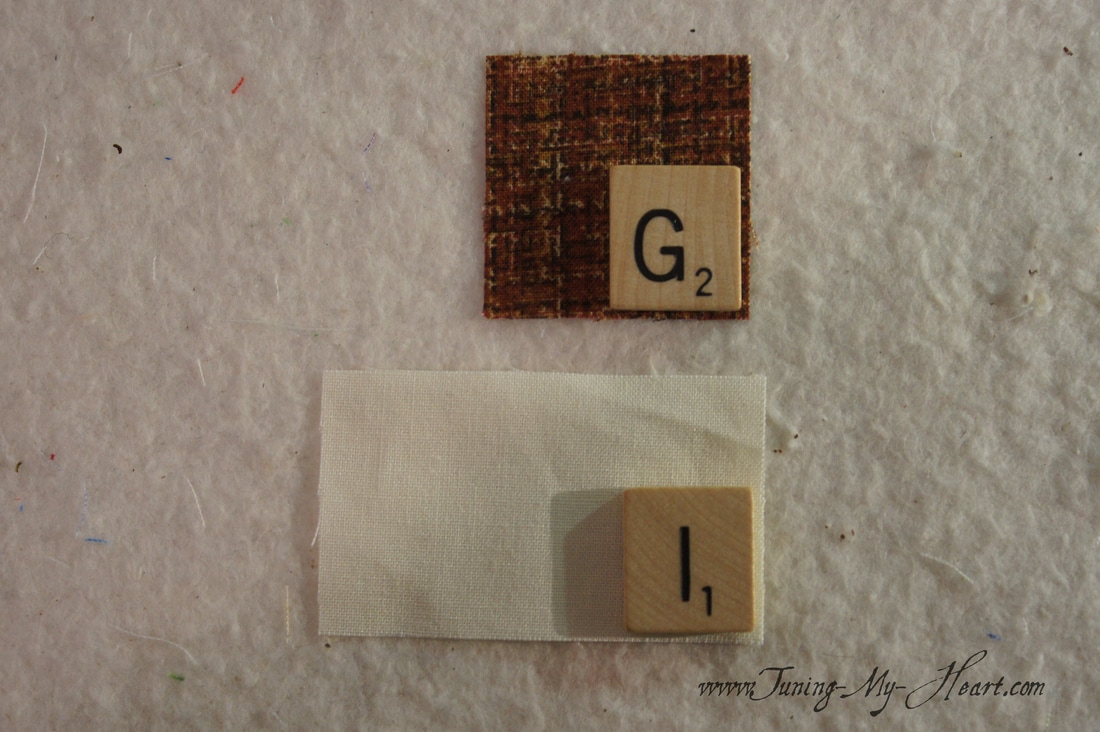
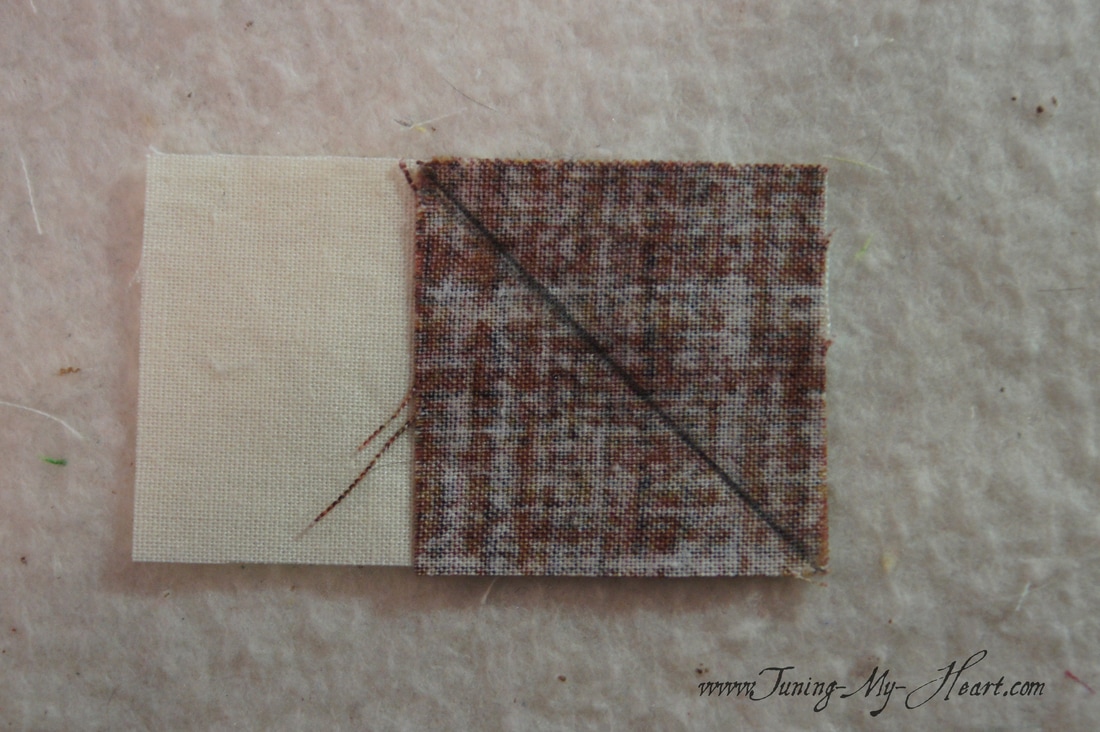
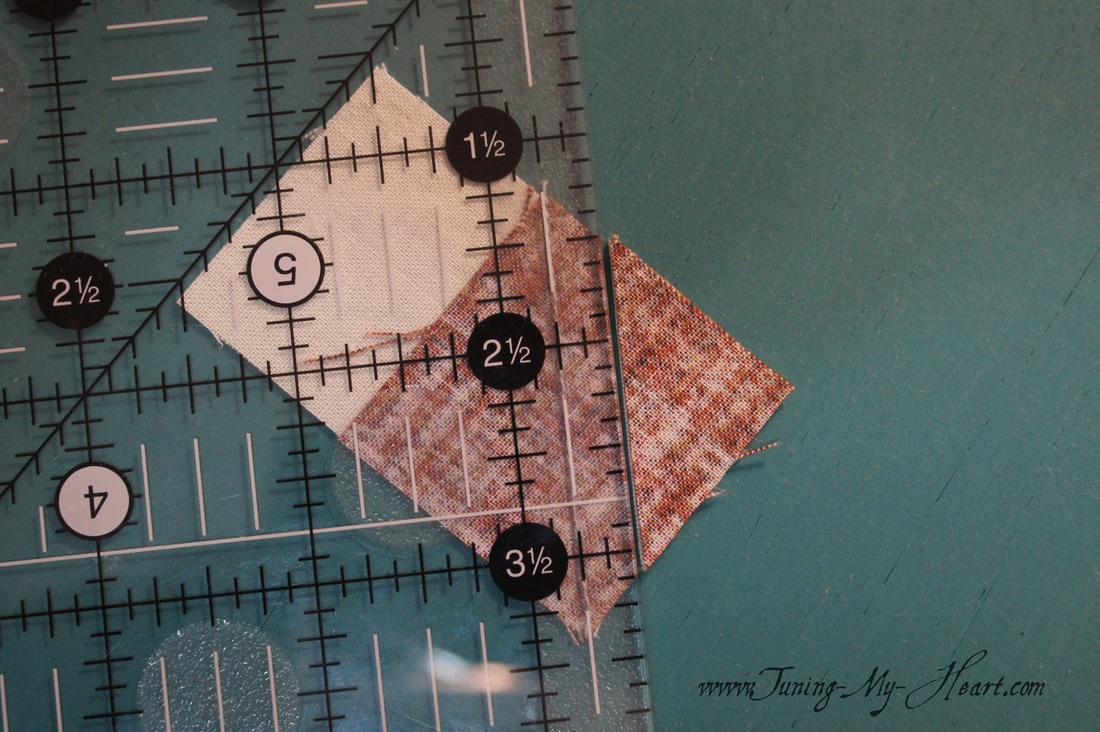
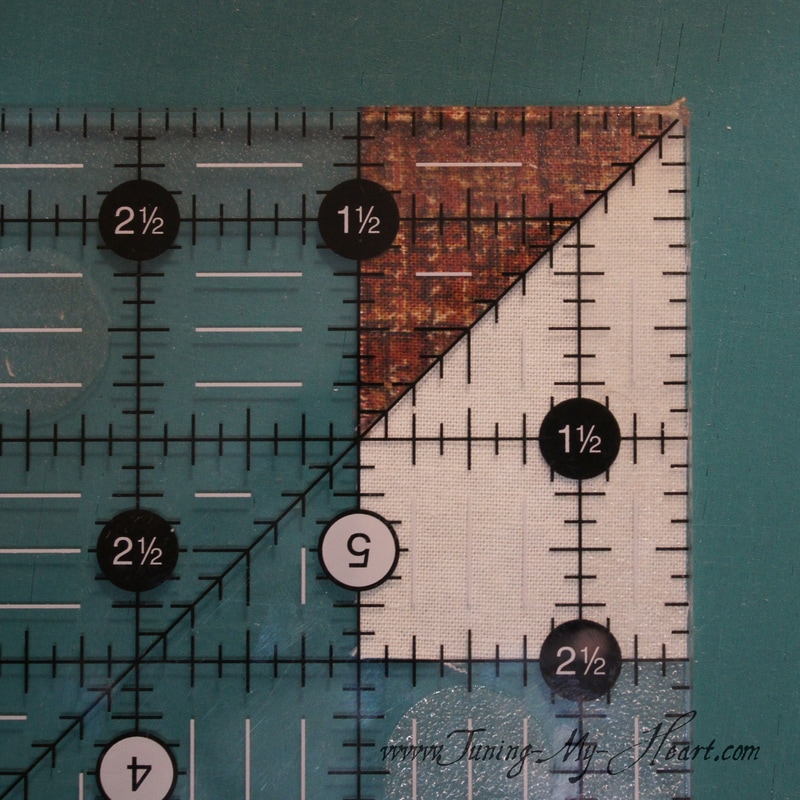
This is where I changed things a little bit. If you have been following my progress on the National Quilters Circle Challenge you have seen me make a lot of Half Square Triangles this way. I like it for the accuracy it gives me and I do not have to be careful about sewing on the bias which can easily become distorted. For this method I cut one G and one H square 2x2 inches On the lighter square I have drawn a diagonal line down the middle. 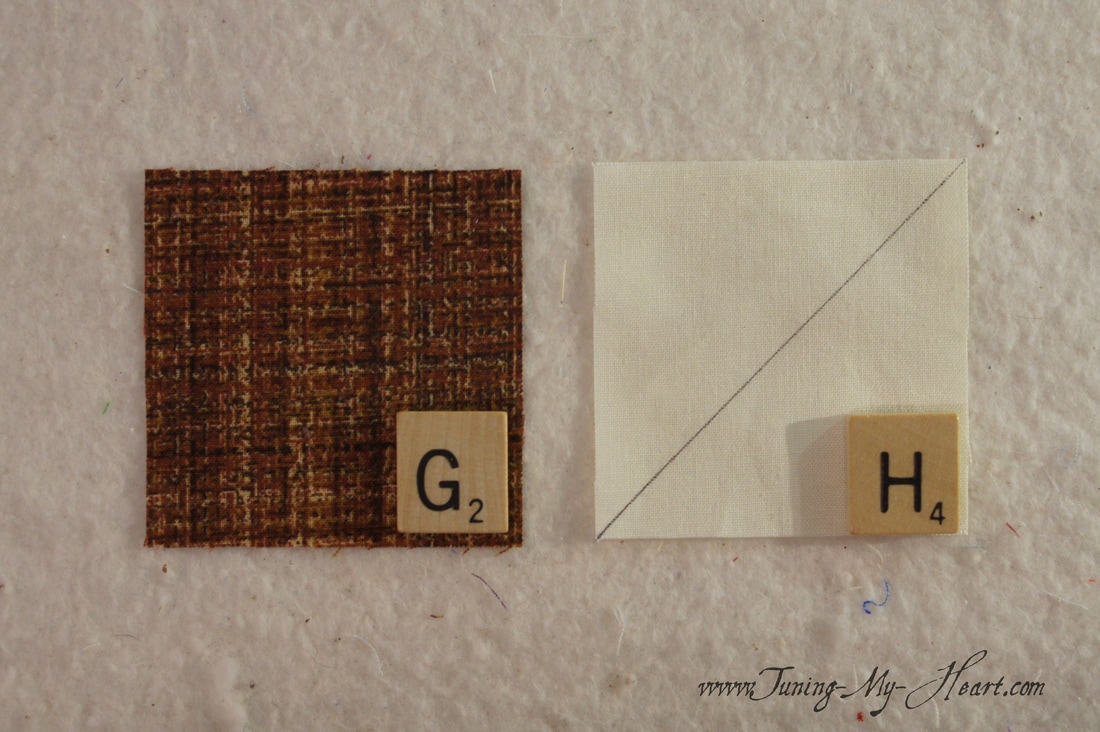 With right sides together join these two squares by sewing 1/4 inch from both sides of the drawn line. Using a ruler and rotary cutter cut on the drawn line to give you two half square triangles. We only need one for this block so the other will be saved for use in a mini. 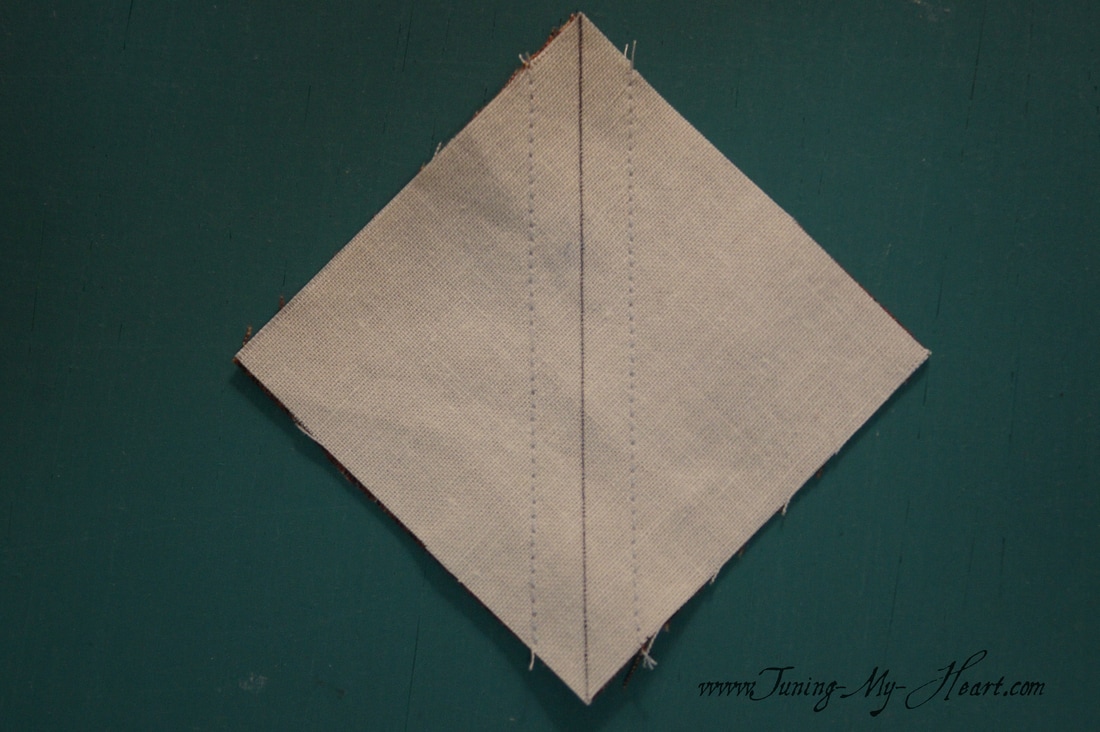 Trim this unit to 1-1/2 inches. It is important to line up the diagonal line on your ruler with the seam line. Trim off two sides, rotate the unit and trim the final two sides.
All trimmed and ready to go. I will set this aside for now and work on the next step. 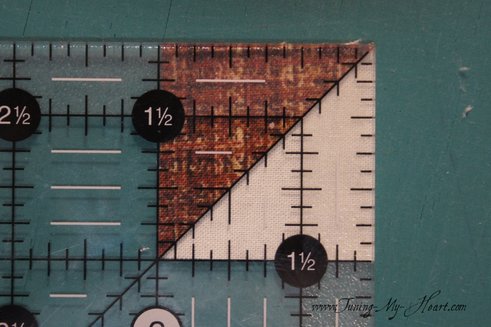 I am not going to cut my G square in half as the directions tell me to. Again, I avoid sewing on two bias edges together if I can so here is my method of joining pieces G and I. I start by drawing a line on G. Making sure I have my diagonal line running in the right direction I am going to sew along the diagonal line this time.
I find it works best to sew just to the outside of the drawn line- just a needle's width. 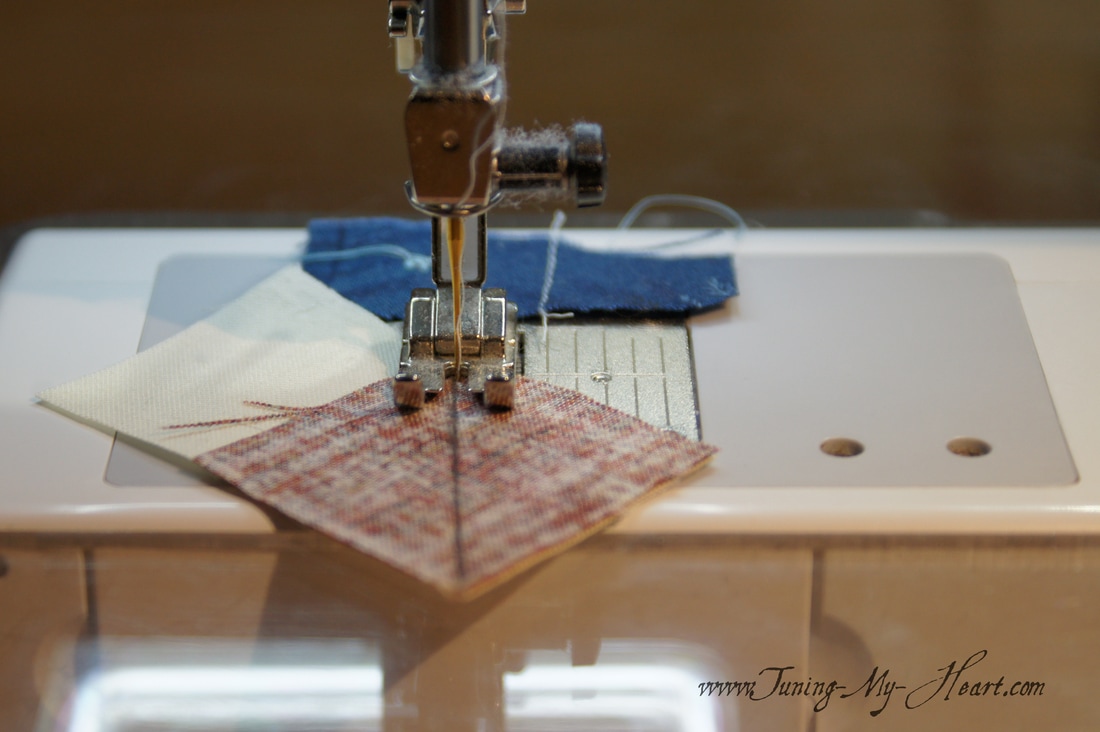 I can now trim away 1/4 inch from the sewn line, press, and end up with a unit that is 1-1/2 x 2 1/2 inches.
With all of my pieces laid out I can sew the two units I just made onto the E rectangles 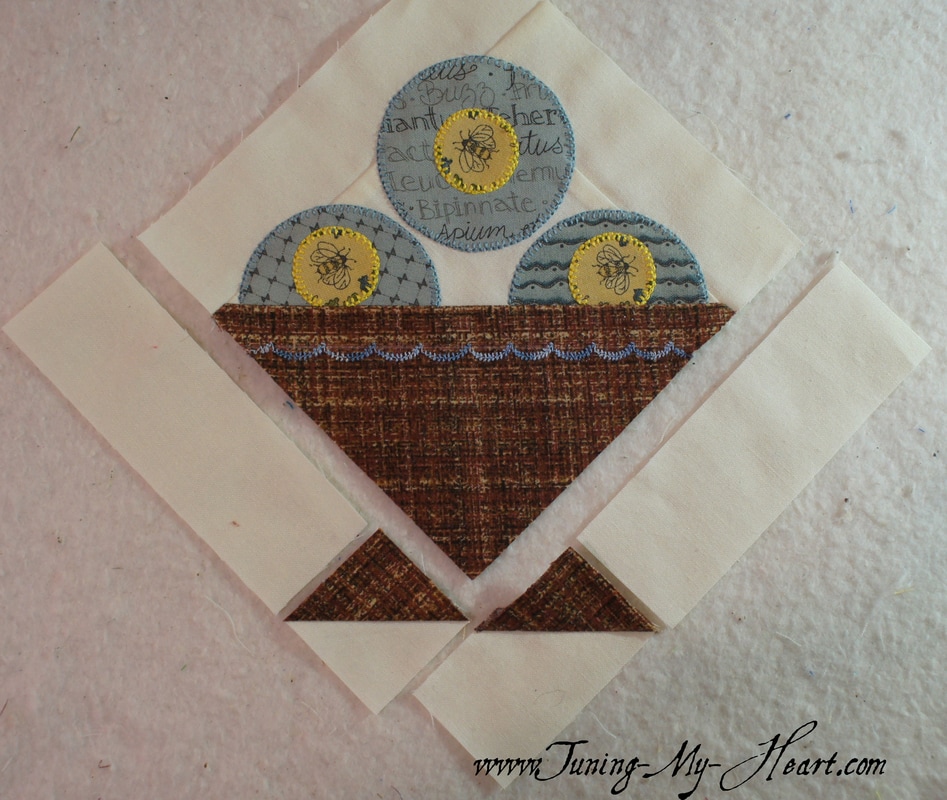 Time to add those sections to the basket unit. First one side and then the other.  My Penny Basket is complete! Just in time for the release of tomorrow's block!!! 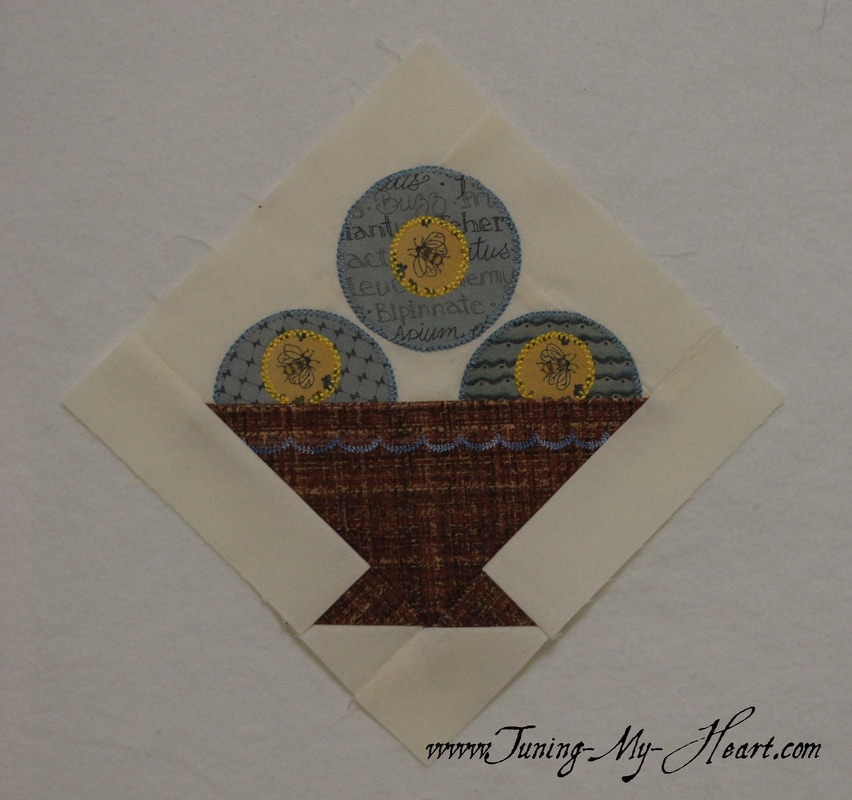 Until next time... Happy Quilting!  Block 8 of the National Quilters Circle 9 week challenge is here. Wow-just one more to go. After spending some time last week working with Half Square Triangles that measured 1 inch when finished this block was a breeze. You can find the pattern for this block by clicking on this link: https://www.nationalquilterscircle.com/video/ I have my 5.25 inch squares all cut, pressed and ready to go. Pretty soon I may be able to sew Half Square Triangles in my sleep! 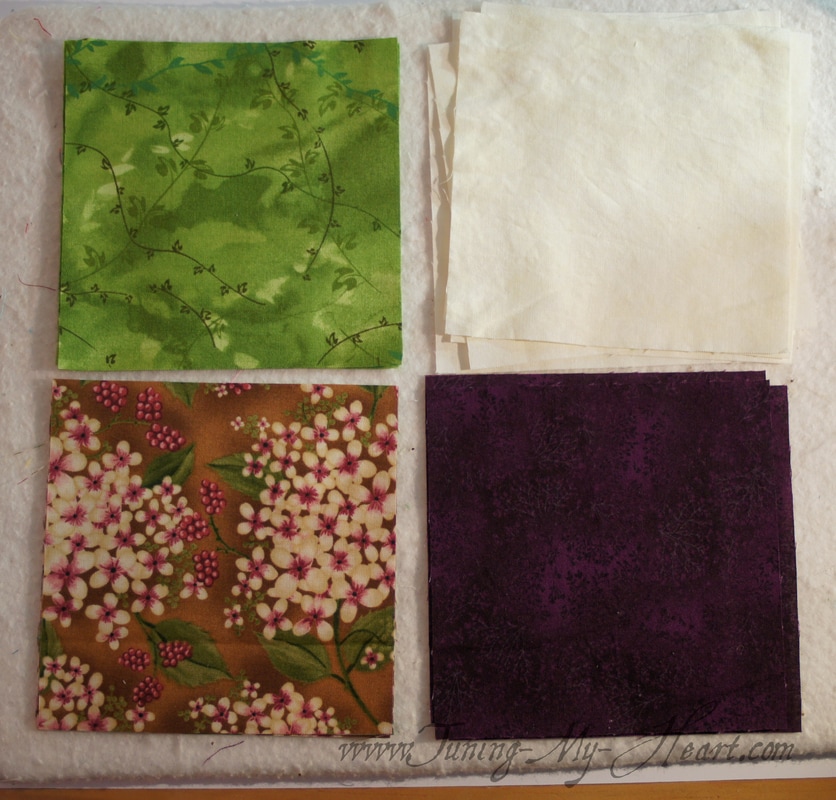 I drew a diagonal line on all of my light colored blocks. I also drew a line on one of the squares for my A/B combination and one for the C/A combination needed for this block.  Each pair of squares is sewn together 1/4 inch from both sides of the drawn line. 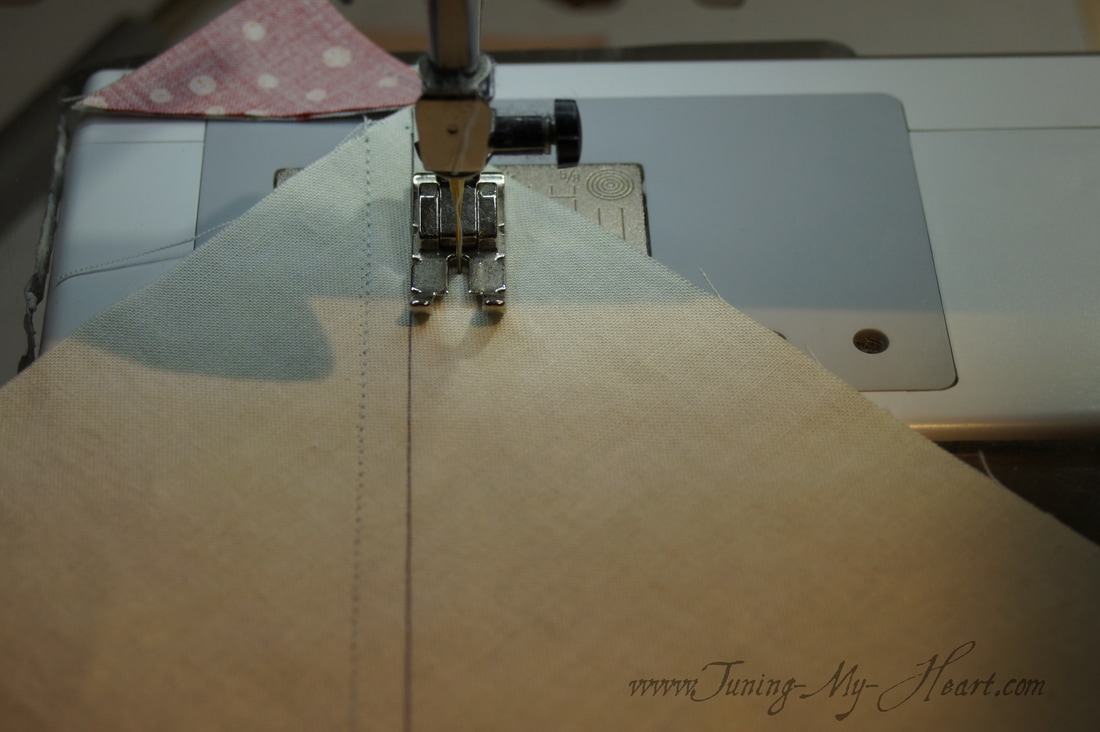 Cutting on the diagonal line will yield 2 Half Square Triangle units. After pressing these open I trim to the required 4 1/2 inches called for in Andrea's directions.
All of my units are sewn and ready to be put together. I just love how many different blocks you can get by simply rearranging these Half Square Triangle units. Have you taken the time to play with yours before arranging them according to the directions? You might come up with some new blocks you love. 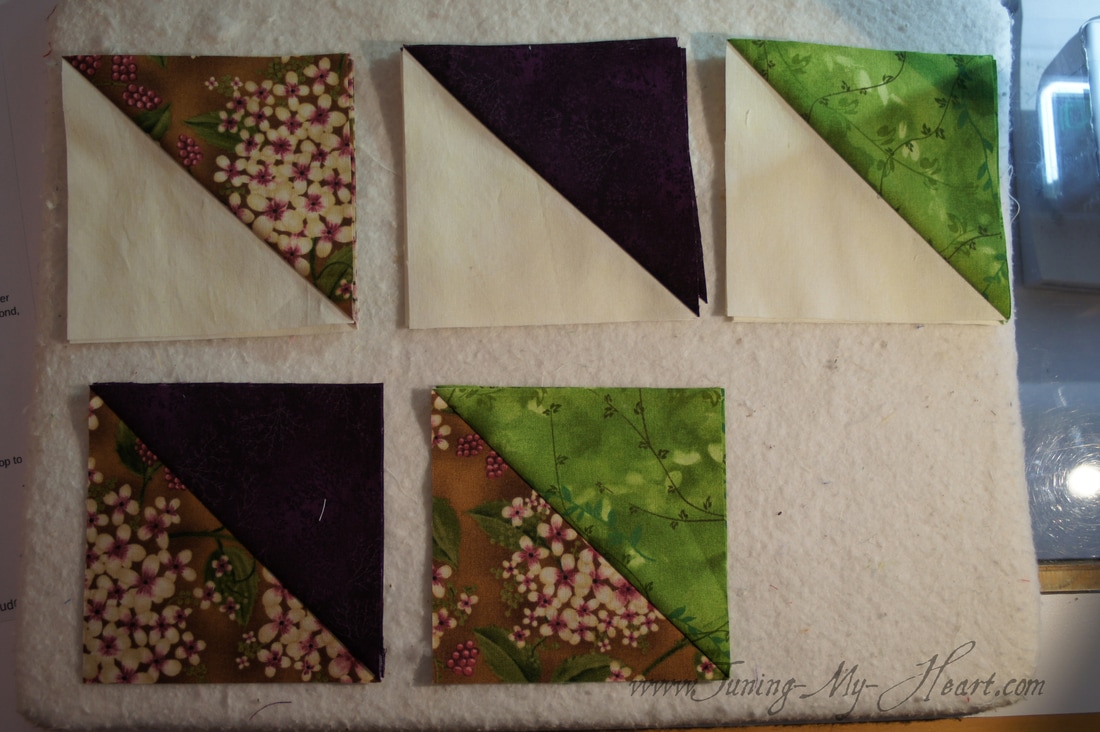 I took a close up off this unit to show off the fabric that comes across as so dark in most of my photos. It really was the perfect choice to go with my main floral fabric. 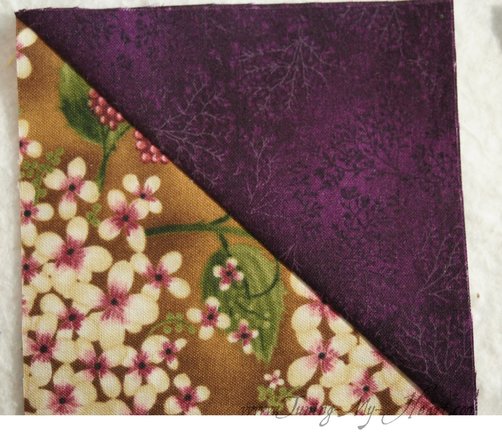 Now that my blocks are arranged in the correct order I begin sewing the rows together. I pressed rows 1 and 3 to the left, and rows 2 and 4 to the right so that the seams will nest together when I join the rows. 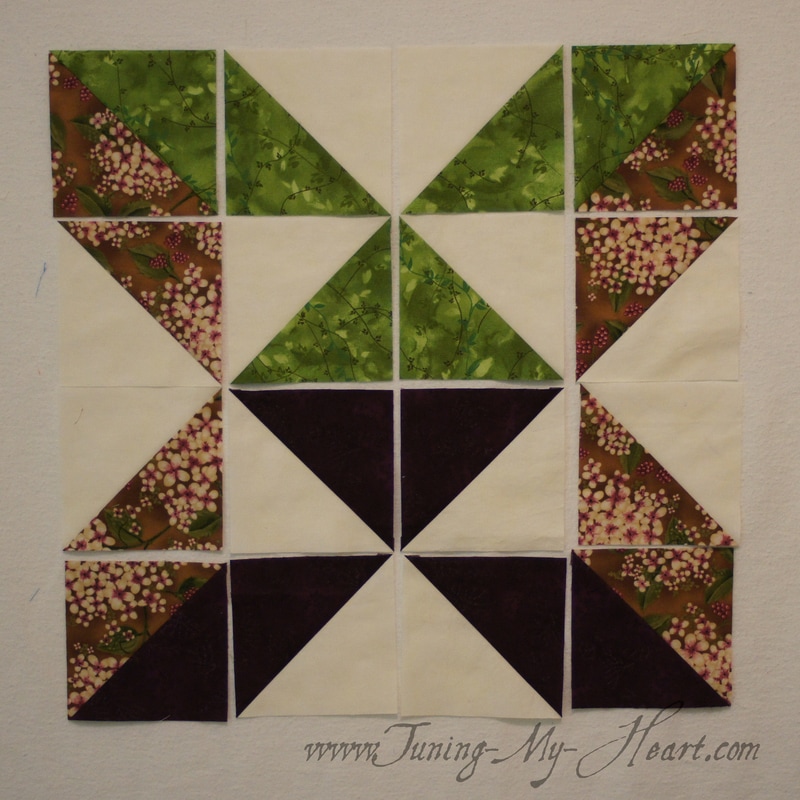 Once the rows are sewn together I can join them together pinning at the seams. 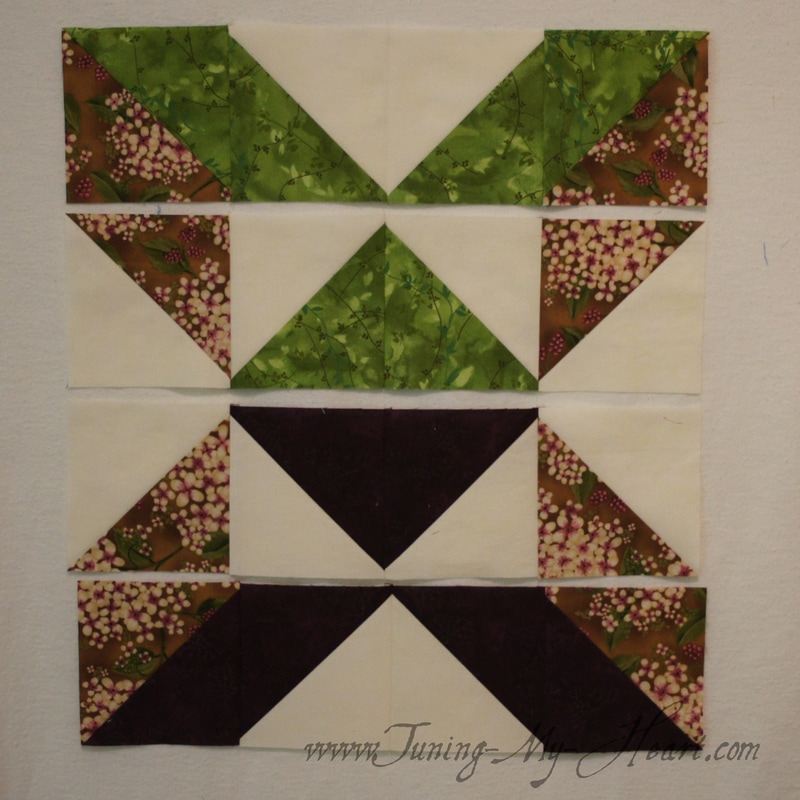 This is how I pin so that I can easily pull them out when I come to them. If all goes well my needle will hit right at that intersection of seams and leave me with perfect points after pressing.  Here is my first version of the block. 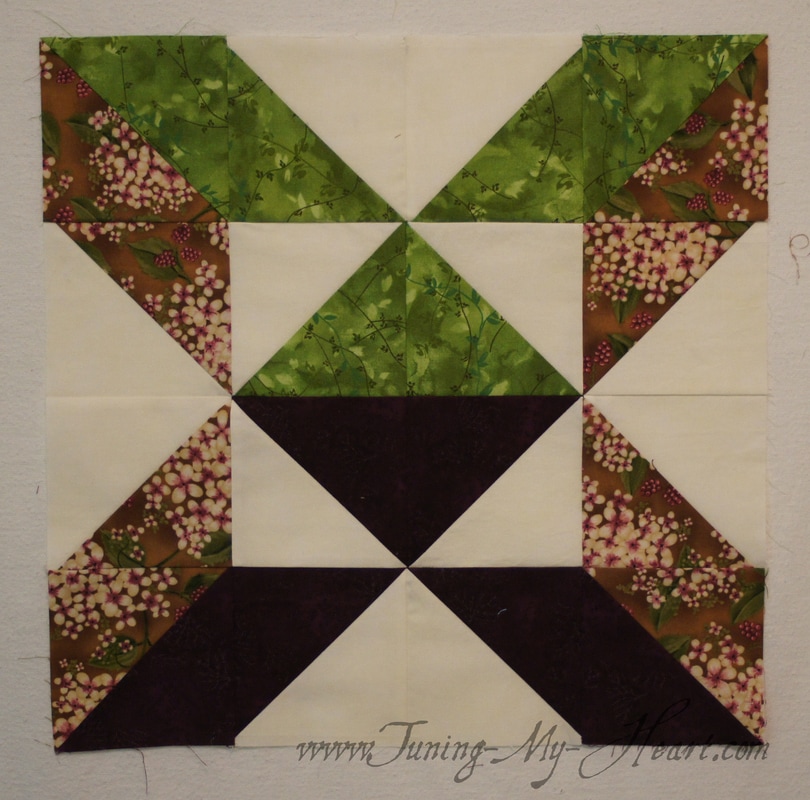 And here is my snowman version. Yes, it was snowing again when I designed this one. 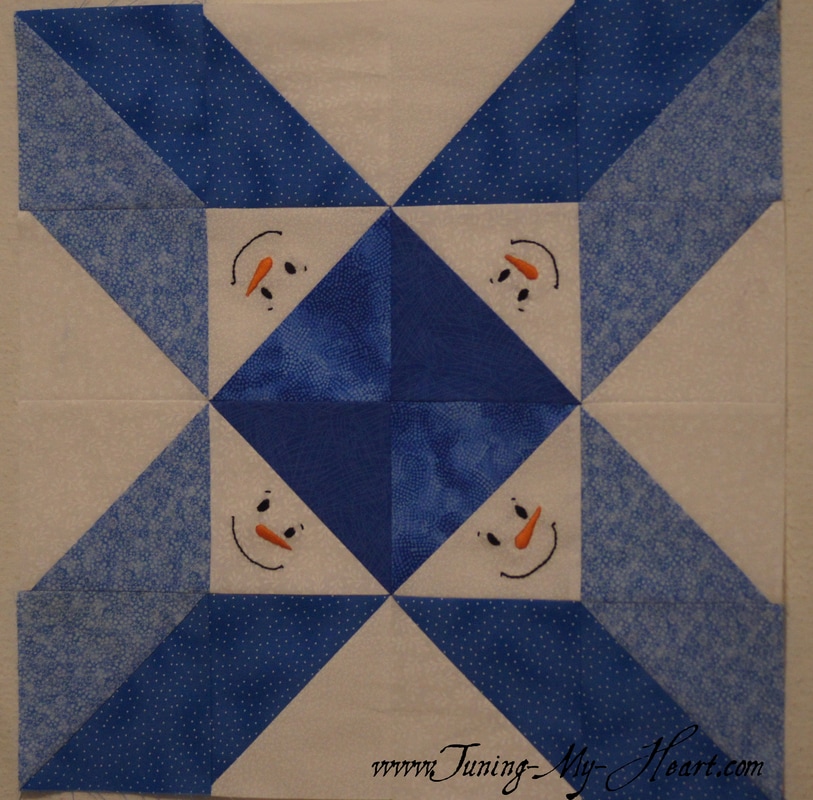 I am bouncing around a few ideas for how I might like to set these blocks in a quilt. There have been some great ideas shared on the group Facebook page already. Well, until next time... Happy Quilting!!  |

Welcome to the site of Debra Davis-a woman who loves the Lord and loves to quilt.
My other blog where I share about my walk of faith:
Sitting at His Feet 
|


 RSS Feed