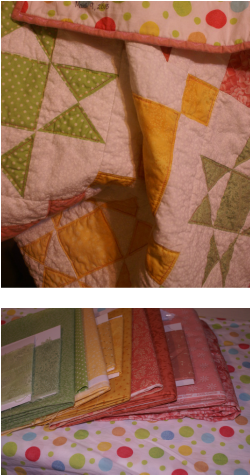
 I have been working on quite a few top secret quilts lately so have not been able to show you what I have been up to. This one is now in the hands of its new owner so I can do the big reveal. It is made up of Ohio Star and Double Irish Chain blocks set on point. I wanted something that would go together quickly and be fast to quilt- this one met those goals. I have written a tutorial on how to make quick work of those triangle squares in the Ohio star Blocks under Quarter-Square Triangles. It is an easy to learn method so I hope you will give them a try if you have ever been afraid of piecing triangles. Remember this? I hinted about at the beginning of the month in What's Happening in the Quilt Studio. I started with my main pink fabric and picked some pinks that supported it, some yellows to create excitement (triads on the color wheel) and some greens for accent (contrasts on the color wheel) I was really excited when I came across the polka dot print for the backing on a shopping trip as it contained the colors I had settled on. A quilt that was truly meant to be. 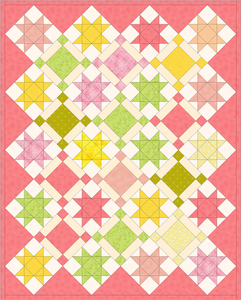
My EQ7 design for this quilt
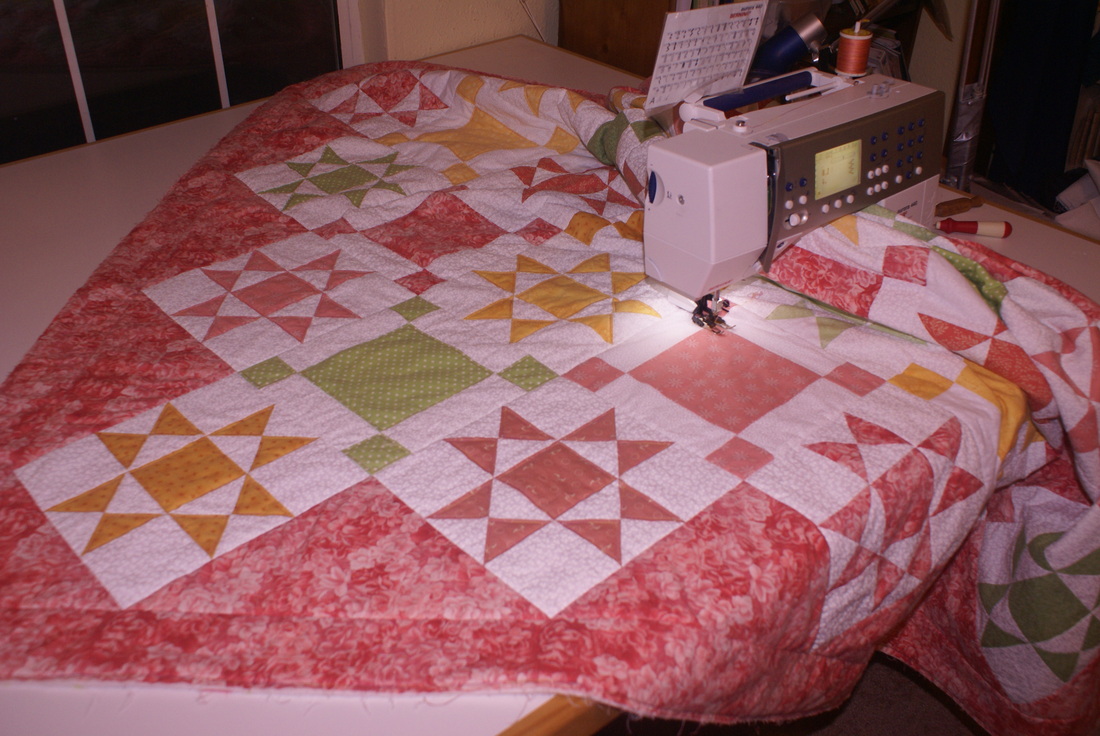
I prefer to do machine quilting on baby quilts as I feel it makes them sturdier and able to withstand the washing machine. Notice I have quilted a quarter inch from the outside edge all around the quilt- this is something new I started doing last year that allows me to get rid of some of the bulk that the extra backing and batting provide when I am trying to fit everything under my sewing machine arm. By stitching this line of quilting I can trim away the excess and not have to deal with it-but only after the entire quilt has been stabilized with "in the ditch" quilting!
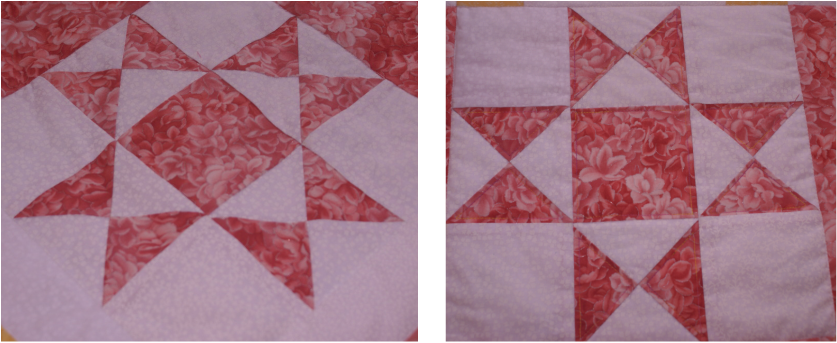
Before...........and after.............. It always amazes me how even the simplest quilting brings a block to life.
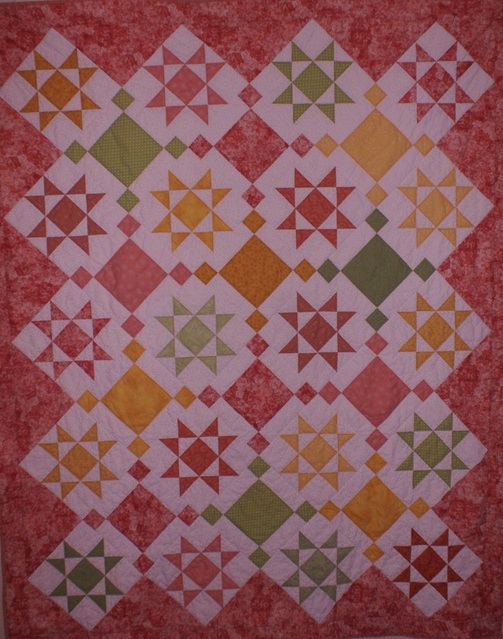
The finished quilt. I used white thread to stitch in the ditch along the rows and along the edge- it has the added benefit of stabilizing the quilt for the rest of the quilting. I did outline stitching on all of the blocks using King Tut #922 in the top and white Masterpiece in the bobbin both by Superior Threads.
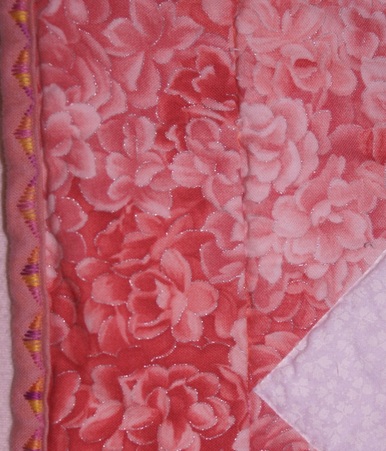
I tried something new with the binding- still needs perfecting- but I used a decorative stitch to finish the binding. It sure made things go faster, though it still takes some time to go around an entire quilt.
 I wish I had taken a clearer picture to show how the decorative stitch looks on the back...if you look carefully you can see how the threads have caught the edge of the binding on the back- I used a pink thread in the bobbin so it blended pretty well. You can also get a sense from this zoomed in shot how the King Tut variegated thread pulls the different colors of the quilt together as it went from a dark pink to bright yellow that went well with the green fabrics too. 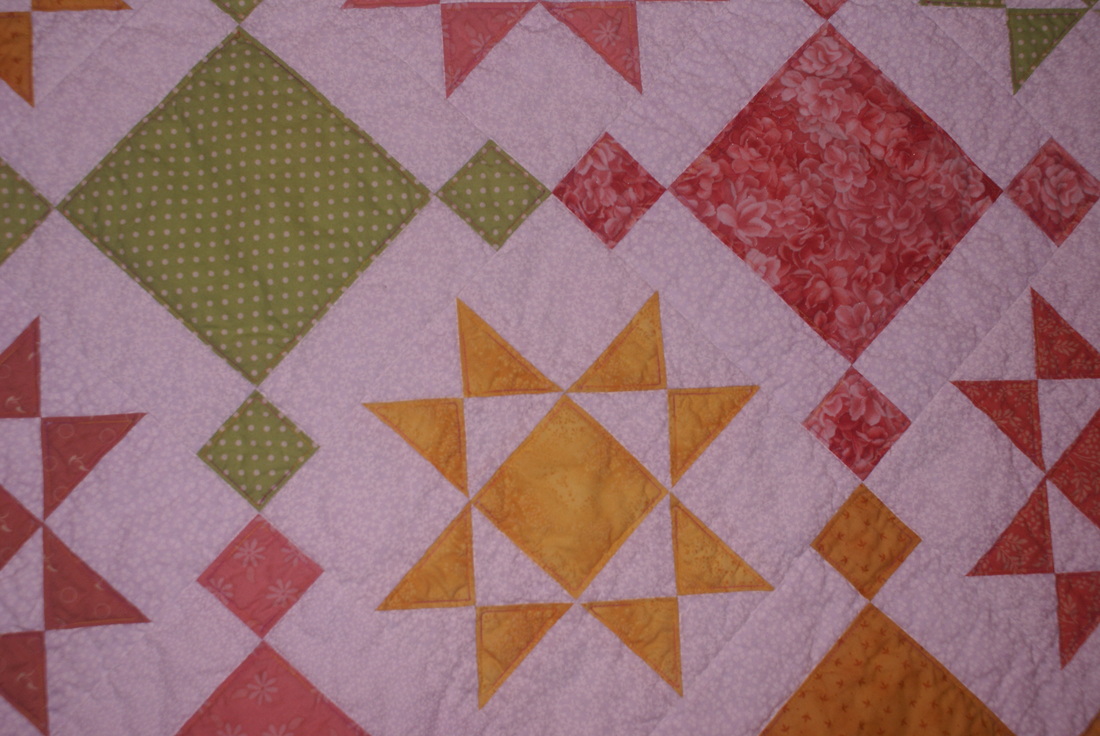
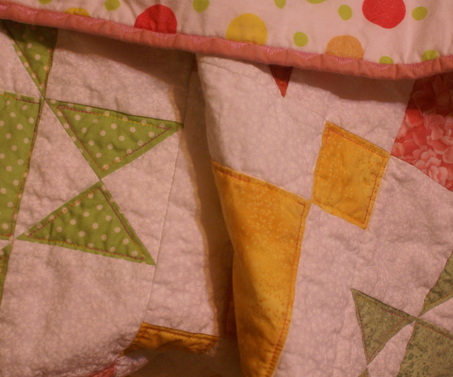
Close up after the quilt has been laundered and dried. Yes I toss these in the dryer before I give them away.
While I thoroughly enjoy giving quilts away I also miss them after they are gone. In case you have not guessed by now this one is destined to wrap a little girl in its embrace- I pray she sleeps soundly and grows into a godly woman that makes her grandma proud (not me, but a dear friend.)
Happy stitching! Deb 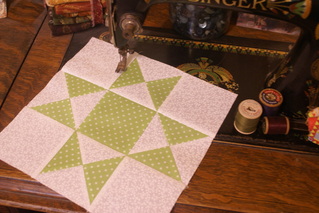 Stars pop up in my quilts frequently and this is one I have done several times as it is easy to piece, especially with a few tricks that eliminate the need for cutting and sewing all those individual triangles. I recently made a baby quilt that incorporated them in its design and I thought I would put together a tutorial to show you how I piece them. 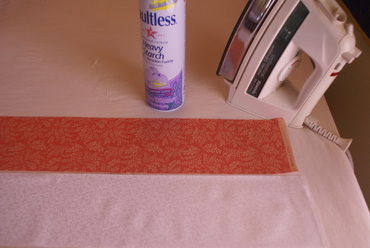 This is a block that benefits from two fabrics with high contrast. Once the fabrics have been chosen we need to do is figure out what size to cut our strips. The finished size of my block is 3 inches. That means I will be cutting the strips for my quarter-square triangles 4-1/4 inches. The math is quite simple: Take the finished size of your block and add 1-1/4 inches. Once I have cut my strips I like to starch them. I have found my piecing to be much more precise by doing so. It will go in the wash once finished so the starch is all washed away in the end. One important note about starch- do not use it if your fabric is going to be sitting around for a long period of time as it will attract bugs. 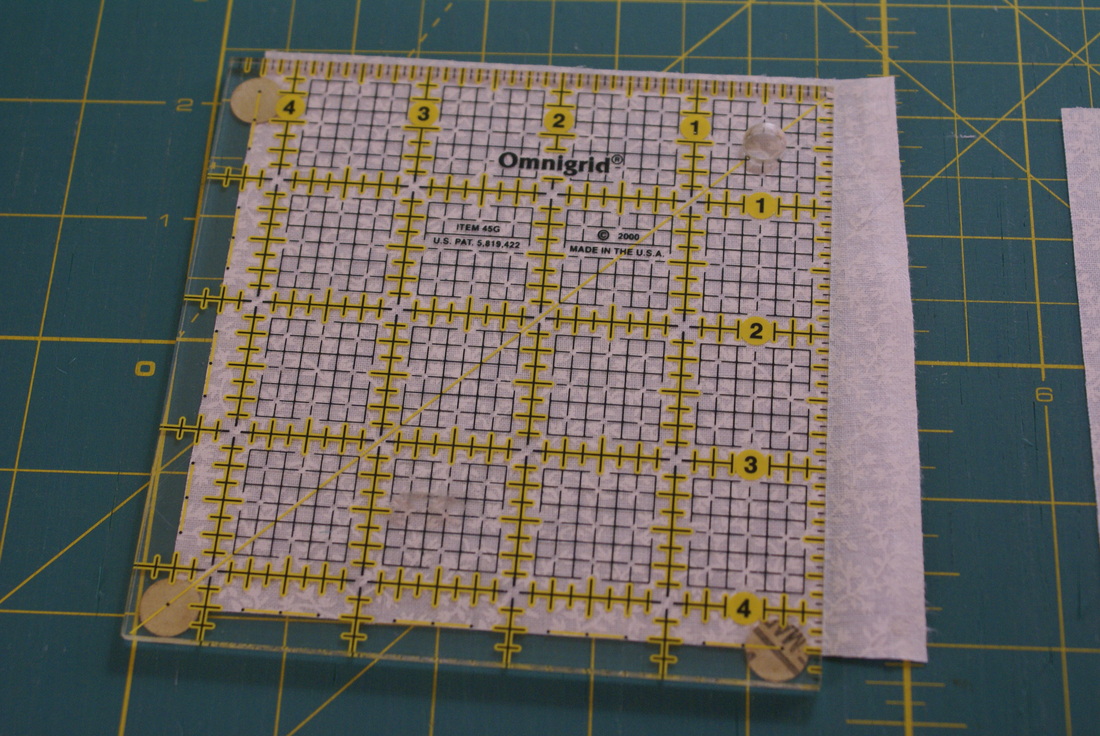
Next I cut the strips into squares- in this case 4-1/4 inch squares. Remember my math formula?- finished size of block plus 1-1/4 inches. Notice in the photo that I have the grid lines on top of the fabric. I don't want to line them up along the outside edge of the fabric as my finished block will be too small. This gives me just the right amount for my scant 1/4 inch seam allowance. I would much rather have to do a little trimming on the finished square than have one that came out too small for the block I am making. 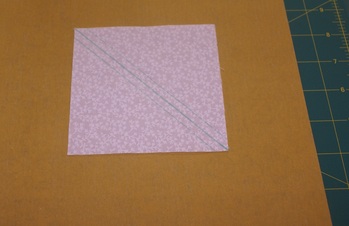 Once my squares are cut I use my ruler and pencil to mark a diagonal line down the center of the lightest color square on the wrong-side of the fabric. I like to add lines on either side of that center line- these are my stitching lines. You do not have to add them, as the center line is your seam guide if you have an accurate 1/4 piecing foot for your machine. I want to be as accurate as possible so, for me, I have found these stitching lines to be important. A trick I have learned when marking fabric is to place a sheet of very fine sandpaper under the fabric. This keeps the fabric from moving during the marking process. Quilt shops sell a sandpaper board that you can purchase but I just picked up a package of 3M Sandblaster Pro 325 grit in the painting section of the hardware store. It has a non-slip backing which keeps it in place on my cutting mat as well. the photo below shows how I mark the stitching lines from the center diagonal. 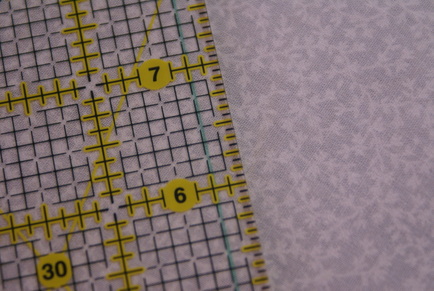
When I mark the stitching lines I place the grid on my ruler just to the edge of my pencil line just the opposite of what I do when cutting my fabric. I want to be sure I have a scant 1/4 inch seam and this is another step to ensure that. I would much rather have a bit to trim away than have a block that measures to small. 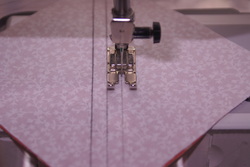 Lining up the stitching line with my needle I chain piece the squares through my machine. I like to stitch a little slower than normal when doing these so that I stay right on that little line. Be especially careful when beginning and ending your stitches on each square. By lifting the presser foot and snugging your fabric up to its starting point at the needle you will get a very smooth entrance. Slowing down as you reach the end of the square and paying close attention to staying right on that line will ensure a straight exit as well. You will need to sew both of your outside diagonal lines. First feed all of your squares through on one side and then turn and do the same for the other line. 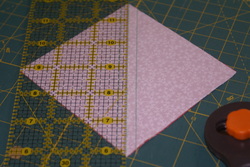 Using a ruler for your guide cut along the middle diagonal line between the two rows of stitching. Press the seams towards the darker side. 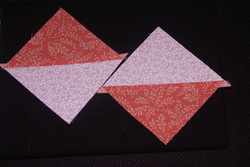 A word about pressing: before opening your triangle squares, with the dark side facing up, press the seam with a hot iron on a dry setting. Gently fold back the darker fabric, finger pressing if you prefer and set your iron onto your square. You do not want to run the iron back and forth, simply set it down on your piece so that the square does not become distorted. Now you have two triangle squares. If you like, trim of the little triangles sticking out over the seams. 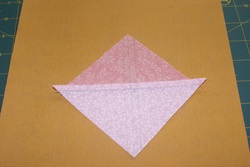 For our quarter-square triangles we need to repeat the process once more. Once again mark diagonal lines onto the wrong side of your square. 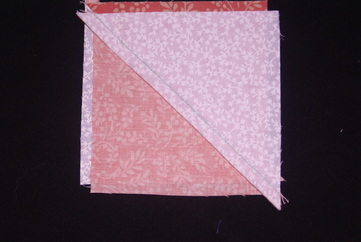 Take a second triangle square and place it right sides together with the one you have marked- light triangles facing dark triangles. The beauty of having pressed towards the dark side is that the two seams will lock into place against each other. This is what as known as matching up seams. 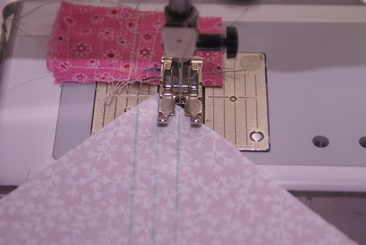 Once again you are going to chain-piece these squares following your marked seam lines. Here I am showing you how I snug a new square right up to the needle before I begin stitching. 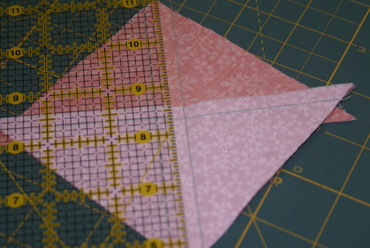 Just like before we need to cut along the center diagonal line to separate the two quarter-square triangles. 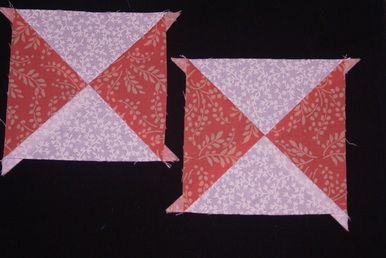
Once you press your seams you should have two quarter-square triangle units ready to do their part in your quilt. A little note: depending on what I am doing with this block I sometimes like to press the seams open rather than to one side. After years of quilting I finally learned that you do not have to press to one side in every application. Seams like these can become very bulky and not lay down nicely- pressing the seam open helps with this in areas where I do not have to match up seams in a block. 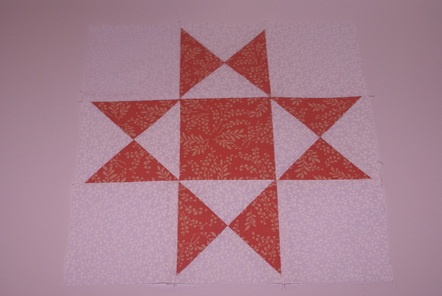
My finished Ohio Star block. Hopefully you will be encouraged to give this block a try now. I laid out a lot of baby steps for you in order to help you have the same success that I do with these quarter-square blocks. Come back and share your pics and stories if you make any yourself- I would love to see what you are doing too!
Happy Stitching, Deb 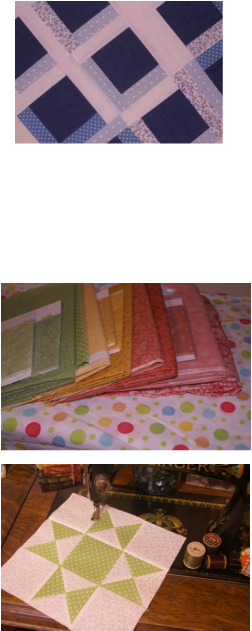 I've not posted much on this new blog yet, mostly because the projects I have been working on are top secret for now. It is funny how excited I am about using up old worn blue jeans. IN an effort to be more productive I am employing the piece two quilts at a time method. I always use a leader and an ender scrap of fabric when chain-piecing. Why not make that useful? So now I am using up blue and white scraps with the denim squares-stitching a side of these blocks instead of just a little scrap to be thrown away. Eventually this will be a quilt that will go on the bench seat by the dining room window which is turning out to be Anya's favorite place to lay and wait for her family to come home.
And who doesn't love babies. Sneak peak at a project I started last week. I like the whimsy that the polka dot fabric will add. The quilt is made up of Ohio Star alternating with Double Irish Chain blocks I'm thinking about calling it A Star is Born, or maybe Under the Stars or...What do you think? I am putting together a little tutorial on making the quarter-triangle squares that make up part of this block. This technique makes quick work of them, and the points in the middle match perfectly too. I should have that up for you soon. Happy quilting! Deb |

Welcome to the site of Debra Davis-a woman who loves the Lord and loves to quilt.
My other blog where I share about my walk of faith:
Sitting at His Feet 
|


 RSS Feed